Labels
- Alikas Scraps
- All Dolled Up Store
- Amy Marie
- Annaica
- Arthur Crowe
- Babycakes Scraps
- Barbara Jensen
- Bibi's Collections
- Black Widow Creationz
- Blu Moon
- Bonnies Creations
- Bookwork Dezines
- Broken Sky Dezine
- Carita Creationz
- Carpe Diem Designs
- CDO
- Celinart Pinup
- Celine
- Chacha Creationz
- Charmed Designs
- Cherry Blossom Designs
- Chili Designz
- Cluster Frame
- Creative Misfits
- Creative Scraps by Crys
- Curious Creative Dreams
- Danny Lee
- Derzi
- Designs by Ali
- Designs by Joan
- Designs by Ketura
- Designs By Norella
- Designs by Vi
- Diana Gali
- Diry Art Designs
- Disturbed Scraps
- Dreaming With Bella
- Eclipse Creations
- Elegancefly
- Extras
- Fabulous Designz
- Forum Set
- Foxy's Designz
- Freek's Creation
- FTU
- FwTags
- Goldwasser
- Gothic Inspirations
- Gothic Raven Designs
- Graphfreaks
- Hania's Designs
- Happy Pumpkin Studios
- Horseplay's Pasture Designs
- indie-Zine
- Irish Princess Designs
- Ishika Chowdhury
- Kaci McVay
- Kajenna
- katharine
- Katherine
- Khloe Zoey
- Killer Kitty
- Kissing Kate
- KiwiFirestorm
- Kiya Designs
- Kizzed by Kelz
- KZ Designz
- Lady Mishka
- Lil Mz Brainstorm
- Maiden of Darkness
- Mariel Designs
- MellieBeans
- Michelle's Myths
- Midnight Shadow
- Misticheskya
- MistyLynn's Creations
- MMeliCrea Designz
- Moon Vixen Designs
- NaSionainne
- Ninaste
- Niqui Designs
- Pandora
- Picsfordesign
- Pink Paradox Productions
- Radyga Designs
- Redefined Designs
- Rissa's Designs
- Schnegge
- ScottishButterfly Creations
- Scrappin Krazy Designs
- Scrappin With Lil Ol Me
- Scraps and the City
- Scraps Dimensions
- Scraps From The Heart
- Scraps N Company
- Scraps with Attitude
- Shining Star Art
- Skyscraps
- Sleek N Sassy Designs
- Sophisticat Simone
- Souldesigner
- Soxsational Scraps
- Spazz
- Starlite and Soul
- Tammy Welt
- Tasha's Playground
- The PSP Project
- Thrifty Scraps by Gina
- Tiny Turtle Designs
- Upyourart
- Verymany
- Wendy Gerber
- Whisper In the Wind
- Wick3d Creationz
- Wicked Diabla
- Yude's Kreationz
Blog Archive
Monday, March 31, 2014
EASTER BABE
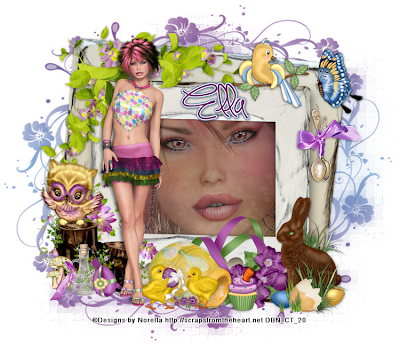
Supplies needed:
I am using the amazing Exclusive art from Designs by Norella for for this tutorial, which you can find here
Scrapkit: I am using a lovely kit from Amy Marie called "Easter Chick" which you can get by going here
Easter Mask from Vix which you can find here
Plugins: Xero- Bad Dream, Xero-Radiance, Lokas 3D Shadow
----------------------------
This tutorial is written for those who have working knowledge of PSPX2 (any version will do).
This tutorial was written by me on March 31, 2013. Please do not copy or paste on any other forum, website or blog provide link back to tut only. Please do not claim as your own. This tutorial is copyrighted to me. Any resemblance to any other tutorial is purely coincidental.
Ok - let's start and remember to save often.
Open up a 750 x 650 blank canvas (we can resize it later)
Select Frame Element 18 and paste in the center of the canvas
Select your magic wand tool and click in the center of the Frame (Add (Shift), RGB Value, Tolerance 25, Contiguous checked, Feather 0)
Selections, Modify, Expand by 5
Paste paper 6
Select invert, delete
Select Close-up tube of choice and paste on top of paper where desired and delete
Select none
Change opacity on tube to Multiply and drop down to 85%
Apply Dropshadow and merge on top of paper
Move paper/tube below frame layer
Paste tube of choice where desired
Apply Xero Radiance at setting of choice
Apply Lokas 3D Shadow at default settings
Select Element 54 - resize by 85%
Paste and position on top left where desired
Select Element 13 - resize by 45%
Paste and position on top right where desired
Select Element 58 - resize by 35%
Image mirror and paste on top right
Select Element 42 - resize by 45%
Paste and position on top right
Select Element 3 - resize by 55%
Paste and position on bottom right
Select Element 28 - resize by 30%
Paste and position on bottom right
Select Element 14 - resize by 30%
Paste and position on bottom right
Select Element 7 - resize by 25%
Paste and position on bottom right
Select Element 48 - resize by 45%
Paste and position on bottom where desired
Select Element 9 - resize by 40%
Paste and position on bottom where desired
Select Element 61 - resize by 55%
Image mirror and paste on bottom left
Select Element 60 - resize by 40%
Paste and position on bottom left
Select Element 24 - resize by 30%
Paste and position on bottom left
Select Element 1 - resize by 15%
Image Free Rotate Left by 15% and paste on bottom left
Add new raster layer and flood-fill with color or gradient of choice
Apply Easter Mask and merge group and move to bottom layer
Add any additional elements you like.
Add any dropshadows you like
Sharpen any elements as needed
Crop and resize as desired
Add copyright info, license number and name
You're done! Thanks for trying my tutorial!
Labels:Amy Marie,Designs By Norella | 0
comments
Saturday, March 29, 2014
HIP IN MY HOP

Supplies needed:
I am using the amazing artwork from Kiwifirestorm for this tutorial which you can find here
Scrapkit: I am using an awesome collab kit from Sleek N Sassy Designs called "Cute as a Bunny" which you can get by going here
Easter Template from Lovely which you can find here
Mask 228 from Weescotlass which you can find here
Plugins used: Xero - Radiance, Xero - Bad Dream, Lokas 3D Shadow
----------------------------
This tutorial is written for those who have working knowledge of PSPX2 (any version will do).
This tutorial was written by me on March 29, 2014. Please do not copy or paste on any other forum, website or blog provide link back to tut only. Please do not claim as your own. This tutorial is copyrighted to me. Any resemblance to any other tutorial is purely coincidental.
Ok - let's start and remember to save often.
Open the template and using your shortcut keys on your keyboard (SHIFT+D) duplicate the template as a new image. Close the original and delete the copywrite layer.
Select Hip Hop Wordart layer
Select all, float, defloat
Add new raster layer and flood-fill with color of choice
Select none
Adjust, Add/Remove Noise, Add Noise (Uniform checked, Noise 75%, Monochrome checked)
Delete/Hide original wordart layer
Select Scallop 1 layer
Select all, float, defloat
Add new raster layer and flood-fill with color or gradient of choice (Linear style, Angle 45, Repeat 2)
Paste close-up tube of choice on top of gradient and delete
Change tube to Overlay
Apply Xero Bad Dream at default settings or random setting of choice
Apply dropshadow and merge close-up down on top of gradient layer
Effect, Texture Effects, Blinds (Width 2, Opactity 25, Horizontal and Light from left/top checked)
Delete/hide original scallop layer
Select Scallop 1 layer and repeat above steps
Select Scallop Bk2 layer
Select all, float, defloat
Add new raster layer and flood-fill with color of choice
Select none
Adjust, Add/Remove Noise, Add Noise (Uniform checked, Noise 75%, Monochrome checked)
Delete/Hide original scallop bk layer
Select Scallop bk 2 layer and repeat above steps
Select SideOverlay layer
Effects, Texture Effects, Blinds (Width 2, Opactity 15, Horizontal and Light from left/top checked)
Select Oval layer
Select all, float, defloat
Paste paper 2
Select invert, delete, select none
Delete/Hide original oval layer
Copy and paste tube of choice and position where desired
Apply Xero Radiance at setting of choice
Apply Lokas 3D Shadow at default settings
Select Element 10 - resize by 25%
Paste and position on the top center where desired
Select Element 20 - resize by 35%
Image Free Rotate Right by 15% and paste on bottom right
Image duplicate and mirror
Select Element 8 - resize by 35%
Paste and position on bottom right
Select Element 15 - resize by 17%
Image Free Rotate Right by 15% and paste on bottom right
Select Element 3 - resize by 25%
Paste and position on bottom right
Select Element 9 - resize by 40%
Paste and position on bottom left
Select Element 7 - resize by 15%
Paste and position on bottom left
Select Element 16 - resize by 15%
Paste and position on bottom left
Select new raster layer and flood fill with color or gradient of choice
Move layer to the bottom of the template
Apply Mask 228
Merge group and move to the bottom layer
Resize mask by 105%
Add any additional elements you like.
Add any dropshadows you like
Crop and resize as desired
Add copyright info, license number and name
You're done! Thanks for trying my tutorial!
Labels:Sleek N Sassy Designs | 0
comments
Friday, March 28, 2014
BAD BUNNY
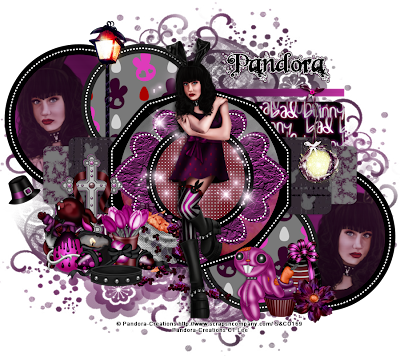
Supplies needed:
I am using the amazing artwork from Pandora Creations for this tutorial which you can find here
Scrapkit: I am using an awesome matching kit from Bibi's Collections called "Bad Bunny" which you can get by going here
Template 181 from Pooker which you can find here
Mask 34 from Trese which you can find here
Plugins used: Eyecandy 4000 - Marble, Xero - Radiance, Xero - Bad Dream, Lokas 3D Shadow
----------------------------
This tutorial is written for those who have working knowledge of PSPX2 (any version will do).
This tutorial was written by me on March 28, 2014. Please do not copy or paste on any other forum, website or blog provide link back to tut only. Please do not claim as your own. This tutorial is copyrighted to me. Any resemblance to any other tutorial is purely coincidental.
Ok - let's start and remember to save often.
Open the template and using your shortcut keys on your keyboard (SHIFT+D) duplicate the template as a new image. Close the original and delete the copywrite layer.
Select White Circle 1 layer
Select all, float, defloat
Add new raster layer and flood-fill with color of choice
Select none
Apply Effects, Texture Effects, Weave (Gap size 2, Width 5, Opacity 10, Fill gaps checked, change Gap and Weave color to one of choice)
Delete/Hide original circle layer
Select Pink Shape layer
Select all, float, defloat
Add new raster layer and flood-fill with color of choice
Select none
Effects, Texture Effects, Texture with the following Leaves settings:
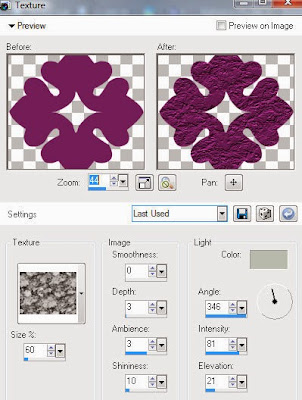
Delete/Hide original shape layer
Select Lt. Pink Circle 1 layer
Select all, float, defloat
Paste paper 10
Select invert, delete, select none
Delete/Hide original circle layer
Select Pink Squares layer
Select all, float, defloat
Paste paper 5
Select invert, delete, select none
Delete/Hide original squares layer
Select Grey Squares layer
Select all, float, defloat
Add new raster layer and flood-fill with color of choice
Select none
Apply Eyecandy Marble with the following settings:
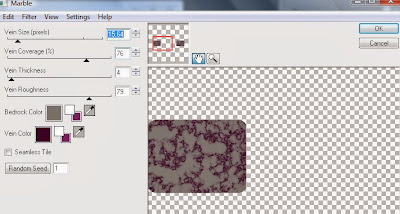
Delete/Hide original squares layer
Select White Circles 2 layer
Select all, float, defloat
Paste paper 8
Select invert, delete, select none
Delete/Hide original circles layer
Select Pink Stripes layer
Select all, float, defloat
Add new raster layer and flood-fill with color or gradient of choice (Linear style, Angle 45, Repeat 4)
Select none
Delete/Hide original strips layer
Select Lt. Pink Rectangles layer
Select all, float, defloat
Paste paper 9
Select invert, delete, select none
Delete/Hide original rectangles layer
Select Lt. Pink Circles 2 layer
Select all, float, defloat
Add new raster layer and flood-fill with color or gradient of choice (Linear style, Angle 45, Repeat 2)
Paste close-up tubes of choice on top of gradient and delete
Drop opacity on tubes down to 70%
Apply Xero Bad Dream at default settings or random setting of choice
Apply dropshadow and merge close-ups down on top of gradient layer
Effect, Texture Effects, Blinds (Width 2, Opactity 25, Horizontal and Light from left/top checked)
Delete/hide original circles layer
Copy and paste tube of choice and position where desired
Apply Xero Radiance at setting of choice
Apply Lokas 3D Shadow at default settings
Select Element 36 - resize by 55%
Paste and position on left side where desired
Select Element 50 - resize by 50%
Paste and position on bottom left
Select Element 53 - resize by 30%
Image mirror and paste on bottom left
Select Element 73 - resize by 30%
Paste and position on bottom left
Select Element 9 - resize by 35%
Image mirror and paste on bottom left
Select Element 40 - resize by 25%
Image mirror and paste on bottom left
Select Element 49 - resize by 30%
Image mirror and paste on bottom left
Select Element 45 - resize by 45%
Paste and position on bottom left
Select Element 51 - resize by 30%
Paste and position on bottom right
Select Element 81 - resize by 35%
Paste and position on bottom right
Select Element 72 - resize by 30%
Paste and position on bottom right
Select Element 77 - resize by 30%
Image mirror and paste on bottom right
Select new raster layer and flood fill with color or gradient of choice
Move layer to the bottom of the template
Apply Mask 34
Merge group and move to the bottom layer
Add any additional elements you like.
Add any dropshadows you like
Crop and resize as desired
Add copyright info, license number and name
You're done! Thanks for trying my tutorial!
Labels:Bibi's Collections,Pandora | 0
comments
Thursday, March 27, 2014
MALIFICIENT
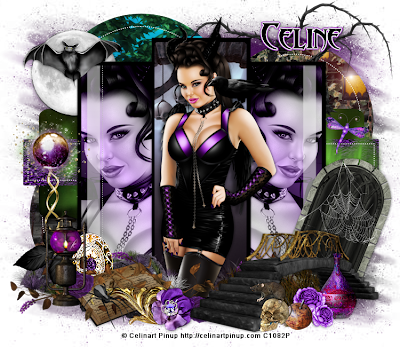
Supplies needed:
I am using the amazing artwork from Celinart Pinup for this tutorial which you can find here
Scrapkit: I am using an awesome matching kit from Hania's Design called "Maleficent" which you can get by going here
Template 7 from Yvette which you can find here
Edge Mask which I have uploaded here. If anyone knows who to give proper credit to, please let me know.
Plugins used: Xero - Radiance, Xero - Bad Dream, Lokas 3D Shadow
----------------------------
This tutorial is written for those who have working knowledge of PSPX2 (any version will do).
This tutorial was written by me on March 27, 2014. Please do not copy or paste on any other forum, website or blog provide link back to tut only. Please do not claim as your own. This tutorial is copyrighted to me. Any resemblance to any other tutorial is purely coincidental.
Ok - let's start and remember to save often.
Open the template and using your shortcut keys on your keyboard (SHIFT+D) duplicate the template as a new image. Close the original and delete the copywrite layer.
Adjust canvas size to 750 x 650
Select Frames layer
Select your magic wand tool and click in the center Frame (Add (Shift), RGB Value, Tolerance 25, Contiguous checked, Feather 0)
Selections, Modify, Expand by 3
Paste paper 4
Select invert, delete, select none
Move paper below frame layer
Select your magic want tool again but select the left and right side of the frames
Selections, Modify, Expand by 3
Add new raster layer and flood-fill with color or gradient of choice (Linear style, Angle 45, Repeat 2)
Paste close-up tubes of choice on top of gradient and delete
Change close-ups to Luminance (Legacy)
Apply Xero Bad Dream at default settings or random setting of choice
Apply dropshadow and merge close-up down on top of gradient layer
Move gradient/tubes layer below frame
Reselect Frames layer
Select all, float, defloat
Add new raster layer and flood-fill with color of choice
Select none
Delete/Hide original frames layer
Select Strips layer
Effect, Texture Effects, Blinds (Width 2, Opactity 25, Horizontal and Light from left/top checked)
Select Frame Back layer and delete/hide
Select Thin Rectangle layer
Select all, float, defloat
Add new raster layer and flood-fill with color of choice
Select none
Delete/Hide original rectangle layer
Select Element 72 - resize by 88%
Paste and position on top of rectangle layer
Select Rounded Rectangles layer
Select all, float, defloat
Paste paper 12
Select invert, delete, select none
Delete/Hide original rectangles layer
Select Circles 1 layer
Select all, float, defloat
Paste paper 6
Select invert, delete, select none
Delete/Hide original circles layer
Select Circles 2 layer
Select all, float, defloat
Paste paper 3
Select invert, delete, select none
Delete/Hide original circles layer
Copy and paste tube of choice and position where desired
Apply Xero Radiance at setting of choice
Apply Lokas 3D Shadow at default settings
Select Element 6 - resize by 55%
Image mirror paste on top right where desired
Select Element 36 - resize by 50%
Paste and position on top left
Select Element 10 - resize by 30%
Paste and position on top left
Select Element 48 - resize by 40%
Image mirror and paste on bottom right
Select Element 49 - resize by 50%
Paste and position on top of element 48
Select Element 35 - resize by 50%
Paste and position on bottom right
Select Element 75 - resize by 40%
Paste and position on bottom right
Select Element 94 - resize by 20%
Paste and position on bottom right
Select Element 24 - resize by 55%
Paste and position on bottom right
Select Element 60 - resize by 35%
Paste and position on bottom right
Select Element 107 - resize by 55%
Paste and position on left side
Select Element 7 - resize by 50%
Paste and position on bottom left
Select Element 30 - resize by 30%
Paste and position on bottom left
Select Element 47 - resize by 45%
Paste and position on bottom left
Select Element 42 - resize by 45%
Paste and position on bottom left
Select Element 104 - resize by 20%
Paste and position on bottom left
Select Element 57 - resize by 35%
Paste and position on bottom left
Select new raster layer and flood fill with color or gradient of choice
Move layer to the bottom of the template
Apply Edgemask
Merge group and move to the bottom layer
Add any additional elements you like.
Add any dropshadows you like
Crop and resize as desired
Add copyright info, license number and name
You're done! Thanks for trying my tutorial!
Labels:Celinart Pinup | 0
comments
Wednesday, March 26, 2014
SPRING WITH SPUNK
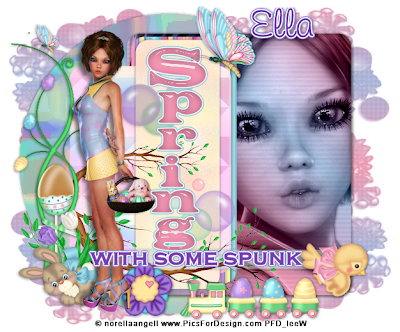
Supplies needed:
I am using the amazing artwork from Designs by Norella for this tutorial which you can find here
Scrapkit: I am using a beautiful kit from Horseplay's Pasture Designs called "Floppy Ears and Fluffy Rears" which you can get by going here
Spring Template 3 from Millie which you can find here
Mask 276 from Weescotlass which you can find here
Plugins used: Eyecandy 4000 - Glass, Xero - Radiance, Xero - Bad Dream, Lokas 3D Shadow
----------------------------
This tutorial is written for those who have working knowledge of PSPX2 (any version will do).
This tutorial was written by me on March 26, 2014. Please do not copy or paste on any other forum, website or blog provide link back to tut only. Please do not claim as your own. This tutorial is copyrighted to me. Any resemblance to any other tutorial is purely coincidental.
Ok - let's start and remember to save often.
Open the template and using your shortcut keys on your keyboard (SHIFT+D) duplicate the template as a new image. Close the original and delete the copywrite layer.
Adjust canvas size to 750 x 650
Select Wordart 8 layer
Select all, float, defloat
Add new raster layer and flood-fill with color of choice
Select none
Apply Eyecandy Gradient Glow on medium default settings (Glow Width 3)
Delete/Hide original wordart layer
Select Wordart 7 layer
Select all, float, defloat
Add new raster layer and flood-fill with color of choice
Select none
Apply Eyecandy Glass on default settings
Apply Eyecandy Gradient Glow on fat default settings
Delete/Hide original wordart layer
Select Strip 6 layer
Effect, Texture Effects, Blinds (Width 2, Opacity 15, Horizontal and Light from left/top checked)
Select Rectangle 5 layer
Select all, float, defloat
Paste paper 9
Select invert, delete, select none
Delete/Hide original rectangle layer
Select Square 4 layer
Select all, float, defloat
Paste paper 15
Select invert, delete, select none
Delete/Hide original square layer
Select Element 10 - resize by 55%
Paste and position on top of square layer where desired
Select Rectangle 3 layer
Select all, float, defloat
Paste paper 4
Select invert, delete, select none
Delete/Hide original rectangle layer
Select Square 2 layer
Select all, float, defloat
Add new raster layer and flood-fill with gradient of choice (Linear style, Angle 45, repeat 2)
Paste close-up tube of choice on top of gradient and delete
Change close-up to Luminance (legacy)
Apply Xero Bad Dream at default settings or random setting of choice
Apply dropshadow and merge close-up down on top of gradient layer
Effects, Texture Effects, Blinds (Width 2, Opactity 15, Horizontal and Light from
left/top checked)
Delete/Hide orginal square layer
Select Circle 1 layer
Select all, float, defloat
Paste paper 7
Select invert, delete, select none
Delete/Hide original circle layer
Copy and paste tube of choice and position where desired
Apply Xero Radiance at setting of choice
Apply Lokas 3D Shadow at default settings
Select Element 47 - resize by 45%
Paste and position on top where desired
Select Element 61 - resize by 85%
Image mirror and paste on left side
Select Element 57 - resize by 35%
Paste and position on bottom left
Select Element 25 - resize by 35%
Paste and position on bottom left
Select Element 43 - resize by 30%
Paste and position on bottom where desired
Select Element 63 - resize by 50%
Paste and position on bottom where desired
Select Element 22 - resize by 35%
Paste and position on bottom right
Select new raster layer and flood fill with color or gradient of choice
Move layer to the bottom of the template
Apply Mask 276
Merge group and move to the bottom layer
Add any additional elements you like.
Add any dropshadows you like
Crop and resize as desired
Add copyright info, license number and name
You're done! Thanks for trying my tutorial!
Monday, March 24, 2014
EASTER SWEET
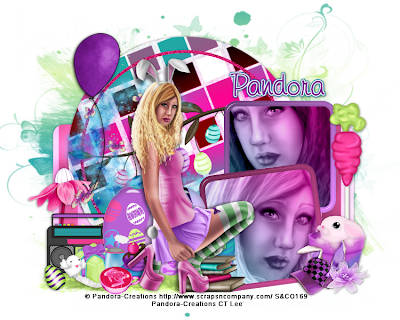
Supplies needed:
I am using the amazing artwork from Pandora Creations for this tutorial which you can find here
Scrapkit: I am using an awesome kit from Bibi's Collections called "Easter Bunny" which you can get by going here
Template 220 from Millie which you can find here
Mask 362 from Vix which you can find here
Plugins used: Eyecandy 4000 - Glass, Xero - Radiance, Xero - Bad Dream, Lokas 3D Shadow
----------------------------
This tutorial is written for those who have working knowledge of PSPX2 (any version will do).
This tutorial was written by me on March 24, 2014. Please do not copy or paste on any other forum, website or blog provide link back to tut only. Please do not claim as your own. This tutorial is copyrighted to me. Any resemblance to any other tutorial is purely coincidental.
Ok - let's start and remember to save often.
Open the template and using your shortcut keys on your keyboard (SHIFT+D) duplicate the template as a new image. Close the original and delete the copywrite layer.
Adjust canvas size to 750 x 600
Select Egg 10 layer
Select all, float, defloat
Paste paper 3
Select invert, delete, select none
Apply Eyecandy Glass on default settings
Delete/Hide original egg layer
Select Egg 9 layer
Select all, float, defloat
Paste paper 11
Select invert, delete, select none
Apply Eyecandy Glass on default settings
Delete/Hide original egg layer
Select Egg 8 layer
Select all, float, defloat
Paste paper 2
Select invert, delete, select none
Apply Eyecandy Glass on default settings
Delete/Hide original egg layer
Select Frame 7 layer
Select all, float, defloat
Add new raster layer and flood-fill with color of choice
Select none
Apply Eyecandy glass on default settings
Delete/Hide original frame layer
Select Frame 5 layer and repeat above steps
Select Square 6 layer
Select all, float, defloat
Add new raster layer and flood-fill with gradient of choice (Linear style, Angle 45, repeat 2)
Paste close-up tube of choice on top of gradient and delete
Change close-up to Luminance (legacy)
Apply Xero Bad Dream at default settings or random setting of choice
Apply dropshadow and merge close-up down on top of gradient layer
Effects, Texture Effects, Blinds (Width 2, Opactity 15, Horizontal and Light from
left/top checked)
Delete/Hide orginal square layer
Select Square 4 layer and repeat above steps
Select Circle 3 layer
Select all, float, defloat
Add new raster layer and flood-fill with color of chioce
Select none
Adjust, Add/Remove Noise, Add Noise (Uniform checked, Noise 65%, Monochrome checked)
Delete/Hide original circle layer
Select Circle 2 layer
Select all, float, defloat
Paste paper 8
Select invert, delete, select none
Delete/Hide original circle layer
Select Rectangle Raster 1 layer
Select all, float, defloat
Paste paper 10
Select invert, delete, select none
Delete/Hide original rectangle layer
Copy and paste tube of choice and position where desired
Apply Xero Radiance at setting of choice
Apply Lokas 3D Shadow at default settings
Select Element 53 - resize by 45%
Paste and position in center circle where desired
Select Element 60 - resize by 55%
Paste and position on right side
Select Element 36 - resize by 45%
Paste and position on bottom right
Select Element 73 - resize by 30%
Paste and position on bottom right
Select Element 92 - resize by 20%
Paste and position on bottom right
Select Element 48 - resize by 40%
Paste and position on bottom left
Select Element 26 - resize by 30%
Paste and position on bottom left
Select Element 40 - resize by 45%
Paste and position on left side
Select Element 49 - resize by 30%
Paste and position on bottom left
Select Element 85 - resize by 22%
Paste and position on bottom left
Select Element 75 - resize by 30%
Paste and position on bottom left
Select Element 111 - resize by 30%
Paste and position on bottom left
Select Element 104 - resize by 25%
Paste and position on bottom left
Select Element 33 - resize by 40%
Paste and position on top left
Select new raster layer and flood fill with color or gradient of choice
Move layer to the bottom of the template
Apply Mask 362
Merge group and move to the bottom layer
Add any additional elements you like.
Add any dropshadows you like
Crop and resize as desired
Add copyright info, license number and name
You're done! Thanks for trying my tutorial!
Sunday, March 23, 2014
LAVENDAR STEAMPUNK
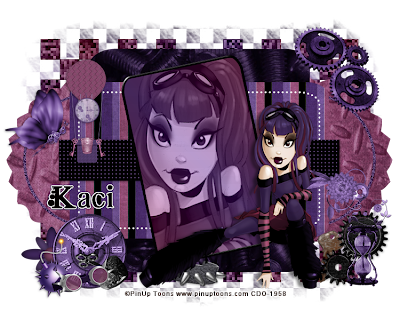
Supplies needed:
I am using the amazing artwork from PinUp Toons for this tutorial which you can find here
Scrapkit: I am using an awesome kit from Scrappin Krazy Designs called "Lavendar Steampunk" which you can get by going here
Template 45 from Twyztedt's Playroom which you can find here
Mask 187 from Insatiable Dreams which you can find here
Plugins used: Eyecandy 4000 - Gradient Glow, Xero - Radiance, Xero-Fritillary, Xero - Bad Dream, Lokas 3D Shadow
----------------------------
This tutorial is written for those who have working knowledge of PSPX2 (any version will do).
This tutorial was written by me on March 23, 2014. Please do not copy or paste on any other forum, website or blog provide link back to tut only. Please do not claim as your own. This tutorial is copyrighted to me. Any resemblance to any other tutorial is purely coincidental.
Ok - let's start and remember to save often.
Open the template and using your shortcut keys on your keyboard (SHIFT+D) duplicate the template as a new image. Close the original and delete the copywrite layer.
Adjust canvas size to 750 x 600
Select Frame Raster 9 layer
Select all, float, defloat
Add new raster layer and flood-fill with color of choice
Select none
Apply Eyecandy Glass on default settings
Delete/Hide original frame layer
Select Rectangle Raster 3 layer
Select all, float, defloat
Add new raster layer and flood-fill with gradient of choice (Linear style, Angle 45, repeat 2)
Paste close-up tube of choice on top of gradient and delete
Change close-up to Luminance (legacy)
Apply Xero Bad Dream at default settings or random setting of choice
Drop opacity down to 70%
Apply dropshadow and merge close-up down on top of gradient layer
Effects, Texture Effects, Blinds (Width 2, Opactity 15, Horizontal and Light from
left/top checked)
Delete/Hide orginal rectangle layer
Select Strip Raster 6 layer
Select all, float, defloat
Add new raster layer and flood-fill with color of chioce
Select none
Apply Effects, Texture Effects, Weave (Gap size 2, Width 5, Opacity 10, Fill gaps checked, change Gap and Weave color to one of choice)
Delete/Hide original strip layer
Select Rectangle Raster 2 layer
Select all, float, defloat
Paste paper 15
Select invert, delete, select none
Delete/Hide original rectangle layer
Select Circles Raster 7 layer
Select all, float, defloat
Add new raster layer and flood-fill with color of choice
Select none
Adjust, Add/Remove Noise, Add Noise (Uniform checked, Noise 85%, Monochrome checked)
Delete/Hide original circles layer
Select Rounded Rectangle Raster 5 layer
Select all, float, defloat
Paste paper 14
Select invert, delete, select none
Delete/Hide original rectangle layer
Select Copy of Raster 5 layer and repeat above steps
Select Shapes Raster 4 layer
Select all, float, defloat
Paste paper 10
Select invert, delete, select none
Delete/Hide original shapes layer
Select Raster 10 layer
Select all, float, defloat
Add new raster layer and flood-fill with gradient of choice (style, Angle 45, repeat 4)
Select none
Apply Xero Fritillary with the following settings:
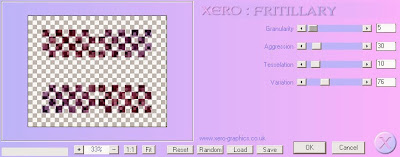
Delete/Hide original Raster 10 layer
Copy and paste tube of choice and position where desired
Apply Xero Radiance at setting of choice
Apply Lokas 3D Shadow at default settings
Select Element 55 - resize by 50%
Image Free Rotate Left by 15% and paste on top left
Select Element 16 - resize by 40%
Paste and position on top right
Select Element 7 - resize by 35%
Image mirror and paste on bottom right
Select Element 3 - resize by 30%
Paste and position on bottom right
Select Element 13 - resize by 40%
Paste and position on bottom right
Select Element 10 - resize by 35%
Paste and position on top left
Select Element 51 - resize by 50%
Paste and position on top left
Select Element 12 - resize by 40%
Paste and position on bottom left
Select Element 54 - resize by 35%
Paste and position on bottom left
Select Element 65 - resize by 30%
Paste and position on bottom left
Select Element 35 - resize by 35%
Paste and position on bottom left
Select Element 38 - resize by 50%
Paste and position on bottom where desired
Select new raster layer and flood fill with color or gradient of choice
Move layer to the bottom of the template
Apply Mask 187
Merge group and move to the bottom layer
Add any additional elements you like.
Add any dropshadows you like
Crop and resize as desired
Add copyright info, license number and name
You're done! Thanks for trying my tutorial!
Labels:Scrappin Krazy Designs | 0
comments
Thursday, March 20, 2014
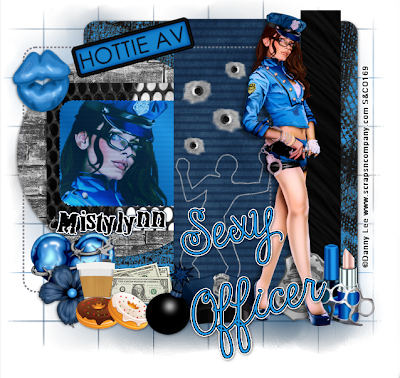
SEXY OFFICER
Supplies needed:
I am using the amazing artwork from Danny Lee for this tutorial which you can find here
Scrapkit: I am using an awesome matching kit from Mistylynn's Creations called "Sexy Officer" which you can get by going here
Collab Template 1 from Millie and Rissa which you can find here
Mask 191 from Insatiable Dreams which you can find here
Plugins used: Eyecandy 4000 - Gradient Glow, Xero - Porcelain, Xero - Bad Dream, Lokas 3D Shadow
----------------------------
This tutorial is written for those who have working knowledge of PSPX2 (any version will do).
This tutorial was written by me on March 19, 2014. Please do not copy or paste on any other forum, website or blog provide link back to tut only. Please do not claim as your own. This tutorial is copyrighted to me. Any resemblance to any other tutorial is purely coincidental.
Ok - let's start and remember to save often.
Open the template and using your shortcut keys on your keyboard (SHIFT+D) duplicate the template as a new image. Close the original and delete the copywrite layer.
Adjust canvas size to 750 x 600
Select Strip 8 layer
Select all, float, defloat
Paste paper 13
Select invert, delete, select none
Delete/Hide original strip layer
Select Wordart 7 layer
Add new raster layer and flood-fill with color of choice
Reselect wordart layer - select all, float, defloat
Go back and select color layer you just filled
Select invert, delete, select none
Apply Eyecandy Gradient Glow on fat default settings (Glow Width 3)
Delete/Hide original wordart layer
Select Rectangle 5 layer
Select all, float, defloat
Paste paper 12
Select invert, delete, select none
Delete/Hide original rectangle layer
Select Element 15 - resize by 55%
Paste and position on top of rectangle layer where desired
Select Element 11 - resize by 55%
Paste and position on top of rectangle where desired
Select Rectangle 4 layer
Select all, float, defloat
Add new raster layer and flood-fill with gradient of choice (Linear style, Angle 45, repeat 2)
Paste close-up tube of choice on top of gradient and delete
Change close-up to Hard Light
Apply Xero Bad Dream at default settings or random setting of choice
Drop opacity down to 65%
Apply dropshadow and merge close-up down on top of gradient layer
Effects, Texture Effects, Blinds (Width 2, Opactity 15, Horizontal and Light from
left/top checked)
Delete/Hide orginal rectangle layer
Select Rectangle 3 layer
Select all, float, defloat
Paste paper 11
Select invert, delete, select none
Delete/Hide original rectangle layer
Select Circle 2 layer
Select all, float, defloat
Paste paper 1
Select invert, delete, select none
Delete/Hide original circle layer
Select Rectangle 1 layer
Select all, float, defloat
Paste paper 4
Select invert, delete, select none
Delete/Hide original rectangle layer
Copy and paste tube of choice and position where desired
Apply Xero Porcelain at setting of choice
Apply Lokas 3D Shadow at default settings
Select Element 55 - resize by 50%
Image Free Rotate Left by 15% and paste on top left
Select Element 42 - resize by 45%
Paste and position on bottom left
Select Element 60 - resize by 25%
Paste and position on bottom left
Select Element 39 - resize by 30%
Paste and position on bottom left
Select Element 30 - resize by 30%
Paste and position on bottom left
Select Element 44 - resize by 30%
Paste and position on bottom left
Select Element 45 - resize by 30%
Paste and position on bottom left
Select Element 1 - resize by 35%
Paste and position on bottom where desired
Select Element 53 - resize by 30%
Paste and position on bottom right
Select Element 52 - resize by 30%
Paste and position on bottom right
Select Element 24 - resize by 30%
Image Free Rotate Right by 15% and paste on bottom right
Select new raster layer and flood fill with color or gradient of choice
Move layer to the bottom of the template
Apply Mask 25
Merge group and move to the bottom layer
Add any additional elements you like.
Add any dropshadows you like
Crop and resize as desired
Add copyright info, license number and name
You're done! Thanks for trying my tutorial!
Wednesday, March 19, 2014
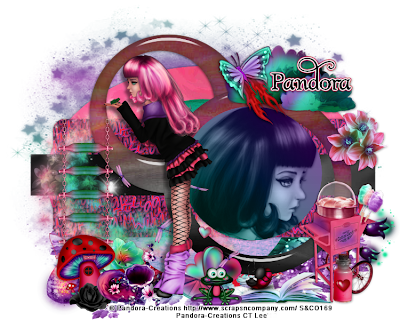
MAKE A WISH
Supplies needed:
I am using the amazing artwork from Pandora Creations for this tutorial which you can find here
Scrapkit: I am using an awesome matching kit from Bibi's Collections called "Make a Wish" which you can get by going here
Template 43 from Scrapity Scrap and More which you can find here
Mask 25 from Witchys Heart which you can find on the Misfits Blog here
Plugins used: Eyecandy 4000 - Glass, Xero - Radiance, Xero - Bad Dream, Lokas 3D Shadow
----------------------------
This tutorial is written for those who have working knowledge of PSPX2 (any version will do).
This tutorial was written by me on March 19, 2014. Please do not copy or paste on any other forum, website or blog provide link back to tut only. Please do not claim as your own. This tutorial is copyrighted to me. Any resemblance to any other tutorial is purely coincidental.
Ok - let's start and remember to save often.
Open the template and using your shortcut keys on your keyboard (SHIFT+D) duplicate the template as a new image. Close the original and delete the copywrite layer.
Adjust canvas size to 750 x 600
Select Circle Raster 4 layer
Select all, float, defloat
Add new raster layer and flood-fill with gradient of choice (Linear style, Angle 45, repeat 2)
Paste close-up tube of choice on top of gradient and delete
Change close-up to Luminence (Legacy)
Apply Xero Bad Dream at default settings or random setting of choice
Drop opacity down to 85%
Apply dropshadow and merge close-up down on top of gradient layer
Effects, Texture Effects, Blinds (Width 2, Opactity 15, Horizontal and Light from
left/top checked)
Delete/Hide orginal circle layer
Select Circle Raster 3 layer
Select all, float, defloat
Paste paper 1
Select invert, delete, select none
Apply Eyecandy Glass on default settings of choice
Delete/Hide original circle layer
Select Circle Raster 8 layer and repeat above steps
Select Strip Raster 2 layer
Select all, float, defloat
Paste paper 6
Select invert, delete, select none
Delete/Hide original strip layer
Select Rectangle Raster 7 layer
Select all, float, defloat
Paste paper 11
Select invert, delete, select none
Delete/Hide original rectangle layer
Select Circle Raster 6 layer
Select all, float, defloat
Paste paper 7
Select invert, delete, select none
Delete/Hide original circle layer
Select Oval Raster 9 layer
Select all, float, defloat
Paste paper 3
Select invert, delete, select none
Delete/Hide original oval layer
Copy and paste tube of choice and position where desired
Apply Xero Radiance at setting of choice
Apply Lokas 3D Shadow at default settings
Select Element 47 - resize by 65%
Paste and position on bottom where desired
Select Element 72 - resize by 45%
Paste and position on top right
Select Element 66 - resize by 55%
Paste and position on top right
Select Element 14 - resize by 65%
Paste and position on top right
Select Element 79 - resize by 30%
Paste and position on bottom right
Select Element 13 - resize by 55%
Paste and position on bottom right
Select Element 40 - resize by 45%
Paste and position on bottom right
Select Element 4 - resize by 30%
Paste and position on bottom where desired
Select Element 85 - resize by 30%
Paste and position on bottom where desired
Select Element 34 - resize by 50%
Paste and position on left side where desired
Select Element 6 - resize by 30%
Paste and position on bottom left
Select Element 23 - resize by 20%
Paste and position on bottom left
Select Element 21 - resize by 20%
Paste and position on bottom left
Select Element 54 - resize by 35%
Paste and position on bottom left
Select new raster layer and flood fill with color or gradient of choice
Move layer to the bottom of the template
Apply Mask 25
Merge group and move to the bottom layer
Add any additional elements you like.
Add any dropshadows you like
Crop and resize as desired
Add copyright info, license number and name
You're done! Thanks for trying my tutorial!
Tuesday, March 18, 2014
NIGHT OF EMOTIONS

Supplies needed:
I am using the amazing artwork from Designs by Norella for this tutorial which you can find here
Scrapkit: I am using a beautiful kit from Graphic of Fantasy called "Dark Love" which you can get by going here
Template 157 from Horeplay's Pastures Designs which you can find here
Mask 25 from Witchyheart which you can find on the Misfits Blog here
Plugins used: Xero - Radiance, Xero - Bad Dream, Lokas 3D Shadow
----------------------------
This tutorial is written for those who have working knowledge of PSPX2 (any version will do).
This tutorial was written by me on March 18, 2014. Please do not copy or paste on any other forum, website or blog provide link back to tut only. Please do not claim as your own. This tutorial is copyrighted to me. Any resemblance to any other tutorial is purely coincidental.
Ok - let's start and remember to save often.
Open the template and using your shortcut keys on your keyboard (SHIFT+D) duplicate the template as a new image. Close the original and delete the copywrite layer.
Adjust canvas size to 700 x 600
Select Heart Raster 17 layer
Select all, float, defloat
Paste paper 12
Select invert, delete, select none
Delete/Hide original heart layer
Select remaining hearts and repeat above steps
Select Strip Raster 13 layer
Effect, Texture Effects, Blinds (Width 2, Opactity 25, Horizontal and Light from left/top checked)
Select Strip Raster 12 layer and repeat above step
Select Square Raster 11 layer
Select all, float, defloat
Add new raster layer and flood-fill with gradient of choice (Linear style, Angle 45, repeat 2)
Paste close-up tube of choice on top of gradient and delete
Change close-up to Luminence (Legacy)
Apply Xero Bad Dream at default settings or random setting of choice
Drop opacity down to 85%
Apply dropshadow and merge close-up down on top of gradient layer
Delete/Hide orginal square layer
Select Square Raster 9 and repeat above steps
Select Square Raster 10 layer
Select all, float, defloat
Add new raster layer and flood-fill with color of choice
Select none
Effects, Texture Effects, Sculpture with the following settings (use pattern of choice)

Delete/hide original square layer
Select Square Raster 8 and repeat above steps
Select Square Raster 7 layer
Select all, float, defloat
Paste paper 5
Select invert, delete, select none
Delete/Hide original square layer
Select Rectangle Raster 6 layer
Select all, float, defloat
Paste paper 10
Select invert, delete, select none
Delete/Hide original rectangle layer
Select Square Raster 3 layer
Select all, float, defloat
Paste paper 13
Select invert, delete, select none
Delete/Hide original square layer
Select Square Raster 2 layer
Select all, float, defloat
Add new raster layer and flood-fill with color of choice
Select none
Effects, Texture Effects, Sculpture with the following settings (use pattern of choice):

Delete/Hide original square layer
Copy and paste tube of choice and position where desired
Apply Xero Radiance at setting of choice
Apply Lokas 3D Shadow at default settings
Select Element 66 - resize by 40%
Paste and position in top right
Select Element 19 - resize by 75%
Paste and position on bottom and move to bottom layer
Select Element 3 - resize by 40%
Paste and position on bottom right
Select Element 17 - resize by 22%
Paste and position on bottom right
Select Element 3 - resize by 15%
Paste and position on bottom right
Select Element 1 - resize by 15%
Image mirror and paste on bottom right
Select Element 4 - resize by 20%
Paste and position on bottom right
Select Element 42 - resize by 25%
Paste and position on top left where desired
Select Element 20 - resize by 18%
Paste and position on top left
Select Element 25 - resize by 40%
Paste and position on left side where desired
Select Element 8 - resize by 20%
Paste and position on bottom where desired
Select Element 52 - resize by 15%
Paste and position on bottom left
Select Element 28 and paste on bottom left
Select Element 15 - resize by 15%
Paste and position on bottom left
Select Wordart 2 Element - resize by 35%
Paste and position on top right
Select new raster layer and flood fill with color or gradient of choice
Move layer to the bottom of the template
Apply Mask 25
Merge group and move to the bottom layer
Add any additional elements you like.
Add any dropshadows you like
Crop and resize as desired
Add copyright info, license number and name
You're done! Thanks for trying my tutorial!
Monday, March 17, 2014
IRELAND BABE

Supplies needed:
I am using the amazing artwork from Danny Lee for this tutorial which you can find here
Scrapkit: I am using an awesome matching kit from Disturbed Scraps called "Ireland Babe" which you can get by going here
Template 506 from Millie which you can find here
Mask 2 from Tonya which you can find on the Misfits Blog here
Plugins used: Eyecandy 4000 - Glass, Xero - Radiance, Penta - Jeans, Lokas 3D Shadow
----------------------------
This tutorial is written for those who have working knowledge of PSPX2 (any version will do).
This tutorial was written by me on March 17, 2014. Please do not copy or paste on any other forum, website or blog provide link back to tut only. Please do not claim as your own. This tutorial is copyrighted to me. Any resemblance to any other tutorial is purely coincidental.
Ok - let's start and remember to save often.
Open the template and using your shortcut keys on your keyboard (SHIFT+D) duplicate the template as a new image. Close the original and delete the copywrite layer.
Adjust canvas size to 700 x 600
Select Shape 15 layer
Select your magic wand tool and select the center of shape
Selections, Modify and Expand by 3
Add new raster layer and flood-fill with color of choice
Select none
Apply Eyecandy Glass on default settings
Select Shape 14 and repeat above steps
Select Circle 13 layer
Select all, float, defloat
Add new raster layer and flood-fill with color of choice
Select none
Apply Penta - Jeans with the following setting
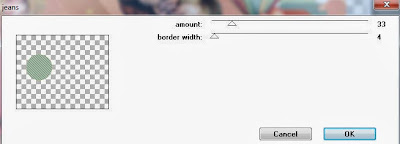
Delete/Hide original circle layer
Select Circle 12 layer and repeat above steps
Select Square 9 layer
Select all, float, defloat
Paste paper 3
Select invert, delete, select none
Delete/Hide original square layer
Select Element 98 - resize by 60%
Paste and position on top of square layer
Select Square 8 layer
Select all, float, defloat
Paste paper 6
Select invert, delete, select none
Delete/Hide original square layer
Select Square 7 layer and repeat above steps
Select Square 6 layer
Select all, float, defloat
Paste paper 2
Select invert, delete, select none
Delete/Hide original square layer
Select Square 5 layer and repeat above steps
Select Circle 4 layer
Select all, float, defloat
Paste paper 13
Select invert, delete, select none
Delete/Hide original circle layer
Select Circle 3 layer and repeat above steps
Select Rectangle 2 layer
Select all, float, defloat
Paste paper 7
Select invert, delete, select none
Delete/Hide original rectangle layer
Select Rectangle 1 layer and repeat above steps
Copy and paste tube of choice and position where desired
Apply Xero Radiance at setting of choice
Apply Lokas 3D Shadow at default settings
Select Element 102 - resize by 50%
Paste and position on top left where desired
Select Element 89 - resize by 45%
Paste and position on top left
Select Element 16 - resize by 25%
Paste and position on bottom right
Select Element 62 - resize by 25%
Image mirror and paste on bottom right
Select Element 66 - resize by 30%
Paste and position on bottom right
Select Element 23 - resize by 25%
Paste and position on bottom right
Select Element 22 - resize by 50%
Paste and position on bottom right
Select Element 72 - resize by 35%
Paste and position on bottom left
Select Element 21 - resize by 30%
Paste and position on bottom left
Select Element 5 - resize by 25%
Paste and position on bottom left
Select Element 47 - resize by 25%
Paste and position on bottom left
Select Element 39 - resize by 22%
Paste and position on bottom left
Select Element 31 - resize by 25%
Image mirror and paste on bottom left
Select Element 51 - resize by 30%
Paste and position on top left
Select new raster layer and flood fill with color or gradient of choice
Move layer to the bottom of the template
Apply Mask 2
Merge group and move to the bottom layer
Add any additional elements you like.
Add any dropshadows you like
Crop and resize as desired
Add copyright info, license number and name
You're done! Thanks for trying my tutorial!
Labels:Scraps N Company | 0
comments
Tuesday, March 11, 2014
MIRROR MIRROR
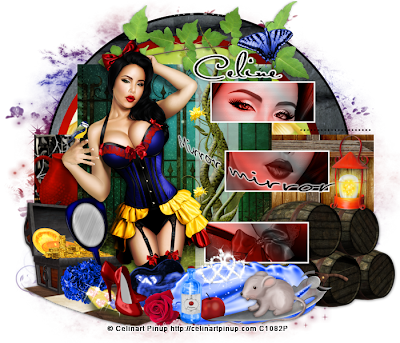
Supplies needed:
I am using the amazing artwork from Celinart Pinup for this tutorial which you can find here
Scrapkit: I am using an awesome matching kit from Hania's Design called "Snow White" which you can get by going here
Template 40 from Scrapity Scrap and More which you can find here
Mask 20 from Moonbeams and Spiderwebs which you can find here
Plugins used: Eyecandy 4000 - Gradient Glow, Xero - Radiance, Xero - Bad Dream, Lokas 3D Shadow
----------------------------
This tutorial is written for those who have working knowledge of PSPX2 (any version will do).
This tutorial was written by me on March 11, 2014. Please do not copy or paste on any other forum, website or blog provide link back to tut only. Please do not claim as your own. This tutorial is copyrighted to me. Any resemblance to any other tutorial is purely coincidental.
Ok - let's start and remember to save often.
Open the template and using your shortcut keys on your keyboard (SHIFT+D) duplicate the template as a new image. Close the original and delete the copywrite layer.
Adjust canvas size to 700 x 600
Select Bottom Rectangle layer
Select all, float, defloat
Add new raster layer and flood-fill with gradient of choice (Linear style, Angle 45, repeat 2)
Paste close-up tube of choice on top of gradient and delete
Change close-up to Luminence (Legacy)
Apply Xero Bad Dream at default settings or random setting of choice
Drop opacity down to 75%
Apply dropshadow and merge close-up down on top of gradient layer
Effects, Texture Effects, Blinds (Width 2, Opactity 15, Horizontal and Light from
left/top checked)
Delete/Hide orginal rectangle layer
Select Middle and Top Rectangle layers and repeat above steps
Select Line Square layer
Effects, Texture Effects, Blinds (Width 2, Opactity 15, Horizontal and Light from
left/top checked)
Select Square layer
Select all, float, defloat
Paste paper 3
Select invert, delete, select none
Delete/Hide original square layer
Select Big Rectangle layer
Select all, float, defloat
Paste paper 11
Select invert, delete, select none
Delete/Hide original rectangle layer
Select Border Smaller Circle layer
Select all, float, defloat
Paste paper 14
Select invert, delete, select none
Delete/Hide original border layer
Select Smaller Circle layer
Select all, float, defloat
Paste paper 6
Select invert, delete, select none
Delete/Hide original circle layer
Select Border Big Circle
Select all, float, defloat
Add new raster layer and flood-fill with color of choice
Select none
Delete/Hide original border layer
Select Big Circle layer
Select all, float, defloat
Paste paper 8
Select invert, delete, select none
Delete/Hide original circle layer
Copy and paste tube of choice and position where desired
Apply Xero Radiance at setting of choice
Apply Lokas 3D Shadow at default settings
Select Element 58 - resize by 65%
Paste and position on right side where desired
Apply Eyecandy Gradient Glow on fat default settings
Select Element 77 - resize by 45%
Paste and position on bottom right where desired
Select Element 36 - resize by 50%
Paste and position on right where desired
Select Element 74 - resize by 40%
Paste and position on bottom where desired
Select Element 50 and paste on bottom where desired
Select Element 4 - resize by 35%
Image mirror and paste on bottom left
Select Element 34 - resize by 45%
Paste and position on bottom left
Select Element 136 - resize by 25%
Image Free Rotate Left by 15% and paste on bottom left
Select Element 39 - resize by 20%
Paste and position on bottom left
Select Element 35 - resize by 25%
Paste and position on bottom left
Select Element 142 - resize by 45%
Image Free Rotate Left by 15% and paste on bottom left
Select Element 22 - resize by 25%
Image mirror and paste on bottom left
Select Element 11 - resize by 70%
Paste and position on top
Select Element 141 - resize by 75%
Paste and position on top right
Select new raster layer and flood fill with color or gradient of choice
Move layer to the bottom of the template
Apply Mask 96
Merge group and move to the bottom layer
Add any additional elements you like.
Add any dropshadows you like
Crop and resize as desired
Add copyright info, license number and name
You're done! Thanks for trying my tutorial!
Labels:Celinart Pinup | 0
comments
Monday, March 10, 2014
SAVAGE PUNK

Supplies needed:
I am using the amazing artwork from Pandora's Creations for this tutorial which you can find here
Scrapkit: I am using an awesome matching kit from Bibi's Collection called "Savage Punk" which you can get by going here
Template 32 from Fired by Flamin which you can find here
Grunge Mask 1 from Tonya which you can find here
Plugins used: Eyecandy 4000 - Glass, Eyecandy 4000 - Gradient Glow, Xero - Radiance, Lokas 3D Shadow
----------------------------
This tutorial is written for those who have working knowledge of PSPX2 (any version will do).
This tutorial was written by me on March 10, 2014. Please do not copy or paste on any other forum, website or blog provide link back to tut only. Please do not claim as your own. This tutorial is copyrighted to me. Any resemblance to any other tutorial is purely coincidental.
Ok - let's start and remember to save often.
Open the template and using your shortcut keys on your keyboard (SHIFT+D) duplicate the template as a new image. Close the original and delete the copywrite layer.
Adjust canvas size to 700 x 700
Select Wordart 2 layer
Select all, float, defloat
Add new raster layer and flood-fill with color(s) of choice
Select none
Apply Eyecandy Glass on default settings
Apply Eyecandy Gradient Glow on fat default settings (Glow Width 3)
Delete/Hide original wordart layer
Select Wordart 1 layer and repeat above steps
Select Element 61 - resize by 60%
Paste and position on top of Pink Rect 2 layer
Image, duplicate, mirror and reposition over Pink Rect 1 layer
Select Pink Oval layer
Select all, float, defloat
Paste paper 8
Select invert, delete, select none
Delete/Hide original oval layer
Select Gry Rect 2 layer
Select all, float, defloat
Paste paper 1
Select invert, delete, select none
Delete/Hide original rectangle layer
Select Gry Rect 1 layer and repeat above steps
Select Blk Rectangle layer
Select all, float, defloat
Paste paper 7
Select invert, delete, select none
Delete/Hide original rectangle layer
Select Oval 1 layer
Select all, float, defloat
Paste paper 6
Select invert, delete, select none
Delete/Hide original oval layer
Select Oval 2 layer and repeat above steps
Copy and paste tube of choice and position where desired
Apply Xero Radiance at setting of choice
Apply Lokas 3D Shadow at default settings
Select Element 56 - resize by 40%
Paste and position on bottom below tube layer
Select Element 7 - resize by 45%
Image Free Rotate Left by 15% and paste below tube layer where desired
Select Element 8 - resize by 45%
Paste and position on bottom right
Select Element 43 - resize by 45%
Paste and position on bottom right
Select Element 36 - resize by 40%
Paste and position on bottom right
Select Element 24 - resize by 45%
Paste and position on bottom where desired
Select Element 39 - resize by 35%
Paste and position on bottom where desired
Select Element 26 - resize by 45%
Paste and position on bottom left
Select Element 64 - resize by 55%
Paste and position on bottom left
Select Element 21 - resize by 45%
Paste and position on top
Select new raster layer and flood fill with color or gradient of choice
Move layer to the bottom of the template
Apply Mask 96
Merge group and move to the bottom layer
Add any additional elements you like.
Add any dropshadows you like
Crop and resize as desired
Add copyright info, license number and name
You're done! Thanks for trying my tutorial!
Thursday, March 6, 2014
GOT THAT LOOK
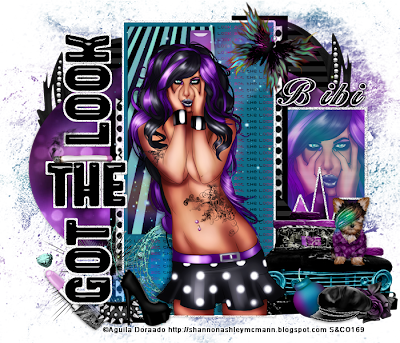
Supplies needed:
I am using the amazing artwork from Aguila Dorado for this tutorial which you can find here
Scrapkit: I am using an awesome kit from Bibi's Collections called "Baby Blue" which you can get by going here
Template 489 from Missy which you can find here
Mask 96 from Trese which you can find here
Plugins used: Eyecandy 4000 - Glass, Xero - Radiance, Lokas 3D Shadow
----------------------------
This tutorial is written for those who have working knowledge of PSPX2 (any version will do).
This tutorial was written by me on March 6, 2014. Please do not copy or paste on any other forum, website or blog provide link back to tut only. Please do not claim as your own. This tutorial is copyrighted to me. Any resemblance to any other tutorial is purely coincidental.
Ok - let's start and remember to save often.
Open the template and using your shortcut keys on your keyboard (SHIFT+D) duplicate the template as a new image. Close the original and delete the copywrite layer.
Adjust canvas size to 700 x 600
Select Wordart layer
Apply Eyecandy Glass on default settings
Select Strip Raster 10 layer
Select all, float, defloat
Add new raster layer and flood-fill with color of choice
Select none
Apply Eyecandy Glass with same settings
Select Rectangle Raster 2 layer
Select all, float, defloat
Paste paper 1
Select invert, delete, select none
Delete/Hide original rectangle layer
Select Rectangle Raster 4 layer
Select all, float, defloat
Add new raster layer and flood-fill with color of choice
Select none
Delete/Hide original rectangle layer
Select Strip Raster 6 layer
Select all, float, defloat
Paste paper 6
Select invert, delete, select none
Delete/Hide original strip layer
Select Strip Copy of Raster 6 and repeat above steps
Select Shape Raster 16 layer
Select all, float, defloat
Add new raster layer and flood-fill with gradient of choice (style, Angle 45, repeat 2)
Paste close-up tube of choice on top of gradient and delete
Change close-up to Screen
Drop opacity down to 80%
Apply Xero Bad Dream at default settings or random setting of choice
Apply dropshadow and merge close-up down on top of gradient layer
Effects, Texture Effects, Blinds (Width 2, Opactity 15, Horizontal and Light from
left/top checked)
Delete/Hide orginal shape layer
Select Oval Raster 19 layer
Select all, float, defloat
Paste paper 4
Select invert, delete, select none
Delete/Hide original oval layer
Select Circle Raster 5 layer
Select Element 52 - resize by 40%
Paste and position over circle layer
Select Circle Copy of Raster 5 and repeat above steps
Copy and paste tube of choice and position where desired
Apply Xero Radiance at setting of choice
Apply Lokas 3D Shadow at default settings
Select Element 3 - resize by 30%
Image mirror and paste on bottom right
Select Element 20 - resize by 50%
Paste and position on bottom right
Select Element 39 - resize by 25%
Paste and position on bottom right
Select Element 50 - resize by 20%
Paste and position on bottom right
Select Element 63 - resize by 40%
Paste and position on bottom right
Select Element 66 - resize by 15%
Paste and position on bottom left
Select Element 47 - resize by 40%
Paste and position on bottom left
Select Element 9 - resize by 30%
Paste and position on bottom left
Select Element 17 - resize by 40%
Paste and position on bottom left
Select Element 10 - resize by 40%
Paste and position on top right
Select new raster layer and flood fill with color or gradient of choice
Move layer to the bottom of the template
Apply Mask 96
Merge group and move to the bottom layer
Add any additional elements you like.
Add any dropshadows you like
Crop and resize as desired
Add copyright info, license number and name
You're done! Thanks for trying my tutorial!
Labels:Bibi's Collections,Scraps N Company | 0
comments
SHAM-ROCKING
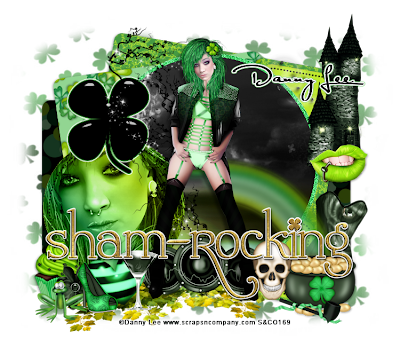
Supplies needed:
I am using the amazing artwork from Danny Lee for this tutorial which you can find here
Scrapkit: I am using an awesome matching kit from Designs by Joan called "Clover" which you can get by going here
Exclusive Template from Dee which you can find here
Mask 43 from Myth which you can find on the Misfits Blog here
Plugins used: Eyecandy 4000 - Marble, Eyecandy 4000 - Glass, Xero - Radiance, Xero-Bad Dream, Lokas 3D Shadow
----------------------------
This tutorial is written for those who have working knowledge of PSPX2 (any version will do).
This tutorial was written by me on March 6, 2014. Please do not copy or paste on any other forum, website or blog provide link back to tut only. Please do not claim as your own. This tutorial is copyrighted to me. Any resemblance to any other tutorial is purely coincidental.
Ok - let's start and remember to save often.
Open the template and using your shortcut keys on your keyboard (SHIFT+D) duplicate the template as a new image. Close the original and delete the copywrite layer.
Adjust canvas size to 750 x 650
Select Sham-rocking gold layer
Effect, Texture Effects, Sculpture with the following settings (use any gold pattern of choice)
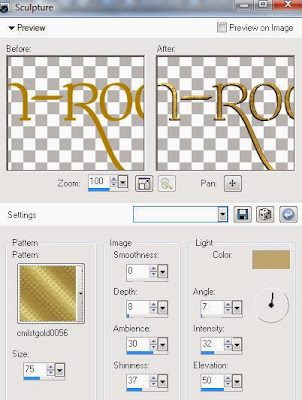
Select Shamrock layer and apply Eyecandy Glass on default setting of choice
Select Yellow Circle layer
Select all, float, defloat
Add new raster layer and flood-fill with gradient of choice (style, Angle 45, repeat 2)
Paste close-up tube of choice on top of gradient and delete
Change close-up to Luminence (Legacy)
Apply Xero Bad Dream at default settings or random setting of choice
Apply dropshadow and merge close-up down on top of gradient layer
Effects, Texture Effects, Blinds (Width 2, Opactity 15, Horizontal and Light from
left/top checked)
Delete/Hide orginal circle layer
Select Green Circle layer
Select all, float, defloat
Paste paper 5
Select invert, delete, select none
Delete/Hide original circle layer
Select White Circle layer
Select all, float, defloat
Add new raster layer and flood-fill with color of choice
Select none
Adjust, Add/Remove Noise, Add Noise (Uniform checked, Noise 85%, Monochrome checked)
Delete/Hide original circle layer
Select Gold Square layer
Select all, float, defloat
Paste paper 10
Select invert, delete, select none
Delete/Hide original square layer
Select Top yellow square layer
Select all, float, defloat
Add new raster layer and flood-fill with color of choice
Select none
Delete/Hide original square layer
Select Bottom Yellow Square layer and repeat above steps
Select Green Square layer
Select all, float, defloat
Add new raster layer and flood-fill with color of choice
Select none
Apply Eyecandy Marble with the following settings:
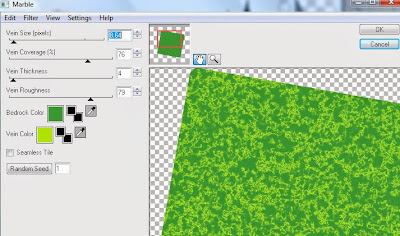
Delete/Hide original square layer
Select Green Rectangle layer
Select all, float, defloat
Paste paper 9
Select invert, delete, select none
Delete/Hide original rectangle layer
Select Element 66 - resize by 85%
Paste and position on bottom where desired
Copy and paste tube of choice and position where desired
Apply Xero Radiance at setting of choice
Apply Lokas 3D Shadow at default settings
Select Element 43 - resize by 40%
Paste and position on top right
Select Element 50 - resize by 50%
Paste and position on top right
Select Element 36 - resize by 40%
Image Free Rotate Right by 15% and paste on bottom right
Select Element 58 - resize by 65%
Image mirror and paste on bottom right
Select Element 32 - resize by 35%
Paste and position on bottom right
Select Element 18 - resize by 60%
Paste and position on bottom below tube layer
Select Element 56 - resize by 35%
Paste and position on bottom left
Select Element 29 - resize by 20%
Paste and position on bottom left
Select Element 26 - resize by 25%
Paste and position on bottom left
Select Element 37 - resize by 55%
Image Free Rotate Left by 15% and paste on bottom left
Select Element 20 - resize by 40%
Paste and position on bottom left
Select Element 60 - resize by 30%
Paste and position on bottom left
Select new raster layer and flood fill with color or gradient of choice
Move layer to the bottom of the template
Apply Mask 43
Merge group and move to the bottom layer
Add any additional elements you like.
Add any dropshadows you like
Crop and resize as desired
Add copyright info, license number and name
You're done! Thanks for trying my tutorial!
Labels:Designs by Joan,Scraps N Company | 0
comments
Wednesday, March 5, 2014
GOTH PRINCESS
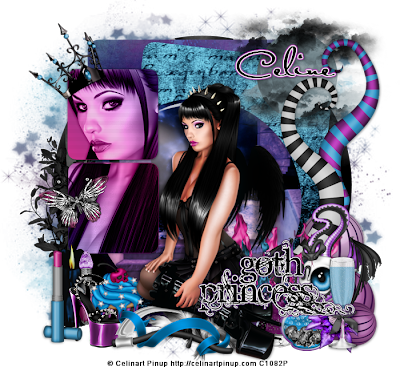
Supplies needed:
I am using the amazing artwork from Celinart Pinup for this tutorial which you can find here
Scrapkit: I am using an awesome matching kit from Pink Paradox Productions called "Shadow Princess" which you can get by going here
Blog Train Template 1 from Millie which you can find here
Mask 25 from WitchysHeart which you can find here
Plugins used: Eyecandy 4000 - Gradient Glow, Xero - Radiance, Xero-Bad Dream, Lokas 3D Shadow
----------------------------
This tutorial is written for those who have working knowledge of PSPX2 (any version will do).
This tutorial was written by me on March 5, 2014. Please do not copy or paste on any other forum, website or blog provide link back to tut only. Please do not claim as your own. This tutorial is copyrighted to me. Any resemblance to any other tutorial is purely coincidental.
Ok - let's start and remember to save often.
Open the template and using your shortcut keys on your keyboard (SHIFT+D)duplicate the template as a new image. Close the original and delete the copywrite layer.
Adjust canvas size to 700 x 650
Select Wordart 7 layer
Apply Eyecandy Gradient Glow on fat default settings (Glow Width 3)
Select Square 6 layer
Select all, float, defloat
Add new raster layer and flood-fill with gradient of choice (style, Angle 45,
Repeat 2)
Paste close-up tube of choice on top of gradient and delete
Change close-up to Luminence (Legacy)
Apply Xero Bad Dream at default settings or random setting of choice
Apply dropshadow and merge close-up down on top of gradient layer
Effects, Texture Effects, Blinds (Width 2, Opactity 15, Horizontal and Light from
left/top checked)
Delete/Hide orginal square layer
Select Square 5 layer and repeat above steps
Select Circle 4 layer
Select all, float, defloat
Paste paper 8
Select invert, delete, select none
Delete/Hide original circle layer
Select Rectangle 3 layer
Select all, float, defloat
Paste paper 12
Select invert, delete, select none
Delete/Hide original rectangle layer
Select Rectangle 2 layer
Select all, float, defloat
Paste paper 16
Select invert, delete, select none
Delete/Hide original rectangle layer
Select Circle 1 layer
Select all, float, defloat
Paste paper 24
Select invert, delete, select none
Delete/Hide original circle layer
Copy and paste tube of choice and position where desired
Apply Xero Radiance at setting of choice
Apply Lokas 3D Shadow at default settings
Select Element 99 - resize by 40%
Paste and position on top right
Select Element 90 - resize by 50%
Paste and position on right side where desired
Select Element 92 - resize by 30%
Paste and position on bottom right
Select Element 64 - resize by 25%
Paste and position on bottom right
Select Element 35 - resize by 25%
Paste and position on bottom right
Select Element 49 - resize by 20%
Paste and position on bottom right
Select Element 159 - resize by 30%
Image mirror and paste on left side where desired
Select Element 7 - resize by 22%
Image Free Rotate Left by 15% and paste on left side
Select Element 38 - resize by 25%
Paste and position on bottom left
Select Element 59 - resize by 22%
Paste and position on bottom left
Select Element 22 - resize by 20%
Paste and position on bottom left
Select Element 65 - resize by 25%
Paste and position on bottom
Select new raster layer and flood fill with color or gradient of choice
Move layer to the bottom of the template
Apply Mask 25
Merge group and move to the bottom layer
Add any additional elements you like.
Add any dropshadows you like
Crop and resize as desired
Add copyright info, license number and name
You're done! Thanks for trying my tutorial!
Labels:Celinart Pinup | 0
comments
Subscribe to:
Posts
(Atom)


