Labels
- Alikas Scraps
- All Dolled Up Store
- Amy Marie
- Annaica
- Arthur Crowe
- Babycakes Scraps
- Barbara Jensen
- Bibi's Collections
- Black Widow Creationz
- Blu Moon
- Bonnies Creations
- Bookwork Dezines
- Broken Sky Dezine
- Carita Creationz
- Carpe Diem Designs
- CDO
- Celinart Pinup
- Celine
- Chacha Creationz
- Charmed Designs
- Cherry Blossom Designs
- Chili Designz
- Cluster Frame
- Creative Misfits
- Creative Scraps by Crys
- Curious Creative Dreams
- Danny Lee
- Derzi
- Designs by Ali
- Designs by Joan
- Designs By Norella
- Designs by Vi
- Diana Gali
- Diry Art Designs
- Disturbed Scraps
- Dreaming With Bella
- Eclipse Creations
- Elegancefly
- Extras
- Fabulous Designz
- Forum Set
- Foxy's Designz
- Freek's Creation
- FTU
- FwTags
- Gothic Inspirations
- Gothic Raven Designs
- Graphfreaks
- Hania's Designs
- Happy Pumpkin Studios
- Horseplay's Pasture Designs
- indie-Zine
- Irish Princess Designs
- Ishika Chowdhury
- Kaci McVay
- Kajenna
- katharine
- Katherine
- Khloe Zoey
- Killer Kitty
- Kissing Kate
- KiwiFirestorm
- Kizzed by Kelz
- KZ Designz
- Lady Mishka
- Lil Mz Brainstorm
- Maiden of Darkness
- Mariel Designs
- MellieBeans
- Misticheskya
- MistyLynn's Creations
- MMeliCrea Designz
- Moon Vixen Designs
- NaSionainne
- Ninaste
- Niqui Designs
- Pandora
- Picsfordesign
- Pink Paradox Productions
- Radyga Designs
- Redefined Designs
- Rissa's Designs
- Schnegge
- ScottishButterfly Creations
- Scrappin Krazy Designs
- Scrappin With Lil Ol Me
- Scraps and the City
- Scraps Dimensions
- Scraps From The Heart
- Scraps N Company
- Scraps with Attitude
- Shining Star Art
- Skyscraps
- Sleek N Sassy Designs
- Sophisticat Simone
- Souldesigner
- Soxsational Scraps
- Spazz
- Starlite and Soul
- Tammy Welt
- Tasha's Playground
- The PSP Project
- Thrifty Scraps by Gina
- Tiny Turtle Designs
- Upyourart
- Verymany
- Wendy Gerber
- Whisper In the Wind
- Wick3d Creationz
- Wicked Diabla
- Yude's Kreationz
Blog Archive
Tuesday, September 30, 2014
VOODOO LOVE
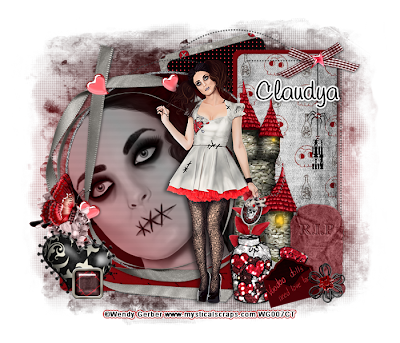
Supplies needed:
I am using the amazing artwork from Wendy Gerber for this tutorial which you can find here
Scrapkit: I am using a stunning kit from Carpe Diem Designs called "Voodoo Doll" which you can get by going here
Template 155 from Horseplay's Pasture Designs which you can find here
Mask 119 from Designs by Vaybs which you can find here
Plugins used: Lokas 3D Shadow
----------------------------
This tutorial is written for those who have working knowledge of PSPX2 (any version will do).
This tutorial was written by me on September 30, 2014. Please do not copy or paste on any other forum, website or blog provide link back to tut only. Please do not claim as your own. This tutorial is copyrighted to me. Any resemblance to any other tutorial is purely coincidental.
Ok - let's start and remember to save often.
Open the template and using your shortcut keys on your keyboard (SHIFT+D) duplicate the template as a new image. Close the original and delete the copywrite layer.
Adjust canvas to 700 x 600
Select Rectangle Raster 11 layer
Select all, float, defloat
Paste paper 7
Select invert, delete, select none
Delete/Hide original rectangle layer
Select Circle Raster 10 layer
Select all, float, defloat
Add new raster layer and flood-fill with gradient of choice (style, Angle 45, Repeat 2)
Add Close-up tube of choice and paste on top of gradient layer
Select invert, delete, select none
Change close-up to Luminance Legacy and drop opacity down to 80%
Apply Xero Bad Dream on default setting of choice
Apply dropshadow and merge tube down on top of gradient
Effect, Texture Effects, Blinds (Width 2, Opactity 15, Horizontal and Light from left/top checked)
Delete/Hide original circle layer
Select Frame 1 Element and paste on top of circle layer
Select Circle Raster 9 layer
Adjust, Add/Remove Noise, Add Noise (Uniform checked, Noise 55%, Monochrome checked)
Select Rectangle Raster 8 layer
Select all, float, defloat
Add new raster layer and flood-fill with color of choice
Select none
Delete/Hide original rectangle layer
Select Rectangle Raster 7 layer
Select all, float, defloat
Paste paper 1
Select invert, delete, select none
Delete/Hide original rectangle layer
Select Rectangle Raster 4 layer
Select all, float, defloat
Add new raster layer and flood-fill with color of choice
Select none
Apply Effects, Texture Effects, Weave (Gap size 2, Width 5, Opacity 10, Fill gaps checked, change Gap and Weave color to one of choice)
Delete/hide original rectangle layer
Select Rectangle Raster 3 layer
Select all, float, defloat
Paste paper 2
Select invert, delete, select none
Delete/Hide original rectangle layer
Copy and paste tube of choice and position where desired
Apply Lokas 3D Shadow at default settings
Select Tag 1 Element - resize by 50%
Paste and position on top right
Select Knoted Ribbon Element - resize by 75%
Paste and position on top right
Select Castle Element - resize by 65%
Image mirror and paste on bottom right
Select Medallion Element - resize by 25%
Paste and position on bottom right
Select Gravestone Element - resize by 30%
Paste and position on bottom right
Select Greenery 2 Element - resize by 50%
Paste and position on bottom right
Select Bottle Element - resize by 65%
Paste and position on bottom right
Select Envelope Element - resize by 30%
Image Free Rotate Left by 15% and paste on bottom right
Select Flower 1 Element - resize by 25%
Paste and position on bottom right
Select Orchids Element - resize by 60%
Image Free Rotate Left by 15% and paste on bottom left
Select Heart 3 - resize by 65%
Image Free Rotate Right by 15% and paste on bottom left
Select Brad1 - resize by 75%
Paste and position on bottom left
Select Butterfly1 Element - resize by 45%
Paste and position on bottom left
Select new raster layer and flood fill with color or gradient of choice
Apply Mask 119 or mask of choice
Merge group and move to the bottom layer
Add any additional elements you like.
Add any dropshadows you like
Crop and resize as desired
Add copyright info, license number and name
You're done! Thanks for trying my tutorial!
Labels:Carpe Diem Designs,Wendy Gerber | 1 comments
Sunday, September 28, 2014
TRICKS & TREATS
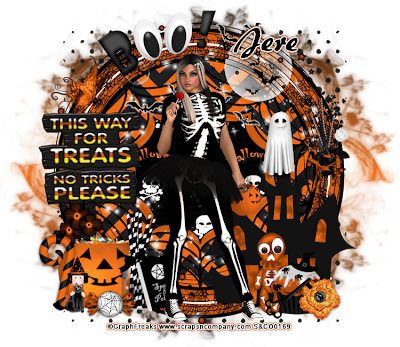
Supplies needed:
I am using the amazing art from Graphfreaks for for this tutorial whice you can find here
Scrapkit: I am using a stunning kit from Whisper in the Wind called "Tricks & Treats" which you can get by going here
Mask 126 from Trese here
Plugins: Lokas 3D Shadow
----------------------------
This tutorial is written for those who have working knowledge of PSPX2 (any version will do).
This tutorial was written by me on September 28, 2014. Please do not copy or paste on any other forum, website or blog provide link back to tut only. Please do not claim as your own. This tutorial is copyrighted to me. Any resemblance to any other tutorial is purely coincidental.
Ok - let's start and remember to save often.
Open up a 750 x 650 blank canvas (we can resize it later)
Select Element 27 and paste in the center of the canvas
Resize by 90%
Select Frame 1 Element and paste on canvas - resize by 80%
Select your magic wand tool and click in the center of the Frame (Add (Shift), RGB Value, Tolerance 25, Contiguous checked, Feather 0)
Selections, Modify, Expand by 5
Paste paper 3
Select invert, delete, select none
Move paper below frame
Select Frame Element 90 - resize by 70%
Paste and position on canvas and move under circle frame
Select your magic wand tool and click in the center of the Frame (Add (Shift), RGB Value, Tolerance 25, Contiguous checked, Feather 0)
Selections, Modify, Expand by 5
Paste paper 2
Select invert, delete, select none
Move paper below frame
Select Frame Element 2 - resize by 75%
Paste and position on top of canvas
Paste tube of choice where desired
Apply Lokas 3D Shadow at default settings
Select Element 60 - resize by 50%
Paste and position on bottom right
Select Element 59 - resize by 40%
Paste and position on left side
Select Element 81 - resize by 40%
Paste and position on top left
Select Element 54 - resize by 22%
Paste and position on bottom left
Select Element 56 - resize by 25%
Paste and position on bottom left
Select Element 18 - resize by 20%
Paste and position on bottom left
Select Element 45 - resize by 15%
Paste and position on bottom left
Select Element 48 - resize by 25%
Paste and position on bottom left
Select Element 26 - resize by 12%
Paste and position on bottom left
Select Element 88 - resize by 12%
Image Free Rotate Left by 15% and paste on bottom left
Select Element 66 - resize by 25%
Paste and position on bottom right
Select Element 70 - resize by 10%
Paste and position on bottom right
Select Element 65 - resize by 35%
Paste and position on bottom right
Select Element 71 - resize by 15%
Paste and position on bottom right
Select Element 82 - resize by 25%
Paste and position on top right
Select Element 63 - resize by 45%
Paste and position on top below tube layer
Select Element 14 - resize by 50%
Paste and position on top right
Select new raster layer and flood fill with color or gradient of choice
Apply Mask 126 or mask of choice
Merge group and move to the bottom layer
Add any dropshadows you like
Sharpen any elements as needed
Crop and resize as desired
Add copyright info, license number and name
You're done! Thanks for trying my tutorial!
Friday, September 26, 2014
KICKS AND CASHMERE
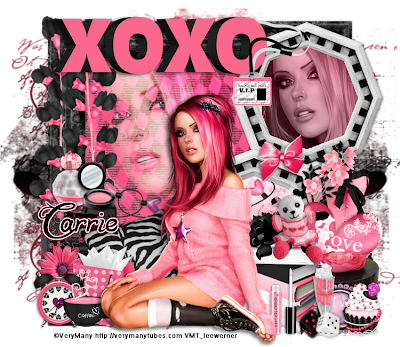
Supplies needed:
I am using the amazing art from Verymany for for this tutorial which you can find here
Scrapkit: I am using a stunning kit from Pink Paradox Productions called "Kicks & Cashmere" which you can get by going here
Mask 113 from Trese here
Plugins: Lokas 3D Shadow
----------------------------
This tutorial is written for those who have working knowledge of PSPX2 (any version will do).
This tutorial was written by me on September 26, 2014. Please do not copy or paste on any other forum, website or blog provide link back to tut only. Please do not claim as your own. This tutorial is copyrighted to me. Any resemblance to any other tutorial is purely coincidental.
Ok - let's start and remember to save often.
Open up a 750 x 650 blank canvas (we can resize it later)
Select Frame Element 9 and paste in the center of the canvas
Resize by 65%
Select your magic wand tool and click in the center of the Frame (Add (Shift), RGB Value, Tolerance 25, Contiguous checked, Feather 0)
Selections, Modify, Expand by 5
Paste paper 8
Select invert, delete
Add Close-up tube of choice and paste on top of paper layer
Delete, select none
Change close-up to Screen - drop opacity down to 80%
Apply dropshadow and merge down on paper layer
Move paper below frame
Select Frame Element 13 - resize by 30%
Paste and position on top right
Duplicate frame and move copy on bottom right where desired
Reselect Original top right frame
Select your magic wand tool and click in the center of the Frame (Add (Shift), RGB Value, Tolerance 25, Contiguous checked, Feather 0)
Selections, Modify, Expand by 5
Add new raster layer and flood-fill with color or gradient of choice
Paste Close-up of choice on top of gradient layer
Select invert, delete, select none
Change close-up to Luminance (Legacy)
Apply dropshadow and merge down on paper layer
Effect, Texture Effects, Blinds (Width 2, Opactity 15, Horizontal and Light from left/top checked)
Move paper below frame
Select copy of bottom frame
Select your magic wand tool and click in the center of the Frame (Add (Shift), RGB Value, Tolerance 25, Contiguous checked, Feather 0)
Selections, Modify, Expand by 5
Paste paper 2
Select invert, delete, select none
Move paper below frame
Select Element 164 - resize by 20%
Paste and position in the middle of frames
Paste tube of choice where desired
Apply Lokas 3D Shadow at default settings
Select Element 151 - resize by 50%
Paste and position on left side of frame
Select Element 162 - resize by 40%
Paste and position on top left
Select Element 80 - resize by 30%
Paste and position on bottom left
Select Element 89 - resize by 25%
Image Free Rotate Left by 15% and paste on bottom left
Select Element 66 - resize by 22%
Paste and position on bottom left
Select Element 145 - resize by 15%
Paste and position on bottom left
Select Element 56 - resize by 15%
Paste and position on bottom left
Select Element 72 - resize by 15%
Paste and position on bottom left
Select Element 39 - resize by 15%
Paste and position on left side on top of speaker element
Select Element 37 - resize by 20%
Paste and position on left side above speaker element
Select Element 31 - resize by 30%
Image Free Rotate Right by 15% and paste on bottom right
Select Element 150 - resize by 15%
Paste and position on right side
Select Element 104 - resize by 25%
Image Free Rotate Right by 15% and paste on bottom right
Select Element 63 - resize by 22%
Paste and position on bottom right
Select Element 88 - resize by 15%
Paste and position on bottom right
Select Element 48 - resize by 15%
Paste and position on bottom right
Select Element 45 - resize by 20%
Paste and position on bottom right
Select Element 83 - resize by 25%
Paste and position on bottom right
Select Element 90 - resize by 12%
Paste and position on bottom right
Select Element 36 - resize by 20%
Paste and position on bottom right
Select Element 2 - resize by 20%
Paste and position on bottom right
Select Element 134 - resize by 15%
Paste and position on bottom right
Select Element 32 - resize by 20%
Paste and position on top right
Select new raster layer and flood fill with color or gradient of choice
Apply Mask 113 or mask of choice
Merge group and move to the bottom layer
Add any dropshadows you like
Sharpen any elements as needed
Crop and resize as desired
Add copyright info, license number and name
You're done! Thanks for trying my tutorial!
Labels:Pink Paradox Productions | 0
comments
Wednesday, September 24, 2014
SEXIEST WITCH
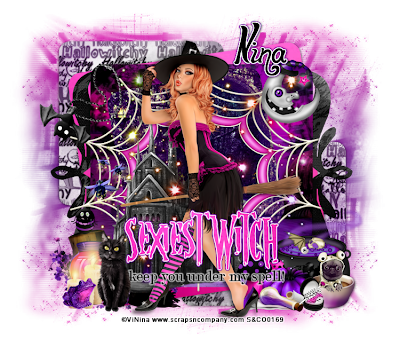
Supplies needed:
I am using the amazing artwork from ViNina for this tutorial which you can find here
Scrapkit: I am using a stunning matching kit from Bibi's Collection called "Salem" which you can get by going here
Template 676 from Millie which you can find here
Halloween Mask from Kylie which you can find here
Plugins used: Eyecandy 4000 - Gradient Glow, Lokas 3D Shadow
----------------------------
This tutorial is written for those who have working knowledge of PSPX2 (any version will do).
This tutorial was written by me on September 24, 2014. Please do not copy or paste on any other forum, website or blog provide link back to tut only. Please do not claim as your own. This tutorial is copyrighted to me. Any resemblance to any other tutorial is purely coincidental.
Ok - let's start and remember to save often.
Open the template and using your shortcut keys on your keyboard (SHIFT+D) duplicate the template as a new image. Close the original and delete the copywrite layer.
Adjust canvas to 750 x 600
Select Wordart 9 layer
Select all, float, defloat
Paste paper 4
Select invert, delete, select none
Apply Gradient Glow on fat default settings (glow width 3)
Delete/Hide original wordart layer
Select Wordart 8 layer
Add new raster and flood-fill with color of choice
Reselect wordart layer
Select all, float, defloat
Go back and select the color layer you just filled
Select invert, delete, select none
Apply Eyecandy Gradient Glow on Medium default settings (Glow Width 3)
Delete/Hide original wordart layer
Select Square 7 layer
Select all, float, defloat
Select all, float, defloat
Paste paper 1
Select invert, delete, select none
Delete/Hide original square layer
Select Element 96 - resize by 60%
Paste and position on the center of the canvas
Select Square 6 layer
Select all, float, defloat
Paste paper 2
Select invert, delete, select none
Delete/Hide original square layer
Select Shape 5 layer
Select all, float, defloat
Paste paper 6
Select invert, delete, select none
Delete/Hide original shape layer
Select Shape 4 and repeat above steps
Select Square 3 layer
Select all, float, defloat
Paste paper 3
Select invert, delete, select none
Delete/Hide original square layer
Select Square 2 layer
Select all, float, defloat
Paste paper 11
Select invert, delete, select none
Delete/Hide original square layer
Select Square 1 and repeat above steps
Select Element 39 - resize by 50%
Image mirror and paste on bottom left below wordart
Copy and paste tube of choice and position where desired
Apply Lokas 3D Shadow at default settings
Select Element 65 - resize by 30%
Paste and position on top right
Select Element 95 - resize by 25%
Paste and position on bottom right
Select Element 74 - resize by
Paste and position on bottom right
Select Element 60 - resize by 20%
Paste and position on bottom right
Select Element 29 - resize by 25%
Paste and position on bottom right
Select Element 7 - resize by 25%
Paste and position on bottom right
Select Element 75 - paste and position on top left
Select Element 88 - resize by 40%
Paste and position on bottom left
Select Element 27 - resize by 40%
Paste and position on bottom left
Select Element 6 - resize by 50%
Paste and position on bottom left
Select Element 36 - resize by 30%
Paste and position on bottom left
Select Element 66 - resize by 40%
Paste and position on bottom left
Select new raster layer and flood fill with color or gradient of choice
Apply Mask of choice
Merge group and move to the bottom layer
Add any additional elements you like.
Add any dropshadows you like
Crop and resize as desired
Add copyright info, license number and name
You're done! Thanks for trying my tutorial!
Labels:Bibi's Collections,Scraps N Company | 0
comments
Sunday, September 21, 2014
GOTHICAL AUTUMN
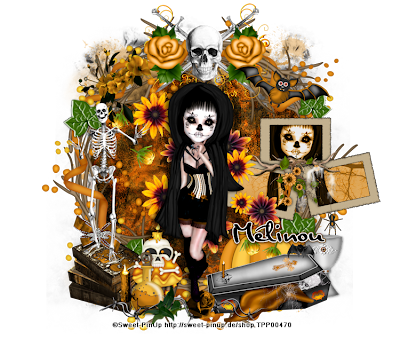
Supplies needed:
I am using the amazing art from Sweet-PinUp for for this tutorial which is no longer available. You can find the artist here
Scrapkit: I am using a stunning kit from MMeliCrea Designz called "Gothical Autumn" which you can get by going here
Plugins: Lokas 3D Shadow
----------------------------
This tutorial is written for those who have working knowledge of PSPX2 (any version will do).
This tutorial was written by me on September 21, 2014. Please do not copy or paste on any other forum, website or blog provide link back to tut only. Please do not claim as your own. This tutorial is copyrighted to me. Any resemblance to any other tutorial is purely coincidental.
Ok - let's start and remember to save often.
Open up a 750 x 650 blank canvas (we can resize it later)
Select Element 5 and paste in the center of the canvas
Select Frame Element 8 and paste in the center of the canvas
Select your magic wand tool and click in the center of the Frame (Add (Shift), RGB Value, Tolerance 25, Contiguous checked, Feather 0)
Selections, Modify, Expand by 5
Paste paper 6
Select invert, delete, select none
Move paper below frame
Select Element 64 - resize by 40%
Paste and position on top of the frame
Select Frame Element 4 - resize by 50%
Paste and position on right side
Select your magic wand tool and click in the center of each square (Add (Shift), RGB Value, Tolerance 25, Contiguous checked, Feather 0)
Selections, Modify, Expand by 5
Paste paper 2
Select invert, delete
Paste tube(s) of choice where desired and delete
Select none
Change close-up(s) to Luminance (Legacy)
Merge down on paper layer
Effect, Texture Effects, Blinds (Width 2, Opactity 15, Horizontal and Light from left/top checked)
Move paper below frame
Select Element 48 - resize by 55%
Paste and position in the center of the frame
Paste tube of choice where desired
Apply Lokas 3D Shadow at default settings
Select Element 39 - resize by 25%
Paste and position on top left
Select Element 58 - resize by 30%
Image mirror and paste on top right
Select Element 60 - resize by 50%
Paste and position on left side
Select Element 9 - resize by 25%
Paste and position on bottom left
Select Element 71 - resize by 30%
Paste and position on bottom left
Select Element 75 - resize by 20%
Paste and position on bottom left
Select Element 9 - resize by 15%
Paste and position on bottom left
Select Element 50 - resize by 30%
Paste and position on bottom right
Select Element 22 - resize by 25%
Paste and position on bottom right
Select Element 61 - resize by 40%
Labels:MMeliCrea Designz | 0
comments
Saturday, September 20, 2014
GIRLS WANNA HAVE FUN

Supplies needed:
I am using the amazing artwork from Wendy Gerber for this tutorial which you can find here
Scrapkit: I am using a stunning matching kit from Whisper In the Wind called "Julia" which you can get by going here
Template 682 from Millie which you can find here
Mask 21 from Gina Gems which you can find here
Plugins used: Eyecandy 4000 - Gradient Glow, Lokas 3D Shadow
----------------------------
This tutorial is written for those who have working knowledge of PSPX2 (any version will do).
This tutorial was written by me on September 20, 2014. Please do not copy or paste on any other forum, website or blog provide link back to tut only. Please do not claim as your own. This tutorial is copyrighted to me. Any resemblance to any other tutorial is purely coincidental.
Ok - let's start and remember to save often.
Open the template and using your shortcut keys on your keyboard (SHIFT+D) duplicate the template as a new image. Close the original and delete the copywrite layer.
Adjust canvas to 750 x 600
Select Wordart 7 layer
Add new raster layer and flood-fill with color of choice
Reselect wordart layer
Select all, float, defloat
Go back and select the color layer you just filled
Select invert, delete, select none
Apply Eyecandy Gradient Glow on Medium default settings (Glow Width 3)
Delete/Hide original wordart layer
Select Wordart 6 layer
Select all, float, defloat
Paste paper 10
Select invert, delete, select none
Apply Eyecandy Gradient Glow on fat default settings (Glow Width 3)
Delete/Hide original wordart layer
Select Rectangle 7 layer
Select all, float, defloat
Add new raster layer and flood-fill with gradient of choice (style, Angle 45, Repeat 2)
Add Close-up tubes of choice and paste on top of gradient layer
Select invert, delete, select none
Change close-ups to Luminance Legacy and drop opacity down to 75%
Apply Xero Bad Dream on default setting of choice
Apply dropshadow and merge tubes down on top of gradient
Effect, Texture Effects, Blinds (Width 2, Opactity 15, Horizontal and Light from left/top checked)
Delete/Hide original rectangle layer
Select Square 4 layer
Select all, float, defloat
Paste paper 8
Select invert, delete, select none
Delete/Hide original square layer
Select Square 2 layer and repeat above steps
Select Circle 3 layer
Select all, float, defloat
Paste paper 7
Select invert, delete, select none
Delete/Hide original circle layer
Select Circle 1 layer
Select all, float, defloat
Paste paper 5
Select invert, delete, select none
Delete/Hide original circle layer
Select Element 76 - resize by 85%
Paste and position in the center of canvas above circle layer
Select Element 79 - resize by 30%
Paste and position on top left
Select Element 13 - resize by 30%
Paste and position on right side
Copy and paste tube of choice and position where desired
Apply Lokas 3D Shadow at default settings
Select Element 38 - resize by 25%
Paste and position on top left
Select Element 43 - resize by 20%
Paste and position on bottom left
Select Element 89 - resize by 15%
Paste and position on bottom left
Select Element 39 - resize by 12%
Paste and position on bottom left
Select Element 31 - resize by 20%
Paste and position on bottom left
Select Element 63 - resize by 15%
Image Free Rotate Left by 15% and paste on bottom left
Select Element 57 - resize by 20%
Paste and position on bottom
Select Element 37 - resize by 25%
Paste and position on bottom
Select Element 3 - resize by 6%
Paste and position on bottom
Select Element 94 - resize by 20%
Paste and position on bottom
Select Element 96 - resize by 15%
Image Free Rotate Right by 15% and paste on bottom right
Select Element 45 - resize by 15%
Paste and position on bottom right
Select Element 35 - resize by 20%
Paste and position on bottom right
Select Element 48 - resize by 12%
Paste and position on bottom right
Select new raster layer and flood fill with color or gradient of choice
Apply Mask 21 mask of choice
Merge group and move to the bottom layer
Add any additional elements you like.
Add any dropshadows you like
Crop and resize as desired
Add copyright info, license number and name
You're done! Thanks for trying my tutorial!
Labels:Wendy Gerber,Whisper In the Wind | 0
comments
Thursday, September 18, 2014
EMO LOVE
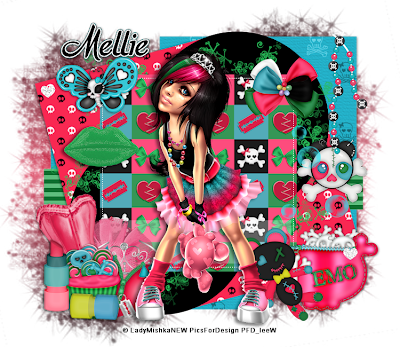
Supplies needed:
I am using the amazing artwork from Lady Mishka for this tutorial which you can find here
Scrapkit: I am using a stunning kit from MellieBeans called "Emo Love" which you can get by going here
Template 378 from Missy which you can find here
Mask 16 from Gina Gems which you can find here
Plugins used: VM Extravaganza - Transmission, Lokas 3D Shadow
----------------------------
This tutorial is written for those who have working knowledge of PSPX2 (any version will do).
This tutorial was written by me on September 18, 2014. Please do not copy or paste on any other forum, website or blog provide link back to tut only. Please do not claim as your own. This tutorial is copyrighted to me. Any resemblance to any other tutorial is purely coincidental.
Ok - let's start and remember to save often.
Open the template and using your shortcut keys on your keyboard (SHIFT+D) duplicate the template as a new image. Close the original and delete the copywrite layer.
Adjust canvas to 750 x 650
Select Heart 1 & 2 layers
Adjust, Add/Remove Noise, Add Noise (Uniform checked, Noise 75%, Monochrome checked)
Select Square 3 layer
Select all, float, defloat
Paste paper 8
Select invert, delete, select none
Delete/Hide original square layer
Select Element 25 - resize by 80%
Paste and position on top of circle layers
Select Sqaure 2 layer
Select all, float, defloat
Paste paper 1
Select invert, delete, select none
Delete/Hide original square layer
Select Square 1 layer and repeat above steps
Select Thin Rectangle layer
Select all, float, defloat
Add new raster layer and flood-fill with color of choice
Select none
Apply VM Transmission with the following settings:
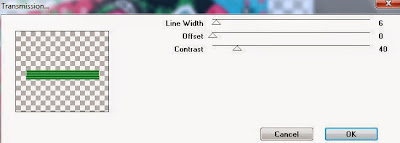
Delete/Hide original rectangle layer
Select Square 5 layer
Select all, float, defloat
Paste paper 7
Select invert, delete, select none
Delete/Hide original square layer
Select Square 4 layer and repeat above steps
Copy and paste tube of choice and position where desired
Apply Lokas 3D Shadow at default settings
Select Element 19 - resize by 20%
Paste and position on top right
Select Element 21 - resize by 30%
Paste and position on top right
Select Element 26 - resize by 18%
Paste and position on right side
Select Element 35 - resize by 30%
Paste and position on bottom right
Select Element 12 - resize by 25%
Paste and position on bottom right
Select Element 14 - resize by 22%
Paste and position on top left
Select Element 42 - resize by 20%
Paste and position on left side
Select Element 23 - resize by 40%
Image Free Rotate Left by 15% and paste on bottom left
Select Element 43 - resize by 25%
Paste and position on bottom left
Select Element 17 - resize by 20%
Paste and position on bottom left
Select Element 9 - resize by 22%
Image Free Rotate Right by 15% and paste on bottom left
Select Element 34 - resize by 20%
Paste and position on bottom left
Select Element 7 - resize by 30%
Paste and position on bottom left
Select new raster layer and flood fill with color or gradient of choice
Apply Mask 16 mask of choice
Merge group and move to the bottom layer
Add any additional elements you like.
Add any dropshadows you like
Crop and resize as desired
Add copyright info, license number and name
You're done! Thanks for trying my tutorial!
Labels:MellieBeans | 0
comments
Wednesday, September 17, 2014
WITCHING HOUR
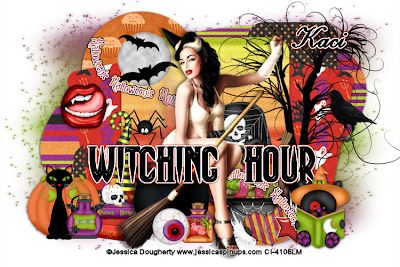
Supplies needed:
I am using the amazing artwork from Jessica Dougherty for this tutorial which you can find here
Scrapkit: I am using a stunning kit from Scrappin Krazy Designs called "Halloweenie" which you can get by going here
Template from Stylelicious Twinky which you can find here
Mask 1 from Melissaz Creationz which you can find here
Plugins used: Eyecandy 4000 - Gradient Glow, Eyecandy 4000 - Glass, Xero - Radiance, Lokas 3D Shadow
----------------------------
This tutorial is written for those who have working knowledge of PSPX2 (any version will do).
This tutorial was written by me on September 17, 2014. Please do not copy or paste on any other forum, website or blog provide link back to tut only. Please do not claim as your own. This tutorial is copyrighted to me. Any resemblance to any other tutorial is purely coincidental.
Ok - let's start and remember to save often.
Open the template and using your shortcut keys on your keyboard (SHIFT+D) duplicate the template as a new image. Close the original and delete the copywrite layer.
Adjust canvas to 750 x 550
Select Wordart Raster 9 layer
Apply Eyecandy Glass on default settings
Apply Eyecandy Gradient Glow on fat default settings (Glow Width 3)
Select Square Raster 7 layer
Select all, float, defloat
Paste paper 1
Select invert, delete, select none
Delete/Hide original square layer
Select Element 14 - resize by 85%
Paste and position in the center of canvas
Apply Gradient Glow with fat default settings
Select Square Raster 6 layer
Select all, float, defloat
Paste paper 16
Select invert, delete, select none
Delete/Hide original square layer
Select Square Raster 5 layer and repeat above steps
Select Circle 4 layer
Select all, float, defloat
Paste paper 3
Select invert, delete, select none
Delete/Hide original circle layer
Select Circle Raster 3 layer and repeat above steps
Select Square Raster 2 layer
Select all, float, defloat
Paste paper 9
Select invert, delete, select none
Delete/Hide original square layer
Select Square Raster 1 layer and repeat above steps
Select Oval Raster 8 layer
Select all, float, defloat
Paste paper 6
Select invert, delete, select none
Delete/Hide original oval layer
Copy and paste tube of choice and position where desired
Apply Xero Radiance at setting of choice
Apply Lokas 3D Shadow at default settings
Select Element 55 - resize by 65%
Paste and position on right side
Select Element 60 - resize by 25%
Paste and position on right side
Select Element 9 - resize by 30%
Image mirror and paste on top left
Select Element 47 - resize by 50%
Select Element 43 - resize by 25%
Paste and position on top left
Select Element 40 - resize by 40%
Paste and position on bottom right
Select Element 49 - resize by 55%
Paste and position on bottom right below wordart
Select Element 27 - resize by 40%
Image Free Rotate Left by 15% and paste on bottom right
Select Element 24 - resize by 50%
Paste and position on bottom right
Select Element 46 - resize by 20%
Paste and position on bottom
Select Element 42 - resize by 20%
Paste and position on bottom
Paste and position on right side below wordart
Select Element 48 - resize by 35%
Paste and position on bottom left below wordart
Select Element 52 - resize by 40%
Paste and position on bottom left below wordart
Select Element 23 - resize by 55%
Paste and position on bottom left
Select Element 28 - resize by 35%
Paste and position on bottom left
Select Element 44 - resize by 25%
Paste and position on bottom left
Select new raster layer and flood fill with color or gradient of choice
Apply Mask 3 or mask of choice
Merge group and move to the bottom layer
Add any additional elements you like.
Add any dropshadows you like
Crop and resize as desired
Add copyright info, license number and name
You're done! Thanks for trying my tutorial!
Labels:Scrappin Krazy Designs | 0
comments
Sunday, September 14, 2014
SASSY STEAMPUNK
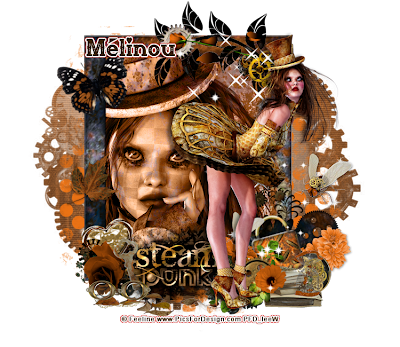
Supplies needed:
I am using the amazing art from Feeline for for this tutorial which you can find here
Scrapkit: I am using a stunning kit from MMeliCrea Designz called "Steampunk" which you can get by going here
Mask 122 from Bitzy Beez Designz which you can find here
Plugins: Lokas 3D Shadow
----------------------------
This tutorial is written for those who have working knowledge of PSPX2 (any version will do).
This tutorial was written by me on September 14, 2014. Please do not copy or paste on any other forum, website or blog provide link back to tut only. Please do not claim as your own. This tutorial is copyrighted to me. Any resemblance to any other tutorial is purely coincidental.
Ok - let's start and remember to save often.
Open up a 750 x 650 blank canvas (we can resize it later)
Select Frame Element 4 and paste in the center of the canvas
I shifted in over to the right about an inch
Select your magic wand tool and click in the center of the Frame (Add (Shift), RGB Value, Tolerance 25, Contiguous checked, Feather 0)
Selections, Modify, Expand by 5
Paste paper 5
Select invert, delete
Add Close-up tube of choice and paste on top of paper layer
Delete, select none
Change close-up to Luminance (Legacy)
Merge down on paper layer
Move paper below frame
Select Element 74 - resize by 55%
Paste and position on top right
Select Element 78 - resize by 20%
Paste and position right side where desired
Select Element 24 - resize by 25%
Paste and position on bottom right
Select Element 41 - resize by 20%
Paste and position on bottom right
Select Element 49 - resize by 28%
Image mirror and paste on bottom right
Select Element 65 - resize by 22%
Image Free Rotate Left by 15% and paste on bottom right
Select Element 28 - resize by 30%
Paste and position on bottom right
Select Mask Element - resize by 55%
Paste and position on bottom
Paste tube of choice where desired
Apply Lokas 3D Shadow at default settings
Select Element 55 - resize by 15%
Image Free Rotate Left by 15% and paste on bottom right
Select Element 72 - resize by 20%
Paste and position on bottom left
Select Element 64 - resize by 15%
Paste and position on bottom left
Select Element 62 - resize by 20%
Paste and postion on bottom left
Select Element 44 - resize by 50%
Paste and position on bottom left
Select Element 35 - resize by 20%
Image Free Rotate Left by 15% and paste on top left
Select Element 1 - resize by 85%
Paste and position on canvas and move to bottom layer
Apply Mask 122 - merge group and move to bottom layer
Add any additional elements you like.
Add any dropshadows you like
Sharpen any elements as needed
Crop and resize as desired
Add copyright info, license number and name
You're done! Thanks for trying my tutorial!
Labels:MMeliCrea Designz | 0
comments
Saturday, September 13, 2014
CAMP BLOOD
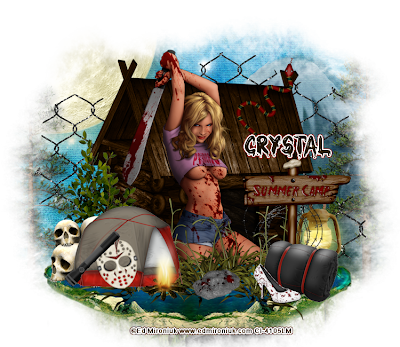
Supplies needed:
I am using the amazing art from Ed Mironiuk for for this tutorial which you can find here
Scrapkit: I am using a wicked kit from Creative Scraps by Crys called "Camp Blood" which you can get by going here
Mask 111 from Designs by Vaybs which you can find here
Plugins: Lokas 3D Shadow
----------------------------
This tutorial is written for those who have working knowledge of PSPX2 (any version will do).
This tutorial was written by me on September 13, 2014. Please do not copy or paste on any other forum, website or blog provide link back to tut only. Please do not claim as your own. This tutorial is copyrighted to me. Any resemblance to any other tutorial is purely coincidental.
Ok - let's start and remember to save often.
Open up a 750 x 650 blank canvas (we can resize it later)
Select Element 21 and paste in the center of the canvas
Resize by 70%
Select Element 18- resize by 95%
Paste and position on bottom
Select Element 20 - resize by 40%
Paste and position on bottom left
Select Element 3 - resize by 45%
Paste and position on bottom right
Paste tube of choice where desired
Apply Lokas 3D Shadow at default settings
Select Element 12 - paste and position on bottom
Select Element 23 - resize by 40%
Image mirror and paste on bottom left
Select Element 5 - resize by 40%
Paste and position on bottom left
Select Element 22 - resize by 25%
Paste and postion on bottom left
Select Element 2 - resize by 20%
Image Free Rotate Left by 15% and paste on bottom left
Select Element 4 - resize by 20%
Paste and position on bottom left
Select Element 13 - resize by 20%
Paste and position on bottom
Select Element 35 - resize by 35%
Paste and position on bottom right
Select Element 7 - resize by 30%
Paste and position on bottom right
Select Element 37 - resize by 20%
Paste and position on bottom right
Select Element 33 - resize by 35%
Paste and position on top right
Select Element 32 - paste and position on the center of canvas and move to bottom layer
Paste paper 1 on canvas
Apply Mask 111 - merge group and move to bottom layer
Add any additional elements you like.
Add any dropshadows you like
Sharpen any elements as needed
Crop and resize as desired
Add copyright info, license number and name
You're done! Thanks for trying my tutorial!
Labels:Creative Scraps by Crys | 0
comments
Friday, September 12, 2014
GRECCA
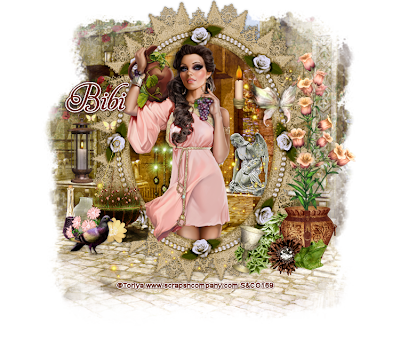
Supplies needed:
I am using the amazing art from Toriya for this tutorial which you can find here
Scrapkit: I am using a beautiful kit from Bibi's Collection called "Grecca" which you can get by going here
Plugins: Lokas 3D Shadow
----------------------------
This tutorial is written for those who have working knowledge of PSPX2 (any version will do).
This tutorial was written by me on September 12, 2014. Please do not copy or paste on any other forum, website or blog provide link back to tut only. Please do not claim as your own. This tutorial is copyrighted to me. Any resemblance to any other tutorial is purely coincidental.
Ok - let's start and remember to save often.
Open up a 750 x 650 blank canvas (we can resize it later)
Select Element 2 - resize by 65%
Paste and position on canvas
Select Frame Element 95 and paste in the center of the canvas
Resize by 55%
Select your magic wand tool and click in the center of the Frame (Add (Shift), RGB Value, Tolerance 25, Contiguous checked, Feather 0)
Selections, Modify, Expand by 5
Paste paper 11
Select invert, delete, select none
Change paper to Overlay
Move paper below frame
Select Element 66 - resize by 10%
Paste and position on right side of paper layer
Select Element 73 - resize by 22%
Paste and position on top right of paper
Select Element 134 - resize by 15%
Paste and position on bottom left above paper
Paste tube of choice where desired
Apply Lokas 3D Shadow at default settings
Select Element 33 - resize by 30%
Paste and position on left side
Select Element 43 - resize by 30%
Paste and position on left side
Select Element 104 - resize by 20%
Paste and position on bottom left
Select Element 8 - resize by 22%
Paste and position on bottom left
Select Element 100 - resize by 18%
Paste and position on bottom left
Select Element 128 - resize by 30%
Paste and position on bottom left
Select Element 120 - resize by 25%
Paste and position on bottom left
Select Element 141 - resize by 40%
Paste and position on bottom right
Select Element 96 - resize by 35%
Image mirror paste and position on right side
Select Element 109 - resize by 40%
Paste and position on bottom right
Select Element 93 - resize by 15%
Paste and position on bottom right
Select Element 46 - resize by 35%
Paste and position on bottom right
Select Element 44 - resize by 24%
Paste and position on bottom right
Select Element 38 - resize by 25%
Paste and position on top right
Add any additional elements you like.
Add any dropshadows you like
Sharpen any elements as needed
Crop and resize as desired
Add copyright info, license number and name
You're done! Thanks for trying my tutorial!
Labels:Bibi's Collections,Scraps N Company | 0
comments
Thursday, September 11, 2014
RUBBER BLACK
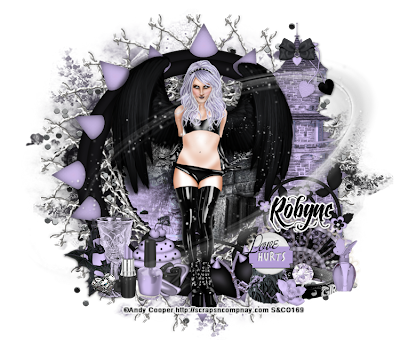
Supplies needed:
I am using the amazing art from Andy Cooper for for this tutorial which you can find here
Scrapkit: I am using a stunning matching kit from Whisper In the Wind called "Rubber Black" which you can get by going here
Mask 29 from Moonbeams and Spiderwebs which you can find here
Plugins: Lokas 3D Shadow
----------------------------
This tutorial is written for those who have working knowledge of PSPX2 (any version will do).
This tutorial was written by me on September 11, 2014. Please do not copy or paste on any other forum, website or blog provide link back to tut only. Please do not claim as your own. This tutorial is copyrighted to me. Any resemblance to any other tutorial is purely coincidental.
Ok - let's start and remember to save often.
Open up a 750 x 650 blank canvas (we can resize it later)
Select Element 54 - resize by 75%
Paste and position on the center of the canvas
Select Frame Element 1 and paste in the center of the canvas
Resize by 75%
Select your magic wand tool and click in the center of the Frame (Add (Shift), RGB Value, Tolerance 25, Contiguous checked, Feather 0)
Selections, Modify, Expand by 5
Paste paper 10
Select invert, delete, select none
Move paper below frame
Select Element 80 - resize by 55%
Paste and position on right side
Select Element 73 - resize by 20%
Paste and position on top right
Select Element 46 - resize by 65%
Paste and position on bottom right
Paste tube of choice where desired
Apply Lokas 3D Shadow at default settings
Select Element 36 - resize by 30%
Image Free Rotate Right by 15% and paste on bottom right
Select Element 66 - resize by 15%
Paste and position on bottom right
Select Element 51 - resize by 25%
Paste and position on bottom right
Select Element 108 - resize by 25%
Paste and postion on bottom right
Select Element 64 - resize by 10%
Paste and position on bottom right
Select Element 85 - resize by 8%
Paste and position on bottom right
Select Element 22 - resize by 15%
Image Free Rotate Left by 15% and paste on bottom right
Select Element 9 - resize by 30%
Paste and position on bottom right
Select Element 100 - resize by 35%
Image Free Rotate Left by 15% and paste on bottom left
Select Element 90 - resize by 20%
Paste and position on bottom left
Select Element 21 - resize by 20%
Paste and position on bottom left
Select Element 75 - resize by 15%
Paste and position on bottom left
Add new raster layer and flood-fill with color of choice
Select Element 43 - resize by 12%
Paste and position on bottom left
Select Element 113 - paste and position on top where desired
Apply Mask 29 - merge group and move to bottom layer
Add any additional elements you like.
Add any dropshadows you like
Sharpen any elements as needed
Crop and resize as desired
Add copyright info, license number and name
You're done! Thanks for trying my tutorial!
Wednesday, September 10, 2014
ROMANTIQUE WITCH
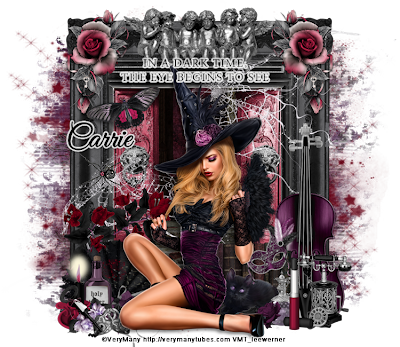
Supplies needed:
I am using the amazing art from Very many for for this tutorial which you can find here
Scrapkit: I am using a beautiful kit from Pink Paradox Productions called "Vampire Romantique - Silver" which you can get by going here
Sparkle Mask from Witchysheart which you can find on the Misfit Blog here
Mask 1 from Kissing Kate which you can find here
Plugins: Eyecandy 4000 - Gradient Glow, Lokas 3D Shadow
----------------------------
This tutorial is written for those who have working knowledge of PSPX2 (any version will do).
This tutorial was written by me on September 10, 2014. Please do not copy or paste on any other forum, website or blog provide link back to tut only. Please do not claim as your own. This tutorial is copyrighted to me. Any resemblance to any other tutorial is purely coincidental.
Ok - let's start and remember to save often.
Open up a 750 x 650 blank canvas (we can resize it later)
Select Frame Element 7 and paste in the center of the canvas
Resize by 65%
Select your magic wand tool and click in the center of the Frame (Add (Shift), RGB Value, Tolerance 25, Contiguous checked, Feather 0)
Selections, Modify, Expand by 5
Paste paper 6
Select invert, delete, select none
Move paper below frame
Select Element 99 - resize by 43%
Paste and position on top of paper layer
Select Element 128 - resize by 20%
Paste and position on top right
Layers duplicate and mirror
Select Element 13 - resize by 30%
Paste and position on top center above frame
Select Element 149 - resize by 22%
Paste and position on top of frame
Apply Eyecandy Gradient Glow on fat default settings (Glow Width 3)
Select Element 12 - resize by 10%
Paste and position on center left where desired
Layers duplicate and mirror
Select Element 152 - resize by 75%
Paste and position on left side where desired
Erase any overhanging bits on element
Paste tube of choice where desired
Apply Lokas 3D Shadow at default settings
Select Element 7 - resize by 25%
Paste and position on top left
Select Element 124 - resize by 25%
Image mirror and psate on bottom left
Select Element 28 - resize by 30%
Image Free Rotate Left by 15% and paste on bottom left
Select Element 36 - resize by 20%
Paste and position on bottom left
Select Element 55 - resize by 20%
Paste and position on bottom left
Select Element 70 - resize by 10%
Paste and position on bottom left
Select Element 61 - resize by 20%
Paste and position on bottom left
Select Element 46 - resize by 45%
Paste and position on bottom right
Select Element 59 - resize by 25%
Paste and position on bottom right
Select Element 52 - resize by 20%
Paste and position on bottom right
Select Element 49 - resize by 20%
Paste and position on bottom right
Select Element 44 - resize by 15%
Paste and position on bottom right
Select Element 3 - resize by 15%
Paste and position on bottom right
Select Element 25 - resize by 15%
Image Free Rotate Left by 15% and paste on bottom right
Add new raster layer and flood-fill with color of choice
Apply Witchyheart mask, merge group and move to bottom layer
Paste paper 7
Apply Mask 1 and merge group - move to bottom layer
Add any additional elements you like.
Add any dropshadows you like
Sharpen any elements as needed
Crop and resize as desired
Add copyright info, license number and name
You're done! Thanks for trying my tutorial!
Labels:Pink Paradox Productions | 0
comments
Monday, September 8, 2014
LIGHT ANGEL
Supplies needed:
I am using the amazing art from Pandora Creations for for this tutorial which you can find here
Scrapkit: I am using a beautiful kit from Pink Paradox Productions called "Beautiful Angel" which you can get by going here
Mask from Kissing Kate which you can find here
Plugins: Lokas 3D Shadow
----------------------------
This tutorial is written for those who have working knowledge of PSPX2 (any version will do).
This tutorial was written by me on September 8, 2014. Please do not copy or paste on any other forum, website or blog provide link back to tut only. Please do not claim as your own. This tutorial is copyrighted to me. Any resemblance to any other tutorial is purely coincidental.
Ok - let's start and remember to save often.
Open up a 750 x 650 blank canvas (we can resize it later)
Select Frame Element 2 and paste in the center of the canvas
Resize by 60%
Select your magic wand tool and click in the center of the Frame (Add (Shift), RGB Value, Tolerance 25, Contiguous checked, Feather 0)
Selections, Modify, Expand by 5
Paste paper 7
Select invert, delete, select none
Move paper below frame
Select Element 112 - resize by 65%
Paste and position on top of frame
Select Frame Element 8 - resize by 22%
Paste and position on top right
Select Element 108 - resize by 55%
Paste and position on right side
Select your magic wand tool and click in the center of the Frame (Add (Shift), RGB Value, Tolerance 25, Contiguous checked, Feather 0)
Selections, Modify, Expand by 2
Paste paper 18
Select invert, delete
Add Close-up tube of choice and paste on top of paper layer
Delete, select none
Change close-up to Burn and drop opacity down to 65%
Merge down on top of paper
Move paper below frame
Select Element 129 - resize by 18%
Paste and position on top left
Layers duplicate and mirror
Select Element 116 - resize by 30%
Image Free Rotate Left by 15% and paste on top right
Paste tube of choice where desired
Apply Lokas 3D Shadow at default settings
Select Element 86 - resize by 45%
Paste and position on left side
Select Element 34 - resize by 30%
Image Free Rotate Left by 15% and paste on bottom left
Select Element 80 - resize by 20%
Image mirror and paste on bottom left
Select Element 52 - resize by 15%
Paste and position bottom left
Select Element 12 - resize by 25%
Image Free Rotate Right by 15% and paste on bottom left
Select Element 59 - resize by 20%
Paste and position on bottom left
Select Element 65 - resize by 20%
Paste and position on bottom right
Select Element 33 - resize by 25%
Image Free Rotate Left by 15% and paste on bottom right
Select Element 73 - resize by 15%
Paste and position on bottom right
Select Element 72 - resize by 18%
Paste and position on bottom right
Select Element 74 - resize by 15%
Paste and position on bottom right
Select Element 68 - resize by 15%
Paste and position on bottom right
Select Element 44 - resize by 25%
Paste and position on bottom
Select Element 131 - resize by 15%
Paste and position on bottom
Select Element 27 - resize by 25%
Paste and position on bottom right
Paste paper 8
Apply Mask and merge group - move to bottom layer
Add any additional elements you like.
Add any dropshadows you like
Sharpen any elements as needed
Crop and resize as desired
Add copyright info, license number and name
You're done! Thanks for trying my tutorial!
Labels:Pandora,Pink Paradox Productions | 0
comments
Sunday, September 7, 2014
ANGEL WITH AN ADDY
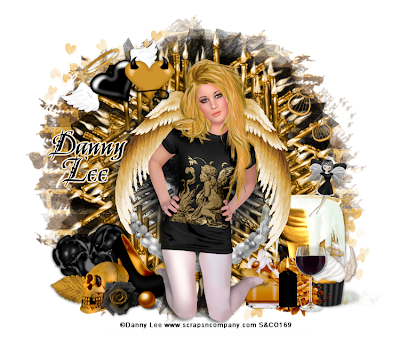
Supplies needed:
I am using the amazing art from Danny Lee for for this tutorial which you can find here
Scrapkit: I am using a beautiful matching collab kit from Bibi's Collection called "Dark Angel" which you can get by going here
Mask from Kissing Kate which you can find here
Plugins: Lokas 3D Shadow
----------------------------
This tutorial is written for those who have working knowledge of PSPX2 (any version will do).
This tutorial was written by me on September 7, 2014. Please do not copy or paste on any other forum, website or blog provide link back to tut only. Please do not claim as your own. This tutorial is copyrighted to me. Any resemblance to any other tutorial is purely coincidental.
Ok - let's start and remember to save often.
Open up a 750 x 650 blank canvas (we can resize it later)
Select Element 48 and paste in the center of the canvas
Select your magic wand tool and click in the center of the Frame (Add (Shift), RGB Value, Tolerance 25, Contiguous checked, Feather 0)
Selections, Modify, Expand by 5
Paste paper 6
Select invert, delete, select none
Move paper below frame
Select Element 31 and paste on top of lace element
Resize by 65%
Paste tube of choice where desired
Apply Lokas 3D Shadow at default settings
Select Element 60 - resize by 40%
Paste and position on top left
Select Element 62 - resize by 65%
Paste and position on bottom right
Select Element 1 - resize by 20%
Paste and position on bottom right
Select Element 56 - resize by 25%
Paste and position on bottom right
Select Element 29 - resize by 40%
Paste and position on bottom right
Select Element 33 - resize by 25%
Paste and position on bottom right
Select Element 59 - resize by 30%
Paste and position on bottom right
Select Element 17 - resize by 20%
Image Free Rotate Left by 15% and paste on bottom left
Select Element 42 - resize by 25%
Paste and position on bottom left
Select Element 25 - resize by 30%
Paste and position on bottom left
Select Element 26 - resize by 15%
Paste and position on bottom left
Select Element 36 - resize by 20%
Paste and position on bottom left
Select Element 24 - paste and position on bottom left
Select Element 30
Paste and position on top left and move to bottom layer
Layers duplicate, mirror and flip
Paste paper 11 on canvas
Apply Mask and merge group - move to bottom layer
Add new raster layer and flood-fill with color of choice
Apply Mask 20 and merge group - move to bottom layer
Add any additional elements you like.
Add any dropshadows you like
Sharpen any elements as needed
Crop and resize as desired
Add copyright info, license number and name
You're done! Thanks for trying my tutorial!
Labels:Bibi's Collections,Scraps N Company | 0
comments
Saturday, September 6, 2014
TRICK OR TREAT
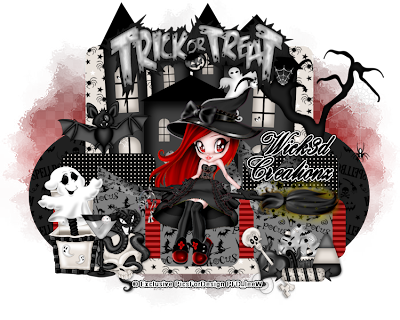
Supplies needed:
I am using an Exclusive artwork from Picsfordesign for this tutorial which you can find here
Scrapkit: I am using a stunning kit from Wick3d Creationz called "When Death Had No Name" which you can get by going here
Template 636 from Millie which you can find here
Mask 1 from Vix which you can find here
Plugins used: Lokas 3D Shadow
----------------------------
This tutorial is written for those who have working knowledge of PSPX2 (any version will do).
This tutorial was written by me on September 5, 2014. Please do not copy or paste on any other forum, website or blog provide link back to tut only. Please do not claim as your own. This tutorial is copyrighted to me. Any resemblance to any other tutorial is purely coincidental.
Ok - let's start and remember to save often.
Open the template and using your shortcut keys on your keyboard (SHIFT+D) duplicate the template as a new image. Close the original and delete the copywrite layer.
Adjust canvas to 750 x 600
Select Square 9 layer
Select all, float, defloat
Paste paper 2
Select invert, delete, select none
Delete/Hide original square layer
Select Squares 7 and 8 and repeat above steps
Select Rectangle 6 layer
Select all, float, defloat
Add new raster layer and flood-fill with color of choice
Select none
Apply VM Transmission with the following settings:
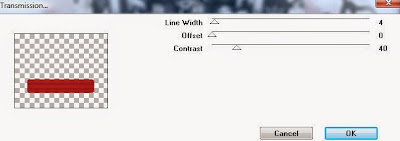
Delete/Hide original rectangle layer
Select Square 5 layer
Select all, float, defloat
Add new raster layer and flood-fill with color of choice
Select none
Apply Effects, Texture Effects, Weave (Gap size 2, Width 5, Opacity 10, Fill gaps checked, change Gap and Weave color to one of choice)
Delete/Hide original square layer
Select Square 4 layer and repeat above steps
Select Square 3 layer
Select all, float, defloat
Paste paper 4
Select invert, delete, select none
Delete/Hide original square layer
Select Element 22 - resize by 53%
Paste and position on top center of square 3 where desired
Select Element 20 - resize by 50%
Paste and position on right side where desired
Select Circle 2 layer
Select all, float, defloat
Paste paper 3
Select invert, delete, select none
Delete/Hide original circle layer
Select Circle 1 layer and repeat above steps
Copy and paste tube of choice and position where desired
Apply Xero Radiance at setting of choice
Apply Lokas 3D Shadow at default settings
Select Element 3 - resize by 25%
Paste and position on bottom left
Select Element 4 - resize by 22%
Paste and position on bottom left
Select Element 9 - resize by 20%
Paste and position on bottom left
Select Element 16 - resize by 15%
Paste and position on bottom right
Select Element 17 - resize by 20%
Paste and position on bottom right
Select Element 5 - resize by 20%
Paste and position on bottom right
Select Element 15 - resize by 20%
Paste and position on bottom right
Select Element 13 - resize by 60%
Paste and position on top where desired
Select Element 12 - resize by 30%
Paste and position on top left
Select new raster layer and flood fill with color or gradient of choice
Apply Mask 1 or mask of choice
Merge group and move to the bottom layer
Add any additional elements you like.
Add any dropshadows you like
Crop and resize as desired
Add copyright info, license number and name
You're done! Thanks for trying my tutorial!
Labels:Wick3d Creationz | 0
comments
Thursday, September 4, 2014
MAGICAL MESS
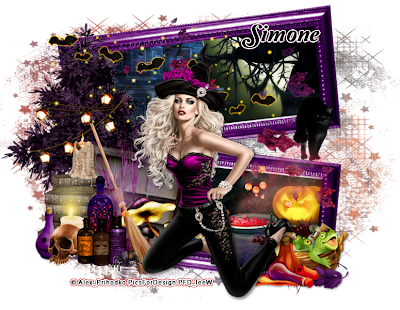
Supplies needed:
I am using the amazing art from Alex Prihodko for for this tutorial which you can find here
Scrapkit: I am using a beautiful kit from Sophisticat Simone called "Magic Mess" which you can get by going here
Mask 3 from Kissing Kate which you can find here
Plugins: Eyecandy 4000 - Gradient Glow, Lokas 3D Shadow
----------------------------
This tutorial is written for those who have working knowledge of PSPX2 (any version will do).
This tutorial was written by me on September 4, 2014. Please do not copy or paste on any other forum, website or blog provide link back to tut only. Please do not claim as your own. This tutorial is copyrighted to me. Any resemblance to any other tutorial is purely coincidental.
Ok - let's start and remember to save often.
Open up a 750 x 650 blank canvas (we can resize it later)
Select Frame Element 1 and paste in the center of the canvas
Image Free Rotate Left by 5% and move to the top of the canvas
Layers duplicate, mirror and move toward the bottom of canvas
Select your magic wand tool and click in the center of the original Frame Element (Add (Shift), RGB Value, Tolerance 25, Contiguous checked, Feather 0)
Selections, Modify, Expand by 5
Paste paper 12
Select invert, delete, select none
Move paper below frame
Repeat steps for duplicate frame
Select Element 41 - resize by 65%
Paste and position on left side
Select Element 24 - resize by 35%
Paste and position on left side above tree element (erase any overhanging bits)
Select Element 17 - resize by 65%
Paste and position on top where desired below tube layer
Apply Eyecandy Gradient Glow on fat default settings
Select Element 51 - resize by 50%
Image Free Rotate Right by 10% and paste on bottom left
Select Element 64 - resize by 50%
Paste and position on bottom left
Paste tube of choice where desired
Apply Lokas 3D Shadow at default settings
Select Element 13 - resize by 30%
Paste and position on bottom left
Select Element 11 - resize by 55%
Paste and position on bottom left
Select Element 35 - resize by 30%
Paste and position on bottom left
Select Element 43 - resize by 25%
Image mirror and paste on bottom left
Select Element 72 - resize by 30%
Paste and position on bottom left
Select Element 56 - resize by 55%
Paste and position on bottom left
Select Element 3 - resize by 55%
Paste and position on bottom left
Select Element 7 - resize by 30%
Paste and position on bottom right
Select Element 9 - resize by 50%
Paste and position on bottom right
Select Element 14 - resize by 25%
Paste and position on bottom right
Select Element 1 - resize by 30%
Paste and position on bottom right
Select Element 16 - resize by 22%
Paste and position on bottom right
Select Element 38 - resize by 35%
Paste and position on right side
Add new raster layer and flood-fill with color or gradient of choice
Apply Mask 3 and merge group - move to bottom layer
Add any additional elements you like.
Add any dropshadows you like
Sharpen any elements as needed
Crop and resize as desired
Add copyright info, license number and name
You're done! Thanks for trying my tutorial!
Labels:Sophisticat Simone | 0
comments
COME AUTUMN
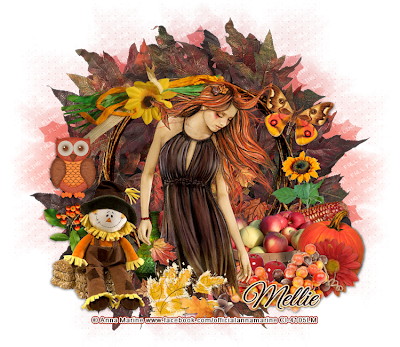
Supplies needed:
I am using the amazing art from Anna Marine for for this tutorial which you can find here
Scrapkit: I am using a beautiful kit from MellieBeans called "Come Autumn" which you can get by going here
Fall Mask from Tonya which you can find on the Misfits Blog here
Plugins: Lokas 3D Shadow
----------------------------
This tutorial is written for those who have working knowledge of PSPX2 (any version will do).
This tutorial was written by me on September 4, 2014. Please do not copy or paste on any other forum, website or blog provide link back to tut only. Please do not claim as your own. This tutorial is copyrighted to me. Any resemblance to any other tutorial is purely coincidental.
Ok - let's start and remember to save often.
Open up a 750 x 650 blank canvas (we can resize it later)
Select Element 28 and paste in the center of the canvas
Resize by 80%
Select your magic wand tool and click in the center of the Frame Element (Add (Shift), RGB Value, Tolerance 25, Contiguous checked, Feather 0)
Selections, Modify, Expand by 5
Paste paper 1
Select invert, delete, select none
Move paper below frame
Select Element 47 - resize by 55%
Paste and position on of canvas
Select Element 48 - resize by 40%
Paste and position on top left
Select Element 44 - resize by 20%
Image Free Rotate Right by 15% and paste on top right
Paste tube of choice where desired
Apply Lokas 3D Shadow at default settings
Select Element 50 - resize by 15%
Paste and position on left side
Select Element 46 - resize by 20%
Paste and position on bottom left
Select Element 26 - resize by 35%
Paste and position on bottom left
Select Element 15 - resize by 20%
Paste and position on bottom
Select Element 23 - resize by 20%
Paste and position on bottom
Select Element 31 - resize by 25%
Paste and position on bottom right
Select Element 4 - resize by 20%
Image Free Rotate Left by 15% and paste on bottom right
Select Element 21 - resize by 25%
Paste and position on bottom right
Select Element 33 - resize by 25%
Image Free Rotate Right by 15% and paste on bottom right
Select Element 11 - resize by 15%
Paste and position on bottom right
Select Element 32 - resize by 30%
Paste and position on bottom right
Add new raster layer and flood-fill with color or gradient of choice
Apply Fall Mask and merge group - move to bottom layer
Add any additional elements you like.
Add any dropshadows you like
Sharpen any elements as needed
Crop and resize as desired
Add copyright info, license number and name
You're done! Thanks for trying my tutorial!
Labels:MellieBeans | 0
comments
Wednesday, September 3, 2014
DIA DE LOS MUERTOS
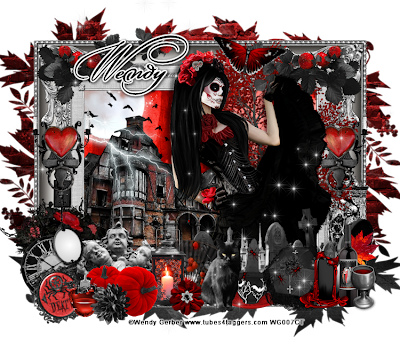
Supplies needed:
I am using the amazing art from Wendy Gerber for for this tutorial which you can find here
Scrapkit: I am using a stunning kit from Pink Paradox Productions called "Autumn Gothique" which you can get by going here
Mask 275 from Weescotlass which you can find here
Plugins: Lokas 3D Shadow
----------------------------
This tutorial is written for those who have working knowledge of PSPX2 (any version will do).
This tutorial was written by me on September 3, 2014. Please do not copy or paste on any other forum, website or blog provide link back to tut only. Please do not claim as your own. This tutorial is copyrighted to me. Any resemblance to any other tutorial is purely coincidental.
Ok - let's start and remember to save often.
Open up a 750 x 650 blank canvas (we can resize it later)
Select Frame Element 10 and paste in the center of the canvas
Resize by 65%
Select your magic wand tool and click in the center of the Frame (Add (Shift), RGB Value, Tolerance 25, Contiguous checked, Feather 0)
Selections, Modify, Expand by 5
Paste paper 23
Select invert, delete, select none
Move paper below frame
Select Element 31 - resize by 22%
Paste and position on top left below frame layer
Select Element 94 - resize by 35%
Image mirror and paste on bottom left below frame
Select Element 49 - resize by 25%
Paste and position on top left
Select Element 4 - resize by 25%
Paste and position on left side below frame
Select Element 158 - resize by 30%
Paste and position on top left
Image duplicate and mirror - reposition on top right
Select Element 157 - resize by 15%
Paste and position on top left
Image duplicate and mirror - reposition on top right
Select Element 89 - resize by 20%
Paste and position on left side
Image duplicate and mirror on right
Paste tube of choice where desired
Apply Lokas 3D Shadow at default settings
Select Element 1 - resize by 30%
Paste and position on bottom left
Select Element 55 - resize by 15%
Paste and position on bottom left
Select Element 85 - resize by 15%
Image Free Rotate Left by 15% and paste on bottom left
Select Element 90 - resize by 18%
Image Free Rotate Left by 15% and paste on bottom left
Select Element 63 - resize by 25%
Paste and position on bottom left
Select Element 99 - resize by 20%
Image mirror and paste on bottom left
Select Element 77 - resize by 12%
Paste and position on bottom left
Select Element 161 - resize by 12%
Paste and position on bottom left
Select Element 46 - resize by 30%
Image Free Rotate Right by 15% and paste on bottom
Select Element 38 - resize by 20%
Paste and position on bottom
Select Element 163 - resize by 10%
Paste and position on bottom
Select Element 119 - resize by 20%
Paste and position on bottom
Select Element 92 - resize by 25%
Paste and position on bottom right
Select Element 25 - resize by 50%
Paste and position on bottom right
Select Element 8 - resize by 12%
Paste and position on bottom right
Select Element 103 - resize by 25%
Paste and position on bottom right
Select Element 73 - resize by 15%
Paste and position on bottom right
Select Element 93 - resize by 20%
Paste and postion on bottom right
Select Element 75 - resize by 15%
Paste and position on bottom
Select Element 13 - resize by 25%
Paste and position on top right
Paste paper 40 on canvas
Apply Mask 275 and merge group - move to bottom layer
Add any additional elements you like.
Add any dropshadows you like
Sharpen any elements as needed
Crop and resize as desired
Add copyright info, license number and name
You're done! Thanks for trying my tutorial!
Tuesday, September 2, 2014
MOONIEL
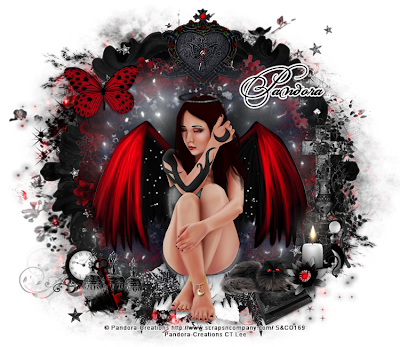
Supplies needed:
I am using the amazing art from Pandora Creations for for this tutorial which you can find here
Scrapkit: I am using a beautiful matching kit from Disturbed Scraps called "Mooniel" which you can get by going here
Mask 20 from Moonbeams and Spiderwebs which you can find here
Plugins: Lokas 3D Shadow
----------------------------
This tutorial is written for those who have working knowledge of PSPX2 (any version will do).
This tutorial was written by me on September 2, 2014. Please do not copy or paste on any other forum, website or blog provide link back to tut only. Please do not claim as your own. This tutorial is copyrighted to me. Any resemblance to any other tutorial is purely coincidental.
Ok - let's start and remember to save often.
Open up a 750 x 650 blank canvas (we can resize it later)
Select Frame Element 68 and paste in the center of the canvas
Resize by 75%
Select Element 65 - resize by 80%
Paste and position on top of canvas
Select Element 73 - resize by 60%
Paste and position on top of frame
Select Element 43 - resize by 40%
Paste and position on top center
Select Element 19 - resize by 55%
Paste and position on right side
Select Element 31 - resize by 65%
Paste and position on bottom
Select Element 56 - resize by 22%
Paste and position on bottom right
Select Element 44 - resize by 30%
Paste and position on bottom right
Paste tube of choice where desired
Apply Lokas 3D Shadow at default settings
Select Element 20 - resize by 20%
Paste and position on bottom right
Select Element 13 - resize by 30%
Paste and position on bottom right
Select Element 50 - resize by 30%
Paste and position on bottom right
Select Element 18 - resize by 25%
Image Free Rotate Left by 15% and paste on bottom left
Select Element 46 - resize by 25%
Paste and position on bottom left
Select Element 51 - resize by 25%
Paste and position on bottom left
Select Element 45 - resize by 25%
Paste and position on bottom left
Select Element 10 - resize by 35%
Paste and position on top left
Paste paper 13
Apply Mask 20 and merge group - move to bottom layer
Add any additional elements you like.
Add any dropshadows you like
Sharpen any elements as needed
Crop and resize as desired
Add copyright info, license number and name
You're done! Thanks for trying my tutorial!
Labels:Pandora | 0
comments
Subscribe to:
Posts
(Atom)


