Labels
- Alikas Scraps
- All Dolled Up Store
- Amy Marie
- Annaica
- Arthur Crowe
- Babycakes Scraps
- Barbara Jensen
- Bibi's Collections
- Black Widow Creationz
- Blu Moon
- Bonnies Creations
- Bookwork Dezines
- Broken Sky Dezine
- Carita Creationz
- Carpe Diem Designs
- CDO
- Celinart Pinup
- Celine
- Chacha Creationz
- Charmed Designs
- Cherry Blossom Designs
- Chili Designz
- Cluster Frame
- Creative Misfits
- Creative Scraps by Crys
- Curious Creative Dreams
- Danny Lee
- Derzi
- Designs by Ali
- Designs by Joan
- Designs by Ketura
- Designs By Norella
- Designs by Vi
- Diana Gali
- Diry Art Designs
- Disturbed Scraps
- Dreaming With Bella
- Eclipse Creations
- Elegancefly
- Extras
- Fabulous Designz
- Forum Set
- Foxy's Designz
- Freek's Creation
- FTU
- FwTags
- Goldwasser
- Gothic Inspirations
- Gothic Raven Designs
- Graphfreaks
- Hania's Designs
- Happy Pumpkin Studios
- Horseplay's Pasture Designs
- indie-Zine
- Irish Princess Designs
- Ishika Chowdhury
- Kaci McVay
- Kajenna
- katharine
- Katherine
- Khloe Zoey
- Killer Kitty
- Kissing Kate
- KiwiFirestorm
- Kiya Designs
- Kizzed by Kelz
- KZ Designz
- Lady Mishka
- Lil Mz Brainstorm
- Maiden of Darkness
- Mariel Designs
- MellieBeans
- Michelle's Myths
- Midnight Shadow
- Misticheskya
- MistyLynn's Creations
- MMeliCrea Designz
- Moon Vixen Designs
- NaSionainne
- Ninaste
- Niqui Designs
- Pandora
- Picsfordesign
- Pink Paradox Productions
- Radyga Designs
- Redefined Designs
- Rissa's Designs
- Schnegge
- ScottishButterfly Creations
- Scrappin Krazy Designs
- Scrappin With Lil Ol Me
- Scraps and the City
- Scraps Dimensions
- Scraps From The Heart
- Scraps N Company
- Scraps with Attitude
- Shining Star Art
- Skyscraps
- Sleek N Sassy Designs
- Sophisticat Simone
- Souldesigner
- Soxsational Scraps
- Spazz
- Starlite and Soul
- Stella Felice
- Tammy Welt
- Tasha's Playground
- The PSP Project
- Thrifty Scraps by Gina
- Tiny Turtle Designs
- Upyourart
- Verymany
- Wendy Gerber
- Whisper In the Wind
- Wick3d Creationz
- Wicked Diabla
- Yude's Kreationz
Blog Archive
-
▼
2015
(197)
-
▼
May
(29)
- ZOMBIE TOWN
- SUNNY
- BEARY BLUE
- BLUE MASQUERADE
- STAR NATIVE
- NIGHT WOMAN
- TATTOO GIRL
- ORANGE SHERBERT
- LEMON AND GINGER
- STEAMPUNK AMY
- TWEETY
- WACKY HAT
- UNSPOKEN
- ETERNAL YEARNING
- DARK NURSE
- STREET ZONE
- GIRLY GLAM
- CANDY COTTAGE
- LOVE OF MIME
- BRAINS ALA CARTE
- SHABBY STEAMPUNK
- COUNTRY LOVE
- UNDERCOVER NINJA
- DARK BOARD
- UNBROKEN SOUL
- DEAR DIARY
- WICKED DIABLA
- SEXY ROCKER
- COCO BEACH
-
▼
May
(29)
Sunday, May 31, 2015
ZOMBIE TOWN
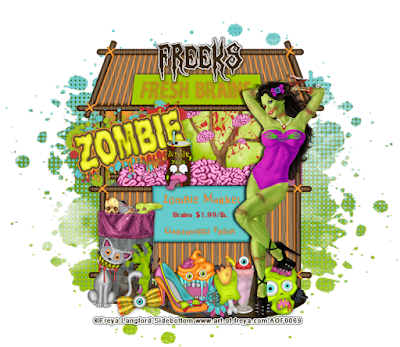
Supplies needed:
I am using the stunning artwork from Freya Langford-Sidebottom for this tutorial which you can find here
Scrapkit: I am using a stunning kit from Freek's Creations called "Zombie Town" which you can get by going here
Mask 113 from Designz by Vaybs which you can find here
Plugins: Lokas 3D Shadow
----------------------------
This tutorial is written for those who have working knowledge of PSPX2 (any version will do).
This tutorial was written by me on May 31, 2014. Please do not copy or paste on any other forum, website or blog provide link back to tut only. Please do not claim as your own. This tutorial is copyrighted to me. Any resemblance to any other tutorial is purely coincidental.
Ok - let's start and remember to save often.
Open up a 750 x 650 blank canvas (we can resize it later)
Select Food Stand Element - resize by 75%
Paste and position in the center of the canvas
Select Splash Element - resize by 50%
Paste and position behind the food stand where desired
Select Tree Element - resize by 40%
Paste and position on the right side below food stand
Select Word Art 2 Element - resize by 35%
Image Free Rotate Left by 15% and paste on top left above food stand element
Select Rubble Element - resize by 65%
Paste and position on bottom of food stand element
Paste tube of choice where desired
Apply Lokas 3D Shadow at default settings
Select Drink Element - resize by 25%
Paste and position in the center above food stand element
Select Garbage Can Element - resize by 40%
Paste and position on bottom left
Select Cat Element - resize by 30%
Paste and position on bottom left
Select Hand Element - resize by 35%
Paste and position on bottom left
Select Bow 2 Element - resize by 25%
Image Free Rotate Left by 15% and paste on bottom left
Select Head 2 Element - resize by 20%
Image Free Rotate Left by 15% and paste on bottom right
Select Shoe Element - resize by 25%
Paste and position on bottom
Select Cupcake Element- resize by 20%
Paste and position on the bottom
Select Flower 2 Element - resize by 20%
Paste and position on bottom
Select Finger Element - resize by 30%
Image Free Rotate Left by 15% and paste on the bottom
Select Milkshake Element - resize by 25%
Paste and position on bottom
Paste paper 9 on canvas
Apply Mask 113 or mask of choice
Merge group and move to the bottom layer
Add any dropshadows you like
Sharpen any elements as needed
Crop and resize as desired
Add copyright info, license number and name
You're done! Thanks for trying my tutorial!
Labels:Freek's Creation | 0
comments
Saturday, May 30, 2015
SUNNY
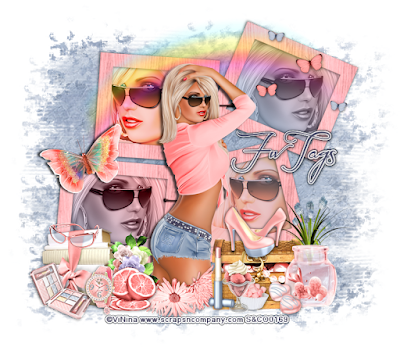
Supplies needed:
I am using the stunning artwork from ViNina for this tutorial which you can find here
Scrapkit: I am using a stunning kit from FwTags called "Sunny" which you can get by going here
Mask 1 from Kissing Kate which you can find here
Plugins: Lokas 3D Shadow
----------------------------
This tutorial is written for those who have working knowledge of PSPX2 (any version will do).
This tutorial was written by me on May 30, 2014. Please do not copy or paste on any other forum, website or blog provide link back to tut only. Please do not claim as your own. This tutorial is copyrighted to me. Any resemblance to any other tutorial is purely coincidental.
Ok - let's start and remember to save often.
Open up a 750 x 650 blank canvas (we can resize it later)
Select Frame 5 Element - resize by 65%
Paste and position in the center of the canvas and move up about an inch
Select your magic wand tool and click in the center of each square in the frame (Add (Shift), RGB Value, Tolerance 25, Contiguous checked, Feather 0)
Selections, Modify, Expand by 5
Add new raster layer and flood-fill with color or gradient of choice
Paste and position any close-up tube of choice on color/gradient layer
Select invert, delete, select none
Change the close-ups to Hard Light or Luminance (Legacy) and merge down on color layer
Move color layer below frame layer
Select Element 45 - resize by 55%
Paste and position on top where desired
Select Element 27 - resize by 25%
Paste and position on top right
Select Element 20 - resize by 20%
Paste and position on left side
Paste tube of choice where desired
Apply Lokas 3D Shadow at default settings
Select Element 14 - resize by 22%
Paste and position on bottom right
Select Element 18 - resize by 15%
Paste and position on bottom right
Select Element 56 - resize by 15%
Paste and position on bottom right
Select Element 1 - resize by 20%
Paste and position on bottom right
Select Element 16 - resize by 8%
Paste and position on bottom right
Select Element 36 - resize by 8%
Paste and position on bottom right
Select Element 9 - resize by 15%
Paste and position on bottom right
Select Element 3 - resize by 30%
Paste and position on the bottom
Select Element 24 - resize by 15%
Paste and position on bottom
Select Element 31 - resize by 20%
Paste and position on bottom left
Select Element 58 - resize by 12%
Paste and position on bottom left
Select Element 10 - resize by 15%
Paste and position on bottom left
Select Element 4 - resize by 12%
Paste and position on bottom left
Select Element 59 - resize by 15%
Paste and position on bottom left
Select Element 21 - resize by 15%
Paste and position on bottom left
Add new raster layer and flood-fill with color or gradient of choice
Apply Mask 1 or mask of choice
Merge group and move to the bottom layer
Add any dropshadows you like
Sharpen any elements as needed
Crop and resize as desired
Add copyright info, license number and name
You're done! Thanks for trying my tutorial!
Labels:FwTags | 0
comments
Friday, May 29, 2015
BEARY BLUE
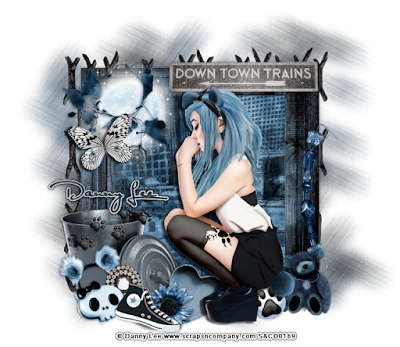
Supplies needed:
I am using the stunning artwork from Danny Lee for this tutorial which you can find here
Scrapkit: I am using a stunning kit from Chili Designz called "Beary Blue" which you can get by going here
Mask 12 from Gina Gem which you can find here
Plugins: Lokas 3D Shadow
----------------------------
This tutorial is written for those who have working knowledge of PSPX2 (any version will do).
This tutorial was written by me on May 29, 2014. Please do not copy or paste on any other forum, website or blog provide link back to tut only. Please do not claim as your own. This tutorial is copyrighted to me. Any resemblance to any other tutorial is purely coincidental.
Ok - let's start and remember to save often.
Open up a 750 x 650 blank canvas (we can resize it later)
Select Wire Element - resize by 90%
Paste and position in the center of the canvas
Select Frame 1 Element - Paste and position in the center of the canvas
Select your magic wand tool and click in the center of the Element (Add (Shift), RGB Value, Tolerance 25, Contiguous checked, Feather 0)
Selections, Modify, Expand by 5
Paste paper 12
Select invert, delete, select none
Move paper below frame layer
Select Moon Element - resize by 40%
Paste and position on top left
Select Greenery 2 Element - resize by 30%
Paste and position on top left
Select Butterfly 2 Element - resize by 55%
Paste and position on top left
Select Sign Element - resize by 36%
Paste and position on the top right
Paste tube of choice where desired
Apply Lokas 3D Shadow at default settings
Select Bin Element - resize by 55%
Paste and position on bottom left
Select Paws Element - resize by 35%
Image mirror and paste on bottom left
Select Bear Ears Element - resize by 30%
Image Free Rotate Left by 15% and paste on bottom left
Select Skull Element - resize by 65%
Paste and position on bottom left
Select Jewel Element - resize by 50%
Paste and position on bottom left
Select Shoe Element - resize by 45%
Paste and position on bottom left
Select Box Element - resize by 40%
Image mirror and paste on the bottom
Select Flower 3 Element - resize by 25%
Paste and position on the bottom
Select Bracelet 2 Element - resize by 50%
Paste and position on bottom right
Select Bear 2 Element - resize by 35%
Paste and position on bottom right
Select Flair Element - resize by 45%
Image Free Rotate Left by 15% and paste on bottom right
Add new raster layer and flood-fill with color or gradient of choice
Apply Mask 12 or mask of choice
Merge group and move to the bottom layer
Add any dropshadows you like
Sharpen any elements as needed
Crop and resize as desired
Add copyright info, license number and name
You're done! Thanks for trying my tutorial!
Labels:Chili Designz,Scraps N Company | 0
comments
Thursday, May 28, 2015
BLUE MASQUERADE
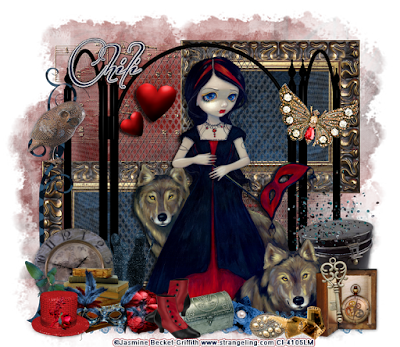
Supplies needed:
I am using the stunning artwork from Jasmine Becket-Griffith for this tutorial which you can find here
Scrapkit: I am using a stunning kit from Chili Designz called "Blue Masquerade" which you can get by going here or here
Mask 22 from Becky which you can find here
Plugins: Lokas 3D Shadow
----------------------------
This tutorial is written for those who have working knowledge of PSPX2 (any version will do).
This tutorial was written by me on May 28, 2014. Please do not copy or paste on any other forum, website or blog provide link back to tut only. Please do not claim as your own. This tutorial is copyrighted to me. Any resemblance to any other tutorial is purely coincidental.
Ok - let's start and remember to save often.
Open up a 750 x 650 blank canvas (we can resize it later)
Select NodeOverlay Element - resize by 60%
Paste and position in the center of the canvas
Select Frame 1 Element - resize by 75%
Paste and position on top right
Image duplicate and reposition copy on bottom left
Select your magic wand tool and click in the center of top right frame (Add (Shift), RGB Value, Tolerance 25, Contiguous checked, Feather 0)
Selections, Modify, Expand by 5
Paste paper 6
Select invert, delete, select none
Move paper below frame layer
Repeat steps for the bottom left frame
Select Screen Element - paste and position in the center of the canvas above frames
Select Hearts Element - resize by 45%
Paste and position on top left side
Select Owl Element - resize by 40%
Paste and position on the left side
Select Butterfly Element - resize by 65%
Image Free Rotate Right by 15% and paste on top right
Paste tube of choice where desired
Apply Lokas 3D Shadow at default settings
Select Hatbox Element - resize by 40%
Paste and position on bottom right
Select Box Element - resize by 30%
Paste and position on bottom right
Select Watch Element - resize by 25%
Image Free Rotate Right by 15% and paste on bottom right
Select Key Element - resize by 45%
Paste and position on bottom right
Select Film Element - resize by 25%
Image mirror and paste on bottom right
Select Broche Element - resize by 45%
Paste and position on bottom right
Select Clock Element - resize by 50%
Image Free Rotate Left by 15% and paste on bottom left
Select Books Element - resize by 45%
Paste and position on bottom left
Select Hat Element - resize by 25%
Paste and position on bottom left
Select Mask Element - resize by 30%
Paste and position on bottom left
Select Leaf 3 Element - resize by 20%
Image mirror and paste on bottom left
Select Flower 8 Element - resize by 25%
Paste and position on bottom left
Select Boots 2 Element - resize by 40%
Paste and position on bottom
Select Chest Element - resize by 22%
Paste and position on bottom
Select Flower 10 Element - resize by 40%
Paste and position on bottom
Paste paper 8 on canvas
Apply Mask 22 or mask of choice
Merge group and move to the bottom layer
Add any dropshadows you like
Sharpen any elements as needed
Crop and resize as desired
Add copyright info, license number and name
You're done! Thanks for trying my tutorial!
Labels:Chili Designz | 0
comments
Wednesday, May 27, 2015
STAR NATIVE
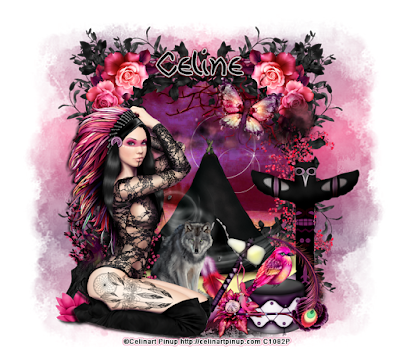
Supplies needed:
I am using the stunning artwork from Celinart Pinup for this tutorial which you can find here
Scrapkit: I am using a stunning kit from Bibi's Collections called "Star Native" which you can get by going here
Mask 4 from Butterfly Flutterby which you can find here
Plugins: Lokas 3D Shadow
----------------------------
This tutorial is written for those who have working knowledge of PSPX2 (any version will do).
This tutorial was written by me on May 27, 2014. Please do not copy or paste on any other forum, website or blog provide link back to tut only. Please do not claim as your own. This tutorial is copyrighted to me. Any resemblance to any other tutorial is purely coincidental.
Ok - let's start and remember to save often.
Open up a 750 x 650 blank canvas (we can resize it later)
Select Element 8 - resize by 65%
Paste and position in the center of the canvas
Select your magic wand tool and click in the center of the Element (Add (Shift), RGB Value, Tolerance 25, Contiguous checked, Feather 0)
Selections, Modify, Expand by 5
Paste paper 10
Select invert, delete, select none
Move paper below element layer
Select Element 23 - resize by 30%
Image flip and paste/postion on top left
Image duplicate and mirror
Select Element 7 - resize by 30%
Image Free Rotate Right by 15% and paste on top right
Select Element 12 - resize by 30%
Paste and position on top right side
Select Element 71 - resize by 40%
Paste and position on the right side
Select Element 44 - resize by 30%
Paste and position on the bottom right
Select Element 41 - resize by 40%
Paste and position in the center towards the bottom
Select Element 66 - resize by 40%
Paste and position on bottom above tent element
Select Element 14 - resize by 25%
Image Free Rotate Left by 15% and paste next to wolf element
Select Element 82 - resize by 35%
Paste and position on bottom left
Select Element 63 - resize by 22%
Paste and position on bottom left
Select Element 70 - resize by 30%
Paste and position on bottom left
Paste tube of choice where desired
Apply Lokas 3D Shadow at default settings
Select Element 13 - resize by 20%
Paste and position on bottom right
Select Element 33 - resize by 15%
Paste and position on bottom right
Select Element 60 - resize by 45%
Paste and position on bottom right
Select Element 36 - resize by 15%
Paste and position on bottom right
Select Element 10 - resize by 25%
Paste and position on bottom right
Select Element 61 - resize by 30%
Paste and position on bottom right
Select Element 57 - resize by 30%
Paste and position on bottom
Add new raster layer and flood-fill with color or gradient of choice
Apply Mask 4 or mask of choice
Merge group and move to the bottom layer
Add any dropshadows you like
Sharpen any elements as needed
Crop and resize as desired
Add copyright info, license number and name
You're done! Thanks for trying my tutorial!
Labels:Bibi's Collections,Celinart Pinup | 0
comments
Monday, May 25, 2015
NIGHT WOMAN
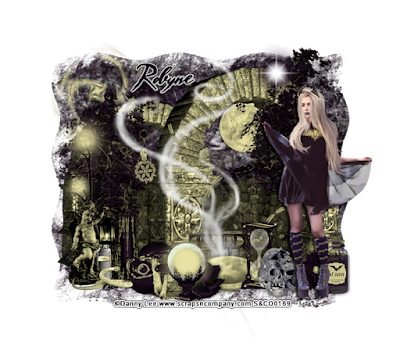
Supplies needed:
I am using the stunning artwork from Danny Lee for this tutorial which you can find here
Scrapkit: I am using a stunning kit from Whisper in the Wind called "Night Woman" which you can get by going here
Mask 56 from Weescotlass which you can find here
Plugins: Lokas 3D Shadow
----------------------------
This tutorial is written for those who have working knowledge of PSPX2 (any version will do).
This tutorial was written by me on May 25, 2014. Please do not copy or paste on any other forum, website or blog provide link back to tut only. Please do not claim as your own. This tutorial is copyrighted to me. Any resemblance to any other tutorial is purely coincidental.
Ok - let's start and remember to save often.
Open up a 750 x 650 blank canvas (we can resize it later)
Select Element 39 - resize by 75%
Paste and position in the center of the canvas
Select Element 36 - resize by 25%
Paste and position on right side below element 39
Select Element 70 - resize by 25%
Paste and position on top left side
Select Element 80 - resize by 55%
Paste and position in the center of the canvas where desired
Select Element 81 - resize by 30%
Paste and position on top right
Paste tube of choice where desired
Apply Lokas 3D Shadow at default settings
Select Element 20 - resize by 40%
Paste and position on bottom left
Select Element 41 - resize by 22%
Paste and position on bottom left
Select Element 52 - resize by 22%
Paste and position on bottom left
Select Element 22 - resize by 12%
Paste and position on bottom left
Select Element 66 - resize by 15%
Paste and position on bottom left
Select Element 32 - resize by 10%
Image Free Rotate Left by 15% and past on bottom left
Select Element 4 - resize by 15%
Paste and position on bottom left
Select Element 33 - resize by 20%
Paste and position on bottom
Select Element 44 - resize by 12%
Paste and position on bottom
Select Element 51 - resize by 25%
Paste and position on bottom
Select Element 12 - resize by 15%
Paste and position on bottom
Select Element 67 - resize by 18%
Paste and position on bottom
Select Element 37 - resize by 15%
Paste and position on bottom right
Select Element 43 - resize by 15%
Paste and position on bottom right
Paste paper 3 on canvas
Apply Mask 56 or mask of choice
Merge group and move to the bottom layer
Add any dropshadows you like
Sharpen any elements as needed
Crop and resize as desired
Add copyright info, license number and name
You're done! Thanks for trying my tutorial!
Labels:Scraps N Company | 0
comments
Sunday, May 24, 2015
TATTOO GIRL
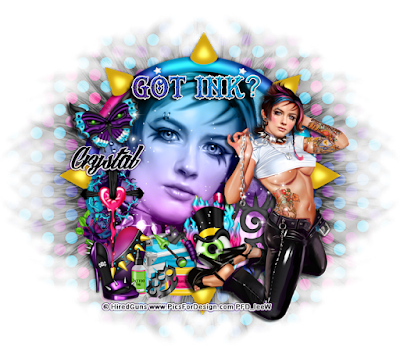
Supplies needed:
I am using the stunning artwork from Hired Guns for this tutorial which you can find here
Scrapkit: I am using a stunning kit from Creative Scraps by Crys called "Ink Masterz" which you can get by going here
Circle Mask 2 from Tonya which you can find here
Plugins: Lokas 3D Shadow, Eyecandy 4000 - Gradient Glow
----------------------------
This tutorial is written for those who have working knowledge of PSPX2 (any version will do).
This tutorial was written by me on May 24, 2014. Please do not copy or paste on any other forum, website or blog provide link back to tut only. Please do not claim as your own. This tutorial is copyrighted to me. Any resemblance to any other tutorial is purely coincidental.
Ok - let's start and remember to save often.
Open up a 750 x 650 blank canvas (we can resize it later)
Select Frame Element 3 - resize by 85%
Paste and position in the center of the canvas
Select your magic wand tool and click in the center of the Frame (Add (Shift), RGB Value, Tolerance 25, Contiguous checked, Feather 0)
Selections, Modify, Expand by 5
Paste paper 16
Select invert, delete
Paste a close-up tube of choice on paper layer and delete
Change close-up to Luminance (Legacy)
Select none and apply dropshadow
Merge tube down on paper layer
Move paper below frame layer
Select Element 61 - resize by 40%
Paste and position on the top of the frame
Apply Eyecandy Gradient Glow on fat default settings (Glow width 3)
Select Element 5 - resize by 30%
Image Free Rotate Left by 15% and paste on top left
Select Element 17 - resize by 40%
Paste and position on bottom right
Paste tube of choice where desired
Apply Lokas 3D Shadow at default settings
Select Element 3 - resize by 40%
Paste and position on left side
Select Element 24 - resize by 20%
Paste and position on bottom left
Select Element 10 - resize by 30%
Image Free Rotate Left by 15% and paste on bottom left
Select Element 39 - resize by 25%
Paste and position on bottom left
Select Element 16 - resize by 20%
Paste and position on bottom left
Select Element 22 - resize by 35%
Paste and position on bottom left
Select Element 34 - resize by 15%
Paste and position on bottom
Select Element 33 - resize by 15%
Paste and position on bottom
Select Element 7 - resize by 18%
Paste and position on bottom
Select Element 28 - resize by 30%
Paste and position on bottom
Select Element 18 - resize by 20%
Image Free Rotate Left by 15% and paste on bottom
Paste paper 5 on canvas
Apply Mask 2 or mask of choice
Merge group and move to the bottom layer
Add any dropshadows you like
Sharpen any elements as needed
Crop and resize as desired
Add copyright info, license number and name
You're done! Thanks for trying my tutorial!
Labels:Creative Scraps by Crys | 0
comments
Saturday, May 23, 2015
ORANGE SHERBERT
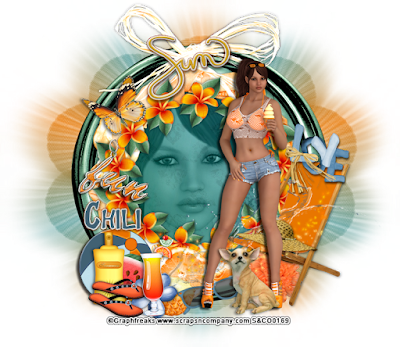
Supplies needed:
I am using the stunning artwork from Graphfreaks for this tutorial which you can find here
Scrapkit: I am using a stunning Collab kit from Chili Designz called "Orange Summer" which you can get by going here
Shell Mask from Jenny which you can on the Misfits Blog here
Plugins: Lokas 3D Shadow, Mura Meister - Copies, Eyecandy 4000 - Gradient Glow
----------------------------
This tutorial is written for those who have working knowledge of PSPX2 (any version will do).
This tutorial was written by me on May 23, 2014. Please do not copy or paste on any other forum, website or blog provide link back to tut only. Please do not claim as your own. This tutorial is copyrighted to me. Any resemblance to any other tutorial is purely coincidental.
Ok - let's start and remember to save often.
Open up a 750 x 650 blank canvas (we can resize it later)
Select Frame Element 1 - paste and position in the center of the canvas
Select your magic wand tool and click in the center of the Frame (Add (Shift), RGB Value, Tolerance 25, Contiguous checked, Feather 0)
Selections, Modify, Expand by 5
Paste paper 8
Select invert, delete
Paste a close-up tube of choice on paper layer and delete
Change close-up to Luminance (Legacy) and reduce opacity to 65%
Select none and apply dropshadow
Merge tube down on paper layer
Move paper below frame layer
Select Frame 9 Element - paste and position above frame 1
Select Flower 10 Element - resize by 25%
Paste and position in the center of the canvas
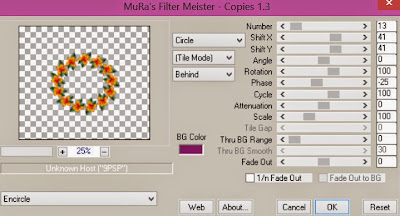
Apply Mura Meister - Copies with the following settings:
Select WA 2 Element - resize by 50%
Paste and position on the top where desird
Apply Eyecandy - Gradient Glow on fat default settings (Glow Width 3)
Select Butterfly 2 Element - resize by 55%
Paste and position on top left
Select Charm Element - resize by 65%
Paste and position on left side
Paste tube of choice where desired
Apply Lokas 3D Shadow at default settings
Select Chair Element - resize by 50%
Image mirror and paste on bottom right below tube
Select WA Love Element - resize by 35%
Paste and position on right side above chair element
Select Water Element - resize by 30%
Paste and position on bottom below tube layer
Select Hat Element - resize by 32%
Image Free Rotate Right by 15% and paste on right side above chair element
Select Puppy Element - resize by 45%
Paste and position on bottom right
Select Ball Element - resize by 75%
Paste and position on bottom left
Select Sunlotion Element - resize by 55%
Paste and position on bottom left
Select Watermelon Element - resize by 45%
Paste and position on bottom left
Select Flipflops Element - resize by 35%
Paste and position on bottom left
Select Flower 8 Element - resize by 30%
Paste and position on bottom left
Select Drink Element - resize by 45%
Paste and position on bottom left
Select Orange Element - resize by 40%
Paste and position on bottom
Select Pineapple 2 Element - resize by 40%
Paste and position on bottom
Select Sunglasses Element - resize by 45%
Image Free Rotate Left by 15% and paste on bottom
Add new raster layer and flood-fill with color or gradient of choice
Apply Mask 126 or mask of choice
Merge group and move to the bottom layer
Add any dropshadows you like
Sharpen any elements as needed
Crop and resize as desired
Add copyright info, license number and name
You're done! Thanks for trying my tutorial!
Labels:Chili Designz,Graphfreaks | 0
comments
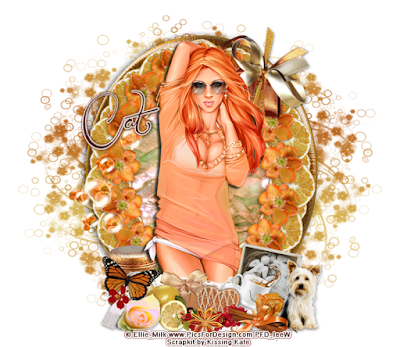
LEMON AND GINGER
Supplies needed:
I am using the stunning artwork from Ellie Milk for this tutorial which you can find here
Scrapkit: I am using a stunning kit from Kissing Kate called "Lemon and Ginger" which you can get by going here or here
Mask 35 from Moonbeams and Spiderwebs which you can find here
Plugins: Lokas 3D Shadow, Mura Meister - Copies
----------------------------
This tutorial is written for those who have working knowledge of PSPX2 (any version will do).
This tutorial was written by me on May 23, 2014. Please do not copy or paste on any other forum, website or blog provide link back to tut only. Please do not claim as your own. This tutorial is copyrighted to me. Any resemblance to any other tutorial is purely coincidental.
Ok - let's start and remember to save often.
Open up a 750 x 650 blank canvas (we can resize it later)
Select Frame Element 1 - resize by 75%
Paste and position in the center of the canvas
Select your magic wand tool and click in the center of the Frame (Add (Shift), RGB Value, Tolerance 25, Contiguous checked, Feather 0)
Selections, Modify, Expand by 5
Paste paper 10
Select invert, delete, select none
Move paper below frame layer
Select Element 69 - resize by 20%
Paste and position in the center of the canvas
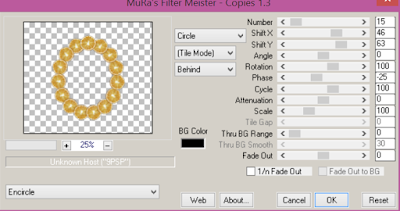
Apply Mura Meister - Copies with the following settings:
Select Element 16 - resize by 18%
Paste and position in the center of the canvas
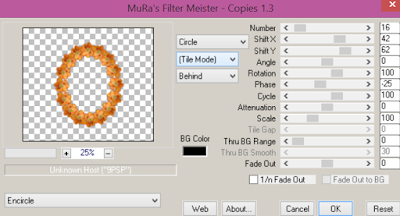
Apply Mura Meister - Copies with the following settings:
Select Element 68 - resize by 20%
Image Free Rotate Right by 15% and paste on top right
Select Element 59 - resize by 30%
Paste and position on left side
Paste tube of choice where desired
Apply Lokas 3D Shadow at default settings
Select Element 66 - resize by 65%
Paste and position on bottom above tube
Select Element 60 - resize by 25%
Paste and position on bottom right
Select Element 18 - resize by 30%
Paste and position on bottom right
Select Element 64 - resize by 22%
Paste and position on bottom right
Select Element 3 - resize by 20%
Paste and position on bottom right
Select Element 40 - resize by 22%
Paste and position on bottom right
Select Element 36 - resize by 20%
Paste and position on bottom left
Select Element 32 - resize by 12%
Paste and position on bottom left
Select Element 25 - resize by 15%
Paste and position on bottom left
Select Element 37 - resize by 25%
Paste and position on bottom left
Select Element 14 - resize by 25%
Image Free Rotate Right by 15% and paste on bottom left
Select Element 5 - resize by 25%
Paste and position on bottom
Select Element 28 - resize by 20%
Paste and position on bottom
Select Element 20 - resize by 18%
Paste and position on bottom
Select Element 17 - resize by 30%
Paste and position on bottom
Select Element 39 - resize by 15%
Paste and position on bottom
Add new raster layer and flood-fill with color or gradient of choice
Apply Mask 35 or mask of choice
Merge group and move to the bottom layer
Add any dropshadows you like
Sharpen any elements as needed
Crop and resize as desired
Add copyright info, license number and name
You're done! Thanks for trying my tutorial!
Labels:Kissing Kate | 0
comments
Friday, May 22, 2015
STEAMPUNK AMY
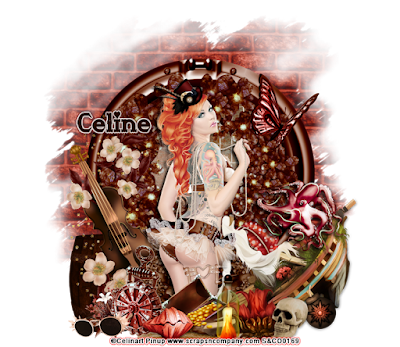
Supplies needed:
I am using the stunning artwork from Celinart Pinup for this tutorial which you can find here
Scrapkit: I am using a stunning kit from Bibi's Collections called "Amy Steampunk" which you can get by going here
Plugins: Lokas 3D Shadow
----------------------------
This tutorial is written for those who have working knowledge of PSPX2 (any version will do).
This tutorial was written by me on May 22, 2014. Please do not copy or paste on any other forum, website or blog provide link back to tut only. Please do not claim as your own. This tutorial is copyrighted to me. Any resemblance to any other tutorial is purely coincidental.
Ok - let's start and remember to save often.
Open up a 750 x 650 blank canvas (we can resize it later)
Select Element 110 - resize by 45%
Paste and position in the center of the canvas
Select Element 3 - resize by 75%
Paste and position on the center of the canvas
Select your magic wand tool and click in the center of the Frame (Add (Shift), RGB Value, Tolerance 25, Contiguous checked, Feather 0)
Selections, Modify, Expand by 5
Paste paper 5
Select invert, delete, select none
Move paper below frame layer
Select Element 22 - resize by 65%
Paste and position on canvas above frame
Select Element 11- resize by 65%
Paste and position on
Paste tube of choice where desired
Apply Lokas 3D Shadow at default settings
Select Element 49 - resize by 25%
Paste and position on bottom right below tube layer
Select Element 66 - resize by 25%
Paste and position on right side
Select Element 30 - resize by 30%
Paste and postion on bottom right
Select Element 61 - resize by 15%
Paste and position on bottom right
Select Element 55 - resize by 25%
Paste and position on bottom right
Select Element 87 - resize by 25%
Paste and position on bottom left
Select Element 85 - resize by 40%
Paste and position on left side
Select Element 27 - resize by 40%
Paste and position on bottom left
Select Element 76 - resize by 25%
Paste and position on bottom left
Select Element 23 - resize by 25%
Paste and position on bottom left
Select Element 88 - resize by 25%
Paste and position on bottom
Select Element 86 - resize by 14%
Paste and position on bottom
Select Element 71 - resize by 25%
Image mirror and paste on bottom
Select Element - resize by 15%
Paste and position on bottom right
Select Element 9 - resize by 35%
Image Free Rotate Right by 15% and paste right side
Select Element 34 - resize by 15%
Paste and position on top right
Add new raster layer and flood-fill with color or gradient of choice
Apply Mask 126 or mask of choice
Merge group and move to the bottom layer
Add any dropshadows you like
Sharpen any elements as needed
Crop and resize as desired
Add copyright info, license number and name
You're done! Thanks for trying my tutorial!
Labels:Bibi's Collections,Celinart Pinup | 0
comments
Thursday, May 21, 2015
TWEETY
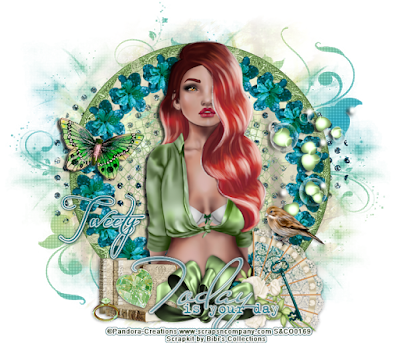
Supplies needed:
I am using the stunning artwork from Pandora Creations for this tutorial which you can find here
Scrapkit: I am using a stunning kit from Bibi's Collections called "Tweety" which you can get by going here
Mask 5 from Melissaz Creations which you can find here
Plugins: Lokas 3D Shadow, Mura Meister - Copies, Eyecandy 4000 - Gradient Glow
----------------------------
This tutorial is written for those who have working knowledge of PSPX2 (any version will do).
This tutorial was written by me on May 21, 2014. Please do not copy or paste on any other forum, website or blog provide link back to tut only. Please do not claim as your own. This tutorial is copyrighted to me. Any resemblance to any other tutorial is purely coincidental.
Ok - let's start and remember to save often.
Open up a 750 x 650 blank canvas (we can resize it later)
Select Element 55 - resize by 55%
Paste and position in the center of the canvas
Select Frame Element 2 - resize by 85%
Select Element 16 - resize by 45%
Paste and position in the center of the frame element
Paste and position in the center of the canvas
Select Element 15 - resize by 50%
Paste and position in the center of the canvas below frame layer
Select Element 79 - paste and position in the center above frame layer
Select Element 21 - resize by 30%
Past and position in the center of the canvas
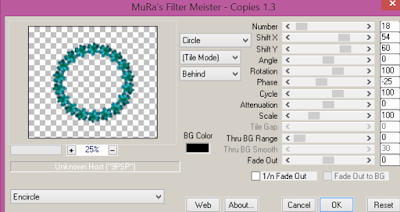
Apply Mura Meister - Copies with the following settings:
Paste tube of choice where desired
Apply Lokas 3D Shadow at default settings
Select Element 8 - resize by 40%
Paste and position on top left
Select Element 59 - resize by 40%
Paste and position on top right
Select Element 35 - resize by 35%
Paste and postion on bottom left
Select Element 82 - resize by 20%
Paste and position on bottom left
Select Element 13 - resize by 12%
Paste and position on bottom left
Select Element 80 - resize by 25%
Image Free Rotate Right by 15% and paste on bottom right
Select Element 74 - resize by 25%
Paste and position on bottom right
Select Element 1 - resize by 55%
Paste and position on bottom
Select Element 14 - resize by 35%
Paste and position on bottom
Apply Eyecandy Gradient Glow on fat default settings (Glow width 3)
Add new raster layer and flood-fill with color or gradient of choice
Apply Mask 5 or mask of choice
Merge group and move to the bottom layer
Add any dropshadows you like
Sharpen any elements as needed
Crop and resize as desired
Add copyright info, license number and name
You're done! Thanks for trying my tutorial!
Labels:Bibi's Collections,Pandora | 0
comments
Wednesday, May 20, 2015
WACKY HAT
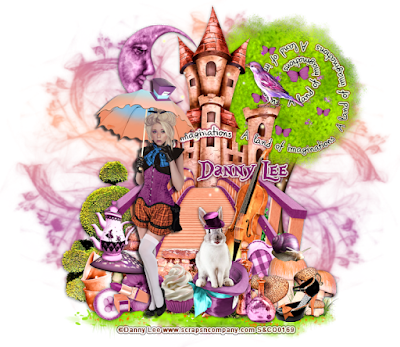
Supplies needed:
I am using the stunning artwork from Danny Lee for this tutorial which you can find here
Scrapkit: I am using a stunning kit from FwTags Creations called "Wacky Hat" which you can get by going here
Mask 126 from Trese which you can find here
Plugins: Lokas 3D Shadow, Eyecandy 4000 - Gradient Glow
----------------------------
This tutorial is written for those who have working knowledge of PSPX2 (any version will do).
This tutorial was written by me on May 20, 2014. Please do not copy or paste on any other forum, website or blog provide link back to tut only. Please do not claim as your own. This tutorial is copyrighted to me. Any resemblance to any other tutorial is purely coincidental.
Ok - let's start and remember to save often.
Open up a 750 x 650 blank canvas (we can resize it later)
Select Element 1 - resize by 45%
Paste and position in the center of the canvas and move to the top
Select Element 21 - resize by 45%
Paste and position on canvase and move towards the bottom above castle element
Select Element 10 - resize by 20%
Image Free Rotate Right by 15% and paste on top left below castle element
Select Element 24 - resize by 55%
Paste and position on right side below castle element
Select Element 36 - resize by 22%
Paste and position on top right
Select Element 83 - resize by 45%
Paste and position on top right
Apply Eyecandy Gradient Glow on fat default settings (Glow Width 3)
Select Element 22 - resize by 65%
Paste and position on botton below bridge element
Select Element 4 - resize by 35%
Paste and position on bottom left below bridge element
Select Element 20 - resize by 40%
Paste and position on bottom left above bridge element
Paste tube of choice where desired
Apply Lokas 3D Shadow at default settings
Select Element 80 - resize by 15%
Paste and position on bottom left
Select Element 93 - resize by 15%
Paste and position on bottom left
Select Element 7 - resize by 15%
Paste and postion on bottom left
Select Element 76 - resize by 8%
Paste and position on bottom left
Select Element 89 - resize by 10%
Paste and position on bottom left
Select Element 26 - resize by 12%
Paste and position on bottom left
Select Element 87 - resize by 12%
Paste and position on bottom
Select Element 5 - resize by 15%
Paste and position on bottom
Select Element 52 - resize by 20%
Paste and position on bottom
Select Element 43 - resize by 25%
Paste and position on bottom right
Select Element 32 - resize by 10%
Paste and position on bottom right above mushroom element
Select Element 8 - resize by 12%
Paste and position on bottom right
Select Element 11 - resize by 20%
Image mirror and paste on bottom right
Select Element 19 - resize by 15%
Paste and position on bottom right
Select Element 9 - resize by 35%
Image Free Rotate Right by 15% and paste right side
Select Element 34 - resize by 15%
Paste and position on top right
Add new raster layer and flood-fill with color or gradient of choice
Apply Mask 126 or mask of choice
Merge group and move to the bottom layer
Add any dropshadows you like
Sharpen any elements as needed
Crop and resize as desired
Add copyright info, license number and name
You're done! Thanks for trying my tutorial!
Labels:FwTags,Scraps N Company | 0
comments
Tuesday, May 19, 2015
UNSPOKEN
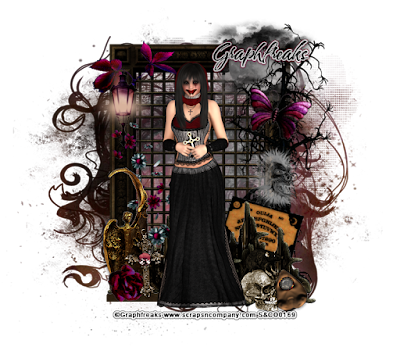
Supplies needed:
I am using the stunning artwork from Graphfreaks for this tutorial which you can find here
Scrapkit: I am using a stunning kit from Devilish Dezines called "The Unspoken" which you can get by going here
Mask 32 from Moonbeams and Spiderwebs which you can find here
Plugins: Lokas 3D Shadow
----------------------------
This tutorial is written for those who have working knowledge of PSPX2 (any version will do).
This tutorial was written by me on May 19, 2014. Please do not copy or paste on any other forum, website or blog provide link back to tut only. Please do not claim as your own. This tutorial is copyrighted to me. Any resemblance to any other tutorial is purely coincidental.
Ok - let's start and remember to save often.
Open up a 750 x 650 blank canvas (we can resize it later)
Select Element 33 - resize by 80%
Paste and position in the center of the canvas
Select Element 41 - resize by 40%
Paste and position on top right where desired
Select Element 22 - resize by 65%
Paste and position on right side
Select Element 1 - resize by 20%
Image Free Rotate Right by 15% and paste on top right
Select Element 45 - resize by 25%
Paste and position on right side
Select Element 7 - resize by 50%
Paste and position on bottom above frame
Select Element 31 - resize by 22%
Paste and position on top left
Select Element 42 - resize by 35%
Paste and position on top left
Select Element 21 - resize by 30%
Paste and position on left side
Paste tube of choice where desired
Apply Lokas 3D Shadow at default settings
Select Element 20 - resize by 30%
Paste and position on bottom left
Select Element 5 - resize by 12%
Paste and position on bottom right
Select Element 17 - resize by 12%
Paste and postion on bottom left
Select Element 48 - resize by 50%
Paste and position on bottom left
Select Element 50 - resize by 20%
Image Free Rotate Right by 15% and paste on bottom right
Select Element 46 - resize by 15%
Paste and position on bottom right
Select Element 37 - resize by 20%
Paste and position on bottom right
Paste paper 3 on canvas
Apply Mask 32 or mask of choice
Merge group and move to the bottom layer
Add any dropshadows you like
Sharpen any elements as needed
Crop and resize as desired
Add copyright info, license number and name
You're done! Thanks for trying my tutorial!
Labels:Graphfreaks | 0
comments
ETERNAL YEARNING
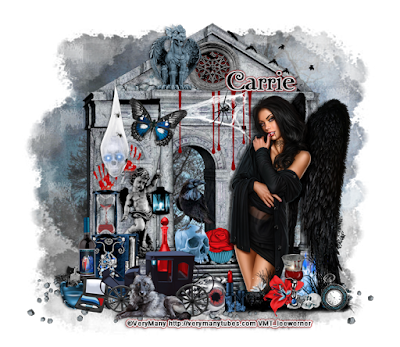
Supplies needed:
I am using the stunning artwork from Verymany for this tutorial which you can find here
Scrapkit: I am using a stunning kit from Pink Paradox Productions called "Eternal Yearning" which you can get by going here
Mask 22 from Becky which you can find here
Plugins: Lokas 3D Shadow
----------------------------
This tutorial is written for those who have working knowledge of PSPX2 (any version will do).
This tutorial was written by me on May 19, 2014. Please do not copy or paste on any other forum, website or blog provide link back to tut only. Please do not claim as your own. This tutorial is copyrighted to me. Any resemblance to any other tutorial is purely coincidental.
Ok - let's start and remember to save often.
Open up a 750 x 650 blank canvas (we can resize it later)
Select Element 124 - resize by 65%
Paste and position in the center of the canvas
Select Element 117 - resize by 13%
Paste and position on top where desired
Select Element 19 - resize by 17%
Paste and position on top left where desired
Select Element 132 - resize by 25%
Paste and position on top where desired
Select Element 28 - resize by 22%
Paste and position on top left
Select Element 69 - resize by 12%
Paste and position on left side
Select Element 128 - resize by 25%
Paste and position on top
Select Element 13 - resize by 15%
Paste and position on top
Select Element 8 - resize by 20%
Image Free Rotate Right by 15% and paste on top left
Paste tube of choice where desired
Apply Lokas 3D Shadow at default settings
Select Element 139 - resize by 25%
Paste and position on bottom right below tube
Select Element 61 - resize by 12%
Image Free Rotate Left by 15% and paste on bottom right
Select Element 47 - resize by 15%
Paste and position on bottom right
Select Element 154 - resize by 12%
Paste and position on bottom right
Select Element 17 - resize by 20%
Paste and postion on left side
Select Element 40 - resize by 12%
Paste and position on bottom left
Select Element 43 - resize by 20%
Paste and position on bottom left
Select Element 59 - resize by 18%
Paste and position on bottom left
Select Element 38 - resize by 10%
Image mirror and paste and position on bottom left
Select Element 102 - resize by 25%
Paste and position on bottom left
Select Element 4 - resize by 18%
Paste and position on bottom left
Select Element 44 - resize by 15%
Paste and position on bottom
Select Element 25 - resize by 15%
Paste and position on bottom
Select Element 1 - resize by 15%
Paste and position on bottom
Select Element 49 - resize by 10%
Paste and position on bottom
Select Element 34 - resize by 15%
Paste and position on bottom
Select Element 36 - resize by 12%
Paste and position on bottom
Paste paper 43 on canvas
Apply Mask 22 or mask of choice
Merge group and move to the bottom layer
Add any dropshadows you like
Sharpen any elements as needed
Crop and resize as desired
Add copyright info, license number and name
You're done! Thanks for trying my tutorial!
Labels:Pink Paradox Productions | 0
comments
Sunday, May 17, 2015
DARK NURSE
Supplies needed:
I am using the stunning artwork from Alfadesire for this tutorial which you can find here
Scrapkit: I am using a stunning kit from Bibi's Collections called "Dark Nurse" which you can get by going here
Mask 179 from Insatiable Dreams which you can find here
Plugins: Lokas 3D Shadow
----------------------------
This tutorial is written for those who have working knowledge of PSPX2 (any version will do).
This tutorial was written by me on May 17, 2014. Please do not copy or paste on any other forum, website or blog provide link back to tut only. Please do not claim as your own. This tutorial is copyrighted to me. Any resemblance to any other tutorial is purely coincidental.
Ok - let's start and remember to save often.
Open up a 750 x 650 blank canvas (we can resize it later)
Select Element 77 - resize by 75%
Paste and position in the center of the canvas
Select Element 26 - resize by 35%
Paste and position on top where desired
Select Element 67 - resize by 45%
Paste and position on top where desired
Select Element 59 - resize by 20%
Paste and position on top left
Paste tube of choice where desired
Apply Lokas 3D Shadow at default settings
Select Element 61 - resize by 40%
Paste and position on right side
Select Element 19 - resize by 35%
Paste and position on bottom right
Select Element 51 - resize by 25%
Paste and position on bottom right
Select Element 56 - resize by 20%
Paste and postion on bottom right
Select Element 14 - resize by 25%
Paste and position on bottom right
Select Element 16 - resize by 15%
Paste and position on bottom right
Select Element 11 - resize by 40%
Paste and position on bottom left
Select Element 52 - resize by 25%
Paste and position on bottom left
Select Element 10 - resize by 30%
Paste and position on bottom left
Select Element 12 - resize by 30%
Paste and position on bottom left
Select Element 20 - resize by 40%
Paste and position on bottom left
Select Element 55 - resize by 25%
Paste and position on bottom
Select Element 68 - resize by 25%
Paste and position on bottom left
Select Element 7 - resize by 20%
Paste and position on bottom
Paste paper 9 on canvas
Apply Mask 179 or mask of choice
Merge group and move to the bottom layer
Add any dropshadows you like
Sharpen any elements as needed
Crop and resize as desired
Add copyright info, license number and name
You're done! Thanks for trying my tutorial!
Labels:Bibi's Collections,Scraps N Company | 0
comments
STREET ZONE
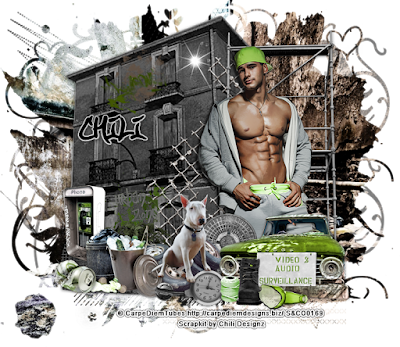
Supplies needed:
I am using the stunning artwork from Carpe Diem for this tutorial which you can find here
Scrapkit: I am using a stunning kit from Chili's Designz called "Street Zone" which you can get by going here
Mask 5 which you can find here
Plugins: Lokas 3D Shadow
----------------------------
This tutorial is written for those who have working knowledge of PSPX2 (any version will do).
This tutorial was written by me on May 17, 2014. Please do not copy or paste on any other forum, website or blog provide link back to tut only. Please do not claim as your own. This tutorial is copyrighted to me. Any resemblance to any other tutorial is purely coincidental.
Ok - let's start and remember to save often.
Open up a 750 x 650 blank canvas (we can resize it later)
Select Building Element - resize by 85%
Paste and position on left side
Select Stillads Element - resize by 55%
Paste and position on right side
Select Mesh Element - resize by 70%
Paste and position on right side
Paste tube of choice where desired
Apply Lokas 3D Shadow at default settings
Select Car Element - resize by 40%
Paste and position on bottom right side
Select Sign 4 Element - resize by 40%
Paste and position on bottom right
Select Bottle 2 Element - resize by 40%
Paste and position on bottom right
Select Boot Element - resize by 30%
Paste and postion on bottom right
Select Yarn Element - resize by 18%
Paste and position on bottom right
Select Deco 2 Element - resize by 30%
Paste and position on bottom right below car element
Select Tires Element - resize by 30%
Paste and position on bottom
Select Dog Element - resize by 50%
Paste and position on bottom
Select Watch Element - resize by 40%
Paste and position on bottom
Select Screw Element - resize by 65%
Paste and position on bottom
Select Phonebox Element - resize by 25%
Paste and position on bottom left
Select Garbage Element - resize by 30%
Paste and position on bottom left
Select Can Element - resize by 30%
Paste and position on bottom left
Select Graffiti Element - resize by 25%
Paste and position on building element where desired
Select Graffiti 3 Element - resize by 25%
Paste and position on building element where desired
Paste paper 4 on canvas
Apply Mask 5 or mask of choice
Merge group and move to the bottom layer
Add any dropshadows you like
Sharpen any elements as needed
Crop and resize as desired
Add copyright info, license number and name
You're done! Thanks for trying my tutorial!
Labels:Chili Designz | 0
comments
GIRLY GLAM
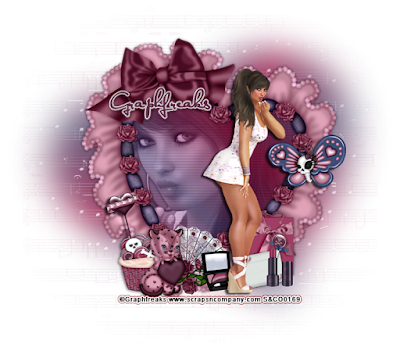
Supplies needed:
I am using the stunning artwork from Graphfreaks for this tutorial which you can find here
Scrapkit: I am using a stunning Collab kit from MMeliCrea Designz called "Little Emo Glam" which you can get by going here
Heart Mask 43 from Chas which you can find in the Misfits Blog here
Plugins: Lokas 3D Shadow
----------------------------
This tutorial is written for those who have working knowledge of PSPX2 (any version will do).
This tutorial was written by me on May 16, 2014. Please do not copy or paste on any other forum, website or blog provide link back to tut only. Please do not claim as your own. This tutorial is copyrighted to me. Any resemblance to any other tutorial is purely coincidental.
Ok - let's start and remember to save often.
Open up a 750 x 650 blank canvas (we can resize it later)
Select Frame Element 1 - resize by 75%
Image Free Rotate Right by 15% and paste in the center of the canvas
Select your magic wand tool and click in the center of the Frame (Add (Shift), RGB Value, Tolerance 25, Contiguous checked, Feather 0)
Selections, Modify, Expand by 5
Add new raster and flood-fill with gradient of choice (Linear style, Angle 45, Repeat 3)
Select invert, delete
Paste close-up tube of choice on top of paper layer and delete
Select none
Change close-up to Luminance (Legacy)
Drop opacity down to 75%
Apply dropshadow and merge close-up down on gradient
Effect, Texture Effects, Blinds (Width 3, Opactity 20, Horizontal and Light from left/top checked)
Move paper below frame
Paste tube of choice where desired
Apply Lokas 3D Shadow at default settings
Select Element 37 - resize by 25%
Paste and position on right side
Select Element 14 - resize by 20%
Paste and position on bottom right
Select Element 40 - resize by 18%
Paste and position on bottom right
Select Element 75 - resize by 15%
Paste and postion on bottom right
Select Element 26 - resize by 20%
Paste and position on bottom left
Select Element 60 - resize by 20%
Paste and position on bottom left
Select Element 56 - resize by 20%
Paste and position on bottom left
Select Element 2 - resize by 20%
Paste and position on bottom
Select Element 87 - resize by 12%
Paste and position on bottom
Add new raster layer and flood-fill with color of choice
Apply Mask 43 or mask of choice
Merge group and move to the bottom layer
Add any dropshadows you like
Sharpen any elements as needed
Crop and resize as desired
Add copyright info, license number and name
You're done! Thanks for trying my tutorial!
Labels:Graphfreaks,MMeliCrea Designz | 0
comments
Friday, May 15, 2015
CANDY COTTAGE

Supplies needed:
Scrapkit: I am using a beautiful kit from Creative Scraps by Crys called "Cottage of Candy" which you can get by going here
Mask 34 from Trese which you can find here
Plugins: Lokas 3D Shadow
----------------------------
This tutorial is written for those who have working knowledge of PSPX2 (any version will do).
This tutorial was written by me on May 15, 2014. Please do not copy or paste on any other forum, website or blog provide link back to tut only. Please do not claim as your own. This tutorial is copyrighted to me. Any resemblance to any other tutorial is purely coincidental.
Ok - let's start and remember to save often.
Open up a 750 x 650 blank canvas (we can resize it later)
Select Element 2 - paste and position in the center of the canvas
Select Element 36 - resize by 50%
Paste and position on the top of the canvas
Apply dropshadow
Select Element 3 - resize by 20%
Paste and position on top left
Select Element 46 - resize by 55%
Paste and position on top right
Select Element 17 - resize by 12%
Paste and position on bottom right
Select Element 37 - resize by 40%
Paste and position on bottom right
Select Element 1 - resize by 40%
Paste and position on bottom right
Select Element 19 - resize by 15%
Paste and position on bottom
Select Element 42 - resize by 25%
Paste and postion on bottom
Select Element 13 - resize by 15%
Paste and position on bottom left
Select Element 16 - resize by 25%
Paste and position on bottom left
Select Element 34 - resize by 25%
Paste and position on bottom left
Add new raster layer and flood-fill with color or gradient of choice
Apply Mask 34 or mask of choice
Merge group and move to the bottom layer
Add any dropshadows you like
Sharpen any elements as needed
Crop and resize as desired
Add copyright info, license number and name
You're done! Thanks for trying my tutorial!
Labels:Creative Scraps by Crys | 0
comments
Wednesday, May 13, 2015
LOVE OF MIME
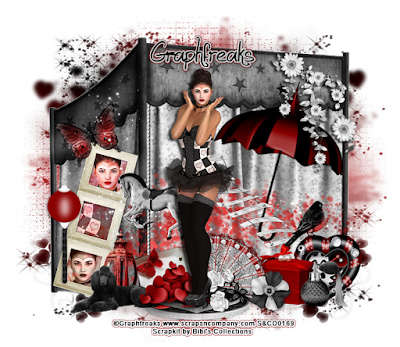
Supplies needed:
I am using the stunning artwork from Graphfreaks for this tutorial which you can find here
Scrapkit: I am using a stunning kit from Bibi's Collections called "Mime" which you can get by going here
Mask M4 from Kylie which you can find on the Misfits Blog here
Plugins: Lokas 3D Shadow
----------------------------
This tutorial is written for those who have working knowledge of PSPX2 (any version will do).
This tutorial was written by me on May 13, 2014. Please do not copy or paste on any other forum, website or blog provide link back to tut only. Please do not claim as your own. This tutorial is copyrighted to me. Any resemblance to any other tutorial is purely coincidental.
Ok - let's start and remember to save often.
Open up a 750 x 650 blank canvas (we can resize it later)
Select Element 33 - resize by 70%
Paste and position in the center of the canvas
Select Element 23 - resize by 30%
Image Free Rotate Right by 15% and paste on bottom left
Select your magic wand tool and click in the center squares of the Frame (Add (Shift), RGB Value, Tolerance 25, Contiguous checked, Feather 0)
Selections, Modify, Expand by 5
Paste paper 9 on top
Select invert, delete
Paste close-up tubes of choice on top of paper layer and delete
Select none
Change close-ups to Luminance (Legacy)
Apply dropshadow and merge close-ups down on paper layer
Move paper below frame
Select Element 44- resize by 20%
Paste and position on the bottom left side
Select Element 85 - resize by 75%
Paste and position on bottom where desired
Select Element 6 - resize by 35%
Image Free Rotate Right by 15% and paste on top right
Select Element 65 - resize by 30%
Paste and position on top right
Paste tube of choice where desired
Apply Lokas 3D Shadow at default settings
Select Element 3 - resize by 30%
Paste and position on bottom below tube layer
Select Element 19 - resize by 35%
Paste and position on bottom left
Select Element 37 - resize by 15%
Paste and position on bottom left
Select Element 11 - resize by 35%
Image mirror and paste on left side
Select Element 67 - resize by 25%
Image Free Rotate Left by 15% and paste on bottom
Select Element 12 - resize by 22%
Image mirror and paste on bottom
Select Element 2 - resize by 30%
Image Free Rotate Right by 15% and paste on bottom
Select Element 64 - resize by 25%
Paste and position on right side
Select Element 21 - resize by 20%
Paste and position on bottom right
Select Element 26 - resize by 25%
Paste and position on bottom right
Select Element 60 - resize by 40%
Paste and position on bottom right
Select Element 17 - resize by 20%
Paste and position on bottom right
Select Element 69 - resize by 55%
Paste and position on top left
Add new raster layer and flood-fill with color or gradient of choice
Apply Mask M4 or mask of choice
Merge group and move to the bottom layer
Add any dropshadows you like
Sharpen any elements as needed
Crop and resize as desired
Add copyright info, license number and name
You're done! Thanks for trying my tutorial!
Labels:Bibi's Collections,Graphfreaks | 0
comments
Tuesday, May 12, 2015
BRAINS ALA CARTE
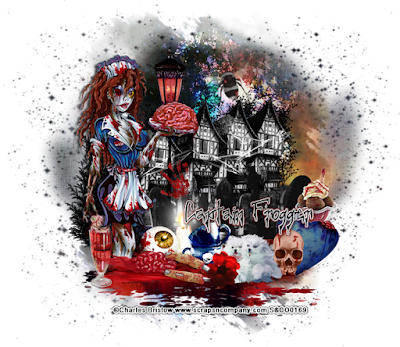
Supplies needed:
I am using the stunning artwork from Charles Bristow for this tutorial which you can find here
Scrapkit: I am using a stunning Collab kit from Bibi's Collections called "Brains Ala Carte" which you can get by going here
Mask 5 from Beth Ann which you can find on the Misfits Blog here
Plugins: Lokas 3D Shadow
----------------------------
This tutorial is written for those who have working knowledge of PSPX2 (any version will do).
This tutorial was written by me on May 8, 2014. Please do not copy or paste on any other forum, website or blog provide link back to tut only. Please do not claim as your own. This tutorial is copyrighted to me. Any resemblance to any other tutorial is purely coincidental.
Ok - let's start and remember to save often.
Open up a 750 x 650 blank canvas (we can resize it later)
Select Element 14 - resize by 55%
Paste and position in the center of the canvas
Select Element 63 - resize by 55%
Paste and position on the top of element 14
Select Element 24 - resize by 50%
Paste and position on the bottom right side
Select Element 61 - resize by 30%
Paste and position on the left hand side
Select Element 32 - resize by 40%
Paste and position on bottom left
Select Element 41 - resize by 45%
Paste and position on bottom where desired
Paste tube of choice where desired
Apply Lokas 3D Shadow at default settings
Select Element 56 - resize by 22%
Paste and position on bottom left
Select Element 48 - resize by 22%
Paste and position on bottom left
Select Element 33 - resize by 30%
Paste and position on bottom left
Select Element 26 - resize by 65%
Paste and postion on bottom left
Select Element 57 - resize by 22%
Paste and position on bottom right
Select Element 30 - resize by 25%
Image Free Rotate Right by 15% and paste on bottom right
Select Element 77 - resize by 20%
Paste and position on bottom right
Select Element 29 - resize by 22%
Paste and position on bottom right
Select Element 65 - resize by 35%
Paste and position on bottom
Select Element 38 - resize by 20%
Paste and position on bottom
Select Element 68 - resize by 25%
Paste and position on bottom
Select Element 34 - resize by 35%
Paste and position on bottom
Select Element 39 - resize by 30%
Image Free Rotate Left by 15% and paste on top right
Paste paper 3 on canvas
Apply Mask 5 or mask of choice
Merge group and move to the bottom layer
Add any dropshadows you like
Sharpen any elements as needed
Crop and resize as desired
Add copyright info, license number and name
You're done! Thanks for trying my tutorial!
Labels:Bibi's Collections,Scraps N Company | 0
comments
SHABBY STEAMPUNK
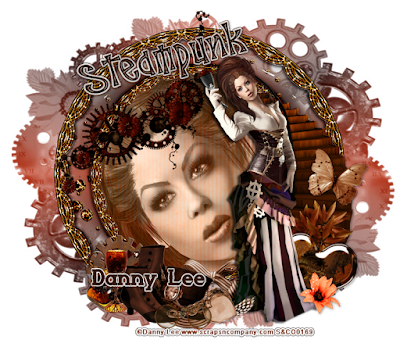
Supplies needed:
I am using the stunning artwork from Danny Lee for this tutorial which you can find here
Scrapkit: I am using a stunning kit from Chili's Designz called "Shabby Steampunk" which you can get by going here
Mask 121 from Bitzy Beez Designz which you can find here
Plugins: Lokas 3D Shadow
----------------------------
This tutorial is written for those who have working knowledge of PSPX2 (any version will do).
This tutorial was written by me on May 12, 2014. Please do not copy or paste on any other forum, website or blog provide link back to tut only. Please do not claim as your own. This tutorial is copyrighted to me. Any resemblance to any other tutorial is purely coincidental.
Ok - let's start and remember to save often.
Open up a 750 x 650 blank canvas (we can resize it later)
Select Frame 6 Element - paste and position on the center of the canvas
Select Coqdeco Element - resize by 40%
Paste and position on top lefte where desired
Select WA Element - resize by 40%
Image Free Rotate Left by 15% and paste on top left
Apply Eyecandy 4000 - Gradient Glow on fat default settings (Glow Width 3)
Select Staircase Element - resize by 55%
Image mirror and paste on right side
Select Butterfly 2 Element - resize by 40%
Paste and position on right side
Select Leaves 4 Element - resize by 25%
Paste and position on bottom right
Select Heart 3 Element - resize by 20%
Image Free Rotate Right by 15% and paste on bottom right
Paste tube of choice where desired
Apply Lokas 3D Shadow at default settings
Select Flower4 Element - resize by 25%
Paste and position on bottom right
Select Coq Element - resize by 40%
Paste and position on bottom left
Select Jewel 7 Element - resize by 40%
Paste and position on bottom left
Select Glass Element - resize by 25%
Paste and postion on bottom left
Select Boots Element - resize by 65%
Paste and position on bottom left
Select Hat Element - resize by 40%
Paste and position on bottom left
Select Bow Element - resize by 30%
Paste and position on bottom
Select Charm Element - resize by 40
Paste and position on bottom
Select Glasses Element - resize by 40%
Paste and position on bottom left
Add new raster layer and flood-fill with color or gradient of choice
Apply Mask 121 or mask of choice
Merge group and move to the bottom layer
Add any dropshadows you like
Sharpen any elements as needed
Crop and resize as desired
Add copyright info, license number and name
You're done! Thanks for trying my tutorial!
Labels:Chili Designz,Scraps N Company | 0
comments
Monday, May 11, 2015
COUNTRY LOVE
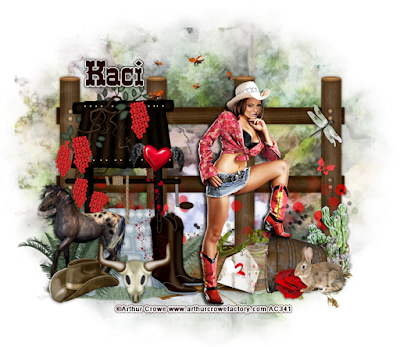
Supplies needed:
I am using the stunning artwork from Arthur Crowe for this tutorial which you can find here
Scrapkit: I am using a beautiful kit from Scrappin Krazy Designs called "Country Love" which you can get by going here
Mask 21 from Gina Gems which you can find here
Plugins: Lokas 3D Shadow
----------------------------
This tutorial is written for those who have working knowledge of PSPX2 (any version will do).
This tutorial was written by me on May 11, 2014. Please do not copy or paste on any other forum, website or blog provide link back to tut only. Please do not claim as your own. This tutorial is copyrighted to me. Any resemblance to any other tutorial is purely coincidental.
Ok - let's start and remember to save often.
Open up a 750 x 650 blank canvas (we can resize it later)
Select Element 79 - Paste and position on the center of canvas
Select Element 90 - resize by 75%
Paste and position on left side where desired
Select Element 52- resize by 90%
Paste and position on bottom where desired
Select Element 41 - resize by 90%
Paste and position on bottom right
Select Element 6 - resize by 40%
Paste and position on bottom right
Select Element 18 - resize by 30%
Paste and position on bottom right
Select Element 22 - resize by 25%
Paste and position on bottom right
Select Element 37 - resize by 25%
Paste and position on bottom right
Select Element 61 - resize by 20%
Paste and position on bottom right
Select Element 31 - resize by 25%
Paste and position on bottom right
Paste tube of choice where desired
Apply Lokas 3D Shadow at default settings
Select Element 17 - resize by 30%
Paste and position on bottom left
Select Element 77 - resize by 30%
Paste and position on bottom left
Select Element 87 - resize by 35%
Paste and position on bottom left
Select Element 80 - resize by 32%
Paste and postion on bottom left
Select Element 36 - resize by 40%
Paste and position on the top where desired
Select Element 12- resize by 20%
Paste and position on the top right
Paste paper 4 on canvas
Apply Mask 21 or mask of choice
Merge group and move to the bottom layer
Add any dropshadows you like
Sharpen any elements as needed
Crop and resize as desired
Add copyright info, license number and name
You're done! Thanks for trying my tutorial!
Labels:Scrappin Krazy Designs | 0
comments
Friday, May 8, 2015
UNDERCOVER NINJA
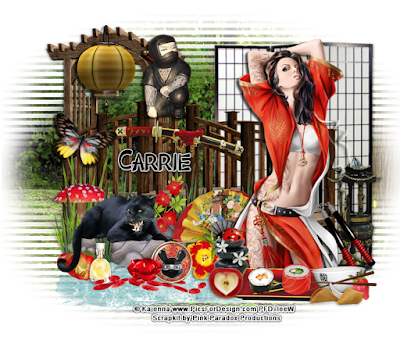
Supplies needed:
I am using the stunning artwork from Kajenna for this tutorial which you can find here
Scrapkit: I am using a stunning kit from Pink Paradox Productions called "Undercover Ninja" which you can get by going here
Mask 11 which you can find here
Plugins: Lokas 3D Shadow
----------------------------
This tutorial is written for those who have working knowledge of PSPX2 (any version will do).
This tutorial was written by me on May 8, 2014. Please do not copy or paste on any other forum, website or blog provide link back to tut only. Please do not claim as your own. This tutorial is copyrighted to me. Any resemblance to any other tutorial is purely coincidental.
Ok - let's start and remember to save often.
Open up a 750 x 650 blank canvas (we can resize it later)
Select Element 96 - resize by 40%
Paste and position on the left side of the canvas
Select Element 84 - resize by 48%
Paste and position on right side where desired
Select Element 86 - resize by 55%
Paste and position on left side
Select Element 99 - resize by 25%
Paste and position on bottom right
Select Element 79 - resize by 25%
Paste and position on top left
Select Element 17 - resize by 20%
Paste and position on top of bridge element
Select Element 30 - resize by 30%
Paste and position on bridge element where desired
Select Element 11 - resize by 20%
Image Free Rotate Right by 15% and paste on left side
Select Element 106 - resize by 40%
Paste and position on bottom left
Select Element 104 - resize by 30%
Paste and position on bottom left below pond element
Paste tube of choice where desired
Apply Lokas 3D Shadow at default settings
Select Element 27 - resize by 20%
Paste and position on bottom right
Select Element 44 - resize by 15%
Paste and position on bottom right
Select Element 39 - resize by 12%
Paste and position on bottom right
Select Element 46 - resize by 20%
Paste and postion on bottom right
Select Element 50 - resize by 15%
Paste and position on bottom right
Select Element 47- resize by 25%
Paste and position on bottom right
Select Element 53 - resize by 12%
Paste and position on bottom right
Select Element 52 - resize by 15%
Paste and position on bottom right
Select Element 118 - resize by 12%
Paste and position on bottom left
Select Element 33 - resize by 12%
Paste and position on bottom left
Select Element 2 - resize by 25%
Paste and position on bottom left above pone element
Select Element 105 - resize by 25%
Paste and position on bottom on top of pond element
Select Element 133 - resize by 15%
Paste and position on the bottom of bridge element
Select Element 23 - resize by 25%
Image Free Rotate left by 15% and paste on bottom of bridge element
Select Element 65 - resize by 10%
Paste and position on bottom
Select Element 18 - resize by 12%
Paste and position on bottom
Select Element 119 - resize by 12%
Paste and position on bottom
Select Element 76 - resize by 15%
Image mirror and paste on bottom
Select Element 8 - resize by 20%
Paste and position on bottom
Select Element 35 - resize by 10%
Paste and position on bottom
Paste paper 23 on canvas
Apply Mask 11 or mask of choice
Merge group and move to the bottom layer
Add any dropshadows you like
Sharpen any elements as needed
Crop and resize as desired
Add copyright info, license number and name
You're done! Thanks for trying my tutorial!
Labels:Pink Paradox Productions | 0
comments
Subscribe to:
Comments
(Atom)


