Labels
- Alikas Scraps
- All Dolled Up Store
- Amy Marie
- Annaica
- Arthur Crowe
- Babycakes Scraps
- Barbara Jensen
- Bibi's Collections
- Black Widow Creationz
- Blu Moon
- Bonnies Creations
- Bookwork Dezines
- Broken Sky Dezine
- Carita Creationz
- Carpe Diem Designs
- CDO
- Celinart Pinup
- Celine
- Chacha Creationz
- Charmed Designs
- Cherry Blossom Designs
- Chili Designz
- Cluster Frame
- Creative Misfits
- Creative Scraps by Crys
- Curious Creative Dreams
- Danny Lee
- Derzi
- Designs by Ali
- Designs by Joan
- Designs by Ketura
- Designs By Norella
- Designs by Vi
- Diana Gali
- Diry Art Designs
- Disturbed Scraps
- Dreaming With Bella
- Eclipse Creations
- Elegancefly
- Extras
- Fabulous Designz
- Forum Set
- Foxy's Designz
- Freek's Creation
- FTU
- FwTags
- Goldwasser
- Gothic Inspirations
- Gothic Raven Designs
- Graphfreaks
- Hania's Designs
- Happy Pumpkin Studios
- Horseplay's Pasture Designs
- indie-Zine
- Irish Princess Designs
- Ishika Chowdhury
- Kaci McVay
- Kajenna
- katharine
- Katherine
- Khloe Zoey
- Killer Kitty
- Kissing Kate
- KiwiFirestorm
- Kiya Designs
- Kizzed by Kelz
- KZ Designz
- Lady Mishka
- Lil Mz Brainstorm
- Maiden of Darkness
- Mariel Designs
- MellieBeans
- Michelle's Myths
- Midnight Shadow
- Misticheskya
- MistyLynn's Creations
- MMeliCrea Designz
- Moon Vixen Designs
- NaSionainne
- Ninaste
- Niqui Designs
- Pandora
- Picsfordesign
- Pink Paradox Productions
- Radyga Designs
- Redefined Designs
- Rissa's Designs
- Schnegge
- ScottishButterfly Creations
- Scrappin Krazy Designs
- Scrappin With Lil Ol Me
- Scraps and the City
- Scraps Dimensions
- Scraps From The Heart
- Scraps N Company
- Scraps with Attitude
- Shining Star Art
- Skyscraps
- Sleek N Sassy Designs
- Sophisticat Simone
- Souldesigner
- Soxsational Scraps
- Spazz
- Starlite and Soul
- Stella Felice
- Tammy Welt
- Tasha's Playground
- The PSP Project
- Thrifty Scraps by Gina
- Tiny Turtle Designs
- Upyourart
- Verymany
- Wendy Gerber
- Whisper In the Wind
- Wick3d Creationz
- Wicked Diabla
- Yude's Kreationz
Blog Archive
Wednesday, September 30, 2015
WHISPER OF HALLOWEEN
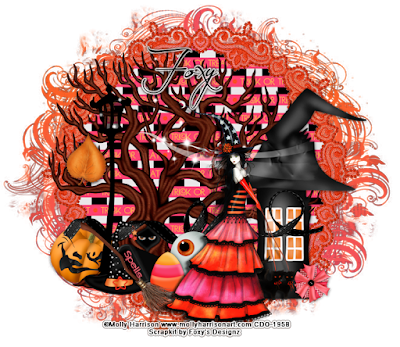
Supplies needed:
I am using the stunning artwork from Molly Harrison for this tutorial which you can find here
Scrapkit: I am using a stunning kit from Foxy's Designz which you can get by going here
Mask 15 from Splintz which you can find here
Plugins: Lokas 3D Shadow
----------------------------
This tutorial is written for those who have working knowledge of PSPX2 (any version will do).
This tutorial was written by me on September 29, 2015. Please do not copy or paste on any other forum, website or blog provide link back to tut only. Please do not claim as your own. This tutorial is copyrighted to me. Any resemblance to any other tutorial is purely coincidental.
Ok - let's start and remember to save often.
Open up a 750 x 650 blank canvas (we can resize it later)
Select Frame Element 2 - resize by 75%
Paste and position in the center of the canvas
Select your magic wand tool and select the center of the frame (Add (Shift), RGB Value, Tolerance 25, Contiguous checked, Feather 0)
Selections, Modify, Expand by 5
Paste paper 4
Select invert, delete, select none
Move paper layer below window frame layer
Select Element 14 - resize by 75%
Paste and position on the left side
Select Element 8 - resize by 65%
Paste and position in on the left side
Select Element 2 - resize by 80%
Paste and position on the right side
Select Element 20 - resize by 65%
Paste and position on the canvas where desired
Select Element 7 - resize by 55%
Paste and position on the bottom where desired
Paste tube of choice where desired
Apply Lokas 3D Shadow at default settings
Select Element 9 - resize by 45%
Paste and position on the bottom left
Select Element 15 - resize by 30%
Paste and position on the bottom left
Select Element 19 - resize by 30%
Paste and position on the bottom left
Select Element 11 - resize by 40%
Paste and position on the bottom
Select Element 6 - resize by 25%
Paste and position on the bottom
Select Element 5 - resize by 25%
Paste and position on the bottom
Select Element 3 - resize by 20%
Paste and position on the left side
Add new raster layer and flood-fill with gradient or color of choice
Apply Mask 15 or mask of choice
Merge group and move to the bottom layer
Add any dropshadows you like
Sharpen any elements as needed
Crop and resize as desired
Add copyright info, license number and name
You're done! Thanks for trying my tutorial!
Labels:Foxy's Designz | 0
comments
Monday, September 28, 2015
KILLER NUN
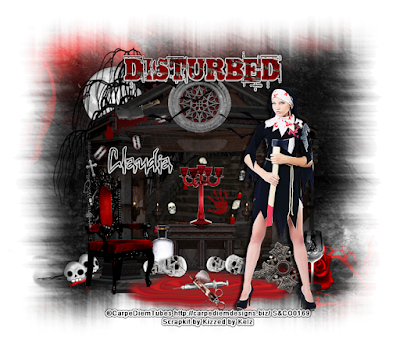
Supplies needed:
I am using the stunning artwork from Carpe Deim for this tutorial which you can find here
Scrapkit: I am using a stunning kit from Kizzed by Kelz called "Killer Nun" which you can get by going here
Mask 7 from Rieka Rafita which you can find here
Plugins: Lokas 3D Shadow, Eyecandy 4000 - Gradient Glow
----------------------------
This tutorial is written for those who have working knowledge of PSPX2 (any version will do).
This tutorial was written by me on September 28, 2015. Please do not copy or paste on any other forum, website or blog provide link back to tut only. Please do not claim as your own. This tutorial is copyrighted to me. Any resemblance to any other tutorial is purely coincidental.
Ok - let's start and remember to save often.
Open up a 750 x 650 blank canvas (we can resize it later)
Select Element 40 - resize by 95%
Paste and position in the center of the canvas
Select Element 89 - resize by 50%
Paste and position in the center below building element
Select Element 28 - resize by 20%
Paste and position on top left below building element
Select Element 126 - paste and position on the top left below element 40
Select Element 36 - resize by 20%
Paste and position on the top center
Select Element 102 - resize by 30%
Paste and position on the top left
Select Element 103 - resize by 15%
Paste and position on the top left
Select Element 24 - resize by 45%
Paste and position on the top where desired
Select Element 91 - resize by 55%
Paste and position on the bottom center
Select Element 25 - resize by 35%
Paste and position on the bottom center
Select Element 46 - resize by 20%
Paste and position in the center
Select Element 106 - resize by 12%
Paste and position in the center above stair element
Paste tube of choice where desired
Apply Lokas 3D Shadow at default settings
Select Element 112 - resize by 30%
Paste and position on the left side
Select Element 45 - resize by 40%
Paste and position on the bottom left
Select Element 1 - resize by 30%
Paste and position on the bottom left
Select Element 70 - resize by 15%
Paste and position on the bottom
Select Element 58 - resize by 30%
Paste and position on the bottom
Select Element 125 - resize by 20%
Paste and position on the bottom right
Select Element 37 - resize by 15%
Paste and paste on the bottom right
Select Element 121 - resize by 20%
Paste and position on the bottom right
Select Element 107 - resize by 50%
Paste and position on the top where desired
Apply Eyecandy Gradient Glow on fat default settings (Glow width 3)
Paste paper 1 on canvas
Apply Mask 7 or mask of choice
Merge group and move to the bottom layer
Add any dropshadows you like
Sharpen any elements as needed
Crop and resize as desired
Add copyright info, license number and name
You're done! Thanks for trying my tutorial!
Labels:Scraps N Company | 0
comments
Friday, September 25, 2015
WITCH DOCTOR
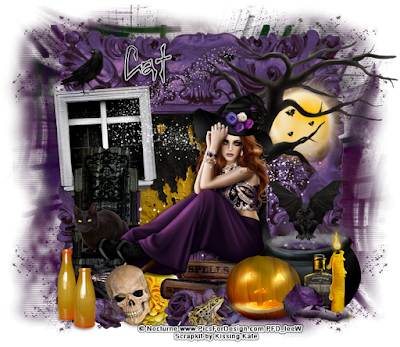
Supplies needed:
I am using the stunning artwork from Nocturne for this tutorial which you can find here
Scrapkit: I am using a stunning kit from Kissing Kate called "Witch Doctor" which you can get by going here
Hocus Pocus Mask from Kylie which you can find here
Plugins: Lokas 3D Shadow
----------------------------
This tutorial is written for those who have working knowledge of PSPX2 (any version will do).
This tutorial was written by me on September 25, 2015. Please do not copy or paste on any other forum, website or blog provide link back to tut only. Please do not claim as your own. This tutorial is copyrighted to me. Any resemblance to any other tutorial is purely coincidental.
Ok - let's start and remember to save often.
Open up a 750 x 650 blank canvas (we can resize it later)
Select Frame Element 2 - resize by 75%
Paste and position in the center of the canvas
Select your magic wand tool and select the center of the frame (Add (Shift), RGB Value, Tolerance 25, Contiguous checked, Feather 0)
Selections, Modify, Expand by 5
Paste paper 5
Select invert, delete, select none
Apply drop shadow and merge down on paper layer
Move paper layer below window frame layer
Select Element 18 - resize by 40%
Paste and position on the left side
Select Element 59 - resize by 65%
Paste and position in the center of the canvas where desired
Select Element 3 - resize by 15%
Paste and position on the top left
Select Element 48 - resize by 40%
Paste and position on the right side
Select Element 10 - resize by 65%
Paste and position on the right side
Select Element 20 - resize by 40%
Paste and position on the bottom right
Select Element 60 - resize by 35%
Paste and position on the bottom right
Select Element 5 - resize by 30%
Paste and position on the bottom right
Select Element 31 - resize by 25%
Paste and position on the bottom right
Select Element 11 - resize by 30%
Paste and position on the bottom right
Select Element 7 - resize by 25%
Paste and position on the bottom right
Select Element 22 - resize by 30%
Paste and position on the bottom
Paste tube of choice where desired
Apply Lokas 3D Shadow at default settings
Select Element 34 - resize by 30%
Paste and position on the bottom
Select Element 73 - resize by 15%
Paste and position on the bottom
Select Element 70 - resize by 55%
Paste and position on the bottom left
Select Element 29 - resize by 25%
Paste and position on the chair element
Select Element 2 - resize by 30%
Paste and position on the bottom left
Select Element 43 - resize by 20%
Paste and position on the bottom left
Select Element 76 - resize by 15%
Paste and paste on the bottom left
Select Element 19 - resize by 30%
Image Free Rotate Left by 15% and paste on bottom left
Select Element 21 - resize by 25%
Paste and position on the bottom
Add new raster layer and flood-fill with gradient or color of choice
Apply Hocus Pocus Mask or mask of choice
Merge group and move to the bottom layer
Add any dropshadows you like
Sharpen any elements as needed
Crop and resize as desired
Add copyright info, license number and name
You're done! Thanks for trying my tutorial!
Labels:Kissing Kate | 0
comments
Wednesday, September 23, 2015
BLUE LOVE
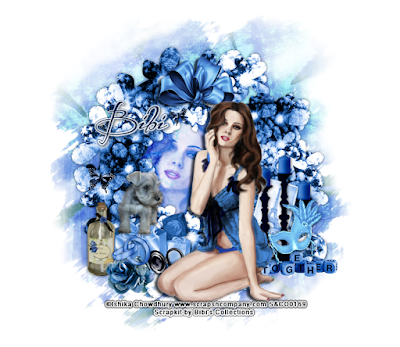
Supplies needed:
I am using the stunning artwork from Ishika Chowdhury for this tutorial which you can find here
Scrapkit: I am using a beautiful kit from Bibi's Collections called "Blues" which you can get by going here
Plugins: Lokas 3D Shadow
----------------------------
This tutorial is written for those who have working knowledge of PSPX2 (any version will do).
This tutorial was written by me on September 23, 2015. Please do not copy or paste on any other forum, website or blog provide link back to tut only. Please do not claim as your own. This tutorial is copyrighted to me. Any resemblance to any other tutorial is purely coincidental.
Ok - let's start and remember to save often.
Open up a 750 x 650 blank canvas (we can resize it later)
Select Element 9 - resize by 55%
Paste and position in the center of the canvas
Select Frame Element 90 - resize by 75%
Paste and position in the center of the canvas
Select your magic wand tool and select the center of the frame (Add (Shift), RGB Value, Tolerance 25, Contiguous checked, Feather 0)
Selections, Modify, Expand by 5
Paste paper 4
Select invert, delete
Paste close-up tube on top of paper where desired and delete
Select none
Change close-up tube to Overlay
Apply drop shadow and merge down on paper layer
Move paper layer below window frame layer
Select Element 6 - resize by 40%
Paste and position in on the top center of the frame
Select Element 74 - resize by 40%
Image mirror and paste on the top left
Select Element 53 - resize by 15%
Image Free Rotate Right by 15% and paste on the bottom right
Select Element 14 - resize by 40%
Paste and position on the bottom right
Select Element 17 - resize by 20%
Paste and position on the bottom right
Select Element 76 - resize by 30%
Paste and position on the bottom right
Select Element 7 - resize by 20%
Image Free Rotate Right by 15% and paste on the bottom right
Paste tube of choice where desired
Apply Lokas 3D Shadow at default settings
Select Element 24 - resize by 30%
Paste and position on the bottom left
Select Element 61 - resize by 25%
Paste and position on the bottom left
Select Element 12 - resize by 30%
Paste and position on the bottom left
Select Element 38 - resize by 20%
Paste and position on the bottom left
Select Element 20 - resize by 25%
Paste and position on the bottom left
Select Element 68 - resize by 15%
Paste and position on the bottom
Add any dropshadows you like
Sharpen any elements as needed
Crop and resize as desired
Add copyright info, license number and name
You're done! Thanks for trying my tutorial!
Labels:Bibi's Collections,Scraps N Company | 0
comments
Tuesday, September 22, 2015
SHADOWS OF NIGHT
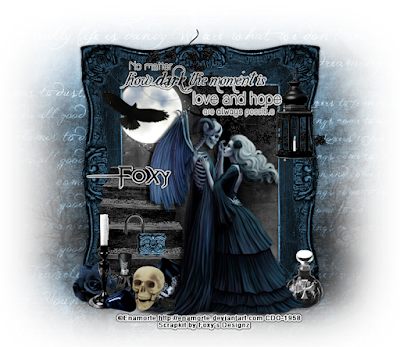
Supplies needed:
I am using the stunning artwork from Enamorte for this tutorial which you can find here
Scrapkit: I am using a beautiful kit from Foxy's Designz called "Shadows of the Night" which you can get by going here
Mask 11 from Horseplay's Pastures which you can find here
Plugins: Lokas 3D Shadow, Eyecandy 4000 - Gradient Glow
----------------------------
This tutorial is written for those who have working knowledge of PSPX2 (any version will do).
This tutorial was written by me on September 22, 2015. Please do not copy or paste on any other forum, website or blog provide link back to tut only. Please do not claim as your own. This tutorial is copyrighted to me. Any resemblance to any other tutorial is purely coincidental.
Ok - let's start and remember to save often.
Open up a 750 x 650 blank canvas (we can resize it later)
Select Frame Element 5 - resize by 65%
Paste and position in the center of the canvas
Select your magic wand tool and select the center of the frame (Add (Shift), RGB Value, Tolerance 25, Contiguous checked, Feather 0)
Selections, Modify, Expand by 5
Paste paper 9
Select invert, delete, select none
Apply drop shadow and merge down on paper layer
Move paper layer below window frame layer
Select Element 2 - resize by 40%
Paste and position on the top left below frame layer
Select Element 1 - resize by 30%
Image Free Rotate Right by 15% and paste on the top left
Select Element 38 - resize by 65%
Paste and position on the the top where desired
Select Element 33 - resize by 45%
Paste and position on the top where desired
Apply Eyecandy Gradient Glow on fat default settings
Select Element 3 - resize by 40%
Paste and position on the top right
Select Element 8 - resize by 65%
Paste and position on the bottom left
Paste tube of choice where desired
Apply Lokas 3D Shadow at default settings
Select Element 22 - resize by 45%
Paste and position on the bottom right
Select Element 13 - resize by 20%
Paste and position on the bottom left
Select Element 32 - resize by 45%
Paste and position on the bottom left
Select Element 11 - resize by 20%
Paste and position on the bottom left
Select Element 6 - resize by 40%
Paste and position on the bottom left
Select Element 21 - resize by 45%
Paste and position on the bottom left
Select Element 15 - resize by 20%
Image Free Rotate Left by 15% and paste on the bottom left
Select Element 28 - resize by 40%
Paste and position above the stair element
Paste paper 11 on canvas
Apply Mask 11 or mask of choice
Merge group and move to the bottom layer
Add any dropshadows you like
Sharpen any elements as needed
Crop and resize as desired
Add copyright info, license number and name
You're done! Thanks for trying my tutorial!
Labels:Foxy's Designz | 0
comments
Monday, September 14, 2015
GOTHIC LEO
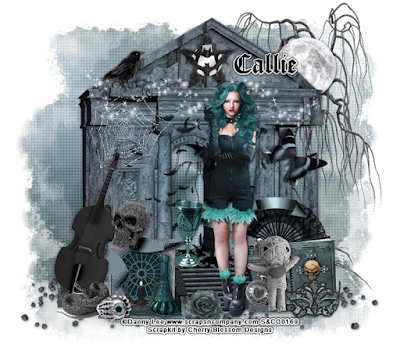
Supplies needed:
I am using the stunning artwork from Danny Lee for this tutorial which you can find here
Scrapkit: I am using a stunning kit from Cherry Blossom Designs called "Goth Leo" which you can get by going here
Mask 22 from Becky which you can find here
Plugins: Lokas 3D Shadow
----------------------------
This tutorial is written for those who have working knowledge of PSPX2 (any version will do).
This tutorial was written by me on September 14, 2015. Please do not copy or paste on any other forum, website or blog provide link back to tut only. Please do not claim as your own. This tutorial is copyrighted to me. Any resemblance to any other tutorial is purely coincidental.
Ok - let's start and remember to save often.
Open up a 750 x 650 blank canvas (we can resize it later)
Select Element 7 - resize by 90%
Paste and position in the center of the canvas
Select Element 1 - resize by 75%
Image mirror and paste on the top right below buidling element
Select Element 4 - resize by 30%
Paste and position on the top right
Select Element 27 - resize by 20%
Paste and position on the top center above the building element
Select Element 38 - resize by 20%
Paste and position on the top left
Select Element 12 - resize by 30%
Paste and position on the top left
Select Element 60 - resize by 65%
Paste and position on the left top where desired
Select Element 59 - resize by 50%
Paste and position on the building where desired
Paste tube of choice where desired
Apply Lokas 3D Shadow at default settings
Select Element 39 - resize by 30%
Paste and position on the right side
Select Element 46 - resize by 40%
Image Free Rotate Right by 15% and paste on the bottom right
Select Element 32 - resize by 30%
Paste and position on the bottom right
Select Element 47 - resize by 30%
Paste and position on the bottom right
Select Element 34 - resize by 30%
Paste and position on the bottom right
Select Element 41 - resize by 20%
Image Free Rotate Right by 15% and paste on the bottom right
Select Element 21 - resize by 40%
Image Free Rotate Right by 15% and paste on the bottom left
Select Element 40 - resize by 15%
Paste and position on the bottom left
Select Element 9 - resize by 20%
Paste and position on the bottom left
Select Element 42 - resize by 75%
Paste and position on the bottom left
Select Element 29 - resize by 25%
Paste and position on the bottom left
Select Element 23 - resize by 30%
Paste and position on the bottom left
Select Element 28 - resize by 25%
Paste and position on the bottom left
Select Element 18 - resize by 40%
Paste and position on the bottom
Select Element 43 - resize by 25%
Paste and position on the bottom
Add new raster layer and flood-fill with color or gradien of choice
Apply Mask 22 or mask of choice
Merge group and move to the bottom layer
Add any dropshadows you like
Sharpen any elements as needed
Crop and resize as desired
Add copyright info, license number and name
You're done! Thanks for trying my tutorial!
Labels:Cherry Blossom Designs | 0
comments
Saturday, September 12, 2015
HAUNTED LOVE
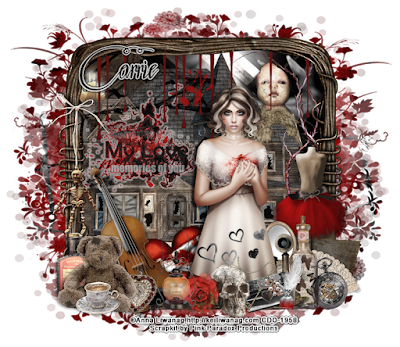
Supplies needed:
I am using the stunning artwork from Anna Liwanag for this tutorial which you can find here
Scrapkit: I am using a beautiful kit from Pink Paradox Productions called "Haunted Love" which you can get by going here
Grunge Mask 4 from Dee which you can find here
Plugins: Lokas 3D Shadow
----------------------------
This tutorial is written for those who have working knowledge of PSPX2 (any version will do).
This tutorial was written by me on September 12, 2015. Please do not copy or paste on any other forum, website or blog provide link back to tut only. Please do not claim as your own. This tutorial is copyrighted to me. Any resemblance to any other tutorial is purely coincidental.
Ok - let's start and remember to save often.
Open up a 750 x 650 blank canvas (we can resize it later)
Select Frame Element 16 - resize by 55%
Paste and position in the center of the canvas
Select your magic wand tool and select the center of the frame (Add (Shift), RGB Value, Tolerance 25, Contiguous checked, Feather 0)
Selections, Modify, Expand by 5
Paste paper 47
Select invert, delete, select none
Apply drop shadow and merge down on paper layer
Move paper layer below window frame layer
Select Element 113 - resize by 45%
Paste and position in the center of the canvas above the paper layer
Select Element 15 - resize by 20%
Paste and position on the top right
Select Element 160 - resize by 15%
Paste and position on the top right
Select Element 167 - resize by 40%
Paste and position on the right side
Select Element 188 - resize by 50%
Paste and position on the top below frame layer
Select Element 179 - resize by 15%
Paste and position on the left side above house element
Apply Eyecandy Gradient Glow on Medium default settings (Glow Width 3)
Select Element 73 - resize by 15%
Image Free Rotate Right by 15% and paste on the top left
Paste tube of choice where desired
Apply Lokas 3D Shadow at default settings
Select Element 17 - resize by 35%
Paste and position on the left side
Select Element 57 - resize by 25%
Paste and position on the bottom right
Select Element 25 - resize by 30%
Paste and position on the right side
Select Element 24 - resize by 25%
Image Free Rotate Right by 15% and paste on the bottom right
Select Element 47 - resize by 15%
Paste and position on the bottom right
Select Element 34 - resize by 25%
Paste and position on the bottom right
Select Element 27 - resize by 20%
Image mirror and paste on the bottom right
Select Element 52 - resize by 15%
Paste and position on the bottom right
Select Element 53 - resize by 25%
Paste and position on the bottom right
Select Element 33 - resize by 18%
Paste and position on the bottom left
Select Element 16 - resize by 20%
Paste and position on the bottom left
Select Element 30 - resize by 13%
Paste and position on the bottom left
Select Element 44 - resize by 35%
Image mirror and paste on the bottom left
Select Element 74 - resize by 15%
Paste and position on the bottom left
Select Element 77 - resize by 25%
Image Free Rotate Left by 15% and paste on the bottom
Select Element 48 - resize by 20%
Paste and position on the bottom
Select Element 137 - resize by 12%
Paste and position on the bottom
Select Element 13 - resize by 15%
Paste and position on the bottom
Select Element 189 - resize by 15%
Paste and position on the bottom above tube layer
Select Element 82 - resize by 15%
Image Free Rotate Left by 15% and paste on the bottom
Select Element 88 - resize by 15%
Paste and position on the bottom
Paste paper 33 on canvas
Apply Mask 4 or mask of choice
Merge group and move to the bottom layer
Add any dropshadows you like
Sharpen any elements as needed
Crop and resize as desired
Add copyright info, license number and name
You're done! Thanks for trying my tutorial!
Labels:Pink Paradox Productions | 0
comments
Friday, September 11, 2015
GOTHIC BALLERINA
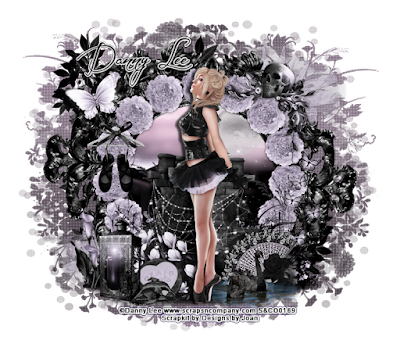
Supplies needed:
I am using the stunning artwork from Danny Lee for this tutorial which you can find here
Scrapkit: I am using a beautiful kit from Designs by Joan called "Gothic Ballerina" which you can get by going here
Grunge Mask 4 from Dee which you can find here
Plugins: Lokas 3D Shadow, Mura Meister - Copies
----------------------------
This tutorial is written for those who have working knowledge of PSPX2 (any version will do).
This tutorial was written by me on September 11, 2015. Please do not copy or paste on any other forum, website or blog provide link back to tut only. Please do not claim as your own. This tutorial is copyrighted to me. Any resemblance to any other tutorial is purely coincidental.
Ok - let's start and remember to save often.
Open up a 750 x 650 blank canvas (we can resize it later)
Select Frame Element 12 - resize by 75%
Paste and position in the center of the canvas
Select your magic wand tool and select the center of the frame (Add (Shift), RGB Value, Tolerance 25, Contiguous checked, Feather 0)
Selections, Modify, Expand by 5
Paste paper 3
Select invert, delete, select none
Move paper layer below window frame layer
Select Element 62 - resize by 15%
Paste and position in the center of the canvas
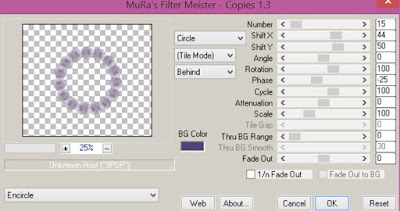
Apply Mura Meister Copies with the following Encircle settings:
Select Element 97 - resize by 30%
Image mirror and paste on the top right
Select Element 75 - resize by 50%
Paste and position on the bottom
Select Element 46 - resize by 40%
Paste and position on the bottom center
Select Element 29 - resize by 35%
Paste and position on the bottom above element 46
Paste tube of choice where desired
Apply Lokas 3D Shadow at default settings
Select Element 94 - resize by 30%
Paste and position on the top left
Select Element 2 - resize by 25%
Paste and position on the left side
Select Element 82 - resize by 50%
Paste and position on the bottom right
Select Element 13 - resize by 20%
Paste and position on the bottom right
Select Element 68 - resize by 20%
Paste and position on the bottom right
Select Element 99 - resize by 20%
Paste and position on the bottom left
Select Element 55 - resize by 30%
Paste and position on the bottom left
Select Element 83 - resize by 65%
Paste and position on the bottom left
Select Element 77 - resize by 20%
Paste and position on the bottom
Select Element 96 - resize by 20%
Paste and position on the bottom
Select Element 95 - resize by 20%
Paste and position on the bottom
Select Element 25 - Paste and position in the center of canvas
Move to the bottom layer
Select Element 22 - resize by 50%
Paste and position on the top right below frame layer
Image duplicate, mirror and flip
Add new raster layer and flood-fill with color or gradient of choice
Apply Mask 4 or mask of choice
Merge group and move to the bottom layer
Add any dropshadows you like
Sharpen any elements as needed
Crop and resize as desired
Add copyright info, license number and name
You're done! Thanks for trying my tutorial!
Labels:Scraps N Company | 0
comments
Tuesday, September 8, 2015
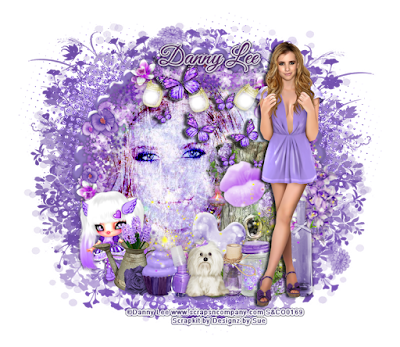
BAD GLAM
Supplies needed:
I am using the stunning artwork from Danny Lee for this tutorial which you can find here
Scrapkit: I am using a beautiful kit from Designz by Sue called "Glam" which you can get by going here
Grunge Mask 4 from Dee which you can find here
Plugins: Lokas 3D Shadow
----------------------------
This tutorial is written for those who have working knowledge of PSPX2 (any version will do).
This tutorial was written by me on September 8, 2015. Please do not copy or paste on any other forum, website or blog provide link back to tut only. Please do not claim as your own. This tutorial is copyrighted to me. Any resemblance to any other tutorial is purely coincidental.
Ok - let's start and remember to save often.
Open up a 750 x 650 blank canvas (we can resize it later)
Select Frame Element 1 - resize by 65%
Paste and position in the center of the canvas
Select your magic wand tool and select the center of the frame (Add (Shift), RGB Value, Tolerance 25, Contiguous checked, Feather 0)
Selections, Modify, Expand by 5
Paste paper 11
Select invert, delete
Paste close-up tube on top of paper where desired and delete
Select none
Change close-up tube to Burn
Apply drop shadow and merge down on paper layer
Move paper layer below window frame layer
Select Element 55 - resize by 75%
Paste and position in the center of the canvas
Select Element 33 - resize by 40%
Paste and position on the top where desired
Select Element 61 - resize by 40%
Paste and position on the top where desired
Select Element 60 - resize by 50%
Paste and position on the bottom right
Paste tube of choice where desired
Apply Lokas 3D Shadow at default settings
Select Element 39 - resize by 40%
Image Free Rotate Right by 15% and paste on the bottom right
Select Element 48 - resize by 30%
Paste and position on the bottom right
Select Element 58 - resize by 25%
Paste and position on the bottom left
Select Element 15 - resize by 40%
Paste and position on the bottom left
Select Element 7 - resize by 15%
Paste and position on the bottom left
Select Element 56 - resize by 40%
Paste and position on the bottom where desired
Select Element 37 - resize by 25%
Paste and position on the bottom
Select Element 46 - resize by 35%
Paste and position on the bottom
Select Element 57 - resize by 40%
Image Free Rotate Right by 15% and paste on the bottom above tree element
Select Element 47 - resize by 25%
Paste and position on the bottom
Select Element 35 - resize by 45%
Paste and position on the bottom
Select Element 52 - resize by 30%
Paste and position on the bottom
Select Element 4 - resize by 30%
Image Free Rotate Left by 15% and paste on the bottom above tree element
Select Element 31 - resize by 95%
Paste and position on the canvas and move to the bottom layer
Adjust, Add/Remove Noise, Add Noise (Uniform checked, Noise 75%, Monochrome checked)
Paste paper 7 on canvas
Apply Mask 4 or mask of choice
Merge group and move to the bottom layer
Add any dropshadows you like
Sharpen any elements as needed
Crop and resize as desired
Add copyright info, license number and name
You're done! Thanks for trying my tutorial!
Labels:Scraps N Company | 0
comments
Sunday, September 6, 2015
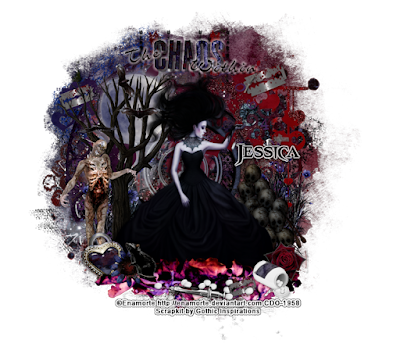
CHAOS WITHIN
Supplies needed:
I am using the stunning artwork from Enamorte for this tutorial which you can find here
Scrapkit: I am using a wicked kit from Gothic Inspirations called "The Chaos Within" which you can get by going here
Plugins: Lokas 3D Shadow
----------------------------
This tutorial is written for those who have working knowledge of PSPX2 (any version will do).
This tutorial was written by me on September 6, 2015. Please do not copy or paste on any other forum, website or blog provide link back to tut only. Please do not claim as your own. This tutorial is copyrighted to me. Any resemblance to any other tutorial is purely coincidental.
Ok - let's start and remember to save often.
Open up a 750 x 650 blank canvas (we can resize it later)
Select Mask Element - resize by 75%
Paste and position in the center of the canvas
Select Smudge Element (Sampler portion of kit) - resize by 75%
Paste and position in the center of the canvas above mask element
Select Broken Glass Element - resize by 40%
Paste and position in the center of the canvas
Select Frame 3 Element - resize by 55%
Paste and position in the center of the canvas
Select Clock Element - resize by 40%
Paste and position in the center of the frame circle layer
Select Heart Deco 1 Element - resize by 55%
Paste and position on the top where desired
Select Moon Element - resize by 25%
Paste and position on the top left
Select Tree Element - resize by 50%
Paste and position on the left side
Select Skulls Element - resize by 40%
Paste and position on the bottom right
Paste tube of choice where desired
Apply Lokas 3D Shadow at default settings
Select Leaves 3 Element - resize by 50%
Paste and position on the bottom
Select Rose Element - resize by 15%
Paste and position on the bottom right
Select Pills Element - resize by 15%
Paste and position on the bottom right
Select Scatter Drugs Element - resize by 25%
Paste and position on the bottom
Select Zombie Element - resize by 35%
Paste and position on the left side
Select Charm Element - resize by 20%
Image Free Rotate Left by 15% and paste on the bottom left
Select Flower 1 Element - resize by 15%
Paste and position on the bottom left
Select Mouse Element - resize by 15%
Paste and position on the bottom left
Select Bats Element - resize by 30%
Paste and position on the top left
Select WA2 Element (Sampler portion) - resize by 40%
Paste and position on the top where desired
Add any dropshadows you like
Sharpen any elements as needed
Crop and resize as desired
Add copyright info, license number and name
You're done! Thanks for trying my tutorial!
Labels:Gothic Inspirations | 1 comments
Friday, September 4, 2015
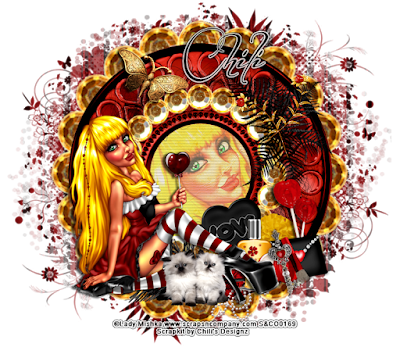
LOLLIPOP GIRL
Supplies needed:
I am using the stunning artwork from Lady Mishka for this tutorial which you can find here
Scrapkit: I am using a stunning kit from Chili's Designz called "Lollipop" which you can get by going here
Grunge Mask 2 from Dee which you can find here
Plugins: Lokas 3D Shadow, Mura Meister - Copies
----------------------------
This tutorial is written for those who have working knowledge of PSPX2 (any version will do).
This tutorial was written by me on September 4, 2015. Please do not copy or paste on any other forum, website or blog provide link back to tut only. Please do not claim as your own. This tutorial is copyrighted to me. Any resemblance to any other tutorial is purely coincidental.
Ok - let's start and remember to save often.
Open up a 750 x 650 blank canvas (we can resize it later)
Select Frame Element 3 - resize by 65%
Paste and position in the center of the canvas
Select your magic wand tool and select the center of the frame (Add (Shift), RGB Value, Tolerance 25, Contiguous checked, Feather 0)
Selections, Modify, Expand by 5
Paste paper 2
Select invert, delete
Paste close-up tube on top of paper where desired and delete
Select none
Change close-up tube to Hard Light and drop opacity down to 50%
Apply drop shadow and merge down on paper layer
Move paper layer below window frame layer
Select Frame Element - resize by 45%
Paste and position in the center of the canvas
Select Gem Element - resize by 85%
Paste and position in the center of the canvas
Apply Mura Meister - Copies with the following settings:
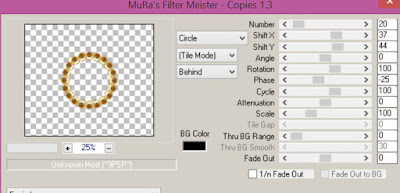
Duplicate the layer and resize to 175%
Move the duplicated circle layer below the frame
Select Greenery 3 Element - resize by 365%
Image Free Rotate Left by 15% and paste on the top right
Select Deco Element - resize by 20%
Paste and position on the top right
Paste tube of choice where desired
Apply Lokas 3D Shadow at default settings
Select Lollipop Element - resize by 40%
Paste and position on the bottom right
Select Flower 6 Element - resize by 25%
Paste and position on the bottom right
Select Bag Element - resize by 30%
Paste and position on the bottom right
Select Powder Element - resize by 40%
Paste and position on the bottom right
Select Perfume Element - resize by 40%
Paste and position on the bottom right
Select Key Element - resize by 25%
Image Free Rotate Left by 15% and paste on the bottom
Select Heart 4 Element - resize by 45%
Paste and position on the bottom where desired
Select Kittens Element - resize by 30%
Paste and position on the bottom
Select Butterfly 3 Element - resize by 40%
Paste and position on the top left
Paste paper 5 on canvas
Apply Mask 2 or mask of choice
Merge group and move to the bottom layer
Add any dropshadows you like
Sharpen any elements as needed
Crop and resize as desired
Add copyright info, license number and name
You're done! Thanks for trying my tutorial!
Labels:Chili Designz,Scraps N Company | 0
comments
Wednesday, September 2, 2015
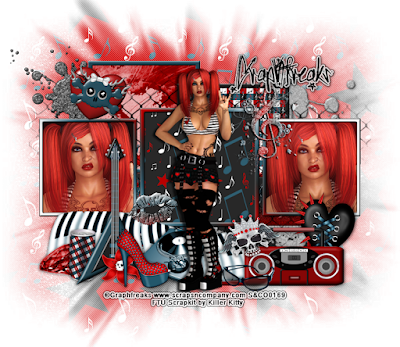
FEEL THE ROCK
Supplies needed:
I am using the stunning artwork from Graphfreaks for this tutorial which you can find here
Scrapkit: I am using a FTU kit from Killer Kitty called "Feel the Rock" which you can get by going here
Grunge Mask 2 from Tonya which you can find here
Plugins: Lokas 3D Shadow
----------------------------
This tutorial is written for those who have working knowledge of PSPX2 (any version will do).
This tutorial was written by me on September 2, 2015. Please do not copy or paste on any other forum, website or blog provide link back to tut only. Please do not claim as your own. This tutorial is copyrighted to me. Any resemblance to any other tutorial is purely coincidental.
Ok - let's start and remember to save often.
Open up a 750 x 650 blank canvas (we can resize it later)
Select Frame Element 5 - resize by 75%
Paste and position in the center of the canvas
Select your magic wand tool and select the top left square of the frame (Add (Shift), RGB Value, Tolerance 25, Contiguous checked, Feather 0)
Selections, Modify, Expand by 5
Paste paper 9 on the top left square
Select invert, delete, select none
Move paper layer below window frame layer
Select your magic wand tool and select the bottom right square of the frame (Add (Shift), RGB Value, Tolerance 25, Contiguous checked, Feather 0)
Selections, Modify, Expand by 5
Paste paper 10 on the bottom right square
Move paper layer below window frame layer
Select Frame Element 6 - resize by
Paste and position in the center of the canvas
Select your magic wand tool and select the top right and bottom left square of the frame (Add (Shift), RGB Value, Tolerance 25, Contiguous checked, Feather 0)
Selections, Modify, Expand by 5
Paste paper 4
Select invert, delete, select none
Move paper layer below window frame layer
Select your magic wand tool and select the center of each square in the frame (Add (Shift), RGB Value, Tolerance 25, Contiguous checked, Feather 0)
Selections, Modify, Expand by 5
Add new raster layer and flood-fill with color or gradient of choice (I used paper 6 for the center square)
Select invert, delete
Paste close-up tubes on top of paper where desired and delete
Select none
Change close-up tubes to Screen
Apply drop shadow and merge down on color layer
Move paper/tubes below frame
Select Glitter Splat 2 Element - resize by 40%
Paste and position on the top left
Select Girly Skull Element - resize by 25%
Image Free Rotate Right by 15% and paste on top left
Select Glitter Splat 4 Element - resize by 35%
Paste and position on the top right
Select Staff Doodle Element - resize by 40%
Paste and position on the top right
Select Keyboard Element - resize by 45%
Paste and position on the bottom left
Paste tube of choice where desired
Apply Lokas 3D Shadow at default settings
Select Spiked Heart Element - resize by 30%
Paste and position on the bottom right
Select Boom Box 1 Element - resize by 40%
Paste and position on the bottom right
Select Skull Charm Element - resize by 30%
Image Free Rotate Left by 15% and paste on bottom right
Select SunGlasses 2 Element - resize by 20%
Paste and position on the bottom where desired
Select Gem 01 Element - resize by 25%
Paste and position on the bottom left
Select Can Element - resize by 25%
Paste and position on the bottom left
Select Guitar Element - resize by 40%
Paste and position on the bottom left
Select SkullLily 1 Element - resize by 15%
Paste and position on the bottom left
Select SpikedHeal Element - resize by 25%
Paste and position on the bottom left
Select TurnTable Element - resize by 35%
Paste and position on the bottom
Select Lip Element - resize by 22%
Paste and position on the bottom
Paste paper 5 on canvas
Apply Grunge Mask 2 or mask of choice
Merge group and move to the bottom layer
Add any dropshadows you like
Sharpen any elements as needed
Crop and resize as desired
Add copyright info, license number and name
You're done! Thanks for trying my tutorial!
Labels:FTU,Graphfreaks | 0
comments
Subscribe to:
Posts
(Atom)

