Labels
- Alikas Scraps
- All Dolled Up Store
- Amy Marie
- Annaica
- Arthur Crowe
- Babycakes Scraps
- Barbara Jensen
- Bibi's Collections
- Black Widow Creationz
- Blu Moon
- Bonnies Creations
- Bookwork Dezines
- Broken Sky Dezine
- Carita Creationz
- Carpe Diem Designs
- CDO
- Celinart Pinup
- Celine
- Chacha Creationz
- Charmed Designs
- Cherry Blossom Designs
- Chili Designz
- Cluster Frame
- Creative Misfits
- Creative Scraps by Crys
- Curious Creative Dreams
- Danny Lee
- Derzi
- Designs by Ali
- Designs by Joan
- Designs By Norella
- Designs by Vi
- Diana Gali
- Diry Art Designs
- Disturbed Scraps
- Dreaming With Bella
- Eclipse Creations
- Elegancefly
- Extras
- Fabulous Designz
- Forum Set
- Foxy's Designz
- Freek's Creation
- FTU
- FwTags
- Gothic Inspirations
- Gothic Raven Designs
- Graphfreaks
- Hania's Designs
- Happy Pumpkin Studios
- Horseplay's Pasture Designs
- indie-Zine
- Irish Princess Designs
- Ishika Chowdhury
- Kaci McVay
- Kajenna
- katharine
- Katherine
- Khloe Zoey
- Killer Kitty
- Kissing Kate
- KiwiFirestorm
- Kizzed by Kelz
- KZ Designz
- Lady Mishka
- Lil Mz Brainstorm
- Maiden of Darkness
- Mariel Designs
- MellieBeans
- Misticheskya
- MistyLynn's Creations
- MMeliCrea Designz
- Moon Vixen Designs
- NaSionainne
- Ninaste
- Niqui Designs
- Pandora
- Picsfordesign
- Pink Paradox Productions
- Radyga Designs
- Redefined Designs
- Rissa's Designs
- Schnegge
- ScottishButterfly Creations
- Scrappin Krazy Designs
- Scrappin With Lil Ol Me
- Scraps and the City
- Scraps Dimensions
- Scraps From The Heart
- Scraps N Company
- Scraps with Attitude
- Shining Star Art
- Skyscraps
- Sleek N Sassy Designs
- Sophisticat Simone
- Souldesigner
- Soxsational Scraps
- Spazz
- Starlite and Soul
- Tammy Welt
- Tasha's Playground
- The PSP Project
- Thrifty Scraps by Gina
- Tiny Turtle Designs
- Upyourart
- Verymany
- Wendy Gerber
- Whisper In the Wind
- Wick3d Creationz
- Wicked Diabla
- Yude's Kreationz
Blog Archive
Wednesday, October 30, 2013
GOTHIC SAMI
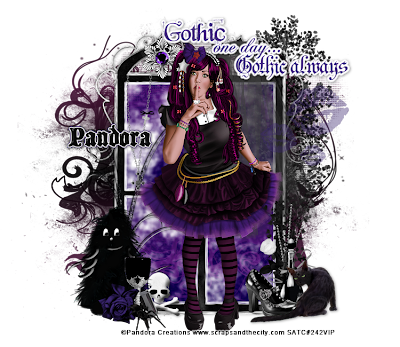
Supplies needed:
I am using the amazing art from Pandora Creations for for this tutorial, which you can find here
Scrapkit: I am using a stunning matching kit from Black Widow Creationz called "Gothic Lolita Sami" which you can get by going here
Mask 32 from Moonbeams and Spiderwebs which you can find here
Plugins used: Xero-Radiance, Eyecandy 4000 - Gradient Glow, Lokas 3D Shadow
----------------------------
This tutorial is written for those who have working knowledge of PSPX2 (any version will do).
This tutorial was written by me on October 30, 2013. Please do not copy or paste on any other forum, website or blog provide link back to tut only. Please do not claim as your own. This tutorial is copyrighted to me. Any resemblance to any other tutorial is purely coincidental.
Ok - let's start and remember to save often.
Open up a 750 x 650 blank canvas (we can resize it later)
Select Element 8 and paste in the center of the canvas
Resize by 60%
Select your magic wand tool and click in the center of the bottom window frames of the Element (Add (Shift), RGB Value, Tolerance 25, Contiguous checked, Feather 0)
Selections, Modify, Expand by 4
Paste paper 7
Select invert, delete, select none
Change layer to Screen and move layer below window element
Paste tube of choice where desired
Apply Xero Radiance at setting of choice
Apply Lokas 3D Shadow at default settings
Select Element 3 and paste on right side below window element
Select Element 21 - resize by 50%
Paste and position on bottom left side
Select Element 43 - resize by 35%
Paste and position on bottom left
Select Element 9 - resize by 20%
Paste and position on bottom left
Select Element 39 - resize by 30%
Paste and position on bottom left
Select Element 30 - resize by 50%
Paste and position on bottom right
Select Element 1 - resize by 35%
Paste and position on bottom right
Select Element 17 - resize by 50%
Paste and position on bottom right
Select Element 20 - resize by 25%
Paste and position on bottom right
Select Element 40 - resize by 50%
Paste and position on top right
Apply Eyecandy Gradient Glow on fat default settings (Glow Width 3)
Add new raster layer and flood-fill with color or gradient of choice
Move to bottom layer
Apply Mask 32 and merge group
Add any additional elements you like.
Add any dropshadows you like
Sharpen any elements as needed
Crop and resize as desired
Add copyright info, license number and name
You're done! Thanks for trying my tutorial!
Monday, October 28, 2013
REBECCA
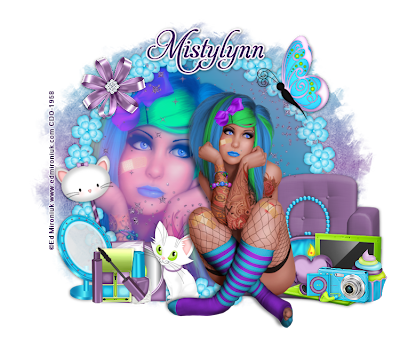
Supplies needed:
I am using the amazing art from Ed Mironiuk for for this tutorial, which you can find here
Scrapkit: I am using a portion of a Collab kit from Mistylynn's Creations called "Rebecca". This kit is in honor of Rebecca Ann Sedwick who was a victim of bullying. You can find the Collab here
Circle Mask 3 from Sue which you can find on the Misfits Blog here
Plugins used: Xero-Radiance, Xero-Bad Dream, Lokas 3D Shadow
----------------------------
This tutorial is written for those who have working knowledge of PSPX2 (any version will do).
This tutorial was written by me on October 28, 2013. Please do not copy or paste on any other forum, website or blog provide link back to tut only. Please do not claim as your own. This tutorial is copyrighted to me. Any resemblance to any other tutorial is purely coincidental.
Ok - let's start and remember to save often.
Open up a 750 x 650 blank canvas (we can resize it later)
Select Frame Element 36 and paste in the center of the canvas
Resize by 85%
Select your magic wand tool and click in each of the center of the Frame (Add (Shift), RGB Value, Tolerance 25, Contiguous checked, Feather 0)
Selections, Modify, Expand by 5
Add new raster layer and flood-fill with gradient of choice
Paste a close-up tube of choice on the top of paper where desired
Select invert, delete, select none
Change close-up to Overlay
Apply Bad Dream on default settings of choice
Apply dropshadow and merge tube down on top of gradient layer
Effect, Texture Effects, Blinds (Width 2, Opactity 10, Horizontal and Light from left/top checked)
Move gradient/tube layer below frame
Paste tube of choice where desired
Apply Xero Radiance at setting of choice
Apply Lokas 3D Shadow at default settings
Select Element 12 - resize by 65%
Image mirror and paste on bottom right
Select Element 8 - resize by 50%
Paste and position on bottom right
Select Element 33 - resize by 25%
Paste and position on bottom right
Select Element 6 - resize by 25%
Paste and position on bottom right
Select Element 4 - resize by 20%
Paste and position on bottom right
Select Element 26 - resize by 25%
Paste and position on bottom right
Select Element 18 - resize by 40%
Paste and position on bottom right
Select Element 16 - resize by 40%
Paste and position on bottom left
Select Element 3 - resize by 25%
Paste and position on bottom left
Select Element 17 - resize by 25%
Paste and position on bottom left
Select Element 13 - resize by 35%
Paste and position on bottom left
Select Element 14 - resize by 25%
Paste and position on bottom left
Select Element 1 - resize by 40%
Paste and position on bottom left
Select Element 19 - resize by 45%
Image Free Rotate Left by 15% and paste on left side
Select Element 30 - resize by 30%
Paste and position on top left
Select Element 2 - resize by 40%
Paste and position on top right
Add new raster layer and flood-fill with color or gradient of choice
Move to bottom layer
Apply Mask 3 and merge group
Add any additional elements you like.
Add any dropshadows you like
Sharpen any elements as needed
Crop and resize as desired
Add copyright info, license number and name
You're done! Thanks for trying my tutorial!
Labels:MistyLynn's Creations | 0
comments
AUTUMN CHARM
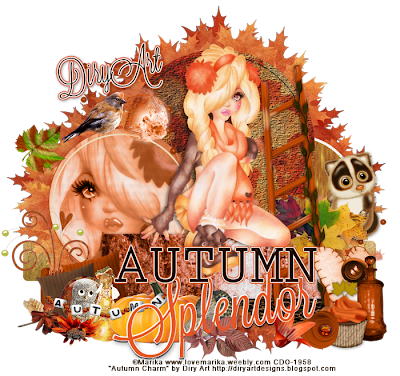
Supplies needed:
I am using the amazing artwork from Marika for this tutorial which you can find here
Scrapkit: I am using a beautiful kit from Diry Art Designs called "Autumn Charm" which you can get by going here
Autumn Splendor Template by Dee which can be found here
Plugins used: Eyecandy 4000 - Glass, Eyecandy 4000 - Gradient Glow, Xero-Radiance, Xero - Bad Dream, Lokas 3D Shadow
----------------------------
This tutorial is written for those who have working knowledge of PSPX2 (any version will do).
This tutorial was written by me on October 28, 2013. Please do not copy or paste on any other forum, website or blog provide link back to tut only. Please do not claim as your own. This tutorial is copyrighted to me. Any resemblance to any other tutorial is purely coincidental.
Ok - let's start and remember to save often.
Open the template and using your shortcut keys on your keyboard (SHIFT+D) duplicate the template as a new image. Close the original and delete the copywrite layer.
Select Autumn Wordart layer
Select all, float, defloat
Add new raster layer and flood-fill with color of choice
Select none
Apply Eyecandy Glass on default settings
Apply Eyecandy Gradient Glow on fat default setting (Glow Width 3)
Delete/Hide original wordart layer
Select Splendor Blue Wordart layer
Select all, float, defloat
Add new raster layer and flood-fill with color of choice
Select none
Delete/Hide original wordart
Select Green Strip layer
Select all, float, defloat
Paste paper 6
Select invert, delete, select none
Delete/Hide original strip layer
Select Rust Circle layer
Select all, float, defloat
Add new raster layer and flood-fill with gradient or color of choice (Linear style, Angle 45, Repeat 2)
Paste close-up tube of choice on top of gradient and delete
Select none
Change closeups to Luminance (Legacy)
Apply Xero Bad Dream at setting of choice
Apply dropshadow and merge tube down on top of gradient layer
Effect, Texture Effects, Blinds (Width 2, Opactity 10, Horizontal and Light from left/top checked)
Delete/Hide original circle layer
Select Blue Circle layer
Select all, float, defloat
Paste paper 7
Select invert, delete, select none
Delete/hide original circle layer
Select Brown Circle layer
Select all, float, defloat
Paste paper 19
Select invert, delete, select none
Delete/Hide original circle layer
Select Creme Circle layer
Select all, float, defloat
Add new raster layer and flood-fill with color of choice
Select none
Delete/Hide original circle layer
Select Recolor Leaves layer
Select all, float, defloat
Paste paper 10
Select invert, delete, select none
Delete/Hide original leaves layer
Select Rust Strip layer
Select all, float, defloat
Paste paper 8
Select invert, delete, select none
Delete/Hide original strip layer
Select Blue Strip layer
Select all, float, defloat
Paste paper 2
Select invert, delete, select none
Copy and paste tube of choice and position where desired
Apply Xero Radiance at setting of choice
Apply Lokas 3D Shadow at default settings
Select Element 56 - resize by 70%
Paste and position on right side below tube layer
Select Element 1 - resize by 20%
Paste and position on right side
Select Element 51 - resize by 25%
Paste and position on bottom right
Select Element 111 - resize by 20%
Paste and position on bottom right
Select Element 101 - resize by 15%
Paste and position on bottom right
Select Element 19 - resize by 15%
Paste and position on bottom right
Select Element 25 - resize by 15%
Paste and positon on bottom right
Select Element 28 - resize by 25%
Paste and position on bottom
Select Element 85 - resize by 30%
Paste and position on bottom left below wordart layers
Select Element 14 - resize by 25%
Paste and position on bottom left
Select Element 17 - resize by 40%
Paste and position on bottom left
Select Element 107 - resize by 40%
Image Free Rotate Left by 15% and paste on bottom left
Select Element 24 - resize by 15%
Paste and position on bottom left
Select Element 89 - resize by 30%
Paste and position on bottom left
Select Element 108 - resize by 25%
Paste and position on bottom left
Add any additional elements you like.
Add any dropshadows you like
Crop and resize as desired
Add copyright info, license number and name
You're done! Thanks for trying my tutorial!
Labels:Diry Art Designs | 0
comments
Friday, October 25, 2013
THANKSGIVING NIGHT
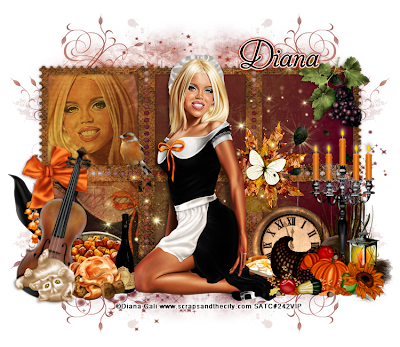
Supplies needed:
I am using the amazing art from Diana Gali for for this tutorial, which you can find here
Scrapkit: I am using a beautiful matching kit from Bibi's Collections called "Thanksgiving Night" which you can get by going here
Mask 22 from Moonbeams and Spiderwebs which you can find here
Plugins used: Xero-Radiance, Xero-Bad Dream, Lokas 3D Shadow
----------------------------
This tutorial is written for those who have working knowledge of PSPX2 (any version will do).
This tutorial was written by me on October 25, 2013. Please do not copy or paste on any other forum, website or blog provide link back to tut only. Please do not claim as your own. This tutorial is copyrighted to me. Any resemblance to any other tutorial is purely coincidental.
Ok - let's start and remember to save often.
Open up a 750 x 650 blank canvas (we can resize it later)
Select Frame Element 6 and paste in the center of the canvas
Resize by 80%
Select your magic wand tool and click in each of the center square of the Frame (Add (Shift), RGB Value, Tolerance 25, Contiguous checked, Feather 0)
Selections, Modify, Expand by 3
Paste paper 11
Select invert, delete
Paste a close-up tube of choice on the top of paper where desired and delete, select none
Change close-up to Overlay
Drop opacity on tube down to 70%
Apply Bad Dream on default settings of choice
Apply dropshadow and merge tube down on top of paper layer
Move paper/tube layer below frame
Paste tube of choice where desired
Apply Xero Radiance at setting of choice
Apply Lokas 3D Shadow at default settings
Select Element 1 - resize by 30%
Paste and position on top right
Select Element 9 - resize by 25%
Paste and position on right side
Select Element 39 - resize by 40%
Paste and position on bottom right
Select Element 19 - resize by 35%
Paste and position on bottom right
Select Element 69 - resize by 40%
Paste and position on bottom right
Select Element 33 - resize by 30%
Paste and position on bottom right
Select Element 90 - resize by 30%
Paste and position on bottom right
Select Element 15 - resize by 30%
Paste and position on bottom right
Select Element 28 - resize by 15%
Paste and position on bottom right
Select Element 26 - resize by 35%
Paste and position on left side
Select Element 17 - resize by 40%
Image Free Rotate Right by 15% and paste on bottom left
Select Element 18 - resize by 20%
Paste and position on bottom left
Select Element 14 - resize by 40%
Paste and position on bottom left
Select Element 13 - resize by 40%
Paste and position on bottom left
Select Element 8 - resize by 45%
Paste and position on bottom left
Select Element 11 - resize by 30%
Paste and position on left side
Add new raster layer and flood-fill with color or gradient of choice
Move to bottom layer
Apply Mask 22 and merge group
Add any additional elements you like.
Add any dropshadows you like
Sharpen any elements as needed
Crop and resize as desired
Add copyright info, license number and name
You're done! Thanks for trying my tutorial!
WICKED GIRL
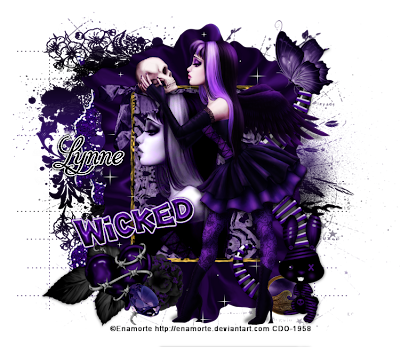
Supplies needed:
I am using the amazing art from Enamorte for for this tutorial, which you can find here
Scrapkit: I am using an awesome matching kit from Babycake Scraps "IB-Enamorte-10-1" which you can get by going here
Mask 33 from Moonbeams and Spiderwebs which you can find here
Plugins used: Eyecandy 4000 - Gradient Glow, Xero-Radiance, Xero-Bad Dream, Lokas 3D Shadow
----------------------------
This tutorial is written for those who have working knowledge of PSPX2 (any version will do).
This tutorial was written by me on October 25, 2013. Please do not copy or paste on any other forum, website or blog provide link back to tut only. Please do not claim as your own. This tutorial is copyrighted to me. Any resemblance to any other tutorial is purely coincidental.
Ok - let's start and remember to save often.
Open up a 750 x 650 blank canvas (we can resize it later)
Select Frame Element 38 and paste in the center of the canvas
Resize by 85%
Select your magic wand tool and click in the center of the Frame (Add (Shift), RGB Value, Tolerance 25, Contiguous checked, Feather 0)
Selections, Modify, Expand by 5
Paste paper 5
Select invert, delete
Paste a close-up tube of choice on the top of paper where desired and delete, select none
Change close-up to Luminance (Legacy)
Apply Bad Dream on default settings of choice
Apply dropshadow and merge tube down on top of paper layer
Move paper/tube layer below frame
Select Element 8 - resize by 80%
Paste and position on right side of frame
Paste tube of choice where desired
Apply Xero Radiance at setting of choice
Apply Lokas 3D Shadow at default settings
Select Element 28 - resize by 40%
Paste and position on top right
Select Element 1 - resize by 50%
Paste and position on bottom right
Select Element 15 - resize by 65%
Paste and position on bottom right
Select Element 31 - resize by 35%
Paste and position on bottom left
Select Element 20 - resize by 55%
Image Free Rotate Left by 15% and paste on bottom left
Select Element 37 - resize by 30%
Paste and position on bottom left
Select Element 16 - resize by 50%
Image mirror and paste on bottom left
Select Wordart Element 13 - resize by 50%
Image Free Rotate Left by 15% and paste on left side where desired
Apply Eyecandy Gradient Glow on fat default settings (Glow Width 3)
Select Element 19 - resize by 55%
Paste and position on left side and move to the bottom layer
Add new raster layer and flood-fill with color or gradient of choice
Move to bottom layer
Apply Mask 33 and merge group
Add any additional elements you like.
Add any dropshadows you like
Sharpen any elements as needed
Crop and resize as desired
Add copyright info, license number and name
You're done! Thanks for trying my tutorial!
Labels:Babycakes Scraps | 0
comments
SEXY PINUP
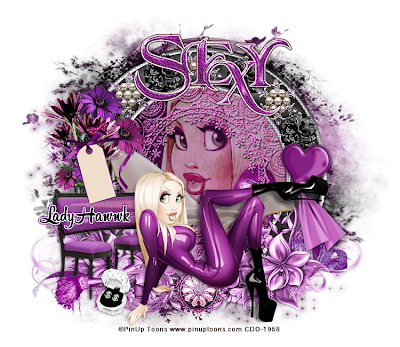
Supplies needed:
I am using the amazing art from Pinup Toons for for this tutorial, which you can find here
Scrapkit: I am using an awesome matching kit from LadyHawwk Designs "PinUpToons-177-3" which you can get by going here
Mask 20 from Moonbeams and Spiderwebs which you can find here
Plugins used: Eyecandy 4000 - Gradient Glow, Xero-Radiance, Xero-Bad Dream, Lokas 3D Shadow
----------------------------
This tutorial is written for those who have working knowledge of PSPX2 (any version will do).
This tutorial was written by me on October 25, 2013. Please do not copy or paste on any other forum, website or blog provide link back to tut only. Please do not claim as your own. This tutorial is copyrighted to me. Any resemblance to any other tutorial is purely coincidental.
Ok - let's start and remember to save often.
Open up a 750 x 650 blank canvas (we can resize it later)
Select Frame 3 Element and paste in the center of the canvas
Resize by 85%
Select your magic wand tool and click in the center of the Frame (Add (Shift), RGB Value, Tolerance 25, Contiguous checked, Feather 0)
Selections, Modify, Expand by 5
Paste paper 6
Select invert, delete
Paste a close-up tube of choice on the top of paper where desired and delete, select none
Change close-up to Hard Light
Apply Bad Dream on default settings of choice
Drop opacity on close-up down to 60%
Apply dropshadow and merge tube down on top of paper layer
Move paper/tube layer below frame
Select Element 4 - resize by 90%
Paste and position on top of paper/tube layer below the frame
Select Element 17 - resize by 85%
Paste and position on bottom above frame
Paste tube of choice where desired
Apply Xero Radiance at setting of choice
Apply Lokas 3D Shadow at default settings
Select Element 13 - resize by 55%
Paste and position on left side above frame layer
Select Element 11 - resize by 50%
Paste and position on left side
Select Element 1 - resize by 45%
Paste and position on bottom left
Select Element 3 - resize by 40%
Paste and position on bottom left
Select Element 7 - resize by 30%
Paste and position on bottom left
Select Element 5 - resize by 45%
Paste and position on right side
Select Element 12 - resize by 25%
Paste and position on bottom
Select Element 10 - resize by 25%
Paste and position on top of frame where desired
Image duplicate and reposition copy where desired - repeat for a total of three
Select Element 20 - resize by 20%
Paste and position on top of frame where desired
Image duplicate and reposition copy where desired - repeat for a total of three
Select Wordart Element - resize by 50%
Paste and position on top of frame where desired
Apply Eyecandy Gradient Glow on fat default settings (Glow Width 3)
Add new raster layer and flood-fill with color or gradient of choice
Move to bottom layer
Apply Mask 20 and merge group
Resize mask by 95%
Add any additional elements you like.
Add any dropshadows you like
Sharpen any elements as needed
Crop and resize as desired
Add copyright info, license number and name
You're done! Thanks for trying my tutorial!
Labels:CDO | 0
comments
Thursday, October 24, 2013
COME FLY WITH ME
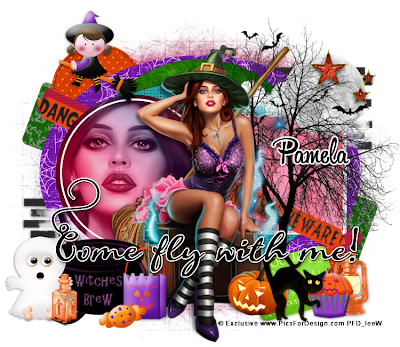
Supplies needed:
I am using an Exclusive artwork for this tutorial which you can find here
Scrapkit: I am using a wicked kit from Redefined Designs called "Witching Hour" which you can get by going here
Halloween Template by Dee which can be found here
Mask 129 from Aqua which you can find on the Misfits Blog here
Plugins used: Eyecandy 4000 - Marble, Xero-Radiance, Xero - Bad Dream, Lokas 3D Shadow
----------------------------
This tutorial is written for those who have working knowledge of PSPX2 (any version will do).
This tutorial was written by me on October 24, 2013. Please do not copy or paste on any other forum, website or blog provide link back to tut only. Please do not claim as your own. This tutorial is copyrighted to me. Any resemblance to any other tutorial is purely coincidental.
Ok - let's start and remember to save often.
Open the template and using your shortcut keys on your keyboard (SHIFT+D) duplicate the template as a new image. Close the original and delete the copywrite layer.
Select Green Stars layer
Select all, float, defloat
Add new raster layer and flood-fill with color of choice
Select none
Apply Eyecandy Glass on default settings
Delete/Hide original stars layer
Select Green Circle layer
Select all, float, defloat
Add new raster layer and flood-fill with gradient or color of choice (Linear style, Angle 45, Repeat 2)
Paste close-up tube of choice on top of gradient and delete
Select none
Change closeups to Luminance (Legacy)
Apply Xero Bad Dream at setting of choice
Drop opacity down to 70% on tube
Apply dropshadow and merge tube down on top of gradient layer
Effect, Texture Effects, Blinds (Width 2, Opactity 15, Horizontal and Light from left/top checked)
Delete/Hide original circle layer
Select Purple Rectangle layer
Select all, float, defloat
Paste paper 12
Select invert, delete, select none
Delete/hide original rectangle layer
Select White Rectangle layer
Adjust, Add/Remove Noise, Add Noise (Uniform checked, Noise 100%, Monochrome checked)
Select Blue Oval layer
Select all, float, defloat
Add new raster layer and flood-fill with color of choice
Select none
Apply Effects, Texture effects, weave (Gap size 2, Width 4, Opacity 5, Fill gaps checked, Change Gap Color to color of choice)
Delete/Hide original oval layer
Select Large Green Circle layer
Select all, float, defloat
Paste paper 10
Select invert, delete, select none
Delete/Hide original circle layer
Select Blue Strip layer
Select all, float, defloat
Add new raster layer and flood-fill with color of choice
Select none
Effect, Texture Effects, Blinds (Width 2, Opacity 15, Horizontal and Light from left/top checked)
Delete/Hide original strip
Select Orange Oval layer
Select all, float, defloat
Paste paper 3
Select invert, delete, select none
Delete/Hide original oval layer
Select Right Purple Circle layer
Select all, float, defloat
Paste paper 1
Select invert, delete, select none
Delete/Hide original circle layer
Select Left Purple Circle layer and repeat above steps
Select Green Strip layer
Select all, float, defloat
Add new raster layer and flood-fill with color of choice
Select none
Apply Eyecandy Marble with the following settings:
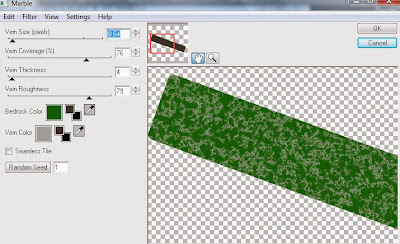
Delete/Hide original strip layer
Select Left Purple Stripes layer
Select all, float, defloat
Add new raster layer and flood-fill with color of choice
Select none
Effect, Texture Effects, Blinds (Width 2, Opactity 15, Horizontal and Light from left/top checked)
Delete/Hide original stripes layer
Select Right Purple Stripes layer and repeat above steps
Copy and paste tube of choice and position where desired
Apply Xero Radiance at setting of choice
Apply Lokas 3D Shadow at default settings
Select Moon Element - resize by 40%
Paste and position on top right
Select Bats Element - resize by 40%
Image mirror and paste on top right over moon
Select Tree Element - resize by 70%
Paste and position on right side below tube layer
Select Lantern Element - resize by 12%
Paste and position on bottom right
Select Cupcake Element - resize by 15%
Paste and position on bottom right
Select OuijaBoard Element - resize by 25%
Image Free Rotate Left by 15% and paste on bottom right
Select Cat Element - resize by 25%
Paste and position on bottom right
Select Cauldron1 Element - resize by 30%
Paste and position on bottom left
Select Little Ghouls Ghost Element - resize by 30%
Paste and position on bottom left
Select Holy Water Element - resize by 40%
Paste and position on bottom left
Select TreatBag Element - resize by 18%
Paste and position on bottom left
Select Candy Element - resize by 15%
Image Free Rotate Left by 15% and paste on bottom left
Select Witch Element - resize by 25%
Paste and position on top left
Select New raster layer and flood fill with color or gradient of choice
Move layer to the bottom of the template
Apply Mask 129
Merge group and move to the bottom
Add any additional elements you like.
Add any dropshadows you like
Crop and resize as desired
Add copyright info, license number and name
You're done! Thanks for trying my tutorial!
Labels:Redefined Designs | 0
comments
Wednesday, October 23, 2013
RACE GIRL
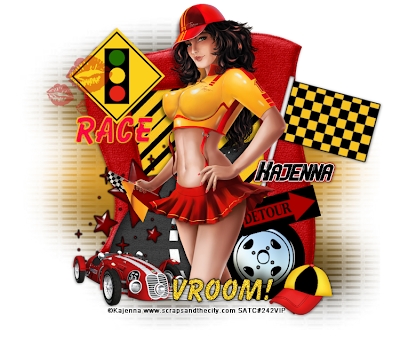
Supplies needed:
I am using the amazing art from Kajenna for for this tutorial, which you can find here
Scrapkit: I am using an awesome matching kit from Black Widow Creationz called "Race Girl" which you can get by going here
Mask 046_LT - I am unsure where I got this mask, so if it belongs to you please let me know and I will add credits. You can download it here
Plugins used: Eyecandy 4000 - Glass, Eyecandy 4000 - Gradient Glow, Xero-Radiance, Xero-Bad Dream, Lokas 3D Shadow
----------------------------
This tutorial is written for those who have working knowledge of PSPX2 (any version will do).
This tutorial was written by me on October 23, 2013. Please do not copy or paste on any other forum, website or blog provide link back to tut only. Please do not claim as your own. This tutorial is copyrighted to me. Any resemblance to any other tutorial is purely coincidental.
Ok - let's start and remember to save often.
Open up a 750 x 650 blank canvas (we can resize it later)
Select Frame Element 28 and paste in the center of the canvas
Resize by 60%
Select your magic wand tool and click in the center of the Frame (Add (Shift), RGB Value, Tolerance 25, Contiguous checked, Feather 0)
Selections, Modify, Expand by 5
Paste paper 8
Select invert, delete, select none
Move paper layer below frame
Select Element 26 - resize by 50%
Paste and position on bottom left above frame element
Paste tube of choice where desired
Apply Xero Radiance at setting of choice
Apply Lokas 3D Shadow at default settings
Select Element 5 - resize by 75%
Paste and position on top left
Select Element 33 - resize by 55%
Paste and position on top left
Select Element 23 - resize by 45%
Image Free Rotate Right by 15% and paste on right side
Select Element 9 - resize by 45%
Image Free Rotate Left by 15% and paste on right side
Select Element 18 - resize by 65%
Paste and position on bottom right
Select Element 25 - resize by 25%
Paste and position on bottom right (I highlighted areas I wanted to recolor and used my paintbrush/target tool to recolor)
Select Element 3 - resize by 45%
Paste and position on bottom left
Apply Eyecandy 4000 - Glass on default settings
Apply Eyecandy - Gradient Glow on fat default settings (Glow width 3)
Select Element 2 - resize by 45%
Paste and position on bottom left
Select Element 34 - resize by 45%
Paste and position on bottom
Adjust, Add/Remove Noise, Add Noise (Uniform checked, Noise 50%, Monochrome checked)
Add new raster layer and flood-fill with color or gradient of choice
Move to bottom layer
Apply Mask 46 and merge group
Resize mask by 90%
Add any additional elements you like.
Add any dropshadows you like
Crop and resize as desired
Add copyright info, license number and name
You're done! Thanks for trying my tutorial!
Labels:Kajenna,Scraps and the City | 0
comments
Tuesday, October 22, 2013
PERFECTLY AUTUMN
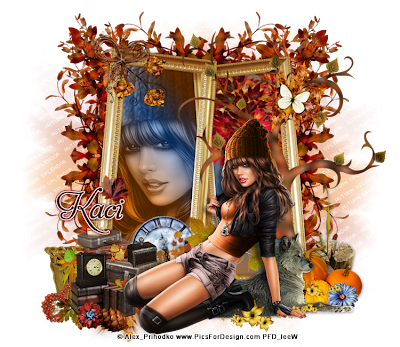
Supplies needed:
I am using the amazing art from Alex Prihodko for for this tutorial, which you can find here
Scrapkit: I am using a beautiful kit from Scrappin Krazy Designs called "Perfectly Autumn" which you can get by going here
Autumn Mask from Tonya which you can find on the Misfits Blog here
Plugins used: Xero-Radiance, Xero-Bad Dream, Lokas 3D Shadow
----------------------------
This tutorial is written for those who have working knowledge of PSPX2 (any version will do).
This tutorial was written by me on October 22, 2013. Please do not copy or paste on any other forum, website or blog provide link back to tut only. Please do not claim as your own. This tutorial is copyrighted to me. Any resemblance to any other tutorial is purely coincidental.
Ok - let's start and remember to save often.
Open up a 750 x 650 blank canvas (we can resize it later)
Select Element 9 - resize by 95%
Paste in the center of the canvas
Select Frame Element 22 and paste in the center of the canvas
Resize by 85%
Select your magic wand tool and click in the center of the left side of the Frame (Add (Shift), RGB Value, Tolerance 25, Contiguous checked, Feather 0)
Selections, Modify, Expand by 5
Add new raster layer and flood-fill with gradient or color of choice (Linear style, Angle 45, Repeat 2)
Paste a close-up tube of choice on the top of gradient where desired and delete, select none
Change close-up to Luminance (Legacy)
Apply Bad Dream on default settings of choice
Drop opacity on close-up down to 65%
Apply dropshadow and merge tube down on top of gradient layer
Effect, Texture Effects, Blinds (Width 2, Opactity 25, Horizontal and Light from left/top checked)
Move gradient/tube layer below frame
Select your magic wand tool and click in the center of the right side of the Frame (Add (Shift), RGB Value, Tolerance 25, Contiguous checked, Feather 0)
Selections, Modify, Expand by 5
Add new raster layer and flood-fill with gradient or color of choice (Linear style, Angle 45, Repeat 2)
Select none
Effect, Texture Effects, Blinds (Width 2, Opactity 25, Horizontal and Light from left/top checked)
Move gradient below frame
Select Element 48 - resize by 40%
Image Free Rotate Right by 5% and paste on top right corner below frame layer
Select Element 13 - resize by 35%
Paste and position on top left corner of frame
Select Element 69 - resize by 30%
Paste and position on top left corner of frame
Paste tube of choice where desired
Apply Xero Radiance at setting of choice
Apply Lokas 3D Shadow at default settings
Select Element 3 - resize by 85%
Image mirror and paste on right side below tube layer
Select Element 42 - resize by 55%
Paste and position on bottom right
Select Element 47 - resize by 40%
Paste and position on bottom right
Select Element 17 - resize by 65%
Paste and position on bottom right
Select Element 1 - resize by 15%
Paste and position on bottom right
Select Element 52 - resize by 40%
Paste and position on bottom left
Select Element 74 - resize by 45%
Image mirror and paste on bottom left
Select Element 27 - resize by 40%
Paste and position on bottom left
Select Element 41 - resize by 20%
Paste and position on bottom left
Select Element 64 - resize by 18%
Paste and position on bottom left
Select Element 15 - resize by 15%
Paste and position on bottom left
Select Element 12 - resize by 30%
Image Free Rotate Left by 15% and paste on bottom left
Add new raster layer and flood-fill with color or gradient of choice
Move to bottom layer
Apply Autumn Mask and merge group
Add any additional elements you like.
Add any dropshadows you like
Crop and resize as desired
Add copyright info, license number and name
You're done! Thanks for trying my tutorial!
Labels:Scrappin Krazy Designs | 0
comments
CHECK YOUR RACK
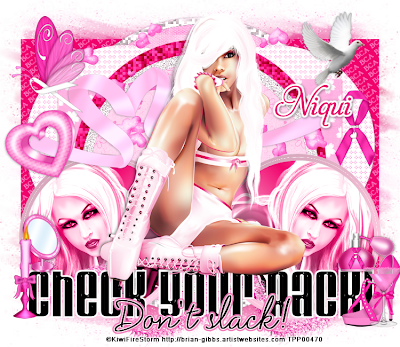
Supplies needed:
I am using the amazing artwork from Kiwifirestorm for this tutorial which you can find here
Scrapkit: I am using a beautiful kit from Niqui's Designs called "Thinking Pink" which you can get by going here
BCA Template by Vaybs which can be found here
Edge Mask which you can find here
Plugins used: Xero - Fritillary, Eyecandy 4000 - Glass, Xero-Radiance, Xero - Bad Dream, Lokas 3D Shadow
----------------------------
This tutorial is written for those who have working knowledge of PSPX2 (any version will do).
This tutorial was written by me on October 21, 2013. Please do not copy or paste on any other forum, website or blog provide link back to tut only. Please do not claim as your own. This tutorial is copyrighted to me. Any resemblance to any other tutorial is purely coincidental.
Ok - let's start and remember to save often.
Open the template and using your shortcut keys on your keyboard (SHIFT+D) duplicate the template as a new image. Close the original and delete the copywrite layer.
Select Check Your Rack "CYR" Wordart layer
Apply Eyecandy Glass on default settings
Select Frame 1 layer
Select all, float, defloat
Add new raster layer and flood-fill with color of choice
Select none
Apply Eyecandy Glass on default settings
Delete/Hide original frame layer
Select Frame 2 and repeat above steps
Select Circle 9 layer
Select all, float, defloat
Add new raster layer and flood-fill with gradient or color of choice (Linear style, Angle 45, Repeat 2)
Paste close-up tube of choice on top of gradient and delete
Select none
Change closeups to Luminance (Legacy)
Apply Xero Bad Dream at setting of choice
Drop opacity down to 75% on tube
Apply dropshadow and merge tube down on top of gradient layer
Effect, Texture Effects, Blinds (Width 2, Opactity 10, Horizontal and Light from left/top checked)
Delete/Hide original circle layer
Select Circle 8 layer and repeat above steps
Select Circle 7 layer
Select all, float, defloat
Paste paper 10
Select invert, delete, select none
Delete/hide original circle layer
Select Circle 6 layer
Select all, float, defloat
Add new raster layer and flood-fill with color of choice
Select none
Adjust, Add/Remove Noise, Add Noise (Uniform checked, Noise 75%, Monochrome checked)
Delete/Hide original circle layer
Select Circle 5 layer
Apply Xero - Fritillary with the following settings:
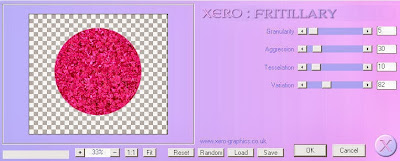
Select Square 3 layer
Select all, float, defloat
Paste paper 8
Select invert, delete, select none
Delete/Hide original square layer
Select Square 2 layer and repeat above steps
Select Circle 4 layer
Select all, float, defloat
Paste paper 6
Select invert, delete, select none
Delete/Hide original circle layer
Select Circle 3 layer and repeat above steps
Select Circle 2 layer
Select all, float, defloat
Paste paper 7
Select invert, delete, select none
Delete/Hide original circle layer
Select Circle 1 layer
Select all, float, defloat
Add new raster layer and flood-fill with color of choice
Select none
Apply same Xero Fritillary settings from above
Delete/Hide original circle layer
Copy and paste tube of choice and position where desired
Apply Xero Radiance at setting of choice
Apply Lokas 3D Shadow at default settings
Select Element 2 - resize by 25%
Paste and position on top left
Select Element 12 - resize by 25%
Image Free Rotate Left by 20% and paste on left side
Select Element 22 - resize by 75%
Paste and position in the center of canvas below tube layer
Select Element 14 - resize by 30%
Paste and position on bottom left
Select Element 34 - resize by 20%
Image mirror and paste on bottom left
Select Element 5 - resize by 25%
Image mirror and paste on bottom right
Select Element 35 - resize by 20%
Paste and position on bottom right
Select Element 21 - resize by 25%
Paste and position on bottom right
Select Element 7 - resize by 25%
Paste and position on right side
Select New raster layer and flood fill with color or gradient of choice
Move layer to the bottom of the template
Apply Edge Mask
Merge group and move to the bottom
Add any additional elements you like.
Add any dropshadows you like
Crop and resize as desired
Add copyright info, license number and name
You're done! Thanks for trying my tutorial!
Labels:Niqui Designs | 0
comments
Monday, October 21, 2013
FALLING FOR YOU
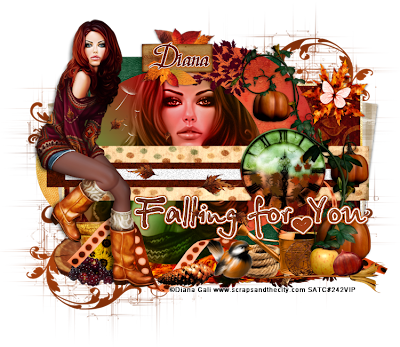
Supplies needed:
I am using the amazing artwork from Diana Gali for this tutorial which you can find here
Scrapkit: I am using a beautiful kit from Disturbed Scraps called "Autumn Girls" which you can get by going here
Template 31 from Cakes which can be found here
Mask 52 from Moonbeams and Spiderweb which you can find here
Plugins used: Eyecandy 4000 - Glass, Xero-Radiance, Xero - Bad Dream, Lokas 3D Shadow
----------------------------
This tutorial is written for those who have working knowledge of PSPX2 (any version will do).
This tutorial was written by me on October 21, 2013. Please do not copy or paste on any other forum, website or blog provide link back to tut only. Please do not claim as your own. This tutorial is copyrighted to me. Any resemblance to any other tutorial is purely coincidental.
Ok - let's start and remember to save often.
Open the template and using your shortcut keys on your keyboard (SHIFT+D) duplicate the template as a new image. Close the original and delete the copywrite layer.
Select Wordart layer
Apply Eyecandy Glass on default settings
Select Raster 3 strip layer
Select all, float, defloat
Paste paper 2
Select invert, delete, select none
Delete/Hide original strip layer
Select Merged Strip layer
Select all, float, defloat
Paste paper 13
Select invert, delete, select none
Delete/Hide original merged layer
Select Circle Raster 2 layer
Select all, float, defloat
Add new raster layer and flood-fill with gradient or color of choice (Linear style, Angle 45, Repeat 2)
Paste close-up tube of choice on top of gradient and delete
Select none
Change closeups to Luminance (Legacy)
Apply Xero Bad Dream at setting of choice
Drop opacity down to 85% on tubes
Apply dropshadow and merge tubes down on top of gradient layer
Effect, Texture Effects, Blinds (Width 2, Opactity 15, Horizontal and Light from left/top checked)
Delete/Hide original circle layer
Select Circle Raster 1 layer
Select all, float, defloat
Paste paper 9
Select invert, delete, select none
Delete/hide original circle layer
Select Square Raster 5 layer
Select all, float, defloat
Paste paper 14
Select invert, delete, select none
Delete/Hide original square layer
Select Rectangle Raster 4 layer
Select all, float, defloat
Paste paper 7
Select invert, delete, select none
Delete/Hide original rectangle layer
Select Rectangle Raster 6 layer
Select all, float, defloat
Paste paper 8
Select invert, delete, select none
Delete/Hide original rectangle layer
Select Rectangle 7 layer and repeat above steps
Select Circle Raster 10 layer
Select all, float, defloat
Paste paper 1
Select invert, delete, select none
Delete/Hide original circle layer
Copy and paste tube of choice and position where desired
Apply Xero Radiance at setting of choice
Apply Lokas 3D Shadow at default settings
Select Element 10 - resize by 65%
Paste and position on right side where desired
Select Element 56 - resize by 25%
Paste and position on center right
Select Element 36 and paste on bottom
Move to bottom layer
Select Element 46 - resize by 40%
Paste and position on bottom right
Select Element 39 - resize by 15%
Paste and position on bottom right
Select Element 44 - resize by 15%
Paste and position on bottom right
Select Element 2 - resize by 20%
Paste and position on bottom
Select Element 53 - resize by 25%
Paste and position on bottom
Select Element 35 - resize by 25%
Paste and position on bottom
Select Element 45 - resize by 30%
Paste and position on bottom left
Select Element 40 - resize by 20%
Paste and position on bottom left
Select Element 32 - resize by 25%
Paste and position on bottom left
Select Element 60 - resize by 90%
Paste and position on bottom
Select Element 38 - resize by 25%
Paste and position on top right
Select New raster layer and flood fill with color or gradient of choice
Move layer to the bottom of the template
Apply Mask 52
Merge group and move to the bottom
Add any additional elements you like.
Add any dropshadows you like
Crop and resize as desired
Add copyright info, license number and name
You're done! Thanks for trying my tutorial!
Sunday, October 20, 2013
DARK OCEAN
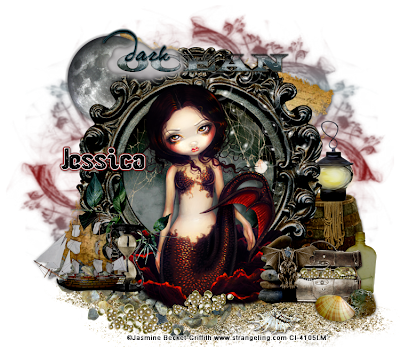
Supplies needed:
I am using the amazing art from Jasmine Becket-Griffith for for this tutorial, which you can find here
Scrapkit: I am using a wicked kit from Gothic Inspirations called "Dark Ocean" which you can get by going here
Mask 126 from Trese which you can find here
Plugins used: Xero-Radiance, Lokas 3D Shadow
----------------------------
This tutorial is written for those who have working knowledge of PSPX2 (any version will do).
This tutorial was written by me on October 20, 2013. Please do not copy or paste on any other forum, website or blog provide link back to tut only. Please do not claim as your own. This tutorial is copyrighted to me. Any resemblance to any other tutorial is purely coincidental.
Ok - let's start and remember to save often.
Open up a 750 x 650 blank canvas (we can resize it later)
Select Frame 1 and paste in the center of the canvas
Resize by 65%
Select your magic wand tool and click in the center of the Frame (Add (Shift), RGB Value, Tolerance 25, Contiguous checked, Feather 0)
Selections, Modify, Expand by 5
Paste paper 4
Select invert, delete, select none
Move paper layer below frame
Select Netting Element - resize by 40%
Paste on top of paper layer below frame
Select Moon Element - resize by 35%
Paste and position on top left below frame layer
Select Sand 1 Element and paste on bottom below frame
Select Pebbles Element - resize by 70%
Paste and position on bottom where desired below frame
Select Pearls Element - resize by 25%
Paste and position on bottom where desired
Duplicate pearls and mirror - reposition where desired
Paste tube of choice where desired
Apply Xero Radiance at setting of choice
Apply Lokas 3D Shadow at default settings
Select Barrel Element - resize by 35%
Paste on bottom right below frame
Select Lamp Element - resize by 25%
Paste on right side
Select Bottle Element - resize by 20%
Paste and position on bottom right
Select Box Element - resize by 25%
Paste and position on bottom right
Select Gargoyle Element - resize by 25%
Paste and position on bottom right
Select Piled Rocks Element - resize by 25%
Paste and position on bottom right
Select Ship Element - resize by 25%
Paste and position on bottom left
Select Hourglass Element - resize by 20%
Paste and position on bottom left
Select WordArt1 - resize by 50%
Paste and position on top where desired
Select Parchment Element - resize by 70%
Image Free Rotate Right by 15% and paste in the center of canvas
Move to bottom layer
Add new raster layer and flood-fill with color or gradient of choice
Move to bottom layer
Apply Mask 126 and merge group
Add any additional elements you like.
Add any dropshadows you like
Crop and resize as desired
Add copyright info, license number and name
You're done! Thanks for trying my tutorial!
Labels:Gothic Inspirations | 0
comments
Thursday, October 17, 2013
ZOMBIE ROCK
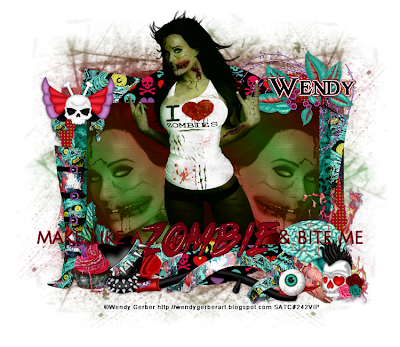
Supplies needed:
I am using the amazing artwork from Wendy Gerber for this tutorial which you can find here
Scrapkit: I am using a wicked kit from Bibi's Collections called "Zombie Rocker" which you can get by going here
Template 186 from Leah which can be found here
Mask 112 from Trese which you can find here
Plugins used: Eyecandy 4000 - Glass, Xero-Radiance, Xero - Bad Dream, Lokas 3D Shadow
----------------------------
This tutorial is written for those who have working knowledge of PSPX2 (any version will do).
This tutorial was written by me on October 17, 2013. Please do not copy or paste on any other forum, website or blog provide link back to tut only. Please do not claim as your own. This tutorial is copyrighted to me. Any resemblance to any other tutorial is purely coincidental.
Ok - let's start and remember to save often.
Open the template and using your shortcut keys on your keyboard (SHIFT+D) duplicate the template as a new image. Close the original and delete the copywrite layer.
Select Words 3 "Zombie" layer
Apply Eyecandy Glass on default settings
Select Rectangle 1 layer
Select all, float, defloat
Add new raster layer and flood-fill with gradient or color of choice (Linear style, Angle 45, Repeat 2)
Paste close-up tubes of choice on top of gradient and delete
Select none
Change closeups to Luminance (Legacy)
Apply Xero Bad Dream at setting of choice
Drop opacity down to 75% on tubes
Apply dropshadow and merge tubes down on top of gradient layer
Effect, Texture Effects, Blinds (Width 2, Opactity 20, Horizontal and Light from left/top checked)
Delete/Hide original rectangle layer
Select Black Strip 2 layer
Select all, float, defloat
Paste paper 3
Select invert, delete, select none
Delete/hide original strip layer
Select Black Strip 3 layer and repeat above steps
Select Circle 4 layer
Select all, float, defloat
Paste paper 12
Select invert, delete, select none
Delete/Hide original circle layer
Select Rectangle 5 layer
Select all, float, defloat
Paste paper 1
Select invert, delete, select none
Delete/Hide original rectangle layer
Select Rectnalge 6 layer
Select all, float, defloat
Add new raster layer and flood-fill with color of choice
Select none
Apply Effects, Texture Effects, Weave (Gap size 2, Width 4, Opacity 5, Fill gaps checked, change Gap and Weave color to one of choice)
Delete/Hide original rectangle layer
Select Rectangle 7 layer
Select all, float, defloat
Paste paper 2
Select invert, delete, select none
Delete/Hide original rectangle layer
Copy and paste tube of choice and position where desired
Apply Xero Radiance at setting of choice
Apply Lokas 3D Shadow at default settings
Select Element 53 - resize by 30%
Paste and position on top left
Select Element 81 - resize by 25%
Paste and position on top right
Select Element 36 - resize by 40%
Image mirror and paste on bottom left
Select Element 32 - resize by 25%
Paste and position on bottom left
Select Element 63 - resize by 25%
Image Free Rotate Left by 15% and paste on bottom left
Select Element 4 - resize by 25%
Paste and position on bottom left
Select Element 61 - resize by 50%
Paste and position on bottom
Select Element 30 - resize by 50%
Paste and position on bottom right
Select Element 75 - resize by 20%
Paste and position on bottom right
Select Element 82 - resize by 25%
Paste and position on bottom right
Select New raster layer and flood fill with color or gradient of choice
Move layer to the bottom of the template
Apply Mask 112
Merge group and move to the bottom
Add any additional elements you like.
Add any dropshadows you like
Crop and resize as desired
Add copyright info, license number and name
You're done! Thanks for trying my tutorial!
Wednesday, October 16, 2013
MONSTER MASH
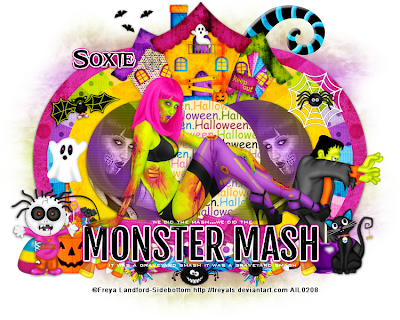
Supplies needed:
I am using the amazing artwork from Freya Langford-Sidebottom for this tutorial which you can find here
Scrapkit: I am using a stunning kit from Soxsational Scraps called "Monster Mash" which was made exclusively for Pinup Fantasies & Fairy Tales Magazine you can find it here
Template 189 from Leah which can be found here
Mask 111 from Designs by Vaybs which you can find here
Plugins used: Eyecandy 4000 - Glass, Eyecandy 4000 - Gradient Glow, Xero-Radiance, Xero - Bad Dream, Lokas 3D Shadow
----------------------------
This tutorial is written for those who have working knowledge of PSPX2 (any version will do).
This tutorial was written by me on October 16, 2013. Please do not copy or paste on any other forum, website or blog provide link back to tut only. Please do not claim as your own. This tutorial is copyrighted to me. Any resemblance to any other tutorial is purely coincidental.
Ok - let's start and remember to save often.
Open the template and using your shortcut keys on your keyboard (SHIFT+D) duplicate the template as a new image. Close the original and delete the copywrite layer.
Select WA 1 layer
Apply Eyecandy Glass on default settings
Apply Eyecandy Gradient Glow on fat default settings (Glow width 4)
Select WA 1 Back and delete
Select Circle 1 layer
Select all, float, defloat
Paste paper 9
Select invert, delete, select none
Delete/Hide original circle layer
Select Black Circle 2 layer
Select all, float, defloat
Add new raster layer and flood-fill with gradient or color of choice (Linear style, Angle 45, Repeat 2)
Paste close-up tube of choice on top of gradient and delete
Select none
Change closeups to Luminance (Legacy)
Apply Xero Bad Dream at setting of choice
Apply dropshadow and merge tube down on top of gradient layer
Effect, Texture Effects, Blinds (Width 2, Opactity 20, Horizontal and Light from left/top checked)
Delete/Hide original circle layer
Select Black Circle 3 layer and repeat above steps
Select Circle 4 layer layer
Select all, float, defloat
Paste paper 3
Select invert, delete, select none
Delete/hide original circle layer
Select Element 22 - resize by 60%
Paste and position on top
Select Circle 5 layer
Select all, float, defloat
Paste paper 5
Select invert, delete, select none
Delete/Hide original circle layer
Select Circle 6 layer and repeat above steps
Select Circle 7 layer
Select all, float, defloat
Paste paper 11
Select invert, delete, select none
Delete/Hide original circle layer
Select Circle 8 layer
Select all, float, defloat
Paste paper 7
Select none
Delete/Hide original circle layer
Select Circle 9 layer and repeat above steps
Select Circle 10 layer
Select all, float, defloat
Paste paper 8
Select invert, delete, select none
Delete/Hide original circle layer
Select Circle 11 layer
Select all, float, defloat
Paste paper 1
Select invert, delete, select none
Delete/Hide original circle layer
Select Circle 12 layer and repeat above steps
Copy and paste tube of choice and position where desired
Apply Xero Radiance at setting of choice
Apply Lokas 3D Shadow at default settings
Select Element 21 - resize by 60%
Image mirror and paste on bottom right
Select Element 15 - resize by 30%
Paste and position on bottom right
Select Element 4 - resize by 25%
Paste and position on bottom right
Select Element 18 - resize by 40%
Paste and position on bottom - duplicate and mirror
Select Element 46 - resize by 15%
Paste and position on bottom - duplicate and mirror
Select Element 20 - resize by 45%
Paste and position on left
Select Element 19 - resize by 40%
Paste and position on bottom left
Select Element 25 - resize by 40%
Paste and position on bottom left
Select Element 5 - resize by 17%
Paste and position on bottom left
Select Element 2 - resize by 60%
Paste and position on top right
Select Element 23 - resize by 23%
Paste and position on top right
Select New raster layer and flood fill with color or gradient of choice
Move layer to the bottom of the template
Apply Mask 111
Merge group and move to the bottom
Add any additional elements you like.
Add any dropshadows you like
Crop and resize as desired
Add copyright info, license number and name
You're done! Thanks for trying my tutorial!
Labels:Soxsational Scraps | 0
comments
Wednesday, October 9, 2013
FREDDY'S GIRL
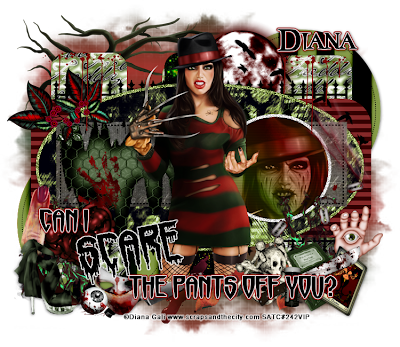
Supplies needed:
I am using the amazing artwork from Diana Gali for this tutorial which you can find here
Scrapkit: I am using a wicked matching kit from Bibi's Collections called "Freddy" which you can get by going here
Halloween Collab Template 1 from Dee and Kandi which can be found here
Mask 302 from Weescotlass which you can find here
Plugins used: VM Extravaganza - Transmission, Eyecandy 4000 - Gradient Glow, Xero-Radiance, Xero - Bad Dream, Lokas 3D Shadow
----------------------------
This tutorial is written for those who have working knowledge of PSPX2 (any version will do).
This tutorial was written by me on October 9, 2013. Please do not copy or paste on any other forum, website or blog provide link back to tut only. Please do not claim as your own. This tutorial is copyrighted to me. Any resemblance to any other tutorial is purely coincidental.
Ok - let's start and remember to save often.
Open the template and using your shortcut keys on your keyboard (SHIFT+D) duplicate the template as a new image. Close the original and delete the copywrite layer.
Select Wordarts "Can I" and "The Pants off you" layers
Apply Eyecandy Gradient Glow on fat default settings (Glow Width 3)
Select Blue Circle layer
Add new raster layer and flood-fill with gradient or color of choice (Linear style, Angle 45, Repeat 2)
Paste close-up tube of choice on top of gradient and delete
Select none
Change closeup to Luminance (Legacy)
Apply Xero Bad Dream at setting of choice
Drop opacity down to 80%
Apply dropshadow and merge tube down on top of gradient layer
Effect, Texture Effects, Blinds (Width 2, Opactity 20, Horizontal and Light from left/top checked)
Delete/Hide original circle layer
Select Top and Bottom Small Orange layers and delete
Select Orange Rectangle layer
Select all, float, defloat
Paste paper 10
Select invert, delete, select none
Delete/hide original rectangle layer
Select Blue Oval layer
Select all, float, defloat
Paste paper 4
Select invert, delete, select none
Delete/Hide original oval layer
Select White Oval layer
Select all, float, defloat
Add new raster layer and flood-fill with color of choice
Select none
Adjust, Add/Remove Noise, Add Noise (Uniform checked, Noise 100%, Monochrome checked)
Delete/Hide original oval layer
Select Purple Rectangle layer
Select all, float, defloat
Add new raster layer and flood-fill with color of choice
Select none
Apply VM Extravaganza - Transmission with the following settings:
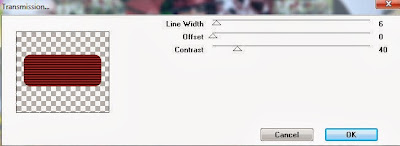
Delete/Hide original rectange layer
Select Element 27 - resize by 65%
Paste and position where desired on top of rectangle layer
Select Middle Green Strip layer
Select all, float, defloat
Paste paper 2
Select invert, delete, select none
Delete/Hide original strip layer
Select Right Green Strip
Select all, float, defloat
Paste paper 5
Select invert, delete, select none
Delete/Hide original strip layer
Select Left Green Strip layer and repeat above steps
Select Right Orange Circle
Select all, float, defloat
Paste paper 6
Select invert, delete, select none
Delete/Hide original circle layer
Select Left Orange Circle layer and repeat above steps
Copy and paste tube of choice and position where desired
Apply Xero Radiance at setting of choice
Apply Lokas 3D Shadow at default settings
Select Element 85 and paste on bottom left
Select Element 65 - resize by 40%
Paste and position on bottom left
Select Element 55 - resize by 45%
Paste and position on bottom left
Select Element 68 - resize by 35%
Paste and position on bottom left
Select Element 40 - resize by 45%
Paste and position on bottom
Select Element 46 - resize by 25%
Paste and position on bottom right
Select Element 132 - resize by 25%
Paste and position on bottom right
Select Element 34 - resize by 50%
Paste and position on bottom right
Select Element 105 - resize by 50%
Paste and position on bottom right
Select Element 13 - resize by 50%
Paste and position on bottom right
Select Element 21 - resize by 65%
Paste and position on top left and move to bottom layer
Select Element 43 - resize by 40%
Paste and position on top right where desired
Select Element 63 - resize by 25%
Paste and position on top left
Select New raster layer and flood fill with color or gradient of choice
Move layer to the bottom of the template
Apply Mask 302
Merge group and move to the bottom
Add any additional elements you like.
Add any dropshadows you like
Crop and resize as desired
Add copyright info, license number and name
You're done! Thanks for trying my tutorial!
Sunday, October 6, 2013
SOMETHING SWEET
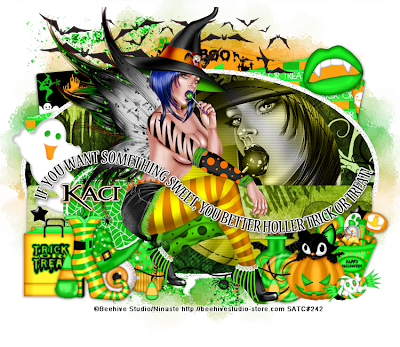
Supplies needed:
I am using the amazing artwork from Ninaste for this tutorial which you can find here
Scrapkit: I am using a stunning kit from Scrappin Krazy Designs called "Neon Halloween" which you can get by goin here
Halloween Template 4 from Dee which can be found here
Big Mask 1 from Vix which you can find here
Plugins used: Eyecandy 4000 - Gradient Glow, Xero-Radiance, Xero - Bad Dream, Lokas 3D Shadow
----------------------------
This tutorial is written for those who have working knowledge of PSPX2 (any version will do).
This tutorial was written by me on October 6, 2013. Please do not copy or paste on any other forum, website or blog provide link back to tut only. Please do not claim as your own. This tutorial is copyrighted to me. Any resemblance to any other tutorial is purely coincidental.
Ok - let's start and remember to save often.
Open the template and using your shortcut keys on your keyboard (SHIFT+D) duplicate the template as a new image. Close the original and delete the copywrite layer.
Select Blue Circle layer
Select all, float, defloat
Paste paper 8
Select invert, delete, select none
Delete/Hide original circle layer
Select Green Strip layer
Select All, float, defloat
Paste paper 14
Select invert, delete, select none
Delete/Hide original strip layer
Select Orange Circle layer
Select all, float, defloat
Add new raster layer and flood-fill with gradient or color of choice (Linear style, Angle 45, Repeat 2)
Paste close-up tube of choice on top of gradient and delete
Select none
Change closeups to Luminance (Legacy)
Apply Xero Bad Dream at setting of choice
Apply dropshadow and merge tubes down on top of gradient layer
Effect, Texture Effects, Blinds (Width 2, Opactity 20, Horizontal and Light from left/top checked)
Delete/Hide original square layer
Select Purple Oval layer
Select all, float, defloat
Paste paper 15
Select invert, delete, select none
Delete/hide original oval layer
Select Green Rectangle layer
Select all, float, defloat
Paste paper 9
Select invert, delete, select none
Delete/Hide original rectangle layer
Select Orange Square layer
Select all, float, defloat
Paste paper 3
Select invert, delete, select none
Delete/Hide original square layer
Select Blue Square layer
Select all, float, defloat
Paste paper 2
Delete/Hide original square layer
Copy and paste tube of choice and position where desired
Apply Xero Radiance at setting of choice
Apply Lokas 3D Shadow at default settings
Select Element 36 - resize by 45%
Paste and position on left side
Select Element 39 - resize by 45%
Paste and position on bottom left
Select Element 28 - resize by 30%
Paste and position on bottom left
Select Element 50 - resize by 40%
Paste and position on bottom left
Select Element 31 - resize by 35%
Paste and position on bottom left
Select Element 19 - resize by 25%
Paste and position on bottom left
Select Element 51 - resize by 40%
Paste and position on bottom right
Select Element 18 - resize by 40%
Paste and position on bottom right
Select Element 26 - resize by 40%
Paste and position on bottom right
Select Element 62 and paste on top
Select Element 23 - resize by 30%
Paste and position on top right
Select New raster layer and flood fill with color or gradient of choice
Move layer to the bottom of the template
Apply Mask 1
Merge group and move to the bottom
Add any additional elements you like.
Add any dropshadows you like
Crop and resize as desired
Add copyright info, license number and name
You're done! Thanks for trying my tutorial!
Labels:Scrappin Krazy Designs | 0
comments
Saturday, October 5, 2013
JAILBIRD
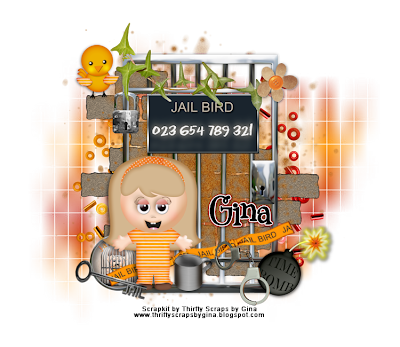
Supplies needed:
Scrapkit: I am using an awesome kit from Thrifty Scraps by Gina "Doing Time" which you can get by going here
Mask 7 from CandyTreats which you can find here
Plugins used: Xero-Radiance, Lokas 3D Shadow
----------------------------
This tutorial is written for those who have working knowledge of PSPX2 (any version will do).
This tutorial was written by me on October 5, 2013. Please do not copy or paste on any other forum, website or blog provide link back to tut only. Please do not claim as your own. This tutorial is copyrighted to me. Any resemblance to any other tutorial is purely coincidental.
Ok - let's start and remember to save often.
Open up a 750 x 650 blank canvas (we can resize it later)
Select Bar Element and paste in the center of the canvas
Resize by 80%
Select MugID Element - resize by 55%
Paste on top where desired
Select Ivy2 Element - resize by 45%
Paste and position on the top
Select Flower1 Element - resize by 25%
Paste and position on top right
Select Bird02 Element - resize by 40%
Paste and position on top left
Select Lock Element - resize by 30%
Paste and position on top left
Select Bomb Element - resize by 65%
Paste and position on bottom right
Select Handcuff Element - resize by 40%
Paste and position on bottom right
Select Ribbon01 Element - resize by 45%
Image Free Rotate Left by 15% and paste on bottom
Select Inmate01 Element - resize by 50%
Paste and position on bottom left
Apply Xero Radiance at setting of choice
Apply Lokas 3D Shadow at default settings
Select Brad01 Element - resize by 55%
Paste and position on bottom left
Select Cup Element - resize by 30%
Paste and position on bottom
Select Key Element - resize by 45%
Image Free Rotate Right by 15% and paste on bottom left
Select Bricks Element - resize by 80%
Paste on canvas and move to bottom layer
Select Dirt Element and paste on top of bricks element
Select Spill Element and paste on left side - move to bottom layer
Select Spill02 Element and paste on right side
Add new raster layer and flood-fill with color or gradient of choice
Move to bottom layer
Apply Mask 7 and merge group
Add any additional elements you like.
Add any dropshadows you like
Crop and resize as desired
Add copyright info, license number and name
You're done! Thanks for trying my tutorial!
Labels:Thrifty Scraps by Gina | 0
comments
Thursday, October 3, 2013
BORN TO FLY
Supplies needed:
I am using an Exclusive artwork for this tutorial which you can find here
Scrapkit: I am using a wicked kit from Horseplay's Pasture called "Born to Fly" which you can get by going here
Template 206 from Toxic Desirez which can be found here
Edge Mask which you can find here
Plugins used: Eyecandy 4000 - Marble, Xero-Radiance, Xero - Bad Dream, Lokas 3D Shadow
----------------------------
This tutorial is written for those who have working knowledge of PSPX2 (any version will do).
This tutorial was written by me on October 3, 2013. Please do not copy or paste on any other forum, website or blog provide link back to tut only. Please do not claim as your own. This tutorial is copyrighted to me. Any resemblance to any other tutorial is purely coincidental.
Ok - let's start and remember to save often.
Open the template and using your shortcut keys on your keyboard (SHIFT+D) duplicate the template as a new image. Close the original and delete the copywrite layer.
Select Circle Raster 2 layer
Select all, float, defloat
Paste paper 15
Select invert, delete, select none
Delete/Hide original circle layer
Select Element 21 - resize by 65%
Paste and position on top of circle layer
Select Square Raster 5 layer
Select all, float, defloat
Paste paper 13
Select invert, delete, select none
Delete/Hide original square layer
Select Square Copy of Raster 5 and repeat above steps
Select Rectangle Raster 4 layer
Select all, float, defloat
Paste paper 3
Select invert, delete
Paste close-up tube on top of paper and delete, select none
Change close-up to Screen and apply dropshadow
Merge close-up down onto paper layer
Delete/Hide original rectangle layer
Select Rectangle Copy of Raster 4 and repeat steps with same paper layer
Select Rectangle Raster 6 layer
Select all, float, defloat
Paste paper 4
Select invert, delete, select none
Delete/hide original rectangle layer
Select Rectangle Copy of Raster 6 layer and repeat above steps
Select Circle Raster 7 layer
Select all, float, defloat
Paste paper 9
Select invert, delete, select none
Delete/Hide original circle layer
Select Circle Copy of Raster 7 and repeat above steps
Select Rectangle Raster 8 layer
Select all, float, defloat
Add new raster layer and flood-fill with color of choice
Select none
Apply Eyecandy Marble with the following settings:

Delete/Hide original rectangle layer
Select Rectangle Copy of Raster 8 and repeat above steps
Copy and paste tube of choice and position where desired
Apply Xero Radiance at setting of choice
Apply Lokas 3D Shadow at default settings
Select Element 42 - resize by 55%
Image Free Rotate Right by 10% and paste on top right
Select Element 15 - resize by 45%
Paste and position on bottom left side
Select Element 12 - resize by 50%
Paste and position on bottom left
Select Element 49 - resize by 50%
Paste and position on bottom left
Select Element 17 - resize by 30%
Paste and position on bottom left
Select Element 18 - resize by 28%
Paste and position on bottom left
Select Element 15 - resize by 70%
Image mirror and paste on right side
Select Element 12 - resize by 55%
Paste and position on right side
Select Element 1 - resize by 35%
Paste and position on bottom right
Select Element 69 - resize by 35%
Paste and position on bottom right
Select Element 29 - resize by 35%
Paste and position on bottom right
Select Element 53 - resize by 50%
Paste and position on bottom right
Select Element 74 - resize by 85%
Image Free Rotate Right by 15%
Paste and position on right side
Select Element 14 - resize by 40%
Paste and position on top left
Select Element 35 - resize by 65%
Paste and position on top left
Select New raster layer and flood fill with color or gradient of choice
Move layer to the bottom of the template
Apply Edgemask
Merge group and move to the bottom
Add any additional elements you like.
Add any dropshadows you like
Crop and resize as desired
Add copyright info, license number and name
You're done! Thanks for trying my tutorial!
Labels:Horseplay's Pasture Designs | 0
comments
Wednesday, October 2, 2013
HALLOWEEN NIGHT
Supplies needed:
I am using the amazing art from Elias Chatzoudis for for this tutorial, which you can find here
Scrapkit: I am using a wicked kit from Mistylynn's Creations called "Halloween Night" which you can get by going here
Mask 1 from Horseplays Pasture which you can find here
Plugins used: Eyecandy 4000 - Gradient Glow, Xero-Radiance, Xero-Bad Dream, Lokas 3D Shadow
----------------------------
This tutorial is written for those who have working knowledge of PSPX2 (any version will do).
This tutorial was written by me on October 2, 2013. Please do not copy or paste on any other forum, website or blog provide link back to tut only. Please do not claim as your own. This tutorial is copyrighted to me. Any resemblance to any other tutorial is purely coincidental.
Ok - let's start and remember to save often.
Open up a 750 x 650 blank canvas (we can resize it later)
Select Frame Element 43 and paste in the center of the canvas
Select your magic wand tool and click in the top left circle (Add (Shift), RGB Value, Tolerance 25, Contiguous checked, Feather 0)
Selections, Modify, Expand by 20
Add new raster layer and flood-fill with gradient of choice (Linear style, Angle 0, Repeat 2)
Paste close-up tube on top of gradient layer where desired
Select invert, delete, select none
Change close-up to Luminance (Legacy)
Apply Bad Dream on default settings of choice
Apply dropshadow and merge on top of gradient layer
Effect, Texture Effects, Blinds (Width 3, Opactity 20, Horizontal and Light from left/top checked)
Reselect your magic wand tool and click in the top right circle (Add (Shift), RGB Value, Tolerance 25, Contiguous checked, Feather 0)
Selections, Modify, Expand by 20
Paste paper 12
Select invert, delete, select none
Move paper below frame
Reselect your magic wand tool and click in the bottom left circle (Add (Shift), RGB Value, Tolerance 25, Contiguous checked, Feather 0)
Selections, Modify, Expand by 20
Paste paper 7
Select invert, delete, select none
Move paper below frame
Paste tube of choice where desired
Apply Xero Radiance at setting of choice
Apply Lokas 3D Shadow at default settings
Select Element 51 - paste and position on bottom above tube layer where desired
Apply Eyecandy Gradient Glow on fat default settings (Glow width 3)
Select Element 31 - resize by 80%
Paste and position on right side
Select Element 25 - resize by 40%
Paste and position on top right
Select Element 5 - resize by 55%
Paste and position on bottom left
Select Element 29 - resize by 25%
Paste and position on bottom left
Select Element 10 - resize by 30%
Paste and position on bottom left
Select Element 59 - resize by 20%
Paste and position on bottom left
Select Element 2 - resize by 40%
Paste and position on bottom
Select Element 57 - resize by 20%
Paste and position on bottom
Select Element 8 - resize by 60%
Paste and position on bottom right
Select Element 13 - resize by 35%
Paste and position on bottom right
Select Element 9 - resize by 30%
Paste and position on bottom right
Select Element 35 - resize by 30%
Image Free Rotate Left by 15% and paste on bottom right
Add new raster layer and flood-fill with color or gradient of choice
Move to bottom layer
Apply Mask 1 and merge group
Add any additional elements you like.
Add any dropshadows you like
Crop and resize as desired
Add copyright info, license number and name
You're done! Thanks for trying my tutorial!
Labels:MistyLynn's Creations | 0
comments
Tuesday, October 1, 2013
BREWING A LOVE POTION - TAG SHOWOFF
New Tag showoff using the amazing artwork from The Hunter here and Bibi's Collections wicked "Bruja's Town" kit here
Labels:Bibi's Collections | 0
comments
Subscribe to:
Posts
(Atom)

