Labels
- Alikas Scraps
- All Dolled Up Store
- Amy Marie
- Annaica
- Arthur Crowe
- Babycakes Scraps
- Barbara Jensen
- Bibi's Collections
- Black Widow Creationz
- Blu Moon
- Bonnies Creations
- Bookwork Dezines
- Broken Sky Dezine
- Carita Creationz
- Carpe Diem Designs
- CDO
- Celinart Pinup
- Celine
- Chacha Creationz
- Charmed Designs
- Cherry Blossom Designs
- Chili Designz
- Cluster Frame
- Creative Misfits
- Creative Scraps by Crys
- Curious Creative Dreams
- Danny Lee
- Derzi
- Designs by Ali
- Designs by Joan
- Designs by Ketura
- Designs By Norella
- Designs by Vi
- Diana Gali
- Diry Art Designs
- Disturbed Scraps
- Dreaming With Bella
- Eclipse Creations
- Elegancefly
- Extras
- Fabulous Designz
- Forum Set
- Foxy's Designz
- Freek's Creation
- FTU
- FwTags
- Goldwasser
- Gothic Inspirations
- Gothic Raven Designs
- Graphfreaks
- Hania's Designs
- Happy Pumpkin Studios
- Horseplay's Pasture Designs
- indie-Zine
- Irish Princess Designs
- Ishika Chowdhury
- Kaci McVay
- Kajenna
- katharine
- Katherine
- Khloe Zoey
- Killer Kitty
- Kissing Kate
- KiwiFirestorm
- Kiya Designs
- Kizzed by Kelz
- KZ Designz
- Lady Mishka
- Lil Mz Brainstorm
- Maiden of Darkness
- Mariel Designs
- MellieBeans
- Michelle's Myths
- Midnight Shadow
- Misticheskya
- MistyLynn's Creations
- MMeliCrea Designz
- Moon Vixen Designs
- NaSionainne
- Ninaste
- Niqui Designs
- Pandora
- Picsfordesign
- Pink Paradox Productions
- Radyga Designs
- Redefined Designs
- Rissa's Designs
- Schnegge
- ScottishButterfly Creations
- Scrappin Krazy Designs
- Scrappin With Lil Ol Me
- Scraps and the City
- Scraps Dimensions
- Scraps From The Heart
- Scraps N Company
- Scraps with Attitude
- Shining Star Art
- Skyscraps
- Sleek N Sassy Designs
- Sophisticat Simone
- Souldesigner
- Soxsational Scraps
- Spazz
- Starlite and Soul
- Stella Felice
- Tammy Welt
- Tasha's Playground
- The PSP Project
- Thrifty Scraps by Gina
- Tiny Turtle Designs
- Upyourart
- Verymany
- Wendy Gerber
- Whisper In the Wind
- Wick3d Creationz
- Wicked Diabla
- Yude's Kreationz
Blog Archive
Sunday, June 30, 2019
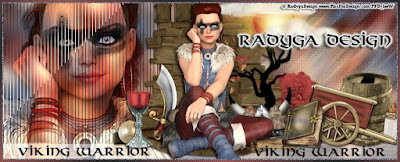
VIKING WARRIOR
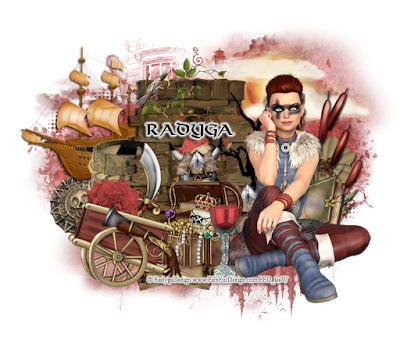
Supplies needed:
I am using the stunning artwork from Radyga Design for this tutorial which you can find Here, Here, Here, Here and Here
Scrapkit: I am using a kit from CSDesigns called "Viking Warrior" which you can get by going here
Mask 17 from Fecnikek which you can find here
Mask 114 from Moonbeams and Spiderwebs which you can find here
Plugins: Lokas 3D Shadow
----------------------------
This tutorial is written for those who have working knowledge of PSPX2 (any version will do).
This tutorial was written by me on June 30, 2019. Please do not copy or paste on any other forum, website or blog provide link back to tut only. Please do not claim as your own. This tutorial is copyrighted to me. Any resemblance to any other tutorial is purely coincidental.
Ok - let's start and remember to save often.
Open up a 750 x 650 blank canvas (we can resize it later)
Select Paper 5 and paste on the canvas
Apply Mask 17 and merge group
Select Paper 5 and paste on the canvas
Apply Mask 114 and merge group
Select Element 9 - resize by 75%
Paste and position in the center of the canvas
Select Element 12 - resize by 50%
Image mirror and paste on the top left
Select Element 57 - resize by 75%
Paste and position on the top right
Select Element 23 - resize by 40%
Paste and position on the top
Select Element 27 - resize by 50%
Paste and position on the right side
Select Element 40 - resize by 40%
Paste and position on the right side
Paste tube of choice where desired
Apply Lokas 3D Shadow at default settings
Select Element 47 - resize by 40%
Paste and position on the left side
Select Element 50 - resize by 25%
Paste and position on the left side
Select Element 37 - resize by 20%
Paste and position on the bottom left
Select Element 15 - resize by 40%
Paste and position on the bottom
Select Element 11 - resize by 20%
Paste and position on the top of the chest element
Select Element 51 - resize by 50%
Paste and paste on the bottom left
Select Element 10 - resize by 30%
Paste and position on the bottom
Select Element 38 - resize by 30%
Paste and position on the bottom
Select Element 16 - resize by 25%
Paste and position on the bottom right
Add any dropshadows you like
Sharpen any elements as needed
Crop and resize as desired
Add copyright info, license number and name
You're done! Thanks for trying my tutorial!

Labels:Radyga Designs | 0
comments
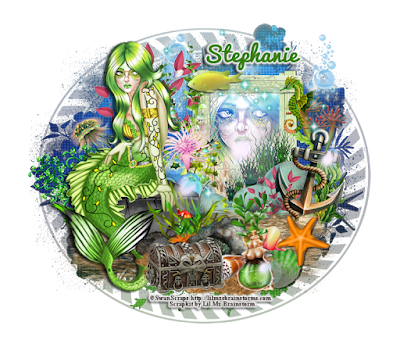
GREEN MERMAID
Supplies needed:
Scrapkit: I am using a beautiful kit from Lil Mz Brainstorm called "Green Mermaid" which you can get by going here
Summer Mask 2 from Fecnikek which you can find here
Plugins: Lokas 3D Shadow
----------------------------
This tutorial is written for those who have working knowledge of PSPX2 (any version will do).
This tutorial was written by me on June 28, 2019. Please do not copy or paste on any other forum, website or blog provide link back to tut only. Please do not claim as your own. This tutorial is copyrighted to me. Any resemblance to any other tutorial is purely coincidental.
Ok - let's start and remember to save often.
Open up a 750 x 650 blank canvas (we can resize it later)
Select Paper 9 and paste on the canvas
Apply Mask 2 and merge group
Select Element 66 - resize by 65%
Paste and position on the top right
Select Frame Element 21 - resize by 40%
Paste and position on the top right
Select your the center of the frame (Add (Shift), RGB Value, Tolerance 25, Contiguous checked, Feather 0)
Selections, Modify, Expand by 5
Paste paper 5
Select invert, delete
Paste close-up tube on paper layer and delete
Select none
Change close-up to Overlay
Move paper layer and closeups below frame element
Select Element 90 - resize by 40%
Paste and position on the top left
Select Element 83 - resize by 85%
Paste and position on the bottom
Select Element 47 - resize by 30%
Paste and position on the left side
Select Element 5 - resize by 20%
Paste and position on the left side
Paste tube of choice where desired
Apply Lokas 3D Shadow at default settings
Select Element 84 - resize by 50%
Paste and position on the right side
Select Element 56 - resize by 2%
Paste and position on the right side
Select Element 52 - resize by 30%
Paste and position on the right side
Select Element 23 - resize by 40%
Paste and position on the left side of the frame
Select Element 57 - resize by 20%
Paste and position below element 23
Select Element 94 - resize by 50%
Paste and position on the bottom below tube layer
Select Element 98 - resize by 25%
Paste and position on the bottom
Select Element 7 - resize by 20%
Paste and position on the bottom right
Select Element 75 - resize by 20%
Paste and position on the bottom
Select Element 54 - resize by 20%
Image Free Rotate Right by 15% and paste on the bottom
Select Element 73 - resize by 20%
Paste and position on the bottom
Select Element 77 - resize by 15%
Paste and position on the bottom
Select Element 97 - resize by 20%
Paste and position on the top
Select Element 9 - resize by 20%
Paste and position on the top right
Select Element 63 - resize by 55%
Paste and position on the top where desired
Select Element 24 - resize by 55%
Paste and position on the canvas where desired
Add any dropshadows you like
Sharpen any elements as needed
Crop and resize as desired
Add copyright info, license number and name
You're done! Thanks for trying my tutorial!

Labels:All Dolled Up Store | 0
comments
Thursday, June 27, 2019
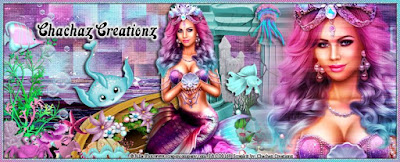
WONDERFUL MERMAID
Supplies needed:
Scrapkit: I am using a beautiful kit from Chachaz Creationz called "Wonderful Mermaid" which you can get by going here
Mask 41 from Vivienne which you can find here
Plugins: Lokas 3D Shadow
----------------------------
This tutorial is written for those who have working knowledge of PSPX2 (any version will do).
This tutorial was written by me on June 27, 2019. Please do not copy or paste on any other forum, website or blog provide link back to tut only. Please do not claim as your own. This tutorial is copyrighted to me. Any resemblance to any other tutorial is purely coincidental.
Ok - let's start and remember to save often.
Open up a 750 x 650 blank canvas (we can resize it later)
Select Paper 3 and paste on the canvas
Apply Mask 41 and merge group
Select Element 62 - resize by 55%
Paste and position on the top left
Select Frame Element 47 - resize by 40%
Paste and position on the top right
Select your magic wand tool and select the center of the frame (Add (Shift), RGB Value, Tolerance 25, Contiguous checked, Feather 0)
Selections, Modify, Expand by 5
Paste paper 7
Select invert, delete
Paste close-up tube on paper layer and delete
Select none
Duplicate close-up, apply Gaussian Blur at 4 and change to Overlay
Move paper layer and closeups below frame element
Select Element 93 - resize by 55%
Paste and position on the top left
Select Element 10 - resize by 50%
Paste and position in the center
Select Element 4 - resize by 50%
Paste and position on the left side
Select Element 2 - resize by 65%
Paste and position on the bottom left
Select Element 17 - resize by 55%
Paste and position on the right side
Select Element 19 - resize by 75%
Paste and position on the bottom
Select Element 65 - paste and position on the bottom
Paste tube of choice where desired
Apply Lokas 3D Shadow at default settings
Select Element 50 - resize by 20%
Paste and position on the top
Select Element 82 - resize by 20%
Paste and position on the top
Select Element 30 - resize by 20%
Paste and position on the top left
Select Element 49 - resize by 25%
Paste and position on the left side
Select Element 6 - resize by 20%
Paste and position on the bottom left
Select Element 40 - resize by 25%
Paste and paste on the bottom left
Select Element 85 - resize by 20%
Paste and position on the bottom
Select Element 86 - resize by 15%
Paste and position on the bottom
Select Element 89 - resize by 30%
Paste and position on the bottom
Select Element 67 - resize by 40%
Paste and position on the right side
Select Element 81 - resize by 25%
Paste and position on the bottom
Select Element 63 - resize by 25%
Paste and position on the bottom right
Select Element 26 - resize by 25%
Paste and position on the bottom
Select Element 5 - resize by 20%
Paste and position on the bottom
Select Element 14 - resize by 20%
Paste and position on the bottom
Select Element 76 - resize by 40%
Paste and position on top where desired
Add any dropshadows you like
Sharpen any elements as needed
Crop and resize as desired
Add copyright info, license number and name
You're done! Thanks for trying my tutorial!

Labels:Chacha Creationz | 0
comments
Wednesday, June 26, 2019
GRAPE GROTTO
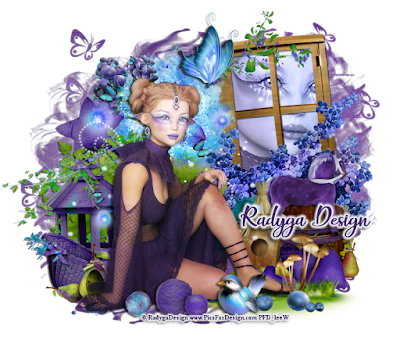
Supplies needed:
I am using the stunning artwork from Radyga Design for this tutorial which you can find Here, Here, Here, Here and Here
Scrapkit: I am using a beautiful kit from Tiny Turtle Designs which you can find here
Spring Mask 4 from Marie's Designs which you can find here
Plugins: Lokas 3D Shadow
----------------------------
This tutorial is written for those who have working knowledge of PSPX2 (any version will do).
This tutorial was written by me on June 26, 2019. Please do not copy or paste on any other forum, website or blog provide link back to tut only. Please do not claim as your own. This tutorial is copyrighted to me. Any resemblance to any other tutorial is purely coincidental.
Ok - let's start and remember to save often.
Open up a 750 x 650 blank canvas (we can resize it later)
Select Paper 3 and paste on the canvas
Apply Mask 4 and merge group
Select Element 87 - resize by 80%
Paste and position on the top left
Select Frame Element 74 - resize by 65%
Paste and position on the top right
Select your magic wand tool and select the center of the frame (Add (Shift), RGB Value, Tolerance 25, Contiguous checked, Feather 0)
Selections, Modify, Expand by 5
Paste paper 17
Select invert, delete
Paste close-up tube on paper layer and delete
Select none
Change close-up to Luminence (Legacy)
Move paper layer and closeup below frame element
Select Element 80 - resize by 40%
Paste and position on the top left
Select Element 57- resize by 40%
Paste and position on the top right
Select Element 3 - resize by 25%
Paste and position on the top left
Select Element 70 -
Paste and position on the bottom left
Select Element 136 - resize by 55%
Paste and position on the right side
Paste tube of choice where desired
Apply Lokas 3D Shadow at default settings
Select Element 48 - resize by 50%
Image mirror and paste on the bottom right
Select Element 34 - resize by 40%
Paste and position on the right side
Select Element 25 - resize by 55%
Paste and position on the left side
Select Element 41 - resize by 35%
Paste and position on the bottom left
Select Element 32 - resize by 25%
Paste and position on the bottom left
Select Element 56 - resize by 30%
Paste and paste on the bottom right
Select Element 90 - resize by 30%
Paste and position on the bottom right
Select Element 66 - resize by 65%
Paste and position on the bottom right below tube layer
Select Element 69 - resize by 30%
Paste and position on the bottom
Select Element 10 - resize by 25%
Paste and position on the bottom
Select Element 123 - resize by 25%
Paste and position on the top right
Select Element 45 - resize by 55%
Paste and position on the canvas where desired
Select Element 73 -
Image mirror and paste on the bottom
Select Element 16 - resize by 85%
Paste and position on the left side
Add any dropshadows you like
Sharpen any elements as needed
Crop and resize as desired
Add copyright info, license number and name
You're done! Thanks for trying my tutorial!

Labels:Radyga Designs | 0
comments
Tuesday, June 25, 2019
TROPICAL BEACH
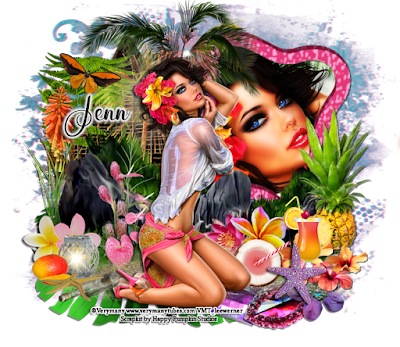
Supplies needed:
I am using the stunning artwork from Verymany for this tutorial which you can find here
Scrapkit: I am using a beautiful kit from Happy Pumpkin Studios called "HPS Kit 36" which you can get by going Here
Mask 195 from Sophisticated Simone which you can find here
Plugins: Lokas 3D Shadow
----------------------------
This tutorial is written for those who have working knowledge of PSPX2 (any version will do).
This tutorial was written by me on June 25, 2019. Please do not copy or paste on any other forum, website or blog provide link back to tut only. Please do not claim as your own. This tutorial is copyrighted to me. Any resemblance to any other tutorial is purely coincidental.
Ok - let's start and remember to save often.
Open up a 750 x 650 blank canvas (we can resize it later)
Select Paper 23 and paste on the canvas
Apply Mask 195 and merge group
Select Element 20 - resize by 40%
Paste and position on the top left
Select Frame Element 2 - resize by 50%
Image Free Rotate Right by 15% and paste on the top right
Select your magic wand tool and select the center of the frame (Add (Shift), RGB Value, Tolerance 25, Contiguous checked, Feather 0)
Selections, Modify, Expand by 5
Paste paper 2
Select invert, delete
Paste close-up tube on paper layer and delete
Select none
Duplicate close-up, apply Gaussian Blur at 4 and change to Overlay
Move paper layer and closeups below frame element
Select Element 10 - resize by 45%
Paste and position on the top center
Select Element 30 - resize by 40%
Paste and position in the center where desired
Select Element 40 - resize by 40%
Paste and position on the top left
Select Element 33 - resize by 40%
Paste and position on the left side
Select Element 37 - resize by 20%
Paste and position on the top left
Select Element 5 - resize by 45%
Paste and position on the left side
Select Element 14 - resize by 50%
Paste and position on the right side
Select Element 128 - resize by 65%
Paste and position on the bottom left
Select Element 15 - resize by 75%
Paste and position on the bottom
Paste tube of choice where desired
Apply Lokas 3D Shadow at default settings
Select Element 160 - resize by 20%
Paste and position on the bottom left
Select Element 131 - resize by 12%
Paste and position on the bottom left
Select Element 61 - resize by 15%
Paste and position on the bottom left
Select Element 1 - resize by 20%
Paste and position on the bottom left
Select Element 23 - resize by 35%
Paste and position on the bottom right
Select Element 11 - resize by 25%
Paste and position on the bottom right
Select Element 48 - resize by 20%
Paste and position on the bottom right
Select Element 73 - resize by 15%
Paste and position on the bottom right
Select Element 70 - resize by 20%
Image Free Rotate Left by 15% and paste on the bottom right
Select Element 129 - resize by 15%
Paste and position on the bottom
Select Element 95 - resize by 15%
Paste and position on the bottom
Select Element 24 - resize by 15%
Paste and position on the bottom
Select Element 114 - resize by 15%
Paste and position on the bottom
Select Element 71 - resize by 15%
Paste and position on the bottom
Add any dropshadows you like
Sharpen any elements as needed
Crop and resize as desired
Add copyright info, license number and name
You're done! Thanks for trying my tutorial!

Labels:Happy Pumpkin Studios | 0
comments
COASTAL DREAMS
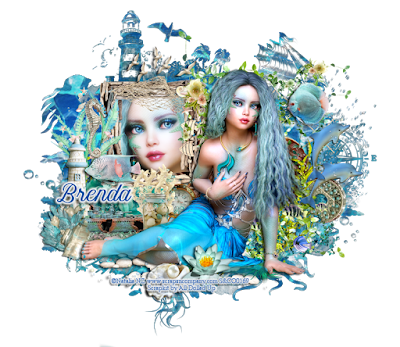
Supplies needed:
I am using the stunning artwork from Natalia NZ for this tutorial which you can find here
Scrapkit: I am using a beautiful kit from All Dolled Up called "Coastal Dreams" which you can get by going here
Summer Mask 1 from Fecnikek which you can find here
Plugins: Lokas 3D Shadow
----------------------------
This tutorial is written for those who have working knowledge of PSPX2 (any version will do).
This tutorial was written by me on June 25, 2019. Please do not copy or paste on any other forum, website or blog provide link back to tut only. Please do not claim as your own. This tutorial is copyrighted to me. Any resemblance to any other tutorial is purely coincidental.
Ok - let's start and remember to save often.
Open up a 750 x 650 blank canvas (we can resize it later)
Select Paper 13 and paste on the canvas
Apply Mask 1 and merge group
Select Paper 12 and paste on the canvas
Reapply Mask 1, merge group and change to Overlay
Select Element 22 - resize by 80%
Paste and position in the center of the canvas
Select Frame Element 57 - resize by 50%
Paste and position on the top left
Select your magic wand tool and select the center of the frame (Add (Shift), RGB Value, Tolerance 25, Contiguous checked, Feather 0)
Selections, Modify, Expand by 5
Paste paper 5
Select invert, delete
Paste close-up tube on paper layer and delete
Select none
Duplicate close-up, apply Gaussian Blur at 4 and change to Overlay
Move paper layer and closeups below frame element
Select Element 123 -
Paste and position on the bottom
Select Element 99 - resize by 65%
Image mirror and paste on the top right
Select Element 94 - resize by 40%
Paste and position on the bottom right
Paste tube of choice where desired
Apply Lokas 3D Shadow at default settings
Select Element 82 - resize by 40%
Paste and position on the top left side
Select Element 79 - resize by 30%
Paste and position on the top left side
Select Element 17 - resize by 30%
Paste and position on the bottom left
Select Element 40 - resize by 25%
Paste and position on the bottom left
Select Element 148 - resize by 30%
Paste and position on the left side
Select Element 70 - resize by 25%
Paste and paste on the left below frame element
Select Element 140 - resize by 20%
Paste and position on the left below frame element
Select Element 138 - resize by 30%
Paste and position on the bottom left
Select Element 128 - resize by 20%
Paste and position on the bottom left
Select Element 74 - resize by 25%
Paste and position on the left side
Select Element 81 - resize by 20%
Paste and position on the top right
Select Element 119 - resize by 40%
Paste and position on the right side
Select Element 143 - resize by 18%
Paste and position on the bottom right
Select Element 33 - resize by 20%
Paste and position on the bottom
Select Element 85 - resize by 20%
Paste and position on the bottom
Select Element 59 - resize by 30%
Paste and position on the top left above frame
Select Element 7 - resize by 85%
Paste and position on the bottom left
Add any dropshadows you like
Sharpen any elements as needed
Crop and resize as desired
Add copyright info, license number and name
You're done! Thanks for trying my tutorial!

Labels:All Dolled Up Store | 0
comments
Monday, June 24, 2019
SILENT SECRETS
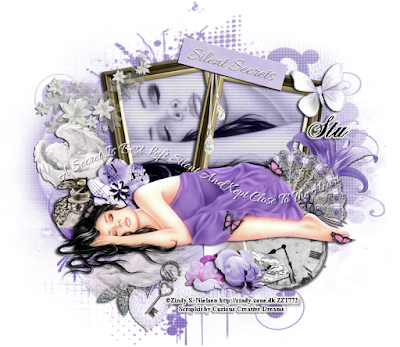
Supplies needed:
I am using the stunning artwork from Zindy Nielsen for this tutorial which you can find here
Scrapkit: I am using a beautiful kit from Curious Creative Dreams called "Silent Secrets" which you can get by going Here and Here
Mask 7 from Vivienne which you can find here
Plugins: Lokas 3D Shadow
----------------------------
This tutorial is written for those who have working knowledge of PSPX2 (any version will do).
This tutorial was written by me on June 24, 2019. Please do not copy or paste on any other forum, website or blog provide link back to tut only. Please do not claim as your own. This tutorial is copyrighted to me. Any resemblance to any other tutorial is purely coincidental.
Ok - let's start and remember to save often.
Open up a 750 x 650 blank canvas (we can resize it later)
Select Paper 74 and paste on the canvas
Apply Mask 7 and merge group
Select Frame Element 65 - resize by 85%
Paste and position on the top center
Select your magic wand tool and select the center squares of the frame (Add (Shift), RGB Value, Tolerance 25, Contiguous checked, Feather 0)
Selections, Modify, Expand by 5
Paste paper 78 - Select invert, delete
Paste close-up tube on paper layer and delete
Select none
Change close-up to Luminence (Legacy)
Merge close-up down on paper layer
Effect, Texture Effects, Blinds (Width 2, Opactity 25, Horizontal and Light from left/top checked)
Move layers below frame element
Select Element 68 - resize by 50%
Image Free Rotate Right by 15% and paste on the top
Select Element 48 - resize by 55%
Paste and position on the top left
Select Element 20 - resize by 50%
Paste and position on the top right
Paste tube of choice where desired
Apply Lokas 3D Shadow at default settings
Select Element 7 - resize by 50%
Paste and position on the left side below tube layer
Select Element 27 - resize by 40%
Paste and position on the left side
Select Element 60 - resize by 50%
Paste and position on the left side
Select Element 29 - resize by 50%
Paste and position on the right side
Select Element 62 - resize by 50%
Paste and position on the right side
Select Element 30 - resize by 40%
Paste and paste on the bottom right
Select Element 41 - resize by 55%
Paste and position on the bottom
Select Element 19 - resize by 40%
Paste and position on the bottom
Select Element 59 - resize by 50%
Paste and position on the bottom
Select Element 10 - resize by 25%
Paste and position on the bottom left
Select Element 11 - resize by 65%
Paste and position on the bottom left
Select Element 16 - resize by 40%
Paste and position on the bottom left
Select Element 42 - resize by 25%
Paste and position on the bottom
Select Element 14 - resize by 40%
Paste and position on the top center
Select Element 67 -
Paste and position in the center
Add any dropshadows you like
Sharpen any elements as needed
Crop and resize as desired
Add copyright info, license number and name
You're done! Thanks for trying my tutorial!

Labels:Curious Creative Dreams | 0
comments
Sunday, June 23, 2019
4TH JULY
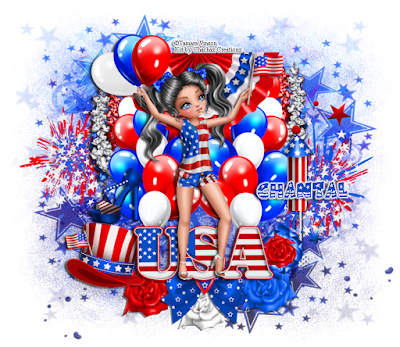
Supplies needed:
Scrapkit: I am using a beautiful kit from Chachaz Creationz called "4th July" which you can get by going Here, Here, Here
Stars Mask from Angie which you can find here
Plugins: Lokas 3D Shadow
----------------------------
This tutorial is written for those who have working knowledge of PSPX2 (any version will do).
This tutorial was written by me on June 23, 2019. Please do not copy or paste on any other forum, website or blog provide link back to tut only. Please do not claim as your own. This tutorial is copyrighted to me. Any resemblance to any other tutorial is purely coincidental.
Ok - let's start and remember to save often.
Open up a 750 x 650 blank canvas (we can resize it later)
Select Background 1 and paste on the canvas
Apply Stars Mask and merge group
Select Balloons Element - resize by 50%
Paste and position on the right side
Image duplicate mirror and reposition on the left side
Select Fireworks 2 Element - resize by 50%
Paste and position on the right side
Select Fireworks 1 Element - resize by 50%
Paste and position on the left side
Select Banner 2 Element - resize by 45%
Paste and position on the top center
Select Flower 3 Element - resize by 40%
Paste and position on the top right
Image duplicate, mirror and reposition on the left
Select USA Element - resize by 50%
Paste and position on the bottom below balloons
Paste tube of choice where desired
Apply Lokas 3D Shadow at default settings
Select Bow Tie Element - resize by 30%
Paste and position on bottom below USA Element
Select Rocket 2 Element - resize by 40%
Paste and position on the right side
Select Rose Blue Red Element - resize by 20%
Paste and position on the bottom right
Select Hat 2 Element - resize by 25%
Image mirror and paste on the bottom left
Select Shoe Element - resize by 25%
Paste and position on the left side above hat element
Select Rose White Element - resize by 25%
Paste and paste on the bottom below bow element
Select Rose Blue Element - resize by 25%
Paste and position on the bottom right
Select Rose Red Element - resize by 25%
Paste and position on the bottom left
Select Stars 2 Element - resize by 25%
Paste and position on the top right
Add any dropshadows you like
Sharpen any elements as needed
Crop and resize as desired
Add copyright info, license number and name
You're done! Thanks for trying my tutorial!

Labels:Chacha Creationz | 0
comments
Friday, June 21, 2019
STEAM
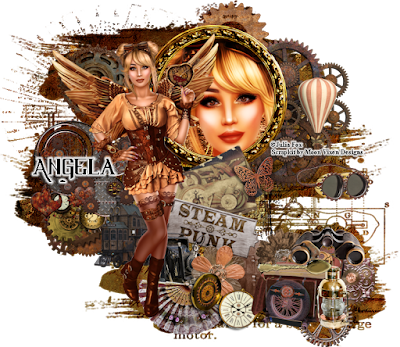
Supplies needed:
Scrapkit: I am using a beautiful kit from Moon Vixen Design called "Steam" which you can get by going Here, Here or Here
Mask 61 from Vivienne which you can find here
Plugins: Lokas 3D Shadow
----------------------------
This tutorial is written for those who have working knowledge of PSPX2 (any version will do).
This tutorial was written by me on June 21, 2019. Please do not copy or paste on any other forum, website or blog provide link back to tut only. Please do not claim as your own. This tutorial is copyrighted to me. Any resemblance to any other tutorial is purely coincidental.
Ok - let's start and remember to save often.
Open up a 750 x 650 blank canvas (we can resize it later)
Select Paper 11 and paste on the canvas
Apply Mask 61 and merge group
Select Paper 7 and paste on the canvas
Apply same mask, merge group and change to Overlay
Select Element 58 - resize by 20%
Paste and position on the top right
Select Element 61 - resize by 40%
Paste and position on the top right
Select Frame Element 143 - resize by 30%
Paste and position on the top right where desired
Select your magic wand tool and select the center of the frame (Add (Shift), RGB Value, Tolerance 25, Contiguous checked, Feather 0)
Selections, Modify, Expand by 5
Paste paper 10
Select invert, delete
Paste close-up tube on paper layer and delete
Select none
Duplicate close-up, apply Gaussian Blur at 4 and change to Overlay
Move paper layer and closeup layers below frame element
Select Element 67 - resize by 20%
Paste and position on the top left
Select Element 95 - resize by 65%
Paste and position in the center where desired
Select Element 49 - resize by 25%
Paste and position on the left side
Select Element 34 - resize by 25%
Paste and position on the left side
Paste tube of choice where desired
Apply Lokas 3D Shadow at default settings
Select Element 46 - resize by 20%
Paste and position on the right side
Select Element 8 - resize by 30%
Paste and position on the right side
Select Element 62 - resize by 25%
Image Free Rotate Left by 15% and paste in the center below frame
Select Element 65 - resize by 20%
Paste and position on the left side
Select Element 3 - resize by 25%
Image Free Rotate Left by 15% and paste in the center
Select Element 9 - resize by 20%
Image Free Rotate Right by 15% and paste in the center
Select Element 97 - resize by 20%
Image mirror and paste on the bottom
Select Element 2 - resize by 25%
Paste and position on the bottom
Select Element 73 - resize by 25%
Paste and position on the bottom
Select Element 10 - resize by 25%
Paste and position on the bottom right
Select Element 68 - resize by 20%
Paste and position on the bottom right
Select Element 5 - resize by 25%
Paste and position on the bottom right
Select Element 48 - resize by 25%
Paste and position on the bottom right
Select Element 87 - resize by 20%
Paste and position on the bottom right
Select Element 113 - resize by 15%
Paste and position on the bottom right
Select Element 45 - resize by 20%
Paste and position on the bottom
Select Element 104 - resize by 20%
Paste and position on the bottom right
Add any dropshadows you like
Sharpen any elements as needed
Crop and resize as desired
Add copyright info, license number and name
You're done! Thanks for trying my tutorial!

Labels:Moon Vixen Designs | 0
comments
Thursday, June 20, 2019
PEACOCK PARK
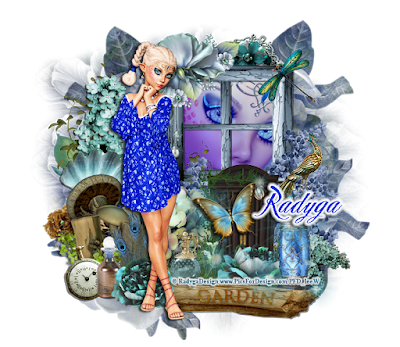
Supplies needed:
I am using the stunning artwork from Radyga Design for this tutorial which you can find Here, Here, Here, Here and Here
Scrapkit: I am using a beautiful kit from Tiny Turtle Designs called "Peacock Park" which you can get by going here
Mask 1 from Crispified by Basima which you can find here
Plugins: Lokas 3D Shadow
----------------------------
This tutorial is written for those who have working knowledge of PSPX2 (any version will do).
This tutorial was written by me on June 20, 2019. Please do not copy or paste on any other forum, website or blog provide link back to tut only. Please do not claim as your own. This tutorial is copyrighted to me. Any resemblance to any other tutorial is purely coincidental.
Ok - let's start and remember to save often.
Open up a 750 x 650 blank canvas (we can resize it later)
Select Paper 17 and paste on the canvas
Apply Mask 1 and merge group
Select Frame Element 127 - resize by 40%
Paste and position on the top right
Select your magic wand tool and select the center of the frame (Add (Shift), RGB Value, Tolerance 25, Contiguous checked, Feather 0)
Selections, Modify, Expand by 5
Add new layer and flood-fill with color or Gradient of choice
Paste close-up tube on flood-fill layer and delete
Select none
Change close-up to Overlay
Move gradient and closeup layers below frame element
Select Element 82 - resize by 40%
Paste and position on the top left on window frame
Select Element 166 - resize by 20%
Paste and position on the top right below window frame
Select Element 158 - resize by 30%
Paste and position on the top left
Select Element 145 - resize by 35%
Paste and position on the top right
Select Element 132 - resize by 25%
Paste and position on the left side
Select Element 125 - resize by 25%
Paste and position on the left side
Select Element 149 - resize by 40%
Paste and position on the bottom left
Select Element 45 - resize by 15%
Paste and position on the left side
Select Element 79 - resize by 20%
Image Free Rotate Left by 15% and paste on the bottom left
Select Element 98 - resize by 20%
Paste and position on the bottom left
Paste tube of choice where desired
Apply Lokas 3D Shadow at default settings
Select Element 139 - resize by 50%
Paste and position on the right side
Select Element 123 - resize by 50%
Paste and position on the bottom right
Select Element 161 - resize by 30%
Paste and position on the bottom right
Select Element 164 - resize by 30%
Paste and position on the right side
Select Element 131 - resize by 30%
Paste and position on the bottom right
Select Element 163 - resize by 25%
Paste and paste on the bottom
Select Element 155 - resize by 40%
Paste and position on the bottom below tube layer
Select Element 43 - resize by 25%
Image Free Rotate Left by 15% and paste on the bottom
Select Element 162 - resize by 20%
Paste and position on the bottom below tube layer
Select Element 152 - resize by 20%
Paste and position on the bottom
Select Element 64 - resize by 50%
Paste and position on the bottom
Select Element 95 - resize by 30%
Paste and position on the bottom left
Select Element 110 - resize by 65%
Paste and position on the canvas where desired
Add any dropshadows you like
Sharpen any elements as needed
Crop and resize as desired
Add copyright info, license number and name
You're done! Thanks for trying my tutorial!
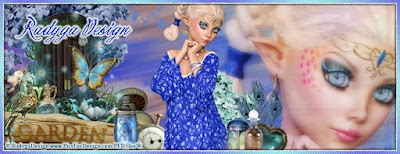

Labels:Radyga Designs | 0
comments
Tuesday, June 18, 2019
VANGIE
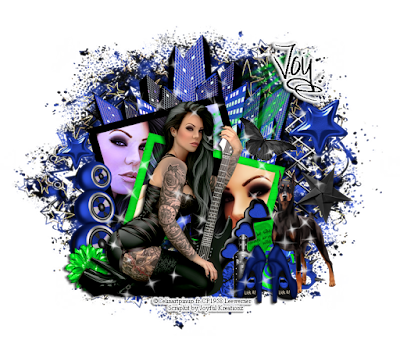
Supplies needed:
I am using the stunning artwork from Celinart Pinup for this tutorial which you can find here
Scrapkit: I am using a beautiful kit from Joyful Kreationz called "Vangie" which you can get by going here
Mask 297 from MizTeeques which you can find here
Plugins: Lokas 3D Shadow
----------------------------
This tutorial is written for those who have working knowledge of PSPX2 (any version will do).
This tutorial was written by me on June 18, 2019. Please do not copy or paste on any other forum, website or blog provide link back to tut only. Please do not claim as your own. This tutorial is copyrighted to me. Any resemblance to any other tutorial is purely coincidental.
Ok - let's start and remember to save often.
Open up a 750 x 650 blank canvas (we can resize it later)
Select Paper 7 and paste on the canvas
Apply Mask 297 and merge group
Select Element 35 - Paste and position in the center above mask
Select Frame Element 2 - resize by 65%
Paste and position in the center of the canvas
Select your magic wand tool and select the center squares of the frame (Add (Shift), RGB Value, Tolerance 25, Contiguous checked, Feather 0)
Selections, Modify, Expand by 5
Add new layer and flood-fill with color or Gradient of choice
Paste close-up tube on flood-fill layer and delete
Select none
Change close-ups to Hard Light
Move gradient and closeup layers below frame element
Select Element 51 - resize by 75%
Paste and position on the top below frame element
Select Element 18 - resize by 80%
Paste and position on the top right
Select Element 106 - resize by 20%
Paste and position on the top right side
Duplicate element and resize by 65% and place on the left side
Paste tube of choice where desired
Apply Lokas 3D Shadow at default settings
Select Element 29 - resize by 20%
Paste and position on the right side
Select Element 2 - resize by 20%
Paste and position on the right side
Select Element 57 - resize by 40%
Paste and position on the left side
Select Element 31 - resize by 20%
Paste and position on the bottom left
Select Element 112 - resize by 40%
Paste and position on the bottom right
Select Element 58 - resize by 40%
Paste and paste on the bottom right
Select Element 48 - resize by 30%
Paste and position on the bottom right
Select Element 5 - resize by 20%
Paste and position on the bottom
Select Element 76 - resize by 30%
Paste and position on the bottom
Select Element 38 - resize by 20%
Paste and position on the bottom
Select Element 59 - resize by 20%
Paste and position on the bottom
Select Element 124 - resize by 90%
Paste and position on canvas where desired
Add any dropshadows you like
Sharpen any elements as needed
Crop and resize as desired
Add copyright info, license number and name
You're done! Thanks for trying my tutorial!

Labels:All Dolled Up Store | 0
comments
Friday, June 14, 2019
CATRINA
Supplies needed:
I am using the stunning artwork from Danny Lee for this tutorial which you can find here
Scrapkit: I am using a beautiful kit from Chili's Designz called "Hat Catrina" which you can get by going here
Mask 51 from Vivienne which you can find here
Plugins: Lokas 3D Shadow
----------------------------
This tutorial is written for those who have working knowledge of PSPX2 (any version will do).
This tutorial was written by me on June 14, 2019. Please do not copy or paste on any other forum, website or blog provide link back to tut only. Please do not claim as your own. This tutorial is copyrighted to me. Any resemblance to any other tutorial is purely coincidental.
Ok - let's start and remember to save often.
Open up a 750 x 650 blank canvas (we can resize it later)
Select Paper 8 and paste on the canvas
Apply Mask 51 and merge group
Select Frame Element 3 - resize by 35%
Image Free Rotate Left by 15% and paste on the top left
Select your magic wand tool and select the center of the frame (Add (Shift), RGB Value, Tolerance 25, Contiguous checked, Feather 0)
Selections, Modify, Expand by 5
Paste paper 10
Select invert, delete
Paste close-up tube above paper layer
Delete, select none
Change closeup to Overlay
Move paper and closeup below frame element
Select Gate Element - resize by 55%
Paste in the center of the mask layer
Select Plant 2 Element - resize by 30%
Paste and position on the top right
Select Flower 4 Element - resize by 40%
Paste and position on the left side
Select Skulls Element - resize by 65%
Paste and position on the bottom
Select Umbrella Element - resize by 30%
Image mirror and paste on the bottom right
Paste tube of choice where desired
Apply Lokas 3D Shadow at default settings
Select Skeleton 3 Element - resize by 40%
Paste and position on the bottom right
Select Rose Element - resize by 25%
Paste and position on the right side
Select Clock Element - resize by 30%
Image Free Rotate Right by 15% and paste on the bottom right
Select Hat 2 Element - resize by 30%
Paste and position on the bottom right
Select Skull Element - resize by 25%
Paste and position on the bottom right
Select Roses Element - resize by 40%
Paste and paste on the bottom below tube layer
Select Fan Element - resize by 30%
Paste and position on the bottom below tube layer
Select Flower 2 Element - resize by 32%
Paste and position on the bottom
Select Box Element - resize by 30%
Paste and position on the bottom
Select Lock Element - resize by 25%
Paste and position on the bottom
Select Shoe 2 Element - resize by 30%
Paste and position on the bottom
Select Hand Element - resize by 25%
Paste and position on the bottom
Select Jewel 2 Element - resize by 40%
Paste and position on the bottom left
Select Holder Element - resize by 30%
Paste and position on the bottom left
Select Cat Element - resize by 40%
Paste and position on the bottom left
Select Cake Element - resize by 30%
Paste and position on the bottom left
Select Jar Element - resize by 30%
Paste and position on the bottom
Select Deco 3 Element - resize by 20%
Paste and position on the bottom
Select Butterfly Element - resize by 30%
Paste and position on the left side
Select Sparkles 2 Element - resize by 65%
Paste on canvas where desired
Add any dropshadows you like
Sharpen any elements as needed
Crop and resize as desired
Add copyright info, license number and name
You're done! Thanks for trying my tutorial!
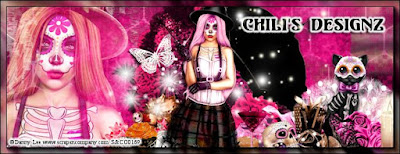

Labels:Chili Designz | 0
comments
Thursday, June 13, 2019
SWEET WATERMELON
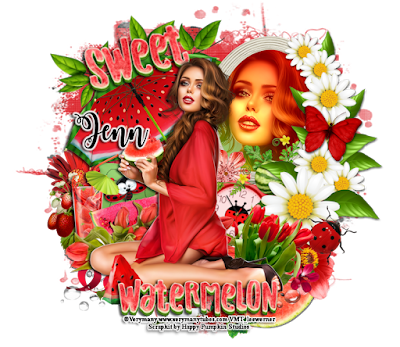
Supplies needed:
I am using the stunning artwork from Verymany for this tutorial which you can find here
Scrapkit: I am using a beautiful kit from Happy Pumpkin Studios called "HPS Kit 30" which you can get by going Here, Here and Here
Mask 278 from MizTeeques which you can find here
Plugins: Lokas 3D Shadow
----------------------------
This tutorial is written for those who have working knowledge of PSPX2 (any version will do).
This tutorial was written by me on June 13, 2019. Please do not copy or paste on any other forum, website or blog provide link back to tut only. Please do not claim as your own. This tutorial is copyrighted to me. Any resemblance to any other tutorial is purely coincidental.
Ok - let's start and remember to save often.
Open up a 750 x 650 blank canvas (we can resize it later)
Select Paper 7 and paste on the canvas
Apply Mask 278 and merge group
Select Element 87 - resize by 45%
Image Free Rotate Left by 15% and paste on the top left
Select Element 123 - resize by 40%
Paste and position on the top left
Select Element 6 - resize by 25%
Image Free Rotate Left by 15% and paste on the top left
Select Frame Element 2 - resize by 40%
Image Free Rotate Right by 15% and paste on the top right
Select your magic wand tool and select the center of the frame (Add (Shift), RGB Value, Tolerance 25, Contiguous checked, Feather 0)
Selections, Modify, Expand by 5
Add new layer and flood-fill with color or Gradient of choice
Paste close-up tube on flood-fill layer and delete
Select none
Duplicate close-up, apply Gaussian Blur at 4 and change to Overlay
Move gradient and closeup layers below frame element
Select Element 77 - resize by 55%
Image mirror and paste on the right side
Select Element 148 - resize by 15%
Image Free Rotate Right by 15% and paste on the right side
Select Element 125 - resize by 25%
Paste and position on the right side
Paste tube of choice where desired
Apply Lokas 3D Shadow at default settings
Select Element 150 - resize by 20%
Paste and position on the left side
Select Element 70 - resize by 15%
Paste and position on the left side
Select Element 79 - resize by 20%
Paste and position on the left side
Select Element 99 - resize by 25%
Paste and position on the left side
Select Element 138 - resize by 20%
Paste and position on the left side
Select Element 40 - resize by 50%
Paste and paste on the bottom left below tube layer
Select Element 91 - resize by 40%
Paste and position on the bottom left
Select Element 130 - resize by 25%
Paste and position on the bottom left
Select Element 19 - resize by 15%
Paste and position on the right side
Select Element 71 - resize by 18%
Image Free Rotate Right by 15% and paste on the right below tube layer
Select Element 4 - resize by 20%
Paste and position on the bottom right
Select Element 65 - resize by 20%
Paste and position on the bottom right
Select Element 143 - resize by 15%
Paste and position on the bottom right
Select Element 9 - resize by 20%
Paste and position on the bottom right
Select Element 144 - resize by 15%
Paste and position on the bottom
Select Element 141 - resize by 15%
Paste and position on the bottom
Select Element 5 - resize by 40%
Paste and position on the bottom
Add any dropshadows you like
Sharpen any elements as needed
Crop and resize as desired
Add copyright info, license number and name
You're done! Thanks for trying my tutorial!

Labels:Happy Pumpkin Studios | 0
comments
Friday, June 7, 2019
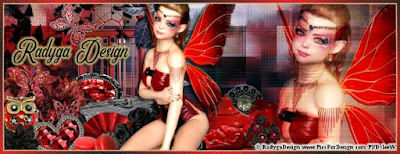
DZHARORINA
Supplies needed:
I am using the stunning artwork from Radyga Designs for this tutorial which you can find Here, Here, Here, Here and Here
Scrapkit: I am using a beautiful kit from Tiny Turtle Designs called "Ruby Birthstone" which you can get by going here
Mask 35 from Vivienne which you can find here
Plugins: Lokas 3D Shadow
----------------------------
This tutorial is written for those who have working knowledge of PSPX2 (any version will do).
This tutorial was written by me on June 7, 2019. Please do not copy or paste on any other forum, website or blog provide link back to tut only. Please do not claim as your own. This tutorial is copyrighted to me. Any resemblance to any other tutorial is purely coincidental.
Ok - let's start and remember to save often.
Open up a 750 x 750 blank canvas (we can resize it later)
Select Paper 4 and paste on the canvas
Apply Mask 35 and merge group
Select Element 35 - resize by 20%
Paste and position on the top left
Select Element 120 - resize by 50%
Paste and position on the top left
Select Element 89 - resize by 20%
Paste and position on the top left
Select Element 159 - resize by 55%
Image mirror, Free Rotate Left by 15% and paste on the right side
Select Element 2 - resize by 50%
Paste and position above the window element
Select Element 157 - resize by 45%
Paste and position below the window element
Select Element 8 - resize by 15%
Paste and position on element 157
Paste tube of choice where desired
Apply Lokas 3D Shadow at default settings
Select Element 90 - resize by 15%
Paste and position on the left side
Select Element 146 - resize by 40%
Paste and position on the left side
Select Element 81 - resize by 30%
Image Free Rotate Left by 15% and paste on the bottom left
Select Element 15 - resize by 15%
Paste and position on the left side
Select Element 73 - resize by 30%
Paste and position on the bottom left
Select Element 71 - resize by 25%
Paste and paste on the bottom left
Select Element 99 - resize by 20%
Paste and position on the bottom left
Select Element 72 - resize by 15%
Paste and position on the bottom left
Select Element 76 - resize by 20%
Paste and position on the bottom
Select Element 67 - resize by 20%
Paste and position on the right side
Select Element 112 - resize by 55%
Paste and position on the right side
Select Element 79 - resize by 20%
Paste and position on the right side
Select Element 116 - resize by 15%
Paste and position on the bottom right
Select Element 63 - resize by 20%
Paste and position on the bottom right
Select Element 152 - resize by 50%
Paste and position on the bottom right
Select Element 47 - resize by 20%
Paste and position on the bottom right
Select Element 75 - resize by 30%
Paste and position on the bottom
Select Element 68 - resize by 50%
Paste and position on the left side
Add any dropshadows you like
Sharpen any elements as needed
Crop and resize as desired
Add copyright info, license number and name
You're done! Thanks for trying my tutorial!

Labels:Radyga Designs | 0
comments
Wednesday, June 5, 2019
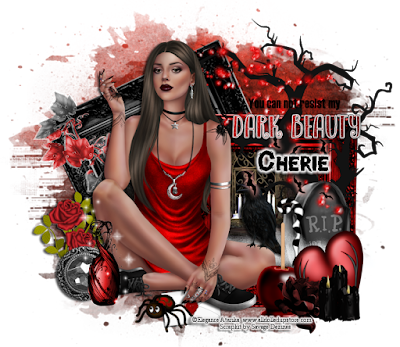
DARK BEAUTY
Supplies needed:
Scrapkit: I am using a stunning kit from Savage Dezines called "Dark Beauty" which you can get by going here
Mask 41 from Vivienne which you can find here
Plugins: Lokas 3D Shadow
----------------------------
This tutorial is written for those who have working knowledge of PSPX2 (any version will do).
This tutorial was written by me on June 5, 2019. Please do not copy or paste on any other forum, website or blog provide link back to tut only. Please do not claim as your own. This tutorial is copyrighted to me. Any resemblance to any other tutorial is purely coincidental.
Ok - let's start and remember to save often.
Open up a 750 x 750 blank canvas (we can resize it later)
Select Paper 8 and paste on the canvas
Apply Mask 41 and merge group
Select Frame Element 30 - resize by 65%
Select your the center of each square in the frame
Paste paper 29
Select invert, delete, select none
Move paper layer below frame element
Select Element 11 - resize by 50%
Paste and position on the top right
Select Element 19 - resize by 90%
Paste and position on the top right
Select Element 137 - resize by 65%
Paste and position on the top right
Select Element 79 - resize by 30%
Paste and position on the top left
Select Tube Element 20
Resize and paste on the bottom where desired
Apply Lokas 3D Shadow at default settings
Select Element 60 - resize by 25%
Paste and position on the bottom left
Select Element 16 - resize by 30%
Paste and position on the bottom right
Select Element 95 - resize by 15%
Paste and position on the bottom right
Select Element 1 - resize by 20%
Image mirror and paste on the bottom right
Select Element 52 - resize by 25%
Paste and position on the bottom right
Select Element 65 - resize by 12%
Paste and paste on the bottom
Select Element 15 - resize by 15%
Paste and position on the bottom left
Select Element 133 - resize by 30%
Paste and position on the bottom left
Select Element 51 - resize by 20%
Paste and position on the bottom left
Select Element 90 - resize by 15%
Paste and position on the bottom
Select Element 40 - resize by 12%
Paste and position on the bottom
Add any dropshadows you like
Sharpen any elements as needed
Crop and resize as desired
Add copyright info, license number and name
You're done! Thanks for trying my tutorial!

Labels:All Dolled Up Store | 0
comments
Tuesday, June 4, 2019
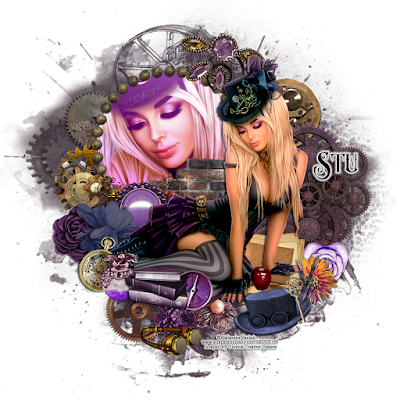
STEAMPUNK MYSTERIES
Supplies needed:
I am using the stunning artwork from Alehandra Vanhek for this tutorial which you can find here
Scrapkit: I am using a stunning kit from Curious Creative Dreams called "Steampunk Mysteries" which you can get by going Here, Here and Here
Mask 49 from Vivienne which you can find here
Plugins: Lokas 3D Shadow
----------------------------
This tutorial is written for those who have working knowledge of PSPX2 (any version will do).
This tutorial was written by me on June 3, 2019. Please do not copy or paste on any other forum, website or blog provide link back to tut only. Please do not claim as your own. This tutorial is copyrighted to me. Any resemblance to any other tutorial is purely coincidental.
Ok - let's start and remember to save often.
Open up a 750 x 750 blank canvas (we can resize it later)
Select paper 9 and paste on the canvas
Apply mask 49 and merge group
Select Element 67 - resize by 60%
Paste and position on the top left
Select your select the center of the frame
Add new layer and flood-fill with color or Gradient of choice
Select invert
Paste close-up tube on paper layer and delete
Select none
Chage the closeup to Overlay
Apply dropshadow and merge down on gradient layer
Move layer below element 67 layer
Select Element 40 - resize by 55%
Paste and position on the top right
Select Element 9 - resize by 40%
Paste and position on the top left
Select Element 6 - resize by 40%
Paste and position on the left side
Select Element 55 - resize by 30%
Paste and position on the top right
Select Element 10 -
Paste and position on the right side
Select Element 36 - resize by 50%
Paste and position in the center below close-up
Paste tube of choice where desired
Apply Lokas 3D Shadow at default settings
Select Element 2 - resize by 30%
Paste and position on the left side
Select Element 18 - resize by 65%
Paste and position on the left side
Select Element 8 - resize by 40%
Paste and position on the left side
Select Element 29 - resize by 40%
Image Free Rotate Right by 15% and paste on the left side
Select Element 62 - resize by 40%
Paste and paste on the left side
Select Element 65 - resize by 40%
Paste and position on the bottom left
Select Element 61 - resize by 50%
Paste and position on the bottom left
Select Element 31 - resize by 30%
Paste and position on the bottom
Select Element 59 - resize by 30%
Paste and position on the bottom
Select Element 3 - resize by 40%
Paste and position on the bottom
Select Element 39 - resize by 30%
Image mirror and paste on the bottom
Select Element 53 - resize by 30%
Paste and position on the bottom right
Select Element 28 - resize by 25%
Paste and position on the bottom right
Select Element 25 - resize by 50%
Paste and position on the right side
Select Element 15 - resize by 65%
Image mirror and paste on the bottom
Add any dropshadows you like
Sharpen any elements as needed
Crop and resize as desired
Add copyright info, license number and name
You're done! Thanks for trying my tutorial!

Labels:Curious Creative Dreams | 0
comments
Subscribe to:
Posts
(Atom)


