Labels
- Alikas Scraps
- All Dolled Up Store
- Amy Marie
- Annaica
- Arthur Crowe
- Babycakes Scraps
- Barbara Jensen
- Bibi's Collections
- Black Widow Creationz
- Blu Moon
- Bonnies Creations
- Bookwork Dezines
- Broken Sky Dezine
- Carita Creationz
- Carpe Diem Designs
- CDO
- Celinart Pinup
- Celine
- Chacha Creationz
- Charmed Designs
- Cherry Blossom Designs
- Chili Designz
- Cluster Frame
- Creative Misfits
- Creative Scraps by Crys
- Curious Creative Dreams
- Danny Lee
- Derzi
- Designs by Ali
- Designs by Joan
- Designs by Ketura
- Designs By Norella
- Designs by Vi
- Diana Gali
- Diry Art Designs
- Disturbed Scraps
- Dreaming With Bella
- Eclipse Creations
- Elegancefly
- Extras
- Fabulous Designz
- Forum Set
- Foxy's Designz
- Freek's Creation
- FTU
- FwTags
- Goldwasser
- Gothic Inspirations
- Gothic Raven Designs
- Graphfreaks
- Hania's Designs
- Happy Pumpkin Studios
- Horseplay's Pasture Designs
- indie-Zine
- Irish Princess Designs
- Ishika Chowdhury
- Kaci McVay
- Kajenna
- katharine
- Katherine
- Khloe Zoey
- Killer Kitty
- Kissing Kate
- KiwiFirestorm
- Kiya Designs
- Kizzed by Kelz
- KZ Designz
- Lady Mishka
- Lil Mz Brainstorm
- Maiden of Darkness
- Mariel Designs
- MellieBeans
- Michelle's Myths
- Midnight Shadow
- Misticheskya
- MistyLynn's Creations
- MMeliCrea Designz
- Moon Vixen Designs
- NaSionainne
- Ninaste
- Niqui Designs
- Pandora
- Picsfordesign
- Pink Paradox Productions
- Radyga Designs
- Redefined Designs
- Rissa's Designs
- Schnegge
- ScottishButterfly Creations
- Scrappin Krazy Designs
- Scrappin With Lil Ol Me
- Scraps and the City
- Scraps Dimensions
- Scraps From The Heart
- Scraps N Company
- Scraps with Attitude
- Shining Star Art
- Skyscraps
- Sleek N Sassy Designs
- Sophisticat Simone
- Souldesigner
- Soxsational Scraps
- Spazz
- Starlite and Soul
- Stella Felice
- Tammy Welt
- Tasha's Playground
- The PSP Project
- Thrifty Scraps by Gina
- Tiny Turtle Designs
- Upyourart
- Verymany
- Wendy Gerber
- Whisper In the Wind
- Wick3d Creationz
- Wicked Diabla
- Yude's Kreationz
Blog Archive
Monday, September 28, 2020
FALL WITCH
These CT Tags were made using the amazing artwork by Charmed Designs. You can purchase the kit "Fall Witch" Here:
Designz Scrap Shop, Secret Garden Designs, All that Glitterz, Mystical Scraps, Sensibility Scrapping, Direct Digital Scrap, Digital Scrappin Depot, Berry Applicious, Treasured Scraps and Design n Company

Labels:Charmed Designs | 0
comments
Saturday, September 26, 2020
TEARS BRIDE
Supplies needed:
Labels:Mariel Designs | 0
comments
Friday, September 25, 2020
SWEET SCARECROW
These CT Tags were made using the amazing kit Sweet Scarecrow by Chili's Designz. You can purchase the kit here
These tags were made by me and my own creativity. Please do not rip apart, destroy, alter them or claim them as your own. Thanks.
Labels:Chili Designz | 0
comments
Thursday, September 24, 2020
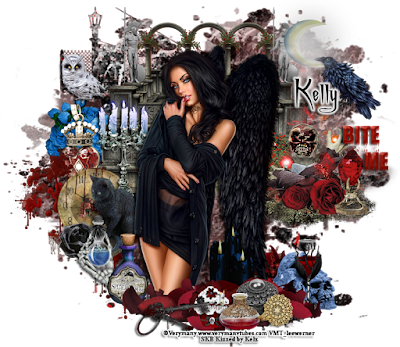
DARK ANGEL
Supplies needed:
I am using the gorgeous artwork from Verymany for this tutorial which you can find here
Scrapkit: I am using a stunning kit by Kizzed by Kelz called "Dark Angel 2" which you can get by going here
Mask 63 and 76 from Vivienne which you can find here
Plugins: Lokas 3D Shadow, Eyecandy Gradient Glow
----------------------------
This tutorial is written for those who have working knowledge of PSPX2 (any version will do).
This tutorial was written by me on September 24, 2020. Please do not copy or paste on any other forum, website or blog provide link back to tut only. Please do not claim as your own. This tutorial is copyrighted to me. Any resemblance to any other tutorial is purely coincidental.
Ok - let's start and remember to save often.
Open up a 750 x 650 blank canvas (we can resize it later)
Select Paper 6 and paste on the canvas
Apply Mask 63 and merge group
Select Paper 2 and paste on the canvas
Apply Mask 76 and merge group
Select Element 23 - resize by 40%
Paste and position on the top left
Select Element 58 - resize by 75%
Paste and position on the top left
Select Element 143 - resize by 25%
Paste and position on the top left
Select Element 79 - resize by 45%
Paste and position on the left side
Select Element 122 - resize by 40%
Paste and position on the bottom center
Select Element 43 -
Paste and position in the center
Select Element 6 - resize by 55%
Paste and position on the top left
Apply Eyecandy Gradient Glow on fat default settings (Glow width 3)
Paste tube of choice where desired
Apply Lokas 3D Shadow at default settings
Select Element 60 - resize by 40%
Paste and position on the top right
Select Element 46 - resize by 25%
Paste and position on the top right
Select Element 31 - resize by 25%
Paste and position on the left side
Select Element 13 - resize by 25%
Paste and position on the left side
Select Element 133 - resize by 25%
Paste and paste on the bottom left
Select Element 148 - resize by 55%
Paste and position on the bottom left
Select Element 146 - resize by 35%
Paste and position on the bottom left
Select Element 34 - resize by 20%
Image mirror and paste on the bottom left
Select Element 136 - resize by 20%
Paste and position on the bottom
Select Element 93 - resize by 20%
Paste and position on the bottom
Select Element 150 - resize by 15%
Paste and position on the bottom
Select Element 110 - resize by 25%
Paste and position on the bottom
Select Element 62 - resize by 30%
Paste and position on the bottom
Select Element 153 - resize by 25%
Paste and position on the bottom
Select Element 74 - resize by 30%
Paste and position on the bottom right
Add any dropshadows you like
Sharpen any elements as needed
Crop and resize as desired
Add copyright info, license number and name
You're done!
Thanks for trying my tutorial!
Labels:Kizzed by Kelz | 0
comments
Wednesday, September 23, 2020
PUMPKIN SEASON
These CT Tags were made using the amazing artwork by Charmed Designs. You can purchase the kit "Pumpkin Season" Here:
Labels:Charmed Designs | 0
comments
Saturday, September 19, 2020
WIHELMINA
Supplies needed: I am using the gorgeous artwork from Verymany for this tutorial which you can find here
Labels:Kizzed by Kelz | 0
comments
Thursday, September 17, 2020
BLACK MAGIC
These CT Tags were made using a collaboration between Curious Creative Dreams And Elegancefly**. The Scrapkit Match Victoria With Dilara Magnificent Tube Victoria. You can purchase the tube at Elegancefly here. You can purchase the matching scrapkit here.
**Note: The Tube is NOT included in the kit.
These tags were made by me and my own creativity. Please do not rip apart, destroy, alter them or claim them as your own. Thanks.
Labels:Curious Creative Dreams,Elegancefly | 0
comments
Sunday, September 13, 2020
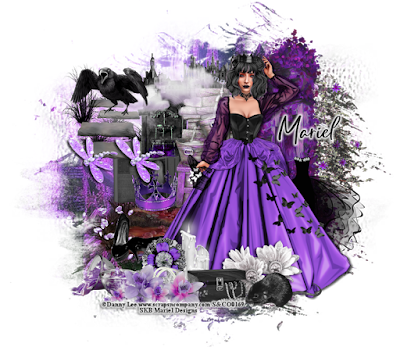
QUEEN PATRIOT

Supplies needed:
I am using the gorgeous artwork from Danny Lee for this tutorial which you can find here
Scrapkit: I am using a stunning kit by Mariel Designs called "Queen Patriot" which you can get by going here
Set 114 Mask 4 from Rachel Designs which you can find here
Plugins: Lokas 3D Shadow
----------------------------
This tutorial is written for those who have working knowledge of PSPX2 (any version will do).
This tutorial was written by me on September 13, 2020. Please do not copy or paste on any other forum, website or blog provide link back to tut only. Please do not claim as your own. This tutorial is copyrighted to me. Any resemblance to any other tutorial is purely coincidental.
Ok - let's start and remember to save often.
Open up a 750 x 650 blank canvas (we can resize it later)
Select Paper 2 and paste on the canvas
Apply Mask 4 and merge group
Select Element 13 - resize by 65%
Paste and position on the top right
Select Element 36 - resize by 45%
Paste and position on the top center
Select Element 56 - resize by 55%
Paste and positon on the top center below element 36
Select Element 4 - resize by 30%
Paste and position on the top left
Select Element 93 - resize by 40%
Paste and position on the top left
Select Element 32 - resize by 50%
Paste and position on the top left and drop opacity down to 85%
Select Element 78 - resize by 55%
Paste and position on the top right side
Select Element 96 - resize by 40%
Paste and position on the bottom right
Paste tube of choice where desired
Apply Lokas 3D Shadow at default settings
Select Element 24 - resize by 25%
Paste and position on the left side
Select Element 85 - resize by 40%
Paste and position on the left side below element 24
Select Element 3 - resize by 25%
Paste and position on the top left
Select Element 57 - resize by 30%
Paste and position on the top left
Select Element 42 - resize by 30%
Paste and paste on the bottom left
Select Element 27 - resize by 15%
Paste and position on the left side
Select Element 37 - resize by 20%
Paste and position on the bottom left
Select Element 83 - resize by 25%
Paste and position on the bottom left
Select Element 89 - resize by 15%
Paste and position on the bottom left
Select Element 101 - resize by 25%
Paste and position on the bottom
Select Element 47 - resize by 20%
Paste and position on the bottom
Select Element 39 - resize by 40%
Paste and position on the bottom left
Select Element 84 - resize by 25%
Paste and position on the bottom
Add any dropshadows you like
Sharpen any elements as needed
Crop and resize as desired
Add copyright info, license number and name
You're done! Thanks for trying my tutorial!

Labels:Mariel Designs | 0
comments
Saturday, September 12, 2020
AUTUMNISH


These CT Tags were made using the amazing artwork by Charmed Designs. You can purchase the kit "Autumnish" Here:
Labels:Charmed Designs | 0
comments
Friday, September 11, 2020
DARK VAMP

Supplies needed:
I am using the gorgeous artwork from Verymany for this tutorial which you can find here
Scrapkit: I am using a stunning kit by Kizzed by Kelz called "Vampire" which you can get by going here
Mask 34 from Vivienne which you can find here
Plugins: Lokas 3D Shadow
----------------------------
This tutorial is written for those who have working knowledge of PSPX2 (any version will do).
This tutorial was written by me on September 11, 2020. Please do not copy or paste on any other forum, website or blog provide link back to tut only. Please do not claim as your own. This tutorial is copyrighted to me. Any resemblance to any other tutorial is purely coincidental.
Ok - let's start and remember to save often.
Open up a 750 x 650 blank canvas (we can resize it later)
Select Paper 10 and paste on the canvas
Apply Mask 34 and merge group
Select Element 40 -
Paste and position on the top center
Select Element 5 - resize by 40%
Paste and positon on the top right
Select Element 92 - resize by 20%
Paste and position on the top left
Select Element 48 - resize by 30%
Paste and position on the top left
Select Element 2 - resize by 40%
Paste and position on the top right
Select Element 109 - resize by 65%
Paste and position on the right side
Select Element 30 - resize by 30%
Paste and position on the right side
Select Element 26 - resize by 25%
Paste and position on the right side
Select Element 6 - resize by 30%
Paste and position on the left side
Select Element 115 - resize by 50%
Paste and position on the left side
Select Element 13 - resize by 30%
Paste and position on the left side
Select Element 21 - resize by 40%
Paste and position on the left side
Select Element 83 - resize by 30%
Paste and position on the right side
Paste tube of choice where desired
Apply Lokas 3D Shadow at default settings
Select Element 29 - resize by 75%
Paste and position on the bottom
Select Element 130 - resize by 40%
Paste and position on the left side
Select Element - resize by 20%
Paste and position on the left side
Select Element 153 - resize by 30%
Paste and position on the bottom left
Select Element 1 - resize by 30%
Paste and paste on the bottom left
Select Element 77 - resize by 30%
Paste and position on the bottom right
Select Element 22 - resize by 30%
Paste and position on the bottom right
Select Element 141 - resize by 30%
Paste and position on the bottom right
Select Element 58 - resize by 30%
Paste and position on the bottom
Select Element 7 - resize by 20%
Paste and position on the bottom
Select Element 33 - resize by 30%
Paste and position on the bottom
Select Element 147 - resize by 30%
Paste and position on the bottom
Select Element 64 - resize by 30%
Paste and position on the bottom
Add any dropshadows you like
Sharpen any elements as needed
Crop and resize as desired
Add copyright info, license number and name
You're done! Thanks for trying my tutorial!

Labels:Kizzed by Kelz | 0
comments
FASHION DIVA


These tags were made by me and my own creativity. Please do not rip apart, destroy, alter them or claim them as your own. Thanks.

Labels:Souldesigner | 0
comments
Sunday, September 6, 2020
MAGIC POTION


These CT Tags were made using the amazing Collab Kit Magic Potions by Chili's Designz. You can purchase the collab here
These tags were made by me and my own creativity. Please do not rip apart, destroy, alter them or claim them as your own. Thanks.

Labels:Chili Designz | 0
comments
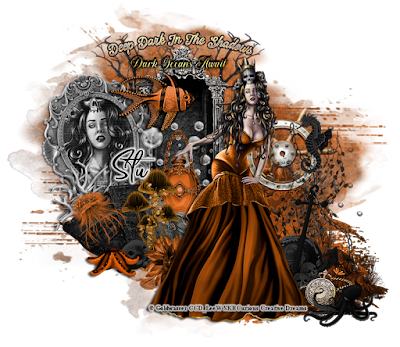
DARK OCEAN OF SHADOWS

Supplies needed:
Scrapkit: I am using a stunning kit by Curious Creative Dreams called "Dark Ocean of Shadows" which you can get by going Here, Here, Here, Here and Here
Mask 45 from Vivienne which you can find here
Mask 12 from PSKopona which you can find here
Plugins: Lokas 3D Shadow
----------------------------
This tutorial is written for those who have working knowledge of PSPX2 (any version will do).
This tutorial was written by me on September 6, 2020. Please do not copy or paste on any other forum, website or blog provide link back to tut only. Please do not claim as your own. This tutorial is copyrighted to me. Any resemblance to any other tutorial is purely coincidental.
Ok - let's start and remember to save often.
Open up a 750 x 650 blank canvas (we can resize it later)
Select Paper 1 and paste on the canvas
Apply Mask 45 and merge group
Select Paper 9 and paste on the canvas
Apply Mask 12 and merge group - resize by 50%
Reposition the mask to the bottom right
Select Element 40 - resize by 65%
Paste and position on the top right
Duplicate element 40 and mirror on the top left side
Select Element 15 - resize by 75%
Paste and positon on the top center
Select Element 60 - resize by 65%
Paste and position on the top center
Select Frame Element 19 - resize by 45%
Image Free Rotate Left by 15% and paste on the top left
Select your magic wand tool and select the center of the frame (Add (Shift), RGB Value, Tolerance 25, Contiguous checked, Feather 0)
Selections, Modify, Expand by 5
Paste paper 10
Select invert, delete
Paste close-up tube on paper layer and delete
Select none
Change close-up tube to and to Luminence (Legacy)
Merge close-up down on paper layer
Move paper and close-up layer below frame element
Effect, Texture Effects, Blinds (Width 3, Opactity 25, Horizontal and Light from left/top checked)
Select Element 2 - resize by 50%
Paste and position on the right side
Select Element 11 - resize by 50%
Paste and position on the bottom right
Select Element 33 - resize by 40%
Paste and position below Element 2
Select Element 51 - resize by 65%
Paste and position on the bottom right
Paste tube of choice where desired
Apply Lokas 3D Shadow at default settings
Select Element 32 - resize by 40%
Paste and position on in the center
Select Element 44 - resize by 40%
Paste and position on the top left
Select Element 4 - resize by 50%
Paste and position on the left below frame element
Select Element 8 - resize by 50%
Paste and position on the left below frame element
Select Element 25 - resize by 30%
Paste and paste on the bottom left
Select Element 58 - resize by 30%
Paste and position in the center
Select Element 24 - resize by 50%
Paste and position on the bottom left
Select Element 52 - resize by 50%
Paste and position on the bottom left
Select Element 45 - resize by 30%
Paste and position on the bottom left
Select Element 29 - resize by 25%
Paste and position on the bottom left
Select Element 17 - resize by 40%
Paste and position on the bottom left
Select Element 22 - resize by 25%
Paste and position on the right side
Select Element 5 - resize by 40%
Paste and position on the bottom right
Select Element 34 - resize by 40%
Paste and position on the bottom right
Add any dropshadows you like
Sharpen any elements as needed
Crop and resize as desired
Add copyright info, license number and name
You're done! Thanks for trying my tutorial!

Labels:Curious Creative Dreams | 0
comments
Friday, September 4, 2020
FASHION WITCH


These tags were made by me and my own creativity. Please do not rip apart, destroy, alter them or claim them as your own. Thanks.

Labels:Souldesigner | 0
comments
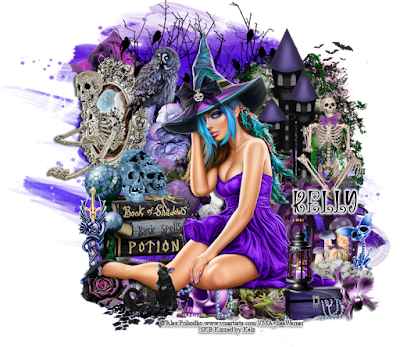
HALLOWEEN WITCH

Supplies needed:
I am using the gorgeous artwork from Alex Prihodko for this tutorial which you can find here
Scrapkit: I am using a stunning kit by Kizzed by Kelz called "Halloween Witch 8" which you can get by going here
Mask 87 from Vivienne which you can find here
Plugins: Lokas 3D Shadow
----------------------------
This tutorial is written for those who have working knowledge of PSPX2 (any version will do).
This tutorial was written by me on September 4, 2020. Please do not copy or paste on any other forum, website or blog provide link back to tut only. Please do not claim as your own. This tutorial is copyrighted to me. Any resemblance to any other tutorial is purely coincidental.
Ok - let's start and remember to save often.
Open up a 750 x 650 blank canvas (we can resize it later)
Select Paper 13 and paste on the canvas
Apply Mask 87 and merge group
Select Element 59 - resize by 75%
Paste and position on the top right
Select Element 114 - resize by 30%
Image mirror and rotate right by 15% on the top left
Select Element 118 - resize by 65%
Paste and positon on the top center
Select Element 44 - resize by 55%
Paste and position on the top left
Select Element 139 - resize by 65%
Paste and position on the top right
Select Element 150 - resize by 40%
Paste and position on the left side
Select Element 119 - resize by 20%
Paste and position on the top left
Select Element 94 - resize by 50%
Paste and position on the bottom right
Select Element 5 - resize by 50%
Image mirror and paste on the bottom left
Select Element 88 - resize by 65%
Paste and position on the bottom right
Paste tube of choice where desired
Apply Lokas 3D Shadow at default settings
Select Element 15 - resize by 40%
Paste and position on the bottom left
Select Element 85 - resize by 40%
Paste and position on the b0ttom left
Select Element 129 - resize by 40%
Paste and position on the bottom left
Select Element 135 - resize by 25%
Paste and position on the bottom left
Select Element 7 - resize by 25%
Paste and paste on the left side
Select Element 121 - resize by 30%
Paste and position on the bottom left
Select Element 68 - resize by 40%
Paste and position on the right side
Select Element 58 - resize by 30%
Paste and position on the bottom right
Select Element 75 - resize by 25%
Paste and position on the bottom right
Select Element 130 - resize by 25%
Paste and position on the bottom right
Select Element 32 - resize by 30%
Paste and position on the bottom right
Select Element 136 - resize by 25%
Paste and position on the bottom right
Select Element 137 - resize by 30%
Paste and position on the bottom right
Select Element 127 - resize by 25%
Paste and position on the bottom
Add any dropshadows you like
Sharpen any elements as needed
Crop and resize as desired
Add copyright info, license number and name
You're done! Thanks for trying my tutorial!

Labels:Kizzed by Kelz | 0
comments
Wednesday, September 2, 2020
MONTHS IN AUTUMN


These CT Tags were made using the amazing artwork by Charmed Designs. You can purchase the kit "Months In Autumn" Here:
Designz Scrap Shop, Secret Garden Designs, All that Glitterz, Mystical Scraps, Sensibility Scrapping, Direct Digital Scrap, Digital Scrappin Depot, Berry Applicious, and Design n Company

Labels:Charmed Designs | 0
comments
Subscribe to:
Comments
(Atom)


