I CT For


Showing posts with label Graphfreaks. Show all posts
Showing posts with label Graphfreaks. Show all posts
Saturday, June 25, 2016
USA LOVE

Supplies needed:
I am using the stunning artwork from Graphfreaks for this tutorial which you can find here
Scrapkit: I am using a stunning kit from Bibi's Collections called "USA Love" which you can get by going here
Patriotic Mask 3 from Dee which you can find here
Plugins: Lokas 3D Shadow
----------------------------
This tutorial is written for those who have working knowledge of PSPX2 (any version will do).
This tutorial was written by me on June 25, 2016. Please do not copy or paste on any other forum, website or blog provide link back to tut only. Please do not claim as your own. This tutorial is copyrighted to me. Any resemblance to any other tutorial is purely coincidental.
Ok - let's start and remember to save often.
Open up a 750 x 650 blank canvas (we can resize it later)
Select Frame Element 192 - resize by 85%
Paste and position in the center of the canvas
Select your magic wand tool and select the center of the frame (Add (Shift), RGB Value, Tolerance 25, Contiguous checked, Feather 0)
Selections, Modify, Expand by 5
Paste paper 29
Select invert, delete
Paste close-up tube on paper layer and delete
Select none
Drop close-up to Hard Light
Apply dropshadow and merge down on paper layer
Effect, Texture Effects, Blinds (Width 3, Opactity 15, Horizontal and Light from left/top checked)
Move paper layer below frame layer
Select Element 166 - resize by 55%
Paste and position in the center of the canvas below frame
Select Element 19 - resize by 35%
Paste and position on the top
Select Element 60 - resize by 40%
Paste and position on the left side
Select Element 157 - resize by 45%
Paste and position on the bottom
Select Element 8 - resize by 40%
Paste and position on the bottom left
Select Element 88 - resize by 40%
Paste and position on the bottom right
Paste tube of choice where desired
Apply Lokas 3D Shadow at default settings
Select Element 215 - resize by 65%
Paste and position on the bottom right
Select Element 123 - resize by 45%
Paste and position on the bottom right
Select Element 204 - resize by 30%
Paste and position on the bottom right on car element
Select Element 32 - resize by 30%
Image mirror and paste on the bottom right
Select Element 207 - resize by 30%
Paste and position on the bottom right
Select Element 240 - resize by 50%
Paste and paste on the bottom on car element
Select Element 251 - resize by 20%
Paste and position on the bottom
Select Element 220 - resize by 25%
Paste and position on the bottom
Select Element 191 - resize by 40%
Paste and position on the bottom left
Select Element 168 - resize by 20%
Paste and position on the bottom left
Select Element 77 - resize by 25%
Paste and position on the bottom left
Select Element 1 - resize by 35%
Paste and position on the bottom left
Select Element 160 - resize by 40%
Paste and position on the bottom left
Select Element 202 - resize by 25%
Paste and position on the bottom
Select Element 156 - resize by 40%
Paste and position on the bottom
Select Element 210 - resize by 25%
Paste and position on the bottom
Paste paper 12 on canvas
Apply Mask 3 or mask of choice
Merge group and move to the bottom layer
Add any dropshadows you like
Sharpen any elements as needed
Crop and resize as desired
Add copyright info, license number and name
You're done! Thanks for trying my tutorial!
Monday, May 30, 2016
VOODOO QUEEN

Supplies needed:
I am using the stunning artwork from Graphfreaks for this tutorial which you can find here
Scrapkit: I am using a stunning kit from Devilish Dezines called "Voodoo" which you can get by going here
Mask 11 from Horseplay's Pasture which you can find here
Plugins: Lokas 3D Shadow
----------------------------
This tutorial is written for those who have working knowledge of PSPX2 (any version will do).
This tutorial was written by me on May 30, 2016. Please do not copy or paste on any other forum, website or blog provide link back to tut only. Please do not claim as your own. This tutorial is copyrighted to me. Any resemblance to any other tutorial is purely coincidental.
Ok - let's start and remember to save often.
Open up a 750 x 650 blank canvas (we can resize it later)
Select Frame Element 9 - resize by 65%
Paste and position in the center of the canvas
Select Element 29 - resize by 75%
Paste and position on left side below frame layer
Select Element 41 - resize by 45%
Paste and position on the bottom below frame layer
Select Element 43 - resize by 40%
Paste and position on the top left below frame layer
Select Element 21 - resize by 25%
Paste and position on the top left
Select Element 3 - resize by 20%
Paste and position on the top left
Select Element 44 - resize by 25%
Paste and position on the top right
Select Element 36 - resize by 40%
Paste and position on the right side
Select Element 5 - resize by 30%
Paste and position on the bottom left
Select Element 27 - resize by 40%
Paste and position on the bottom
Paste tube of choice where desired
Apply Lokas 3D Shadow at default settings
Select Element 7 - resize by 30%
Paste and position on the bottom right
Select Element 19 - resize by 25%
Paste and position on the bottom right
Select Element 42 - resize by 20%
Paste and position on the bottom right
Select Element 8 - resize by 20%
Paste and position on the bottom right
Select Element 11 - resize by 20%
Paste and position on the bottom right
Select Element 37 - resize by 15%
Paste and paste on the bottom
Select Element 35 - resize by 15%
Paste and position on the left side
Select Element 49 - resize by 20%
Paste and position on the bottom left
Select Element 16 - resize by 25%
Paste and position on the bottom left
Select Element 40 - resize by 25%
Paste and position on the left side where desired
Select Element 33 - resize by 15%
Paste and position on the bottom
Select Element 45 - resize by 20%
Paste and position on the bottom
Select Element 6 - resize by 10%
Paste and position on the bottom
Paste paper 3 on canvas
Apply Mask 11 or mask of choice
Merge group and move to the bottom layer
Add any dropshadows you like
Sharpen any elements as needed
Crop and resize as desired
Add copyright info, license number and name
You're done! Thanks for trying my tutorial!
Sunday, February 7, 2016
MY VALENTINE

Supplies needed:
I am using the stunning artwork from Graphfreaks for this tutorial which you can find here
Scrapkit: I am using a stunning kit from Designs by Joan called "My Valentine" which you can get by going here
Mask 3 from Rachel Designs which you can find here
Plugins: Lokas 3D Shadow, Eyecandy - Gradient Glow
----------------------------
This tutorial is written for those who have working knowledge of PSPX2 (any version will do).
This tutorial was written by me on February 7, 2016. Please do not copy or paste on any other forum, website or blog provide link back to tut only. Please do not claim as your own. This tutorial is copyrighted to me. Any resemblance to any other tutorial is purely coincidental.
Ok - let's start and remember to save often.
Open up a 750 x 650 blank canvas (we can resize it later)
Select Element 56 - resize by 65%
Paste and position in the center of the canvas
Select Element 23 - resize by 40%
Paste and position on the top center of the frame
Select Element 15 - resize by 65%
Paste and position on te bottom right
Select Element 58 - resize by 45%
Paste and position on the bottom where desired
Select Element 47 - resize by 55%
Paste and position on the top right
Select Element 37 - resize by 30%
Paste and position on the right side
Select Element 65 - resize by 30%
Paste and position on the right side
Select Element 49 - resize by 35%
Paste and position on the bottom right
Select Element 78 - resize by 30%
Paste and position on the bottom right
Select Element 70 - resize by 25%
Paste and position in the center of the canvas where desired
Select Element 64 - resize by 25%
Paste and position on the bottom
Paste tube of choice where desired
Apply Lokas 3D Shadow at default settings
Select Element 6 - resize by 20%
Paste and position on the bottom
Select Element 10 - resize by 40%
Paste and position on the left side
Select Element 22 - resize by 30%
Paste and position on the left side
Select Element 11 - resize by 25%
Paste and position on the bottom left
Select Element 72 - resize by 22%
Paste and position on the bottom left
Select Element 81 - resize by 25%
Paste and paste on the bottom left
Select Element 31 - resize by 20%
Paste and position on the left side
Select Element 68 - resize by 30%
Paste and position on the bottom left
Select Element 75 - resize by 55%
Paste and position on the bottom right
Select Element 82 - resize by 35%
Paste and position on the top right
Apply Gradient Glow on fat default settings (Glow width 3)
Add new raster layer and flood-fill with color or gradient of choice
Apply Mask 3 or mask of choice
Merge group and move to the bottom layer
Add any dropshadows you like
Sharpen any elements as needed
Crop and resize as desired
Add copyright info, license number and name
You're done! Thanks for trying my tutorial!

Saturday, December 19, 2015
ANEIRA'S SNOW

Supplies needed:
I am using the stunning artwork from Graphfreaks for this tutorial which you can find here
Scrapkit: I am using a beautiful kit from Kizzed by Kelz called "Aneira" which you can get by going here
Winter Mask 10 from Dee which you can find here
Plugins: Lokas 3D Shadow
----------------------------
This tutorial is written for those who have working knowledge of PSPX2 (any version will do).
This tutorial was written by me on December 19, 2015. Please do not copy or paste on any other forum, website or blog provide link back to tut only. Please do not claim as your own. This tutorial is copyrighted to me. Any resemblance to any other tutorial is purely coincidental.
Ok - let's start and remember to save often.
Open up a 750 x 650 blank canvas (we can resize it later)
Select Frame Element 48 -paste and position in the center of the canvas
Select your magic wand tool and select the center of the frame (Add (Shift), RGB Value, Tolerance 25, Contiguous checked, Feather 0)
Selections, Modify, Expand by 3
Paste paper 13
Select invert, delete
Paste close-up tube of choice on top of paper and delete
Select none
Change close-up to Luminence (Legacy) and drop opacity down to 50%
Apply dropshadow and merge down on top of paper layer
Effect, Texture Effects, Blinds (Width 3, Opactity 15, Horizontal and Light from left/top checked)
Move paper layer below frame layer
Select Element 96 - resize by 30%
Paste and position on top left
Select Element 57 - resize by 20%
Paste and position on the top right
Select Element 109 - resize by 25%
Paste and position on the left side
Select Element 111 - resize by 30%
Paste and position on the bottom right
Select Element 75 - resize by 25%
Paste and position on the bottom right
Select Element 121 - resize by 20%
Paste and position on bottom right
Paste tube of choice where desired
Apply Lokas 3D Shadow at default settings
Select Element 83 - resize by 30%
Paste and position on the bottom
Select Element 91 - resize by 30%
Paste and position on the bottom
Select Element 1 - resize by 20%
Image Free Rotate Left by 15% and paste on the bottom
Select Element 22 - resize by 20%
Paste and position on the bottom
Select Element 71 - resize by 30%
Paste and paste on the bottom left
Select Element 128 - resize by 20%
Image mirror and paste on the bottom left
Select Element 115 - resize by 40%
Paste and position on the bottom left
Select Element 6 - resize by 20%
Image Free Rotate Left by 15% and paste on the bottom left
Select Element 73 - resize by 22%
Image Free Rotate Left by 15% and paste on the bottom left
Select Element 68 - resize by 25%
Paste and position on the bottom
Select Element 14 - resize by 30%
Paste and position on the bottom
Paste paper 5 on canvas
Apply Mask 10 or mask of choice
Merge group and move to the bottom layer
Add any dropshadows you like
Sharpen any elements as needed
Crop and resize as desired
Add copyright info, license number and name
You're done! Thanks for trying my tutorial!
Sunday, November 15, 2015
MALPHAS

Supplies needed:
I am using the stunning artwork from Graphfreaks for this tutorial which you can find here
Scrapkit: I am using a stunning kit from Bibi's Collections called "Malphas Mastemas" which you can get by going here
Plugins: Lokas 3D Shadow
----------------------------
This tutorial is written for those who have working knowledge of PSPX2 (any version will do).
This tutorial was written by me on November 15, 2015. Please do not copy or paste on any other forum, website or blog provide link back to tut only. Please do not claim as your own. This tutorial is copyrighted to me. Any resemblance to any other tutorial is purely coincidental.
Ok - let's start and remember to save often.
Open up a 750 x 650 blank canvas (we can resize it later)
Select Paper 1 - resize by 75%
Paste and position in the center of the canvas
Select Element 39 - resize by 65%
Paste and position in the center of the canvas
Select Element 70 - resize by 55%
Paste and position on the bottom
Select Element 28 - resize by 25%
Paste and position on the top left
Select Element 37 - resize by 30%
Paste and position in the center of the canvas
Select Element 54 - resize by 55%
Paste and position on the top right below element 54
Select Element 77 - resize by 50%
Paste and position in the center below element 54
Select Element 33 - resize by 30%
Paste and position on top where desired
Select Element 17 - resize by 40%
Paste and position on the top where desired
Select Element 59 - resize by 25%
Paste and position in the center where desired
Select Element 57 - resize by 20%
Paste and position on the bottom right
Paste tube of choice where desired
Apply Lokas 3D Shadow at default settings
Select Element 22 - resize by 25%
Paste and position on the bottom left
Select Element 74 - resize by 40%
Paste and position on the bottom left
Select Element 71 - resize by 30%
Paste and position on the bottom left
Select Element 12 - resize by 25%
Paste and position on the bottom left
Select Element 7 - resize by 25%
Paste and position on the bottom
Select Element 32 - resize by 30%
Paste and position on the bottom
Select Element 46 - resize by 25%
Paste and paste on the bottom
Select Element 69 - resize by 30%
Paste and position on the bottom
Add any dropshadows you like
Sharpen any elements as needed
Crop and resize as desired
Add copyright info, license number and name
You're done! Thanks for trying my tutorial!
Sunday, November 1, 2015
DREAMSTALKER

Supplies needed:
I am using the stunning artwork from Graphfreaks for this tutorial which you can find here
Scrapkit: I am using a stunning kit from Chili Designz called "Claw Me" which you can get by going here
Mask 113 from Designs by Vaybz which you can find here
Mask 76 from Vix which you can find here
Plugins: Lokas 3D Shadow
----------------------------
This tutorial is written for those who have working knowledge of PSPX2 (any version will do).
This tutorial was written by me on November 1, 2015. Please do not copy or paste on any other forum, website or blog provide link back to tut only. Please do not claim as your own. This tutorial is copyrighted to me. Any resemblance to any other tutorial is purely coincidental.
Ok - let's start and remember to save often.
Open up a 750 x 650 blank canvas (we can resize it later)
Select House Element - resize by 55%
Paste and position in the center of the canvas
Select Tree 3 Element - resize by 45%
Paste and position on the top right below house element
Select Candles Element - resize by 20%
Paste and position on the top right below house element
Select Claw Marks Element - resize by 40%
Paste and position on the top of the house element
Select Blood Element - resize by 30%
Paste and position on top of the house element where desired
Select Deco 2 Element - resize by 25%
Image mirror and paste on the bottom right side
Select Tombstone Element - resize by 25%
Paste and position on the bottom right
Select Flower 4 Element - resize by 20%
Paste and position on the bottom right
Select Chain 2 Element - resize by 20%
Paste and position on the bottom right
Select Snake Element - resize by 25%
Image Free Rotate Left by 15% and paste on the bottom right
Paste tube of choice where desired
Apply Lokas 3D Shadow at default settings
Select Sparkles 3 Element - resize by 20%
Paste and position on the bottom
Select Skeleton Element - resize by 30%
Paste and position on the bottom left
Select Knives Element - resize by 30%
Paste and position on the bottom left
Select Floppy Element - resize by 25%
Paste and position on the bottom left
Select Claw 3 Element - resize by 20%
Paste and position on the bottom left
Select Skull Element - resize by 25%
Paste and position on the bottom
Select Spider 3 Element - resize by 30%
Paste and paste on the bottom above skull element
Select Flower Element - resize by 15%
Paste and position on the bottom
Select Claws 3 Element - resize by 20%
Paste and position on the bottom
Select Sparkles 5 Element - resize by 30%
Paste and position on top right where desired
Paste paper 9 on canvas
Apply Mask 76 or mask of choice
Merge group and move to the bottom layer
Paste paper 12 on canvas
Apply Mask 113 or mask of choice
Merge group and move above 1st mask
Add any dropshadows you like
Sharpen any elements as needed
Crop and resize as desired
Add copyright info, license number and name
You're done! Thanks for trying my tutorial!
Saturday, October 24, 2015
DEADTIME DOLLY

Supplies needed:
I am using the stunning artwork from Graphfreaks for this tutorial which you can find here
Scrapkit: I am using a stunning kit from Chili's Designz called "Dolly Deadtime" which you can get by going here
Mask 22 from Becky which you can find here
Plugins: Lokas 3D Shadow
----------------------------
This tutorial is written for those who have working knowledge of PSPX2 (any version will do).
This tutorial was written by me on October 24, 2015. Please do not copy or paste on any other forum, website or blog provide link back to tut only. Please do not claim as your own. This tutorial is copyrighted to me. Any resemblance to any other tutorial is purely coincidental.
Ok - let's start and remember to save often.
Open up a 750 x 650 blank canvas (we can resize it later)
Select Houses Element - resize by 65%
Paste and position in the center of the canvas
Select Tree Element - resize by 45%
Paste and position on the right side below houses element
Select Pile Element - resize by 40%
Paste and position on the bottom left
Select SkullgirlLM Element - resize by 25%
Paste and position on the left side above pile element
Select Greenery 4 Element - resize by 30%
Paste and position on the bottom left
Select Moon Element - resize by 35%
Paste and position on top right below houses element
Select Tombstone Element - resize by 30%
Paste and position on the bottom right
Select Candles Element - resize by 30%
Paste and position on the bottom right side
Select Blood Element - resize by 30%
Paste and position on top left
Select Deco 2 Element - resize by 40%
Paste and position on the bottom left
Select Fungis3 Element - resize by 25%
Paste and position on the bottom where desired
Select Eye Element - resize by 65%
Paste and position on the bottom
Select Book Element - resize by 25%
Paste and position on the bottom
Select Spider Element - resize by 25%
Paste and position on the bottom
Paste tube of choice where desired
Apply Lokas 3D Shadow at default settings
Select Bottles Element - resize by 30%
Paste and position on the bottom right
Select Blade 2 Element - resize by 30%
Paste and position on the bottom right
Select Cat Element - resize by 30%
Paste and position on the bottom right
Select Axe Element - resize by 30%
Paste and position on the bottom left
Select Key 2 Element - resize by 20%
Image Free Rotate Right by 15% and paste on the bottom left
Select Goblet Element - resize by 30%
Paste and position on the bottom left
Select Pumpkin Element - resize by 30%
Paste and paste on the bottom left
Select Doll Element - resize by 35%
Paste and position on the bottom
Select Skull 3 Element - resize by 35%
Paste and position on the bottom
Select Bottle 2 Element - resize by 25%
Paste and position on the bottom
Paste paper 16 on canvas
Apply Mask 22 or mask of choice
Merge group and move to the bottom layer
Add any dropshadows you like
Sharpen any elements as needed
Crop and resize as desired
Add copyright info, license number and name
You're done! Thanks for trying my tutorial!
Monday, October 5, 2015
PUMPKIN CARVER

Supplies needed:
I am using the stunning artwork from Graphfreaks for this tutorial which you can find here
Scrapkit: I am using a stunning kit from Kizzed by Kelz called "Carrie Carver" which you can get by going here
Mask 36 from Millie which you can find here
Plugins: Lokas 3D Shadow
----------------------------
This tutorial is written for those who have working knowledge of PSPX2 (any version will do).
This tutorial was written by me on October 5, 2015. Please do not copy or paste on any other forum, website or blog provide link back to tut only. Please do not claim as your own. This tutorial is copyrighted to me. Any resemblance to any other tutorial is purely coincidental.
Ok - let's start and remember to save often.
Open up a 750 x 650 blank canvas (we can resize it later)
Select Frame Element 115 - resize by 85%
Paste and position in the center of the canvas
Select your magic wand tool and select the center of the frame (Add (Shift), RGB Value, Tolerance 25, Contiguous checked, Feather 0)
Selections, Modify, Expand by 5
Paste paper 24
Select invert, delete, select none
Apply drop shadow and merge down on paper layer
Move paper layer below window frame layer
Select Element 1 - resize by 85%
Paste and position on the canvas where desired
Select Element 31- resize by 30%
Paste and position on the top right
Select Element 121 - resize by 55%
Paste and position on the right side
Select Element 24 - resize by 50%
Paste and position on the right side
Select Element 17 - resize by 40%
Paste and position on the top left
Select Element 52 - resize by 25%
Image Free Rotate Left by 15% and paste on the left side
Select Element 10 - resize by 45%
Paste and position on the left side
Paste tube of choice where desired
Apply Lokas 3D Shadow at default settings
Select Element 117 - resize by 15%
Paste and position on the bottom left
Select Element 38 - resize by 30%
Paste and position on the bottom left
Select Element 86 - resize by 30%
Paste and position on the bottom left
Select Element 55 - resize by 40%
Paste and position on the bottom right
Select Element 9 - resize by 25%
Paste and position on the bottom right
Select Element 107 - resize by 40%
Paste and position on the bottom right
Select Element 14 - resize by 22%
Paste and paste on the bottom right
Select Element 112 - resize by 12%
Paste and position on the bottom right
Paste paper 25 on canvas
Apply Mask 36 or mask of choice
Merge group and move to the bottom layer
Add any dropshadows you like
Sharpen any elements as needed
Crop and resize as desired
Add copyright info, license number and name
You're done! Thanks for trying my tutorial!
Wednesday, September 2, 2015
FEEL THE ROCK

Supplies needed:
I am using the stunning artwork from Graphfreaks for this tutorial which you can find here
Scrapkit: I am using a FTU kit from Killer Kitty called "Feel the Rock" which you can get by going here
Grunge Mask 2 from Tonya which you can find here
Plugins: Lokas 3D Shadow
----------------------------
This tutorial is written for those who have working knowledge of PSPX2 (any version will do).
This tutorial was written by me on September 2, 2015. Please do not copy or paste on any other forum, website or blog provide link back to tut only. Please do not claim as your own. This tutorial is copyrighted to me. Any resemblance to any other tutorial is purely coincidental.
Ok - let's start and remember to save often.
Open up a 750 x 650 blank canvas (we can resize it later)
Select Frame Element 5 - resize by 75%
Paste and position in the center of the canvas
Select your magic wand tool and select the top left square of the frame (Add (Shift), RGB Value, Tolerance 25, Contiguous checked, Feather 0)
Selections, Modify, Expand by 5
Paste paper 9 on the top left square
Select invert, delete, select none
Move paper layer below window frame layer
Select your magic wand tool and select the bottom right square of the frame (Add (Shift), RGB Value, Tolerance 25, Contiguous checked, Feather 0)
Selections, Modify, Expand by 5
Paste paper 10 on the bottom right square
Move paper layer below window frame layer
Select Frame Element 6 - resize by
Paste and position in the center of the canvas
Select your magic wand tool and select the top right and bottom left square of the frame (Add (Shift), RGB Value, Tolerance 25, Contiguous checked, Feather 0)
Selections, Modify, Expand by 5
Paste paper 4
Select invert, delete, select none
Move paper layer below window frame layer
Select your magic wand tool and select the center of each square in the frame (Add (Shift), RGB Value, Tolerance 25, Contiguous checked, Feather 0)
Selections, Modify, Expand by 5
Add new raster layer and flood-fill with color or gradient of choice (I used paper 6 for the center square)
Select invert, delete
Paste close-up tubes on top of paper where desired and delete
Select none
Change close-up tubes to Screen
Apply drop shadow and merge down on color layer
Move paper/tubes below frame
Select Glitter Splat 2 Element - resize by 40%
Paste and position on the top left
Select Girly Skull Element - resize by 25%
Image Free Rotate Right by 15% and paste on top left
Select Glitter Splat 4 Element - resize by 35%
Paste and position on the top right
Select Staff Doodle Element - resize by 40%
Paste and position on the top right
Select Keyboard Element - resize by 45%
Paste and position on the bottom left
Paste tube of choice where desired
Apply Lokas 3D Shadow at default settings
Select Spiked Heart Element - resize by 30%
Paste and position on the bottom right
Select Boom Box 1 Element - resize by 40%
Paste and position on the bottom right
Select Skull Charm Element - resize by 30%
Image Free Rotate Left by 15% and paste on bottom right
Select SunGlasses 2 Element - resize by 20%
Paste and position on the bottom where desired
Select Gem 01 Element - resize by 25%
Paste and position on the bottom left
Select Can Element - resize by 25%
Paste and position on the bottom left
Select Guitar Element - resize by 40%
Paste and position on the bottom left
Select SkullLily 1 Element - resize by 15%
Paste and position on the bottom left
Select SpikedHeal Element - resize by 25%
Paste and position on the bottom left
Select TurnTable Element - resize by 35%
Paste and position on the bottom
Select Lip Element - resize by 22%
Paste and position on the bottom
Paste paper 5 on canvas
Apply Grunge Mask 2 or mask of choice
Merge group and move to the bottom layer
Add any dropshadows you like
Sharpen any elements as needed
Crop and resize as desired
Add copyright info, license number and name
You're done! Thanks for trying my tutorial!
Saturday, August 8, 2015
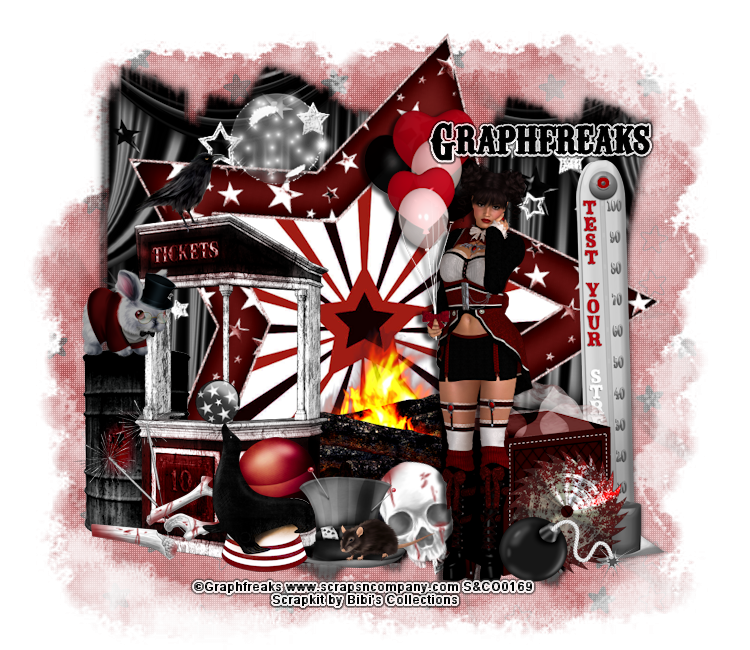
CARNIVAL FREAKSHOW
Supplies needed:
I am using the stunning artwork from Graphfreaks for this tutorial which you can find here
Scrapkit: I am using a stunning kit from Bibi's Collections called "Dark Carnival" which you can get by going here
Mask 22 from Becky which you can find here
Plugins: Lokas 3D Shadow
----------------------------
This tutorial is written for those who have working knowledge of PSPX2 (any version will do).
This tutorial was written by me on August 8, 2015. Please do not copy or paste on any other forum, website or blog provide link back to tut only. Please do not claim as your own. This tutorial is copyrighted to me. Any resemblance to any other tutorial is purely coincidental.
Ok - let's start and remember to save often.
Open up a 750 x 650 blank canvas (we can resize it later)
Select Element 27 - resize by 50%
Paste and position in the center of the canvas
Select Element 58 - resize by 85%
Paste and position on top of the canvas where desired
Select Frame Element 5 - resize by 55%
Paste and position in the center of the canvas
Image Free Rotate Right by 15% and reposition if desired
Select your magic wand tool and select the center of the frame (Add (Shift), RGB Value, Tolerance 25, Contiguous checked, Feather 0)
Selections, Modify, Expand by 5
Paste paper 3
Select invert, delete, select none
Move paper layer below frame layer
Select Element 32 - resize by 35%
Paste and position on the bottom right
Select Element 25 - resize by 30%
Image mirror and paste on the bottom right
Select Element 106 - resize by 50%
Paste and position on the bottom
Paste tube of choice where desired
Apply Lokas 3D Shadow at default settings
Select Element 122 - resize by 15%
Paste and position on the bottom right
Select Element 33 - resize by 20%
Paste and position on the bottom right
Select Element 95 - resize by 25%
Image Free Rotate Left by 15% and paste on the bottom
Select Element 43 - resize by 40%
Paste and position on the bottom
Select Element 103 - resize by 30%
Paste and position on the bottom
Select Element 18 - resize by 40%
Image mirror and paste on the bottom left
Select Element 41 - resize by 65%
Paste and position on the bottom left
Select Element 126 - resize by 22%
Paste and position on top of the barrel element
Select Element 37 - resize by 40%
Paste and position on the bottom left
Select Element 99 - resize by 20%
Paste and position on the bottom left
Select Element 2 - resize by 25%
Paste and position on the bottom
Select Element 80 - resize by 18%
Paste and position on the top left
Select Element 118 - resize by 30%
Image mirror and paste on the top left
Paste paper 5 on canvas
Apply Mask 22 or mask of choice
Merge group and move to the bottom layer
Add any dropshadows you like
Sharpen any elements as needed
Crop and resize as desired
Add copyright info, license number and name
You're done! Thanks for trying my tutorial!
Tuesday, July 21, 2015
HARASS

Supplies needed:
I am using the stunning artwork from Graphfreaks for this tutorial which you can find here
Scrapkit: I am using a stunning kit from Whisper in the Wind called "Harass" which you can get by going here
Mask 127 from Trese which you can find here
Plugins: Lokas 3D Shadow, Eyecandy 4000 - Gradient Glow
----------------------------
This tutorial is written for those who have working knowledge of PSPX2 (any version will do).
This tutorial was written by me on July 21, 2015. Please do not copy or paste on any other forum, website or blog provide link back to tut only. Please do not claim as your own. This tutorial is copyrighted to me. Any resemblance to any other tutorial is purely coincidental.
Ok - let's start and remember to save often.
Open up a 750 x 650 blank canvas (we can resize it later)
Select Element 67 - resize by 75%
Paste and position on the left side towards the bottom
Select Element 11 - resize by 40%
Paste and position on left side where desired
Select Element 22 - resize by 40%
Paste and position on the bottom right below wall element
Select Element 6 - resize by 25%
Paste and position on the right side
Select Element 3 - resize by 50%
Paste and position in the center of the wall where desired
Select Element 84 - resize by 75%
Paste and position on the bottom
Paste tube of choice where desired
Apply Lokas 3D Shadow at default settings
Select Element 82 - resize by 25%
Paste and position on bottom right side
Select Element 23 - resize by 15%
Paste and position on the bottom right
Select Element 85 - resize by 25%
Paste and position on the bottom right above mushroom element
Select Element 79 - resize by 25%
Paste and position on the bottom right
Select Element 88 - resize by 30%
Paste and position on the bottom left
Select Element 74 - resize by 15%
Image mirror and paste on bottom left
Select Element 80 - resize by 15%
Paste and position on the bottom left
Select Element 62 - resize by 20%
Paste and position on the bottom left
Select Element 68 - resize by 20%
Paste and position on the bottom left
Select Element 81 - resize by 15%
Paste and position on the bottom left
Select Element 21 - resize by 15%
Paste and position on the bottom
Select Element 53 - resize by 12%
Paste and position on the bottom
Select Element 16 - resize by 35%
Paste and position on the bottom
Select Element 50 - resize by 15%
Paste and position on the bottom
Select Element 12 - resize by 12%
Paste and position on the bottom
Select Element 8 - resize by 15%
Paste and position on left side above wall
Select Element 99 - resize by 30%
Paste and position in the top center where desired
Apply Eyecandy Gradient Glow on fat default settings (Glow Width 3)
Select Element 13 - resize by 40%
Paste and position on top where desired
Select Element 33 - resize by 20%
Paste and position on top where desired
Paste paper 2 on canvas
Apply Mask 127 or mask of choice
Merge group and move to the bottom layer
Add any dropshadows you like
Sharpen any elements as needed
Crop and resize as desired
Add copyright info, license number and name
You're done! Thanks for trying my tutorial!
Friday, June 26, 2015
MADDIE HATTER

Supplies needed:
I am using the stunning artwork from Graphfreaks for this tutorial which you can find here
Scrapkit: I am using a stunning kit from Chili Designz called "Maddie Hatter" which you can get by going here
Mask 315 from Aqua which you can find on the Misfits Blog here
Plugins: Lokas 3D Shadow
----------------------------
This tutorial is written for those who have working knowledge of PSPX2 (any version will do).
This tutorial was written by me on June 26, 2014. Please do not copy or paste on any other forum, website or blog provide link back to tut only. Please do not claim as your own. This tutorial is copyrighted to me. Any resemblance to any other tutorial is purely coincidental.
Ok - let's start and remember to save often.
Open up a 750 x 650 blank canvas (we can resize it later)
Select Frame Element 5 - paste and position in the center of the canvas
Select your magic wand tool and select the center of the frame (Add (Shift), RGB Value, Tolerance 25, Contiguous checked, Feather 0)
Selections, Modify, Expand by 5
Paste paper 18
Select invert, delete select none
Move paper layer below window frame layer
Select Frame Element 10 - paste on top of frame 5 and reposition where desired
Select Greenery Element - resize by 20%
Paste and position on top left below frame 10
Select WA2 Element - resize by 45%
Paste and position on top right
Apply Eyecandy 4000 - Gradient Glow on fat default settings (Glow Width 3)
Select Bridge Element - resize by 45%
Paste and position on bottom right
Select Butterly Element- resize by 55%
Paste and position on right side where desired
Select Deco6 Element - resize by 45%
Paste and position on left side
Paste tube of choice where desired
Apply Lokas 3D Shadow at default settings
Select Mushroom 2 Element - resize by 25%
Paste and position on the bottom right side
Select Hat 3 Element - resize by 30%
Paste and position on the bottom right
Select Teapot Element - resize by 30%
Paste and position on the bottom right
Select Deco 3 Element - resize by 40%
Image Free Rotate Left by 15% and paste on the bottom
Select Flower 4 Element - resize by 25%
Paste and position on bottom left
Select Bottle Element - resize by 40%
Paste and position on the bottom left
Select Stamp Element - resize by 25%
Paste and position on the bottom left
Select Books 2 Element - resize by 40%
Paste and position on the bottom left
Select Cat Element - resize by 40%
Paste and position on the bottom left
Select Flower 5 Element - resize by 30%
Paste and position on the bottom left
Select Mushroom 4 Element - resize by 35%
Paste and position on the bottom left
Select Brad 3 Element - resize by 75%
Paste and position on the bottom
Select Caterpillar Element - resize by 55%
Paste and position on the bottom
Paste paper 11 on canvas
Apply Mask 315 or mask of choice
Merge group and move to the bottom layer
Add any dropshadows you like
Sharpen any elements as needed
Crop and resize as desired
Add copyright info, license number and name
You're done! Thanks for trying my tutorial!
Friday, June 19, 2015
ORIYA


Monday, June 15, 2015
MELODY DE MAYET

Supplies needed:
I am using the stunning artwork from Graphfreaks for this tutorial which you can find here
Scrapkit: I am using a beautiful kit from Bibi's Collections called "Melody De Mayet" which you can get by going here
Plugins: Lokas 3D Shadow
----------------------------
This tutorial is written for those who have working knowledge of PSPX2 (any version will do).
This tutorial was written by me on June 15, 2014. Please do not copy or paste on any other forum, website or blog provide link back to tut only. Please do not claim as your own. This tutorial is copyrighted to me. Any resemblance to any other tutorial is purely coincidental.
Ok - let's start and remember to save often.
Open up a 750 x 650 blank canvas (we can resize it later)
Select Element 63 - resize by 65%
Paste and position in the center of the canvas
Select Element 23 - resize by 45%
Paste and position in the center of the canvas
Select Element 107 - resize by 45%
Paste and position right side below the bridge element
Select Element 22 - resize by 40%
Image mirror and paste on the right side below bridge element
Select Element 16 - resize by 55%
Paste and position on the left side below bridge element
Select Element 99 - resize by 18%
Paste on right side below bridge element
Paste tube of choice where desired
Apply Lokas 3D Shadow at default settings
Select Element 65 - resize by 30%
Paste and position on left side
Select Element 24 - resize by 25%
Paste and position on left side
Select Element 89 - resize by 15%
Paste and position on bottom left
Select Element 5 - resize by 25%
Paste and position on bottom left
Select Element 17 - resize by 20%
Image Free Rotate Left by 15% and paste on bottom left
Select Element 37 - resize by 35%
Paste and position on bottom left
Select Element 97 - resize by 40%
Paste and position on top right
Select Element 6 - resize by 15%
Paste and position on right side
Select Element 38 - resize by 15%
Paste and position on the bottom right
Select Element 18 - resize by 35%
Paste and position on the bottom right
Select Element 47 - resize by 20%
Paste and position on the bottom right
Select Element 36 - resize by 15%
Paste and position on the bottom below tube layer
Select Element 109 - resize by 25%
Paste and position on the top left
Add any dropshadows you like
Sharpen any elements as needed
Crop and resize as desired
Add copyright info, license number and name
You're done! Thanks for trying my tutorial!
Wednesday, June 3, 2015
MIDNIGHT SERENADE

Supplies needed:
I am using the stunning artwork from Graphfreaks for this tutorial which you can get free with a $5.00 purchase here
Scrapkit: I am using a stunning kit from Bibi's Collections called "Patrizia Fairy" which you can get by going here
Mask 252 from Weescotlass which you can find here
Plugins: Lokas 3D Shadow
----------------------------
This tutorial is written for those who have working knowledge of PSPX2 (any version will do).
This tutorial was written by me on June 3, 2014. Please do not copy or paste on any other forum, website or blog provide link back to tut only. Please do not claim as your own. This tutorial is copyrighted to me. Any resemblance to any other tutorial is purely coincidental.
Ok - let's start and remember to save often.
Open up a 750 x 650 blank canvas (we can resize it later)
Select Element 98 - resize by 68%
Paste and position in the center of the canvas
Select Element 43 - resize by 85%
Paste and position on the top left
Select Element 76 - resize by 40%
Paste and position on the right hand side
Select Element 66 - resize by 35%
Paste and position on top right
Select Element 106 - resize by 55%
Paste and position on top right
Select Element 103 - resize by 50%
Paste and position on bottom right above staircase layer
Select Element 30 - resize by 40%
Paste and position on the center right
Select Element 71 - resize by 25%
Paste and position on right side below staircase elememt
Select Element 92 - resize by 40%
Paste and position on center lefthand side
Select Element 37 - resize by 35%
Paste and position on top left
Select Element 38 - resize by 30%
Image Free Rotate Right by 15% and paste on top left
Select Element 107 - resize by 40%
Paste and position on bottom where desired
Paste tube of choice where desired
Apply Lokas 3D Shadow at default settings
Select Element 68 - resize by 30%
Image mirror and flip and paste on bottom left
Select Element 2 - resize by 35%
Paste and position on bottom left
Select Element 80 - resize by 25%
Paste and position on bottom right
Select Element 85 - resize by 40%
Image Free Rotate Right by 15% and paste on bottom right
Select Element 32 - resize by 40%
Paste and position on bottom right
Select Element 86 - resize by 35%
Paste and position on bottom right
Select Element 111 - resize by 35%
Image Free Rotate Left by 15% and paste on bottom right
Select Element 110 - resize by 25%
Paste and position on bottom right
Select Element 105 - resize by 25%
Paste and position on the bottom right
Select Element 104 - resize by 15%
Paste and position on bottom where desired
Paste paper 4 on canvas
Apply Mask 252 or mask of choice
Merge group and move to the bottom layer
Select Element 74 - resize by 40%
Paste and position on bottom right
Add any dropshadows you like
Sharpen any elements as needed
Crop and resize as desired
Add copyright info, license number and name
You're done! Thanks for trying my tutorial!
Saturday, May 23, 2015
ORANGE SHERBERT

Supplies needed:
I am using the stunning artwork from Graphfreaks for this tutorial which you can find here
Scrapkit: I am using a stunning Collab kit from Chili Designz called "Orange Summer" which you can get by going here
Shell Mask from Jenny which you can on the Misfits Blog here
Plugins: Lokas 3D Shadow, Mura Meister - Copies, Eyecandy 4000 - Gradient Glow
----------------------------
This tutorial is written for those who have working knowledge of PSPX2 (any version will do).
This tutorial was written by me on May 23, 2014. Please do not copy or paste on any other forum, website or blog provide link back to tut only. Please do not claim as your own. This tutorial is copyrighted to me. Any resemblance to any other tutorial is purely coincidental.
Ok - let's start and remember to save often.
Open up a 750 x 650 blank canvas (we can resize it later)
Select Frame Element 1 - paste and position in the center of the canvas
Select your magic wand tool and click in the center of the Frame (Add (Shift), RGB Value, Tolerance 25, Contiguous checked, Feather 0)
Selections, Modify, Expand by 5
Paste paper 8
Select invert, delete
Paste a close-up tube of choice on paper layer and delete
Change close-up to Luminance (Legacy) and reduce opacity to 65%
Select none and apply dropshadow
Merge tube down on paper layer
Move paper below frame layer
Select Frame 9 Element - paste and position above frame 1
Select Flower 10 Element - resize by 25%
Paste and position in the center of the canvas
Apply Mura Meister - Copies with the following settings:

Select WA 2 Element - resize by 50%
Paste and position on the top where desird
Apply Eyecandy - Gradient Glow on fat default settings (Glow Width 3)
Select Butterfly 2 Element - resize by 55%
Paste and position on top left
Select Charm Element - resize by 65%
Paste and position on left side
Paste tube of choice where desired
Apply Lokas 3D Shadow at default settings
Select Chair Element - resize by 50%
Image mirror and paste on bottom right below tube
Select WA Love Element - resize by 35%
Paste and position on right side above chair element
Select Water Element - resize by 30%
Paste and position on bottom below tube layer
Select Hat Element - resize by 32%
Image Free Rotate Right by 15% and paste on right side above chair element
Select Puppy Element - resize by 45%
Paste and position on bottom right
Select Ball Element - resize by 75%
Paste and position on bottom left
Select Sunlotion Element - resize by 55%
Paste and position on bottom left
Select Watermelon Element - resize by 45%
Paste and position on bottom left
Select Flipflops Element - resize by 35%
Paste and position on bottom left
Select Flower 8 Element - resize by 30%
Paste and position on bottom left
Select Drink Element - resize by 45%
Paste and position on bottom left
Select Orange Element - resize by 40%
Paste and position on bottom
Select Pineapple 2 Element - resize by 40%
Paste and position on bottom
Select Sunglasses Element - resize by 45%
Image Free Rotate Left by 15% and paste on bottom
Add new raster layer and flood-fill with color or gradient of choice
Apply Mask 126 or mask of choice
Merge group and move to the bottom layer
Add any dropshadows you like
Sharpen any elements as needed
Crop and resize as desired
Add copyright info, license number and name
You're done! Thanks for trying my tutorial!
Tuesday, May 19, 2015
UNSPOKEN

Supplies needed:
I am using the stunning artwork from Graphfreaks for this tutorial which you can find here
Scrapkit: I am using a stunning kit from Devilish Dezines called "The Unspoken" which you can get by going here
Mask 32 from Moonbeams and Spiderwebs which you can find here
Plugins: Lokas 3D Shadow
----------------------------
This tutorial is written for those who have working knowledge of PSPX2 (any version will do).
This tutorial was written by me on May 19, 2014. Please do not copy or paste on any other forum, website or blog provide link back to tut only. Please do not claim as your own. This tutorial is copyrighted to me. Any resemblance to any other tutorial is purely coincidental.
Ok - let's start and remember to save often.
Open up a 750 x 650 blank canvas (we can resize it later)
Select Element 33 - resize by 80%
Paste and position in the center of the canvas
Select Element 41 - resize by 40%
Paste and position on top right where desired
Select Element 22 - resize by 65%
Paste and position on right side
Select Element 1 - resize by 20%
Image Free Rotate Right by 15% and paste on top right
Select Element 45 - resize by 25%
Paste and position on right side
Select Element 7 - resize by 50%
Paste and position on bottom above frame
Select Element 31 - resize by 22%
Paste and position on top left
Select Element 42 - resize by 35%
Paste and position on top left
Select Element 21 - resize by 30%
Paste and position on left side
Paste tube of choice where desired
Apply Lokas 3D Shadow at default settings
Select Element 20 - resize by 30%
Paste and position on bottom left
Select Element 5 - resize by 12%
Paste and position on bottom right
Select Element 17 - resize by 12%
Paste and postion on bottom left
Select Element 48 - resize by 50%
Paste and position on bottom left
Select Element 50 - resize by 20%
Image Free Rotate Right by 15% and paste on bottom right
Select Element 46 - resize by 15%
Paste and position on bottom right
Select Element 37 - resize by 20%
Paste and position on bottom right
Paste paper 3 on canvas
Apply Mask 32 or mask of choice
Merge group and move to the bottom layer
Add any dropshadows you like
Sharpen any elements as needed
Crop and resize as desired
Add copyright info, license number and name
You're done! Thanks for trying my tutorial!
Sunday, May 17, 2015
GIRLY GLAM

Supplies needed:
I am using the stunning artwork from Graphfreaks for this tutorial which you can find here
Scrapkit: I am using a stunning Collab kit from MMeliCrea Designz called "Little Emo Glam" which you can get by going here
Heart Mask 43 from Chas which you can find in the Misfits Blog here
Plugins: Lokas 3D Shadow
----------------------------
This tutorial is written for those who have working knowledge of PSPX2 (any version will do).
This tutorial was written by me on May 16, 2014. Please do not copy or paste on any other forum, website or blog provide link back to tut only. Please do not claim as your own. This tutorial is copyrighted to me. Any resemblance to any other tutorial is purely coincidental.
Ok - let's start and remember to save often.
Open up a 750 x 650 blank canvas (we can resize it later)
Select Frame Element 1 - resize by 75%
Image Free Rotate Right by 15% and paste in the center of the canvas
Select your magic wand tool and click in the center of the Frame (Add (Shift), RGB Value, Tolerance 25, Contiguous checked, Feather 0)
Selections, Modify, Expand by 5
Add new raster and flood-fill with gradient of choice (Linear style, Angle 45, Repeat 3)
Select invert, delete
Paste close-up tube of choice on top of paper layer and delete
Select none
Change close-up to Luminance (Legacy)
Drop opacity down to 75%
Apply dropshadow and merge close-up down on gradient
Effect, Texture Effects, Blinds (Width 3, Opactity 20, Horizontal and Light from left/top checked)
Move paper below frame
Paste tube of choice where desired
Apply Lokas 3D Shadow at default settings
Select Element 37 - resize by 25%
Paste and position on right side
Select Element 14 - resize by 20%
Paste and position on bottom right
Select Element 40 - resize by 18%
Paste and position on bottom right
Select Element 75 - resize by 15%
Paste and postion on bottom right
Select Element 26 - resize by 20%
Paste and position on bottom left
Select Element 60 - resize by 20%
Paste and position on bottom left
Select Element 56 - resize by 20%
Paste and position on bottom left
Select Element 2 - resize by 20%
Paste and position on bottom
Select Element 87 - resize by 12%
Paste and position on bottom
Add new raster layer and flood-fill with color of choice
Apply Mask 43 or mask of choice
Merge group and move to the bottom layer
Add any dropshadows you like
Sharpen any elements as needed
Crop and resize as desired
Add copyright info, license number and name
You're done! Thanks for trying my tutorial!
Wednesday, May 13, 2015
LOVE OF MIME

Supplies needed:
I am using the stunning artwork from Graphfreaks for this tutorial which you can find here
Scrapkit: I am using a stunning kit from Bibi's Collections called "Mime" which you can get by going here
Mask M4 from Kylie which you can find on the Misfits Blog here
Plugins: Lokas 3D Shadow
----------------------------
This tutorial is written for those who have working knowledge of PSPX2 (any version will do).
This tutorial was written by me on May 13, 2014. Please do not copy or paste on any other forum, website or blog provide link back to tut only. Please do not claim as your own. This tutorial is copyrighted to me. Any resemblance to any other tutorial is purely coincidental.
Ok - let's start and remember to save often.
Open up a 750 x 650 blank canvas (we can resize it later)
Select Element 33 - resize by 70%
Paste and position in the center of the canvas
Select Element 23 - resize by 30%
Image Free Rotate Right by 15% and paste on bottom left
Select your magic wand tool and click in the center squares of the Frame (Add (Shift), RGB Value, Tolerance 25, Contiguous checked, Feather 0)
Selections, Modify, Expand by 5
Paste paper 9 on top
Select invert, delete
Paste close-up tubes of choice on top of paper layer and delete
Select none
Change close-ups to Luminance (Legacy)
Apply dropshadow and merge close-ups down on paper layer
Move paper below frame
Select Element 44- resize by 20%
Paste and position on the bottom left side
Select Element 85 - resize by 75%
Paste and position on bottom where desired
Select Element 6 - resize by 35%
Image Free Rotate Right by 15% and paste on top right
Select Element 65 - resize by 30%
Paste and position on top right
Paste tube of choice where desired
Apply Lokas 3D Shadow at default settings
Select Element 3 - resize by 30%
Paste and position on bottom below tube layer
Select Element 19 - resize by 35%
Paste and position on bottom left
Select Element 37 - resize by 15%
Paste and position on bottom left
Select Element 11 - resize by 35%
Image mirror and paste on left side
Select Element 67 - resize by 25%
Image Free Rotate Left by 15% and paste on bottom
Select Element 12 - resize by 22%
Image mirror and paste on bottom
Select Element 2 - resize by 30%
Image Free Rotate Right by 15% and paste on bottom
Select Element 64 - resize by 25%
Paste and position on right side
Select Element 21 - resize by 20%
Paste and position on bottom right
Select Element 26 - resize by 25%
Paste and position on bottom right
Select Element 60 - resize by 40%
Paste and position on bottom right
Select Element 17 - resize by 20%
Paste and position on bottom right
Select Element 69 - resize by 55%
Paste and position on top left
Add new raster layer and flood-fill with color or gradient of choice
Apply Mask M4 or mask of choice
Merge group and move to the bottom layer
Add any dropshadows you like
Sharpen any elements as needed
Crop and resize as desired
Add copyright info, license number and name
You're done! Thanks for trying my tutorial!
Thursday, May 7, 2015
UNBROKEN SOUL

Supplies needed:
I am using the stunning artwork from Graphfreaks for this tutorial which you can find here
Scrapkit: I am using a stunning kit from Chili's Designz called "Unbroken Soul" which you can get by going here
Mask 21 from Moonbeams and Spiderwebs which you can find here
Plugins: Lokas 3D Shadow, Eyecandy 4000 - Gradient Glow
----------------------------
This tutorial is written for those who have working knowledge of PSPX2 (any version will do).
This tutorial was written by me on May 7, 2014. Please do not copy or paste on any other forum, website or blog provide link back to tut only. Please do not claim as your own. This tutorial is copyrighted to me. Any resemblance to any other tutorial is purely coincidental.
Ok - let's start and remember to save often.
Open up a 750 x 650 blank canvas (we can resize it later)
Select Frame Element 4 and paste in the center of the canvas
Select your magic wand tool and click in the center circle including excess areas around the inner circle (Add (Shift), RGB Value, Tolerance 25, Contiguous checked, Feather 0)
Selections, Modify, Expand by 3
Paste paper 10
Select invert, delete, select none
Move paper below frame
Select Moon Element - resize by 40%
Paste and position on top right above paper layer
If you desire - change the color with the following settings:

Select Sparkles Element - resize by 75%
Paste and position on top of paper layer where desired
Select Steps Element - resize by 45%
Paste and position on bottom right
Select Tower Element - resize by 30%
Paste and position on bottom right
Select Trail Element - resize by 40%
Paste and position on bottom left above frame where desired
Paste tube of choice where desired
Apply Lokas 3D Shadow at default settings
Select Angel Element - resize by 40%
Paste and position on right side above steps element
Select Ribbon 2 Element - resize by 35%
Paste and position on right side
Select Box Element- resize by 40%
Paste and position on bottom right
Select Book Element - resize by 25%
Image Free Rotate Right by 15% and paste on bottom right
Select Flower 5 Element - resize by 30%
Paste and position on bottom right
Select Skull Element - resize by 40%
Paste and position on bottom right
Select Skull 2 Element - resize by 25%
Paste and position on bottom
Select Jewel Element - paste and position on bottom
Select Button Element - resize by 65%
Paste and position on bottom
Select Feather Element - resize by 30%
Paste and position on bottom
Select Wa3 Element - resize by 50%
Paste and position on bottom above steps element
Apply Eyecandy Gradient Glow on fat default settings (Glow Width 3)'
Select Wa2 Element and repeat above steps
Reposition Wa2 on right side
Select Butterfly Element - resize by 50%
Paste and position on left side
Select Heart Element - resize by 50%
Image Free Rotate Left by 15% and paste on bottom left
Select Snake Element - resize by 40%
Paste and position on bottom left
Add new raster layer and flood-fill with gradient of choice
Apply Mask 21 or mask of choice
Merge group and move to the bottom layer
Add any dropshadows you like
Sharpen any elements as needed
Crop and resize as desired
Add copyright info, license number and name
You're done! Thanks for trying my tutorial!
Subscribe to:
Posts
(Atom)


