Labels
- Alikas Scraps
- All Dolled Up Store
- Amy Marie
- Annaica
- Arthur Crowe
- Babycakes Scraps
- Barbara Jensen
- Bibi's Collections
- Black Widow Creationz
- Blu Moon
- Bonnies Creations
- Bookwork Dezines
- Broken Sky Dezine
- Carita Creationz
- Carpe Diem Designs
- CDO
- Celinart Pinup
- Celine
- Chacha Creationz
- Charmed Designs
- Cherry Blossom Designs
- Chili Designz
- Cluster Frame
- Creative Misfits
- Creative Scraps by Crys
- Curious Creative Dreams
- Danny Lee
- Derzi
- Designs by Ali
- Designs by Joan
- Designs by Ketura
- Designs By Norella
- Designs by Vi
- Diana Gali
- Diry Art Designs
- Disturbed Scraps
- Dreaming With Bella
- Eclipse Creations
- Elegancefly
- Extras
- Fabulous Designz
- Forum Set
- Foxy's Designz
- Freek's Creation
- FTU
- FwTags
- Goldwasser
- Gothic Inspirations
- Gothic Raven Designs
- Graphfreaks
- Hania's Designs
- Happy Pumpkin Studios
- Horseplay's Pasture Designs
- indie-Zine
- Irish Princess Designs
- Ishika Chowdhury
- Kaci McVay
- Kajenna
- katharine
- Katherine
- Khloe Zoey
- Killer Kitty
- Kissing Kate
- KiwiFirestorm
- Kiya Designs
- Kizzed by Kelz
- KZ Designz
- Lady Mishka
- Lil Mz Brainstorm
- Maiden of Darkness
- Mariel Designs
- MellieBeans
- Michelle's Myths
- Midnight Shadow
- Misticheskya
- MistyLynn's Creations
- MMeliCrea Designz
- Moon Vixen Designs
- NaSionainne
- Ninaste
- Niqui Designs
- Pandora
- Picsfordesign
- Pink Paradox Productions
- Radyga Designs
- Redefined Designs
- Rissa's Designs
- Schnegge
- ScottishButterfly Creations
- Scrappin Krazy Designs
- Scrappin With Lil Ol Me
- Scraps and the City
- Scraps Dimensions
- Scraps From The Heart
- Scraps N Company
- Scraps with Attitude
- Shining Star Art
- Skyscraps
- Sleek N Sassy Designs
- Sophisticat Simone
- Souldesigner
- Soxsational Scraps
- Spazz
- Starlite and Soul
- Stella Felice
- Tammy Welt
- Tasha's Playground
- The PSP Project
- Thrifty Scraps by Gina
- Tiny Turtle Designs
- Upyourart
- Verymany
- Wendy Gerber
- Whisper In the Wind
- Wick3d Creationz
- Wicked Diabla
- Yude's Kreationz
Blog Archive
-
▼
2014
(276)
-
▼
April
(26)
- KATRINA
- NAUGHTY ANGEL
- CAMO CAKES
- SPRING ON MY MIND
- CANDYLAND FAIRY
- SKULL BABE
- DEPLOYMENT
- TOXIC PUNK
- BEWARE THE WOLF
- DESPERADO
- HAPPY EASTER
- STEAMPUNK DOLL
- IF YOU LOVE SOMETHING
- BLACK SWAN
- KISS THIS
- DARE TO BE DIFFERENT
- YOU SWEETEN MY COFFEE
- BAD EGG
- DELICIOUS BUNNY
- SLEEPING BEAUTY
- LOVE BUNNY
- EVER AFTER
- GOTHIC SMILE
- POISON IVY
- BREATH OF SPRING
- TIME FOR SPRING
-
▼
April
(26)
Wednesday, April 30, 2014
KATRINA
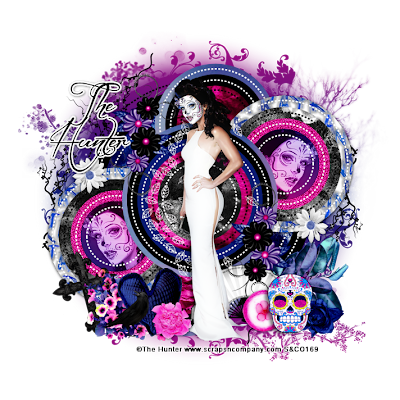
Supplies needed:
I am using the amazing artwork from The Hunter for this tutorial which you can find here
Scrapkit: I am using a stunning matching kit from Bibi's Collections called "Katrina" which you can get by going here
Template 210 from Pooker which you can find here
Mask 53 from Moonbeams and Spiderwebs which you can find here
Plugins used: Xero - Radiance, Xero - Bad Dream, Lokas 3D Shadow
----------------------------
This tutorial is written for those who have working knowledge of PSPX2 (any version will do).
This tutorial was written by me on April 30, 2014. Please do not copy or paste on any other forum, website or blog provide link back to tut only. Please do not claim as your own. This tutorial is copyrighted to me. Any resemblance to any other tutorial is purely coincidental.
Ok - let's start and remember to save often.
Open the template and using your shortcut keys on your keyboard (SHIFT+D) duplicate the template as a new image. Close the original and delete the copywrite layer.
Select Green Circle layer
Select all, float, defloat
Paste paper 13
Select invert, delete, select none
Delete/Hide original circle layer
Select White Circle layer
Select all, float, defloat
Paste paper 1
Select invert, delete, select none
Delete/Hide original circle layer
Select Blue Circle layer
Select all, float, defloat
Add new raster layer and flood-fill with color of choice
Select none
Delete/Hide original circle layer
Select Red Circle layer
Select all, float, defloat
Paste paper 8
Select invert, delete, select none
Delete/Hide original circle layer
Select 2 Black Circles1 layer
Select all, float, defloat
Add new raster layer and flood-fill with color or gradient of choice (Linear style, Angle 45, Repeat 2)
Paste close-up tubes of choice on top of gradient and delete
Change tube to Luminence (Legacy)
Apply Xero Bad Dream at default settings or random setting of choice
Drop opacity down to 80%
Apply dropshadow and merge close-ups down on top of gradient layer
Effect, Texture Effects, Blinds (Width 2, Opactity 25, Horizontal and Light from left/top checked)
Delete/Hide original circles layer
Select 2 Blue Circles layer
Select all, float, defloat
Add new raster layer and flood-fill with color of choice
Select none
Adjust, Add/Remove Noise, Add Noise (Uniform checked, Noise 65%, Monochrome checked)
Delete/Hide original circles layer
Select 2 White Circles layer
Select all, float, defloat
Paste paper 13
Select invert, delete, select none
Delete/Hide original circles layer
Select 2 Green Circles layer
Select all, float, defloat
Paste paper 5
Select invert, delete, select none
Delete/Hide original circles layer
Select 2 White Circles 2 layer
Select all, float, defloat
Paste paper 1
Select invert, delete, select none
Delete/Hide original circles layer
Select 2 Red Circles layer
Select all, float, defloat
Paste paper 8
Select invert, delete, select none
Delete/Hide original circles layer
Select Blue Circle 2 layer
Select all, float, defloat
Paste paper 12
Select invert, delete, select none
Delete/Hide original circle layer
Copy and paste tube of choice and position where desired
Apply Xero Radiance at setting of choice
Apply Lokas 3D Shadow at default settings
Select Element 33 - resize by 55%
Image mirror and paste on top of the center circle
Select Element 65 - resize by 35%
Paste and position on top left
Image duplicate, mirror and reposition on bottom right
Select Element 123 - resize by 30%
Paste and position on bottom right
Select Element 95 - resize by 15%
Paste and position on bottom right
Select Element 46 - resize by 25%
Paste and position on bottom right
Select Element 75 - resize by 20%
Paste and position on bottom right
Select Element 129 - resize by 40%
Paste and position on bottom right
Select Element 113 - resize by 25%
Image Free Rotate Left by 15% and paste on bottom left
Select Element 32 - resize by 25%
Paste and position on bottom left
Select Element 89 - resize by 30%
Paste and position on bottom left
Select Element 120 - resize by 25%
Paste and position on bottom left
Select Element 72 - resize by 9%
Paste and position on bottom left
Select Element 56 - resize by 45%
Image flip and postion on left side where desired and move to bottom layer
Image duplicate, mirror and reposition where desired
Select new raster layer and flood fill with color or gradient of choice
Move layer to the bottom of the template
Apply Mask 53
Merge group and move to the bottom layer
Add any additional elements you like.
Add any dropshadows you like
Crop and resize as desired
Add copyright info, license number and name
You're done! Thanks for trying my tutorial!
Labels:Bibi's Collections,Scraps N Company | 0
comments
Tuesday, April 29, 2014
NAUGHTY ANGEL
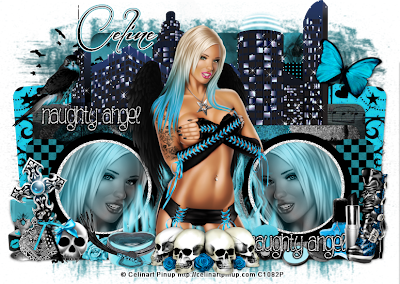
Supplies needed:
I am using the amazing artwork from Celinart Pinup for this tutorial which you can find here
Scrapkit: I am using a stunning matching kit from Pink Paradox Productions called "Fallen Angel" which you can get by going here
Template 233 from Millie which you can find here
Mask 179 from Insatiable Dreams which you can find here
Plugins used: Alien Skin Xenofex 2 - Constellation, Eyecandy 4000 - Gradient Glow, Xero - Radiance, Xero - Bad Dream, Lokas 3D Shadow
----------------------------
This tutorial is written for those who have working knowledge of PSPX2 (any version will do).
This tutorial was written by me on April 29, 2014. Please do not copy or paste on any other forum, website or blog provide link back to tut only. Please do not claim as your own. This tutorial is copyrighted to me. Any resemblance to any other tutorial is purely coincidental.
Ok - let's start and remember to save often.
Open the template and using your shortcut keys on your keyboard (SHIFT+D) duplicate the template as a new image. Close the original and delete the copywrite layer.
Adjust the canvas size to 775 x 550
Select Star 20 layer
Select all, float, defloat
Add new raster layer and flood-fill with color of choice
Select none
Delete/Hide original star layer
Select Star 19 layer and repeat above steps
Select Wordart 18 layer
Apply Eyecandy Gradient Glow on fat default settings
Select Wordart 17 layer and repeat above step
Select Circle 16 layer
Select all, float, defloat
Add new raster layer and flood-fill with color or gradient of choice (Linear style, Angle 45, Repeat 2)
Paste close-up tube of choice on top of gradient and delete
Change tube to Luminence (Legacy)
Apply Xero Bad Dream at default settings or random setting of choice
Drop opacity down to 80%
Apply dropshadow and merge close-up down on top of gradient layer
Effect, Texture Effects, Blinds (Width 2, Opactity 25, Horizontal and Light from left/top checked)
Delete/Hide original circle layer
Select Circle 15 layer and repeat above steps
Select Circle 14 layer
Adjust, Add/Remove Noise, Add Noise (Uniform checked, Noise 100%, Monochrome checked)
Select Circle 13 layer and repeat above step
Select Circle 12 layer
Select all, float, defloat
Add new raster layer and flood-fill with color of choice
Select none
Delete/Hide original circle layer
Select Circle 11 layer and repeat above steps
Select Rectangle 10 layer
Select all, float, defloat
Paste paper 25
Select invert, delete, select none
Delete/Hide original rectangle layer
Select Rectangle 9 layer and repeat above steps
Select Rectangle 8 layer
Select all, float, defloat
Paste paper 36
Select invert, delete, select none
Delete/Hide original rectangle layer
Select Rectangle 7 layer
Select all, float, defloat
Paste paper 28
Select invert, delete, select none
Delete/Hide orignal rectangle layer
Select Square 6 layer
Select all, float, defloat
Paste paper 9
Select invert, delete, select none
Delete/Hide original square layer
Select Square 5 layer and repeat above steps
Select Square 4 layer
Apply Effects, Texture effects, weave (Gap size 2, Width 5, Opacity 10, Fill gaps checked, Change Gap Color to color of choice)
Select Square 3 layer and repeat above step
Select Rectangle 2 layer
Select all, float, defloat
Paste paper 19
Select invert, delete, select none
Delete/Hide original rectangle layer
Select Square 1 layer
Select all, float, defloat
Paste paper 33
Select invert, delete, select none
Delete/Hide original square layer
Copy and paste tube of choice and position where desired
Apply Xero Radiance at setting of choice
Apply Lokas 3D Shadow at default settings
Select Element 117 - resize by 50%
Paste and position on top where desired
Apply Xenofex - Constellation with the following settings (optional):
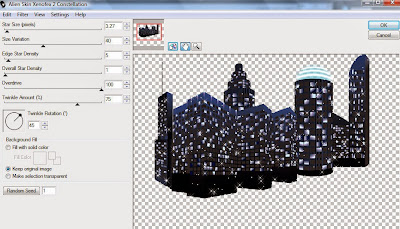
Select Element 12 - resize by 25%
Image Free Rotate Right by 15% and paste on top right
Select Element 18 - resize by 25%
Paste and position on bottom right
Select Element 26 - resize by 25%
Paste and position on bottom right
Select Element 21 - resize by 18%
Paste and position on bottom right
Select Element 29 - resize by 15%
Paste and position on bototm right
Select Element 14 - resize by 25%
Paste and position on bottom where desired
Select Element 25 - resize by 20%
Paste and position on bottom left
Select Element 99 - resize by 35%
Image Free Rotate Left by 15% and paste on bottom left
Select Element 22 - resize by 15%
Paste and position on bottom left
Select Element 2 - resize by 25%
Paste and position on bottom left
Select Element 39 - resize by 20%
Paste and position on bottom left
Select Element 147 - resize by 20%
Paste and position on bottom left
Select Element 55 - resize by 15%
Paste and position on bottom left
Select Element 64 - resize by 25%
Paste and position on bottom left
Select new raster layer and flood fill with color or gradient of choice
Move layer to the bottom of the template
Apply Mask 179
Merge group and move to the bottom layer
Apply Cybia Screenworks - Chainlink on the following settings:
Add any additional elements you like.
Add any dropshadows you like
Crop and resize as desired
Add copyright info, license number and name
You're done! Thanks for trying my tutorial!
Monday, April 28, 2014
CAMO CAKES
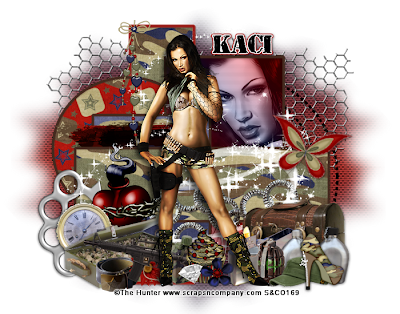
Supplies needed:
I am using the amazing artwork from The Hunter for this tutorial which you can find here
Scrapkit: I am using a stunning kit from Scrappin Krazy Designs called "Camo Cakes" which you can get by going here
Template 10 from Scrapity Scrap which you can find here
Mask 133 from Weescotlass which you can find here
Plugins used: Cybia - Screenworks, Eyecandy 4000 - Gradient Glow, Xero - Radiance, Lokas 3D Shadow
----------------------------
This tutorial is written for those who have working knowledge of PSPX2 (any version will do).
This tutorial was written by me on April 28, 2014. Please do not copy or paste on any other forum, website or blog provide link back to tut only. Please do not claim as your own. This tutorial is copyrighted to me. Any resemblance to any other tutorial is purely coincidental.
Ok - let's start and remember to save often.
Open the template and using your shortcut keys on your keyboard (SHIFT+D) duplicate the template as a new image. Close the original and delete the copywrite layer.
Adjust the canvas size to 700 x 550
Select Frame Copy of Vector 1 layer
Select all, float, defloat
Add new raster layer and flood-fill with color of choice
Select none
Delete/Hide original frame layer
Select remaining frames and repeat above steps
Select Rectangle Raster 6 layer
Select all, float, defloat
Paste paper 12
Select invert, delete, select none
Delete/Hide original rectangle layer
Select Square Raster 5 layer
Select all, float, defloat
Paste paper 9
Select invert, delete, select none
Delete/Hide original square layer
Select Rectangle Raster 4 layer
Select all, float, defloat
Add new raster layer and flood-fill with color or gradient of choice (Linear style, Angle 45, Repeat 2)
Paste close-up tube of choice on top of gradient and delete
Change tube to Luminence (Legacy)
Apply Xero Bad Dream at default settings or random setting of choice
Drop opacity down to 75%
Apply dropshadow and merge close-up down on top of gradient layer
Effect, Texture Effects, Blinds (Width 2, Opactity 25, Horizontal and Light from left/top checked)
Delete/Hide original rectangle layer
Select Circle Raster 2 layer
Select all, float, defloat
Paste paper 16
Select invert, delete, select none
Delete/Hide original circle layer
Select Rectangle Raster 3 layer
Select all, float, defloat
Paste paper 12
Select invert, delete, select none
Delete/Hide original rectangle layer
Copy and paste tube of choice and position where desired
Apply Xero Radiance at setting of choice
Apply Lokas 3D Shadow at default settings
Select Element 58 - resize by 50%
Paste and position on bottom right
Select Element 25 - resize by 50%
Image mirror and paste on bottom right
Select Element 49 - resize by 45%
Paste and position on bottom right
Select Element 50 - resize by 35%
Pasate and position on bottom right
Select Element 7 - resize by 25%
Image mirror and paste on bottom right
Select Element 46 - resize by 25%
Paste and position on bottom right
Select Element 31 - resize by 45%
Paste and position on bototm right
Select Element 96 - resize by 25%
Paste and postion on bottom
Select Element 74 - resize by 20%
Paste and position on bottom
Select Element 76 - resize by 25%
Image Free Rotate Left by 15% and paste on bottom
Select Element 55 - resize by 50%
Paste and position on bottom left
Select Element 59 - resize by 25%
Paste and positon on bottom left
Select Element 23 - resize by 50%
Paste and position on bottom left
Select Element 26 - resize by 45%
Paste and position on bottom left
Select Element 16 - resize by 25%
Paste and position on bottom left
Select Element 48 - resize by 45%
Image Free Rotate Right by 15% and paste on bottom left
Select Element 4 - resize by 35%
Image Free Rotate Right by 15% and paste on right side
Select Element 85 - resize by 90%
Paste and position in the center of canvas and move to bottom layer
Select new raster layer and flood fill with color or gradient of choice
Move layer to the bottom of the template
Apply Mask 133
Merge group and move to the bottom layer
Apply Cybia Screenworks - Chainlink on the following settings:
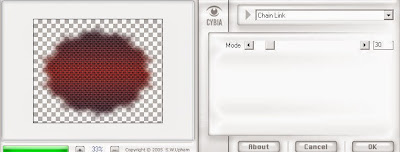
Add any additional elements you like.
Add any dropshadows you like
Crop and resize as desired
Add copyright info, license number and name
You're done! Thanks for trying my tutorial!
Labels:Scrappin Krazy Designs | 0
comments
Sunday, April 27, 2014
SPRING ON MY MIND
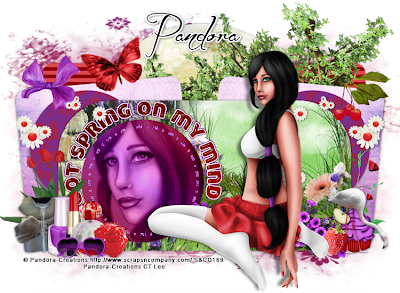
Supplies needed:
I am using the amazing artwork from Pandora Creations for this tutorial which you can find here
Scrapkit: I am using a stunning matching kit from Designs by Joan called "Spring" which you can get by going here
Spring Template 3 from Millie which you can find here
Mask 30 from Millie which you can find here
Plugins used: Eyecandy 4000 - Marble, Eyecandy 4000 - Glass, Eyecandy 4000 - Gradient Glow, Xero - Radiance, VM Extravaganza - Transmission, Lokas 3D Shadow
----------------------------
This tutorial is written for those who have working knowledge of PSPX2 (any version will do).
This tutorial was written by me on April 27, 2014. Please do not copy or paste on any other forum, website or blog provide link back to tut only. Please do not claim as your own. This tutorial is copyrighted to me. Any resemblance to any other tutorial is purely coincidental.
Ok - let's start and remember to save often.
Open the template and using your shortcut keys on your keyboard (SHIFT+D) duplicate the template as a new image. Close the original and delete the copywrite layer.
Adjust the canvas size to 750 x 550
Select Dotted Circle 10 layer
Select all, float, defloat
Add new raster layer and flood-fill with color of choice
Select none
Adjust, Add/Remove Noise, Add Noise (Uniform checked, Noise 65%, Monochrome checked)
Delete/Hide original dotted circle
Select Circle 9 layer
Select all, float, defloat
Add new raster layer and flood-fill with color or gradient of choice (Linear style, Angle 45, Repeat 2)
Paste close-up tube of choice on top of gradient and delete
Change tube to Luminence (Legacy)
Apply Xero Bad Dream at default settings or random setting of choice
Drop opacity down to 85%
Apply dropshadow and merge close-up down on top of gradient layer
Effect, Texture Effects, Blinds (Width 2, Opactity 25, Horizontal and Light from left/top checked)
Delete/Hide original circle layer
Select Wordart 8 layer
Select all, float, defloat
Add new raster layer and flood-fill with color of choice
Select none
Apply Eyecandy Glass on default settings of choice
Apply Eyecandy Gradient Glow on fat default setting (Glow Width 3)
Delete/Hide original wordart layer
Select Rectangle 7 layer
Select all, float, defloat
Paste paper 6
Select invert, delete, select none
Delete/Hide original rectangle layer
Select Circle 6 layer
Apply Eyecandy Marble with the following settings:
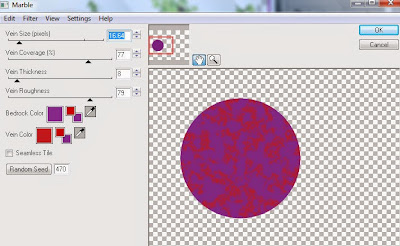
Select Circle 5 layer and repeat above step
Select Square 4 layer
Select all, float, defloat
Paste paper 9
Select invert, delete, select none
Delete/Hide original square layer
Select Square 3 layer and repeat above steps
Select Circle 2 layer
Select all, float, defloat
Paste paper 2
Select invert, delete, select none
Delete/Hide original circle layer
Select Strip 1 layer
Select all, float, defloat
Add new raster layer and flood-fill with color of choice
Select none
Apply VM Transmission with the following settings:
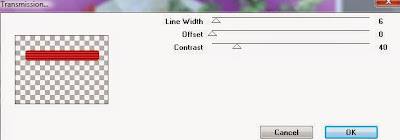
Delete/Hide original strip layer
Copy and paste tube of choice and position where desired
Apply Xero Radiance at setting of choice
Apply Lokas 3D Shadow at default settings
Select Element 18 - resize by 70%
Paste and position on top right where desired
Select Element 54 - resize by 40%
Paste and position on right side below tube layer
Image duplicate and mirror
Select Element 56 - resize by 20%
Paste and position on bottom right
Select Element 63 - resize by 40%
Paste and position on bottom right
Select Element 37 - resize by 20%
Paste and position on bottom right
Select Element 28 - resize by 30%
Paste and position on bottom right
Select Element 55 - resize by 25%
Paste and position on top left
Select Element 42 - resize by 30%
Paste and position on bottom left
Select Element 69 - resize by 40%
Paste and position on bottom left
Select Element 67 - resize by 35%
Paste and position on bottom left
Select Element 29 - resize by 30%
Paste and position on bottom left
Select Element 13 - resize by 20%
Image mirror and paste on bottom left
Select Element 70 - resize by 22%
Paste and position on bottom left
Select Element 71 - resize by 35%
Image Rotate Left by 15% and paste on top left
Select new raster layer and flood fill with color or gradient of choice
Move layer to the bottom of the template
Apply Mask 30
Merge group and move to the bottom layer
Add any additional elements you like.
Add any dropshadows you like
Crop and resize as desired
Add copyright info, license number and name
You're done! Thanks for trying my tutorial!
Labels:Pandora,Scraps N Company | 0
comments
Thursday, April 24, 2014
CANDYLAND FAIRY
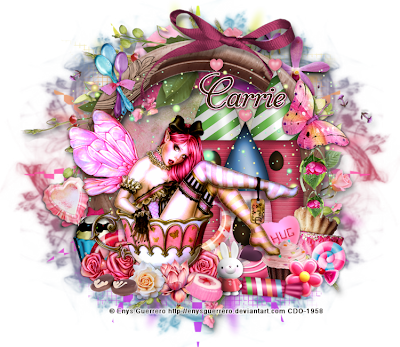
Supplies needed:
I am using the amazing bonus tube from Enys Guerrero for for this tutorial, which you can find here
Scrapkit: I am using a stunning kit from Pink Paradox Productions called "Candyland Fairy" which you can get by going here
Mask 126 from Trese which you can find here
Plugins: Xero- Bad Dream, Lokas 3D Shadow
----------------------------
This tutorial is written for those who have working knowledge of PSPX2 (any version will do).
This tutorial was written by me on April 24, 2013. Please do not copy or paste on any other forum, website or blog provide link back to tut only. Please do not claim as your own. This tutorial is copyrighted to me. Any resemblance to any other tutorial is purely coincidental.
Ok - let's start and remember to save often.
Open up a 750 x 650 blank canvas (we can resize it later)
Select Frame Element 1 and paste in the center of the canvas
Resize by 70%
Select your magic wand tool and click in the center of the Frame (Add (Shift), RGB Value, Tolerance 25, Contiguous checked, Feather 0)
Selections, Modify, Expand by 8
Paste paper 21
Select invert, delete, select none
Move paper below the frame
Select Element 84 - resize by 35%
Paste and position on right side
Paste tube of choice where desired
Apply Xero Bad Dream with the following settings:
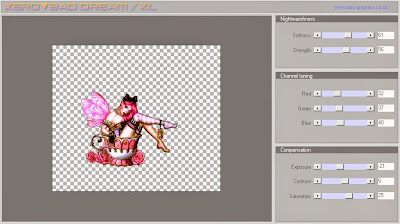
Apply Lokas 3D Shadow at default settings
Select Element 7 - resize by 25%
Paste and position on top right
Select Element 124 - resize by 20%
Paste and position on right side
Select Element 48 - resize by 22%
Paste and position on bottom right
Select Element 49 - resize by 25%
Paste and position on bottom right
Select Element 13 - resize by 15%
Paste and position on bottom right
Select Element 113 - resize by 50%
Paste and position on bottom right
Select Element 21 - resize by 30%
Image Free Rotate Left by 15% and paste on bottom right
Select Element 12 - resize by 40%
Paste and position on bottom right
Select Element 31 - resize by 25%
Image Free Rotate Right by 5% and paste on bottom right
Select Element 2 - resize by 45%
Paste and position on bottom
Select Element 43 - resize by 15%
Image Free Rotate Right by 15% and paste on bottom
Select Element 114 - resize by 20%
Paste and position on bottom left
Select Element 118 - resize by 12%
Paste and position on bottom left
Select Element 19 - resize by 15%
Paste and position on bottom left
Select Element 37 - resize by 25%
Image Free Rotate by 15% and paste on bottom left
Select Element 20 - resize by 15%
Paste and position on bottom left
Select Element 65 - resize by 20%
Paste and position on top left
Select Element 71 - resize by 85%
Paste and position in the center of canvas and move to bottom layer
Apply Eyecandy Gradient Glow on fat default settings
Add new raster layer and flood-fill with color or gradient of choice
Apply Mask 126 and merge group and move to bottom layer
Add any additional elements you like.
Add any dropshadows you like
Sharpen any elements as needed
Crop and resize as desired
Add copyright info, license number and name
You're done! Thanks for trying my tutorial!
Labels:Pink Paradox Productions | 0
comments
SKULL BABE
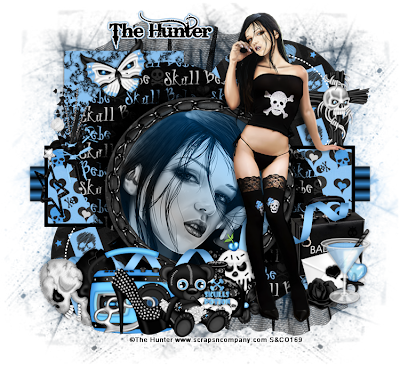
Supplies needed:
I am using the amazing artwork from The Hunter for this tutorial which you can find here
Scrapkit: I am using a stunning matching kit from Lizquis Scraps called "Skull Bebe" which you can get by going here
Template 3 from Chas which you can find here
Mask 112 from Trese which you can find here
Plugins used: Eyecandy 4000 - Marble, Eyecandy 4000 - Gradient Glow, Xero - Radiance, Lokas 3D Shadow
----------------------------
This tutorial is written for those who have working knowledge of PSPX2 (any version will do).
This tutorial was written by me on April 24, 2014. Please do not copy or paste on any other forum, website or blog provide link back to tut only. Please do not claim as your own. This tutorial is copyrighted to me. Any resemblance to any other tutorial is purely coincidental.
Ok - let's start and remember to save often.
Open the template and using your shortcut keys on your keyboard (SHIFT+D) duplicate the template as a new image. Close the original and delete the copywrite layer.
Adjust the canvas size to 750 x 700
Select Half Moon Raster 12 layer
Select all, float, defloat
Paste paper 6
Select invert, delete, select none
Delete/Hide original layer
Select Half Moon Raster 10 layer and repeat above steps
Select Circle Raster 11 layer
Add new raster layer and flood-fill with color or gradient of choice (Linear style, Angle 45, Repeat 2)
Paste close-up tube of choice on top of gradient and delete
Change tube to Luminence (Legacy)
Apply Xero Bad Dream at default settings or random setting of choice
Drop opacity down to 75%
Apply dropshadow and merge close-up down on top of gradient layer
Effect, Texture Effects, Blinds (Width 2, Opactity 25, Horizontal and Light from left/top checked)
Delete/Hide original circle layer
Select Frame 3 Element - resize by 65%
Paste and position on top of circle layer
Select Rectangle frame Raster 9 layer
Select all, float, defloat
Add new raster layer and flood-fill with color of choice
Select none
Delete/Hide original frame layer
Select Rectangle Raster 8 layer
Select all, float, defloat
Paste paper 7
Select invert, delete, select none
Delete/Hide original rectangle layer
Select Circle Raster 5 layer
Select all, float, defloat
Paste paper 3
Select invert, delete, select none
Delete/Hide original circle layer
Select Circle Raster 4 layer and repeat above steps
Select Strip Raster 3 layer
Select all, float, defloat
Add new raster layer and flood-fill with gradient of choice (Linear style, Angle 0, Repeat 4)
Select none
Delete/Hide original strip layer
Select Square Raster 1 layer
Apply Eyecandy Marble with the following settings:
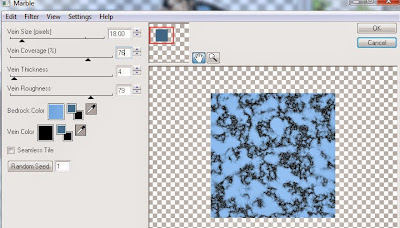
Select Rectangle Raster 2 layer and repeat above step
Copy and paste tube of choice and position where desired
Apply Xero Radiance at setting of choice
Apply Lokas 3D Shadow at default settings
Select Cross 1 Element - resize by 40%
Paste and position on top right
Select Bag Element - resize by 50%
Paste and position on bottom right
Select Letter Element - resize by 30%
Image Free Rotate Left by 15% and paste on bottom right
Select Drink Element - resize by 35%
Paste and position on bottom right
Select Rose Element - resize by 25%
Paste and position on bottom right
Select Ring Candy Element - resize by 20%
Image mirror and paste on bottom right
Select Cranial Heart Element - resize by 40%
Image mirror, Free Rotate Left by 15% and paste on bottom left
Select Cassette Player Element - resize by 45%
Paste and position on bottom left
Select Knuckles Element - resize by 35%
Image Free Rotate Left by 15% and paste on bottom left
Select Shoe Element - resize by 35%
Paste and position on bottom left
Select Bear Element - resize by 35%
Paste and position on bottom left
Select Potion Element - resize by 35%
Paste and position on bottom left
Select Ice Cream Element - resize by 40%
Paste and position on bottom
Select Branch Element - resize by 45%
Paste and position on top left
Select Butterfly Element - resize by 30%
Image Free Rotate Left by 15% and paste on top left
Select Netting Element - resize by 55%
Paste and position on top left and move to bottom layer
Image duplicate, mirror, flip and reposition where desired
Select new raster layer and flood fill with color or gradient of choice
Move layer to the bottom of the template
Apply Mask 112
Merge group and move to the bottom layer
Add any additional elements you like.
Add any dropshadows you like
Crop and resize as desired
Add copyright info, license number and name
You're done! Thanks for trying my tutorial!
Labels:Scraps N Company | 0
comments
Tuesday, April 22, 2014
DEPLOYMENT
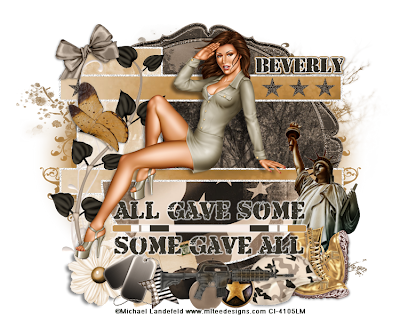
Supplies needed:
I am using the amazing artwork from Michael Landefeld for this tutorial which you can find here
Scrapkit: I am using a stunning kit from Horseplay's Pasture Desigsn called "Deployment" which you can get by going here
Template 30 from Scrapity Scrap and More which you can find here
Mask 53 from Moonbeam and Spiderwebs which you can find here
Plugins used: Eyecandy 4000 - Gradient Glow, Xero - Radiance, Lokas 3D Shadow
----------------------------
This tutorial is written for those who have working knowledge of PSPX2 (any version will do).
This tutorial was written by me on April 22, 2014. Please do not copy or paste on any other forum, website or blog provide link back to tut only. Please do not claim as your own. This tutorial is copyrighted to me. Any resemblance to any other tutorial is purely coincidental.
Ok - let's start and remember to save often.
Open the template and using your shortcut keys on your keyboard (SHIFT+D) duplicate the template as a new image. Close the original and delete the copywrite layer.
Adjust the canvas size to 750 x 600
Select Stars Raster 7 layer
Select all, float, defloat
Add new raster layer and flood-fill with color of choice
Select none
Adjust, Add/Remove Noise, Add Noise (Uniform checked, Noise 75%, Monochrome checked)
Delete/Hide original stars layer
Select Border Copy of Vector 5
Adjust, Add/Remove Noise, Add Noise (Uniform checked, Noise 75%, Monochrome checked)
Select Half Circle Raster 6 layer
Select all, float, defloat
Paste paper 1
Select invert, delete, select none
Delete/Hide original half circle layer
Select Copy of Vector 1 layer
Adjust, Add/Remove Noise, Add Noise (Uniform checked, Noise 75%, Monochrome checked)
Select Strip Raster 5 layer
Select all, float, defloat
Paste paper 10
Select invert, delete, select none
Delete/Hide original strip layer
Select Copy of Vector 2 layer
Adjust, Add/Remove Noise, Add Noise (Uniform checked, Noise 75%, Monochrome checked)
Select Strip Raster 4 layer and repeat same steps for Raster 5
Select Copy of Vector 4 layer
Adjust, Add/Remove Noise, Add Noise (Uniform checked, Noise 75%, Monochrome checked)
Select Rectangle Raster 3 layer
Select all, float, defloat
Paste paper 5
Select invert, delete, select none
Delete/Hide original rectangle layer
Select Circle Raster 2 layer
Select all, float, defloat
Paste paper 17
Select invert, delete, select none
Delete/Hide original circle layer
Select Frame Element 19 - resize by 88%
Paste and position on top of circle layer
Copy and paste tube of choice and position where desired
Apply Xero Radiance at setting of choice
Apply Lokas 3D Shadow at default settings
Select Element 12 - resize by 50%
Paste and position on bottom right
Select Element 22 - resize by 35%
Paste and position on bottom right
Select Element 26 - resize by 40%
Image Free Rotate Left by 5% and paste on bottom right
Select Element 13 - resize by 30%
Paste and position on bottom where desired
Select Element 14 - resize by 35%
Paste and position on bottom where desired
Select Element 4 - resize by 30%
Image Free Rotate Left by 15% and paste on bottom
Select Element 23 - resize by 50%
Paste and position on bottom
Select Element 15 - resize by 35%
Paste and postion on bottom left
Select Element 46 - resize by 40%
Paste and position on bottom left
Select Element 55 - resize by 80%
Paste and position on left side
Select Element 13 - resize by 45%
Paste and position on top left
Seelct Element 17 - resize by 40%
Image mirror and paste on top left
Select Element 25 - resize by 75%
Paste and position on bottom where desired
Apply Eyecandy Gradient Glow on Medium default settings
Select new raster layer and flood fill with color or gradient of choice
Move layer to the bottom of the template
Apply Mask 53
Merge group and move to the bottom layer
Add any additional elements you like.
Add any dropshadows you like
Crop and resize as desired
Add copyright info, license number and name
You're done! Thanks for trying my tutorial!
Labels:Horseplay's Pasture Designs | 0
comments
Saturday, April 19, 2014
TOXIC PUNK
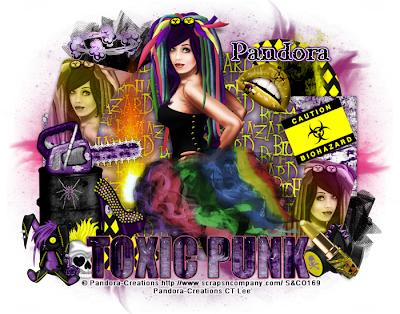
Supplies needed:
I am using the amazing artwork from Pandora Creations for this tutorial which you can find here
Scrapkit: I am using a stunning matching kit from Bibi's Collections called "Bio-Hazard" which you can get by going here
Toxic Template from Sandra which you can find here
Mask 36 from Millie which you can find here
Plugins used: Eyecandy 4000 - Glass, Eyecandy 4000 - Gradient Glow, Xero - Radiance, Xero - Bad Dream, Lokas 3D Shadow
----------------------------
This tutorial is written for those who have working knowledge of PSPX2 (any version will do).
This tutorial was written by me on April 17, 2014. Please do not copy or paste on any other forum, website or blog provide link back to tut only. Please do not claim as your own. This tutorial is copyrighted to me. Any resemblance to any other tutorial is purely coincidental.
Ok - let's start and remember to save often.
Open the template and using your shortcut keys on your keyboard (SHIFT+D) duplicate the template as a new image. Close the original and delete the copywrite layer.
Adjust the canvas size to 700 x 550
Select Words layer
Select all, float, defloat
Paste paper 5
Select invert, delete, select none
Apply Eyecandy Glass on default settings
Apply Eyecandy Gradient Glow on fat default settings (Glow Width 3)
Delete/Hide original wordart layer
Select Large Circle layer
Select all, float, defloat
Paste paper 14
Select invert, delete, select none
Delete/Hide original circle layer
Select Rounded Rectangle 2 layer
Select all, float, defloat
Add new raster layer and flood-fill with color or gradient of choice (Linear style, Angle 45, Repeat 2)
Paste close-up tube of choice on top of gradient and delete
Change tube to Luminence (Legacy)
Apply Xero Bad Dream at default settings or random setting of choice
Drop opacity down to 85%
Apply dropshadow and merge close-up down on top of gradient layer
Effect, Texture Effects, Blinds (Width 2, Opactity 25, Horizontal and Light from left/top checked)
Delete/hide original rectangle layer
Select Rounded Rectangle 1 layer and repeat above steps
Select Sqaure 2 layer
Select all, float, defloat
Paste paper 10
Select invert, delete, select none
Delete/Hide original square layer
Select Square 1 layer and repeat above steps
Select Small Circle 2 layer
Select all, float, defloat
Paste paper 9
Select invert, delete, select none
Delete/Hide original circle layer
Select Small Circle 1 layer and repeat above steps
Copy and paste tube of choice and position where desired
Apply Xero Radiance at setting of choice
Apply Lokas 3D Shadow at default settings
Select Element 14 - resize by 80%
Paste and position on left side below tube layer
Select Element 8 - resize by 35%
Paste and position on bottom left
Select Element 58 - resize by 25%
Image mirror and paste on left side - image free rotate left by 5%
Select Element 39 - resize by 25%
Paste and position on bottom left
Select Element 92 - resize by 20%
Paste and position on bottom left
Select Element 75 - resize by 12%
Paste and position on bottom left
Select Element 33 - resize by 30%
Paste and position on top right
Select Element 23 - resize by 60%
Paste and position on top right
Select Element 53 - resize by 25%
Paste and position on top right
Select Element 44 - resize by 25%
Paste and positio on bottom right
Select Element 25 - resize by 40%
Paste and position on bottom right
Select Element 21 - resize by 25%
Paste and position on top left
Select Element 10 - resize by 55%
Paste and position on top left and move to bottom layer
Image duplicate, mirror and flip (reposition where desired)
Select new raster layer and flood fill with color or gradient of choice
Move layer to the bottom of the template
Apply Mask 36
Merge group and move to the bottom layer
Add any additional elements you like.
Add any dropshadows you like
Crop and resize as desired
Add copyright info, license number and name
You're done! Thanks for trying my tutorial!
BEWARE THE WOLF
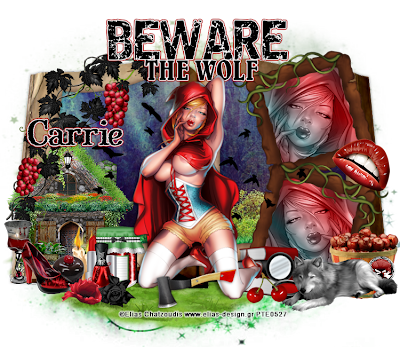
Supplies needed:
I am using the amazing art from Elias Chatzoudis for for this tutorial, which you can find here
Scrapkit: I am using a stunning kit from Pink Paradox Productions called "Beware the Wolf" which you can get by going here
Mask 39 from Millie which you can find here
Plugins: Eyecandy 4000 - Gradient Glow, Xero- Bad Dream, Xero-Radiance, Lokas 3D Shadow
----------------------------
This tutorial is written for those who have working knowledge of PSPX2 (any version will do).
This tutorial was written by me on April 19, 2014. Please do not copy or paste on any other forum, website or blog provide link back to tut only. Please do not claim as your own. This tutorial is copyrighted to me. Any resemblance to any other tutorial is purely coincidental.
Ok - let's start and remember to save often.
Open up a 750 x 650 blank canvas (we can resize it later)
Select Frame Element 16 and paste in the center of the canvas
Resize by 75%
Select your magic wand tool and click in the center on both sides of the Frame (Add (Shift), RGB Value, Tolerance 25, Contiguous checked, Feather 0)
Selections, Modify, Expand by 5
Paste paper 18
Select invert, delete, select none
Move paper below the frame
Select Frame Element 6 - resize by 25%
Image Free Rotate Left by 15% and paste on top right where desired
Image duplicate, mirror and repositon copy on bottom right
Select your magic wand tool and click in the center of the top Frame (Add (Shift), RGB Value, Tolerance 25, Contiguous checked, Feather 0)
Selections, Modify, Expand by 5
Add new raster layer and flood-fill with color or gradient of choice (Linear style, Angle 45, Repeat 2)
Paste close-up tube of choice on top of gradient and delete
Change tube to Luminence (Legacy)
Apply Xero Bad Dream at default settings or random setting of choice
Drop opacity down to 85%
Apply dropshadow and merge close-up down on top of gradient layer
Effect, Texture Effects, Blinds (Width 2, Opactity 25, Horizontal and Light from left/top checked)
Move gradient/tube layer below frame
Select the copy of frame and repeat above steps
Paste tube of choice where desired
Apply Xero Radiance at setting of choice
Apply Lokas 3D Shadow at default settings
Select Element 93 - paste and positon on bottom where desired
Select Element 105 - resize by 35%
Paste and position on top left
Select Element 95 - resize by 35%
Paste and position on bottom left
Select Element 9 - resize by 45%
Paste and position on left side behide tube layer
Select Element 37 - resize by 20%
Paste and position on bottom left
Select Element 13 - resize by 22%
Paste and position on bottom left
Select Element 47 - resize by 15%
Paste and position on bottom left
Select Element 18 - resize by 15%
Paste and position on bottom left
Select Element 23 - resize by 15%
Paste and position on bottom left
Select Element 49 - resize by 20%
Paste and position on bottom left
Select Element 26 - resize by 22%
Paste and position on bottom right
Select Element 5 - resize by 25%
Paste and position on bottom right
Select Element 50 - resize by 25%
Paste and position on bottom right
Select Element 21 - resize by 20%
Paste and paste on bottom right
Select Element 42 - resize by 20%
Paste and position on bottom right
Select Element 19 - resize by 23%
Paste and position on top right
Select Element 144 - resize by 45%
Paste and position on top where desired
Apply Eyecandy Gradient Glow on fat default settings
Add new raster layer and flood-fill with color or gradient of choice
Apply Mask 39 and merge group and move to bottom layer
Resize by 110%
Add any additional elements you like.
Add any dropshadows you like
Sharpen any elements as needed
Crop and resize as desired
Add copyright info, license number and name
You're done! Thanks for trying my tutorial!
Labels:Pink Paradox Productions | 0
comments
Thursday, April 17, 2014
DESPERADO
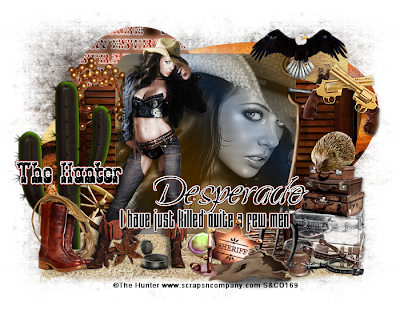
Supplies needed:
I am using the amazing artwork from The Hunter for this tutorial which you can find here
Scrapkit: I am using a stunning matching kit from Bibi's Collections called "West Babe" which you can get by going here
Template from Stylelicious Twinky which you can find here
Mask 249 from Trese which you can find here
Plugins used: Eyecandy 4000 - Gradient Glow, Xero - Radiance, Xero - Bad Dream, Lokas 3D Shadow
----------------------------
This tutorial is written for those who have working knowledge of PSPX2 (any version will do).
This tutorial was written by me on April 17, 2014. Please do not copy or paste on any other forum, website or blog provide link back to tut only. Please do not claim as your own. This tutorial is copyrighted to me. Any resemblance to any other tutorial is purely coincidental.
Ok - let's start and remember to save often.
Open the template and using your shortcut keys on your keyboard (SHIFT+D) duplicate the template as a new image. Close the original and delete the copywrite layer.
Adjust the canvas size to 700 x 550
Select Wordart Raster 9 layer
Apply Eyecandy Gradient Glow on fat default settings (Glow Width 3)
Select Square Raster 7
Select all, float, defloat
Add new raster layer and flood-fill with color or gradient of choice (Linear style, Angle 45, Repeat 2)
Paste close-up tube of choice on top of gradient and delete
Change tube to Luminence (Legacy)
Apply Xero Bad Dream at default settings or random setting of choice
Drop opacity down to 75%
Apply dropshadow and merge close-up down on top of gradient layer
Effect, Texture Effects, Blinds (Width 2, Opactity 25, Horizontal and Light from left/top checked)
Delete/hide original square layer
Select Square Raster 5 layer
Select all, float, defloat
Paste paper 6
Select invert, delete, select none
Delete/Hide original square layer
Select Square Raster 6 layer and repeat above steps
Select Circle Raster 4 layer
Select all, float, defloat
Paste paper 8
Select invert, delete, select none
Delete/Hide original circle layer
Select Circle Raster 3 layer and repeat above steps
Select Square Raster 2 layer
Select all, float, defloat
Paste paper 3
Select invert, delete, select none
Delete/Hide original square layer
Select Square Raster 1 layer and repeat above steps
Select Oval Raster 8 layer
Select all, float, defloat
Paste paper 5
Select invert, delete, select none
Delete/Hide original oval layer
Copy and paste tube of choice and position where desired
Apply Xero Radiance at setting of choice
Apply Lokas 3D Shadow at default settings
Select Element 91 - resize by 75%
Paste and position on bottom where desired
Select Element 88 - resize by 30%
Paste and position on top left
Select Element 80 - resize by 45%
Paste and position on bottom left
Select Element 50 - resize by 25%
Paste and position on bottom left
Select Element 5 - resize by 50%
Image mirror and paste on bottom left
Select Element 72 - resize by 25%
Paste and position on bottom left
Select Element 98 - resize by 30%
Paste and position on bottom left
Select Element 71 - resize by 28%
Image mirror and paste on bottom right
Select Element 16 - resize by 28%
Paste and position on right side
Select Element 82 - resize by 20%
Paste and position on bottom right
Select Element 101 - resize by 75%
Image mirror and paste on right side
Select Element 102 - resize by 40%
Paste and position on bottom right
Select Element 13 - resize by 25%
Paste and position on bottom right
Select Element 38 - resize by 35%
Paste and position on bottom
Select Element 15 - resize by 22%
Paste and position on top right
Select Element 51 - resize by 40%
Image Free Rotate Right by 15% and paste on top right
Select new raster layer and flood fill with color or gradient of choice
Move layer to the bottom of the template
Apply Mask 249
Merge group and move to the bottom layer
Add any additional elements you like.
Add any dropshadows you like
Crop and resize as desired
Add copyright info, license number and name
You're done! Thanks for trying my tutorial!
Labels:Bibi's Collections,Scraps N Company | 0
comments
HAPPY EASTER
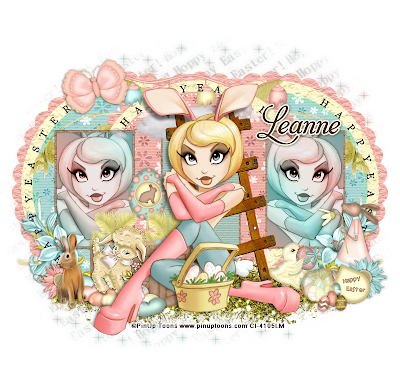
Supplies needed:
I am using the amazing artwork from Pinup Toons for this tutorial which you can find here
Scrapkit: I am using a beautiful kit from Icy Blue Mystic Designs called "Easter Morning" which you can get by going here
Template 177 from Punky Butts which you can find here
Easter Mask from Aqua which you can find on the Misfits Blog here
Plugins used: Xero - Radiance, Xero - Bad Dream, Lokas 3D Shadow
----------------------------
This tutorial is written for those who have working knowledge of PSPX2 (any version will do).
This tutorial was written by me on April 17, 2014. Please do not copy or paste on any other forum, website or blog provide link back to tut only. Please do not claim as your own. This tutorial is copyrighted to me. Any resemblance to any other tutorial is purely coincidental.
Ok - let's start and remember to save often.
Open the template and using your shortcut keys on your keyboard (SHIFT+D) duplicate the template as a new image. Close the original and delete the copywrite layer.
Adjust the canvas size to 750 x 650
Select Right Frame Rec layer
Select all, float, defloat
Paste paper 5
Select invert, delete, select none
Delete/Hide original frame layer
Select Center and Left Frames and repeat above steps
Select Right Rec layer
Select all, float, defloat
Add new raster layer and flood-fill with color or gradient of choice (Linear style, Angle 45, Repeat 2)
Paste close-up tube of choice on top of gradient and delete
Change tube to Luminence (Legacy)
Apply Xero Bad Dream at default settings or random setting of choice
Apply dropshadow and merge close-up down on top of gradient layer
Effect, Texture Effects, Blinds (Width 2, Opactity 25, Horizontal and Light from left/top checked)
Delete/hide original rect layer
Select Left Rec layer and repeat above steps
Select Center Rec layer
Select all, float, defloat
Paste paper 10
Select invert, delete, select none
Delete/Hide original rec layer
Select Center Outer Circle layer
Select all, float, defloat
Paste paper 3
Select invert, delete, select none
Delete/Hide original circle layer
Select Left and Right Ourter Circles and repeat above steps
Select Dots Circle Center layer
Add new raster layer and flood-fill with color of choice
Reselect Dots Circle - select all, float, defloat
Go back and select color layer you just filled
Select invert, delete, select none
Delete/Hide original dots circle layer
Select remaining dots circle layers and repeat above steps
Select Center Innter Circle layer
Select all, float, defloat
Paste paper 12
Select invert, delete, select none
Delete/Hide original Circle layer
Select Center Scallop layer
Select all, float, defloat
Paste paper 2
Select invert, delete, select none
Delete/Hide original circle layer
Select Scallop Left and Right layers and repeat above steps
Select Right Inner Circle layer
Select all, float, defloat
Paste paper 11
Select invert, delete, select none
Delete/Hide original circle layer
Select Left Inner Circle layer and repeat above steps
Select Element 89 - paste and position on bottom where desired
Copy and paste tube of choice and position where desired
Apply Xero Radiance at setting of choice
Apply Lokas 3D Shadow at default settings
Select Element 21 - resize by 85%
Paste and position towards the right side behind tube layer
Select Element 20 - resize by 40%
Paste and position on bottom left behind tube layer
Select Element 44 - resize by 40%
Paste and position on bottom left below tube layer
Select Element 75 - resize by 25%
Paste and position on bottom left
Select Element 72 - resize by 35%
Paste and position on bottom left
Select Element 53 - resize by 30%
Paste and position on bottom right - image duplicate and mirror
Select Element 46 - resize by 30%
Image mirror and paste on bottom right
Select Element 58 - resize by 15%
Paste and position on bottom right
Select Element 33 - resize by 25%
Paste and position on bottom right
Select Element 3 - resize by 30%
Paste and position on bottom right
Select Element 50 - resize by 30%
Image Free Rotate Left by 15% and paste on top left
Select new raster layer and flood fill with color or gradient of choice
Move layer to the bottom of the template
Apply Easter Mask
Merge group and move to the bottom layer
Add any additional elements you like.
Add any dropshadows you like
Crop and resize as desired
Add copyright info, license number and name
You're done! Thanks for trying my tutorial!
Labels:Scraps From The Heart | 0
comments
Tuesday, April 15, 2014
STEAMPUNK DOLL
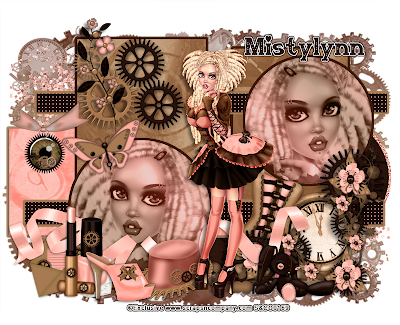
Supplies needed:
I am using the amazing Exclusive artwork from Scraps N Company for this tutorial which you can free with purchase here
Scrapkit: I am using a stunning kit from Mistylynn's Creations called "Steampunk Doll" which you can get by going here
Template 44 from Scrapity Scrap and More which you can find here
Mask 124 from Bitzy Beez Designz which you can find here
Plugins used: Eyecandy 4000 - Gradient Glow, Xero - Radiance, Xero - Bad Dream, Lokas 3D Shadow
----------------------------
This tutorial is written for those who have working knowledge of PSPX2 (any version will do).
This tutorial was written by me on April 15, 2014. Please do not copy or paste on any other forum, website or blog provide link back to tut only. Please do not claim as your own. This tutorial is copyrighted to me. Any resemblance to any other tutorial is purely coincidental.
Ok - let's start and remember to save often.
Open the template and using your shortcut keys on your keyboard (SHIFT+D) duplicate the template as a new image. Close the original and delete the copywrite layer.
Adjust the canvas size to 785 x 650
Select Circle Raster 15
Select all, float, defloat
Add new raster layer and flood-fill with color or gradient of choice (Linear style, Angle 45, Repeat 2)
Paste close-up tube of choice on top of gradient and delete
Change tube to Luminence (Legacy)
Apply Xero Bad Dream at default settings or random setting of choice
Drop opacity down to 75%
Apply dropshadow and merge close-up down on top of gradient layer
Effect, Texture Effects, Blinds (Width 2, Opactity 25, Horizontal and Light from left/top checked)
Delete/hide original circle layer
Select Circle Raster 7 and repeat above steps
Select Circle Raster 17 layer
Select all, float, defloat
Add new raster layer and flood-fill with color of choice
Select none
Delete/Hide original circle layer
Select Circle Raster 9 layer and repeat above steps
Select Raster 2 layer
Select all, float, defloat
Add new raster layer and flood-fill with color of choice
Select none
Apply Effects, Texture effects, weave (Gap size 2, Width 5, Opacity 10, Fill gaps checked, Change Gap Color to color of choice)
Delete/Hide original strip layer
Select Strip Raster 14 and repeat above steps
Select Strip Raster 8 layer
Select all, float, defloat
Add new raster and flood-fill with color of choice
Select none
Delete/Hide original strip layer
Select Strip Raster 13 layer and repeat above steps
Select Rectangle 16 layer
Select all, float, defloat
Paste paper 1
Select invert, delete, select none
Delete/Hide original rectangle layer
Select Rectangle 12 layer and repeat above steps
Select Rectangle Raster 3 layer
Select all, float, defloat
Add new raster layer and flood-fill with color of choice
Select none
Delete/Hide Rectangle layer
Select Rectangle Raster 6 and repeat above steps
Select Rectangle Raster 10 layer
Select all, float, defloat
Paste paper 3
Select invert, delete, select none
Delete/Hide original rectangle layer
Select Rectangle Raster 4 layer
Select all, float, defloat
Add new raster layer and flood-fill with color of choice
Select none
Delete/Hide original rectangle layer
Select Oval Raster 5 layer
Select all, float, defloat
Paste paper 6
Select invert, delete, select none
Delete/Hide original oval layer
Select Oval Raster 11 layer
Select all, float, defloat
Add new raster layer and flood-fill with color of choice
Select none
Delete/Hide original oval layer
Copy and paste tube of choice and position where desired
Apply Xero Radiance at setting of choice
Apply Lokas 3D Shadow at default settings
Select Element 18 - resize by 55%
Paste and position on top left
Select Element 13 - resize by 25%
Select Element 15 - resize by 65%
Paste and position on bottom right
Select Element 27 - resize by 40%
Paste and position on bottom right
Select Element 39 - resize by 40%
Paste and position on bottom right
Select Element 11 - resize by 40%
Image Free Rotate Right by 15% and position on bottom right
Select Element 34 and paste on bottom where desired
Select Element 20 - resize by 30%
Image Free Rotate Left by 15% and paste on bottom left
Select Element 23 - resize by 45%
Paste and position on bottom left
Select Element 25 - resize by 40%
Paste and position on bottom left
Select Element 31 - resize by 35%
Paste and position on bototm left
Select Element 22 - resize by 40%
Paste and position on bottom left
Select Element 8 - resize by 40%
Paste and position on top left
Select Element 12 - resize by 40%
Image Free Rotate Left by 15% and paste on top left
Select new raster layer and flood fill with color or gradient of choice
Move layer to the bottom of the template
Apply Mask 124
Merge group and move to the bottom layer
Add any additional elements you like.
Add any dropshadows you like
Crop and resize as desired
Add copyright info, license number and name
You're done! Thanks for trying my tutorial!
IF YOU LOVE SOMETHING
Supplies needed:
I am using the amazing art from Enys Guerrero for for this tutorial, which you can find here
Scrapkit: I am using a stunning kit from Gothic Inspirations called "If You Love Something" which you can get by going here
Floral Mask 2 from Dee which you can find here
Plugins: Xero-Radiance, Lokas 3D Shadow
----------------------------
This tutorial is written for those who have working knowledge of PSPX2 (any version will do).
This tutorial was written by me on April 15, 2014. Please do not copy or paste on any other forum, website or blog provide link back to tut only. Please do not claim as your own. This tutorial is copyrighted to me. Any resemblance to any other tutorial is purely coincidental.
Ok - let's start and remember to save often.
Open up a 750 x 650 blank canvas (we can resize it later)
Select Frame Element 8 and paste in the center of the canvas
Resize by 85%
Select your magic wand tool and click in the center of the Frame (Add (Shift), RGB Value, Tolerance 25, Contiguous checked, Feather 0)
Selections, Modify, Expand by 5
Paste paper 6
Select invert, delete, select none
Move paper below frame layer
Paste tube of choice where desired
Apply Xero Radiance at setting of choice
Apply Lokas 3D Shadow at default settings
Select Berries Element - resize by 30%
Paste and position on top right
Select Butterfly Element - resize by 30%
Paste and position on right side
Select Bow1 Element - resize by 40%
Paste and position on bottom right
Select Hat Element - resize by 30%
Paste and position on bottom right
Select Wing Element - resize by 20%
Image mirror and paste on bottom right
Select Key Element - resize by 20%
Paste and position on bottom right
Select Stone Element - resize by 50%
Paste and position on bottom
Select WaxRose Element - resize by 20%
Image mirror and paste on bottom
Select CrystalBall Element - resize by 25%
Paste and position on bottom
Select Book Element - resize by 25%
Image Free Rotate Left by 15% and paste on bottom left
Select Bird Element - resize by 25%
Paste and position on bottom left
Select Broach Element - resize by 18%
Image Free Rotate Right by 5% and paste on bottom left
Select Candle1 Element - resize by 30%
Paste and position on left side
Select MoonPhases Element - resize by 30%
Image mirror and paste on top left
Select Smudged3 Element - paste and position on left side where desired and move to bottom layer
Image duplicate, mirror and reposition on right side
Add new raster layer and flood-fill with color or gradient of choice
Apply Mask 2 and merge group and move to bottom layer
Add any additional elements you like.
Add any dropshadows you like
Sharpen any elements as needed
Crop and resize as desired
Add copyright info, license number and name
You're done! Thanks for trying my tutorial!
Labels:Gothic Inspirations | 2
comments
Monday, April 14, 2014
BLACK SWAN
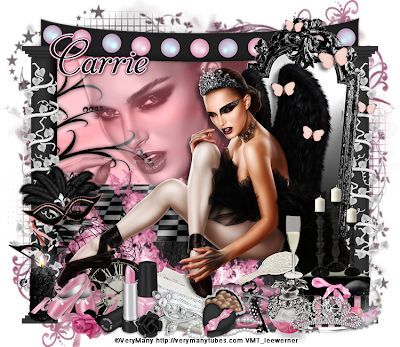
Supplies needed:
I am using the amazing art from Verymany for for this tutorial, which you can find here
Scrapkit: I am using a beautiful kit from Pink Paradox Productions called "Black Swan" which you can get by going here
Mask 8 from Zuzzanna which you can find here
Plugins: Xero- Bad Dream, Xero-Radiance, Lokas 3D Shadow
----------------------------
This tutorial is written for those who have working knowledge of PSPX2 (any version will do).
This tutorial was written by me on April 14, 2014. Please do not copy or paste on any other forum, website or blog provide link back to tut only. Please do not claim as your own. This tutorial is copyrighted to me. Any resemblance to any other tutorial is purely coincidental.
Ok - let's start and remember to save often.
Open up a 750 x 650 blank canvas (we can resize it later)
Select Frame Element 1 and paste in the center of the canvas
Resize by 60%
Select your magic wand tool and click in the center of the Frame (Add (Shift), RGB Value, Tolerance 25, Contiguous checked, Feather 0)
Selections, Modify, Expand by 5
Paste paper 25
Select invert, delete
Select Close-up tube of choice and paste on top of paper where desired and delete
Select none
Change opacity on tube to Luminence (Legacy) and drop down to 65%
Apply Dropshadow and merge on top of paper
Move paper/tube below frame layer
Select Element 91 - resize by 50%
Image Free Rotate Right by 5% and paste on right side
Paste tube of choice where desired
Apply Xero Radiance at setting of choice
Apply Lokas 3D Shadow at default settings
Select Element 5 - resize by 25%
Paste and position on top right
Select Element 105 - resize by 55%
Paste and position on right side
Image duplicate and mirror
Select Element 52 - resize by 20%
Paste and position on bottom right
Select Element 90 - resize by 25%
Paste and position on bottom right
Select Element 12 - resize by 22%
Paste and position on bottom right
Select Element 40 - resize by 25%
Paste and position on bottom right
Select Element 9 - resize by 22%
Paste and position on bottom right
Select element 44 - resize by 20%
Paste and position on bottom right
Select Element 68 - resize by 15%
Paste and position on bottom
Select Element 63 - resize by 20%
Paste and position on bottom
Select Element 13 - resize by 20%
Paste and position on bottom
Select Element 28 - resize by 45%
Paste and position on bottom left
Select Element 69 - resize by 25%
Paste and position on bottom left
Select Element 15 - resize by 25%
Paste and position on bottom left
Select Element 66 - resize by 25%
Paste and position on bottom left
Select Element 36 - resize by 20%
Paste and position on bottom left
Select Element 32 - resize by 25%
Paste and position on bottom left
Select Element 124 - resize by 10%
Paste and position on bottom left
Add new raster layer and flood-fill with color or gradient of choice
Apply Mask 8 and merge group and move to bottom layer
Add any additional elements you like.
Add any dropshadows you like
Sharpen any elements as needed
Crop and resize as desired
Add copyright info, license number and name
You're done! Thanks for trying my tutorial!
Labels:Pink Paradox Productions | 0
comments
Sunday, April 13, 2014
KISS THIS
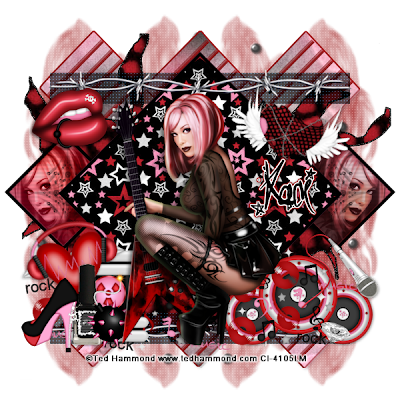
Supplies needed:
I am using the amazing artwork from Ted Hammond for this tutorial which you can find here
Scrapkit: I am using a stunning kit from Scrappin Krazy Designs called "Kiss This" which you can get by going here
Template 3 from Rosesblack which you can find here
Plugins used: Xero - Radiance, Xero - Bad Dream, Lokas 3D Shadow
----------------------------
This tutorial is written for those who have working knowledge of PSPX2 (any version will do).
This tutorial was written by me on April 13, 2014. Please do not copy or paste on any other forum, website or blog provide link back to tut only. Please do not claim as your own. This tutorial is copyrighted to me. Any resemblance to any other tutorial is purely coincidental.
Ok - let's start and remember to save often.
Open the template and using your shortcut keys on your keyboard (SHIFT+D) duplicate the template as a new image. Close the original and delete the copywrite layer.
Adjust the canvas size to 650 x 600
Select Diamond Copy Raster 5 layer
Select all, float, defloat
Paste paper 10
Select invert, delete, select none
Delete/Hide original diamond layer
Select Diamonds Copy Raster 12 layer
Select all, float, defloat
Add new raster layer and flood-fill with color or gradient of choice (Linear style, Angle 45, Repeat 2)
Paste close-up tubes of choice on top of gradient and delete
Change tube to Luminence (Legacy)
Apply Xero Bad Dream at default settings or random setting of choice
Drop opacity down to 75%
Apply dropshadow and merge close-ups down on top of gradient layer
Effect, Texture Effects, Blinds (Width 2, Opactity 25, Horizontal and Light from left/top checked)
Delete/hide original diamonds layer
Select Shape Rsater 2 layer
Select all, float, defloat
Paste paper 3
Select invert, delete, select none
Delete/Hide original shape layer
Select Raster 7 layer
Select all, float, defloat
Paste paper 12
Select invert, delete, select none
Delete/Hide original raster 7 layer
Select Raster 8 layer
Select all, float, defloat
Add new raster layer and flood-fill with color of choice
Select none
Delete/Hide original Raster 8 layer
Select Shape Raster 4 layer
Select all, float, defloat
Add new raster layer and flood-fill with color or gradient of choice
Select none
Delete/Hide original shape layer
Copy and paste tube of choice and position where desired
Apply Xero Radiance at setting of choice
Apply Lokas 3D Shadow at default settings
Select Element 49 - resize by 65%
Paste and position on top where desired
Image duplicate and flip - reposition on bottom where desired
Select Element 65 - resize by 50%
Paste and position on bottom right
Select Element 58 - resize by 30%
Paste and position on bottom right
Select Element 66 - paste and position on bottom where desired
Select Element 56 - resize by 40%
Image Free Rotate Left by 15% and paste on bottom left
Select Element 33 - resize by 35%
Paste and position on bottom left
Select Element 15 - resize by 30%
Past and position on bottom left
Select Element 41 - resize by 45%
Paste and positon on bottom left
Select Element 9 - resize by 30%
Paste and position on bottom left
Select Element 10 - resize by 30%
Paste and position on top left
Select Element 38 - resize by 45%
Image Free Rotate Right by 15% and paste on top right
Add any additional elements you like.
Add any dropshadows you like
Crop and resize as desired
Add copyright info, license number and name
You're done! Thanks for trying my tutorial!
Labels:Scrappin Krazy Designs | 0
comments
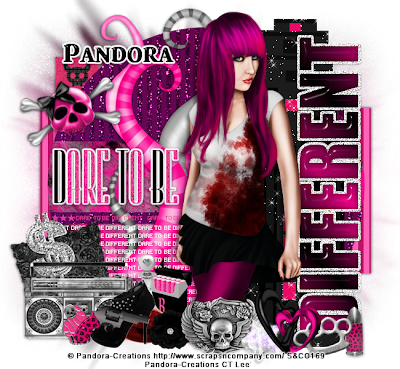
DARE TO BE DIFFERENT
Supplies needed:
I am using the amazing artwork from Pandora Creations for this tutorial which you can find here
Scrapkit: I am using a stunning matching kit from Disturbed Scraps called "Dangerous Babe" which you can get by going here
Template 297 from Minxy which you can find here
Grunge Mask 2 from Tonya which you can find here
Plugins used: Alien Skin Xenofex 2 - Constellation (optional), Eyecandy 4000 - Glass, Eyecandy 4000 - Gradient Glow, Xero - Radiance, Xero - Bad Dream, Lokas 3D Shadow
----------------------------
This tutorial is written for those who have working knowledge of PSPX2 (any version will do).
This tutorial was written by me on April 13, 2014. Please do not copy or paste on any other forum, website or blog provide link back to tut only. Please do not claim as your own. This tutorial is copyrighted to me. Any resemblance to any other tutorial is purely coincidental.
Ok - let's start and remember to save often.
Open the template and using your shortcut keys on your keyboard (SHIFT+D) duplicate the template as a new image. Close the original and delete the copywrite layer.
Adjust the canvas size to 650 x 600
Select "Different" Wordart layer
Select all, float, defloat
Add new raster layer and flood-fill with color or gradient of choice
Select none
Apply Eyecandy Glass on default settings
Delete/Hide original wordart layer
Select Glittered Different wordart layer
Adjust, Add/Remove Noise, Add Noise (Uniform checked, Noise 100%, Monochrome checked)
Select Element 88 - resize by 90%
Paste and position on right side below wordart layer
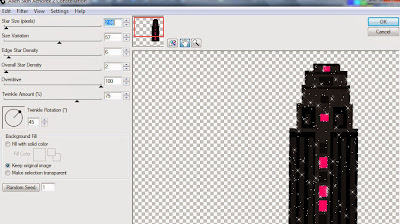
Apply Alien Skin Constellation with the following settings if desired:
Select Pixel words layer
Add new raster layer and flood-fill with color of choice
Reselect pixel layer
Select all, float, defloat
Go back and select color layer you just filled
Select invert, delete, select none
Delete/Hide original pixel layer
Select "Dare to be" wordart layer
Apply Eyecandy Gradient Glow on fat default settings (Glow Width 3)
Select Thin Rectangle 2 layer
Select all, float, defloat
Paste paper 1
Select invert, delete, select none
Delete/Hide original rectangle layer
Select Half Circle layer
Select all, float, defloat
Paste paper 1
Select invert, delete, select none
Delete/Hide original circle layer
Select Circle layer
Select all, float, defloat
Paste paper 5
Select invert, delete, select none
Delete/Hide original circle layer
Select Thin Rectangle 1 layer
Select all, float, defloat
Paste paper 9
Select invert, delete, select none
Delete/Hide original rectangle layer
Select Thin Rectangle 3 layer
Select all, float, defloat
Paste paper 12
Select invert, delete, select none
Delete/Hide original rectangle layer
Copy and paste tube of choice and position where desired
Apply Xero Radiance at setting of choice
Apply Lokas 3D Shadow at default settings
Select Element 47 - resize by 80%
Paste and position on left side where desired
Select Element 25 - resize by 35%
Image Free Rotate Left by 15% and paste on top left
Select Element 75 - resize by 40%
Image Free Rotate Left by 15% and paste on bottom left
Select Element 64 - resize by 40%
Image Free Rotate Left by 15% and paste on bottom left
Select Element 58 - resize by 40%
Paste and position on bottom left
Select Element 28 - resize by 30%
Paste and position on bottom left
Select Element 65 - resize by 25%
Image Free Rotate Right by 15% and paste on bottom left
Select Element 29 - resize by 35%
Paste and position on bottom left
Select Element 7 - resize by 30%
Paste and position on bottom left
Select Element 15 - resize by 20%
Paste and position on bottom left
Select Element 44 - resize by 45%
Paste and position on bottom
Select Element 16 - resize by 35%
Paste and position on bottom right
Select Element 21 - resize by 25%
Paste and position on bottom right side
Select Element 61 - resize by 25%
Image Free Rotate Left by 15% and paste on bottom right
Select Element 66 - resize by 40%
Paste and position on bottom right
Select new raster layer and flood fill with color or gradient of choice
Move layer to the bottom of the template
Apply Mask 30
Merge group and move to the bottom layer
Add any additional elements you like.
Add any dropshadows you like
Crop and resize as desired
Add copyright info, license number and name
You're done! Thanks for trying my tutorial!
Labels:Pandora,Scraps N Company | 0
comments
Subscribe to:
Comments
(Atom)


