Labels
- Alikas Scraps
- All Dolled Up Store
- Amy Marie
- Annaica
- Arthur Crowe
- Babycakes Scraps
- Barbara Jensen
- Bibi's Collections
- Black Widow Creationz
- Blu Moon
- Bonnies Creations
- Bookwork Dezines
- Broken Sky Dezine
- Carita Creationz
- Carpe Diem Designs
- CDO
- Celinart Pinup
- Celine
- Chacha Creationz
- Charmed Designs
- Cherry Blossom Designs
- Chili Designz
- Cluster Frame
- Creative Misfits
- Creative Scraps by Crys
- Curious Creative Dreams
- Danny Lee
- Derzi
- Designs by Ali
- Designs by Joan
- Designs By Norella
- Designs by Vi
- Diana Gali
- Diry Art Designs
- Disturbed Scraps
- Dreaming With Bella
- Eclipse Creations
- Elegancefly
- Extras
- Fabulous Designz
- Forum Set
- Foxy's Designz
- Freek's Creation
- FTU
- FwTags
- Gothic Inspirations
- Gothic Raven Designs
- Graphfreaks
- Hania's Designs
- Happy Pumpkin Studios
- Horseplay's Pasture Designs
- indie-Zine
- Irish Princess Designs
- Ishika Chowdhury
- Kaci McVay
- Kajenna
- katharine
- Katherine
- Khloe Zoey
- Killer Kitty
- Kissing Kate
- KiwiFirestorm
- Kizzed by Kelz
- KZ Designz
- Lady Mishka
- Lil Mz Brainstorm
- Maiden of Darkness
- Mariel Designs
- MellieBeans
- Misticheskya
- MistyLynn's Creations
- MMeliCrea Designz
- Moon Vixen Designs
- NaSionainne
- Ninaste
- Niqui Designs
- Pandora
- Picsfordesign
- Pink Paradox Productions
- Radyga Designs
- Redefined Designs
- Rissa's Designs
- Schnegge
- ScottishButterfly Creations
- Scrappin Krazy Designs
- Scrappin With Lil Ol Me
- Scraps and the City
- Scraps Dimensions
- Scraps From The Heart
- Scraps N Company
- Scraps with Attitude
- Shining Star Art
- Skyscraps
- Sleek N Sassy Designs
- Sophisticat Simone
- Souldesigner
- Soxsational Scraps
- Spazz
- Starlite and Soul
- Tammy Welt
- Tasha's Playground
- The PSP Project
- Thrifty Scraps by Gina
- Tiny Turtle Designs
- Upyourart
- Verymany
- Wendy Gerber
- Whisper In the Wind
- Wick3d Creationz
- Wicked Diabla
- Yude's Kreationz
Blog Archive
Wednesday, May 28, 2014
SUMMER AMELIA
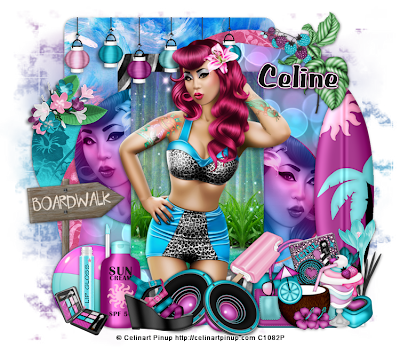
Supplies needed:
I am using the amazing artwork from Celinart Pinup for this tutorial which you can find here
Scrapkit: I am using a stunning kit from Pink Paradox Productions called "Cyber Goth Summer" which you can get by going here
Template 584 from Millie which you can find here
Mask 2 from Country Gal which you can find on the Misfits Blog here
Plugins used: Xero - Radiance, Xero - Bad Dream, Lokas 3D Shadow
----------------------------
This tutorial is written for those who have working knowledge of PSPX2 (any version will do).
This tutorial was written by me on May 28, 2014. Please do not copy or paste on any other forum, website or blog provide link back to tut only. Please do not claim as your own. This tutorial is copyrighted to me. Any resemblance to any other tutorial is purely coincidental.
Ok - let's start and remember to save often.
Open the template and using your shortcut keys on your keyboard (SHIFT+D) duplicate the template as a new image. Close the original and delete the copywrite layer.
Adjust canvas 750 x 650
Select Rectangle 12 layer
Select all, float, defloat
Paste paper 28
Select invert, delete, select none
Delete/Hide original rectangle layer
Select Circle 11 layer
Select all, float, defloat
Add new raster layer and flood-fill with gradient of choice (style, Angle 45, Repeat 2)
Paste close-up tube of choice on top of gradient and delete
Change tubes to Luminence (Legacy)
Apply Xero Bad Dream at default settings or random setting of choice
Drop opacity down on tube to 80%
Apply dropshadow and merge close-up down on top of gradient layer
Effect, Texture Effects, Blinds (Width 2, Opactity 15, Horizontal and Light from left/top checked)
Delete/Hide original circle layer
Select Circle 10 layer and repeat above steps
Select Square 9 layer
Select all, float, defloat
Paste paper 38
Select invert, delete, select none
Delete/Hide original square layer
Select Square 8 and repeat above steps
Select Rectangle 7 layer
Select all, float, defloat
Paste paper 4
Select invert, delete, select none
Delete/Hide original rectangle layer
Select Circle 6 layer
Select all, float, defloat
Paste paper 12
Select invert, delete, select none
Delete/Hide original circle layer
Select Circle 5 and repeat above steps
Select Rectangles 4 layer
Select all, float, defloat
Paste paper 37
Select invert, delete, select none
Delete/Hide original rectangle layer
Select Rectangle 3 layer and repeat above steps
Select Circle 2 layer
Select all, float, defloat
Paste paper 16
Select invert, delete, select none
Delete/Hide original circle layer
Select Circle 1 layer and repeat above steps
Copy and paste tube of choice and position where desired
Apply Xero Radiance at setting of choice
Apply Lokas 3D Shadow at default settings
Select Element 88 - resize by 35%
Paste and position on top
Select Element 65 - resize by 50%
Paste and position on right side where desired
Select Element 105 - resize by 25%
Paste and position on top right
Select Element 103 - resize by 25%
Paste and position on bottom right
Select Element 2 - resize by 25%
Paste and position on bottom right
Select Element 27 - resize by 15%
Paste and position on bottom right
Select Element 20 - resize by 20%
Paste and position on bottom right
Select Element 19 - resize by 20%
Paste and position on bottom right
Select Element 37 - resize by 20%
Image Free Rotate Left by 15% and paste on bottom right
Select Element 30 - resize by 20%
Paste and position on bottom right
Select Element 39 - resize by 25%
Paste and position on bottom
Select Element 1 - resize by 20%
Paste and position on bottom
Select Element 89 - resize by 40%
Paste and position on bottom left
Select Element 32 - resize by 30%
Paste and position on bottom left
Select Element 41 - resize by 25%
Paste and position on bottom left
Select Element 51 - resize by 25%
Paste and position on bottom left
Select Element 53 - resize by 15%
Paste and position on bottom left
Select Element 104 - resize by 20%
Paste and position on top left
Select new raster layer and flood fill with color or gradient of choice
Move layer to the bottom of the template
Apply Mask 2 or mask of choice
Merge group and move to the bottom layer
Add any additional elements you like.
Add any dropshadows you like
Crop and resize as desired
Add copyright info, license number and name
You're done! Thanks for trying my tutorial!
Monday, May 26, 2014
CYBER PUNK
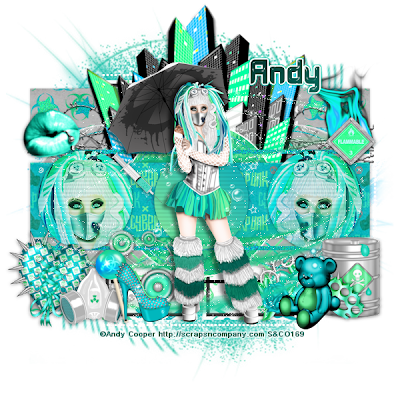
Supplies needed:
I am using the amazing artwork from Andy Cooper for this tutorial which you can find here
Scrapkit: I am using a stunning matching kit from Lizquis Scraps called "Cyberpunk" which you can get by going here
Template 48 from RoseBlack Creation which you can find here
Mask 74 from Trese which you can find here
Plugins used: Xero - Radiance, Xero - Bad Dream, Lokas 3D Shadow
----------------------------
This tutorial is written for those who have working knowledge of PSPX2 (any version will do).
This tutorial was written by me on May 26, 2014. Please do not copy or paste on any other forum, website or blog provide link back to tut only. Please do not claim as your own. This tutorial is copyrighted to me. Any resemblance to any other tutorial is purely coincidental.
Ok - let's start and remember to save often.
Open the template and using your shortcut keys on your keyboard (SHIFT+D)
duplicate the template as a new image. Close the original and delete the copywrite layer.
Adjust canvas 600 x 600
Select Circles Raster 3 layer
Select all, float, defloat
Add new raster layer and flood-fill with gradient of choice (style, Angle 45, Repeat 2)
Paste close-up tubes of choice on top of gradient and delete
Change tubes to Hard Light
Apply Xero Bad Dream at default settings or random setting of choice
Drop opacity down on tube to 80%
Apply dropshadow and merge close-ups down on top of gradient layer
Effect, Texture Effects, Blinds (Width 2, Opactity 25, Horizontal and Light from left/top checked)
Delete/Hide original circles layer
Select Rectangle Copie de Raster 1 layer
Select all, float, defloat
Paste paper 1
Select invert, delete, select none
Delete/Hide original rectangle layer
Select Strip Raster 4 layer
Select all, float, defloat
Add new raster layer and flood-fill with color of choice
Select none
Adjust, Add/Remove Noise, Add Noise (Uniform checked, Noise 55%, Monochrome checked)
Delete/Hide original strips layer
Select Circle Frame Copie Raster 5 layer and repeat above steps
Select Circle Copie de Copie Raster 5
Select all, float, defloat
Paste paper 6
Select invert, delete, select none
Delete/Hide original circle layer
Select Circles Copie (2) sur Raster 5 layer
Select all, float, defloat
Add new raster layer and flood-fill with color of choice
Adjust, Add/Remove Noise, Add Noise (Uniform checked, Noise 55%, Monochrome checked)
Delete/Hide original circles layer
Select Circles Copie de Raster 5 layer
Select all, float, defloat
Paste paper 9
Select invert, delete, select none
Delete/Hide original circles layer
Select Rectangles Raster 6 layer
Select all, float, defloat
Paste paper 10
Select invert, delete, select none
Delete/Hide original rectangles layer
Select Stars Raster 7 layer
Select all, float, defloat
Add new raster layer and flood-fill with color of choice
Select none
Adjust, Add/Remove Noise, Add Noise (Uniform checked, Noise 25%, Monochrome checked)
Delete/Hide original stars layer
Select Strips Raster 1 layer
Select all, float, defloat
Paste paper 4
Select invert, delete, select none
Delete/Hide original strips layer
Copy and paste tube of choice and position where desired
Apply Xero Radiance at setting of choice
Apply Lokas 3D Shadow at default settings
Select Wire 1 Element - resize by 85%
Paste and position on top where desired
Select City Element - resize by 68%
Paste and position on top where desired
Select Barrel Element - resize by 30%
Paste and position on bottom right
Select Knuckles Element - resize by 20%
Image mirror and paste on bottom right
Select Bear Element - resize by 30%
Image mirror and paste on bottom right
Select Roseheart Element - resize by 25%
Paste and position on bottom right
Select Spiked Heart Element - resize by 35%
Paste and position on bottom left
Select Mask 2 Element - resize by 25%
Paste and position on bottom left
Select Speakers Element - resize by 35%
Paste and position on bottom left
Select Shoe Element - resize by 25%
Paste and position on bottom left
Select Fire Element - resize by 40%
Paste and position on top right
Select Lips Element - resize by 25%
Image Free Rotate Left by 15% and paste on top left
Select new raster layer and flood fill with color or gradient of choice
Move layer to the bottom of the template
Apply Mask 74 or mask of choice
Merge group and move to the bottom layer
Add any additional elements you like.
Add any dropshadows you like
Crop and resize as desired
Add copyright info, license number and name
You're done! Thanks for trying my tutorial!
Labels:Scraps N Company | 0
comments
Saturday, May 24, 2014
GOTHIC ROSE
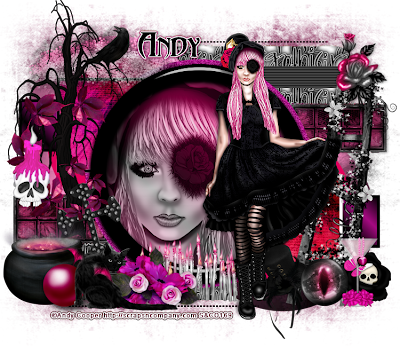
Supplies needed:
I am using the amazing artwork from Andy Cooper for this tutorial which you can find here
Scrapkit: I am using a stunning matching kit from Bibi's Collections called "Gothic Rose" which you can find here
Collab Template from Missy and Rose which you can find here
Mask 249 from Becky which you can find here
Plugins used: Eyecandy 4000 - Glass, Xero - Radiance, Xero - Bad Dream, Lokas 3D Shadow
----------------------------
This tutorial is written for those who have working knowledge of PSPX2 (any version will do).
This tutorial was written by me on May 24, 2014. Please do not copy or paste on any other forum, website or blog provide link back to tut only. Please do not claim as your own. This tutorial is copyrighted to me. Any resemblance to any other tutorial is purely coincidental.
Ok - let's start and remember to save often.
Open the template and using your shortcut keys on your keyboard (SHIFT+D) duplicate the template as a new image. Close the original and delete the copywrite layer.
Adjust canvas 750 x 600
Select Wordart Raster 13 layer and delete
Select Circle Raster 6 layer
Select all, float, defloat
Add new raster layer and flood-fill with color of choice
Select none
Apply Eyecandy Glass on default setting
Delete/Hide original circle layer
Select Circle Raster 7 layer
Select all, float, defloat
Add new raster layer and flood-fill with gradient of choice (style, Angle 45, Repeat 2)
Paste close-up tube of choice on top of gradient and delete
Change tubes to Luminence - Legacy
Apply Xero Bad Dream at default settings or random setting of choice
Drop opacity down on tube to 85%
Apply dropshadow and merge close-up down on top of gradient layer
Effect, Texture Effects, Blinds (Width 2, Opactity 25, Horizontal and Light from left/top checked)
Delete/Hide original circle layer
Select Square Frame Raster 1 layer
Select all, float, defloat
Paste paper 8
Select invert, delete, select none
Delete/Hide original square layer
Select Square Copy of Raster 9 layer and repeat above steps
Select Square Frame Raster 1 layer
Select all, float, defloat
Add new raster layer and flood-fill with color of choice
Delete/Hide orginal square layer
Select Square Raster 10 and Copy of Raster 10 and repeat above steps
Select Dotted Line Raster 12 layer
Add new raster layer and flood-fill with color of choice
Reselect dotted line - select all, float, defloat
Go back to color layer you just filled
Select invert, delete, select none
Delete/Hide original dotted line
Select Dotted Line Copy of Raster 12 and repeat above steps
Select Square Raster 11
Select all, float, defloat
Add new raster layer and flood-fill with gradient of choice (style, Angle 45, Repeat 2)
Select none
Delete/Hide original square layer
Select Square Copy of Raster 11 and repeat above steps
Select Circle Raster 4 layer
Select all, float, defloat
Add new raster layer and flood-fill with color of choice
Select none
Adjust, Add/Remove Noise, Add Noise (Uniform checked, Noise 55%, Monochrome checked)
Delete/Hide original circle layer
Select Rectangle Promoted Selection layer
Select Element 63 - resize by 30%
Paste and position on top of promoted selection layer
Image duplicate, mirror and reposition over the Copy of promoted selection layer
Select Circles Raster 3 layer
Select all, float, defloat
Add new raster layer and flood-fill with color of choice
Select none
Delete/Hide original circles layer
Select Circles Raster 5 layer
Select all, float, defloat
Paste paper 5
Select invert, delete, select none
Delete/Hide original circles layer
Select Strip Raster 8 layer
Select all, float, defloat
Add new raster layer and flood-fill with color of choice
Select none
Effect, Texture Effects, Blinds (Width 3, Opactity 35, Horizontal and Light from left/top checked, Color #ffffff)
Delete/Hide original strip layer
Select Strip Copy of Raster 8 layer and repeat above steps
Select Rectangle Raster 2 layer
Select all, float, defloat
Paste paper 11
Select invert, delete, select none
Delete/Hide original rectangle layer
Select Promoted Selection 1 and repeat above steps
Copy and paste tube of choice and position where desired
Apply Xero Radiance at setting of choice
Apply Lokas 3D Shadow at default settings
Select Element 64 - resize by 50%
Paste and position on top left
Select Element 22 - resize by 85%
Paste and position on left side where desired
Select Element 19 - resize by 55%
Paste and position on left side
Select Element 15 - resize by 40%
Paste and position on bottom left
Select Element 75 - paste and position on bottom left
Select Element 69 - resize by 50%
Paste and position on left side
Select Element 18 - resize by 55%
Image Free Rotate Left by 15% and paste on bottom left
Select Element 50 - resize by 60%
Image mirror and paste on bottom left
Select Element 40 - resize by 40%
Paste and position on bottom
Select Element 9 - resize by 50%
Paste and position on right side
Select Element 66 - resize by 25%
Paste and position on top right
Select Element 43 - resize by 40%
Paste and position on bottom right
Select Element 44 - resize by 40%
Paste and position on bottom right
Select Element 32 - resize by 50%
Paste and position on bottom right
Select Element 53 - resize by 55%
Paste and position on bottom right
Select new raster layer and flood fill with color or gradient of choice
Move layer to the bottom of the template
Apply Mask 249 or mask of choice
Merge group and move to the bottom layer
Add any additional elements you like.
Add any dropshadows you like
Crop and resize as desired
Add copyright info, license number and name
You're done! Thanks for trying my tutorial!
Labels:Bibi's Collections,Scraps N Company | 0
comments
HAREM DANCER
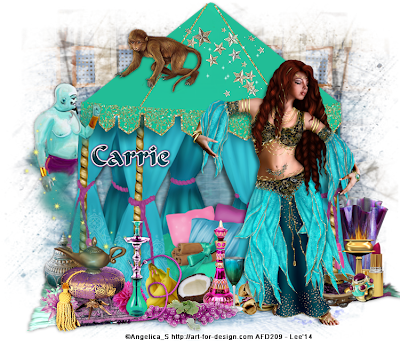
Supplies needed:
I am using the amazing art from Angelica Sellers for for this tutorial, which you can find here
Scrapkit: I am using a stunning kit from Pink Paradox Productions called "Harem Dancer" which you can get by going here
Mask 112 from Trese which you can find here
Plugins: Eyecandy 4000 - Gradient Glow, Xero - Radiance, Lokas 3D Shadow
----------------------------
This tutorial is written for those who have working knowledge of PSPX2 (any version will do).
This tutorial was written by me on May 24, 2014. Please do not copy or paste on any other forum, website or blog provide link back to tut only. Please do not claim as your own. This tutorial is copyrighted to me. Any resemblance to any other tutorial is purely coincidental.
Ok - let's start and remember to save often.
Open up a 750 x 650 blank canvas (we can resize it later)
Select Element 81 - resize by 55%
Paste in the center of the canvas
Select Element 61 - resize by 20%
Paste and position on top right
Select Element 78 - resize by 75%
Paste and position on bottom below tent layer
Paste tube of choice where desired
Apply Xero Radiance with the default settings of choice
Apply Lokas 3D Shadow at default settings
Select Element 49 - resize by 20%
Paste and position on bottom left
Select Element 92 - resize by 20%
Image mirror and paste on bottom left
Select Element 33 - resize by 20%
Paste and position on bottom left
Select Element 6 - resize by 40%
Paste and position on left side
Select Element 37 - resize by 25%
Paste and position on bottom left
Select Element 23 - resize by 25%
Paste and position on bottom
Select Element 24 - resize by 25%
Paste and position on bottom
Select Element 22 - resize by 22%
Paste and position on bottom
Select Element 41 - resize by 25%
Paste and position on bottom
Select Element 21 - resize by 15%
Paste and position on bottom
Select Element 28 - resize by 25%
Paste and position on bottom right
Select Element 50 - resize by 15%
Paste and position on bottom right
Select Element 39 - resize by 20%
Paste and position on bottom right
Select Element 56 - resize by 8%
Image Free Rotate Left by 15% and paste on bottom right
Select Element 46 - resize by 15%
Paste and position on bottom right
Select Element 12 - resize by 22%
Paste and position on top left
Paste paper 23 on canvas
Apply Mask 119 and merge group and move to bottom layer
Add any additional elements you like.
Add any dropshadows you like
Sharpen any elements as needed
Crop and resize as desired
Add copyright info, license number and name
You're done! Thanks for trying my tutorial!
Labels:Pink Paradox Productions | 0
comments
Friday, May 23, 2014
PUMPED UP EMO
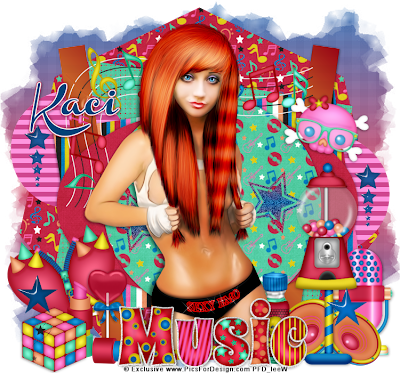
Supplies needed:
I am using an Exclusive artwork from Picsfordesign for this tutorial which you can find here
Scrapkit: I am using a stunning kit from Scrappin Krazy Designs called "Pumped Up Kicks" which you can get by going here
Template 82 from Addictive Pleasures which you can find here
Mask 363 from Weescottlass which you can find here
Plugins used: Eyecandy 4000 - Glass, Xero - Radiance, VM Extravaganza - Transmission, Lokas 3D Shadow
----------------------------
This tutorial is written for those who have working knowledge of PSPX2 (any version will do).
This tutorial was written by me on May 23, 2014. Please do not copy or paste on any other forum, website or blog provide link back to tut only. Please do not claim as your own. This tutorial is copyrighted to me. Any resemblance to any other tutorial is purely coincidental.
Ok - let's start and remember to save often.
Open the template and using your shortcut keys on your keyboard (SHIFT+D) duplicate the template as a new image. Close the original and delete the copywrite layer.
Adjust canvas 750 x 700
Select Stars Raster 13 layer
Select all, float, defloat
Add new raster layer and flood-fill with color of choice
Select none
Delete/Hide original stars layer
Select "Emo and Star" wording and delete
Select Stars Raster 11, 12 and Copy of Raster 11 and 12 layers and repeat above steps from previous stars and apply Eyecandy Glass on default settings if desired
Select Circle Raster 4 layer
Select all, float, defloat
Paste paper 11
Select invert, delete, select none
Delete/Hide original circle layer
Select Oval Raster 7 layer
Select all, float, defloat
Paste paper 13
Select invert, delete, select none
Delete/Hide original oval layer
Select Strip Raster 8 layer
Select all, float, defloat
Add new raster layer and flood-fill with color or gradient of choice
Select none
Effect, Texture Effects, Blinds (Width 2, Opactity 15, Horizontal and Light from left/top checked)
Delete/Hide original strip layer
Select Strip Copy of Raster 8 layer and repeat above steps
Select Rectangle Raster 2 layer
Select all, float, defloat
Paste paper 8
Select invert, delete, select none
Delete/Hide original rectangle layer
Select Circle Raster 5 layer
Select all, float, defloat
Add new raster layer and flood-fill with color of choice
Select none
Appy VM Transmission with the following settings:
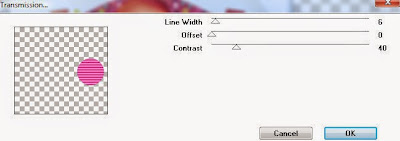
Delete/Hide original circle layer
Select Circle Copy of Raster 5 and repeat above steps
Select Square Raster 3 layer
Select all, float, defloat
Paste paper 15
Select invert, delete, select none
Apply Effects, Texture Effects, Weave (Gap size 2, Width 5, Opacity 10, Fill gaps checked, change Gap and Weave color to one of choice)
Delete/Hide original square layer
Select Shape Raster 5 layer
Select all, float, defloat
Paste paper 10
Select invert, delete, select none
Delete/Hide original shape layer
Copy and paste tube of choice and position where desired
Apply Xero Radiance at setting of choice
Apply Lokas 3D Shadow at default settings
Select Element 17 and paste on top where desired
Select Element 63 - resize by 40%
Image Free Rotate Right by 15% and paste on top right
Select Element 66 - resize by 55%
Image Free Rotate Left by 15% and paste on bottom left
Select Element 57 - resize by 45%
Paste and position on bottom left
Select Element 52 - resize by 30%
Paste and position on bottom left
Select Element 1 - resize by 45%
Paste and position on bottom left
Select Element 14 - resize by 55%
Paste and position on bottom right
Select Element 19 - resize by 50%
Paste and position on bottom right
Select Element 68 - resize by 85%
Paste and position on bottom right
Select Element 23 - resize by 45%
Paste and position on bottom right
Select Element 40 - resize by 55%
Paste and position on bottom where desired
Select new raster layer and flood fill with color or gradient of choice
Move layer to the bottom of the template
Apply Mask 22 or mask of choice
Merge group and move to the bottom layer
Add any additional elements you like.
Add any dropshadows you like
Crop and resize as desired
Add copyright info, license number and name
You're done! Thanks for trying my tutorial!
Labels:Scrappin Krazy Designs | 0
comments
Wednesday, May 21, 2014
DARK MOMENTS
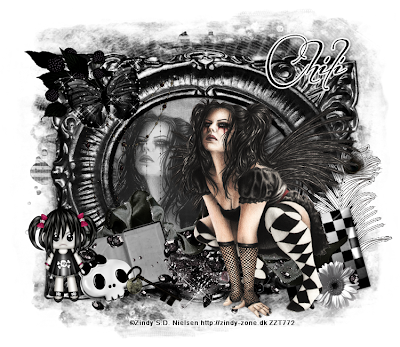
Supplies needed:
I am using the amazing art from Zindy Nielsen for for this tutorial, which you can find here
Scrapkit: I am using a stunning kit from Chili's Designz called "Tiny Moments 5" which you can get by going here
Mask 119 from Designs by Vaybs which you can find here
Plugins: Eyecandy 4000 - Gradient Glow, Xero - Radiance, Xero - Bad Dream, Lokas 3D Shadow
----------------------------
This tutorial is written for those who have working knowledge of PSPX2 (any version will do).
This tutorial was written by me on May 21, 2014. Please do not copy or paste on any other forum, website or blog provide link back to tut only. Please do not claim as your own. This tutorial is copyrighted to me. Any resemblance to any other tutorial is purely coincidental.
Ok - let's start and remember to save often.
Open up a 750 x 650 blank canvas (we can resize it later)
Select Frame Element 5 and paste in the center of the canvas
Select your magic wand tool and click in the center of the Frame (Add (Shift), RGB Value, Tolerance 25, Contiguous checked, Feather 0)
Selections, Modify, Expand by 5
Paste paper 10
Select invert, delete
Paste close-up tube of choice on top of paper and delete
Select none
Change tube to Luminence (Legacy)
Apply Xero Bad Dream at default settings or random setting of choice
Drop opacity down to 75%
Apply dropshadow and merge close-up down on top of paper layer
Move layer below frame
Effect, Texture Effects, Blinds (Width 2, Opactity 25, Horizontal and Light from left/top checked)
Paste tube of choice where desired
Apply Xero Radiance with the default settings of choice
Apply Lokas 3D Shadow at default settings
Select Berries Element - resize by 35%
Paste and position on top left
Select Butterfly Element - resize by
Image Free Rotate Left by 15% and paste on top left
Select Doll Element - resize by 30%
Paste and position on bottom left
Select Book Element - resize by 25%
Image Free Rotate Left by 15% and paste on bottom left
Select Jewels Element - resize by 65%
Paste and position on bottom below tube layer
Select Skull Element - resize by 40%
Paste and position on bottom left
Select Key Element - resize by 25%
Paste and position on bottom left
Select Feather Element - resize by 30%
Paste and position on bottom right
Apply Eyecandy Gradient Glow on fat default settings (Glow Width 3)
Select Pillow2 Element - resize by 25%
Image Free Rotate Left by 15% and paste on bottom right
Select Flower3 Element - resize by 30%
Paste and position on bottom right
Add new raster layer and flood-fill with color or gradient of choice
Apply Mask 119 and merge group and move to bottom layer
Add any additional elements you like.
Add any dropshadows you like
Sharpen any elements as needed
Crop and resize as desired
Add copyright info, license number and name
You're done! Thanks for trying my tutorial!
Labels:Chili Designz | 0
comments
CAT LOVER
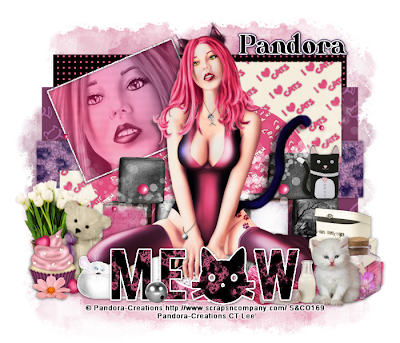
Supplies needed:
I am using the amazing artwork from Pandora Creations for this tutorial which you can find here
Scrapkit: I am using a stunning matching Collab kit from Designs by Joan called "Cat Lover" which you can get by going here
Template from Stylicious Twinky which you can find here
Mask 22 from Becky which you can find here
Plugins used: Eyecandy 4000 - Marble, Alien Skin Eyecandy 5 - Texures (Animal Fur), Xero - Radiance, Xero - Bad Dream, Lokas 3D Shadow
----------------------------
This tutorial is written for those who have working knowledge of PSPX2 (any version will do).
This tutorial was written by me on May 21, 2014. Please do not copy or paste on any other forum, website or blog provide link back to tut only. Please do not claim as your own. This tutorial is copyrighted to me. Any resemblance to any other tutorial is purely coincidental.
Ok - let's start and remember to save often.
Open the template and using your shortcut keys on your keyboard (SHIFT+D) duplicate the template as a new image. Close the original and delete the copywrite layer.
Adjust canvas 700 x 600
Select your magic wand and select the inner portion of the "Meow" wording
Apply Eyecandy Marble with the following settings:
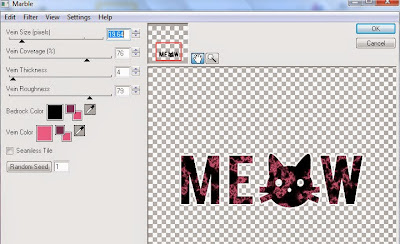
Select Square Raster 8 layer
Select all, float, defloat
Add new raster layer and flood-fill with gradient of choice (style, Angle 45, Repeat 2)
Paste close-up tube of choice on top of gradient and delete
Change tubes to Luminence - Legacy
Apply Xero Bad Dream at default settings or random setting of choice
Drop opacity down on tube to 75%
Apply dropshadow and merge close-up down on top of gradient layer
Effect, Texture Effects, Blinds (Width 2, Opactity 25, Horizontal and Light from left/top checked)
Delete/Hide original square layer
Select Circle Raster 7 layer
Select all, float, defloat
Paste paper 3
Select invert, delete, select none
Delete/Hide original circle layer
Select Square Raster 6 layer
Select all, float, defloat
Paste paper 4
Select invert, delete, select none
Delete/Hide original square layer
Select Square Raster 5 layer and repeat above steps
Select Strip Raster 3 layer
Select all, float, defloat
Add new raster layer and flood-fill with color of choice
Apply Eyecandy Fur with the following settings:
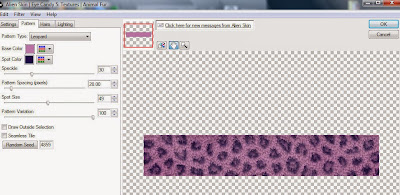
Delete/Hide original strip layer
Select Rectangle Raster 2 layer
Select all, float, defloat
Paste paper 6
Select invert, delete, select none
Delete/Hide original rectangle layer
Select Square Raster 1 layer
Apply Effects, Texture Effects, Weave (Gap size 2, Width 5, Opacity 10, Fill gaps checked, change Gap and Weave color to one of choice)
Copy and paste tube of choice and position where desired
Apply Xero Radiance at setting of choice
Apply Lokas 3D Shadow at default settings
Select Element 2 - resize by 85%
Paste and position in the bottom center below tube layer
Select Element 19 - resize by 80%
Paste and position in the center below tube layer
Select Element 46 - resize by 35%
Image mirror and paste on bottom right
Select Element 32 - resize by 30%
Paste and position on bottom right
Select Element 20 - resize by 30%
Image mirror and paste on bottom right
Select Element 14 - resize by 35%
Paste and position on bottom left
Select Element 28 - resize by 30%
Paste and position on bottom left
Select Element 33 - resize by 25%
Paste and position on bottom left
Select Element 1 - resize by 20%
Paste and position on bottom left
Select Element 30 - resize by 15%
Paste and position on bottom left
Select Element 44 - resize by 25%
Paste and position on right side
Select new raster layer and flood fill with color or gradient of choice
Move layer to the bottom of the template
Apply Mask 22 or mask of choice
Merge group and move to the bottom layer
Add any additional elements you like.
Add any dropshadows you like
Crop and resize as desired
Add copyright info, license number and name
You're done! Thanks for trying my tutorial!
Labels:Pandora,Scraps N Company | 0
comments
Sunday, May 18, 2014
LITTLE RED
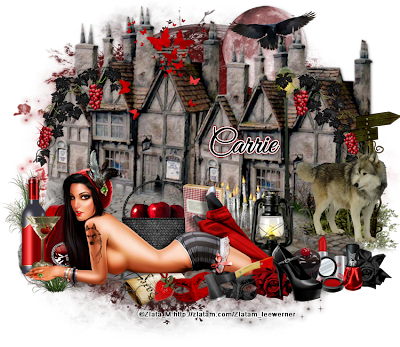
Supplies needed:
I am using the amazing art from Zlata M for for this tutorial, which you can find here
Scrapkit: I am using a stunning kit from Pink Paradox Productions called "Beware the Wolf" which you can get by going here
Mask 20 from Moonbeams and Spiderwebs which you can find here
Plugins: Xero - Radiance, Lokas 3D Shadow
----------------------------
This tutorial is written for those who have working knowledge of PSPX2 (any version will do).
This tutorial was written by me on May 18, 2014. Please do not copy or paste on any other forum, website or blog provide link back to tut only. Please do not claim as your own. This tutorial is copyrighted to me. Any resemblance to any other tutorial is purely coincidental.
Ok - let's start and remember to save often.
Open up a 750 x 650 blank canvas (we can resize it later)
Select Element 91- resize by 66%
Paste and position in the center of the canvas
Select Element 81 - resize by 22%
Paste and position on top right
Change color saturation as follows if desired:
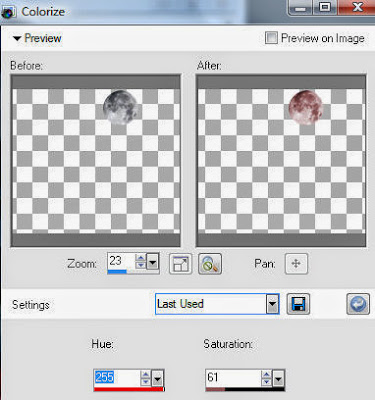
Select Element 11 - resize by 25%
Paste and position on top right
Paste tube of choice where desired
Apply Xero Radiance with the default settings of choice
Apply Lokas 3D Shadow at default settings
Select Element 92 - resize by 85%
Paste and position on bottom below tube layer
Select Element 105 - resize by 20%
Paste and position on top left
Image duplicate, mirror and reposition on right
Select Element 3 - resize by 22%
Paste and position on bottom right
Select Element 112 - resize by 15%
Paste and position on bottom right
Sleect Element 23 - resize by 15%
Paste and position on bottom right
Select Element 18 - resize by 15%
Paste and position on bottom right
Select Element 21- resize by 15%
Paste and position on bottom right
Select Element 15 - resize by 16%
Paste and position on bottom right
Select Element 65 - resize by 20%
Paste and position on bottom right
Select Element 111 - resize by 15%
Paste and position on bottom right
Select Element 28 - resize by 18%
Paste and position on bottom below tube layer where desired
Select Element 38 - resize by 18%
Paste and position in basket element
Select your eraser tool and erase any overhanging bits to make it blend into the basket
Select Element 55 - resize by 18%
Paste and position on bottom below tube layer where desired
Select Element 63 - resize by 20%
Paste and position on bottom where desired
Select Element 12 - resize by 18%
Paste and position on bottom
Select Element 54 - resize by 17%
Paste and position on bottom where desired
Select Element 60 - resize by 18%
Image Free Rotate Left by 20% and paste on bottom
Select Element 46 - resize by 25%
Paste and position on bottom left
Select Element 16 - resize by 20%
Paste and position on bottom left
Select Element 39 - resize by 15%
Paste and position on bottom left
Add new raster layer and flood-fill with color or gradient of choice
Apply Mask 20 and merge group and move to bottom layer
Add any additional elements you like.
Add any dropshadows you like
Sharpen any elements as needed
Crop and resize as desired
Add copyright info, license number and name
You're done! Thanks for trying my tutorial!
Labels:Pink Paradox Productions | 0
comments
Saturday, May 17, 2014
CUTE FLIRT
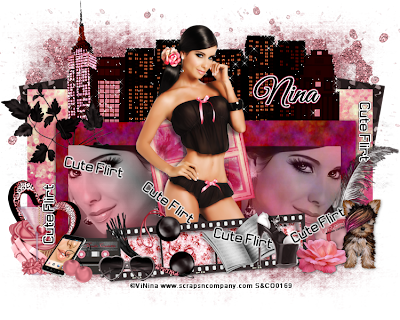
Supplies needed:
I am using the amazing artwork from Vi Nina for this tutorial which you can find here
Scrapkit: I am using a stunning matching kit from Bibi's Collections called "Naughty Girls" which you can get by going here
Template from Stylicious Twinky which you can find here
Mask 249 from Trese which you can find here
Plugins used: Alien Skin 5 - Textures (Noise), Alien Skin Xenofex 2 - Constellation, Eyecandy 4000 - Gradient Glow, Xero - Radiance, Xero - Bad Dream, Lokas 3D Shadow
----------------------------
This tutorial is written for those who have working knowledge of PSPX2 (any version will do).
This tutorial was written by me on May 17, 2014. Please do not copy or paste on any other forum, website or blog provide link back to tut only. Please do not claim as your own. This tutorial is copyrighted to me. Any resemblance to any other tutorial is purely coincidental.
Ok - let's start and remember to save often.
Open the template and using your shortcut keys on your keyboard (SHIFT+D) duplicate the template as a new image. Close the original and delete the copywrite layer.
Adjust canvas 750 x 600
Select "Cute Flirt" Wordart Raster 11 layer
Apply Eyecandy Gradient Glow on fat default settings (Glow Width 3)
Select Wordart Raster 10 layer and repeat above step
Select Square Raster 8 layer
Select all, float, defloat
Add new raster layer and flood-fill with gradient of choice (style, Angle 45, Repeat 2)
Paste close-up tube of choice on top of gradient and delete
Change tubes to Luminence - Legacy
Apply Xero Bad Dream at default settings or random setting of choice
Drop opacity down on tube to 85%
Apply dropshadow and merge close-up down on top of gradient layer
Effect, Texture Effects, Blinds (Width 2, Opactity 25, Horizontal and Light from left/top checked)
Delete/Hide original square layer
Select Square Raster 7 and repeat above steps
Select Square Raster 6 layer
Select all, float, defloat
Add new layer and flood-fill with color of choice
Select none
Apply Eyecandy Texture Noise on default settings
Delete/Hide original square layer
Select Square Raster 5 layer and repeat above steps
Select Square Raster 4 layer
Select all, float, defloat
Paste paper 4
Select invert, delete, select none
Delete/Hide original square layer
Select Square Raster 3 layer and repeat above steps
Select Square Raster 2 layer
Select all, float, defloat
Paste paper 7
Select invert, delete, select none
Delete/Hide original square layer
Select Square Raster 1 layer and repeat above steps
Copy and paste tube of choice and position where desired
Apply Xero Radiance at setting of choice
Apply Lokas 3D Shadow at default settings
Select Element 40 - resize by 60%
Paste and position on top below tube layer
Apply Alien Skin Constellation with the following settings:
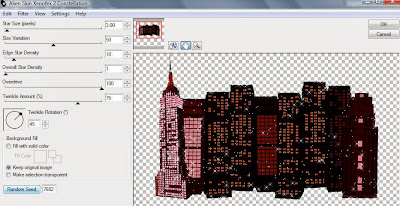
Select Element 57 - resize by 35%
Paste and position on bottom where desired
Select magic wand and select center squares on the film
Selections, modify, expand by 3
Paste paper 5
Select invert, delete, select none
Move paper below frame
Select Element 53 - resize by 60%
Paste and position in the center below tube layer
Select Element 60 - resize by 30%
Paste and position on bottom left
Select Element 34 - resize by 25%
Past and position on bottom left
Select Element 32 - resize by 40%
Paste and position on bottom left
Select Element 76 - resize by 35%
Paste and position on bottom left
Select Element 21 - resize by 40%
Paste and position on bottom left
Select Element 52 - resize by 35%
Paste and postion on bottom left
Select Element 54 - resize by 25%
Paste and position on bottom left
Select Element 1 - resize by 40%
Paste and position on bottom
Select Element 46 - resize by 65%
Paste and postion on bottom left
Select Element 65 - resize by 35%
Paste and position on bottom
Select Element 74 - resize by 40%
Paste and position on bottom right
Select Element 22 - resize by 50%
Paste and postion on bottom right
Select Element 18 - resize by 55%
Paste and position on bottom right
Select Element 36 - resize by 22%
Pate and position on bottom right
Select Element 49 - resize by 25%
Paste and position on bottom right
Select Element 28 - resize by 30%
Paste and position on top left and move to bottom layer
Image duplicate, mirror, flip and reposition on top right
Select new raster layer and flood fill with color or gradient of choice
Move layer to the bottom of the template
Apply Mask 16 or mask of choice
Merge group and move to the bottom layer
Add any additional elements you like.
Add any dropshadows you like
Crop and resize as desired
Add copyright info, license number and name
You're done! Thanks for trying my tutorial!
Labels:Bibi's Collections,Scraps N Company | 0
comments
Thursday, May 15, 2014
SWEET TEMPTATION
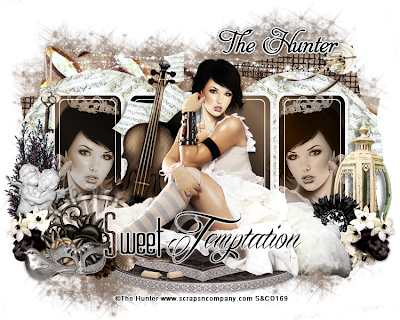
Supplies needed:
I am using the amazing artwork from The Hunter for this tutorial which you can find here
Scrapkit: I am using a stunning matching kit from Bibi's Collections called "Precious" which you can get by going here
Template from Stylicious Twinky which you can find here
Mask 16 from Gina Gems which you can find here
Plugins used: Xero - Radiance, Xero - Bad Dream, Lokas 3D Shadow
----------------------------
This tutorial is written for those who have working knowledge of PSPX2 (any version will do).
This tutorial was written by me on May 15, 2014. Please do not copy or paste on any other forum, website or blog provide link back to tut only. Please do not claim as your own. This tutorial is copyrighted to me. Any resemblance to any other tutorial is purely coincidental.
Ok - let's start and remember to save often.
Open the template and using your shortcut keys on your keyboard (SHIFT+D) duplicate the template as a new image. Close the original and delete the copywrite layer.
Adjust canvas 750 x 600
Select Wordart layer
Select your magic wand and select the "S"
Add new raster layer and flood-fill with color of choice
Select none
Adjust, Add/Remove Noise, Add Noise (Uniform checked, Noise 75%, Monochrome checked)
Select Rectangles Raster 6 layer
Select all, float, defloat
Add new raster layer and flood-fill with color or gradient of choice (Linear style, Angle 45, Repeat 2)
Paste close-up tubes of choice on top of gradient and delete
Change tubes to Luminence - Legacy
Apply Xero Radiance at default settings or random setting of choice
Drop opacity down on tubes to 75%
Apply dropshadow and merge close-ups down on top of gradient layer
Effect, Texture Effects, Blinds (Width 2, Opactity 25, Horizontal and Light from left/top checked)
Delete/Hide original rectangles layer
Select Circle Raster 4 layer
Select all, float, defloat
Paste paper 9
Select invert, delete, select none
Delete/Hide original circle layer
Select Circle Raster 3 layer and repeat above steps
Select Rectangle Raster 2 layer
Select all, float, defloat
Paste paper 2
Select invert, delete, select none
Delete/Hide original rectangle layer
Select Rectangle Raster 1 layer
Select all, float, defloat
Paste paper 1
Select invert, delete, select none
Delete/Hide original rectangle layer
Copy and paste tube of choice and position where desired
Apply Xero Radiance at setting of choice
Apply Lokas 3D Shadow at default settings
Select Element 39 - resize by 55%
Paste and position on bottom below tube layer
Select Element 84 - resize by 55%
Paste and position on left side below tube layer
Select Element 107 - resize by 25%
Paste and position on bottom right
Select Element 12 - resize by 30%
Paste and position on bottom right
Image duplicate and mirror
Select Element 68 - resize by 15%
Paste and position on bottom right
Select Element 45 - resize by 30%
Paste and position on bottom left
Select Element 22 - resize by 22%
Paset and position on bottom left
Select Element 75 - resize by 40%
Paste and position on bottom left
Select Element 63 - resize by 20%
Paste and position on bottom left
Select Element 42 - resize by 30%
Paste and position on bottom left
Select Element 23 - resize by 30%
Paste and position on bottom left
Select Element 59 - resize by 75%
Paste and position on top where desired
Select new raster layer and flood fill with color or gradient of choice
Move layer to the bottom of the template
Apply Mask 16 or mask of choice
Merge group and move to the bottom layer
Add any additional elements you like.
Add any dropshadows you like
Crop and resize as desired
Add copyright info, license number and name
You're done! Thanks for trying my tutorial!
Labels:Bibi's Collections,Scraps N Company | 0
comments
Tuesday, May 13, 2014
LOVELY LAVENDAR
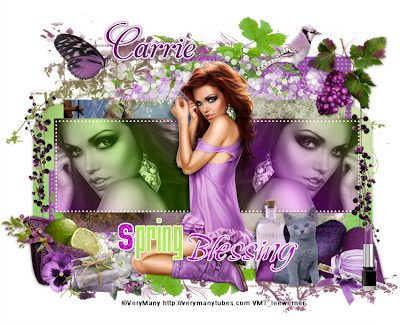
Supplies needed:
I am using the amazing artwork from Verymany for this tutorial which you can find here
Scrapkit: I am using a stunning kit from PinkParadox Productions called "Lovely Lavendar" which you can get by going here
Template from Stylicious Twinky which you can find here
Mask 44 from Moonbeams and Spiderwebs which you can find here
Plugins used: Xero - Radiance, Xero - Bad Dream, Lokas 3D Shadow
----------------------------
This tutorial is written for those who have working knowledge of PSPX2 (any version will do).
This tutorial was written by me on May 13, 2014. Please do not copy or paste on any other forum, website or blog provide link back to tut only. Please do not claim as your own. This tutorial is copyrighted to me. Any resemblance to any other tutorial is purely coincidental.
Ok - let's start and remember to save often.
Open the template and using your shortcut keys on your keyboard (SHIFT+D) duplicate the template as a new image. Close the original and delete the copywrite layer.
Adjust canvas 750 x 700
Select Wordart layer
Select your magic wand and select he areas you want to change the color
Add new raster layer and flood-fill with color of choice
Select none
Select Squares Raster 6 layer
Select all, float, defloat
Add new raster layer and flood-fill with color or gradient of choice (Linear style, Angle 45, Repeat 2)
Paste close-up tubes of choice on top of gradient and delete
Change tubes to Luminence - Legacy
Apply Xero Radiance at default settings or random setting of choice
Drop opacity down to 75%
Apply dropshadow and merge close-ups down on top of gradient layer
Effect, Texture Effects, Blinds (Width 2, Opactity 25, Horizontal and Light from left/top checked)
Delete/Hide original squares layer
Select Rectangle Raster 5 layer
Select all, float, defloat
Paste paper 8
Select invert, delete, select none
Delete/Hide original rectangle layer
Select Circle Raster 4 layer
Select all, float, defloat
Paste paper 27
Select invert, delete, select none
Delete/Hide original circle layer
Select Frame Element 12 - resize by 60%
Paste and position on top of circle layer
Select Rectangle Raster 3 layer
Apply Texture, Texture Effects, Weave (Gap size 3, Width 5, Opactity 10, Fill gaps checked)
Select Rectangle Raster 2 and repeat above step
Select Rectangle Raster 1
Select all, float, defloat
Paste paper 2
Select invert, delete, select none
Delete/Hide original rectangle layer
Copy and paste tube of choice and position where desired
Apply Xero Radiance at setting of choice
Apply Lokas 3D Shadow at default settings
Select Element 18 - resize by 20%
Image mirror and paste on top right
Select Element 5 - resize by 25%
Image mirror and paste on top left
Select Element 78 - resize by 22%
Paste and position on bottom left
Select Element 19 - resize by 20%
Paste and position on top of basket element and erase any excess to blend in
Select Element 101 - resize by 12%
Paste and position on bottom left
Select Element 30 - resize by 18%
Paste and position on bottom left
Select Element 109 - resize by 25%
Paste and position on bottom left
Select Element 56 - resize by 35%
Paste and position on bottom right
Select Element 9 - resize by 22%
Paste and position on bottom right
Select Element 15 - resize by 12%
Paste and position on bottom right
Select Element 29 - resize by 25%
Paste and position on bottom right
Select Element 39 - resize by 20%
Paste and position on bottom right
Select Element 13 - resize by 20%
Paste and position on bottom right
Select Element 130 - resize by 30%
Paste and postion on right side
Image duplicate, mirror and flip - reposition where desired
Select new raster layer and flood fill with color or gradient of choice
Move layer to the bottom of the template
Apply Mask 44 or mask of choice
Merge group and move to the bottom layer
Add any additional elements you like.
Add any dropshadows you like
Crop and resize as desired
Add copyright info, license number and name
You're done! Thanks for trying my tutorial!
Labels:Pink Paradox Productions | 0
comments
Monday, May 12, 2014
EVIL ANGEL
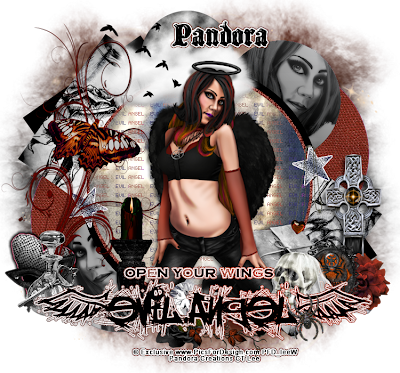
Supplies needed:
I am using the amazing artwork from Pandora Creations for this tutorial which you can find here
Scrapkit: I am using a stunning kit from Hania's Designs called "Angel Eyes" which you can get by going here
Template 159 from Toxic Desirez which you can find here
Mask 111 from Designs by Vaybs which you can find here
Plugins used: Xero - Radiance, Lokas 3D Shadow
----------------------------
This tutorial is written for those who have working knowledge of PSPX2 (any version will do).
This tutorial was written by me on May 12, 2014. Please do not copy or paste on any other forum, website or blog provide link back to tut only. Please do not claim as your own. This tutorial is copyrighted to me. Any resemblance to any other tutorial is purely coincidental.
Ok - let's start and remember to save often.
Open the template and using your shortcut keys on your keyboard (SHIFT+D) duplicate the template as a new image. Close the original and delete the copywrite layer.
Adjust canvas 750 x 700
Select Wordart layer
Select your Change to Target brush as shown:
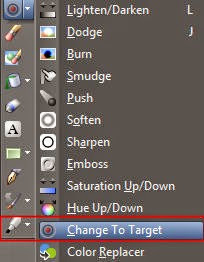
Change color on palette to #7b3724 and brush over purple areas of the wordart
Select the Pixel Words layer and repeat for the "Angel" wording
Select Right Star layer
Select all, float, defloat
Add new raster layer and flood-fill with color or gradient of choice
Adjust, Add/Remove Noise, Add Noise (Uniform checked, Noise 75%, Monochrome checked)
Delete/Hide original star layer
Select Left Star layer and repeat above steps
Select Large Circle 2 layer
Paste paper 4
Select invert, delete, select none
Delete/Hide original circle layer
Select Glitter Circle layer
Select all, float, defloat
Add new raster layer and flood-fill with color of choice
Select none
Adjust, Add/Remove Noise, Add Noise (Uniform checked, Noise 75%, Monochrome checked)
Delete/Hide original circle layer
Select Right Square 2 layer
Select all, float, defloat
Paste paper 8
Select invert, delete, select none
Delete/Hide original square layer
Select Left Square 1 layer and repeat above steps
Select Dotted Circle and Dotted Squares layer and delete
Select Left Circle 2 layer
Select all, float, defloat
Add new raster layer and flood-fill with color or gradient of choice (Linear style, Angle 45, Repeat 2)
Paste close-up tube of choice on top of gradient and delete
Change tube to Luminence - Legacy
Apply Xero Radiance at default settings or random setting of choice
Drop opacity down to 60%
Apply dropshadow and merge close-up down on top of gradient layer
Effect, Texture Effects, Blinds (Width 2, Opactity 25, Horizontal and Light from left/top checked)
Delete/Hide original circle layer
Select Right Circle 2 and repeat above steps
Copy and paste tube of choice and position where desired
Apply Xero Radiance at setting of choice
Apply Lokas 3D Shadow at default settings
Select Element 31 - resize by 50%
Paste and position on top where desired
Select Element 78 - resize by 55%
Paste and position on top where desired
Select Element 83 - resize by 50%
Paste and position on top where desired
Select Element 81 - resize by 90%
Paste and position on left side
Select Element 84 - resize by 50%
Paste and position on top left
Select Element 1 - resize by 50%
Paste and positon on bottom right
Select Element 80 - resize by 25%
Paste and positio non bottom right
Select Element 42 - resize by 40%
Paste and position on bottom right
Select Element 51 - resize by 40%
Paste and position on bottom right
Select Element 3 - resize by 35%
Paste and position on bottom right
Select Element 63 - resize by 45%
Paste and position on bottom left
Select Element 34 - resize by 40%
Paste and position on bottom left
Select Element 79 - resize by 50%
Paste and position on bottom left
Select Element 25 - resize by 35%
Paste and position on bottom left
Select new raster layer and flood fill with color or gradient of choice
Move layer to the bottom of the template
Apply Mask 111 or mask of choice
Merge group and move to the bottom layer
Add any additional elements you like.
Add any dropshadows you like
Crop and resize as desired
Add copyright info, license number and name
You're done! Thanks for trying my tutorial!
Labels:Pandora | 0
comments
Saturday, May 10, 2014
MERMAID PRINCESS
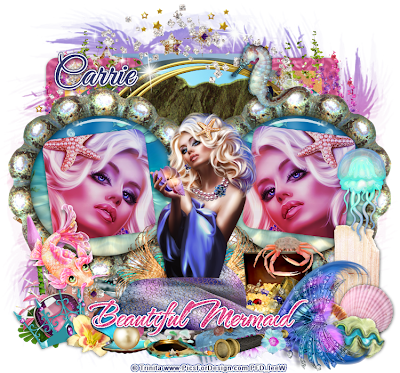
Supplies needed:
I am using the amazing artwork from Trinita for this tutorial which you can find here
Scrapkit: I am using a stunning kit from Pink Paradox Productions called "Mermaid Princess" which you can get by going here
Template 313 from Millie which you can find here
Mask 59 from Weescotslass which you can find here
Plugins used: Alien Skin Nature - Ripples, Eyecandy 4000 - Glass, Eyecandy 4000 - Gradient Glow, Xero - Bad Dream, Lokas 3D Shadow
----------------------------
This tutorial is written for those who have working knowledge of PSPX2 (any version will do).
This tutorial was written by me on May 10, 2014. Please do not copy or paste on any other forum, website or blog provide link back to tut only. Please do not claim as your own. This tutorial is copyrighted to me. Any resemblance to any other tutorial is purely coincidental.
Ok - let's start and remember to save often.
Open the template and using your shortcut keys on your keyboard (SHIFT+D) duplicate the template as a new image. Close the original and delete the copywrite layer.
Adjust canvas 750 x 700
Select Wordart 14 layer
Select all, float, defloat
Add new raster layer and flood-fill with color of choice
Select none
Adjust, Add/Remove Noise, Add Noise (Uniform checked, Noise 55%, Monochrome checked)
Apply Eyecandy Gradient Glow on fat default settings (Glow Width 3)
Delete/Hide original wordart layer
Select Square 13 layer
Select all, float, defloat
Add new raster layer and flood-fill with color or gradient of choice (Linear style, Angle 45, Repeat 2)
Paste close-up tube of choice on top of gradient
Select invert, delete, select none
Change tube to Hard Light
Apply Xero Bad Dream at default settings or random setting of choice
Drop opacity down to 90%
Apply dropshadow and merge close-up down on top of gradient
Effect, Texture Effects, Blinds (Width 2, Opactity 15, Horizontal and Light from left/top checked)
Delete/Hide original square layer
Select Square 12 layer and repeat above steps
Select Circle 11 layer
Select all, float, defloat
Paste paper 3
Select invert, delete, select none
Apply Eyecandy Glass on default settings of choice
Delete/Hide original circle layer
Select Circle 10 layer and repeat above steps
Select Circle 9 layer
Select Frame Element 7 - resize by 42%
Paste and position on top of circle 9 layer
Image duplicate, mirror and reposition over circle 8 layer
Select Cirlce 7 layer
Select all, float, defloat
Paste paper 21
Select invert, delete, select none
Delete/Hide original circle layer
Select Frame Element 3 - resize by 60%
Paste and position on top of circle 7 layer
Select Oval 5 layer
Select all, float, defloat
Paste paper 34
Select invert, delete, select none
Delete/Hide original oval layer
Select Square 4 layer
Select all, float, defloat
Paste paper 1
Select invert, delete, select none
Delete/Hide original square layer
Select Rectangle 2 layer
Select all, float, defloat
Add new raster layer and flood-fill with color of choice
Select none
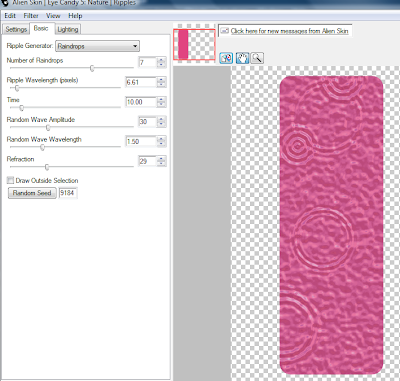
Apply Eyecandy Nature - Ripple with the following settings:
Delete/Hide original rectangle layer
Select Rectangle 3 and repeat above steps
Select Rectangle 1 layer
Select all, float, defloat
Paste paper 36
Select invert, delete, select none
Delete/Hide original rectangle layer
Select Element 79 - resize by 45%
Paste and position on bottom
Copy and paste tube of choice and position where desired
Apply Xero Radiance at setting of choice
Apply Lokas 3D Shadow at default settings
Select Element 27 - resize by 25%
Paste and position on right side where desired
Select Element 94 - resize by 30%
Paste and position on bottom right
Select Element 61 - resize by 25%
Paste and position on bottom right
Select Element 68 - resize by 15%
Paste and position on bottom right
Select Element 37 - resize by 20%
Paste and position on bottom right
Select Element 11 - resize by 20%
Paste and position on top of chest
Select Element 47 - resize by 20%
Paste and position on bottom right
Select Element 33 - resize by 20%
Image Free Rotate Left by 15% and paste on bottom right
Select Element 14 - resize by 25%
Image mirror and paste on bottom left
Select Element 53 - resize by 15%
Paste and position on bottom left
Select Element 59 - resize by 15%
Paste and position inside clam shell
Select Element 110 - resize by 15%
Paste and position on bottom left
Select Element 31 - resize by 20%
Paste and position on bottom left
Select Element 66 - resize by 15%
Paste and position on bottom left
Select Element 114 - resize by 25%
Paste and position on bottom left
Select Element 32 - resize by 25%
Paste and position on bottom where desired
Select Element 25 - resize by 20%
Image Free Rotate Left by 15% and paste on top right
Select new raster layer and flood fill with color or gradient of choice
Move layer to the bottom of the template
Apply Mask 39 or mask of choice
Merge group and move to the bottom layer
Add any additional elements you like.
Add any dropshadows you like
Crop and resize as desired
Add copyright info, license number and name
You're done! Thanks for trying my tutorial!
Labels:Pink Paradox Productions | 0
comments
Friday, May 9, 2014
TINY MOMENTS
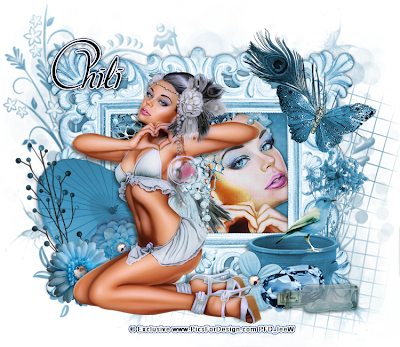
Supplies needed:
I am using the an Exclusive tube from Picsfordesign for for this tutorial, which you can find here
Scrapkit: I am using a beautiful kit from Chili Designz called "Tiny Moments 3" which you can get by going here
Floral Grunge Frame from Essex Girl which you can find here
Plugins: Xero - Porcelain, Lokas 3D Shadow
----------------------------
This tutorial is written for those who have working knowledge of PSPX2 (any version will do).
This tutorial was written by me on May 9, 2014. Please do not copy or paste on any other forum, website or blog provide link back to tut only. Please do not claim as your own. This tutorial is copyrighted to me. Any resemblance to any other tutorial is purely coincidental.
Ok - let's start and remember to save often.
Open up a 750 x 650 blank canvas (we can resize it later)
Select Frame Element - resize by 85%
Paste and position in the center of the canvas
Select your magic wand tool and click in the center of the Frame (Add (Shift), RGB Value, Tolerance 25, Contiguous checked, Feather 0)
Selections, Modify, Expand by 5
Paste paper 3
Select invert, delete
Add new raster layer and flood-fill with color or gradient of choice (Linear style, Angle 45, Repeat 2)
Paste close-up tube of choice on top of gradient and delete
Change tube to Hard Light
Apply Xero Bad Dream at default settings or random setting of choice
Drop opacity down to 90%
Apply dropshadow and merge close-up down on top of gradient layer
Move layer below frame
Effect, Texture Effects, Blinds (Width 2, Opactity 25, Horizontal and Light from left/top checked)
Paste tube of choice where desired
Apply Xero Porcelain with the default settings of choice
Apply Lokas 3D Shadow at default settings
Select Feather Element - resize by 32%
Paste and position on top right
Select Butterfly Element - resize by 30%
Paste and position on top right
Select Pott Element - resize by 35%
Paste and position on bottom right
Select Jewel 4 Element - resize by 85%
Paste and position on bottom right
Select Jewel 3 Element - resize by 75%
Paste and position on bottom right
Select Flower 4 - resize by 40%
Paste and position on bottom right
Select Bottle Element - resize by 25%
Paste and position on bottom right
Select Parasol Element - resize by 40%
Paste and position on bottom left
Select Flower Element - resize by 30%
Paste and position on bottom left
Select Flower 3 Element - resize by 30%
Paste and position on bottom left
Select Berries Element - resize by 30%
Image Free Rotate Left by 15% and paste on bottom left
Add new raster layer and flood-fill with color or gradient of choice
Apply Floral Mask 1 and merge group and move to bottom layer
Add any additional elements you like.
Add any dropshadows you like
Sharpen any elements as needed
Crop and resize as desired
Add copyright info, license number and name
You're done! Thanks for trying my tutorial!
Labels:Chili Designz | 0
comments
Thursday, May 8, 2014
BAD BOYS
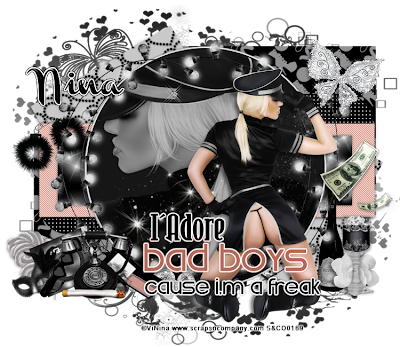
Supplies needed:
I am using the amazing artwork from Vi Nina for this tutorial which you can find here
Scrapkit: I am using a stunning matching kit from Designs by Joan called "Dempsey" which you can get by going here
Bad Boy Template from Stylicious Twinky which you can find here
Mask 39 from Moonbeams and Spiderwebs which you can find here
Plugins used: Penta - Jeans, Xero - Radiance, Xero - Bad Dream, Lokas 3D Shadow
----------------------------
This tutorial is written for those who have working knowledge of PSPX2 (any version will do).
This tutorial was written by me on May 8, 2014. Please do not copy or paste on any other forum, website or blog provide link back to tut only. Please do not claim as your own. This tutorial is copyrighted to me. Any resemblance to any other tutorial is purely coincidental.
Ok - let's start and remember to save often.
Open the template and using your shortcut keys on your keyboard (SHIFT+D) duplicate the template as a new image. Close the original and delete the copywrite layer.
Adjust canvas 750 x 650
Select Wordart Raster 9 layer
Select your Change to Target brush as shown:
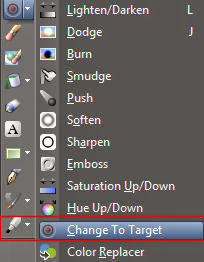
Change color on palatte to #b76a5b and brush over "Bad Boys" portion of the wordart
Select Circle Raster 8 layer
Select all, float, defloat
Paste close-up tube of choice on top of circle
Select invert, delete, select none
Change tube to Luminence (Legacy)
Apply Xero Bad Dream at default settings or random setting of choice
Drop opacity down to 80%
Apply dropshadow and merge close-up down on top of circle
Effect, Texture Effects, Blinds (Width 2, Opactity 15, Horizontal and Light from left/top checked)
Select Element 4 - resize by 90%
Paste and position on top of circle layer
Select Rectangle Raster 7 layer
Select all, float, defloat
Paste paper 8
Select invert, delete, select none
Delete/Hide original rectangle layer
Select Rectangle Raster 6 layer
Select all, float, defloat
Add new raster layer and flood-fill with color of choice
Select none
Apply Penta - Jeans with the following settings:
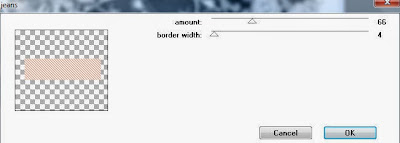
Delete/Hide original rectangle layer
Select Square Raster 5 layer
Select all, float, defloat
Paste paper 2
Select invert, delete, select none
Delete/Hide original square layer
Select Square Raster 4 and repeat above steps
Select Rectangle Raster 3 layer
Apply Effects, Texture Effects, Weave (Gap size 2, Width 5, Opacity 10, Fill gaps checked, change Gap and Weave color to one of choice)
Select Square Raster 2 layer
Select all, float, defloat
Paste paper 7
Select invert, delete, select none
Delete/Hide original square layer
Select Square Raster 1 layer and repeat above steps
Copy and paste tube of choice and position where desired
Apply Xero Radiance at setting of choice
Apply Lokas 3D Shadow at default settings
Select Element 57 - resize by 45%
Image Free Rotate Right by 15% and paste on top right
Select Element 35 - resize by 30%
Paste and position on right side
Select Element 19 - resize by 35%
Paste and position on bottom right
Select Element 40 - resize by 20%
Paste and position on bottom right
Select Element 38 - resize by 50%
Paste and position on bottom right
Select Element 30 - resize by 25%
Paste and position on bottom left
Select Element 68 - resize by 30%
Image Free Rotate Left by 15% and paste on bottom left
Select Element 29 - resize by 45%
Paste and position on bottom left
Select Element 70 - resize by 30%
Paste and position on bottom left
Select Element 39 - resize by 40%
Paste and position on bottom left
Select Element 16 - resize by 25%
Paste and position on bottom left
Select Element 28 - resize by 40%
Paste and position on bottom left
Select Element 10 - resize by 40%
Paste and position on top left
Select new raster layer and flood fill with color or gradient of choice
Move layer to the bottom of the template
Apply Mask 39 or mask of choice
Merge group and move to the bottom layer
Add any additional elements you like.
Add any dropshadows you like
Crop and resize as desired
Add copyright info, license number and name
You're done! Thanks for trying my tutorial!
Labels:Scraps N Company | 0
comments
Tuesday, May 6, 2014
PRINCESS
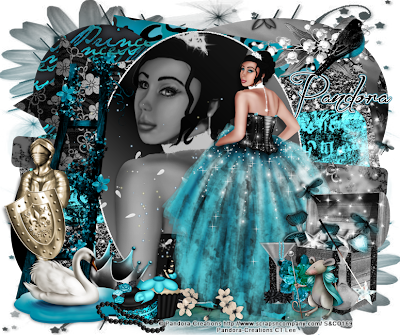
Supplies needed:
I am using the amazing artwork from Pandora Creations for this tutorial which you can find here
Scrapkit: I am using a stunning matching kit from Bibi's Collections called "Princess Collab" which you can get by going here
Template 247 from Toxic Desirez which you can find here
Flower Mask which you can find here
Plugins used: Eyecandy 4000 - Marble, Xero - Radiance, Xero - Bad Dream, Lokas 3D Shadow
----------------------------
This tutorial is written for those who have working knowledge of PSPX2 (any version will do).
This tutorial was written by me on May 6, 2014. Please do not copy or paste on any other forum, website or blog provide link back to tut only. Please do not claim as your own. This tutorial is copyrighted to me. Any resemblance to any other tutorial is purely coincidental.
Ok - let's start and remember to save often.
Open the template and using your shortcut keys on your keyboard (SHIFT+D) duplicate the template as a new image. Close the original and delete the copywrite layer.
Adjust canvas 775 x 650
Select Oval Raster 3 layer
Select all, float, defloat
Add new raster layer and flood-fill with color or gradient of choice (Linear style, Angle 45, Repeat 2)
Paste close-up tube of choice on top of gradient and delete
Change tube to Luminence (Legacy)
Apply Xero Bad Dream at default settings or random setting of choice
Drop opacity down to 80%
Apply dropshadow and merge close-up down on top of gradient layer
Effect, Texture Effects, Blinds (Width 2, Opactity 15, Horizontal and Light from left/top checked)
Delete/Hide original oval layer
Select Star Raster 6 layer
Select all, float, defloat
Paste paper 4
Select invert, delete, select none
Delete/Hide original star layer
Select Star Copy of Raster 6 and repeat above steps
Select Strip Raster 5 layer
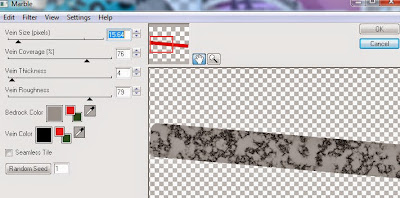
Apply Eyecandy Marble with the following settings:
Select Rectangle Raster 2 layer
Select all, float, defloat
Paste paper 11
Select invert, delete, select none
Delete/Hide original rectangle layer
Select Square Raster 8 layer
Select all, float, defloat
Paste paper 7
Select invert, delete, select none
Delete/Hide original square layer
Select Square Copy of Raster 8 and repeat above steps
Select Circle Raster 7 layer
Select all, float, defloat
Paste paper 12
Select invert, delete, select none
Delete/Hide original circle layer
Select Circle Copy of Raster 7 layer and repeat above steps
Select Rectangle Raster 9 layer
Select all, float, defloat
Paste paper 3
Select invert, delete, select none
Delete/Hide original rectangle layer
Select Oval Raster 10 layer
Select all, float, defloat
Paste paper 1
Select invert, delete, select none
Delete/Hide original oval layer
Copy and paste tube of choice and position where desired
Apply Xero Radiance at setting of choice
Apply Lokas 3D Shadow at default settings
Select Element 1 - resize by 55%
Paste and position on bottom right
Select Element 60 - resize by 75%
Paste and position on top right
Select Element 36 - resize by 25%
Paste and position on top right
Select Element 70 - resize by 20%
Paste and position on bottom right
Select Element 48 - resize by 25%
Paste and position on bottom right
Select Element 43 - resize by 35%
Paste and position on bottom right
Select Element 53 - resize by 55%
Paste and position on left side where desired
Select Element 13 - resize by 45%
Paste and position bottom left
Select Element 66 - resize by 35%
Paste and position on bottom left
Select Element 81 - resize by 55%
Paste and position on bottom left
Select Element 54 - resize by 40%
Paste and position on bottom where desired
Select Element 50 - resize by 32%
Paste and position on bottom where desired
Select Element 77 - resize by 50%
Paste and positon on bottom
Select Element 3 - resize by 55%
Paste and position on bottom
Select new raster layer and flood fill with color or gradient of choice
Move layer to the bottom of the template
Apply Flower Mask or mask of choice
Merge group and move to the bottom layer
Add any additional elements you like.
Add any dropshadows you like
Crop and resize as desired
Add copyright info, license number and name
You're done! Thanks for trying my tutorial!
Monday, May 5, 2014
VIVA LA FIESTA
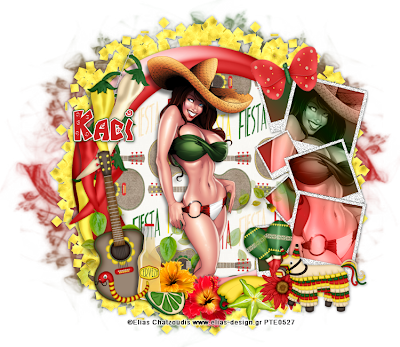
Supplies needed:
I am using the amazing art from Elias Chatzoudis for for this tutorial, which you can find here
Scrapkit: I am using a stunning kit from Scrappin Krazy Designs called "Viva la Fiesta" which you can get by going here
Mask 126 from Trese which you can find here
Plugins: Xero - Radiance, Xero - Bad Dream, Lokas 3D Shadow
----------------------------
This tutorial is written for those who have working knowledge of PSPX2 (any version will do).
This tutorial was written by me on May 5, 2014. Please do not copy or paste on any other forum, website or blog provide link back to tut only. Please do not claim as your own. This tutorial is copyrighted to me. Any resemblance to any other tutorial is purely coincidental.
Ok - let's start and remember to save often.
Open up a 750 x 650 blank canvas (we can resize it later)
Select Frame Element 52 - resize by 80%
Paste and position in the center of the canvas
Select your magic wand tool and click in the center of the Frame (Add (Shift), RGB Value, Tolerance 25, Contiguous checked, Feather 0)
Selections, Modify, Expand by 5
Paste paper 4
Select invert, delete, select none
Move paper below the frame
Select Frame Element 55 - resize by 65%
Paste and position on right side where desired
Select your magic wand tool and click in the center of all the Frames (Add (Shift), RGB Value, Tolerance 25, Contiguous checked, Feather 0)
Selections, Modify, Expand by 3
Add new raster layer and flood-fill with color or gradient of choice (Linear style, Angle 45, Repeat 2)
Paste close-up tube of choice on top of gradient and delete
Change tube to Luminence (Legacy)
Apply Xero Bad Dream at default settings or random setting of choice
Drop opacity down to 75%
Apply dropshadow and merge close-up down on top of gradient layer
Move layer below frame
Effect, Texture Effects, Blinds (Width 2, Opactity 25, Horizontal and Light from left/top checked)
Select Frame - Adjust, Add/Remove Noise, Add Noise (Uniform checked, Noise 75%, Monochrome checked)
Select Element 23 - image free rotate right by 15%
Paste and position on left side of frame
Paste tube of choice where desired
Apply Xero Radiance with the default settings of choice
Apply Lokas 3D Shadow at default settings
Select Element 3 - resize by 65%
Image Free Rotate Left by 10% and paste on bottom left
Select Element 12 - resize by 30%
Paste and position on bottom left
Select Element 15 - resize by 30%
Paste and position on bottom left
Select Element 42 - resize by 25%
Paste and position on bottom left
Select Element 44 - resize by 30%
Paste and position on bottom
Select Element 9 - resize by 35%
Paste and position on bottom right
Select Element 24 - resize by 30%
Image Free Rotate Left by 15% and paste on bottom right
Select Element 38 - resize by 25%
Paste and position on bottom right
Select Element 2 - resize by 30%
Paste and position on bottom right
Select Element 43 - resize by 25%
Paste and position on bottom right
Select Element 35 - resize by 35%
Image Free Rotate Left by 15% and paste on top right
Select Element 48 - paste and position in the center of canvas and move to bottom layer
Add new raster layer and flood-fill with color or gradient of choice
Apply Mask 126 and merge group and move to bottom layer
Add any additional elements you like.
Add any dropshadows you like
Sharpen any elements as needed
Crop and resize as desired
Add copyright info, license number and name
You're done! Thanks for trying my tutorial!
Labels:Scrappin Krazy Designs | 0
comments
Subscribe to:
Posts
(Atom)


