Labels
- Alikas Scraps
- All Dolled Up Store
- Amy Marie
- Annaica
- Arthur Crowe
- Babycakes Scraps
- Barbara Jensen
- Bibi's Collections
- Black Widow Creationz
- Blu Moon
- Bonnies Creations
- Bookwork Dezines
- Broken Sky Dezine
- Carita Creationz
- Carpe Diem Designs
- CDO
- Celinart Pinup
- Celine
- Chacha Creationz
- Charmed Designs
- Cherry Blossom Designs
- Chili Designz
- Cluster Frame
- Creative Misfits
- Creative Scraps by Crys
- Curious Creative Dreams
- Danny Lee
- Derzi
- Designs by Ali
- Designs by Joan
- Designs By Norella
- Designs by Vi
- Diana Gali
- Diry Art Designs
- Disturbed Scraps
- Dreaming With Bella
- Eclipse Creations
- Elegancefly
- Extras
- Fabulous Designz
- Forum Set
- Foxy's Designz
- Freek's Creation
- FTU
- FwTags
- Gothic Inspirations
- Gothic Raven Designs
- Graphfreaks
- Hania's Designs
- Happy Pumpkin Studios
- Horseplay's Pasture Designs
- indie-Zine
- Irish Princess Designs
- Ishika Chowdhury
- Kaci McVay
- Kajenna
- katharine
- Katherine
- Khloe Zoey
- Killer Kitty
- Kissing Kate
- KiwiFirestorm
- Kizzed by Kelz
- KZ Designz
- Lady Mishka
- Lil Mz Brainstorm
- Maiden of Darkness
- Mariel Designs
- MellieBeans
- Misticheskya
- MistyLynn's Creations
- MMeliCrea Designz
- Moon Vixen Designs
- NaSionainne
- Ninaste
- Niqui Designs
- Pandora
- Picsfordesign
- Pink Paradox Productions
- Radyga Designs
- Redefined Designs
- Rissa's Designs
- Schnegge
- ScottishButterfly Creations
- Scrappin Krazy Designs
- Scrappin With Lil Ol Me
- Scraps and the City
- Scraps Dimensions
- Scraps From The Heart
- Scraps N Company
- Scraps with Attitude
- Shining Star Art
- Skyscraps
- Sleek N Sassy Designs
- Sophisticat Simone
- Souldesigner
- Soxsational Scraps
- Spazz
- Starlite and Soul
- Tammy Welt
- Tasha's Playground
- The PSP Project
- Thrifty Scraps by Gina
- Tiny Turtle Designs
- Upyourart
- Verymany
- Wendy Gerber
- Whisper In the Wind
- Wick3d Creationz
- Wicked Diabla
- Yude's Kreationz
Blog Archive
Sunday, August 28, 2016
FIONA

Supplies needed:
I am using the stunning artwork from Chris Pastel for this tutorial which you can find here
Scrapkit: I am using a stunning kit from Jens Sweet Temptations called "Fiona" which you can get by going here
Mask 9 from Splitz Designs which you can find here
Plugins: Lokas 3D Shadow
----------------------------
This tutorial is written for those who have working knowledge of PSPX2 (any version will do).
This tutorial was written by me on August 28, 2016. Please do not copy or paste on any other forum, website or blog provide link back to tut only. Please do not claim as your own. This tutorial is copyrighted to me. Any resemblance to any other tutorial is purely coincidental.
Ok - let's start and remember to save often.
Open up a 750 x 650 blank canvas (we can resize it later)
Select Frame Element 21 - Paste and position in the center of the canvas
Select your magic wand tool and select the center of the frame (Add (Shift), RGB Value, Tolerance 25, Contiguous checked, Feather 0)
Selections, Modify, Expand by 5
Paste paper 1
Select invert, delete
Paste close-up tube on paper layer and delete
Select none
Drop close-up to Luminance (Legacy)
Apply dropshadow and merge down on paper layer
Effect, Texture Effects, Blinds (Width 3, Opactity 15, Horizontal and Light from left/top checked)
Move paper layer below frame layer
Select Element 22 - resize by 50%
Paste and position on the top left
Select Element 46 - resize by 25%
Paste and position on the top right
Select Element 11 - resize by 65%
Paste and position on the right side
Select Element 15 - resize by 40%
Paste and position on the bottom right
Paste tube of choice where desired
Apply Lokas 3D Shadow at default settings
Select Element 50 - resize by 25%
Paste and position on the bottom right
Select Element 16 - resize by 30%
Paste and position on the bottom right
Select Element 44 - resize by 20%
Paste and position on the bottom right
Select Element 20 - resize by 25%
Paste and paste on the bottom left
Select Element 35 - resize by 30%
Image mirror and paste on the bottom left
Select Element 7 - resize by 25%
Paste and position on the bottom left
Select Element 13 - resize by 25%
Paste and position on the bottom left
Select Element 9 - resize by 25%
Paste and position on the bottom
Select Element 54 - resize by 20%
Paste and position on the bottom
Select Element 49 - resize by 25%
Paste and position on the bottom
Select Element 28 - resize by 30%
Paste and position on the bottom
Select Element 34 - resize by 22%
Paste and position on the bottom
Select Element 56 - resize by 75%
Paste and position on the left side where desired
Select Element 5 -Paste and position on the canvas where desired
Paste paper 7 on canvas
Apply Mask 9 or mask of choice
Merge group and move to the bottom layer
Add any dropshadows you like
Sharpen any elements as needed
Crop and resize as desired
Add copyright info, license number and name
You're done! Thanks for trying my tutorial!

Labels:Scraps N Company | 0
comments
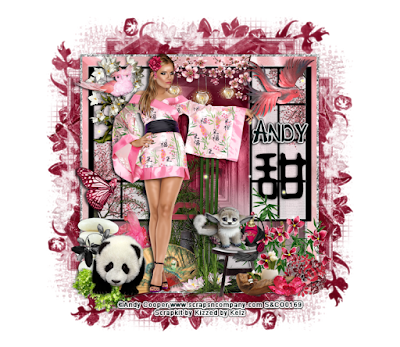
KIMONO BAMBOO
Supplies needed:
I am using the stunning artwork from Andy Cooper for this tutorial which you can find here
Scrapkit: I am using a stunning kit from Kizzed by Kelz called "Kimono Bamboo" which you can get by going here
Mask 29 from Babes Designz which you can find here
Plugins: Lokas 3D Shadow
----------------------------
This tutorial is written for those who have working knowledge of PSPX2 (any version will do).
This tutorial was written by me on August 28, 2016. Please do not copy or paste on any other forum, website or blog provide link back to tut only. Please do not claim as your own. This tutorial is copyrighted to me. Any resemblance to any other tutorial is purely coincidental.
Ok - let's start and remember to save often.
Open up a 750 x 650 blank canvas (we can resize it later)
Select Frame Element 4 - resize by 85%
Paste and position in the center of the canvas
Select your magic wand tool and select the center of the frame (Add (Shift), RGB Value, Tolerance 25, Contiguous checked, Feather 0)
Selections, Modify, Expand by 5
Paste paper 8
Select invert, delete, select none
Move paper layer below frame layer
Select Element 68 - resize by 75%
Paste and position above the frame element where desired
Select Element 123 - resize by 30%
Paste and position on the top of the frame
Select Element 109 - resize by 25%
Paste and position on the top right
Select Element 94 - resize by 35%
Paste and position on the top left
Select Element 125 - resize by 20%
Paste and position on the top left
Select Element 92 - resize by 20%
Paste and position on the bottom right above the screen element
Select Element 42 - resize by 65%
Paste and position on the bottom
Select Element 58 - resize by 30%
Paste and position on the bottom
Paste tube of choice where desired
Apply Lokas 3D Shadow at default settings
Select Element 131 - resize by 35%
Paste and position on the bottom right
Select Element 3 - resize by 30%
Paste and position on the bottom right
Select Element 120 - resize by 15%
Paste and position on the bottom right
Select Element 10 - resize by 20%
Paste and paste on the bottom right
Select Element 112 - resize by 12%
Paste and position on the bottom right
Select Element 16 - resize by 25%
Paste and position on the left side
Select Element 48 - resize by 40%
Paste and position on the bottom left
Select Element 39 - resize by 30%
Paste and position on the bottom left
Select Element 76 - resize by 15%
Paste and position on the bottom left
Select Element 33 - resize by 30%
Image Free Rotate Left by 15% and paste on the bottom left
Select Element 14 - resize by 20%
Paste and position on the bottom left
Select Element 18 - resize by 20%
Paste and position on the bottom
Select Element 13 - resize by 15%
Paste and position on the bottom
Select Element 132 - resize by 75%
Paste and position on the canvas where desired
Paste paper 13 on canvas
Apply Mask 61 or mask of choice
Merge group and move to the bottom layer
Add any dropshadows you like
Sharpen any elements as needed
Crop and resize as desired
Add copyright info, license number and name
You're done! Thanks for trying my tutorial!

Labels:Scraps N Company | 0
comments
Saturday, August 27, 2016
ESMERALDA

Supplies needed:
I am using the stunning artwork from Souldesigner for this tutorial which you can find here
Scrapkit: I am using a stunning kit from Bibi's Collections called "Esmeralda" which you can get by going here
Mask 61 from Squirrely which you can find here
Plugins: Lokas 3D Shadow
----------------------------
This tutorial is written for those who have working knowledge of PSPX2 (any version will do).
This tutorial was written by me on August 27, 2016. Please do not copy or paste on any other forum, website or blog provide link back to tut only. Please do not claim as your own. This tutorial is copyrighted to me. Any resemblance to any other tutorial is purely coincidental.
Ok - let's start and remember to save often.
Open up a 750 x 650 blank canvas (we can resize it later)
Select Frame Element 80 - resize by 55%
Paste and position in the center of the canvas
Select your magic wand tool and select the center of the frame (Add (Shift), RGB Value, Tolerance 25, Contiguous checked, Feather 0)
Selections, Modify, Expand by 5
Paste paper 7
Select invert, delete, select none
Move paper layer below frame layer
Select Element 85 - resize by 35%
Paste and position on the top right
Select Element 1 - resize by 40%
Paste and position on the left side
Select Element 37 - resize by 15%
Paste and position on the top left
Select Element 65 - resize by 30%
Paste and position on the bottom left
Select Element 32 - resize by 20%
Paste and position on the top right above paper layer
Select Element 26 - resize by 18%
Paste and position on the bottom right
Select Element 46 - resize by 30%
Paste and position on the bottom right
Paste tube of choice where desired
Apply Lokas 3D Shadow at default settings
Select Element 38 - resize by 12%
Paste and position on the bottom right
Select Element 61 - resize by 25%
Paste and position on the bottom right
Select Element 19 - resize by 12%
Paste and position on the bottom right
Select Element 69 - resize by 25%
Paste and paste on the bottom right
Select Element 35 - resize by 12%
Paste and position on the bottom right
Select Element 10 - resize by 15%
Paste and position on the bottom below tube layer
Select Element 31 - resize by 20%
Image Free Rotate Right by 15% and paste on the bottom left
Select Element 3 - resize by 20%
Paste and position on the left side
Select Element 41 - resize by 25%
Paste and position on the bottom left
Select Element 40 - resize by 20%
Paste and position on the bottom left
Select Element 28 - resize by 8%
Paste and position on the bottom left
Select Element 56 - resize by 20%
Paste and position on the bottom left
Select Element 86 - resize by 15%
Paste and position on the bottom
Select Element 54 - resize by 12%
Paste and position on the bottom
Select Element 87 - resize by 55%
Paste and position on left side
Select Element 89 - resize by 80%
Paste and position on the canvas where desired
Paste paper 2 on canvas
Apply Mask 61 or mask of choice
Merge group and move to the bottom layer
Add any dropshadows you like
Sharpen any elements as needed
Crop and resize as desired
Add copyright info, license number and name
You're done! Thanks for trying my tutorial!

Labels:Bibi's Collections | 0
comments
Tuesday, August 23, 2016
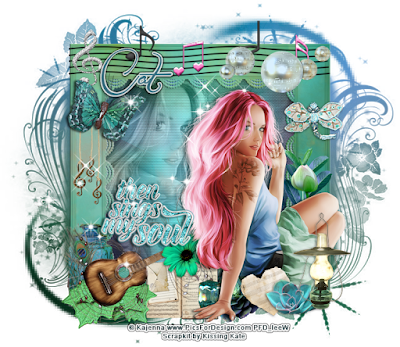
SUMMER SONG
Supplies needed:
I am using the stunning artwork from Kajenna for this tutorial which you can find here
Scrapkit: I am using a stunning kit from Kissing Kate called "Summer Song" which you can get by going here
Mask 5 from Splitz Designs which you can find here
Plugins: Lokas 3D Shadow, Eyecandy Gradient Glow
----------------------------
This tutorial is written for those who have working knowledge of PSPX2 (any version will do).
This tutorial was written by me on August 23, 2016. Please do not copy or paste on any other forum, website or blog provide link back to tut only. Please do not claim as your own. This tutorial is copyrighted to me. Any resemblance to any other tutorial is purely coincidental.
Ok - let's start and remember to save often.
Open up a 750 x 650 blank canvas (we can resize it later)
Select Frame Element 2 - resize by 65%
Paste and position in the center of the canvas
Select your magic wand tool and select the center of the frame (Add (Shift), RGB Value, Tolerance 25, Contiguous checked, Feather 0)
Selections, Modify, Expand by 5
Paste paper 11
Select invert, delete
Paste close-up tube on paper layer and delete
Select none
Drop close-up to Luminance (Legacy) and drop opacity to 55%
Apply dropshadow and merge down on paper layer
Effect, Texture Effects, Blinds (Width 3, Opactity 15, Horizontal and Light from left/top checked)
Move paper layer below frame layer
Select Element 61 - resize by 89%
Paste and position on the top center of the frame
Select Element 34 - resize by 30%
Paste and position on the left side
Select Element 67 - resize by 25%
Image Free Rotate Right by 15% and paste on the top left
Select Element 65 - resize by 25%
Paste and position on the right side
Select Element 22 - resize by 25%
Paste and position on the right side
Paste tube of choice where desired
Apply Lokas 3D Shadow at default settings
Select Element 17 - resize by 30%
Paste and position on the bottom right
Select Element 60 - resize by 20%
Paste and position on the bottom right
Select Element 55 - resize by 25%
Paste and position on the bottom right
Select Element 36 - resize by 25%
Paste and paste on the bottom left
Select Element 3 - resize by 25%
Image Free Rotate Left by 15% and paste on the bottom left
Select Element 9 - resize by 30%
Paste and position on the bottom left
Select Element 11 - resize by 25%
Paste and position on the bottom
Select Element 20 - resize by 50%
Paste and position on the bottom left
Select Element 31 - resize by 20%
Paste and position on the bottom
Select Element 43 - Paste and position on the bottom
Select Element 64 - resize by 20%
Paste and position on the bottom below the tube layer
Select Wordart 1 Element - resize by 25%
Paste and position on the left side
Apply Eyecandy Gradient Glow on fat default settings (Glow width 3)
Select Element 25 - resize by 35%
Paste and position on the top right
Select Element 70 - resize by 20%
Paste and position on the top right
Select Spray 2 Element - resize by 75%
Paste and position on the canvas where desired
Paste paper 3 on canvas
Apply Mask 5 or mask of choice
Merge group and move to the bottom layer
Add any dropshadows you like
Sharpen any elements as needed
Crop and resize as desired
Add copyright info, license number and name
You're done! Thanks for trying my tutorial!

Labels:Kissing Kate | 0
comments
Monday, August 22, 2016
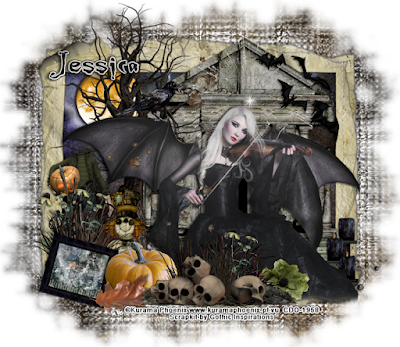
DANCE OF LIGHT
Supplies needed:
I am using the stunning artwork from Kurama Phoenix for this tutorial which you can find here
Scrapkit: I am using a stunning kit from Gothic Inspirations called "Dance of Light" which you can get by going here
Mask 14 from Artmama which you can find here
Plugins: Lokas 3D Shadow
----------------------------
This tutorial is written for those who have working knowledge of PSPX2 (any version will do).
This tutorial was written by me on August 22, 2016. Please do not copy or paste on any other forum, website or blog provide link back to tut only. Please do not claim as your own. This tutorial is copyrighted to me. Any resemblance to any other tutorial is purely coincidental.
Ok - let's start and remember to save often.
Open up a 750 x 650 blank canvas (we can resize it later)
Select Frame Element 6 - resize by 75%
Paste and position in the center of the canvas
Select your magic wand tool and select the center of the frame (Add (Shift), RGB Value, Tolerance 25, Contiguous checked, Feather 0)
Selections, Modify, Expand by 5
Paste paper 3
Select invert, delete, select none
Move paper layer below frame layer
Select Moon Element - resize by 20%
Paste and position on the top left
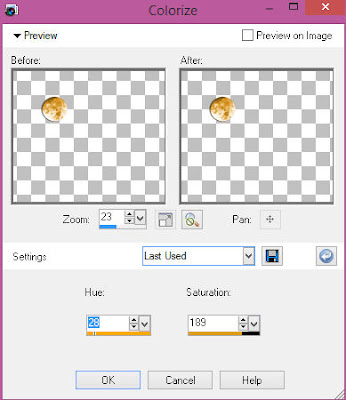
Adjust, Hue and Saturation, Colorize with the following settings:
Select Ruins Element - resize by 75%
Paste and position on the right side of the frame
Select Light 1 Element - resize by 45%
Paste and position on top of the ruins element
Select Bats Element - resize by 30%
Paste and position on the top right
Select Tree Element - resize by 75%
Paste and position on the left side
Paste tube of choice where desired
Apply Lokas 3D Shadow at default settings
Select Candes Element - resize by 25%
Paste and position on the bottom right
Select Jack Element - resize by 40%
Paste and position on the left side
Select WeedsNThings Element - resize by 45%
Paste and position on the bottom left
Select Scarecrow Element - resize by 25%
Paste and paste on the bottom left
Select BrokenPicture Element - resize by 22%
Image Free Rotate Right by 15% and paste on the bottom left
Select Pumpkin2 Element - resize by 25%
Paste and position on the bottom left
Select Leaf Element - resize by 25%
Paste and position on the bottom left
Select Skulls Element - resize by 40%
Paste and position on the bottom
Select Flower 2 Element - resize by 20%
Paste and position on the bottom
Select Raven Element - resize by 20%
Paste and position on the top where desired
Paste paper 9 on canvas
Apply Mask 14 or mask of choice
Merge group and move to the bottom layer
Add any dropshadows you like
Sharpen any elements as needed
Crop and resize as desired
Add copyright info, license number and name
You're done! Thanks for trying my tutorial!

Labels:Gothic Inspirations | 0
comments
Sunday, August 21, 2016
DRAGONFIRE

Supplies needed:
I am using the stunning artwork from Danny Lee for this tutorial which you can find here
Scrapkit: I am using a stunning kit from Toxic Desirez called "Dragon on Fire" which you can get by going here
Mask 176 from Aqua which you can find here
Mask 18 from Horseplay's Pasture which you can find here
Plugins: Lokas 3D Shadow
----------------------------
This tutorial is written for those who have working knowledge of PSPX2 (any version will do).
This tutorial was written by me on August 21, 2016. Please do not copy or paste on any other forum, website or blog provide link back to tut only. Please do not claim as your own. This tutorial is copyrighted to me. Any resemblance to any other tutorial is purely coincidental.
Ok - let's start and remember to save often.
Open up a 750 x 650 blank canvas (we can resize it later)
Select Frame Element 1 - resize by 75%
Paste and position in the center of the canvas
Select your magic wand tool and select the center of the frame (Add (Shift), RGB Value, Tolerance 25, Contiguous checked, Feather 0)
Selections, Modify, Expand by 5
Paste paper 10
Select invert, delete, select none
Move paper layer below frame layer
Select Bow 2 Element - resize by 30%
Paste and position on the top center of the frame
Select Wordart Element - resize by 30%
Paste and position on the top right
Apply Gradient Glow on fat default setting (Glow Width 3)
Select Plant Element - resize by 30%
Paste and position on the bottom left
Select Flame Element - resize by 50%
Paste and position on the bottom left
Select Game Console Element - resize by 20%
Paste and position on the bottom left
Select Candy Element - resize by 30%
Paste and position on the bottom right
Select Cuppy Element - resize by 20%
Paste and position on the bottom right
Select Flower 2 Element - resize by 25%
Paste and position on the bottom right
Select Rocks Element - resize by 30%
Paste and position on the bottom right
Paste tube of choice where desired
Apply Lokas 3D Shadow at default settings
Select Butterfly Element - resize by 30%
Paste and position on the right side
Select Ball Element - resize by 15%
Paste and position on the bottom right
Select Toy 1 Element - resize by 20%
Paste and position on the bottom right
Select Glasses Element - resize by 15%
Paste and position on the bottom right
Select Pocket Gamer Element - resize by 18%
Image Free Rotate Left by 15% and paste on the bottom left
Select Toy 2 Element - resize by 30%
Paste and position on the bottom left
Select Skull 2 Element - resize by 25%
Paste and position on the bottom left
Select Eyeball Element - resize by 15%
Paste and position on bottom below tube layer
Select Turtle Shell Element - resize by 20%
Paste and position on the bottom below tube layer
Select Flower 1 Element - resize by 25%
Paste and position on the bottom below tube layer
Paste paper 6 on canvas
Apply AR Mask 176
Merge group and move to the bottom layer
Paste paper 11 on canvas
Apply Horseplay's Mask 18
Merge group and move to the bottom layer
Add any dropshadows you like
Sharpen any elements as needed
Crop and resize as desired
Add copyright info, license number and name
You're done! Thanks for trying my tutorial!
Labels:Scraps N Company | 0
comments
Saturday, August 20, 2016
MY DENIM
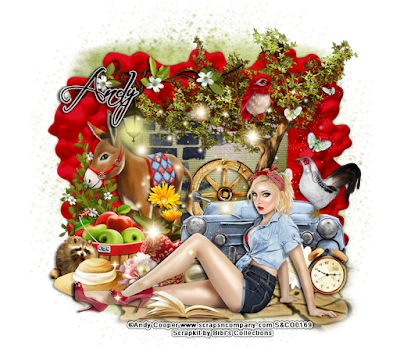
Supplies needed:
I am using the stunning artwork from Andy Cooper for this tutorial which you can find here
Scrapkit: I am using a stunning kit from Bibi's Collections called "My Denim" which you can get by going here
Plugins: Lokas 3D Shadow
----------------------------
This tutorial is written for those who have working knowledge of PSPX2 (any version will do).
This tutorial was written by me on August 20, 2016. Please do not copy or paste on any other forum, website or blog provide link back to tut only. Please do not claim as your own. This tutorial is copyrighted to me. Any resemblance to any other tutorial is purely coincidental.
Ok - let's start and remember to save often.
Open up a 750 x 650 blank canvas (we can resize it later)
Select Element 20 - resize by 65%
Paste and position in the center of the canvas
Select Frame Element 102 - paste and position in the center of the canvas
Select your magic wand tool and select the center of the frame (Add (Shift), RGB Value, Tolerance 25, Contiguous checked, Feather 0)
Selections, Modify, Expand by 5
Paste paper 8
Select invert, delete, select none
Move paper layer below frame layer
Select Element 22 - resize by 25%
Paste and position on the left side of the paper below frame layer
Select Element 109 - resize by 40%
Paste and position on the top right
Select Element 10 - resize by 40%
Paste and position on the top left
Select Element 70 - resize by 20%
Paste and position on the top right
Select Element 87 - resize by 85%
Paste and position on the bottom
Select Element 37 - resize by 30%
Paste and position on the bottom right
Select Element 113 - resize by 20%
Paste and position on the bottom right
Select Element 49 - resize by 15%
Paste and position on the bottom right
Select Element 8 - resize by 25%
Paste and position on the bottom left
Select Element 62 - resize by 25%
Paste and position on the bottom left
Select Element 66 - resize by 25%
Paste and position on the bottom left
Paste tube of choice where desired
Apply Lokas 3D Shadow at default settings
Select Element 15 - resize by 30%
Paste and position in the center below car element
Select Element 57 - resize by 20%
Paste and position on the bottom left
Select Element 92 - resize by 20%
Paste and position on the bottom left
Select Element 34 - resize by 25%
Paste and position on the bottom left
Select Element 69 - resize by 20%
Paste and paste on the bottom below tube element
Select Element 4 - resize by 30%
Image Free Rotate Right by 15% and paste on the bottom below tube layer
Select Element 31 - resize by 18%
Paste and position on the bottom below the tube layer
Select Element 26 - resize by 30%
Paste and position on the bottom
Select Element 21 - resize by 75%
Paste and position on the canvas where desired
Select Element 1 - resize by 20%
Paste and position on the right side
Add any dropshadows you like
Sharpen any elements as needed
Crop and resize as desired
Add copyright info, license number and name
You're done! Thanks for trying my tutorial!

Labels:Bibi's Collections | 0
comments
Friday, August 19, 2016
PERLA
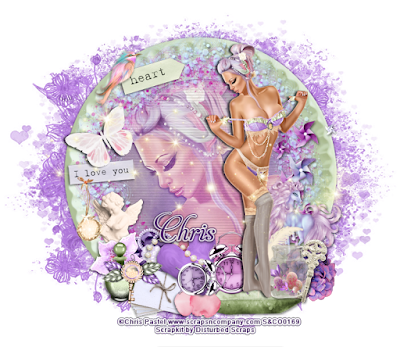
Supplies needed:
I am using the stunning artwork from Chris Pastel for this tutorial which you can find here
Scrapkit: I am using a stunning kit from Disturbed Scraps called "Piece of my Heart" which you can get by going here
Floral Mask 2 from Dee which you can find here
Plugins: Lokas 3D Shadow
----------------------------
This tutorial is written for those who have working knowledge of PSPX2 (any version will do).
This tutorial was written by me on August 19, 2016. Please do not copy or paste on any other forum, website or blog provide link back to tut only. Please do not claim as your own. This tutorial is copyrighted to me. Any resemblance to any other tutorial is purely coincidental.
Ok - let's start and remember to save often.
Open up a 750 x 650 blank canvas (we can resize it later)
Select Frame Element 77 - resize by 85%
Paste and position in the center of the canvas
Select your magic wand tool and select the center of the frame (Add (Shift), RGB Value, Tolerance 25, Contiguous checked, Feather 0)
Selections, Modify, Expand by 5
Paste paper 12
Select invert, delete
Paste close-up tube on paper layer and delete
Select none
Drop close-up to Overlay
Apply dropshadow and merge down on paper layer
Effect, Texture Effects, Blinds (Width 3, Opactity 15, Horizontal and Light from left/top checked)
Move paper layer below frame layer
Select Element 75 - resize by 90%
Paste and position in the center of the canvas
Select Element 62 - resize by 25%
Paste and position on the top left
Select Element 39 - resize by 25%
Paste and position on the top left
Select Element 64 - resize by 25%
Paste and position on the left side
Select Element 43 - resize by 30%
Paste and position on the top left
Select Element 72 - resize by 40%
Paste and position on the right side
Select Element 65 - resize by 30%
Paste and position on the bottom right
Select Element 4 - resize by 25%
Paste and position on the bottom right
Select Element 23 - resize by 40%
Paste and position on the bottom right
Select Element 14 - resize by 25%
Paste and position on the bottom right
Paste tube of choice where desired
Apply Lokas 3D Shadow at default settings
Select Element 15 - resize by 30%
Image Free Rotate Right by 15% and paste on the bottom right
Select Element 46 - resize by 25%
Paste and position on the bottom right
Select Element 27 - resize by 30%
Paste and position on the bottom
Select Element 17 - resize by 30%
Paste and position on the bottom
Select Element 21 - resize by 25%
Paste and paste on the bottom left
Select Element 41 - resize by 30%
Paste and position on the bottom left
Select Element 5 - resize by 25%
Paste and position on the bottom left
Select Element 30 - resize by 25%
Paste and position on the bottom left
Select Element 20 - resize by 25%
Paste and position on the bottom left
Select Element 68 - resize by 25%
Paste and position on the bottom left
Select Element 18 - resize by 25%
Paste and position on the bottom left
Select Element 6 - resize by 20%
Paste and position on the bottom
Select Element 81
Paste and position on the canvas where desired
Paste paper 14 on the canvas
Apply Mask 2 or mask of choice
Merge group and move to the bottom layer
Add any dropshadows you like
Sharpen any elements as needed
Crop and resize as desired
Add copyright info, license number and name
You're done! Thanks for trying my tutorial!

Labels:Scraps N Company | 0
comments
Sunday, August 14, 2016
VICTORIAN TIMES
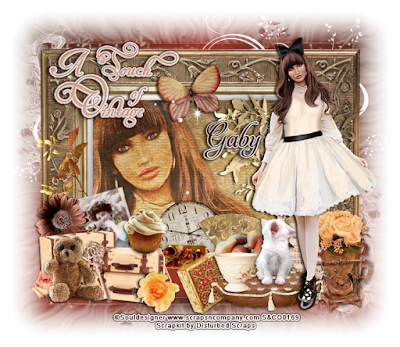
Supplies needed:
I am using the stunning artwork from Souldesigner for this tutorial which you can find here
Scrapkit: I am using a stunning kit from Disturbed Scraps called "Victorian Times" which you can get by going here
Mask 43 from Moonbeams and Spiderwebs which you can find here
Plugins: Lokas 3D Shadow
----------------------------
This tutorial is written for those who have working knowledge of PSPX2 (any version will do).
This tutorial was written by me on August 14, 2016. Please do not copy or paste on any other forum, website or blog provide link back to tut only. Please do not claim as your own. This tutorial is copyrighted to me. Any resemblance to any other tutorial is purely coincidental.
Ok - let's start and remember to save often.
Open up a 750 x 650 blank canvas (we can resize it later)
Select Frame Element 72 - Paste and position in the center of the canvas
Select your magic wand tool and select the center of the frame (Add (Shift), RGB Value, Tolerance 25, Contiguous checked, Feather 0)
Selections, Modify, Expand by 5
Paste paper 13
Select invert, delete
Paste close-up tube on paper layer and delete
Select none
Drop close-up to Hard Light and drop opacity to 70%
Apply dropshadow and merge down on paper layer
Effect, Texture Effects, Blinds (Width 3, Opactity 15, Horizontal and Light from left/top checked)
Move paper layer below frame layer
Select Element 70 - resize by 40%
Paste and position on the top left
Apply Eyecandy Gradient Glow on fat default settings (Glow Width 3)
Select Element 46 - resize by 30%
Image Free Rotate Left by 15% and paste on the top
Select Element 13 - resize by 45%
Paste and position on the right side
Select Element 11 - resize by 30%
Paste and position on the left side
Select Element 5 - resize by 35%
Paste and position on the bottom right
Select Element 21 - resize by 30%
Paste and position on the bottom right
Select Element 48 - resize by 45%
Paste and position on the bottom right
Select Element 53 - resize by 30%
Paste and position on the bottom right
Paste tube of choice where desired
Apply Lokas 3D Shadow at default settings
Select Element 33 - resize by 45%
Paste and position on the bottom left
Select Element 42 - resize by 25%
Paste and position on the bottom left
Select Element 9 - resize by 15%
Paste and position on the bottom left
Select Element 62 - resize by 25%
Paste and position on the bottom left
Select Element 19 - resize by 25%
Paste and paste on the bottom left
Select Element 69 - resize by 25%
Image Free Rotate Left by 15% and paste on the bottom left
Select Element 55 - resize by 20%
Paste and position on the bottom
Select Element 12 - resize by 20%
Paste and position on the bottom
Select Element 38 - resize by 30%
Paste and position on the bottom
Select Element 51 - resize by 25%
Paste and position on the bottom
Select Element 16 - resize by 25%
Paste and position on the bottom
Select Element 57 - resize by 25%
Paste and position on the bottom
Select Element 47 - resize by 30%
Paste and position on the bottom
Select Element 63 - resize by 25%
Paste and position on the bottom
Select Element 76 - Paste and position on the canvas where desired
Add new raster layer and flood-fill with color of choice
Apply Mask 43 or mask of choice
Merge group and move to the bottom layer
Add any dropshadows you like
Sharpen any elements as needed
Crop and resize as desired
Add copyright info, license number and name
You're done! Thanks for trying my tutorial!

Labels:Scraps N Company | 0
comments
STEAMPUNK CHOCOLAT
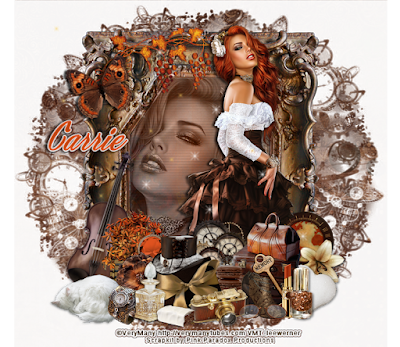
Supplies needed:
I am using the stunning artwork from Verymany for this tutorial which you can find here
Scrapkit: I am using a stunning kit from Pink Paradox Productions called "Steampunk Chocolat" which you can get by going here
Steampunk Mask 330 Babs Bitzy Designz from which you can find here
Plugins: Lokas 3D Shadow
----------------------------
This tutorial is written for those who have working knowledge of PSPX2 (any version will do).
This tutorial was written by me on August 14, 2016. Please do not copy or paste on any other forum, website or blog provide link back to tut only. Please do not claim as your own. This tutorial is copyrighted to me. Any resemblance to any other tutorial is purely coincidental.
Ok - let's start and remember to save often.
Open up a 750 x 650 blank canvas (we can resize it later)
Select Frame Element 9 - resize by 55%
Paste and position in the center of the canvas
Select your magic wand tool and select the center of the frame (Add (Shift), RGB Value, Tolerance 25, Contiguous checked, Feather 0)
Selections, Modify, Expand by 5
Paste paper 41
Select invert, delete
Paste close-up tube on paper layer and delete
Select none
Drop close-up to Luminance (Legacy) and drop opacity to 65%
Apply dropshadow and merge down on paper layer
Effect, Texture Effects, Blinds (Width 3, Opactity 15, Horizontal and Light from left/top checked)
Move paper layer below frame layer
Select Element 154 - resize by 40%
Paste and position on the top left
Select Element 2 - resize by 25%
Image Free Rotate Left by 15% and paste on the top left
Select Element 45 - resize by 40%
Image Free Rotate Right by 15% and paste on the bottom left
Select Element 82 - resize by 40%
Paste and position on the bottom left
Select Element 4 - resize by 20%
Paste and position on the bottom left
Select Element 123 - resize by 15%
Paste and position on the bottom left
Select Element 35 - resize by 15%
Paste and position on the bottom left
Paste tube of choice where desired
Apply Lokas 3D Shadow at default settings
Select Element 97 - resize by 15%
Paste and position on the bottom right
Select Element 129 - resize by 15%
Paste and position on the bottom right
Select Element 19 - resize by 20%
Image Free Rotate Right by 15% and paste on the bottom right
Select Element 41 - resize by 25%
Paste and position on the bottom right
Select Element 28 - resize by 20%
Paste and paste on the bottom right
Select Element 26 - resize by 20%
Paste and position on the bottom right
Select Element 59 - resize by 20%
Paste and position on the bottom right
Select Element 8 - resize by 15%
Paste and position on the bottom right
Select Element 98 - resize by 12%
Paste and position on the bottom
Select Element 22 - resize by 15%
Paste and position on the bottom
Select Element 43 - resize by 20%
Image Free Rotate Left by 15% and paste on the bottom
Select Element 9 - resize by 15%
Paste and position on the bottom
Select Element 33 - resize by 20%
Paste and position on the bottom
Select Element 20 - resize by 15%
Paste and position on the bottom
Select Element 34 - resize by 20%
Paste and position on the bottom
Select Element 159 - resize by 50%
Paste and position on the canvas where desired
Paste paper 39 on canvas
Apply Mask 330 or mask of choice
Merge group and move to the bottom layer
Add any dropshadows you like
Sharpen any elements as needed
Crop and resize as desired
Add copyright info, license number and name
You're done! Thanks for trying my tutorial!

Labels:Pink Paradox Productions | 0
comments
Saturday, August 13, 2016
ROJO
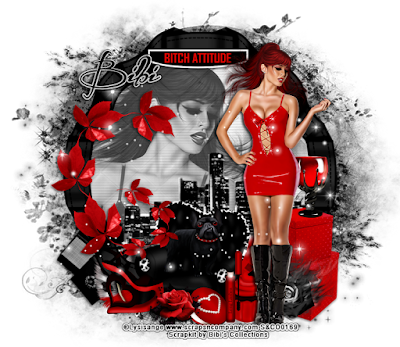
Supplies needed:
I am using the stunning artwork from Lysisange for this tutorial which you can find here
Scrapkit: I am using a stunning kit from Bibi's Collections called "Rojo" which you can get by going here
Mask 20 from Moonbeams and Spiderwebs which you can find here
Plugins: Lokas 3D Shadow
----------------------------
This tutorial is written for those who have working knowledge of PSPX2 (any version will do).
This tutorial was written by me on August 12, 2016. Please do not copy or paste on any other forum, website or blog provide link back to tut only. Please do not claim as your own. This tutorial is copyrighted to me. Any resemblance to any other tutorial is purely coincidental.
Ok - let's start and remember to save often.
Open up a 750 x 650 blank canvas (we can resize it later)
Select Frame Element 67 - resize by 75%
Paste and position in the center of the canvas
Select your magic wand tool and select the center of the frame (Add (Shift), RGB Value, Tolerance 25, Contiguous checked, Feather 0)
Selections, Modify, Expand by 5
Paste paper 3
Select invert, delete
Paste close-up tube on paper layer and delete
Select none
Drop close-up to Luminance (Legacy) and drop opacity to 75%
Apply dropshadow and merge down on paper layer
Effect, Texture Effects, Blinds (Width 3, Opactity 15, Horizontal and Light from left/top checked)
Move paper layer below frame layer
Select Element 39 - resize by 50%
Paste and position on the left side
Select Element 6 - resize by 40%
Paste and position on the top center of the frame
Select Element 42 - resize by 55%
Paste and position on towards the bottom of the frame
Select Element 59 - resize by 30%
Paste and position on the bottom right
Select Element 33 - resize by 20%
Paste and position on the right side
Select Element 15 - resize by 15%
Paste and position on the bottom right
Select Element 90 - resize by 25%
Paste and position on the bottom right
Paste tube of choice where desired
Apply Lokas 3D Shadow at default settings
Select Element 13 - resize by 40%
Paste and position on the bottom
Select Element 27 - resize by 30%
Image Free Rotate Left by 45% and paste on the bottom left
Select Element 64 - resize by 20%
Paste and position on the bottom left
Select Element 49 - resize by 30%
Paste and position on the bottom left
Select Element 34 - resize by 25%
Paste and position on the bottom
Select Element 2 - resize by 20%
Paste and paste on the bottom
Select Element 3 - resize by 12%
Paste and position on the bottom
Select Element 32 - resize by 20%
Paste and position on the bottom
Select Element 36 - resize by 80%
Paste and position on the canvas where desired
Paste paper 4 on canvas
Apply Mask 20 or mask of choice
Merge group and move to the bottom layer
Add any dropshadows you like
Sharpen any elements as needed
Crop and resize as desired
Add copyright info, license number and name
You're done! Thanks for trying my tutorial!

Labels:Bibi's Collections | 0
comments
Sunday, August 7, 2016
FELINE
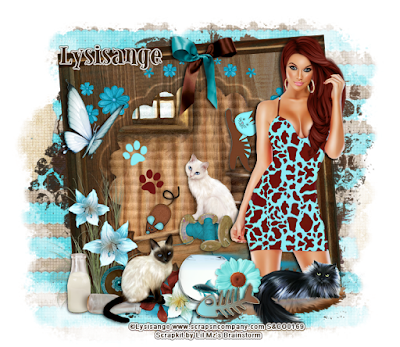
Supplies needed:
I am using the stunning artwork from Lysisange for this tutorial which you can find here
Scrapkit: I am using a stunning kit from Lil Mz's Brainstorm called "Feline" which you can get by going here
Mask 22 from Becky which you can find here
Plugins: Lokas 3D Shadow
----------------------------
This tutorial is written for those who have working knowledge of PSPX2 (any version will do).
This tutorial was written by me on August 7, 2016. Please do not copy or paste on any other forum, website or blog provide link back to tut only. Please do not claim as your own. This tutorial is copyrighted to me. Any resemblance to any other tutorial is purely coincidental.
Ok - let's start and remember to save often.
Open up a 750 x 650 blank canvas (we can resize it later)
Select Element 21 - resize by 110%
Paste and position in the center of the canvas
Select Frame Element 28 - Paste and position in the center of the canvas
Select your magic wand tool and select the center of the frame (Add (Shift), RGB Value, Tolerance 25, Contiguous checked, Feather 0)
Selections, Modify, Expand by 5
Paste paper 19
Select invert, delete, select none
Move paper layer below frame layer
Select Element 30 - resize by 35%
Paste and position on the top left above frame
Image duplicate and mirror
Select Element 73 - resize by 25%
Paste and position on the top center of the frame
Select Element 49 - resize by 25%
Paste and position on the left
Select Element 43 - resize by 45%
Paste and position on the bottom left
Select Element 16 - resize by 45%
Paste and position on the bottom right
Select Element 96 - resize by 20%
Paste and position on the top right
Paste tube of choice where desired
Apply Lokas 3D Shadow at default settings
Select Element 11 - resize by 30%
Paste and position on the bottom right
Select Element 8 - resize by 30%
Paste and position in the center where desired
Select Element 92 - resize by 30%
Paste and position on the left side
Select Element 97 - resize by 15%
Paste and position on the left side
Select Element 32 - resize by 25%
Paste and position on the bottom
Select Element 83 - resize by 30%
Paste and paste on the bottom left
Select Element 61 - resize by 15%
Paste and position on the bottom left
Select Element 76 - resize by 20%
Paste and position on the bottom
Select Element 10 - resize by 30%
Paste and position on the bottom
Select Element 46 - resize by 15%
Paste and position on the bottom
Select Element 90 - resize by 20%
Paste and position on the bottom
Select Element 70 - resize by 15%
Paste and position on the bottom
Select Element 101 - resize by 20%
Image Free Rotate Left by 15% and paste and position on the bottom
Paste paper 13 on canvas
Apply Mask 22 or mask of choice
Merge group and move to the bottom layer
Add any dropshadows you like
Sharpen any elements as needed
Crop and resize as desired
Add copyright info, license number and name
You're done! Thanks for trying my tutorial!

Labels:Scraps N Company | 0
comments
SEA PEARL
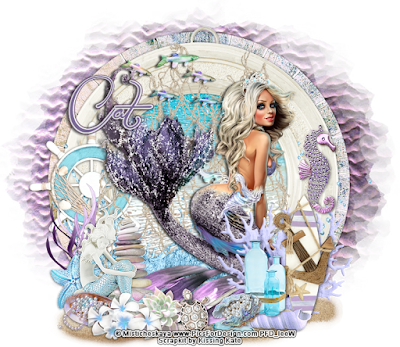
Supplies needed:
I am using the stunning artwork from Misticheskaya for this tutorial which you can find here
Scrapkit: I am using a stunning kit from Kissing Kate called "Sea Pearl" which you can get by going here
Mask 9 from Horseplay's Pasture which you can find here
Plugins: Lokas 3D Shadow
----------------------------
This tutorial is written for those who have working knowledge of PSPX2 (any version will do).
This tutorial was written by me on August 7, 2016. Please do not copy or paste on any other forum, website or blog provide link back to tut only. Please do not claim as your own. This tutorial is copyrighted to me. Any resemblance to any other tutorial is purely coincidental.
Ok - let's start and remember to save often.
Open up a 750 x 650 blank canvas (we can resize it later)
Select Frame Element 1 - resize by 80%
Paste and position in the center of the canvas
Select Frame Element 3 - resize by 75%
Paste and position in the center of the canvas
Select your magic wand tool and select the center of the frame (Add (Shift), RGB Value, Tolerance 25, Contiguous checked, Feather 0)
Selections, Modify, Expand by 5
Paste paper 14
Select invert, delete, select none
Move paper layer below frame layer
Select Element 46 - resize by 65%
Paste and position on the top of the frame where desired
Select Element 21 - resize by 90%
Paste and position on the bottom
Select Element 25 - resize by 80%
Paste and position on the bottom
Select Element 90A - resize by 80%
Paste and position on the bottom
Select Element 84 - resize by 45%
Paste and position on the left side
Select Element 111 - resize by 30%
Paste and position on the right side
Paste tube of choice where desired
Apply Lokas 3D Shadow at default settings
Select Element 6B - resize by 50%
Paste and position on the bottom right
Select Element 32 - resize by 40%
Paste and position on the bottom right
Select Element 8 - resize by 25%
Paste and position on the bottom right
Select Element 45 - resize by 30%
Paste and position on the bottom right
Select Element 96 - resize by 20%
Paste and position on the bottom
Select Element 15A - resize by 45%
Paste and paste on the bottom left
Select Element 31 - resize by 20%
Paste and position on the bottom left
Select Element 14 - resize by 40%
Paste and position on the bottom left
Select Element 2 - resize by 25%
Paste and position on the bottom left
Select Element 12 - resize by 20%
Paste and position on the bottom left
Select Element 13 - resize by 25%
Paste and position on the bottom
Select Element 37 - resize by 20%
Paste and position on the bottom
Select Element 101 - resize by 20%
Paste and position on the bottom
Select Element 95 - resize by 20%
Paste and position on the bottom
Select Element 63 - resize by 30%
Paste and position on the top where desired
Paste paper 10 on canvas
Apply Mask 9 or mask of choice
Merge group and move to the bottom layer
Add any dropshadows you like
Sharpen any elements as needed
Crop and resize as desired
Add copyright info, license number and name
You're done! Thanks for trying my tutorial!

Labels:Kissing Kate | 0
comments
Saturday, August 6, 2016
FAIRY SPARKLES
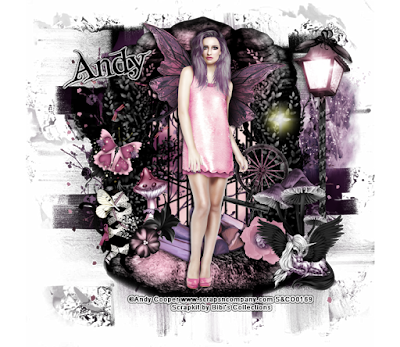
Supplies needed:
I am using the stunning artwork from Andy Cooper for this tutorial which you can find here
Scrapkit: I am using a stunning kit from Bibi's Collections called "Fairy Sparkles" which you can get by going here
Plugins: Lokas 3D Shadow
----------------------------
This tutorial is written for those who have working knowledge of PSPX2 (any version will do).
This tutorial was written by me on August 6, 2016. Please do not copy or paste on any other forum, website or blog provide link back to tut only. Please do not claim as your own. This tutorial is copyrighted to me. Any resemblance to any other tutorial is purely coincidental.
Ok - let's start and remember to save often.
Open up a 750 x 650 blank canvas (we can resize it later)
Select Element 2 - resize by 55%
Paste and position in the center of the canvas
Select Element 8 - resize by 45%
Paste and position in the center of the canvas
Select Element 6 - resize by 75%
Paste and position in the center of the canvas
Select Element 40 - resize by 40%
Paste and position on the top right
Select Element 25 - resize by 65%
Paste and position on the right side
Select Element 37 - resize by 45%
Paste and position on the bottom
Select Element 22 - resize by 35%
Paste and position on the bottom right
Paste tube of choice where desired
Apply Lokas 3D Shadow at default settings
Select Element 14 - resize by 25%
Paste and position on the bottom right
Select Element 3 - resize by 20%
Paste and position on the bottom right
Select Element 7 - resize by 22%
Paste and position on the bottom right
Select Element 11 - resize by 30%
Paste and position on the top left
Select Element 33 - resize by 15%
Paste and position on the left side
Select Element 5 - resize by 30%
Paste and paste on the bottom left
Select Element 50 - resize by 40%
Paste and position on the bottom left
Select Element 24 - resize by 30%
Paste and position on the bottom left
Select Element 10 - resize by 30%
Paste and position on the right side
Add any dropshadows you like
Sharpen any elements as needed
Crop and resize as desired
Add copyright info, license number and name
You're done! Thanks for trying my tutorial!

Labels:Bibi's Collections | 0
comments
Subscribe to:
Posts
(Atom)

