I CT For


Saturday, October 27, 2012
EMO WINTER

Supplies needed:
I am using the amazing art from Alex Prihodko for this tutorial, which you can find here
Scrapkit: I am using a awesome kit from Amy Marie called "Emo Winter" which you can get by going here
Template 94 from Millie which can be found here
Designs by Vaybs Mask 133 here
Plugins used: Alien Skin Eyecandy 5 - Textures, Alien Skin Eyecandy 5 - Nature (Snow Drift), Eyecandy 4000 - Glass, Eyecandy 4000 - Gradient Glow, Xero-Radiance, Xero-Bad Dream, Lokas 3D Shadow
----------------------------
This tutorial is written for those who have working knowledge of PSPX2 (any version will do).
This tutorial was written by me on October 27 2012. Please do not copy or paste on any other forum, website or blog provide link back to tut only. Please do not claim as your own. This tutorial is copyrighted to me. Any resemblance to any other tutorial is purely coincidental.
Ok - let's start and remember to save often.
Open the template and using your shortcut keys on your keyboard (SHIFT+D) duplicate the template as a new image. Close the original and delete the copywrite layer.
Image, Adjust Canvas Size 750 x 700 (You can resize later)
Select Wordart layer 9
Select all, float, defloat
Add new raster layer and flood-fill with color or gradient of choice
Select none
Apply Eyecandy Glass at default settings
Apply Eyecandy - Gradient Glow on fat default settings
Apply Eye Candy 5 - Snow Drift at the following settings:

Delete/Hide original wordart layer
Select Circle 8 layer
Select all, float, defloat
Add new raster layer and flood-fille with gradient of choice (Radial style, Angle 45, Repeat 5)
Paste close-up tube of choice on top of gradient and delete
Change closeup to Luminance (Legacy)
Apply Xero Bad Dream at default settings
Drop the opacity on close-ups down to about 80%
Apply dropshadow and merge down on top of gradient
Apply Effect, Texture Effects, Blinds (Width 2, Opactity 15, Horizontal and Light from left/top checked)
Hide/Delete original circle layer
Select Frame4 element - resize by 90%
Paste and position on top of circle layer
Apply Eye Candy 5 - Snow Drift with the following Light Dusting default setting:

Select Rectangle 6 layer
Select all, float, defloat
Add new raster layer and flood-fill with color of choice
Select none
Apply Eye Candy 4 - Textures with the following Animal Fur settings:


Delete/Hide original rectangle layer
Select Square 3 layer
Select all, float, defloat
Add new raster layer and flood fill with gradient of choice (Linear style, Angle 45, Repeat 2)
Select none
Delete/Hide original square layer
Select Square 4 layer
Repeat above steps
Select Icy element - resize by 90%
Paste and position on top of square layers
Select Half Circle 5 layer
Select all, float, defloat
Paste paper pp024
Select invert, delete, select none
Delete/Hide original half circle layer
Select Rectangle 2 layer
Select all, float, defloat
Add new raster layer and flood-fill with color of choice
Delete/Hide original rectangle layer
Select Square 1 layer
Select all, float, defloat
Paste paper pp013
Select invert, delete, select none
Delete/Hide original square layer
Copy and paste tube of choice and position where desired
Apply Xero Radiance at setting of choice
Apply Lokas 3D Shadow at default settings
Select New raster layer and flood fill with color or gradient of choice
Move layer to the bottom of the template
Apply Mask 133
Merge group and move to the bottom
Select Snowbacking element and paste on top of mask layer
Add any additional elements you like.
Add any dropshadows you like
Crop and resize as desired
Add copyright info, license number and name
You're done! Thanks for trying my tutorial!
Wednesday, October 24, 2012
CUTE BUT BAD

Supplies needed:
I am using the amazing art from Skyscraps Pinup for this tutorial, which you can find here
Scrapkit: I am using an awesome kit from Broken Sky Dezine called "I'm Not Broken" which you can get by going here
Template 334 from Divine Intentionz which can be found here
Mask 160 from Insatiable Dreams here
Plugins used: Penta - Jeans, Xero-Radiance, Xero-Bad Dream, Lokas 3D Shadow
----------------------------
This tutorial is written for those who have working knowledge of PSPX2 (any version will do).
This tutorial was written by me on October 24, 2012. Please do not copy or paste on any other forum, website or blog provide link back to tut only. Please do not claim as your own. This tutorial is copyrighted to me. Any resemblance to any other tutorial is purely coincidental.
Ok - let's start and remember to save often.
Open the template and using your shortcut keys on your keyboard (SHIFT+D) duplicate the template as a new image. Close the original and delete the copywrite layer.
Image, Adjust Canvas Size 850 x 650 (You can resize later)
Select Circle left 2 layer
Select all, float, and defloat
Paste paper BSD5
Select invert, delete
Paste close-up tube of choice on top of paper and delete
Select none
Change closeup to Hard Light
Apply Xero Bad Dream at default settings
Drop the opacity on close-ups down to about 70%
Apply dropshadow and merge down on top of paper
Delete/Hide original circle layer
Select Circle Right 2 layer
Repeat above steps/settings
Select Glittered circle left 2 layer
Select all, float, defloat
Add new raster layer and flood-fill with color of choice
Select none
Adjust, Add/Remove Noise, Add Noise (Uniform checked, Noise 75%, Monochrome checked)
Delete/Hide original circle layer
Select Glittered Circle Right 2 layer
Repeat above steps
Select Circle Left layer
Select all, float, defloat
Add new raster layer and flood-fill with color of choice
Select none
Delete/Hide original circle layer
Select Circle Right layer
Repeat above steps
Select Frame 1 layer
Select all, float, defloat
Add new raster layer and flood-fill with color of choice
Select none
Apply Penta - Jeans with the following settings:

Delete/Hide original frame layer
Select Frame 2 layer
Repeat above steps/settings
Select Frame 1 background layer
Select all, float, defloat
Add new raster layer and flood fill with gradient of choice (Linear style, Angle 45, Repeat 2)
Paste close-up tube of choice on top of gradient and delete
Select none
Change closeup to Luminence (Legacy)
Apply Xero Bad Dream at default settings
Drop the opacity on close-up down to about 55%
Apply dropshadow and merge down on top of paper
Apply Effect, Texture Effects, Blinds (Width 2, Opacity 15, Horizontal and Light from left/top checked)
Delete/Hide original square back layer
Select Frame 2 background layer
Repeat above steps/settings
Select Med circle layer
Select all, float, defloat
Paste paper BSD11
Select invert, delete, select none
Delete/Hide original circle layer
Select Circle 2 layer
Select all, float, defloat
Add new raster layer and flood-fill with color of choice
Select none
Apply Effects, Texture effects, Weave (Gap size 3, Width 7, Opacity 5, Fill gaps checked, Change Gap Color to color of choice)
Hide/Delete original circle layer
Select Glittered Circle 1 layer
Select all, float, defloat
Add new raster layer and flood-fill with color of choice
Adjust, Add/Remove Noise, Add Noise (Uniform checked, Noise 75%, Monochrome checked)
Delete/Hide original circle layer
Select BSD47 element - resize by 90%
Paste and reposition below circle layers in the center of canvas
Select Rectangle 1 layer
Select all, float, defloat
Paste paper BSD6
Select invert, delete, select none
Delete/Hide original rectangle layer
Select Rectangle 2 layer
Repeat above steps
Select Wordart by Missy layer
Move and reposition where desired
Add new raster layer and flood-fill with color of choice
Reselect wordart layer
Select all, float, defloat
Go back and select color layer you just filled
Select invert, delete, select none
Delete/Hide original wordart layer
Select dotted lines layer
Repeat above steps
Select bottom pixel words layer and delete like I did or repeat above steps if you want to keep it
Copy and paste tube of choice and position where desired
Apply Xero Radiance at setting of choice
Apply Lokas 3D Shadow at default settings
Select BSD28 element - resize by 95%
Paste and move to the bottom layer
Select New raster layer and flood fill with color or gradient of choice
Move layer to the bottom of the template
Apply Mask 160
Merge group and move to the bottom
Add any additional elements you like.
Add any dropshadows you like
Crop and resize as desired
Add copyright info, license number and name
You're done! Thanks for trying my tutorial!
Tuesday, October 23, 2012
AUTUMN PRINCESS

Supplies needed:
I am using the amazing art from Unholy Vault Designs. Unfortunately, you can no longer purchase this artwork.
Scrapkit: I am using a kit from Sleek N Sassy Designs called "Autumn Fantasy" which you can get by going here
Template 50 from Millie which can be found here
Mask 132 from Aqua here
Plugins used: Eyecandy 4000 - Glass, Xero-Radiance, Xero-Bad Dream, Lokas 3D Shadow
----------------------------
This tutorial is written for those who have working knowledge of PSPX2 (any version will do).
This tutorial was written by me on October 23, 2012. Please do not copy or paste on any other forum, website or blog provide link back to tut only. Please do not claim as your own. This tutorial is copyrighted to me. Any resemblance to any other tutorial is purely coincidental.
Ok - let's start and remember to save often.
Open the template and using your shortcut keys on your keyboard (SHIFT+D) duplicate the template as a new image. Close the original and delete the copywrite layer.
Select Autumn Princess Wordart Raster 7
Select all, float, defloat
Add new raster layer and flood-fill with color of choice
Select none
Apply Eyecandy Glass at default settings
Delete/Hide original wordart layer
Select Rectangle 6 layer
Select all, float, defloat
Add new raster layer and flood-fill with color of choice
Select none
Effect, Texture Effect, Fine Leather with the following settings:

Delete/Hide original rectangle layer
Select Square Raster 5 layer
Select all, float, defloat
Selections, Modify, Contract by 5
Add new raster layer and flood-fill with gradient of choice (Linear style, Angle 45, Repeat 2)
Paste close-up tube of choice on top of gradient and delete
Change closeup to Luminence (Legacy)
Apply Xero Bad Dream at default settings
Drop the opacity on close-up down to about 75%
Apply dropshadow and merge down on top of gradient
Apply Effect, Texture Effects, Blinds (Width 2, Opactity 15, Horizontal and Light from left/top checked)
Select Square Raster 5 layer again
Select all, float, defloat
Add new raster layer and flood-fill with color of choice
Select none
Apply Eyecandy Glass at subtle hump default settings
Hide/Delete original square layer
Select Circle Raster 4 layer
Select all, float, defloat
Paste AF_Paper1
Select invert, delete, select none
Delete/Hide original circle layer
Select Square Raster 3 layer
Select all, float, defloat
Paste AF_Paper4
Select invert, delete, select none
Delete/Hide original square layer
Select Square 2 layer
Repeat above steps
Select Circle 1 layer
Select all, float, defloat
Paste AF_paper3
Select invert, delete, select none
Effects, Texture Effects, Texture with the following Wood grain settings:

Delete/Hide original circle layer
Copy and paste tube of choice and position where desired
Apply Xero Radiance at setting of choice
Apply Lokas 3D Shadow at default settings
Select AF_Element 4 - resize by 65%
Paste and reposition on the bottom and move to the bottom layer
Duplicate and flip
Select New raster layer and flood fill with color or gradient of choice
Move layer to the bottom of the template
Apply Mask 170
Merge group and move to the bottom
Add any additional elements you like.
Add any dropshadows you like
Crop and resize as desired
Add copyright info, license number and name
You're done! Thanks for trying my tutorial!
RAWKIN GOTH

Supplies needed:
I am using the amazing art from Angela Newman for this tutorial, which you can find here
Scrapkit: I am using an awesome kit from Scrappin Krazy Designs called "Rawkin Goth" which you can get by going here
Template 105 from Tamie which can be found here
Mask 170 from Insatiable Dreams here
Plugins used: Alien Skin Xenofex 2 - Burnt Edges, Eyecandy 4000 - Glass, Eyecandy 4000 - Gradient Glow, Xero-Radiance, Xero-Bad Dream, Lokas 3D Shadow
----------------------------
This tutorial is written for those who have working knowledge of PSPX2 (any version will do).
This tutorial was written by me on October 23, 2012. Please do not copy or paste on any other forum, website or blog provide link back to tut only. Please do not claim as your own. This tutorial is copyrighted to me. Any resemblance to any other tutorial is purely coincidental.
Ok - let's start and remember to save often.
Open the template and using your shortcut keys on your keyboard (SHIFT+D) duplicate the template as a new image. Close the original and delete the copywrite layer.
Select Wordart Raster 8
Select all, float, defloat
Add new raster layer and flood-fill with color of choice
Select none
Adjust, Add/Remove Noise, Add Noise (Uniform checked, Noise 60%, Monochrome checked)
Apply Eyecandy Gradient Glow on fat default settings (Glow width 3)
Delete/Hide original wordart layer
Select Copy of Wordart 8 and repeat above settings/steps
Select Frame Raster 9 layer
Select all, float, defloat
Add new raster layer and flood-fill with color of choice
Select none
Apply Eyecandy Glass at default settings
Delete/Hide original frame layer
Select Circle Raster 5 layer
Select all, float, defloat
Add new raster layer and flood-fill with gradient of choice (Linear style, Angle 45, Repeat 2)
Paste close-up tube of choice on top of gradient and delete
Change closeup to Hard Light
Apply Xero Bad Dream at default settings
Drop the opacity on close-up down to about 70%
Apply dropshadow and merge down on top of gradient
Apply Effect, Texture Effects, Blinds (Width 2, Opactity 15, Horizontal and Light from left/top checked)
Hide/Delete original circle layer
Select Square Raster 7 layer
Select all, float, defloat
Add new raster layer and flood-fill with color of choice
Select none
Apply Eyecandy Glass at default settings
Delete/Hide original square layer
Select Square Raster 2 layer
Select all, float, defloat
Paste paper p06
Select invert, delete, select none
Delete/Hide original square layer
Select Square Raster 3 layer
Select all, float, defloat
Paste paper p15
Select invert, delete, select none
Delete/Hide original square layer
Select Rectangle 10 layer
Select all, float, defloat
Paste paper p05
Select invert, delete, select none
Delete/Hide original rectangle layer
Select Circle Raster 4 layer
Select all, float, defloat
Paste paper p12
Select invert, delete, select none
Delete/Hide original circle layer
Select Circle Raster 6 layer
Select discoball element - resize by 95%
Paste and reposition on top of circle layer to the right
Select Rectangle Raster 11
Select all, float defloat
Paste paper p10
Select invert, delete, select none
Apply Xenofex 2 - Burnt Edges with the following settings:

Delete/Hide original rectangle layer
Select Cane element - Image mirror and resize by 75%
Paste and reposition on top of burnt rectangle layer to the top left
Copy and paste tube of choice and position where desired
Apply Xero Radiance at setting of choice
Apply Lokas 3D Shadow at default settings
Select New raster layer and flood fill with color or gradient of choice
Move layer to the bottom of the template
Apply Mask 170
Merge group and move to the bottom
Add any additional elements you like.
Add any dropshadows you like
Crop and resize as desired
Add copyright info, license number and name
You're done! Thanks for trying my tutorial!
PUMPKIN MOON CLUSTER FRAME

Sunday, October 21, 2012
SAVE THE TATA'S

Supplies needed:
I am using the amazing artwork from Ken Jeremiassen for this tutorial, which you can find here
Scrapkit: I am using an awesome freebie kit from Inzpired Creations called "Save The Tata's" which you can get by going on the Misfits blog here
Yezmask 015 here
Amperzand font here
Plugins used: Xero-Fritillary, Xero-Radiance, Lokas 3D Shadow
----------------------------
This tutorial is written for those who have working knowledge of PSPX2 (any version will do).
This tutorial was written by me on October 21, 2012. Please do not copy or paste on any other forum, website or blog provide link back to tut only. Please do not claim as your own. This tutorial is copyrighted to me. Any resemblance to any other tutorial is purely coincidental.
Ok - let's start and remember to save often.
Open up a 700 x 650 blank canvas
Select Frame 1 element - resize by 75%
Paste in the center of your canvas
Select your magic wand tool and click in the center of the frame (Add (Shift), RGB Value, Tolerance 10, Contiguous checked, Feather 0)
Selections, Modify, Expand by 5
Paste paper 10
Select invert, delete, select none
Move paper layer under the frame
Apply Xero - Fritillary with the following settings

Copy and paste tube of choice in the center of frame where desired
Duplicate tube and move original below frame layer
Now select duplicate tube and erase any overhanging pieces
Select original tube layer again and apply dropshadow of choice
Select Butterfly 2 element - resize by 35%
Paste and reposition on left side of frame layer
Select wordart element - resize by 58%
Paste and reposition on the bottom as shown
Apply Eyecandy - Gradient Glow at fat default settings (change colors on glow if you desire)
Paste paper 1 as a new layer
Move layer to the bottom of the template
Apply Mask 15
Merge group and move to the bottom
Add any additional elements you like.
Add any dropshadows you like
Crop and resize as desired
Add copyright info, license number and name
You're done! Thanks for trying my tutorial!
Wednesday, October 17, 2012
ZOMBIE BABE

Supplies needed:
I am using the amazing art from Cliff Thomas for this tutorial, which you can find here
Scrapkit: I am using a kit from Addictive Pleasures called "Lady Mishkas - Zombie" which you can get by going here
Template 85 from Tamie which can be found here
Vix Big Mask 005 here
Plugins used: Eyecandy 4000 - Drip, Xero-Bad Dream, Lokas 3D Shadow
----------------------------
This tutorial is written for those who have working knowledge of PSPX2 (any version will do).
This tutorial was written by me on October 17, 2012. Please do not copy or paste on any other forum, website or blog provide link back to tut only. Please do not claim as your own. This tutorial is copyrighted to me. Any resemblance to any other tutorial is purely coincidental.
Ok - let's start and remember to save often.
Open the template and using your shortcut keys on your keyboard (SHIFT+D) duplicate the template as a new image. Close the original and delete the copywrite layer.
Select Wordart Raster 15 layer
Select all, float, defloat
Add new raster layer and flood-fill with color or gradient of choice
Select none
Apply Eyecandy Glass at default settings to the Zombie word
Delete/Hide original wordart layer
Select Wordart Raster 9 layer
Repeat above steps
Select Circle Frame Raster 11 layer
Select all, float, defloat
Add new raster layer and flood-fill with gradient of choice
Select none
Adjust, Add/Remove Noise, Add Noise (Uniform checked, Noise 55%, Monochrome checked)
Delete/Hide original frame layer
Select Circle Raster 7 layer
Select all, float, defloat
Add new raster layer and flood-fill with gradient of choice (Linear style, Angle 45, Repeat 2)
Paste close-up tube of choice on top of gradient and delete
Select none
Change close-ups to Luminance (Legacy)
Apply Xero Bad Dream at default settings
Drop the opacity on close-ups down to about 50%
Apply dropshadow and merge down on top of paper
Apply Effect, Texture Effects, Blinds (Width 2, Opactity 15, Horizontal and Light from left/top checked)
Hide/Delete original circle layer
Select Circle Frame Raster 14 layer
Select all, float, defloat
Add new raster layer and flood-fill with gradient of choice
Select none
Adjust, Add/Remove Noise, Add Noise (Uniform checked, Noise 55%, Monochrome checked)
Delete/Hide original frame layer
Select Circle Raster 13 layer
Select all, float, defloat
Add new raster layer and flood-fill with gradient of choice (Linear style, Angle 45, Repeat 2)
Paste close-up tube of choice on top of gradient and delete
Select none
Change close-ups to Luminance (Legacy)
Apply Xero Bad Dream at default settings
Drop the opacity on close-ups down to about 50%
Apply dropshadow and merge down on top of paper
Apply Effect, Texture Effects, Blinds (Width 2, Opactity 15, Horizontal and Light from left/top checked)
Hide/Delete original circle layer
Select Rectangle Raster 3 layer
Select all, float, defloat
Paste paper p11
Select invert, delete, select none
Delete/Hide original rectangle layer
Select Rectangle Raster 8 layer
Select all, float, defloat
Paste paper p2
Select invert, delete, select none
Delete/Hide original rectangle layer
Select your pen tool (width set to 7)
Draw a line on the top of your rectangle paper layer
Convert to raster and apply Eyecandy Drip with the following settings:

Select Rectangle Raster 5 layer
Select all, float, defloat
Add new raster layer and flood-fill with color of choice
Select none
Effects, Texture Effects, Weave (Gap size 3, Width 9, Opacity 2, Fill gaps checked)
Delete/Hide original rectangle layer
Select Rectangle Raster 4 layer
Select all, float, defloat
Paste paper p7
Select invert, delete, select none
Delete/Hide original rectangle layer
Select your pen tool again and draw another line with same width as before on top of paper layer
Apply Eyecandy Drip with same settings from above
Select Circle frame Raster 12 layer
Select all, float, defloat
Add new raster layer and flood-fill with gradient of choice
Select none
Adjust, Add/Remove Noise, Add Noise (Uniform checked, Noise 55%, Monochrome checked)
Delete/Hide original frame layer
Select Circle Raster 6 layer
Select all, float, defloat
Paste paper p3
Select invert, delete, select none
Delete/Hide original rectangle layer
Select Circle Raster 2 layer
Select all, float, defloat
Paste paper p6
Select invert, delete, select none
Delete/Hide original circle layer
Copy and paste tube of choice and position where desired
Apply Xero Bad Dream at setting of choice
Apply Lokas 3D Shadow
Select New raster layer and flood fill with color or gradient of choice
Move layer to the bottom of the template
Apply Mask 5
Merge group and move to the bottom
Add any elements you like
Add any dropshadows you like
Crop and resize as desired
Add copyright info, license number and name
You're done! Thanks for trying my tutorial!
Tuesday, October 16, 2012
SWEET HALLOW EXTRA'S


These extra's were made by me and my own creativity. Please do not rip apart, destroy, alter them or claim them as your own. Thanks.
LIVING DEAD GIRL

Supplies needed:
I am using the amazing art from Alfadesire for this tutorial, which you can find here
Scrapkit: I am using an awesome kit from Amy Marie called "Living Dead Girl" which you can get by going here
Template 159 from Punky Butts which can be found here
Designs by Vaybs Mask 79 here
Plugins used: Eyecandy 4000 - Glass, Xero-Radiance, Xero-Bad Dream, Lokas 3D Shadow
----------------------------
This tutorial is written for those who have working knowledge of PSPX2 (any version will do).
This tutorial was written by me on October 15, 2012. Please do not copy or paste on any other forum, website or blog provide link back to tut only. Please do not claim as your own. This tutorial is copyrighted to me. Any resemblance to any other tutorial is purely coincidental.
Ok - let's start and remember to save often.
Open the template and using your shortcut keys on your keyboard (SHIFT+D) duplicate the template as a new image. Close the original and delete the copywrite layer.
Select Right Orange Circle frame
Select all, float, defloa
Add new raster layer and flood-fill with color of choice
Select none
Delete/Hide original circle layer
Select Right orange circle layer
Select all, float, defloat
Add new raster layer and flood-fill with gradient of choice (Linear style, Angle 45, Repeat 2)
Paste close-up tube of choice on top of gradient and delete
Select none
Change close-ups to Luminance (Legacy)
Apply Xero Bad Dream at default settings
Drop the opacity on close-ups down to about 75%
Apply dropshadow and merge down on top of paper
Apply Effect, Texture Effects, Blinds (Width 2, Opactity 15, Horizontal and Light from left/top checked)
Hide/Delete original circle layer
Select Center Green Square layer
Select all, float, defloat
Add new raster layer and flood-fill with color of choice
Select none
Apply Eyecandy Glass at default settings
Delete/Hide original square frame
Select Center Green Square layer
Select all, float, defloat
Paste paper pp014
Select invert, delete, select none
Delete/Hide original rectangle layer
Select Left Orange Circle frame layer
Select all, float, defloat
Add new raster layer and flood-fill with color of choice
Select none
Delete/Hide original frame layer
Select Left Orange Circle layer
Select all, float, defloat
Add new raster layer and flood-fill with gradient of choice (Linear style, Angle 45, Repeat 2)
Paste close-up tube of choice on top of gradient and delete
Select none
Change close-ups to Luminance (Legacy)
Apply Xero Bad Dream at default settings
Drop the opacity on close-ups down to about 75%
Apply dropshadow and merge down on top of paper
Apply Effect, Texture Effects, Blinds (Width 2, Opactity 15, Horizontal and Light from left/top checked)
Hide/Delete original circle layer
Select Left Black Square layer
Select all, float, defloat
Paste paper pp025
Select invert, delete, select none
Delete/Hide original square layer
Select Right Black Square layer
Repeat above steps
Select drip2 element - resize by 58%
Paste and reposition on top of right black square layer
Select Left Lite Orange Square layer
Select all, float, defloat
Paste paper pp015
Select invert, delete, select none
Delete/Hide original square layer
Select Right Lite Orange Square layer
Repeat above steps
Select Right Small Square layer
Select all, float, defloat
Paste paper pp024
Select invert, delete, select none
Delete/Hide original square layer
Select Left Small Square layer
Repeat above steps
Copy and paste tube of choice and position where desired
Apply Xero Radiance at setting of choice
Apply Lokas 3D Shadow
Select fog element
Paste behind tube and drop opacity down to 85%
Select flyingkeys element - resize by 80%
Paste and reposition behind tube layer
Free rotate left 20%
Select New raster layer and flood fill with color or gradient of choice
Move layer to the bottom of the template
Apply Mask 79
Merge group and move to the bottom
I applied the following Dither texture:

Add any additional elements you like.
Add any dropshadows you like
Crop and resize as desired
Add copyright info, license number and name
You're done! Thanks for trying my tutorial!
Sunday, October 14, 2012
BCA HOPE

Supplies needed:
I am using the amazing art from Ismael Rac for this tutorial, which you can find here
Scrapkit: I am using an awesome freebie kit from Niqui's Designs called "Hope" which you can get by going here
Template 167 from Punky Butts which can be found here
Mask 4 by Butterfly Flutterby here
Plugins used: Xero-Radiance, Xero-Bad Dream, Lokas 3D Shadow
----------------------------
This tutorial is written for those who have working knowledge of PSPX2 (any version will do).
This tutorial was written by me on October 14, 2012. Please do not copy or paste on any other forum, website or blog provide link back to tut only. Please do not claim as your own. This tutorial is copyrighted to me. Any resemblance to any other tutorial is purely coincidental.
Ok - let's start and remember to save often.
Open the template and using your shortcut keys on your keyboard (SHIFT+D) duplicate the template as a new image. Close the original and delete the copywrite layer.
Select Check Your Rack Circle Wordart
Add new raster layer and flood-fill with color of choice
Reselect wordart layer
Select all, float, defloat
Select color layer you just filled
Select invert, delete, select none
Delete/Hide original wordart layer
Select remaining wordart layers and repeat above steps
Select Pink Circle layer
Selections, Modify, Contract by 25
Paste nq-paper 1
Select invert, delete, select none
Reselect Pink Circle layer again
Select all, float, defloat
Add new raster layer and flood-fill with color of choice
Select none
Apply Effects, Texture Effects, Weave (Gap size 2, Width 5, Opacity 5, Fill gaps checked)
Delete/Hide original circle layer
Select Rectangle 3 layer
Select all, float, defloat
Add new raster layer and flood-fill with gradient of choice (Linear style, Angle 45, Repeat 2)
Paste close-up tubes of choice on top of gradient and delete
Change close-ups to Luminance (Legacy)
Apply Xero Bad Dream at default settings
Drop the opacity on close-ups down to about 70%
Apply dropshadow and merge down on top of paper
Apply Effect, Texture Effects, Blinds (Width 2, Opactity 15, Horizontal and Light from left/top checked)
Hide/Delete original rectangle layer
Select Rectangle 2 layer
Select all, float, defloat
Paste nq-paper5
Select invert, delete, select none
Delete/Hide original rectangle layer
Select Rectangle layer
Select all, float, defloat
Paste nq-paper7
Select invert, delete, select none
Delete/Hide original rectangle layer
Now Select all of the rectangle frame layer
Adjust, Add/Remove Noise, Add Noise (Uniform checked, Noise 100%, Monochrome checked)
Copy and paste tube of choice and position where desired
Apply Xero Radiance at setting of choice
Apply Lokas 3D Shadow
Select New raster layer and flood fill with color or gradient of choice
Move layer to the bottom of the template
Apply Mask 4
Merge group and move to the bottom
Add any additional elements you like.
Add any dropshadows you like
Crop and resize as desired
Add copyright info, license number and name
You're done! Thanks for trying my tutorial!
Saturday, October 13, 2012
EMO-WEEN

Supplies needed:
I am using the amazing art from Loshadka for this tutorial, which you can find here
Scrapkit: I am using an awesome kit from Scraps Dimensions called "Emo-Ween" which you can get by going here
Halloween Template 2 from Punky Butts which can be found here
Mask 177 by Insatiable Dreams here
Plugins used: Alien Skin Eyecandy Impact - Extrude, Xero-Radiance, Xero-Bad Dream, Lokas 3D Shadow
----------------------------
This tutorial is written for those who have working knowledge of PSPX2 (any version will do).
This tutorial was written by me on October 13, 2012. Please do not copy or paste on any other forum, website or blog provide link back to tut only. Please do not claim as your own. This tutorial is copyrighted to me. Any resemblance to any other tutorial is purely coincidental.
Ok - let's start and remember to save often.
Open the template and using your shortcut keys on your keyboard (SHIFT+D) duplicate the template as a new image. Close the original and delete the copywrite layer.
Select Wordart layer and delete
Select Rectangle 8 layer
Select all, float, defloat
Add new raster layer and flood-fill with color of choice
Select none
Apply Effects, Texture Effects, Texture with the following brick texture:

Apply Alien Skin Impact - Extrude with the following settings:

Delete/Hide original rectangle layer
Select Square 7 layer
Select all, float, defloat
Add new raster layer and flood-fill with gradient of choice (Linear style, Angle 45, Repeat 2)
Select none
Paste close-up tube of choice on top of gradient and delete
Change closeup to Luminance (Legacy)
Apply Xero Bad Dream at default settings
Drop the opacity on close-ups down to about 65%
Apply dropshadow and merge down on top of paper
Apply Effect, Texture Effects, Blinds (Width 2, Opactity 15, Horizontal and Light from left/top checked)
Hide/Delete original square layer
Select Square 6 layer
Repeat above gradient steps
Select sd-element 41 (tree) - resize by 55%
Paste and reposition on top of rectangle layer to the left
Image mirror
Select sd-element40 (house) - resize by 50%
Paste and reposition on top of tree layer to the left
Image mirror
Select Circle 5 layer
Select all, float, defloat
Paste sd-paper1
Select invert, delete, select none
Delete/Hide original circle layer
Select Rectangle 4 layer
Select all, float, defloat
Paste sd-paper5
Select invert, delete, select none
Delete/Hide original rectangle layer
Select Rectangle 3 layer
Repeat above steps
Select Square 2 layer
Select all, float, defloat
Paste sd-paper3
Select invert, delete, select none
Delete/Hide original square layer
Select Square 1 layer
Repeat above steps
Copy and paste tube of choice and position where desired
Apply Xero Radiance at setting of choice
Apply Lokas 3D Shadow
Select New raster layer and flood fill with color or gradient of choice
Move layer to the bottom of the template
Apply Mask 177
Merge group and move to the bottom
Add any additional elements you like.
Add any dropshadows you like
Crop and resize as desired
Add copyright info, license number and name
You're done! Thanks for trying my tutorial!
Friday, October 12, 2012
BLEEDING LOVE

Supplies needed:
I am using the amazing art from Uchakina for this tutorial, which you can find here
Scrapkit: I am using an awesome kit from Rissa's Designs called "Bleeding In Love" which you can get by going here
Template 162 from Punky Butts which can be found here
Weescotslass Mask 192 here
Plugins used: Xero - Fritillary, Eyecandy 4000 - Glass, Tramages - Tow the Line, Xero-Radiance, Xero-Bad Dream, Lokas 3D Shadow
----------------------------
This tutorial is written for those who have working knowledge of PSPX2 (any version will do).
This tutorial was written by me on October 12, 2012. Please do not copy or paste on any other forum, website or blog provide link back to tut only. Please do not claim as your own. This tutorial is copyrighted to me. Any resemblance to any other tutorial is purely coincidental.
Ok - let's start and remember to save often.
Open the template and using your shortcut keys on your keyboard (SHIFT+D) duplicate the template as a new image. Close the original and delete the copywrite layer.
Select Vamp wordart layer
Select all, float, defloat
Add new raster layer and flood-fill with color of choice
Select none
Apply Eyecandy Glass at default settings
Move wordart if you desire (Rotate Left 90 degrees)
Select Is A Glow Wordart layer
Select all, float, defloat
Add new raster layer and flood-fill with color of choice
Select none
Delete/Hide original wordart layer
Select The Lady wordart layer and repeat above steps
Select Square Black Right layer
Apply Tramages - Tow the Line with the following settings:

Select Square Black Left layer
Repeat above step
Select Right Red Larger Rectangle layer
Select all, float, defloat
Add new raster layer and flood-fill with gradient of choice (Linear style, Angle 45, Repeat 4)
Select none
Apply Xero-Fritillary with the following settings:

Delete/Hide original rectangle layer
Select Left Red Larger Rectangle layer
Repeat above steps/settings
Select Right Red Small Rectangle
Select all, float, defloat
Add new raster layer and flood-fill with color of choice
Select none
Apply Photoeffex - Scanlines with the following settings:

Delete/Hide original rectangle layer
Select Left Small Red Rectangle layer
Repeat above steps/settings
Select Large Circle layer
Select all, float, defloat
Paste RD_Paper11
Select invert, delete, select none
Delete/Hide original circle layer
Select Bottom Black Rectangle layer
Select all, float, defloat
Paste RD_Paper15
Select invert, delete, select none
Delete/Hide original rectangle layer
Select Top Black Rectangle layer
Repeat above steps
Select RD_Swirlie element
Paste and reposition on right side
Select Top Right Dark grey Square layer
Select all, float, defloat
Add new raster layer and flood-fill with gradient of choice (Linear style, Angle 45, Repeat 3)
Select none
Delete/Hide original rectangle layer
Select Top Left, Bottom Right, and Bottom Left Dark Grey Square layers and repeat above steps/settings
Select Top Right Light Grey Square layer
Select all, float, defloat
Add new raster layer and flood-fill with color of choice
Adjust, Add/Remove Noise, Add Noise (Uniform checked, Noise 100%, Monochrome checked)
Delete/Hide original square layer
Select Top Left, Bottom Left and Bottom Right Light Grey Square layers and repeat above steps/settings
Select Circle dots layer
Add new raster layer and flood-fill with color of choice
Select Circle dots layer again
Select all, float, defloat
Go back and select color layer you just filled
Select invert, delete, select none
Delete/Hide original dots layer
Select Right Circle layer
Select all, float, defloat
Add new raster layer and flood-fill with gradient of choice (Linear style, Angle 45, Repeat 2)
Paste close up tube of choice on top of gradient and delete
Change closeup to Luminance (Legacy)
Apply Xero Bad Dream at default settings
Drop the opacity on close-ups down to about 80%
Apply dropshadow and merge down on top of paper
Apply Effect, Texture Effects, Blinds (Width 2, Opactity 15, Horizontal and Light from left/top checked)
Hide/Delete original circle layer
Select left circle layer
Repeat above steps/settings
Copy and paste tube of choice and position where desired
Apply Xero Radiance at setting of choice
Apply Lokas 3D Shadow
Select New raster layer and flood fill with color or gradient of choice
Move layer to the bottom of the template
Apply Mask 192
Merge group and move to the bottom
Add any additional elements you like.
Add any dropshadows you like
Crop and resize as desired
Add copyright info, license number and name
You're done! Thanks for trying my tutorial!
LET'S RACE

Supplies needed:
I am using the amazing artwork from Cliff Thomas for this tutorial, which you can find here
Scrapkit: I am using an awesome freebie kit from The Okie Toothfairy called "Let's Go Racing Boys!" which you can get by going here
Plugins used: Xero-Bad Dream, Lokas 3D Shadow
----------------------------
This tutorial is written for those who have working knowledge of PSPX2 (any version will do).
This tutorial was written by me on October 12, 2012. Please do not copy or paste on any other forum, website or blog provide link back to tut only. Please do not claim as your own. This tutorial is copyrighted to me. Any resemblance to any other tutorial is purely coincidental.
Ok - let's start and remember to save often.
Open up a 700 x 650 blank canvas
Select Element 8 frame - resize by 30%
Paste in the center of your canvas
Select your magic wand and click in the center of your frame (Add (Shift), RGB Value, Tolerance 10, Contiguous checked, Feather 0)
Selections, Modify, Expand by 5
Paste Paper 7 on top of frame - resize by 20%
Select invert, delete, select none
Move paper layer under frame
Select element 65 - resize by 45%
Paste on top of paper layer under frame
Select element 5 - resize by 15%
Paste on top of frame layer
Copy and paste tube of choice and position where desired
Apply Xero Bad Dream at setting of choice
Apply Lokas 3D Shadow
Select element 4 - resize by 18%
Paste and reposition on the botton of tag and move element to the bottom layer
Select element 38 - resize by 33%
Paste and move to the bottom layer
Add any additional elements you like.
Add any dropshadows you like
Crop and resize as desired
Add copyright info, license number and name
You're done! Thanks for trying my tutorial!
Wednesday, October 10, 2012
HALLOWEEN DEMON

Supplies needed:
I am using the amazing artwork from Spazz for this tutorial, which you can find here
Scrapkit: I am using a wicked kit from Irish Bitch Designs called "Pumpkin Witch" which you can get by going here
Template 159 from Leah which can be found here
Mask 34 by Brutal Designs here
Plugins used: Eyecandy 4000- Glass, Xero - Fritillary, Penta - Color dots, Xero-Radiance, Xero-Bad Dream, Lokas 3D Shadow
----------------------------
This tutorial is written for those who have working knowledge of PSPX2 (any version will do).
This tutorial was written by me on October 10, 2012. Please do not copy or paste on any other forum, website or blog provide link back to tut only. Please do not claim as your own. This tutorial is copyrighted to me. Any resemblance to any other tutorial is purely coincidental.
Ok - let's start and remember to save often.
Open the template and using your shortcut keys on your keyboard (SHIFT+D) duplicate the template as a new image. Close the original and delete the copywrite layer.
Select Words 3 Back layer
Adjust, Add/Remove Noise, Add Noise (Uniform checked, Noise 100%, Monochrome checked)
Select Words 4 layer
Select all, float, defloat
Add new raster layer and flood-fill with gradient of choice (Linear style, Angle 45, Repeat 2)
Select none
Apply Eyecandy Glass at default settings
Delete/Hide original words layer
Select Square 1 layer
Select all, float, defloat
Paste IBD-Paper 5
Select invert, delete, select one
Delete/Hide original Square layer
Select IBD_Claws element - resize by 20%
Paste and reposition on top of paper 5 layer to the left
Select Square 2 layer
Effect, Texture Effect, Weave (Gap size 2, Width 5, Opacity 5, Fill gaps checked)
Select Circle 3 layer
Select all, float, defloat
Add new raster layer and flood-fill with color of choice
Select none
Effect, Texture Effects, Snake Texture with the following settings:

Delete/Hide original circle layer
Select Square 4 layer
Select all, float, defloat
Paste IBD_Paper6
Select invert, delete, select none
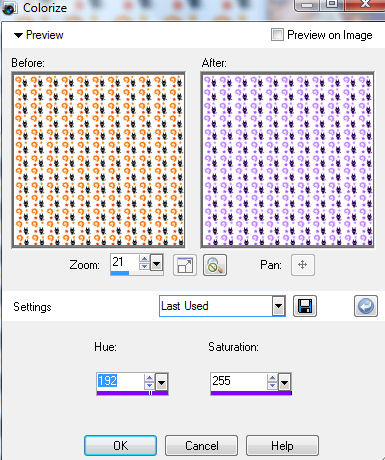
Colorize paper with these settings if desired:
Delete/Hide original square layer
Select Square 6 layer
Repeat above steps/settings
Select Square 7 layer
Repeat above steps/settings
Select Square 5 layer
Select all, float, defloat
Add new raster layer and flood-fill with gradient of choice
Apply Xero Fritillary with following settings:

Delete/Hide original square layer
Select Circle 8 layer
Effect, Texture Effect, Weave (Gap size 2, Width 5, Opacity 5, Fill gaps checked)
Select Square 9 layer
Select all, float, defloat
Paste IBD_Paper 2
Select invert, delete, select none
Delete/Hide original square layer
Select Square 10 layer
Repeat above steps
Copy and paste tube of choice and position where desired
Apply Xero Radiance at setting of choice
Apply Lokas 3D Shadow
Paste on bottom left side and move to the bottom
Select New raster layer and flood fill with color or gradient of choice
Move layer to the bottom of the template
Apply Brutal Mask
Merge group and move to the bottom
Apply Penta - Colordots at default settings
Add any additional elements you like.
Add any dropshadows you like
Crop and resize as desired
Add copyright info, license number and name
You're done! Thanks for trying my tutorial!
Sunday, October 7, 2012
TRICKSTER

Supplies needed:
I am using the amazing artwork from Sweet-PinUp for this tutorial, which you can find here
Scrapkit: I am using a wicked kit from Toxic Desirez called "Trickster" which you can get by going here
Template 179 from Toxic Desirez which can be found here
Mask of choice
Plugins used: Xero-Radiance, Xero-Bad Dream, Lokas 3D Shadow
----------------------------
This tutorial is written for those who have working knowledge of PSPX2 (any version will do).
This tutorial was written by me on October 7, 2012. Please do not copy or paste on any other forum, website or blog provide link back to tut only. Please do not claim as your own. This tutorial is copyrighted to me. Any resemblance to any other tutorial is purely coincidental.
Ok - let's start and remember to save often.
Open the template and using your shortcut keys on your keyboard (SHIFT+D) duplicate the template as a new image. Close the original and delete the copywrite layer.
Select Circle layer
Select all, float, defloat
Paste paper 11
Select invert, delete, select none
Delete/Hide original circle layer
Select Frame 3 from kit
Paste in the center of your canvas
Image, Free rotate, Left 20 degrees
Select your magic wand and click in the center of the frame
Selections, Modify, Expand by 2
Add new raster layer and flood-fill with gradient of choice (Linear style, Angle 45, Repeat 2)
Paste close up tubes of choice on top of gradient and delete
Select none
Change closeups to Hard Light
Drop the opacity on close-ups down to about 80%
Apply dropshadow and merge down on top of gradient
Move gradient/tube layer below frame layer
Apply Lokas Shadow to frame layer at default settings
Select Bottom Round Rectangle layer
Select all, float, defloat
Paste paper 24
Select invert, delete, select none
Delete/Hide original rectangle layer
Select Top Round Rectangle layer
Repeat above steps
Select Bottom Red Circle
Select all, float, defloat
Paste paper 3
Select invert, delete, select none
Paste close-up tube of choice and delete
Select none
Apply Xero - Bad dream at setting of choice
Drop the opacity on close-up down to about 80%
Apply dropshadow and merge down on top of paper layer
Apply Effects, Texture Effects, Blinds (Width 2, Opactity 20, Horizontal and Light from left/top checked)
Delete/Hide original circle layer
Select Top Red Circle layer
Repeat above steps/settings
Select Rectangle layer
Select all, float, defloat
Paste paper 26
Select invert, delete, select none
Delete/Hide original rectangle layer
Select Spider & Web element - resize by 60%
Image mirror and paste on top left of rectangle layer
Select Bottom Black Square layer
Select all, float, defloat
Paste paper 21
Select invert, delete, select none
Delete/Hide original square layer
Select Top Black Square layer
Repeat above steps
Copy and paste tube of choice and position where desired
Apply Xero Radiance at setting of choice
Apply Lokas 3D Shadow
Paste on bottom left side and move to the bottom
Select New raster layer and flood fill with color or gradient of choice
Move layer to the bottom of the template
Apply Mask of choice
Merge group and move to the bottom
Add any additional elements you like.
Add any dropshadows you like
Crop and resize as desired
Add copyright info, license number and name
You're done! Thanks for trying my tutorial!
Wednesday, October 3, 2012
ROCKITUDNESS

Supplies needed:
I am using the amazing artwork from Very Many for this tutorial, which you can find here
Scrapkit: I am using an awesome kit from Eclipse Creations called "Hot Girl" which you can get by going here
Template 375 from Missy which can be found here
Tonya Grunge 1 Mask here
Plugins used: Xero-Radiance, Xero-Bad Dream, Lokas 3D Shadow
----------------------------
This tutorial is written for those who have working knowledge of PSPX2 (any version will do).
This tutorial was written by me on October 3, 2012. Please do not copy or paste on any other forum, website or blog provide link back to tut only. Please do not claim as your own. This tutorial is copyrighted to me. Any resemblance to any other tutorial is purely coincidental.
Ok - let's start and remember to save often.
Open the template and using your shortcut keys on your keyboard (SHIFT+D) duplicate the template as a new image. Close the original and delete the copywrite layer.
Select frame layer
Select all, float, defloat
Add a new raster layer and flood-fill with color of choice
Select none
Adjust, Add/Remove Noise, Add Noise (Uniform checked, Noise 50%, Monochrome checked)
Delete/Hide original frame layer
Select Frame Back layer
Select all, float, defloat
Add new raster layer and flood-fill with gradient of choice (Linear style, Angle 45, Repeat 2)
Paste close up tube of choice on top of gradient and delete
Change closeup to Luminence (Legacy)
Drop the opacity on close-ups down to about 70%
Apply dropshadow and merge down on top of paper
Apply Effects, Texture Effects, Blinds (Width 2, Opactity 20, Horizontal and Light from left/top checked)
Hide/Delete original frame back layer
Select EC_HG_DiscoBall element
Paste in the center under your frame back square layer
Select Oval Frame layer
Select all, float, defloat
Add new raster layer and flood-fill with color of choice
Select none
Delete/Hide original oval frame layer
Select Oval layer
Select all, float, defloat
Paste paper EC_HG_P6
Select invert, delete, select none
Delete/Hide original oval layer
Select Circle 2 layer
Select all, float, defloat
Add new raster layer and flood fill with gradient of choice (Linear style, Angle 45, Repeat 2)
Paste close up tube of choice on top of gradient and delete
Change closeup to Hard Light
Drop the opacity on close-ups down to about 70%
Apply dropshadow and merge down on top of gradient
Apply Effects, Texture Effects, Blinds (Width 2, Opactity 15, Horizontal and Light from left/top checked)
Hide/Delete original circle layer
Select Circle 1 layer
Repeat above steps/settings
Select Rectangles layer
Select all, float, defloat
Paste paper EC_HG_P7
Select invert, delete, select none
Delete/Hide original rectangles layer
Copy and paste tube of choice and position where desired
Apply Xero Radiance at setting of choice
Apply Lokas 3D Shadow
Select EC_HG_Musicnotes element - resize by 80%
Paste on bottom left side and move to the bottom
Select New raster layer and flood fill with color or gradient of choice
Move layer to the bottom of the template
Apply Grunge 1 Mask
Merge group and move to the bottom
Add any additional elements you like.
Add any dropshadows you like
Crop and resize as desired
Add copyright info, license number and name
You're done! Thanks for trying my tutorial!
Tuesday, October 2, 2012
WICKED DEMONA

Supplies needed:
I am using an Exclusive artwork from Celine Pinups for this tutorial, which you can find here
Scrapkit: I am using a wicked kit from Amy Marie called "Skulls N Roses" which you can get by going here
Template 171 from Tami which can be found here
Tonya Grunge 2 Mask here
Plugins used: Eyecandy 4000 - Glass, Xero-Radiance, Xero-Bad Dream, Lokas 3D Shadow
----------------------------
This tutorial is written for those who have working knowledge of PSPX2 (any version will do).
This tutorial was written by me on October 2, 2012. Please do not copy or paste on any other forum, website or blog provide link back to tut only. Please do not claim as your own. This tutorial is copyrighted to me. Any resemblance to any other tutorial is purely coincidental.
Ok - let's start and remember to save often.
Open the template and using your shortcut keys on your keyboard (SHIFT+D) duplicate the template as a new image. Close the original and delete the copywrite layer.
Select Attitude Word Art layers and delete if you want your own wording
Change your palette to gradient or color of choice
Select your text tool and type out wording of choice
Convert wording to raster layer
Select all, float, defloat
Selections, Modify, Expand by 4
Add a new raster layer and flood-fill with color of choice
Select none
Move layer behind your wording
Adjust, Add/Remove Noise, Add Noise (Uniform checked, Noise 100%, Monochrome checked)
Select your top wording layer again
Adjust, Add/Remove Noise, Add Noise (Uniform checked, Noise 25%, Monochrome checked)
Apply Eyecandy - Glass at default settings
Select Square Frame Raster 10 layer
Adjust, Add/Remove Noise, Add Noise (Uniform checked, Noise 60%, Monochrome checked)
Select Square Raster 7 layer
Select all, float, defloat
Add new raster layer and flood fill with gradient of choice (Linear style, Angle 45, Repeat 2)
Paste close up tube of choice on top of gradient and delete
Change closeup to Hard Light
Drop the opacity on close-ups down to about 60%
Apply dropshadow and merge down on top of paper
Hide/Delete original square layer
Select Square Raster 1 layer
Select all, float, defloat
Paste paper pp017
Select invert, delete, select none
Delete/Hide original square layer
Select Circle frame Raster 11 layer
Adjust, Add/Remove Noise, Add Noise (Uniform checked, Noise 85%, Monochrome checked)
Select Circle Raster 6 layer
Select all, float, defloat
Add new raster layer and flood fill with gradient of choice (Linear style, Angle 45, Repeat 2)
Paste close up tube of choice on top of gradient and delete
Change closeup to Hard Light
Drop the opacity on close-ups down to about 60%
Apply dropshadow and merge down on top of paper
Hide/Delete original circle layer
Select Rectangle Raster 3 layer
Select all, float, defloat
Paste paper pp9
Select invert, delete, select none
Delete/Hide original rectangle layer
Select Square Raster 2 layer
Select all, float, defloat
Paste paper pp8
Select invert, delete, select none
Delete/Hide original square layer
Select SkullSpider element - resize by 30%
Paste and reposition on top of paper 8 layer
Select Circle Raster 5 layer
Select all, float, defloat
Paste paper pp9
Select invert, delete, select none
Delete/Hide original circle layer
Select Oval Raster 12 layer
Select all, float, defloat
Paste paper pp014
Select invert, delete, select none
Delete/Hide original oval layer
Select Circle Raster 4 layer
Select all, float, defloat
Paste paper pp015
Select invert, delete, select none
Delete/Hide original circle layer
Copy and paste tube of choice and position where desired
Apply Xero Radiance at setting of choice
Apply Lokas 3D Shadow
Select New raster layer and flood fill with color or gradient of choice
Move layer to the bottom of the template
Apply Grunge 2 Mask
Merge group and move to the bottom
Add any additional elements you like.
Add any dropshadows you like
Crop and resize as desired
Add copyright info, license number and name
You're done! Thanks for trying my tutorial!
SKULL RAWK EXTRA'S


These extra's were made by me and my own creativity. Please do not rip apart, destroy, alter them or claim them as your own. Thanks.
Subscribe to:
Posts
(Atom)


