Labels
- Alikas Scraps
- All Dolled Up Store
- Amy Marie
- Annaica
- Arthur Crowe
- Babycakes Scraps
- Barbara Jensen
- Bibi's Collections
- Black Widow Creationz
- Blu Moon
- Bonnies Creations
- Bookwork Dezines
- Broken Sky Dezine
- Carita Creationz
- Carpe Diem Designs
- CDO
- Celinart Pinup
- Celine
- Chacha Creationz
- Charmed Designs
- Cherry Blossom Designs
- Chili Designz
- Cluster Frame
- Creative Misfits
- Creative Scraps by Crys
- Curious Creative Dreams
- Danny Lee
- Derzi
- Designs by Ali
- Designs by Joan
- Designs by Ketura
- Designs By Norella
- Designs by Vi
- Diana Gali
- Diry Art Designs
- Disturbed Scraps
- Dreaming With Bella
- Eclipse Creations
- Elegancefly
- Extras
- Fabulous Designz
- Forum Set
- Foxy's Designz
- Freek's Creation
- FTU
- FwTags
- Goldwasser
- Gothic Inspirations
- Gothic Raven Designs
- Graphfreaks
- Hania's Designs
- Happy Pumpkin Studios
- Horseplay's Pasture Designs
- indie-Zine
- Irish Princess Designs
- Ishika Chowdhury
- Kaci McVay
- Kajenna
- katharine
- Katherine
- Khloe Zoey
- Killer Kitty
- Kissing Kate
- KiwiFirestorm
- Kiya Designs
- Kizzed by Kelz
- KZ Designz
- Lady Mishka
- Lil Mz Brainstorm
- Maiden of Darkness
- Mariel Designs
- MellieBeans
- Michelle's Myths
- Midnight Shadow
- Misticheskya
- MistyLynn's Creations
- MMeliCrea Designz
- Moon Vixen Designs
- NaSionainne
- Ninaste
- Niqui Designs
- Pandora
- Picsfordesign
- Pink Paradox Productions
- Radyga Designs
- Redefined Designs
- Rissa's Designs
- Schnegge
- ScottishButterfly Creations
- Scrappin Krazy Designs
- Scrappin With Lil Ol Me
- Scraps and the City
- Scraps Dimensions
- Scraps From The Heart
- Scraps N Company
- Scraps with Attitude
- Shining Star Art
- Skyscraps
- Sleek N Sassy Designs
- Sophisticat Simone
- Souldesigner
- Soxsational Scraps
- Spazz
- Starlite and Soul
- Tammy Welt
- Tasha's Playground
- The PSP Project
- Thrifty Scraps by Gina
- Tiny Turtle Designs
- Upyourart
- Verymany
- Wendy Gerber
- Whisper In the Wind
- Wick3d Creationz
- Wicked Diabla
- Yude's Kreationz
Blog Archive
Monday, May 30, 2016
VOODOO QUEEN
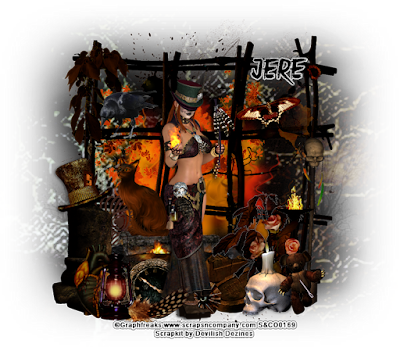
Supplies needed:
I am using the stunning artwork from Graphfreaks for this tutorial which you can find here
Scrapkit: I am using a stunning kit from Devilish Dezines called "Voodoo" which you can get by going here
Mask 11 from Horseplay's Pasture which you can find here
Plugins: Lokas 3D Shadow
----------------------------
This tutorial is written for those who have working knowledge of PSPX2 (any version will do).
This tutorial was written by me on May 30, 2016. Please do not copy or paste on any other forum, website or blog provide link back to tut only. Please do not claim as your own. This tutorial is copyrighted to me. Any resemblance to any other tutorial is purely coincidental.
Ok - let's start and remember to save often.
Open up a 750 x 650 blank canvas (we can resize it later)
Select Frame Element 9 - resize by 65%
Paste and position in the center of the canvas
Select Element 29 - resize by 75%
Paste and position on left side below frame layer
Select Element 41 - resize by 45%
Paste and position on the bottom below frame layer
Select Element 43 - resize by 40%
Paste and position on the top left below frame layer
Select Element 21 - resize by 25%
Paste and position on the top left
Select Element 3 - resize by 20%
Paste and position on the top left
Select Element 44 - resize by 25%
Paste and position on the top right
Select Element 36 - resize by 40%
Paste and position on the right side
Select Element 5 - resize by 30%
Paste and position on the bottom left
Select Element 27 - resize by 40%
Paste and position on the bottom
Paste tube of choice where desired
Apply Lokas 3D Shadow at default settings
Select Element 7 - resize by 30%
Paste and position on the bottom right
Select Element 19 - resize by 25%
Paste and position on the bottom right
Select Element 42 - resize by 20%
Paste and position on the bottom right
Select Element 8 - resize by 20%
Paste and position on the bottom right
Select Element 11 - resize by 20%
Paste and position on the bottom right
Select Element 37 - resize by 15%
Paste and paste on the bottom
Select Element 35 - resize by 15%
Paste and position on the left side
Select Element 49 - resize by 20%
Paste and position on the bottom left
Select Element 16 - resize by 25%
Paste and position on the bottom left
Select Element 40 - resize by 25%
Paste and position on the left side where desired
Select Element 33 - resize by 15%
Paste and position on the bottom
Select Element 45 - resize by 20%
Paste and position on the bottom
Select Element 6 - resize by 10%
Paste and position on the bottom
Paste paper 3 on canvas
Apply Mask 11 or mask of choice
Merge group and move to the bottom layer
Add any dropshadows you like
Sharpen any elements as needed
Crop and resize as desired
Add copyright info, license number and name
You're done! Thanks for trying my tutorial!

Labels:Graphfreaks | 0
comments
Sunday, May 29, 2016
EGYPTIAN DARKNESS
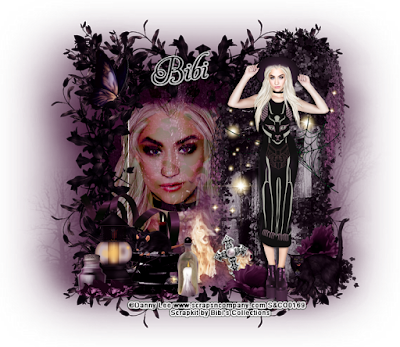
Supplies needed:
I am using the stunning artwork from Danny Lee for this tutorial which you can find here
Scrapkit: I am using a stunning kit from Bibi's Collections called "Darkness" which you can get by going here
Mask 11 from Horseplay's Pasture which you can find here
Plugins: Lokas 3D Shadow
----------------------------
This tutorial is written for those who have working knowledge of PSPX2 (any version will do).
This tutorial was written by me on May 29, 2016. Please do not copy or paste on any other forum, website or blog provide link back to tut only. Please do not claim as your own. This tutorial is copyrighted to me. Any resemblance to any other tutorial is purely coincidental.
Ok - let's start and remember to save often.
Open up a 750 x 650 blank canvas (we can resize it later)
Select Frame Element 24 - resize by 45%
Paste and position in the center of the canvas
Select your magic wand tool and select the center of the frame (Add (Shift), RGB Value, Tolerance 25, Contiguous checked, Feather 0)
Selections, Modify, Expand by 5
Paste paper 4
Select invert, delete
Paste close-up tube on paper layer and delete
Select none
Change close-up to Hard Light and drop opacity to 55%
Apply dropshadow and merge down on paper layer
Move paper layer below frame layer
Select Element 4 - resize by 60%
Paste and position on the top right
Select Element 29 - resize by 40%
Paste and position on the right side
Select Element 30 - resize by 45%
Paste and position on the bottom left
Select Element 45 - resize by 30%
Paste and position on the right side
Select Element 37 - resize by 50%
Paste and position on the right side
Select Element 28 - resize by 30%
Image Free Rotate Right by 15% and paste on the top left
Select Element 1 - resize by 30%
Paste and position on the bottom right
Select Element 12 - resize by 20%
Paste and position on the bottom right
Select Element 19 - resize by 50%
Paste and position on the bottom
Paste tube of choice where desired
Apply Lokas 3D Shadow at default settings
Select Element 11 - resize by 20%
Paste and position on the bottom
Select Element 17 - resize by 20%
Image Free Rotate Left by 15% and paste on the bottom
Select Element 42 - resize by 20%
Paste and position on the bottom left
Select Element 39 - resize by 25%
Paste and position on the bottom left
Select Element 22 - resize by 40%
Paste and position on the bottom left
Select Element 3 - resize by 30%
Paste and paste on the bottom
Select Element 47 - resize by 25%
Paste and position on the bottom
Select Element 52 - resize by 25%
Paste and position on the bottom
Apply Mask 11 or mask of choice
Merge group and move to the bottom layer
Add any dropshadows you like
Sharpen any elements as needed
Crop and resize as desired
Add copyright info, license number and name
You're done! Thanks for trying my tutorial!

Labels:Bibi's Collections | 0
comments
Saturday, May 28, 2016
ANGRY PUNK
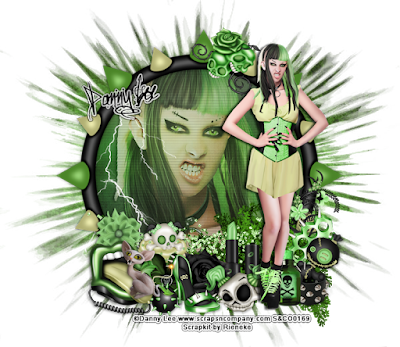
Supplies needed:
I am using the stunning artwork from Danny Lee for this tutorial which you can find here
Scrapkit: I am using a stunning kit from Rieneke called "Angry Punk" which you can get by going here
Mask 18 from Horseplay's Pasture which you can find here
Plugins: Lokas 3D Shadow
----------------------------
This tutorial is written for those who have working knowledge of PSPX2 (any version will do).
This tutorial was written by me on May 28, 2016. Please do not copy or paste on any other forum, website or blog provide link back to tut only. Please do not claim as your own. This tutorial is copyrighted to me. Any resemblance to any other tutorial is purely coincidental.
Ok - let's start and remember to save often.
Open up a 750 x 650 blank canvas (we can resize it later)
Select Frame Element 20 - resize by 90%
Paste and position in the center of the canvas
Select your magic wand tool and select the center of the frame (Add (Shift), RGB Value, Tolerance 25, Contiguous checked, Feather 0)
Selections, Modify, Expand by 5
Paste paper 2
Select invert, delete
Paste close-up tube on paper layer and delete
Select none
Change close-up to Hard Light and drop opacity to 68%
Apply dropshadow and merge down on paper layer
Effect, Texture Effects, Blinds (Width 3, Opactity 15, Horizontal and Light from left/top checked)
Move paper layer below frame layer
Select Element 5 - resize by 65%
Paste and position on the left side below frame layer
Select Element 25 - resize by 25%
Paste and position on the top right
Select Element 23 - resize by 50%
Paste and position on the bottom right
Select Element 47 - resize by 30%
Paste and position on the bottom right
Select Element 39 - resize by 20%
Paste and position on the bottom right
Select Element 30 - resize by 25%
Paste and position on the bottom right
Select Element 42 - resize by 20%
Paste and position on the bottom right
Paste tube of choice where desired
Apply Lokas 3D Shadow at default settings
Select Element 3 - resize by 25%
Paste and position on the bottom right
Select Element 49 - resize by 80%
Paste and position on the bottom
Select Element 8 - resize by 20%
Paste and position on the bottom
Select Element 11 - resize by 25%
Paste and position on the bottom
Select Element 16 - resize by 20%
Paste and position on the bottom
Select Element 13 - resize by 20%
Paste and paste on the bottom
Select Element 10 - resize by 20%
Paste and position on the bottom
Select Element 46 - resize by 20%
Paste and position on the bottom left
Select Element 9 - resize by 25%
Paste and position on the bottom left
Select Element 17 - resize by 20%
Paste and position on the bottom left
Select Element 41 - resize by 20%
Paste and position on the bottom left
Select Element 6 - resize by 22%
Paste and position on the bottom left
Paste paper 7 on canvas
Apply Mask 18 or mask of choice
Merge group and move to the bottom layer
Add any dropshadows you like
Sharpen any elements as needed
Crop and resize as desired
Add copyright info, license number and name
You're done! Thanks for trying my tutorial!

Labels:Scraps N Company | 0
comments
Sunday, May 22, 2016
GYPSY ROSE
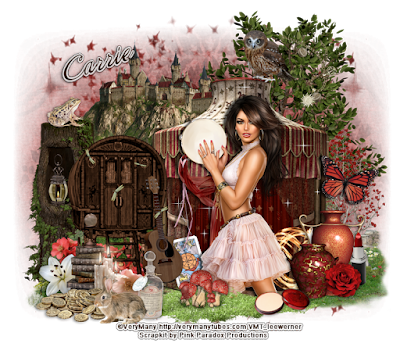
Supplies needed:
I am using the stunning artwork from Verymany for this tutorial which you can find here
Scrapkit: I am using a stunning kit from Pink Paradox Productions called "Gypsy Rose" which you can get by going here
Sparkle Mask 3 from Aqua which you can find on the Misfits Blog here
Plugins: Lokas 3D Shadow
----------------------------
This tutorial is written for those who have working knowledge of PSPX2 (any version will do).
This tutorial was written by me on May 22, 2016. Please do not copy or paste on any other forum, website or blog provide link back to tut only. Please do not claim as your own. This tutorial is copyrighted to me. Any resemblance to any other tutorial is purely coincidental.
Ok - let's start and remember to save often.
Open up a 750 x 650 blank canvas (we can resize it later)
Select Element 67 - resize by 40%
Paste and position on the top left
Select Element 137 - resize by 50%
Paste and position on the top right
Select Element 49 - resize by 40%
Paste and position on the bottom right
Select Element 135 - resize by 35%
Paste and position on the left side
Select Element 50 - resize by 35%
Paste and position on the left side
Select Element 35 - resize by 15%
Paste and position on the left side in the tree element
Select Element 13 - resize by 15%
Paste and position on the top left
Select Element 131 - resize by 25%
Paste and position on the right side
Select Element 9 - resize by 20%
Paste and position on the top right
Select Element 10 - resize by 25%
Image Free Rotate Right by 15% and paste on the right side
Select Element 71 - resize by 30%
Paste and position on the bottom right below the tent
Select Element 72 - resize by 40%
Paste and position on the bottom left below the tent
Select Element 98 - resize by 30%
Paste and position on the bottom left below the caravan
Paste tube of choice where desired
Apply Lokas 3D Shadow at default settings
Select Element 84 - resize by 50%
Paste and position on the bottom where desired
Select Element 107 - resize by 15%
Paste and position on the bottom left
Select Element 39 - resize by 20%
Paste and position on the bottom left
Select Element 23 - resize by 25%
Paste and position on the bottom left
Select Element 34 - resize by 20%
Paste and position on the bottom left
Select Element 95 - resize by 12%
Paste and paste on the bottom left
Select Element 6 - resize by 18%
Paste and position on the bottom left
Select Element 36 - resize by 30%
Paste and position on the bottom
Select Element 31 - resize by 20%
Paste and position on the bottom
Select Element 41 - resize by 20%
Paste and position on the bottom
Select Element 122 - resize by 15%
Paste and position on the bottom
Select Element 18 - resize by 20%
Paste and position on the bottom right
Select Element 25 - resize by 20%
Paste and position on the bottom right
Select Element 76 - resize by 15%
Paste and position on the bottom right
Select Element 97 - resize by 12%
Paste and position on the bottom right
Select Element 16 - resize by 20%
Paste and position on the bottom
Select Element 15 - resize by 22%
Paste and position on the left side
Paste paper 22 on canvas
Apply Mask 3 or mask of choice
Merge group and move to the bottom layer
Add any dropshadows you like
Sharpen any elements as needed
Crop and resize as desired
Add copyright info, license number and name
You're done! Thanks for trying my tutorial!

Labels:Pink Paradox Productions | 0
comments
MAD IN WONDERLAND
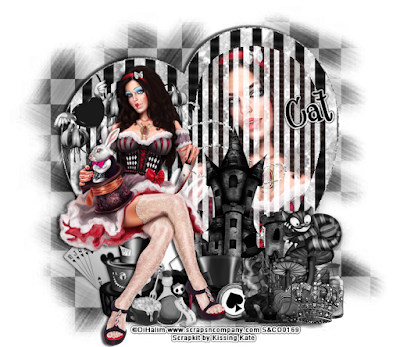
Supplies needed:
I am using the stunning artwork from DiHalim for this tutorial which you can find here
Scrapkit: I am using a stunning kit from Kissing Kate called "Wonderland" which you can get by going here
Mask 12 from Gina Gems which you can find here
Plugins: Lokas 3D Shadow
----------------------------
This tutorial is written for those who have working knowledge of PSPX2 (any version will do).
This tutorial was written by me on May 22, 2016. Please do not copy or paste on any other forum, website or blog provide link back to tut only. Please do not claim as your own. This tutorial is copyrighted to me. Any resemblance to any other tutorial is purely coincidental.
Ok - let's start and remember to save often.
Open up a 750 x 650 blank canvas (we can resize it later)
Select Frame Element 3 - resize by 75%
Paste and position in the center of the canvas
Select your magic wand tool and select the center of the frame (Add (Shift), RGB Value, Tolerance 25, Contiguous checked, Feather 0)
Selections, Modify, Expand by 5
Paste paper 9
Select invert, delete
Paste close-up tube on paper layer and delete
Select none
Change close-up to screen
Apply dropshadow and merge down on paper layer
Move paper layer below frame layer
Select Element 56 - resize by 50%
Paste and position on the top left
Select Element 57 - resize by 20%
Paste and position on the top left
Select Element 19 - resize by 50%
Paste and position on the bottom right
Select Element 83 - resize by 45%
Paste and position on the bottom right
Select Element 40 - resize by 30%
Paste and position on the bottom right
Select Element 35 - resize by 22%
Paste and position on the bottom right
Select Element 28 - resize by 20%
Paste and position on the bottom right
Select Element 75 - resize by 22%
Paste and position on the bottom right
Select Element 25 - resize by 40%
Paste and position on the bottom left
Paste tube of choice where desired
Apply Lokas 3D Shadow at default settings
Select Element 13 - resize by 22%
Image Free Rotate Left by 15% and paste on the bottom left
Select Element 17 - resize by 20%
Paste and position on the bottom left
Select Element 50 - resize by 20%
Paste and position on the bottom left
Select Element 74 - resize by 20%
Paste and position on the bottom
Select Element 45 - resize by 25%
Paste and position on the bottom
Select Element 80 - resize by 25%
Paste and paste on the bottom
Select Element 64 - resize by 10%
Paste and position on the bottom
Paste paper 6 on canvas
Apply Mask 12 or mask of choice
Merge group and move to the bottom layer
Add any dropshadows you like
Sharpen any elements as needed
Crop and resize as desired
Add copyright info, license number and name
You're done! Thanks for trying my tutorial!

Labels:Kissing Kate | 0
comments
Saturday, May 21, 2016
ONLY FOR A MOMENT

Supplies needed:
I am using the stunning artwork from Enys Guerrero for this tutorial which you can find here
Scrapkit: I am using a stunning kit from Gothic Inspirations called "Only for a Moment" which you can get by going here
Plugins: Lokas 3D Shadow
----------------------------
This tutorial is written for those who have working knowledge of PSPX2 (any version will do).
This tutorial was written by me on May 21, 2016. Please do not copy or paste on any other forum, website or blog provide link back to tut only. Please do not claim as your own. This tutorial is copyrighted to me. Any resemblance to any other tutorial is purely coincidental.
Ok - let's start and remember to save often.
Open up a 750 x 650 blank canvas (we can resize it later)
Select Flower Frame Element - resize by 75%
Paste and position in the center of the canvas
Select Frame 8 Element - resize by 52%
Select your magic wand tool and select the center of the frame (Add (Shift), RGB Value, Tolerance 25, Contiguous checked, Feather 0)
Selections, Modify, Expand by 5
Paste paper 7
Select invert, delete
Paste close-up tube on paper layer and delete
Select none
Drop close-up to Overlay
Apply dropshadow and merge down on paper layer
Move paper layer below frame layer
Select CloudwBirds Element - resize by 35%
Paste and position on the top of the frame where desired
Select LilBugBee Element - resize by 20%
Image Free Rotate Right by 15% and paste on the top left
Select Butterflies Element - resize by 30%
Paste and position on the left side
Select GrassFlowers Element - resize by 40%
Paste and position on the bottom left
Select Rose 1 Element - resize by 15%
Paste and position on the bottom left
Select Lantern Element - resize by 22%
Paste and position on the bottom left
Paste tube of choice where desired
Apply Lokas 3D Shadow at default settings
Select Grass Element - resize by 55%
Paste and position on the bottom
Select WA Cluster Element - resize by 40%
Paste and position on the bottom right
Select Candle Element - resize by 20%
Paste and position on the bottom right side
Select Snail Element - resize by 15%
Paste and position on the bottom right
Select Flower 3 Element - resize by 20%
Paste and position on the bottom right
Select Clock Element - resize by 20%
Paste and position on the bottom below WA element
Select Hat Element - resize by 15%
Paste and paste on the bottom
Select Flower 5 Element - resize by 20%
Paste and position on the bottom left
Select LittleBird Element - resize by 16%
Paste and position on the bottom left
Select Parchment Element - resize by 12%
Image Free Rotate Left by 15% and paste on the bottom
Select Pen Element - resize by 20%
Paste and position on the bottom
Select Smudged Element - resize by 80%
Paste and position in the center of the canvas
Move to the bottom layer
Add any dropshadows you like
Sharpen any elements as needed
Crop and resize as desired
Add copyright info, license number and name
You're done! Thanks for trying my tutorial!

Labels:Gothic Inspirations | 1 comments
Sunday, May 15, 2016
QUEEN OF DARKNESS
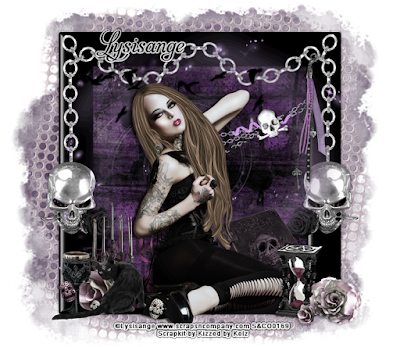
Supplies needed:
I am using the stunning artwork from Lysisange for this tutorial which you can find here
Scrapkit: I am using a stunning Collab kit from Kizzed by Kelz called "Darkness" which you can get by going here
Mask 22 from Becky which you can find here
Plugins: Lokas 3D Shadow
----------------------------
This tutorial is written for those who have working knowledge of PSPX2 (any version will do).
This tutorial was written by me on May 15, 2016. Please do not copy or paste on any other forum, website or blog provide link back to tut only. Please do not claim as your own. This tutorial is copyrighted to me. Any resemblance to any other tutorial is purely coincidental.
Ok - let's start and remember to save often.
Open up a 750 x 650 blank canvas (we can resize it later)
Select Frame Element 7 - paste and position in the center of the canvas
Select your magic wand tool and select the center of the frame (Add (Shift), RGB Value, Tolerance 25, Contiguous checked, Feather 0)
Selections, Modify, Expand by 5
Paste paper 1
Select invert, delete, select none
Move paper layer below frame layer
Select Element 39 - resize by 90%
Paste and position on the top of the frame layer
Select Element 38 - resize by 65%
Paste and position on the top left
Select Element 21 - resize by 45%
Paste and position on the top right
Select Element 15 - resize by 55%
Paste and position on the right side where desired
Paste tube of choice where desired
Apply Lokas 3D Shadow at default settings
Select Element 10 - resize by 20%
Paste and position on the bottom right
Select Element 5 - resize by 35%
Paste and position on the bottom right
Select Element 40 - resize by 30%
Paste and position on the bottom right below tube layer
Select Element 31 - resize by 35%
Paste and position on the bottom left
Select Element 4 - resize by 15%
Paste and position on the bottom left
Select Element 18 - resize by 35%
Paste and paste on the bottom left
Select Element 19 - resize by 30%
Paste and position on the bottom left
Select Element 34 - resize by 30%
Paste and position on the bottom left
Select Element 9 - resize by 110%
Paste and position in the center of the canvas and move to the bottom layer
Add new raster layer and flood-fill with color of choice
Apply Mask 22 or mask of choice
Merge group and move to the bottom layer
Add any dropshadows you like
Sharpen any elements as needed
Crop and resize as desired
Add copyright info, license number and name
You're done! Thanks for trying my tutorial!
Labels:Scraps N Company | 0
comments
Sunday, May 1, 2016
PUNK ROCK
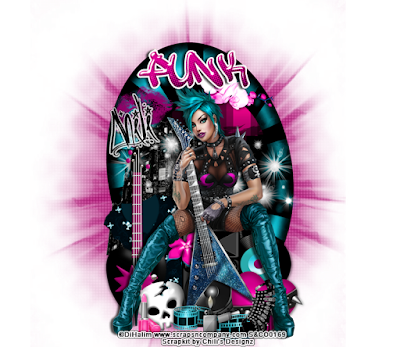
Supplies needed:
I am using the stunning artwork from DiHalim for this tutorial which you can find here
Scrapkit: I am using a stunning kit from Chili's Designz called "Punk Babe" which you can get by going here
Mask 71 from Gina Gems which you can find here
Plugins: Lokas 3D Shadow
----------------------------
This tutorial is written for those who have working knowledge of PSPX2 (any version will do).
This tutorial was written by me on May 1, 2016. Please do not copy or paste on any other forum, website or blog provide link back to tut only. Please do not claim as your own. This tutorial is copyrighted to me. Any resemblance to any other tutorial is purely coincidental.
Ok - let's start and remember to save often.
Open up a 750 x 650 blank canvas (we can resize it later)
Select Frame Element 4 - resize by 75%
Paste and position in the center of the canvas
Select your magic wand tool and select the center of the frame (Add (Shift), RGB Value, Tolerance 25, Contiguous checked, Feather 0)
Selections, Modify, Expand by 5
Paste paper 9
Select invert, delete, select none
Move paper layer below frame layer
Select Orchid Element - resize by 25%
Paste and position on the top right
Select WA Element - resize by 50%
Paste and position on the top of the frame where desired
Select Lips Element - resize by 50%
Paste and position on the top left
Select House Element - resize by 30%
Paste and position on the left side
Select Speaker Element - resize by 55%
Paste and position on the bottom
Paste tube of choice where desired
Apply Lokas 3D Shadow at default settings
Select Sparkles 4 Element - resize by 40%
Paste and position on the right side below tube layer
Select Shirt Element - resize by 50%
Image Free Rotate Left by 15% and paste on the bottom left
Select Guitar 3 Element - resize by 55%
Paste and position on the bottom left
Select Skull Element - Image Free Rotate Left by 15% and paste on the bottom
Select Lipstick Element - resize by 30%
Paste and position on the bottom left
Select Heart 2 Element - resize by 55%
Image Free Rotate Right by 15% and paste on the bottom right below the tube
Select LP Element - resize by 40%
Paste and position on the bottom right
Select Film Element - resize by 20%
Paste and position on the bottom
Select Lighter Element - resize by 25%
Paste and position on the bottom
Select Shoe2 Element - resize by 40%
Paste and position on the bottom
Paste paper 7 on canvas
Apply Mask 71 or mask of choice
Merge group and move to the bottom layer
Add any dropshadows you like
Sharpen any elements as needed
Crop and resize as desired
Add copyright info, license number and name
You're done! Thanks for trying my tutorial!
Labels:Chili Designz,Scraps N Company | 0
comments
Subscribe to:
Posts
(Atom)


