Labels
- Alikas Scraps
- All Dolled Up Store
- Amy Marie
- Annaica
- Arthur Crowe
- Babycakes Scraps
- Barbara Jensen
- Bibi's Collections
- Black Widow Creationz
- Blu Moon
- Bonnies Creations
- Bookwork Dezines
- Broken Sky Dezine
- Carita Creationz
- Carpe Diem Designs
- CDO
- Celinart Pinup
- Celine
- Chacha Creationz
- Charmed Designs
- Cherry Blossom Designs
- Chili Designz
- Cluster Frame
- Creative Misfits
- Creative Scraps by Crys
- Curious Creative Dreams
- Danny Lee
- Derzi
- Designs by Ali
- Designs by Joan
- Designs By Norella
- Designs by Vi
- Diana Gali
- Diry Art Designs
- Disturbed Scraps
- Dreaming With Bella
- Eclipse Creations
- Elegancefly
- Extras
- Fabulous Designz
- Forum Set
- Foxy's Designz
- Freek's Creation
- FTU
- FwTags
- Gothic Inspirations
- Gothic Raven Designs
- Graphfreaks
- Hania's Designs
- Happy Pumpkin Studios
- Horseplay's Pasture Designs
- indie-Zine
- Irish Princess Designs
- Ishika Chowdhury
- Kaci McVay
- Kajenna
- katharine
- Katherine
- Khloe Zoey
- Killer Kitty
- Kissing Kate
- KiwiFirestorm
- Kizzed by Kelz
- KZ Designz
- Lady Mishka
- Lil Mz Brainstorm
- Maiden of Darkness
- Mariel Designs
- MellieBeans
- Misticheskya
- MistyLynn's Creations
- MMeliCrea Designz
- Moon Vixen Designs
- NaSionainne
- Ninaste
- Niqui Designs
- Pandora
- Picsfordesign
- Pink Paradox Productions
- Radyga Designs
- Redefined Designs
- Rissa's Designs
- Schnegge
- ScottishButterfly Creations
- Scrappin Krazy Designs
- Scrappin With Lil Ol Me
- Scraps and the City
- Scraps Dimensions
- Scraps From The Heart
- Scraps N Company
- Scraps with Attitude
- Shining Star Art
- Skyscraps
- Sleek N Sassy Designs
- Sophisticat Simone
- Souldesigner
- Soxsational Scraps
- Spazz
- Starlite and Soul
- Tammy Welt
- Tasha's Playground
- The PSP Project
- Thrifty Scraps by Gina
- Tiny Turtle Designs
- Upyourart
- Verymany
- Wendy Gerber
- Whisper In the Wind
- Wick3d Creationz
- Wicked Diabla
- Yude's Kreationz
Blog Archive
Friday, August 30, 2019
HALLO-WITCH
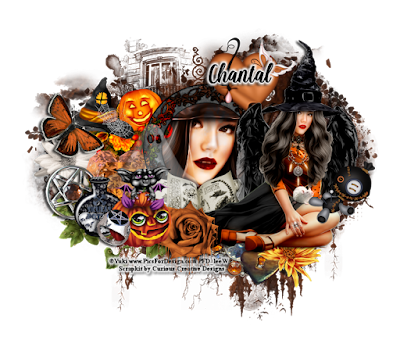
Supplies needed:
I am using the stunning CU artwork from Chachaz Creationz for this tutorial which you can find here
Scrapkit: I am using a beautiful kit from Curious Creative Dreams called "Hallo-Witch" which you can get by going here, here or here
Halloween Mask 3 from Fecnikek which you can find here
Plugins: Lokas 3D Shadow
----------------------------
This tutorial is written for those who have working knowledge of PSPX2 (any version will do).
This tutorial was written by me on August 30, 2019. Please do not copy or paste on any other forum, website or blog provide link back to tut only. Please do not claim as your own. This tutorial is copyrighted to me. Any resemblance to any other tutorial is purely coincidental.
Ok - let's start and remember to save often.
Open up a 750 x 650 blank canvas (we can resize it later)
Select Paper 2 and paste on the canvas
Apply Mask 3 and merge group
Select Frame Element 52 - resize by 40%
Paste and position on the top center
Select your magic wand tool and select the center of the frame (Add (Shift), RGB Value, Tolerance 25, Contiguous checked, Feather 0)
Selections, Modify, Expand by 5
Paste paper 4
Select invert, delete
Paste close-up tube on paper layer and delete
Select none
Duplicate close-up, apply Gaussian Blur at 4 and change to Overlay
Move paper layer and closeups below frame element
Select Element 65 - resize by 50%
Paste and position on the top right
Select Element 14 - resize by 50%
Paste and position on the top left
Select Element 13 - resize by 50%
Paste and position on the top left
Paste CU Tube on the right side
Apply Lokas 3D Shadow at default settings
Select Element 67 - resize by 50%
Paste and position on the left side
Select Element 16 - resize by 40%
Paste and position on the left side
Select Element 77 - resize by 50%
Paste and position on the left side
Select Element 42 - resize by 40%
Paste and position on the bottom left
Select Element 50 - resize by 40%
Paste and position on the bottom left
Select Element 19 - resize by 40%
Paste and paste on the bottom left
Select Element 70 - resize by 50%
Paste and position on the bottom left
Select Element 30 - resize by 40%
Paste and position on the bottom
Select Element 40 - resize by 40%
Paste and position on the bottom
Select Element 62 - resize by 30%
Paste and position on the left side
Select Element 49 - resize by 50%
Paste and position on the bottom right
Select Element 10 - resize by 30%
Paste and position on the bottom
Select Element 61 - resize by 50%
Paste and position on the bottom below tube layer
Select Element 17 - resize by 50%
Paste and position on the bottom
Select Element 12 - resize by 55%
Paste and position on the bottom left above mask layer
Add any dropshadows you like
Sharpen any elements as needed
Crop and resize as desired
Add copyright info, license number and name
You're done! Thanks for trying my tutorial!

Monday, August 26, 2019
PUMPKIN SPICE
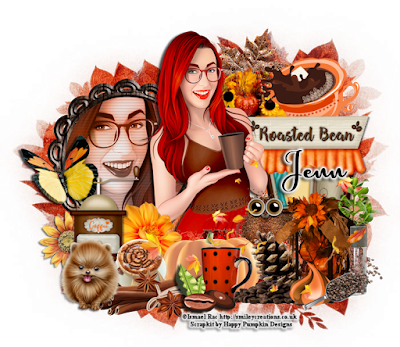
Supplies needed:
Scrapkit: I am using a beautiful kit from Happy Pumpkin Studios called "HPS Kit 39 " which you can get by going Here, Here and Here
Fall Mask 3 from Dee which you can find here
Plugins: Lokas 3D Shadow
----------------------------
This tutorial is written for those who have working knowledge of PSPX2 (any version will do).
This tutorial was written by me on August 26, 2019. Please do not copy or paste on any other forum, website or blog provide link back to tut only. Please do not claim as your own. This tutorial is copyrighted to me. Any resemblance to any other tutorial is purely coincidental.
Ok - let's start and remember to save often.
Open up a 750 x 650 blank canvas (we can resize it later)
Select Paper 6 and paste on the canvas
Apply Mask 3 and merge group
Select Paper 5 and paste on the canvas
Reapply Mask 4, merge group and change to Overlay
Select Frame Element 8 - resize by 40%
Paste and position on the top left
Select your magic wand tool and select the center of the frame (Add (Shift), RGB Value, Tolerance 25, Contiguous checked, Feather 0)
Selections, Modify, Expand by 5
Paste paper 13
Select invert, delete
Paste close-up tube on paper layer and delete
Select none
Change close-up to Luminance (Legacy) and merge down on paper layer
Move paper layer below frame element
Effect, Texture Effects, Blinds (Width 2, Opactity 15, Horizontal and Light from left/top checked)
Select Element 69 - resize by 25%
Paste and position on the top right
Select Element 131 - resize by 30%
Paste and position on the top right
Select Element 121 - resize by 20%
Paste and position on the top right
Select Element 55 - resize by 40%
Paste and position on the right side
Paste tube of choice where desired
Apply Lokas 3D Shadow at default settings
Select Element 134 - resize by 20%
Paste and position on the left side
Select Element 113 - resize by 15%
Paste and position on the bottom left
Select Element 60 - resize by 25%
Paste and position on the bottom left
Select Element 141 - resize by 20%
Paste and position on the bottom left
Select Element 11 - resize by 20%
Paste and position on the bottom left
Select Element 52 - resize by 15%
Paste and paste on the bottom left
Select Element 48 - resize by 25%
Paste and position on the bottom
Select Element 3 - resize by 25%
Paste and position on the bottom left
Select Element 53 - resize by 15%
Paste and position on the bottom
Select Element 68 - resize by 15%
Paste and position on the bottom
Select Element 24 - resize by 25%
Paste and position on the bottom right
Select Element 106 - resize by 30%
Paste and position on the bottom right
Select Element 70 - resize by 15%
Paste and position on the bottom right
Select Element 28 - resize by 20%
Paste and position on the bottom right
Select Element 29 - resize by 30%
Paste and position on the bottom right
Select Element 91 - resize by 20%
Paste and position on the bottom right
Select Element 49 - resize by 15%
Paste and position on the bottom right
Select Element 94 - resize by 65%
Paste and position on the canvas where desired
Add any dropshadows you like
Sharpen any elements as needed
Crop and resize as desired
Add copyright info, license number and name
You're done! Thanks for trying my tutorial!

Labels:Happy Pumpkin Studios | 0
comments
Sunday, August 25, 2019
DRESSING GOWN
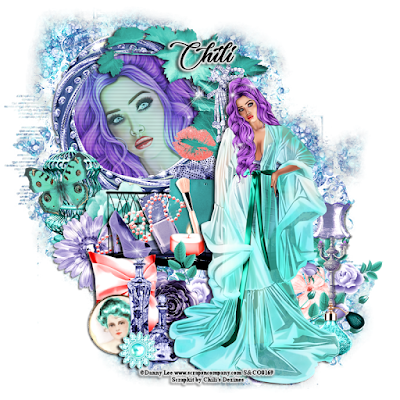
Supplies needed:
I am using the stunning artwork from Danny Lee for this tutorial which you can find here
Scrapkit: I am using a beautiful kit from Chili's Dezines called "Dressing Gown" which you can get by going here
Mask 12 from Vivienne which you can find here
Plugins: Lokas 3D Shadow
----------------------------
This tutorial is written for those who have working knowledge of PSPX2 (any version will do).
This tutorial was written by me on August 25, 2019. Please do not copy or paste on any other forum, website or blog provide link back to tut only. Please do not claim as your own. This tutorial is copyrighted to me. Any resemblance to any other tutorial is purely coincidental.
Ok - let's start and remember to save often.
Open up a 750 x 650 blank canvas (we can resize it later)
Select Paper 3 and paste on the canvas
Apply Mask 12 and merge group
Select Frame Element 2 - resize by 45%
Paste and position on the top left
Select your magic wand tool and select the center of the frame (Add (Shift), RGB Value, Tolerance 25, Contiguous checked, Feather 0)
Selections, Modify, Expand by 5
Add a new raster layer and flood-fill with gradient of choice
Paste close-up tube on gradient layer and delete
Select none
Change close-up to Hard Light and merge down on gradient layer
Effect, Texture Effects, Blinds (Width 2, Opactity 15, Horizontal and Light from left/top checked)
Move layer below frame element
Select Vine 2 Element - resize by 55%
Paste and position on the top right
Select Cage Element - resize by 40%
Paste and position on the left side
Select Butterfly Element - resize by 35%
Image Free Rotate Left by 15% and paste on the left
Select Flower Element - resize by 40%
Paste and position on the left side
Select Flower 2 Element - resize by 40%
Paste and position on the left side
Select Bench Element - resize by 65%
Paste and position in the center below frame
Select Deco 2 Element - resize by 50%
Paste and position on the bottom right
Paste tube of choice where desired
Apply Lokas 3D Shadow at default settings
Select Pillow Element - resize by 55%
Paste and position on the bottom left
Select Flair Element - resize by 25%
Image Free Rotate Left by 15% and paste on the bottom left
Select Flower 4 Element - resize by 30%
Paste and position on the bottom left
Select Vases Element - resize by 40%
Image mirror and paste on the bottom left
Select Jewel 3 Element - resize by 40%
Paste and paste on the bottom left
Select Bag 2 Element - resize by 40%
Paste and position above the bench element
Select Brush 3 Element - resize by 30%
Paste and position above the bench element
Select Polish Element - resize by 40%
Paste and position above the bench element
Select Shoe Element - resize by 30%
Paste and position above the bench element
Select Candle Element - resize by 30%
Paste and position above the bench element
Select Pearls 2 Element - resize by 30%
Paste and position above the bench element
Select Lamp Element - resize by 40%
Paste and position on the bottom right
Select Flower 5 Element - resize by 30%
Paste and position on the bottom right
Select Perfume 2 Element - resize by 30%
Image mirror and paste on the bottom right
Select Lips Element - resize by 40%
Paste and position on the top right
Select Pin Element - resize by 40%
Paste and position on the top right
Select Sparkles 3 - resize by 85%
Paste on canvas where desired
Add any dropshadows you like
Sharpen any elements as needed
Crop and resize as desired
Add copyright info, license number and name
You're done! Thanks for trying my tutorial!

Labels:Chili Designz | 0
comments
Tuesday, August 20, 2019
GOTHIC DREAMS
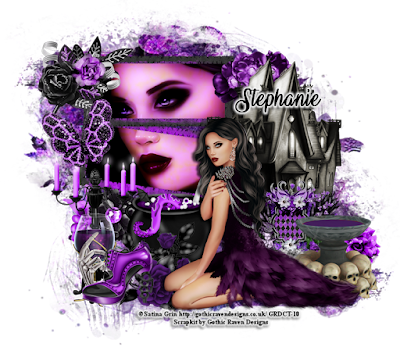
Supplies needed:
Scrapkit: I am using a beautiful kit from Gothic Raven Designs called "Gothic Dream" which you can get by going Here, Here and Here
Mask 209 from MzTeeques which you can find here
Mask 125 from Moonbeams and Spiderwebs here
Plugins: Lokas 3D Shadow
----------------------------
This tutorial is written for those who have working knowledge of PSPX2 (any version will do).
This tutorial was written by me on August 20, 2019. Please do not copy or paste on any other forum, website or blog provide link back to tut only. Please do not claim as your own. This tutorial is copyrighted to me. Any resemblance to any other tutorial is purely coincidental.
Ok - let's start and remember to save often.
Open up a 750 x 650 blank canvas (we can resize it later)
Select Paper 9 and paste on the canvas
Apply Mask 125 and merge group
Select Paper 9 and paste on the canvas
Apply Mask 209 and merge group
Select Frame Element 92 - resize by 50%
Paste and position on the top left
Select your magic wand tool and select the center rectangles of the frame (Add (Shift), RGB Value, Tolerance 25, Contiguous checked, Feather 0)
Selections, Modify, Expand by 5
Paste paper 8
Select invert, delete
Paste close-up tube on paper layer and delete
Select none
Duplicate close-up, apply Gaussian Blur at 4 and change to Overlay
Change orginal close-up to Luminance (Legacy)
Move paper layer and closeups below frame element
Select Element 86 - resize by 30%
Paste and position on the top left
Select Element 83 - resize by 25%
Paste and position on the top right
Select Element 63 - resize by 50%
Paste and position on the right side
Select Element 98 - resize by 40%
Paste and position on the bottom right
Select Element 5 - resize by 50%
Paste and position on the bottom right
Paste tube of choice where desired
Apply Lokas 3D Shadow at default settings
Select Element 95 - resize by 25%
Image Free Rotate Left by 15% and paste on the top left
Select Element 94 - resize by 50%
Paste and position on the bottom left
Select Element 79 - resize by 25%
Paste and position on the bottom left
Select Element 82 - resize by 40%
Paste and position on the bottom
Select Element 3 - resize by 30%
Paste and position on the bottom
Select Element 100 - resize by 30%
Paste and paste on the bottom left
Select Element 90 - resize by 25%
Paste and position on the bottom left
Add any dropshadows you like
Sharpen any elements as needed
Crop and resize as desired
Add copyright info, license number and name
You're done! Thanks for trying my tutorial!

Labels:Gothic Raven Designs | 0
comments
Sunday, August 18, 2019
FALL CUTIE
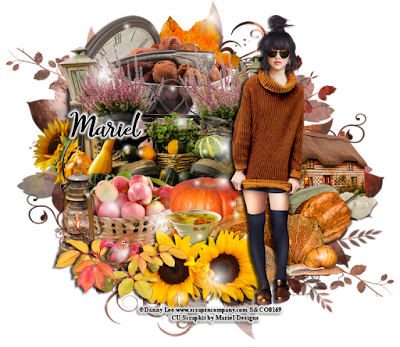
Supplies needed:
I am using the stunning artwork from Danny Lee for this tutorial which you can find here
Scrapkit: I am using a beautiful CU kit from Mariel Designs called "CU Fall 1" which you can get by going here
Autumn Mask 2 from Dee which you can find here
Plugins: Lokas 3D Shadow
----------------------------
This tutorial is written for those who have working knowledge of PSPX2 (any version will do).
This tutorial was written by me on August 18, 2019. Please do not copy or paste on any other forum, website or blog provide link back to tut only. Please do not claim as your own. This tutorial is copyrighted to me. Any resemblance to any other tutorial is purely coincidental.
Ok - let's start and remember to save often.
Open up a 750 x 650 blank canvas (we can resize it later)
Select Paper 1 and paste on the canvas
Apply Mask 2 and merge group
Select Element 2 - resize by 20%
Paste and position on the top left
Select Element 22 - resize by 15%
Image mirror and paste on the top right
Select Element 30 - resize by 20%
Paste and position on the top
Select Element 24 - resize by 40%
Paste and position on the top
Select Element 20 - resize by 15%
Paste and position on the left side
Select Element 28 - resize by 25%
Paste and position on the right side
Paste tube of choice where desired
Apply Lokas 3D Shadow at default settings
Select Element 14 - resize by 15%
Paste and position in the center where desired
Select Element 12 - resize by 20%
Paste and position on the left side
Select Element 26 - resize by 15%
Paste and position on the left side
Select Element 10 - resize by 10%
Paste and position on the bottom
Select Element 15 - resize by 20%
Paste and position on the bottom
Select Element 29 - resize by 20%
Paste and paste on the bottom left
Select Element 11 - resize by 15%
Paste and position on the bottom right
Select Element 23 - resize by 25%
Paste and position on the bottom right
Select Element 21 - resize by 10%
Paste and position on the bottom right
Select Element 34 - resize by 65%
Paste and position on the canvas where desired
Add any dropshadows you like
Sharpen any elements as needed
Crop and resize as desired
Add copyright info, license number and name
You're done! Thanks for trying my tutorial!

Labels:Mariel Designs | 0
comments
Saturday, August 17, 2019
VILLIAN
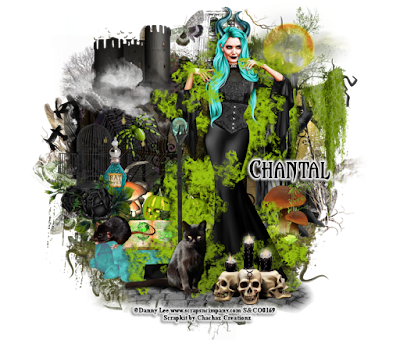
Supplies needed:
I am using the gorgeous artwork from Danny Lee for this tutorial which you can find here
Scrapkit: I am using a stunning kit from Chachaz Creationz called "Villian" which you can get by going here
Halloween Mask 2 from Fecnikek which you can find here
Plugins: Lokas 3D Shadow
----------------------------
This tutorial is written for those who have working knowledge of PSPX2 (any version will do).
This tutorial was written by me on August 17, 2019. Please do not copy or paste on any other forum, website or blog provide link back to tut only. Please do not claim as your own. This tutorial is copyrighted to me. Any resemblance to any other tutorial is purely coincidental.
Ok - let's start and remember to save often.
Open up a 750 x 650 blank canvas (we can resize it later)
Select Paper 3 and paste on the canvas
Apply Mask 2 and merge group
Select Element 44 - resize by 40%
Paste and position on the top left
Select Element 65 - resize by 40%
Paste and position on the top left
Select Element 71 - resize by 40%
Paste and position on the top right
Select Element 9 - resize by 30%
Paste and position on the left side
Select Element 52 - resize by 75%
Paste and position on the right side
Select Element 13 - resize by 50%
Paste and position on the top right
Select Element 16 - resize by 65%
Paste and position on the bottom right
Paste tube of choice where desired
Apply Lokas 3D Shadow at default settings
Select Element 51 - resize by 30%
Paste and position on the right side
Select Element 59 - resize by 40%
Paste and position on the left side
Select Element 8 - resize by 25%
Paste and position on the left side
Select Element 68 - resize by 40%
Image mirror and paste on the left side
Select Element 56 - resize by 40%
Paste and position on the bottom left
Select Element 47 - resize by 30%
Paste and paste on the bottom left
Select Element 10 - resize by 25%
Paste and position on the top left
Select Element 41 - resize by 30%
Paste and position on the bottom left
Select Element 58 - resize by 50%
Paste and position on the bottom
Select Element 15 - resize by 40%
Paste and position on the bottom
Select Element 32 - resize by 30%
Paste and position on the bottom
Add any dropshadows you like
Sharpen any elements as needed
Crop and resize as desired
Add copyright info, license number and name
You're done! Thanks for trying my tutorial!

Labels:Chacha Creationz | 0
comments
GOTHIC DAYS
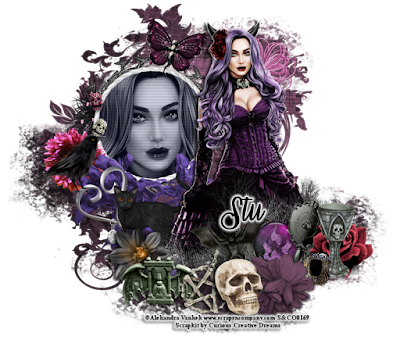
Supplies needed:
I am using the stunning artwork from Alehandra Vanhek for this tutorial which you can find here
Scrapkit: I am using a beautiful kit from Curious Creative Dreams called "Gothic Days" which you can get by going Here and Here
Mask 32 from Vivienne which you can find here
Plugins: Lokas 3D Shadow
----------------------------
This tutorial is written for those who have working knowledge of PSPX2 (any version will do).
This tutorial was written by me on August 17, 2019. Please do not copy or paste on any other forum, website or blog provide link back to tut only. Please do not claim as your own. This tutorial is copyrighted to me. Any resemblance to any other tutorial is purely coincidental.
Ok - let's start and remember to save often.
Open up a 750 x 650 blank canvas (we can resize it later)
Select Paper 59 and paste on the canvas
Apply Mask 32 and merge group
Select Frame Element 22 - resize by 65%
Paste and position on the top left
Select your magic wand tool and select the center of the frame (Add (Shift), RGB Value, Tolerance 25, Contiguous checked, Feather 0)
Selections, Modify, Expand by 5
Paste paper 58
Select invert, delete
Paste close-up tube on paper layer and delete
Select none
Change Close-up to Luminence (Legacy)
Merge close-up down on paper layer and move below frame
Effect, Texture Effects, Blinds (Width 2, Opactity 25, Horizontal and Light from left/top checked)
Select Element 13 - resize by 55%
Image Free Rotate Right by 15% and paste on the top above frame
Select Element 15 - resize by 55%
Paste and position on the top right
Select Element 47 - resize by 80%
Paste and position in the center below frame element
Paste tube of choice where desired
Apply Lokas 3D Shadow at default settings
Select Element 23 - resize by 40%
Paste and position on the left side
Select Element 43 - resize by 40%
Paste and position on the left side
Select Element 41 - resize by 75%
Paste and position on the bottom right
Select Element 10 - resize by 40%
Paste and position on the bottom right
Select Element 45 - resize by 50%
Image mirror and paste and on the left side
Select Element 44 - resize by 55%
Paste and paste on the bottom left
Select Element 46 - resize by 50%
Paste and position on the bottom left
Select Element 31 - resize by 50%
Paste and position on the bottom right
Select Element 33 - resize by 45%
Image Free Rotate Right by 15% and paste on the bottom right
Select Element 40 - resize by 30%
Paste and position on the bottom right
Select Element 14 - resize by 65%
Paste and position on the bottom
Select Element 17 - resize by 40%
Paste and position on the bottom
Select Element 48 - resize by 75%
Paste and position on the bottom
Select Element 34 - resize by 55%
Paste and position on the bottom
Select Element 24 - resize by 50%
Image Free Rotate Right by 15% and paste on the bottom
Select Element 29 - resize by 65%
Paste and position on the left side
Add any dropshadows you like
Sharpen any elements as needed
Crop and resize as desired
Add copyright info, license number and name
You're done! Thanks for trying my tutorial!

Labels:Curious Creative Dreams | 0
comments
Wednesday, August 14, 2019
SCHOOL FOR DOGS

Supplies needed:
I am using the stunning CU artwork from Mariel Designs for this tutorial which you can find here
Scrapkit: I am using a stunning CU kit from Mariel Designs called "Back to School 2" which you can get by going here
Mask 81 from Millie which you can find here
Plugins: Lokas 3D Shadow
----------------------------
This tutorial is written for those who have working knowledge of PSPX2 (any version will do).
This tutorial was written by me on August 14, 2019. Please do not copy or paste on any other forum, website or blog provide link back to tut only. Please do not claim as your own. This tutorial is copyrighted to me. Any resemblance to any other tutorial is purely coincidental.
Ok - let's start and remember to save often.
Open up a 750 x 650 blank canvas (we can resize it later)
Select CU Paper and paste on the canvas
Apply Mask 81 and merge group
Select Element 17 - resize by 10%
Paste and position on the top left
Select Element 31 - resize by 25%
Paste and position on the left side
Select Element 26 - resize by 15%
Paste and position on the top right
Select Element 19 - resize by 15%
Paste and position on the top right
Select Element 29 - resize by 15%
Image mirror and paste on the top right
Select Element 27 - resize by 10%
Paste and position on the top
Paste CU Dog tube on the bottom right at desired sized
Apply Lokas 3D Shadow at default settings
Select Element 30 - resize by 15%
Paste and position on the top left side
Select Element 25 - resize by 20%
Paste and position in the center
Select Element 9 - resize by 10%
Paste and position on the left side
Select Element 5 - resize by 15%
Paste and position on the bottom left
Select Element 1 - resize by 15%
Paste and position on the bottom left
Select Element 6 - resize by 15%
Paste and paste on the bottom
Select Element 12 - resize by 20%
Paste and position on the right side
Select Element 18 - resize by 15%
Paste and position on the right side
Select Element 11 - resize by 15%
Paste and position on the bottom
Select Element 3 - resize by 15%
Paste and position on the bottom
Select Element 20 - resize by 10%
Paste and position on the bottom
Select Element 2 - resize by 15%
Paste and position on the bottom
Select Element 28 - resize by 10%
Paste and position on the bottom
Select Element 16 - resize by 20%
Paste and position in the center
Add any dropshadows you like
Sharpen any elements as needed
Crop and resize as desired
Add copyright info, license number and name
You're done! Thanks for trying my tutorial!

Labels:Mariel Designs | 0
comments
Sunday, August 11, 2019
BIKER GIRL
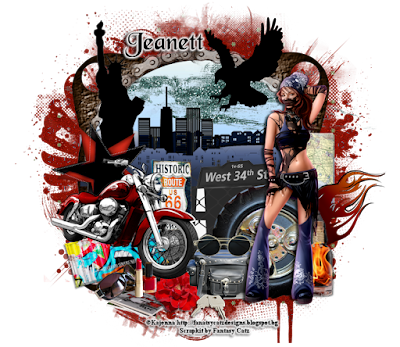
Supplies needed:
Scrapkit: I am using a stunning kit from Fantasy Catz Designs called "Biker Girl" which you can get by going here
Grunge Mask 2 from Fecnikek which you can find here
Plugins: Lokas 3D Shadow
----------------------------
This tutorial is written for those who have working knowledge of PSPX2 (any version will do).
This tutorial was written by me on August 11, 2019. Please do not copy or paste on any other forum, website or blog provide link back to tut only. Please do not claim as your own. This tutorial is copyrighted to me. Any resemblance to any other tutorial is purely coincidental.
Ok - let's start and remember to save often.
Open up a 750 x 650 blank canvas (we can resize it later)
Select Paper 9 and paste on the canvas
Apply Mask 2 and merge group
Select Frame Element 4 - resize by 75%
Paste and position in the center of the canvas
Select your magic wand tool and select the center of the frame (Add (Shift), RGB Value, Tolerance 25, Contiguous checked, Feather 0)
Selections, Modify, Expand by 5
Paste paper 3
Select invert, delete, select none
Move paper layer below frame element
Select Element 30 - resize by 75%
Paste and position on the top of the frame element
Select Element 154 - resize by 90%
Paste and position on the top of paper layer
Select Element 142 - resize by 65%
Paste and position center above frame layer
Select Element 59 - resize by 30%
Paste and position on the top right
Select Element 137 - resize by 80%
Paste and position on the bottom of frame layer
Select Element 140 - resize by 50%
Paste and position on the bottom right
Paste tube of choice where desired
Apply Lokas 3D Shadow at default settings
Select Element 53 - resize by 40%
Image Free Rotate Left by 15% and paste on the left side
Select Element 33 - resize by 50%
Paste and position on the left side
Select Element 85 - resize by 30%
Image Free Rotate Left by 15% and paste on the bottom left
Select Element 50 - resize by 25%
Paste and position on the bottom left
Select Element 71 - resize by 30%
Paste and position on the bottom left
Select Element 23 - resize by 20%
Paste and paste on the bottom
Select Element 81 - resize by 30%
Paste and position on the bottom
Select Element 16 - resize by 30%
Paste and position on the bottom
Select Element 88 - resize by 30%
Paste and position on the right side
Select Element 11 - resize by 30%
Paste and position on the bottom right
Select Element 28 - resize by 30%
Image mirror and paste on the right side
Select Element 68 - resize by 25%
Paste and position in the center below cycle element
Select Element 132 - resize by 30%
Paste and position in the center on the right
Select Element 87 - resize by 30%
Paste and position on the bottom
Add any dropshadows you like
Sharpen any elements as needed
Crop and resize as desired
Add copyright info, license number and name
You're done! Thanks for trying my tutorial!

Labels:All Dolled Up Store | 0
comments
Monday, August 5, 2019
ALIKI
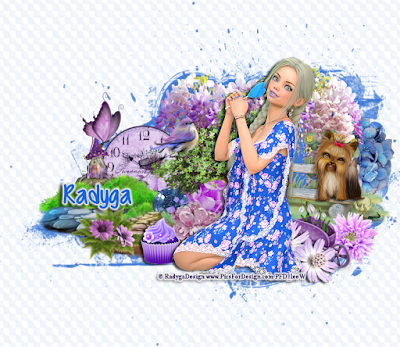
Supplies needed:
I am using the stunning artwork from Radgya Designs for this tutorial which you can find Here, Here, Here, Here and Here
Scrapkit: I am using a beautiful kit from Bella Caribena called "Strawberry Lover" which you can get by going here
Mask 31 from PsKopona which you can find here
Plugins: Lokas 3D Shadow
----------------------------
This tutorial is written for those who have working knowledge of PSPX2 (any version will do).
This tutorial was written by me on August 5, 2019. Please do not copy or paste on any other forum, website or blog provide link back to tut only. Please do not claim as your own. This tutorial is copyrighted to me. Any resemblance to any other tutorial is purely coincidental.
Ok - let's start and remember to save often.
Open up a 750 x 650 blank canvas (we can resize it later)
Add a new raster layer and flood-fill with color of choice
Apply Mask 31 and merge group
Select Element 98 - resize by 80%
Paste and position on the top
Select Element 11 - resize by 30%
Paste and position on the right side
Select Element 33 - resize by 55%
Paste and position on the right side
Select Element 4 - resize by 65%
Paste and position on the left side
Paste tube of choice where desired
Apply Lokas 3D Shadow at default settings
Select Element 7 - resize by 25%
Paste and position on the left side
Select Element 32 - resize by 40%
Image mirror and paste on the left side
Select Element 78 - resize by 25%
Paste and position on the left side
Select Element 77 - resize by 30%
Paste and position on the bottom
Select Element 88 - resize by 55%
Paste and position on the bottom
Select Element 152 - resize by 15%
Paste and paste on the bottom
Select Element 62 - resize by 15%
Paste and position on the bottom
Select Element 51 - resize by 25%
Paste and position on the right side
Select Element 74 - resize by 20%
Paste and position on the bottom right
Select Element 94 - resize by 20%
Paste and position on the left side
Select Element 81 - resize by 30%
Paste and position on the bottom right
Select Element 145 - resize by 25%
Paste and position on the bottom right
Add any dropshadows you like
Sharpen any elements as needed
Crop and resize as desired
Add copyright info, license number and name
You're done! Thanks for trying my tutorial!

Labels:Radyga Designs | 0
comments
Sunday, August 4, 2019
WONDERS OF THE SEA
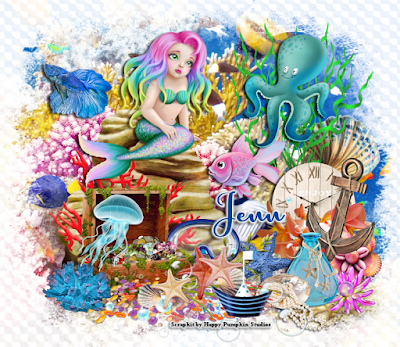
Supplies needed:
Scrapkit: I am using a beautiful kit from Happy Pumpkin Studios called "HPS Kit 37" which you can get by going Here or Here
Mask 2 from PsKopona which you can find here
Plugins: Lokas 3D Shadow
----------------------------
This tutorial is written for those who have working knowledge of PSPX2 (any version will do).
This tutorial was written by me on August 4, 2019. Please do not copy or paste on any other forum, website or blog provide link back to tut only. Please do not claim as your own. This tutorial is copyrighted to me. Any resemblance to any other tutorial is purely coincidental.
Ok - let's start and remember to save often.
Open up a 750 x 650 blank canvas (we can resize it later)
Select Paper 17 and paste on the canvas
Apply Mask 2 and merge group
Select Element 103 - resize by 50%
Paste and position on the left side
Select Element 104 - resize by 40%
Paste and position on the bottom left
Select Element 56 - resize by 55%
Paste and position on the bottom
Select Element 58 - resize by 30%
Paste and position on the bottom left
Paste Element 119 or tube of choice where desired
Apply Lokas 3D Shadow at default settings
Select Element 91 - resize by 20%
Paste and position on the top left
Select Element 20 - resize by 20%
Paste and position on the bottom left
Select Element 30 - resize by 20%
Paste and position on the bottom left
Select Element 22 - resize by 20%
Paste and position on the bottom
Select Element 55 - resize by 40%
Paste and position on the top right
Select Element 7 - resize by 20%
Paste and paste on the right side
Select Element 13 - resize by 30%
Paste and position on the top right
Select Element 73 - resize by 25%
Paste and position on the right side
Select Element 5 - resize by 30%
Image mirror and paste on the bottom right
Select Element 42 - resize by 15%
Paste and position on the bottom right
Select Element 68 - resize by 30%
Image Free Rotate Right by 15% and paste on the bottom right
Select Element 60 - resize by 15%
Paste and position on the bottom right
Select Element 65 - resize by 20%
Paste and position on the bottom right
Select Element 74 - resize by 20%
Paste and position on the bottom
Select Element 72 - resize by 20%
Paste and position on the bottom
Select Element 17 - resize by 50%
Paste and position on the bottom
Select Element 125 - resize by 20%
Paste and position on the right
Select Element 88 - resize by 20%
Paste and position on the bottom
Add any dropshadows you like
Sharpen any elements as needed
Crop and resize as desired
Add copyright info, license number and name
You're done! Thanks for trying my tutorial!

Labels:Happy Pumpkin Studios | 0
comments
Subscribe to:
Posts
(Atom)

