Labels
- Alikas Scraps
- All Dolled Up Store
- Amy Marie
- Annaica
- Arthur Crowe
- Babycakes Scraps
- Barbara Jensen
- Bibi's Collections
- Black Widow Creationz
- Blu Moon
- Bonnies Creations
- Bookwork Dezines
- Broken Sky Dezine
- Carita Creationz
- Carpe Diem Designs
- CDO
- Celinart Pinup
- Celine
- Chacha Creationz
- Charmed Designs
- Cherry Blossom Designs
- Chili Designz
- Cluster Frame
- Creative Misfits
- Creative Scraps by Crys
- Curious Creative Dreams
- Danny Lee
- Derzi
- Designs by Ali
- Designs by Joan
- Designs by Ketura
- Designs By Norella
- Designs by Vi
- Diana Gali
- Diry Art Designs
- Disturbed Scraps
- Dreaming With Bella
- Eclipse Creations
- Elegancefly
- Extras
- Fabulous Designz
- Forum Set
- Foxy's Designz
- Freek's Creation
- FTU
- FwTags
- Goldwasser
- Gothic Inspirations
- Gothic Raven Designs
- Graphfreaks
- Hania's Designs
- Happy Pumpkin Studios
- Horseplay's Pasture Designs
- indie-Zine
- Irish Princess Designs
- Ishika Chowdhury
- Kaci McVay
- Kajenna
- katharine
- Katherine
- Khloe Zoey
- Killer Kitty
- Kissing Kate
- KiwiFirestorm
- Kiya Designs
- Kizzed by Kelz
- KZ Designz
- Lady Mishka
- Lil Mz Brainstorm
- Maiden of Darkness
- Mariel Designs
- MellieBeans
- Michelle's Myths
- Midnight Shadow
- Misticheskya
- MistyLynn's Creations
- MMeliCrea Designz
- Moon Vixen Designs
- NaSionainne
- Ninaste
- Niqui Designs
- Pandora
- Picsfordesign
- Pink Paradox Productions
- Radyga Designs
- Redefined Designs
- Rissa's Designs
- Schnegge
- ScottishButterfly Creations
- Scrappin Krazy Designs
- Scrappin With Lil Ol Me
- Scraps and the City
- Scraps Dimensions
- Scraps From The Heart
- Scraps N Company
- Scraps with Attitude
- Shining Star Art
- Skyscraps
- Sleek N Sassy Designs
- Sophisticat Simone
- Souldesigner
- Soxsational Scraps
- Spazz
- Starlite and Soul
- Tammy Welt
- Tasha's Playground
- The PSP Project
- Thrifty Scraps by Gina
- Tiny Turtle Designs
- Upyourart
- Verymany
- Wendy Gerber
- Whisper In the Wind
- Wick3d Creationz
- Wicked Diabla
- Yude's Kreationz
Blog Archive
Wednesday, October 30, 2019
SCARECROW HISTORY
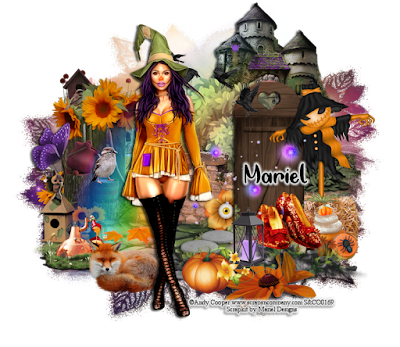
Supplies needed:
I am using the stunning artwork from Andy Cooper for this tutorial which you can find here
Scrapkit: I am using a beautiful kit from Mariel Designs called "Scarecrow History" which you can get by going here
Autumn Mask 11 from Dee which you can find here
Plugins: Lokas 3D Shadow
----------------------------
This tutorial is written for those who have working knowledge of PSPX2 (any version will do).
This tutorial was written by me on October 30, 2019. Please do not copy or paste on any other forum, website or blog provide link back to tut only. Please do not claim as your own. This tutorial is copyrighted to me. Any resemblance to any other tutorial is purely coincidental.
Ok - let's start and remember to save often.
Open up a 750 x 650 blank canvas (we can resize it later)
Select Paper 13 and paste on the canvas
Apply Mask 11 and merge group
Select Element 84 - resize by 65%
Paste and position in on the top right
Select Element 57 - resize by 65%
Paste and position on the top
Select Element 53 - resize by 55%
Paste and position on the top left
Select Element 78 - resize by 75%
Paste and position in the center
Select Element 33 - resize by 65%
Paste and position on the bottom left
Select Element 55 - resize by 55%
Paste and postion in the center
Select Element 29 - resize by 65%
Paste and position on the right side
Paste tube of choice where desired
Apply Lokas 3D Shadow at default settings
Select Element 75 - resize by 15%
Paste and position on the left side
Select Element 51 - resize by 25%
Paste and position on the bottom left side
Select Element 12 - resize by 25%
Paste and position on the bottom left
Select Element 30 - resize by 25%
Paste and position on the bottom left
Select Element 28 - resize by 20%
Paste and position on the bottom left side
Select Element 11 - resize by 12%
Paste and paste on the left side
Select Element 80 - resize by 30%
Paste and position on the top right
Select Element 63 - resize by 40%
Paste and position on the right side
Select Element 65 - resize by 30%
Paste and position on the bottom right
Select Element 39 - resize by 20%
Paste and position on the bottom right
Select Element 71 - resize by 55%
Paste and position on the bottom right
Select Element 17 - resize by 20%
Paste and position on the bottom right
Select Element 23 - resize by 15%
Paste and position on the bottom
Select Element 73 - resize by 25%
Paste and position on the bottom
Select Element 36 - resize by 30%
Paste and position on the bottom
Select Element 44 - resize by 30%
Paste and position on the bottom
Select Element 91 - resize by 45%
Paste and postion in the center where desired
Add any dropshadows you like
Sharpen any elements as needed
Crop and resize as desired
Add copyright info, license number and name
You're done! Thanks for trying my tutorial!

Labels:Mariel Designs | 0
comments
Monday, October 28, 2019
WITCH FELICIA

Supplies needed:
I am using the stunning artwork from Julia Fox for this tutorial which you can find here
Scrapkit: I am using a beautiful kit from Chachaz Creationz called "Felicia" which you can get by going here
Mask 877 from Rachel Designs which you can find here
Plugins: Lokas 3D Shadow
----------------------------
This tutorial is written for those who have working knowledge of PSPX2 (any version will do).
This tutorial was written by me on October 28, 2019. Please do not copy or paste on any other forum, website or blog provide link back to tut only. Please do not claim as your own. This tutorial is copyrighted to me. Any resemblance to any other tutorial is purely coincidental.
Ok - let's start and remember to save often.
Open up a 750 x 650 blank canvas (we can resize it later)
Select Paper 6 and paste on the canvas
Apply Mask 877 and merge group
Select Element 19 - resize by 40%
Paste and position on the top left
Select Element 91 - resize by 50%
Paste and position on the top left
Select Element 90 - resize by 50%
Paste and position on the top right
Select Element 68 - resize by 75%
Paste and position on the right side
Select Element 29 - resize by 55%
Paste and position on the bottom left
Paste tube of choice where desired
Apply Lokas 3D Shadow at default settings
Select Element 48 - resize by 25%
Paste and position on the bottom left
Select Element 31 - resize by 25%
Paste and position on the bottom left
Select Element 76 - resize by 30%
Paste and position on the bottom left
Select Element 55 - resize by 25%
Paste and position on the bottom left
Select Element 25 - resize by 30%
Paste and position on the bottom
Select Element 1 - resize by 25%
Paste and paste on the bottom
Select Element 74 - resize by 25%
Paste and position on the bottom
Select Element 60 - resize by 45%
Paste and position on the right side
Select Element 27 - resize by 25%
Paste and position on the bottom right
Select Element 56 - resize by 40%
Paste and position on the bottom right
Select Element 8 - resize by 20%
Paste and position on the bottom right
Select Element 75 - resize by 25%
Paste and position on the bottom right
Select Element 35 - resize by 40%
Paste and position on the canvas where desired
Add any dropshadows you like
Sharpen any elements as needed
Crop and resize as desired
Add copyright info, license number and name
You're done! Thanks for trying my tutorial!

Labels:Chacha Creationz | 0
comments
Sunday, October 27, 2019
DEMON GIRL
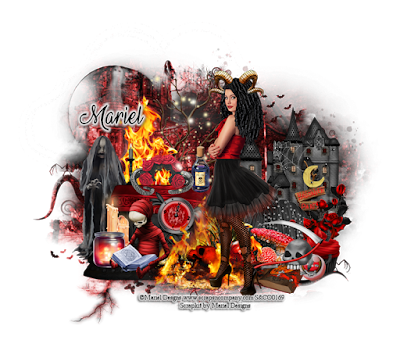
Supplies needed:
I am using the stunning artwork from Mariel Designs for this tutorial which you can find here
Scrapkit: I am using a beautiful kit from Mariel Designs called "Demon" which you can get by going here
Halloween Mask from Fecnikek which you can find here
Plugins: Lokas 3D Shadow
----------------------------
This tutorial is written for those who have working knowledge of PSPX2 (any version will do).
This tutorial was written by me on October 27, 2019. Please do not copy or paste on any other forum, website or blog provide link back to tut only. Please do not claim as your own. This tutorial is copyrighted to me. Any resemblance to any other tutorial is purely coincidental.
Ok - let's start and remember to save often.
Open up a 750 x 650 blank canvas (we can resize it later)
Select Paper 5 and paste on the canvas
Apply Mask and merge group
Select Element 81 - resize by 40%
Paste and position on the right side
Select Element 85 - resize by 40%
Paste and position on the top center
Select Element 38 - resize by 40%
Paste and position on the left side
Select Element 75 - resize by 40%
Paste and position on the top left
Select Element 90 - resize by 40%
Paste and position on the left side
Select Element 7 - resize by 40%
Paste and position on the top center
Select Element 69 - resize by 50%
Paste and position on the bottom left
Select Element 34 - resize by 40%
Paste and position on the bottom
Paste tube of choice where desired
Apply Lokas 3D Shadow at default settings
Select Element 45 - resize by 20%
Paste and position on in the center
Select Element 29 - resize by 15%
Paste and position in the center
Select Element 44 - resize by 20%
Paste and position on the bottom left
Select Element 24 - resize by 10%
Paste and position on the bottom left
Select Element 9 - resize by 25%
Paste and position on the bottom left
Select Element 18 - resize by 20%
Image Free Rotate Right by 15% and paste on the bottom
Select Element 3 - resize by 30%
Paste and position on the bottom right
Select Element 82 - resize by 20%
Paste and position on the bottom right
Select Element 56 - resize by 30%
Paste and position on the bottom right
Select Element 28 - resize by 15%
Paste and position on the bottom right
Select Element 66 - resize by 10%
Paste and position on the bottom right
Select Element 31 - resize by 30%
Paste and position on the bottom right
Select Element 26 - resize by 20%
Paste and position on the bottom right
Select Element 19 - resize by 25%
Paste and position on the bottom right
Select Element 71 - resize by 65%
Paste and position in the center where desiredAdd any dropshadows you like
Sharpen any elements as needed
Crop and resize as desired
Add copyright info, license number and name
You're done! Thanks for trying my tutorial!

Labels:Mariel Designs | 0
comments
Sunday, October 20, 2019
CATRINA SUGAR SKULL
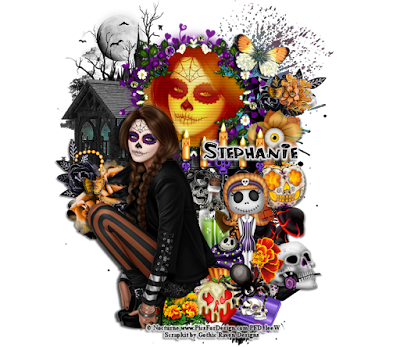
Supplies needed:
I am using the stunning artwork from Nocturne for this tutorial which you can find here
Scrapkit: I am using a beautiful kit from Gothic Raven Design called "Sugar Skull" which you can get by going Here, Here and Here
Mask 4 from Minja Designs which you can find here
Plugins: Lokas 3D Shadow
----------------------------
This tutorial is written for those who have working knowledge of PSPX2 (any version will do).
This tutorial was written by me on October 20, 2019. Please do not copy or paste on any other forum, website or blog provide link back to tut only. Please do not claim as your own. This tutorial is copyrighted to me. Any resemblance to any other tutorial is purely coincidental.
Ok - let's start and remember to save often.
Open up a 750 x 650 blank canvas (we can resize it later)
Select Paper 10 and paste on the canvas
Apply Mask 3 and merge group
Select Element 94 - resize by 40%
Paste and position on the top left
Select Element 48 - resize by 50%
Paste and position on the top left
Select Frame Element 86 - resize by 40%
Paste and position on the top of the canvas
Select your magic wand tool and select the center of the frame (Add (Shift), RGB Value, Tolerance 25, Contiguous checked, Feather 0)
Selections, Modify, Expand by 5
Paste paper 7
Select invert, delete
Paste close-up tube on paper layer and delete
Select none
Apply Luminence (Legacy) to close-up and merge down on paper layer
Effect, Texture Effects, Blinds (Width 2, Opactity 25, Horizontal and Light from left/top checked)
Move paper layer below frame element
Select Element 74 - resize by 30%
Paste and position on the left side
Select Element 73 - resize by 20%
Paste and position on the top right
Select Element 69 - resize by 15%
Image Free Rotate Right by 15% and paste on the top right
Select Element 68 - resize by 20%
Paste and position on the right side
Select Element 43 - resize by 20%
Paste and position in the center
Paste tube of choice where desired
Apply Lokas 3D Shadow at default settings
Select Element 117 - resize by 15%
Image mirror and paste on the right side
Select Element 85 - resize by 30%
Paste and position below frame element
Select Element 88 - resize by 25%
Paste and position in the center
Select Element 84 - resize by 30%
Paste and position on the bottom
Select Element 56 - resize by 15%
Paste and position on the bottom right
Select Element 76 - resize by 15%
Paste and paste on the bottom right
Select Element 31 - resize by 15%
Paste and position on the bottom right
Select Element 83 - resize by 20%
Paste and position on the bottom
Select Element 110 - resize by 20%
Paste and position on the bottom below tube layer
Select Element 126 - resize by 15%
Paste and position on the bottom
Select Element 16 - resize by 15%
Paste and position on the bottom
Select Element 99 - resize by 15%
Paste and position on the bottom
Add any dropshadows you like
Sharpen any elements as needed
Crop and resize as desired
Add copyright info, license number and name
You're done! Thanks for trying my tutorial!

Labels:Gothic Raven Designs | 0
comments
Friday, October 18, 2019
STRIPED WITCH
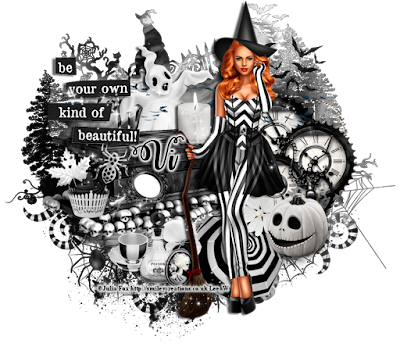
Supplies needed:
I am using the stunning CU artwork Striped Witch 1 from SCS Tubes for this tutorial which you can find here
Scrapkit: I am using a beautiful kit from Pink Paradox Productions called "Halloween Dream" which you can get by going here
Halloween Mask 3 from Fecnikek which you can find here
Plugins: Lokas 3D Shadow
----------------------------
This tutorial is written for those who have working knowledge of PSPX2 (any version will do).
This tutorial was written by me on October 18, 2019. Please do not copy or paste on any other forum, website or blog provide link back to tut only. Please do not claim as your own. This tutorial is copyrighted to me. Any resemblance to any other tutorial is purely coincidental.
Ok - let's start and remember to save often.
Open up a 750 x 650 blank canvas (we can resize it later)
Select Paper 13 and paste on the canvas
Apply Mask 3 and merge group
Select Element 5 - resize by 30%
Paste and position on the top
Select Element 83 - resize by 50%
Paste and position on the left side
Select Element 64 - resize by 30%
Paste and position on the top left
Select Element 6 - resize by 25%
Image mirror and paste on the top right
Select Element 69 - resize by 25%
Paste and position on the right side
Select Element 38 - resize by 25%
Paste and position on the bottom
Paste CU tube of choice where desired
Apply Lokas 3D Shadow at default settings
Select Element 19 - resize by 20%
Paste and position on the bottom right
Select Element 45 - resize by 20%
Paste and position in the center
Select Element 96 - resize by 20%
Paste and position on the left side
Select Element 29 - resize by 15%
Image Free Rotate Right by 15% and paste on the left side
Select Element 44 - resize by 20%
Paste and position on the left side
Select Element 28 - resize by 25%
Paste and paste on the bottom left
Select Element 26 - resize by 20%
Paste and position on the bottom left
Select Element 90 - resize by 15%
Paste and position on the bottom
Select Element 57 - resize by 15%
Image Free Rotate Right by 15% and paste on the bottom
Select Element 109 - resize by 50%
Paste and position on the canvas where desired
Add any dropshadows you like
Sharpen any elements as needed
Crop and resize as desired
Add copyright info, license number and name
You're done! Thanks for trying my tutorial!

Labels:Designs by Vi | 0
comments
Sunday, October 6, 2019
LADY MAGIC
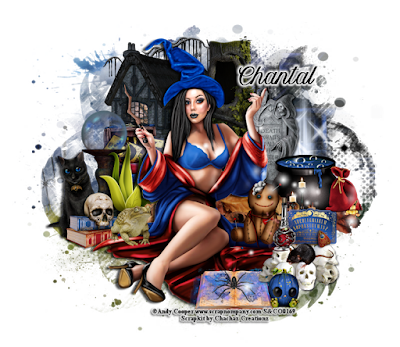
Supplies needed:
I am using the stunning artwork from Andy Cooper for this tutorial which you can find here
Scrapkit: I am using a beautiful kit from Chachaz Creationz called "Lady Magic" which you can get by going here
Mask 878 from Rachel Designs which you can find here
Plugins: Lokas 3D Shadow
----------------------------
This tutorial is written for those who have working knowledge of PSPX2 (any version will do).
This tutorial was written by me on October 6, 2019. Please do not copy or paste on any other forum, website or blog provide link back to tut only. Please do not claim as your own. This tutorial is copyrighted to me. Any resemblance to any other tutorial is purely coincidental.
Ok - let's start and remember to save often.
Open up a 750 x 650 blank canvas (we can resize it later)
Select Paper 2 and paste on the canvas
Apply Mask 878 and merge group
Select Element 76 - resize by 580%
Paste and position in on the top of the canvas
Select Element 42 - resize by 45%
Paste and position on the top left
Select Element 77 - resize by 55%
Paste and position on the top right
Select Element 69 - resize by 30%
Paste and position on the left side
Select Element 58 - resize by 40%
Paste and position on the right side
Select Element 80 - resize by 40%
Paste and position on the right side
Select Element 46 -
Paste and position in the center where desired
Paste tube of choice where desired
Apply Lokas 3D Shadow at default settings
Select Element 74 - resize by 40%
Paste and position on the left side
Select Element 15 - resize by 35%
Paste and position on the left side
Select Element 6 - resize by 30%
Paste and position on the left side
Select Element 71 - resize by 25%
Paste and position on the bottom left
Select Element 41 - resize by 20%
Paste and position on the bottom left
Select Element 8 - resize by 30%
Paste and paste on the right side
Select Element 21 - resize by 20%
Paste and position on the right side
Select Element 68 - resize by 30%
Paste and position on the right side
Select Element 70 - resize by 30%
Paste and position on the bottom right
Select Element 73 - resize by 30%
Paste and position on the bottom right
Select Element 27 - resize by 30%
Paste and position on the bottom right
Select Element 56 - resize by 40%
Paste and position on the bottom right
Select Element 10 - resize by 20%
Paste and position on the bottom right
Select Element 33 - resize by 20%
Paste and position on the bottom
Select Element 55 - resize by 20%
Paste and position on the bottom right
Select Element 34 - resize by 65%
Paste and position on the right where desired
Add any dropshadows you like
Sharpen any elements as needed
Crop and resize as desired
Add copyright info, license number and name
You're done! Thanks for trying my tutorial!

Labels:Chacha Creationz | 0
comments
GOTHIC ALLEY CAT
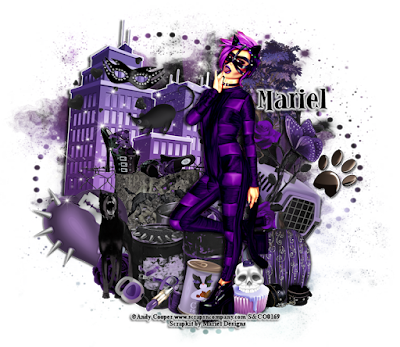
Supplies needed:
I am using the stunning artwork from Andy Cooper for this tutorial which you can find here
Scrapkit: I am using a beautiful kit from Mariel Designs called "Gothic Queen Cat" which you can get by going here
Mask 2 from Rachel Designs which you can find here
Plugins: Lokas 3D Shadow
----------------------------
This tutorial is written for those who have working knowledge of PSPX2 (any version will do).
This tutorial was written by me on October 6, 2019. Please do not copy or paste on any other forum, website or blog provide link back to tut only. Please do not claim as your own. This tutorial is copyrighted to me. Any resemblance to any other tutorial is purely coincidental.
Ok - let's start and remember to save often.
Open up a 750 x 650 blank canvas (we can resize it later)
Select Paper 2 and paste on the canvas
Apply Mask 2 and merge group
Select Element 32 - resize by 55%
Paste and position on the top left
Select Element 50 - resize by 50%
Paste and position on the top right
Select Element 54 - resize by 50%
Paste and position below building element
Select Element 30 - resize by 50%
Paste and position on the bottom
Select Element 34 - resize by 30%
Paste and position on the right side
Select Element 62 - resize by 50%
Image Free Rotate Right by 15% and paste on the right side
Paste tube of choice where desired
Apply Lokas 3D Shadow at default settings
Select Element 91 - resize by 30%
Paste and position on the bottom left
Select Element 71 - resize by 15%
Paste and position on the bottom left
Select Element 64 - resize by 35%
Paste and position on the bottom left
Select Element 89 - resize by 20%
Image Free Rotate Right by 15% and paste on the top left
Select Element 9 - resize by 25%
Paste and position on the buildng element
Select Element 59 - resize by 30%
Paste and paste in the center
Select Element 41 - resize by 20%
Paste and position on the bottom
Select Element 92 - resize by 10%
Paste and position on the bottom
Select Element 38 - resize by 20%
Paste and position on the bottom
Select Element 39 - resize by 15%
Paste and position on the right side
Select Element 47 - resize by 15%
Image mirror and paste on the right side
Select Element 101 - resize by 30%
Paste and position on the bottom right
Select Element 24 - resize by 20%
Paste and position on the bottom right
Select Element 48 - resize by 20%
Paste and position on the bottom right
Select Element 16 - resize by 20%
Paste and position on the bottom
Select Element 58 - resize by 30%
Paste and position on the top left
Select Element 27 - resize by 65%
Paste and position on the top left where desired
Add any dropshadows you like
Sharpen any elements as needed
Crop and resize as desired
Add copyright info, license number and name
You're done! Thanks for trying my tutorial!

Labels:Mariel Designs | 0
comments
Friday, October 4, 2019
PRINCESS OF DARKNESS
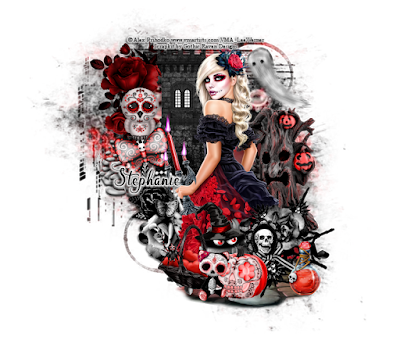
Supplies needed:
I am using the stunning artwork from Alex Prihodko for this tutorial which you can find here
Scrapkit: I am using a beautiful kit from Gothic Raven Designs called "Frightful Halloween" which you can get by going Here, Here and Here
Mask 311 from Mizteeques which you can find here
Plugins: Lokas 3D Shadow
----------------------------
This tutorial is written for those who have working knowledge of PSPX2 (any version will do).
This tutorial was written by me on October 4, 2019. Please do not copy or paste on any other forum, website or blog provide link back to tut only. Please do not claim as your own. This tutorial is copyrighted to me. Any resemblance to any other tutorial is purely coincidental.
Ok - let's start and remember to save often.
Open up a 750 x 650 blank canvas (we can resize it later)
Select Paper 8 and paste on the canvas
Apply Mask 311 and merge group
Select Element 32 - resize by 30%
Paste and position on the top right
Select Element 63 - resize by 40%
Paste and position on the top left
Select Element 36 - resize by 20%
Paste and position on the left side
Select Element 93 - resize by 35%
Paste and position on the right side
Select Element 72 - resize by 40%
Paste and position on the bottom
Paste tube of choice where desired
Apply Lokas 3D Shadow at default settings
Select Element 92 - resize by 15%
Paste and position on the top left
Select Element 102 - resize by 15%
Image Free Rotate Left by 15% and paste on the left side
Select Element 9 - resize by 30%
Paste and position on the bottom left
Select Element 65 - resize by 20%
Paste and position on the bottom left
Select Element 78 - resize by 20%
Paste and position on the bottom left
Select Element 5 - resize by 30%
Paste and paste on the bottom right
Select Element 77 - resize by 15%
Paste and position on the bottom right
Select Element 50 - resize by 25%
Paste and position on the bottom
Select Element 39 - resize by 15%
Paste and position on the bottom
Select Element 101 - resize by 15%
Paste and position on the bottom
Select Element 18 - resize by 15%
Paste and position on the bottom
Select Element 54 - resize by 20%
Paste and position on the top right
Add any dropshadows you like
Sharpen any elements as needed
Crop and resize as desired
Add copyright info, license number and name
You're done! Thanks for trying my tutorial!

Labels:Gothic Raven Designs | 0
comments
Tuesday, October 1, 2019
RED DIABLA

Supplies needed:
I am using the stunning artwork from Janah Irinya for this tutorial which you can find here
Scrapkit: I am using a beautiful kit from Chachaz Creationz called "Diabla" which you can get by going here
Mask 879 from Rachel Designs which you can find here
Plugins: Lokas 3D Shadow
----------------------------
This tutorial is written for those who have working knowledge of PSPX2 (any version will do).
This tutorial was written by me on October 1 , 2019. Please do not copy or paste on any other forum, website or blog provide link back to tut only. Please do not claim as your own. This tutorial is copyrighted to me. Any resemblance to any other tutorial is purely coincidental.
Ok - let's start and remember to save often.
Open up a 750 x 650 blank canvas (we can resize it later)
Select Paper 2 and paste on the canvas
Apply Mask 879 and merge group
Select Element 29 - resize by 65%
Paste and position on the right side
Select Element 41 - resize by 65%
Paste and position on the bottom right
Select Element 71 - resize by 40%
Paste and position on the top right
Select Element 33 - resize by 30%
Paste and position on the top left
Select Element 60 - resize by 50%
Paste and position on the left side
Select Element 28 - resize by 40%
Image Free Rotate Left by 15% and paste on the right side
Select Element 67 - resize by 30%
Paste and position on the right side
Select Elemet 48 - resize by 45%
Paste and position on the bottom
Paste tube of choice where desired
Apply Lokas 3D Shadow at default settings
Select Element 9 - resize by 20%
Image mirror paste and position on the bottom left
Select Element 53 - resize by 25%
Paste and position on the bottom left
Select Element 49 - resize by 30%
Paste and position on the bottom left
Select Element 37 - resize by 65%
Paste and position on the left side
Select Element 74 - resize by 25%
Paste and position on the bottom left
Select Element 78 - resize by 25%
Paste and paste on the bottom
Select Element 45 - resize by 40%
Paste and position on the bottom right
Select Element 46 - resize by 25%
Paste and position on the bottom right
Select Element 14 - resize by 25%
Paste and position on the bottom right
Select Element 62 - resize by 25%
Paste and position on the top right
Select Element 52 -
Paste and position on the bottom where desired
Add any dropshadows you like
Sharpen any elements as needed
Crop and resize as desired
Add copyright info, license number and name
You're done! Thanks for trying my tutorial!

Labels:Chacha Creationz | 0
comments
Subscribe to:
Posts
(Atom)


