I CT For


Sunday, September 30, 2012
DARK ELIZABETH

Supplies needed:
I am using the amazing art from Bonnies Creations for this tutorial, which you can find here
Scrapkit: I am using an awesome kit from Amy Marie called "Devilish" which you can get by going here
Plugins used: Xero-Radiance, Xero-Bad Dream, Lokas 3D Shadow
----------------------------
This tutorial is written for those who have working knowledge of PSPX2 (any version will do).
This tutorial was written by me on September 30, 2012. Please do not copy or paste on any other forum, website or blog provide link back to tut only. Please do not claim as your own. This tutorial is copyrighted to me. Any resemblance to any other tutorial is purely coincidental.
Ok - let's start and remember to save often.
Open up a 700 x 650 blank canvas
Select Mask 2 element and paste in the center of your canvas
Select frame 2 element
Paste in the center on top of mask layer
Select your magic wand and click in the center of your frame (Add (Shift), RGB Value, Tolerance 10, Contiguous checked, Feather 0)
Selections, Modify, Expand by 5
Paste paper pp012
Select invert, delete, select none
Move paper below frame layer
Select Scrunched Ribbon element and move on the bottom on top of frame layer
Select frame 8 element - resize by 35%
Paste and reposition on bottom right on top of frame 2 layer
Select your magic wand again and click in the center of each square
Selections, Modify, Expand by 2
Add new raster layer and flood-fill with gradient of choice (Linear style, Angle 45, Repeat 2)
Copy and paste close-up tube of choice
Select invert, delete, select none
Change tube to Luminence (Legacy)
Apply Xero Bad Dream at default settings
Drop the opacity on close-up down to about 70%
Apply dropshadow and merge tube down on top of gradient
Move gradient/tube layer below frame element
Apply dropshadow to frame and merge together with gradient/tube layer
Copy and paste tube of choice and position where desired
Apply Xero Radiance at setting of choice
Apply Lokas 3D Shadow at default settings
Select Deadtree element - resize by 85%
Paste and reposition under frame 8 layer to the right
Select MoonWGlow element - resize by 40%
Paste and reposition on top right of mask 2 layer
Add any additional elements you like.
Add any dropshadows you like
Crop and resize as desired
Add copyright info, license number and name
You're done! Thanks for trying my tutorial!
Saturday, September 29, 2012
AUTUMN PLEASURES

Supplies needed:
I am using the amazing art from Alex Prihodko for this tutorial, which you can find here
Scrapkit: I am using a beautiful kit from Niqui Designs called "Autumn Pleasures" which you can get by going here
Vix Masks 238 and 404 here
Plugins used: Penta - Color dots, Xero-Radiance, Xero-Bad Dream, Lokas 3D Shadow
----------------------------
This tutorial is written for those who have working knowledge of PSPX2 (any version will do).
This tutorial was written by me on September 29, 2012. Please do not copy or paste on any other forum, website or blog provide link back to tut only. Please do not claim as your own. This tutorial is copyrighted to me. Any resemblance to any other tutorial is purely coincidental.
Ok - let's start and remember to save often.
Open up a 700 x 650 blank canvas
Choose a color from your tube for your foreground and deselect background color
Use you Selection Tool set on Eclipse (Line width set on 10)
Draw out a large circle to the left of your canvas
Convert circle to raster layer
Select your magic wand and click in the center of your circle (Add (Shift), RGB Value, Tolerance 10, Contiguous checked, Feather 0)
Selections, Modify, Expand by 5
Paste nq-paper 8
Select invert, delete, select none
Move paper below circle layer
Select frame on circle and Adjust, Add/Remove Noise, Add Noise (Uniform checked, Noise 75%, Monochrome checked)
Merge paper and circle frame together
Select your Eclipse tool again and draw another smaller circle on top of the circle you just made (change line width of circle to 5)
Convert to circle to raster layer
Select your magic wand again and click in the center of the new circle
Selections, Modify, Expand by 2
Paste nq-paper 13
Select invert, delete, select none
Move paper layer below circle and merge together
You should have something like this now

Select nq-element 8 frame - resize by 50%
Paste and reposition on right side of circles
Select your magic want and click the center of each frame
Selections, modify, expand by 4
Add a new raster layer and flood-fill each square with gradient of choice (Linear style, Angle 45, Repeat 2)
Copy and paste tubes of choice
Select invert, delete, select none
Change tubes to Hard Light
Apply Xero Bad Dream at default settings
Drop the opacity on close-up down to about 85%
Apply dropshadow and merge tubes down on top of gradient
Move gradient layer below frame element
Apply dropshadow to frame and merge together with gradient/tube layer
Select nq-element 25 (mailbox) - resize by 70%
Paste and reposition on left side of circles
Select nq-element 24 (leaves) - resize by 85%
Paste and reposition on bottom under circles layer
Copy and paste tube of choice and position where desired
Apply Xero Radiance at setting of choice
Apply Lokas 3D Shadow at default settings
Select New raster layer and flood-fill with color of choice
Apply Vix Mask 238
Merge group and move to the bottom
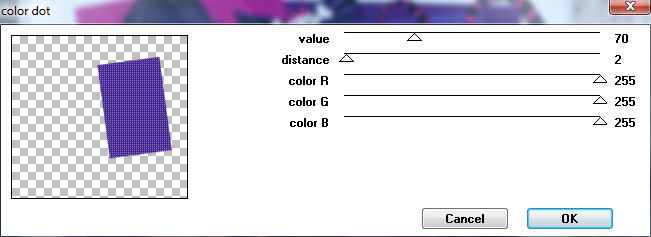
Apply Penta - color dots at default settings
Select New raster layer and flood-fill with color or gradient of choice
Move layer to the bottom of the template
Apply Vix Mask 404
Merge group and move to the bottom
Add any additional elements you like.
Add any dropshadows you like
Crop and resize as desired
Add copyright info, license number and name
You're done! Thanks for trying my tutorial!
Friday, September 28, 2012
SEASON OF FROST

Supplies needed:
I am using the amazing art from EOS Sparks for this tutorial, which you can find here
Scrapkit: I am using a beautiful kit from Sleek 'N Sassy Designs called "Frost" which you can get by going here
Collab Template 02 from Aqua and Kylie which can be found on the Misfits blog here
Weescotlass Mask 41 here
Plugins used: Eyecandy 4000 - Glass, Tramages - Tow the Line, PentaXero-Radiance, Xero-Bad Dream, Lokas 3D Shadow
----------------------------
This tutorial is written for those who have working knowledge of PSPX2 (any version will do).
This tutorial was written by me on September 28, 2012. Please do not copy or paste on any other forum, website or blog provide link back to tut only. Please do not claim as your own. This tutorial is copyrighted to me. Any resemblance to any other tutorial is purely coincidental.
Ok - let's start and remember to save often.
Open the template and using your shortcut keys on your keyboard (SHIFT+D) duplicate the template as a new image. Close the original and delete the copywrite layer.
Select Deco Flowers layer and delete
Select Tramages Rectangle layer
Select all, float, and defloat
Paste Frost_Paper 5
Select invert, delete, select none
Delete/Hide original rectangle layer
Select Frost_Element21 - resize by 82%
Paste and reposition on top of rectangle layer
Select Colored Square layer
Select all, float, defloat
Paste Frost_Paper 7
Select invert, delete, select none
Delete/Hide original square layer
Select Glittered Aqua Square layer
Select all, float, defloat
Add new raster layer and flood-fill with color of choice
Select none
Delete/Hide original square layer
Select Aqua Rectangle layer
Select all, float, defloat
Paste Frost_Paper 2
Select invert, delete, select none
Delete/Hide original rectangle layer
Select Pink Rectangle layer
Repeat above steps
Select Colored Half Circle layer
Select all, float, defloat
Add new raster layer and flood-fill with color of choice (I used #d92c1a)
Select none
Apply Tramages - Tow the Line with the following settings:

Change Half Circle to Soft Light
Delete/Hide original circle layer
Select Aqua Circle layer
Select all, float, defloat
Add new raster layer and flood-fill with gradient of choice (Linear style, Angle 45, Repeat 2)
Paste close up tube of choice on top of gradient and delete, select none
Change closeup to Multiply
Apply Xero Bad Dream at default settings
Drop the opacity on close-ups down to about 70%
Apply dropshadow and merge down on top of paper
Hide/Delete original circle layer
Select Colored Circle layer
Select all, float, defloat
Add new raster layer and flood fill with gradient of choice (Linear style, Angle 45, Repeat 2)
Paste close up tube of choice on top of gradient and delete, select none
Change closeup to Luminance (Legacy)
Apply Xero Bad Dream at default settings
Drop the opacity on close-ups down to about 75%
Apply dropshadow and merge down on top of paper
Hide/Delete original circle layer
Select Pink Circle layer
Select all, float, defloat
Add new raster layer and flood-fill with color of choice
Select none
Apply Penta - Jeans with the following settings

Delete/Hide original circle layer
Select 5-poles layer
Select all, float, defloat
Add new raster layer and flood-fill with gradient of choice (Linear style, Angle 45, Repeat 7)
Select none
Apply Eyecandy 4000 Gradient Glass at default settings
Delete/Hide original poles layer
Copy and paste tube of choice and position where desired
Apply Xero Radiance at setting of choice
Apply Lokas 3D Shadow at default settings
Select Frost_Element42
Paste and reposition under tube layer on the bottom
Select Frost_Element51 - resize about 85%
Paste and reposition to the right on top of element 42
Select New raster layer and flood fill with color or gradient of choice
Move layer to the bottom of the template
Apply WSL Mask 41
Merge group and move to the bottom
Add any additional elements you like.
Add any dropshadows you like
Crop and resize as desired
Add copyright info, license number and name
You're done! Thanks for trying my tutorial!
Thursday, September 27, 2012
SAMHAIN NIGHTS

Supplies needed:
I am using the amazing art from Anna Marine for this tutorial, which you can find here
Scrapkit: I am an awesome kit from Scrappin Krazy Designs called "Samhain Night" which you can get by going here
Weescotlass Mask 236 here
Plugins used: Eyecandy 4000 - Glass, Xero-Radiance, Xero-Bad Dream, Lokas 3D Shadow
----------------------------
This tutorial is written for those who have working knowledge of PSPX2 (any version will do).
This tutorial was written by me on September 26, 2012. Please do not copy or paste on any other forum, website or blog provide link back to tut only. Please do not claim as your own. This tutorial is copyrighted to me. Any resemblance to any other tutorial is purely coincidental.
Ok - let's start and remember to save often.
Open up a 700 x 650 blank canvas
Select your frame ele05 element
Paste in the center of your canvas
Select your magic wand and click in the center of your frame (Add (Shift), RGB Value, Tolerance 10, Contiguous checked, Feather 0)
Selections, Modify, Expandy by 5
Paste Paper p02
Select invert, delete, select none
Move paper layer under frame
Use your Selection Tool set on Rectangle (Line Width set at 5)
Draw a rectangle on out on the top of your frame on the right side as shown

Draw another rectangle under the first one
Convert both to raster
Apply Eyecandy - Glass at default settings to both frames
Take your magic wand and click in the center of your first rectangle
Selections, Modify, Expand by 2
Add new raster layer and flood fill with gradient of choice (Linear style, Angle 45, Repeat 2)
Paste close up tube of choice on top of gradient and delete
Change closeup to Luminance (Legacy)
Apply Xero Bad Dream at default settings
Drop the opacity on close-up down to about 85%
Apply dropshadow and merge down on top of gradient
Move under rectangle frame
Apply a dropshadow to the frame and merge together
Select 2nd rectangle and repeat above steps/settings
Select 1st rectangle frame again and rotate right 20%
Select 2nd rectangle frame and rotate left 20%
You can leave where they are or reposition them to your liking
You should now have something like this

Select your ele10 web element
Paste and reposition on your paper 2 layer under your frame
Erase any web bits that hang over the frame
Copy and paste tube of choice and position where desired
Apply Xero Radiance at setting of choice
Apply Lokas 3D Shadow
Select ele47 tree element and paste on bottom layer to the left
Select ele48 moon element - resize by 50%
Paste and reposition behind tree element in top left corner
Select ele33 owl element - resize by 55%
Paste and reposition on top of frame to the left
Select ele58 net element - resize by 45%
Paste and reposition under frame layer on top right corner
Select New raster layer and flood fill with color or gradient of choice
Move layer to the bottom of the template
Apply WSL Mask 236
Merge group and move to the bottom
Add any additional elements you like.
Add any dropshadows you like
Crop and resize as desired
Add copyright info, license number and name
You're done! Thanks for trying my tutorial!
Wednesday, September 26, 2012
WITCHES BREW

Supplies needed:
I am using the amazing art from VeryMany for this tutorial, which you can find here
Scrapkit: I am an awesome kit from Kirstys Scraps called "The Witches Brew" which you can get by going here
Template 233 from Denz Designz which can be found here
Candy Treats Mask 8 here
Plugins used: Eyecandy 4000 - Gradient Glow, Xero-Radiance, Xero-Bad Dream, Lokas 3D Shadow
----------------------------
This tutorial is written for those who have working knowledge of PSPX2 (any version will do).
This tutorial was written by me on September 26, 2012. Please do not copy or paste on any other forum, website or blog provide link back to tut only. Please do not claim as your own. This tutorial is copyrighted to me. Any resemblance to any other tutorial is purely coincidental.
Ok - let's start and remember to save often.
Open the template and using your shortcut keys on your keyboard (SHIFT+D) duplicate the template as a new image. Close the original and delete the copywrite layer.
Select Word art Raster 13 layer
Apply Eyecandy - Gradient Glow at fat default settings (Glow Width 3)
Select Rectangle Raster 6 layer
Select all, float, and defloat
Paste Paper 10
Select invert, delete, select none
Delete/Hide original rectangle layers
Select Rectangle Raster 5 layer
Select all, float, defloat
Add new raster layer and flood-fill with color of choice
Select none
Delete/Hide original rectangle layer
Select Dotted Circle Raster 8 layer
Add new raster layer and flood-fill with color of choice
Reselect your dotted circle layer
Select all, float, defloat
Click back on filled color layer, delete, select none
Select Dotted Copy of Raster 8 layer
Repeat above steps
Select Circle Raster 4 layer
Select all, float, defloat
Add new raster layer and flood fill with gradient of choice (Linear style, Angle 45, Repeat 2)
Paste close up tube of choice on top of paper and delete
Change closeup to Luminance (Legacy)
Apply Xero Bad Dream at default settings
Drop the opacity on close-ups down to about 65%
Apply dropshadow and merge down on top of paper
Apply Effect, Texture Effects, Blinds (Width 2, Opactity 15, Horizontal and Light from left/top checked)
Hide/Delete original circle layer
Select Copy of Raster 4 layer
Repeat above steps/settings
Select Rectangle Raster 3 layer
Select all, float, defloat
Paste Glitter Paper 5
Select invert, delete, select none
Select Glitter Paper layer
Select all, float defloat
Selections, Modify, Contract by 7
Paste Paper 11
Select invert, delete, select none
Delete/Hide original rectangle layer
Select Copy of Raster 3 Rectangle layer
Repeat above steps
Select Circle Raster 10 layer
Select all, float, defloat
Paste Glitter Paper 1
Select invert, delete, select none
Delete/Hide original circle layer
Select Rectangle Raster 7 layer
Select all, float, defloat
Paste Paper 3
Select invert, delete, select none
Delete/Hide original Rectangle layer
Select Copy of Raster 7 Rectangle layer
Repeat above steps
Select Archway element - resize by 45%
Paste and reposition on top of Rectangle paper layer and erase any paper bits that are on the top window area
Duplicate archway element and mirror
Select Shelf element - resize by 25%
Paste and repostion on top of right archway element
Select Rectangle Raster 2 layer
Select all, float, defloat
Paste paper 7
Select invert, delete, select none
Delete/Hide original rectangle layer
Copy and paste tube of choice and position where desired
Apply Xero Radiance at setting of choice
Apply Lokas 3D Shadow
Select Frame 6 element
Paste and reposition on bottom layer
Select New raster layer and flood fill with color or gradient of choice
Move layer to the bottom of the template
Apply Mask 8
Merge group and move to the bottom
Add any additional elements you like.
Add any dropshadows you like
Crop and resize as desired
Add copyright info, license number and name
You're done! Thanks for trying my tutorial!
NAUGHTY SPACEGIRL EXTRA'S


These extra's were made by me and my own creativity. Please do not rip apart, destroy, alter them or claim them as your own. Thanks.
Tuesday, September 25, 2012
TOIL AND TROUBLE

Supplies needed:
I am using the amazing art from Malberri for this tutorial, which you can find here
Scrapkit: I am using an awesome kit from Rissa's Designs called "Scary Business" which you can get by going here
Halloween Template from PSP Enchanted Designs which can be found here
Candy Treats Mask 2 here
Plugins used: Xero-Radiance, Xero-Bad Dream, Lokas 3D Shadow
----------------------------
This tutorial is written for those who have working knowledge of PSPX2 (any version will do).
This tutorial was written by me on September 25, 2012. Please do not copy or paste on any other forum, website or blog provide link back to tut only. Please do not claim as your own. This tutorial is copyrighted to me. Any resemblance to any other tutorial is purely coincidental.
Ok - let's start and remember to save often.
Open the template and using your shortcut keys on your keyboard (SHIFT+D) duplicate the template as a new image. Close the original and delete the copywrite layer.
Select Bat Raster 3 layer and delete
Select Copy of Raster 2 Square layer
Select all, float, defloat
Selections, Modify, Contract by 5
Add new raster layer and flood-fill with gradient of choice (Linear style, Angle 45, Repeat 2)
Paste close-up tube of choice on top of gradient
Select invert, delete, select none
Change closeup to Luminence (Legacy)
Apply Xero Bad Dream at default settings
Drop the opacity on close-ups down to about 65%
Apply dropshadow and merge down on top of gradient
Repeat above steps/settings for the two remaining square layers
Select Copy of Raster 1 Circle layer
Select all, float, defloat
Paste RD_paper3
Select invert, delete, select none
Delete/Hide original Circle layer
Select Words Raster 5 layer and delete
Select Vector 1 Rectangle layer
Select all, float, defloat
Paste RD_Paper7
Select invert, delete, select none
Delete/Hide original rectangle layer
Copy and paste tube of choice and position where desired
Apply Xero Radiance at setting of choice
Apply Lokas 3D Shadow
Select RD_SkullSitting element - resize by 30%
Paste and reposition skull element on right-side of tube
Select RD_Tombstone element - resize by 50%
Paste and repositon tombstone element on left-side behind tube layer
Select New raster layer and flood fill with color or gradient of choice
Move layer to the bottom of the template
Apply Mask 2
Merge group and move to the bottom
Add any additional elements you like.
Add any dropshadows you like
Crop and resize as desired
Add copyright info, license number and name
You're done! Thanks for trying my tutorial!
FORUM SET SHOWOFF


Monday, September 24, 2012
EMO WITCH

Supplies needed:
I am using the amazing art from Alex Prihodko for this tutorial, which you can find here
Scrapkit: I am using an awesome kit from Niqui Designs called "Halloweenie" which you can get by going here
Emo Witch Template from Tina which can be found here
Halloween Mask from Tonya which you can find on the Misfits blog here
Plugins used: Eyecandy 4000 - Gradient Glow Xero-Radiance, Xero-Bad Dream, Lokas 3D Shadow
----------------------------
This tutorial is written for those who have working knowledge of PSPX2 (any version will do).
This tutorial was written by me on September 24, 2012. Please do not copy or paste on any other forum, website or blog provide link back to tut only. Please do not claim as your own. This tutorial is copyrighted to me. Any resemblance to any other tutorial is purely coincidental.
Ok - let's start and remember to save often.
Open the template and using your shortcut keys on your keyboard (SHIFT+D) duplicate the template as a new image. Close the original and delete the copywrite layer.
Select Emo Witch word layer
Apply Eyecandy - Graident Glow at fat default settings
Select Circle layer
Select all, float, defloat
Paste NQ-Paper 6
Select invert, delete, select none
Delete/Hide original circle layer
Select White Circle layer
Adjust, Add/Remove Noise, Add Noise (Uniform checked, Noise 100%, Monochrome checked)
Select Rectangle 1 layer
Select all, float, defloat
Add new raster layer and flood fill with gradient of choice (Linear style, Angle 45, Repeat 2)
Paste close-up tubes of choice on top of gradient and delete
Select none
Change closeup to Hard Light
Apply Xero Bad Dream at default settings
Drop the opacity on close-ups down to about 70%
Apply dropshadow and merge down on top of paper
Hide/Delete original rectangle layer
Select Rectangle2 layer
Select all, float, defloat
Paste NQ-Paper 11
Select invert, delete, select none
Delete/Hide original rectangle layer
Select nq-element 45 - resize by 90%
Paste and reposition on top of Rect. 2 layer
Image, flip the element
Select CircleLeft layer
Select all, float, defloat
Paste NQ-Paper 7
Select invert, delete, select none
Delete/Hide original circle layer
Select CircleRight layer
Repeat above steps
Select Rectangle 3 layer
Select all, float, defloat
Paste NQ-Paper 12
Select invert, delete, select none
Delete/Hide original rectangle layer
Copy and paste tube of choice and position where desired
Apply Xero Radiance at setting of choice
Apply Lokas 3D Shadow
Select New raster layer and flood fill with color or gradient of choice
Move layer to the bottom of the template
Apply Mask
Merge group and move to the bottom
Add any additional elements you like.
Add any dropshadows you like
Crop and resize as desired
Add copyright info, license number and name
You're done! Thanks for trying my tutorial!
NIGHTLIFE EXTRA'S


These extra's were made by me and my own creativity. Please do not rip apart, destroy, alter them or claim them as your own. Thanks.
Sunday, September 23, 2012
PUMPKIN MOON

Supplies needed:
I am using the amazing art from Myriadelle for this tutorial, which you can find here
Scrapkit: I am using an awesome kit from Irish Bitch Designs called "Pumpkin Moon" which you can get by going here
Gina Gems Mask 5 here
Plugins used: Xero-Radiance, Xero-Bad Dream, Lokas 3D Shadow
----------------------------
This tutorial is written for those who have working knowledge of PSPX2 (any version will do).
This tutorial was written by me on September 23, 2012. Please do not copy or paste on any other forum, website or blog provide link back to tut only. Please do not claim as your own. This tutorial is copyrighted to me. Any resemblance to any other tutorial is purely coincidental.
Ok - let's start and remember to save often.
Open up a 700 x 650 blank canvas.
Select IBD_Frame 2
Paste in the center of the canvas
Select your Magic Wand Tool and click in the center of frame
Selections, Modify, Expand by 4
Paste IBD_paper8
Select invert, delete, select none
Move paper under frame layer
Select IBD_House element - resize by 95%
Paste and reposition on top of frame layer to the right
Select IBD_Clouds element
Paste and position on top of House element on top right-side
Drop opacity on clouds element down to 70%
Select IBD_Swirls element - resize by 65%
Paste and reposition under House layer on the right side
Select IBD_Beware element - resize by 50%
Paste and reposition on top left-side
Select IBD_skullsitter element - resize by 40%
Paste and reposition on top of house layer on bottom right-side
Select IBD_PumpkinStack element - resize by 50%
Paste and reposition on top of skullsitter element on bottom right-side
Copy and paste tube of choice and position where desired
Apply Xero Radiance at setting of choice
Apply Lokas 3D Shadow
Select New raster layer and flood fill with color or gradient of choice
Move layer to the bottom of the template
Apply Gem Mask 5
Merge group and move to the bottom
Duplicate, mirror, flip
Add any additional elements you like.
Add any dropshadows you like
Crop and resize as desired
Add copyright info, license number and name
You're done! Thanks for trying my tutorial!
HALLOWEEN KITTY

Supplies needed:
I am using the amazing art from Uchakina for this tutorial, which you can find here
Scrapkit: I am using an awesome kit from Eclipse Creations called "Playful Pumpkins" which you can get by going here
Template 21 from Rosa which can be found here
Mask of choice
Plugins used: Xero-Radiance, Xero-Bad Dream, Lokas 3D Shadow
----------------------------
This tutorial is written for those who have working knowledge of PSPX2 (any version will do).
This tutorial was written by me on September 23, 2012. Please do not copy or paste on any other forum, website or blog provide link back to tut only. Please do not claim as your own. This tutorial is copyrighted to me. Any resemblance to any other tutorial is purely coincidental.
Ok - let's start and remember to save often.
Open the template and using your shortcut keys on your keyboard (SHIFT+D) duplicate the template as a new image. Close the original and delete the copywrite layer.
Select Capa 9 Bat layer and delete
Select Capa 10 Cat layer and delete
Select Capa 11 layer
Apply Eyecandy Glass at default settings
Select Capa 10 layer
Select all, float, and defloat
Add new raster layer and flood-fill with color of choice
Select none
Delete/Hide original capa layer
Select Capa 7 Rectangle layer
Select all, float, defloat
Paste EC_PP_P9
Select invert, delete, select none
Delete/Hide original rectangle layer
Select Capa 5 circles layer
Select all, float, defloat
Add new raster layer and flood-fill with gradient of choice (Linear style, Angle 45, Repeat 2)
Paste close-up tube of choice on top of gradient and delete (Note: I only used one close-up tube as I left the wordart over the top right circle)
Select none
Change closeup to Luminance (Legacy)
Apply Xero Bad Dream at default settings
Drop the opacity on close-up to about 80%
Apply dropshadow and merge down on top of gradient
Apply Effects, Texture Effects, Blinds (Width 2, Opactity 15, Horizontal and Light from left/top checked)
Hide/Delete original circles layer
Select Capa 4 Circle layer
Select all, float, defloat
Paste Paper EC_PP_P2
Select invert, delete, select none
Delete/Hide original circle layer
Select EC_PP_HauntedHouse element - resize by 75%
Paste and reposition on top of rectangle layer to the right
Select Capa 3 Circle layer
Select all, float, defloat
Add new raster layer and flood-fill with gradient of choice
Select none
Adjust, Add/Remove Noise, Add Noise (Uniform checked, Noise 70%, Monochrome checked)
Delete/Hide original circle layer
Select Capa 1 rectangle layer
Select all, float, defloat
Paste Paper EC_PP_P11
Select invert, delete, select none
Delete/Hide original rectangle layer
Copy and paste tube of choice and position where desired
Apply Xero Radiance at setting of choice
Apply Lokas 3D Shadow
Select EC_PP_Broom element
Image, Free Rotate 90 degrees to the left
Paste and reposition on the bottom of the tube layer
Select EC_PP_Stars element
Paste and reposition where desired on bottom layer
Select New raster layer and flood fill with color or gradient of choice
Move layer to the bottom of the template
Apply Make of choice
Merge group and move to the bottom
Add any additional elements you like.
Add any dropshadows you like
Crop and resize as desired
Add copyright info, license number and name
You're done! Thanks for trying my tutorial!
Friday, September 21, 2012
CITY AT NIGHT

Supplies needed:
I am using the amazing art from Akkasshaa for this tutorial, which you can find here
Scrapkit: I am using an awesome kit from Amy Marie called "City At Night" which you can get by going here
Template 214 from Blissfully Beth which can be found here
Grunge Mask 125 from Vaybs here
Plugins used: Eyecandy 4000 - Glass, Xero-Radiance, Xero-Bad Dream, Lokas 3D Shadow
----------------------------
This tutorial is written for those who have working knowledge of PSPX2 (any version will do).
This tutorial was written by me on September 21, 2012. Please do not copy or paste on any other forum, website or blog provide link back to tut only. Please do not claim as your own. This tutorial is copyrighted to me. Any resemblance to any other tutorial is purely coincidental.
Ok - let's start and remember to save often.
Open the template and using your shortcut keys on your keyboard (SHIFT+D) duplicate the template as a new image. Close the original and delete the copywrite layer.
Select Small Black Stars layer and delete
Select Lg Black Star layer
Select all, float, and defloat
Add new raster layer and flood-fill with gradient of choice
Select none
Apply Eyecandy 4000 Glass at default settings
Delete/Hide original star layer
Select Hell on Heels Word layer
Change your foreground palette to color of choice
Select your Change to Target tool as shown and change the color of words if you desire

Take your Magic Wand tool and select the letters you want to apply glass effect (Add (Shift), RGB Value, Tolerance 10, Contiguous checked, Feather 0)
Apply Eyecandy Glass at default settings
Select Gray Oval layer
Select all, float, defloat
Paste Paper 015
Select invert, delete, select none
Delete/Hide original oval layer
Select Cityscape2 element - resize by 75%
Paste and reposition behind oval layer
Select Red Rect1 layer
Select all, float, defloat
Add new raster layer and flood-fill with gradient of choice (Linear style, Angle 45, Repeat 5)
Paste close up tube of choice on top of gradient and delete
Select none
Change closeup to Luminance (Legacy)
Apply Xero Bad Dream at default settings
Drop the opacity on close-up to about 80%
Apply dropshadow and merge down on top of paper
Hide/Delete original rectangle layer
Select Red Rect 2 layer
Repeat above steps/settings
Select Lg White Box layer
Select all, float, defloat
Paste Paper pp1
Select invert, delete, select none
Delete/Hide original box layer
Select Lg Black Box layer
Select all, float, defloat
Paste paper pp019
Select invert, delete, select none
Delete/Hide original box layer
Copy and paste tube of choice and position where desired
Apply Xero Radiance at setting of choice
Apply Lokas 3D Shadow
Select Net 6 element - resize by 85%
Paste and reposition on the bottom right corner
Duplicate, mirror, flip
Select New raster layer and flood fill with color or gradient of choice
Move layer to the bottom of the template
Apply Grunge Mask 125
Merge group and move to the bottom
Add any additional elements you like.
Add any dropshadows you like
Crop and resize as desired
Add copyright info, license number and name
You're done! Thanks for trying my tutorial!
Thursday, September 20, 2012
HARDCORE EXTRA'S


Wednesday, September 19, 2012
TOUCHED BY AN ANGEL

Supplies needed:
I am using the amazing art from Tiffany Mann for this tutorial, which you can find here
Scrapkit: I am using a kit from Tamie called "Ambrosia" which can be found here
Template 112 from Pooker which can be found here
M4 Mask from Kylie which you can find on the Misfits blog here
Plugins used: Alien Skin Eye candy 5 - Impact (Bevel), Eyecandy - Gradient Glow, Eyecandy 4000 - Glass, Xero-Radiance, Xero-Bad Dream, Lokas 3D Shadow
----------------------------
This tutorial is written for those who have working knowledge of PSPX2 (any version will do).
This tutorial was written by me on September 19, 2012. Please do not copy or paste on any other forum, website or blog provide link back to tut only. Please do not claim as your own. This tutorial is copyrighted to me. Any resemblance to any other tutorial is purely coincidental.
Ok - let's start and remember to save often.
Open the template and using your shortcut keys on your keyboard (SHIFT+D) duplicate the template as a new image. Close the original and delete the copywrite layer.
Select Hearts layer
Select all, float, defloat
Add new raster layer and flood-fill with color of choice
Select none
Delete/Hide original hearts layer
Select Left square frame layer
Select all, float, defloat
Add new raster layer and flood-fill with color of choice
Select none
Delete/Hide original frame layer
Select Left Square layer
Select all, float, defloat
Paste Paper 10
Select invert, delete, select none
Delete/Hide original square layer
Select Right Rectangle Frame layer
Select all, float, defloat
Add new raster layer and flood-fill with color of choice
Select none
Delete/Hide original frame layer
Select Right Rectangle layer
Select all, float, defloat
Add new raster layer and flood-fill with color of choice
Select none
Apply Effects, Texture Effects, Weave (Gap size 3, Width 5, Opacity 10, Fill gaps checked)
Delete/Hide original rectangle layer
Select heart dots layer
Add new raster layer and flood-fill with color of choice
Select hearts dots layer again
Select all, float, defloat
Go back and select color layer you just filled
Select invert, delete, select none
Delete/Hide original dots layer
Select Heart layer
Select all, float, defloat
Add new raster layer and flood-fill with color or gradient of choice
Select none
Apply Gradient Glow at fat default settings
Apply Alien Skin Impact - Bevel with the following settings:

Delete/Hide original heart layer
Select Left Circle Frame
Select all, float, defloat
Add new raster layer and flood-fill with color of choice
Select none
Adjust, Add/Remove Noise, Add Noise (Uniform checked, Noise 65%, Monochrome checked)
Delete/Hide original frame layer
Select Left Circle layer
Select all, float, defloat
Add new raster layer and flood-fill with gradient of choice (Linear style, Angle 45, Repeat 2)
Paste and reposition close-up tube of choice on top of gradient layer and delete
Select none
Change closeup to Luminence (Legacy)
Apply Xero Bad Dream at default settings
Drop the opacity on close-ups down to about 60%
Apply dropshadow and merge down on top of paper
Apply Effects, Texture Effects, Blinds (Width 2, Opactity 15, Horizontal and Light from left/top checked)
Delete/Hide original circle layer
Select Right Square Frame layer
Select all, float, defloat
Add new raster layer and flood-fill with color of choice
Select none
Delete/Hide original frame layer
Select Right Square layer
Select all, float, defloat
Paste Paper 10
Select invert, delete, select none
Delete/Hide original square layer
Select Rectangle Left Frame layer
Select all, float, defloat
Add new raster layer and flood-fill with color of choice
Select none
Delete/Hide original frame layer
Select Rectangle Left layer
Select all, float, defloat
Paste Paper 4
Select invert, delete, select none
Delete/Hide original rectangle layer
Select Right Circle Frame layer
Select all, float, defloat
Add new raster layer and flood-fill with color of choice
Select none
Delete/Hide original frame layer
Select Right Circle layer
Select all, float, defloat
Add new raster layer and flood-fill with gradient of choice (Linear style, Angle 45, Repeat 2)
Paste and reposition close-up tube of choice on top of gradient layer and delete
Select none
Change closeup to Luminence (Legacy)
Apply Xero Bad Dream at default settings
Drop the opacity on close-ups down to about 60%
Apply dropshadow and merge down on top of paper
Apply Effects, Texture Effects, Blinds (Width 2, Opactity 15, Horizontal and Light from left/top checked)
Delete/Hide original circle layer
Copy and paste tube of choice and position where desired
Apply Xero Radiance at setting of choice
Apply Lokas 3D Shadow
Select Coloum element - resize by 50%
Paste and reposition on left side where desired
You can either keep the Wordart layer or delete it and type another saying of choice like I did
Select New raster layer and flood fill with color or gradient of choice
Move layer to the bottom of the template
Apply Kylie mask
Merge group and move to the bottom
Add any additional elements you like.
Add any dropshadows you like
Crop and resize as desired
Add copyright info, license number and name
You're done! Thanks for trying my tutorial!
Tuesday, September 18, 2012
WITCHY WOMAN

Supplies needed:
I am using the amazing art from Tatjana Willms for this tutorial, which you can find here
Scrapkit: I am using an awesome kit from Annaica called "Cursed!" which can be found here
Halloween Template 105 from Leah which can be found here
Gems Mask 21 here
Plugins used: Eyecandy 4000 - Gradient Glow, Eyecandy 4000 - Glass, Xero-Radiance, Lokas 3D Shadow
----------------------------
This tutorial is written for those who have working knowledge of PSPX2 (any version will do).
This tutorial was written by me on September 18, 2012. Please do not copy or paste on any other forum, website or blog provide link back to tut only. Please do not claim as your own. This tutorial is copyrighted to me. Any resemblance to any other tutorial is purely coincidental.
Ok - let's start and remember to save often.
Open the template and using your shortcut keys on your keyboard (SHIFT+D) duplicate the template as a new image. Close the original and delete the copywrite layer.
Select Words 1 and Word 2 layers and move to the bottom of the Rect 1 layer
Select Frame 1 layer
Select all, float, defloat
Add new raster layer and flood-fill with color of choice
Select none
Apply Eyecandy Glass at default settings
Delete/Hide original frame layer
Select Rect 1 layer
Select all, float, defloat
Paste AP_Cursed_Paper 1 (resize and reposition where desired)
Select invert, delete, select none
Delete/Hide original rectangle layer
Select Circle 1 layer
Select all, float, defloat
Paste AP_Cursed_Paper 6
Select invert, delete, select none
Delete/Hide original circle layer
Select Frame 2 layer
Select all, float, defloat
Add new raster layer and flood-fill with color of choice
Select none
Delete/Hide original frame layer
Select Square 1 layer
Select all, float, defloat
Paste AP_Cursed_Paper 4
Select invert, delete, select none
Delete/Hide original square layer
Select Square 2 layer
Select all, float, defloat
Add new raster layer and flood-fill with gradient of choice (Linear style, Angle 45, Repeat 5)
Select none
Delete/Hide original square layer
Select Square 3 layer
Select all, float, defloat
Paste AP_Cursed_Paper 12
Select invert, delete, select none
Delete/Hide original square layer
Select Circle 2 layer
Select all, float, defloat
Paste AP_Cursed_Paper 15
Select invert, delete, select none
Delete/Hide original circle layer
Select Rect 2 layer
Select all, float, defloat
Paste AP_Cursed_Paper 4
Select invert, delete, select none
Delete/Hide original rectangle layer
Copy and paste tube of choice and position where desired
Apply Xero Radiance at setting of choice
Apply Lokas 3D Shadow
Select AP_Cursed_Element20 (House) - resize by 40%
Paste and reposition behind your tube layer on the left side
Select AP_Cursed_Element 24 - resize by 80%
Paste and reposition behind Half Circle 1 layer
Select AP_Cursed_Element19 - resize by 75%
Paste and reposition on top of your rectangle 1 layer
Select AP_Cursed_Element60 - resize by 80%
Paste and reposition on the bottom under your Rect 1 layer
Select New raster layer and flood fill with color or gradient of choice
Move layer to the bottom of the template
Apply Gems mask 21
Merge group and move to the bottom
Add any additional elements you like.
Add any dropshadows you like
Crop and resize as desired
Add copyright info, license number and name
You're done! Thanks for trying my tutorial!
TRICK OR TREAT

Supplies needed:
I am using the amazing art from Elias Chatzoudis for this tutorial, which you can find here
Scrapkit: I am using an awesome kit from Niqui's Designs called "Hocus Pocus" which can be found here
Halloween Template 1 from Kristin which can be found here
Kylie's Hocus Pocus Mask here
Plugins used: Penta - Jeans, Eyecandy - Gradient Glow, Eyecandy 4000 - Glass, Xero-Radiance, Xero-Bad Dream, Lokas 3D Shadow
----------------------------
This tutorial is written for those who have working knowledge of PSPX2 (any version will do).
This tutorial was written by me on September 18, 2012. Please do not copy or paste on any other forum, website or blog provide link back to tut only. Please do not claim as your own. This tutorial is copyrighted to me. Any resemblance to any other tutorial is purely coincidental.
Ok - let's start and remember to save often.
Open the template and using your shortcut keys on your keyboard (SHIFT+D) duplicate the template as a new image. Close the original and delete the copywrite layer.
Select Black Circle layer
Select all, float, defloat
Paste nq-paper9
Select invert, delete, select none
Delete/Hide original circle layer
Select Pixel Words layer
Add new raster layer and flood-fill with color of choice
Select Pixel words layer again
Select all, float, defloat
Go back and select your color layer you just flood-filled
Select invert, delete, select none
Delete/Hide original words layer
Select web nq-element 27 - resize by 60%
Paste and reposition on top of words layer
Select nq-element 60 - resize by 47%
Paste and reposition on top of web layer
Select nq-element14 (tree) - resize by 70%
Paste and reposition behind the circle layer to the right
Select nq-element 6 (moon) -resize by 45%
Paste and reposition behind the tree element
Select Square Right layer
Select all, float, defloat
Paste nq-paper5
Select invert, delete, select none
Delete/Hide original square layer
Select Square left layer
Repeat above steps
Select Rectangle layer
Effects, Texture Effects, Blinds (Width 2, Opacity 20, Color: #f0771c, Horizontal and Light from left/top checked)
Select Circle 2 Right layer
Select all, float, defloat
Add new raster layer and flood-fill with gradient of choice (Linear style, Angle 45, Repeat 2)
Paste and reposition close-up tube of choice on top of gradient layer and delete
Select none
Change closeup to Luminence (Legacy)
Apply Xero Bad Dream at default settings
Drop the opacity on close-ups down to about 60%
Apply dropshadow and merge down on top of paper
Hide/Delete original circle layer
Select Circle 1 Right
Select all, float, defloat
Add new raster layer and flood-fill with color of choice
Apply Penta - Jeans with the following settings:

Delete/Hide original circle layer
Select Circle 2 Left layer
Repeat same steps/settings that we did for Circle 2 Right layer
Select Circle 1 Left layer
Repeat same steps/settings that we did for Circle 1 Right layer
Copy and paste tube of choice and position where desired
Apply Xero Radiance at setting of choice
Apply Lokas 3D Shadow
Select New raster layer and flood fill with color or gradient of choice
Move layer to the bottom of the template
Apply Kylie's mask
Merge group and move to the bottom
Add any additional elements you like.
Add any dropshadows you like
Crop and resize as desired
Add copyright info, license number and name
You're done! Thanks for trying my tutorial!
Sunday, September 16, 2012
HOT STUFF

Supplies needed:
I am using the amazing art from Jon Moss for this tutorial, which you can find here
Scrapkit: I am using a kit from Designs by Ali called "Devilish" which is not available any longer because she has retired.
CMTemp_Flames1 Template from Biene which can be found on the Misfits blog here
Gems Mask 22 here
Plugins used: Alien Skin Xenofex 2 - Burnt Edges, Eyecandy - Gradient Glow, Eyecandy 4000 - Glass, Xero-Radiance, Xero-Bad Dream, Lokas 3D Shadow
----------------------------
This tutorial is written for those who have working knowledge of PSPX2 (any version will do).
This tutorial was written by me on September 16, 2012. Please do not copy or paste on any other forum, website or blog provide link back to tut only. Please do not claim as your own. This tutorial is copyrighted to me. Any resemblance to any other tutorial is purely coincidental.
Ok - let's start and remember to save often.
Open the template and using your shortcut keys on your keyboard (SHIFT+D) duplicate the template as a new image. Close the original and delete the copywrite layer.
Select Flame Right
Apply Eyecandy - Gradient Glow at fat default settings
Select Overlay half circle
Select all, float, defloat
Paste DBA Paper10 or paper of choice
Select invert, delete, select none
Change the paper to Luminance (Legacy)
Select the Vector 1 Circle layer
Select all, float, defloat
Add new raster layer and flood-fill with gradient of choice (Linear style, Angle 45, Repeat 2)
Paste and reposition close-up tube of choice on top of gradient layer and delete
Select none
Change closeup to Luminence (Legacy)
Apply Xero Bad Dream at default settings
Drop the opacity on close-ups down to about 60%
Apply dropshadow and merge down on top of paper
Apply Effect, Texture Effects, Blinds (Width 2, Opactity 15, Horizontal and Light from left/top checked)
Hide/Delete original circle layer
Merge all existing circle layers together
Apply Alien Skin Xenofex - Burnt Edges at the following settings:

Select Flame Left
Apply Eyecandy - Glass at default settings
Apply Eyecandy - Gradient Glow at fat default settings
Select Black Rectangle layer
Select all, float, defloat
Paste DBA_Paper 3 or paper of choice
Select invert, delete, select none
Delete/Hide original Rectangle layer
Select your DBA Tube51 element - resize by 60%
Paste and reposition on top of paper 3 layer and move to the top
Duplicate and move down to the bottom of rectangle
Select Gradient Square top
Select all, float, defloat
Paste DBA Paper14 - resize by 75%
Select invert, delete, select none
Delete/Hide original gradient layer
Select Gradient Square bottom layer
Repeat above steps
Select Bl Rectangle Right
Select all, float, defloat
Paste DBA Paper16 or paper of choice
Select invert, delete, select none
Select DBA Tube 68 (tree) element - resize by 75%
Paste under rectangle layer in top right corner
Select DBA Tube 69 (moon) element - resize by 35%
Paste in top right corner under tree element
Copy and paste tube of choice and position where desired
Apply Xero Radiance at setting of choice
Apply Lokas 3D Shadow
Select New raster layer and flood-fill with color or gradient of choice
Move layer to the bottom of the template
Apply mask 22
Merge group and move to the bottom
Add any additional elements you like.
Add any dropshadows you like
Crop and resize as desired
Add copyright info, license number and name
You're done! Thanks for trying my tutorial!
Thursday, September 13, 2012
TOO CUTE TO SPOOK

Supplies needed:
I am using the adorable art from Skyscraps Pinup for this tutorial, which you can find here
Scrapkit: I am using an exclusive kit from Amy Marie called "Halloween 4 Marie" which you can only here or here
Halloween Temp 1 from Tamie which can be found here
Gems Mask 21 here
Plugins used: Eyecandy 4000 - Glass, Xero-Radiance, Xero-Bad Dream, Lokas 3D Shadow
----------------------------
This tutorial is written for those who have working knowledge of PSPX2 (any version will do).
This tutorial was written by me on September 13, 2012. Please do not copy or paste on any other forum, website or blog provide link back to tut only. Please do not claim as your own. This tutorial is copyrighted to me. Any resemblance to any other tutorial is purely coincidental.
Ok - let's start and remember to save often.
Open the template and using your shortcut keys on your keyboard (SHIFT+D) duplicate the template as a new image. Close the original and delete the copywrite layer.
Select Raster 8 "Too" Wordart
Apply Eyecandy - Glass at default settings
Select Raster 9 Wordart white back
Adjust, Add/Remove Noise, Add Noise (Uniform checked, Noise 100%, Monochrome checked)
Select Raster 6 Wordart layer
Select all, float, defloat
Add new raster layer and flood-fill with gradient of choice (Linear style, Angle 45, Repeat 6)
Delete/Hide original wordart layer
Select Raster 7 Wordart white back layer
Adjust, Add/Remove Noise, Add Noise (Uniform checked, Noise 100%, Monochrome checked)
Select Ghosts Raster 12 layer
Apply Eyecandy - Glass with same default settings
Select Square Raster 10 Frame layer
Select all, float, and defloat
Add new raster layer and flood fill with color of choice
Apply Eyecandy - Glass with same default setting as above
Delete/Hide original frame layer
Select Square Raster 1 layer
Select all, float, defloat
Paste Paper pp6
Select invert, delete, select none
Delete/Hide original square layer
Select Square Frame Raster 11 layer
Select all, float, defloat
Add new raster layer and flood-fill with color of choice
Select none
Again apply Eyecandy - Glass at default settings
Delete/Hide original frame layer
Select Square Raster 3 layer
Select all, float, defloat
Add new raster layer and flood-fill with gradient of choice (Linear style, Angle 45, Repeat 2)
Select none
Delete/Hide original square layer
Select trees element from kit - resize by 35%
Paste and reposition on top of gradient square layer under frame
Now you can either erase the little bits hanging over OR go back to your gradient layer
Select all, float, defloat
Select your element layer again
Select invert, delete, select none
Select your Fog element - resize by 80%
Paste and reposition over your tree layer under frame
Select Square Raster 21 layer
Select all, float, defloat
Paste paper pp3
Select invert, delete, select none
Delete/Hide original square layer
Select Circle Raster 5 layer
Select all, float, defloat
Add new raster layer and flood-fill with gradient of choice (Linear style, Angle 45, Repeat 2)
Paste and reposition close-up tube of choice on top of gradient and delete
Change closeup to Hard Light
Apply Xero Bad Dream at default settings
Drop the opacity on close-ups down to about 60%
Apply dropshadow and merge down on top of paper
Apply Effect, Texture Effects, Blinds (Width 2, Opactity 15, Horizontal and Light from left/top checked)
Hide/Delete original circle layer
Select Frame2 element from kit - resize by 60%
Paste and reposition on top of circle layer
Select Rectangle Raster 4 layer
Select all, float, defloat
Add new raster layer and flood-fill with color of choice
Select none
Effects, Texture Effect, Small Stone Texture with the following settings:

Delete/Hide original rectangle layer
Copy and paste tube of choice and position where desired
Apply Xero Radiance at setting of choice
Apply Lokas 3D Shadow
Select New raster layer and flood fill with color or gradient of choice
Move layer to the bottom of the template
Apply mask 21
Merge group and move to the bottom
Add any additional elements you like.
Add any dropshadows you like
Crop and resize as desired
Add copyright info, license number and name
You're done! Thanks for trying my tutorial!
Wednesday, September 12, 2012
BOO-TACULAR!

Supplies needed:
I am using the amazing art from Elias Chatzoudis for this tutorial, which you can find here
Scrapkit: I am using an awesome kit from Rissa's Designs called "Boo-tacular" which you can get by going here
Temp 129 from Pooker which can be found here
Mask of choice
Plugins used: Xero-Radiance, Xero-Bad Dream, Lokas 3D Shadow
----------------------------
This tutorial is written for those who have working knowledge of PSPX2 (any version will do).
This tutorial was written by me on September 12, 2012. Please do not copy or paste on any other forum, website or blog provide link back to tut only. Please do not claim as your own. This tutorial is copyrighted to me. Any resemblance to any other tutorial is purely coincidental.
Ok - let's start and remember to save often.
Open the template and using your shortcut keys on your keyboard (SHIFT+D) duplicate the template as a new image. Close the original and delete the copywrite layer.
Select Circle Right layer
Select all, float, and defloat
Add new raster layer and flood fill with gradient of choice (Linear style, Angle 45, Repeat 2)
Paste close-up tube of choice on top of gradient and delete
Change closeup to Luminance (Legacy)
Apply Xero Bad Dream at default settings
Drop the opacity on close-ups down to about 70%
Apply dropshadow and merge down on top of paper
Apply Effect, Texture Effects, Blinds (Width 2, Opactity 15, Horizontal and Light from left/top checked)
Hide/Delete original circle layer
Select Circle Left layer
Repeat above steps/settings
Select Large Circle layer
Select all, float, defloat
Add new raster layer and flood-fill with color of choice
Delete/Hide original circle layer
Select Strip layer
Select all, float, defloat
Add new raster layer and flood-fill with color of choice
Select none
Apply Texture, Texture Effects, Weave (Gap size 3, Width 5, Opactity 10, Fill gaps checked)
Delete/Hide original strip layer
Select Left Square layer
Select all, float, defloat
Paste RD_pp4
Select invert, delete, select none
Delete/Hide original square layer
Select Right Square layer
Repeat above steps
Select Top Right Square layer
Select all, float, defloat
Add new raster layer and flood-fill with color of choice
Select none
Delete/Hide original square layer
Copy and paste tube of choice and position where desired
Apply Xero Radiance at setting of choice
Apply Lokas 3D Shadow
Select RD_SpiderWeb element - resize by 67%
Paste under tube layer so it's positioned in the center of the circle layer
Erase any bits that are overhanging
Select New raster layer and flood fill with color or gradient of choice
Move layer to the bottom of the template
Apply mask of choice
Merge group and move to the bottom
Add any additional elements you like.
Add any dropshadows you like
Crop and resize as desired
Add copyright info, license number and name
You're done! Thanks for trying my tutorial!
EMO CAROUSEL

Supplies needed:
I am using the amazing art from Bonnies Creations for this tutorial, which you can find here
Scrapkit: I am using an awesome kit from Irish Bitch Designs called "Emo Carousel" which you can get by going here
Temp 185 from Tami which can be found here
Mask of choice
Plugins used: Tramages - Tow the Line, Eyecandy 4000 - Glass, Penta - Colordots, Xero-Radiance, VM Extravaganza - Transmission, Xero-Bad Dream, Lokas 3D Shadow
----------------------------
This tutorial is written for those who have working knowledge of PSPX2 (any version will do).
This tutorial was written by me on September 12, 2012. Please do not copy or paste on any other forum, website or blog provide link back to tut only. Please do not claim as your own. This tutorial is copyrighted to me. Any resemblance to any other tutorial is purely coincidental.
Ok - let's start and remember to save often.
Open the template and using your shortcut keys on your keyboard (SHIFT+D) duplicate the template as a new image. Close the original and delete the copywrite layer.
Select Circle Frame Raster 11 layer
Select all, float, and defloat
Add new raster layer and flood-fill with color of choice
Select none
Apply Eyecandy - Glass with default settings
Delete/Hide original frame layer
Select Circle Raster 4 layer
Select all, float, defloat
Add new raster layer and flood fill with gradient of choice (Linear style, Angle 45, Repeat 2)
Paste close-up tube of choice on top of gradient and delete
Change closeup to Luminance (Legacy)
Apply Xero Bad Dream at default settings
Drop the opacity on close-ups down to about 50%
Apply dropshadow and merge down on top of paper
Apply Effect, Texture Effects, Blinds (Width 2, Opactity 20, Horizontal and Light from left/top checked)
Hide/Delete original circle layer
Select Square Copy of Raster 12 layer
Select all, float, defloat
Add new raster layer and flood-fill with color of choice
Select none
Delete/Hide original square layer
Select Oval Raster 2 layer
Select all, float, defloat
Add new raster layer and flood-fill with color of choice
Select none
Apply VM Extravaganza - Transmission with the following settings:
Delete/Hide original oval layer
Select Square Raster 12 layer
Select all, float, defloat
Add new raster layer and flood-fill with color of choice
Select none
Apply Tramages - Tow the Line with the following settings:

Delete/Hide original square layer
Select Circle Raster 3 layer
Select all, float, defloat
Paste IBD_Paper13
Select invert, delete, select none
Delete/Hide original circle layer
Select Rectangle Raster 8 layer
Select all, float, defloat
Add new raster layer and flood-fill with gradient of choice (Linear style, Angle 0, Repeat 1)
Select none
Delete/Hide original rectangle layer
Select Square Raster 7 layer
Select all, float, defloat
Paste IBD_Paper8
Select invert, delete, select none
Delete/Hide original square layer
Select Square Raster 6 layer
Select all, float, defloat
Add new raster layer and flood-fill with color of choice
Select none
Delete/Hide original square layer
Select Square Raster 5 layer
Select all, float, defloat
Add new raster layer and flood-fill with color of choice
Select none
Apply Penta - Color dots with the following settings:
Delete/Hide original square layer
Select Square Raster 9 layer
Select all, float, defloat
Add new raster layer and flood-fill with color of choice
Select none
Apply Texture, Texture Effects, Weave (Gap size 3, Width 5, Opactity 10, Fill gaps checked)
Delete/Hide original square layer
Select Square Raster 10 layer
Select all, float, defloat
Paste IBD_Paper 17
Select invert, delete, select none
Delete/Hide original square layer
Copy and paste tube of choice and position where desired
Apply Xero Radiance at setting of choice
Apply Lokas 3D Shadow
Select New raster layer and flood fill with color or gradient of choice
Move layer to the bottom of the template
Apply mask of choice
Merge group and move to the bottom
Add any additional elements you like.
Add any dropshadows you like
Crop and resize as desired
Add copyright info, license number and name
You're done! Thanks for trying my tutorial!
Subscribe to:
Comments
(Atom)


