Labels
- Alikas Scraps
- All Dolled Up Store
- Amy Marie
- Annaica
- Arthur Crowe
- Babycakes Scraps
- Barbara Jensen
- Bibi's Collections
- Black Widow Creationz
- Blu Moon
- Bonnies Creations
- Bookwork Dezines
- Broken Sky Dezine
- Carita Creationz
- Carpe Diem Designs
- CDO
- Celinart Pinup
- Celine
- Chacha Creationz
- Charmed Designs
- Cherry Blossom Designs
- Chili Designz
- Cluster Frame
- Creative Misfits
- Creative Scraps by Crys
- Curious Creative Dreams
- Danny Lee
- Derzi
- Designs by Ali
- Designs by Joan
- Designs by Ketura
- Designs By Norella
- Designs by Vi
- Diana Gali
- Diry Art Designs
- Disturbed Scraps
- Dreaming With Bella
- Eclipse Creations
- Elegancefly
- Extras
- Fabulous Designz
- Forum Set
- Foxy's Designz
- Freek's Creation
- FTU
- FwTags
- Goldwasser
- Gothic Inspirations
- Gothic Raven Designs
- Graphfreaks
- Hania's Designs
- Happy Pumpkin Studios
- Horseplay's Pasture Designs
- indie-Zine
- Irish Princess Designs
- Ishika Chowdhury
- Kaci McVay
- Kajenna
- katharine
- Katherine
- Khloe Zoey
- Killer Kitty
- Kissing Kate
- KiwiFirestorm
- Kiya Designs
- Kizzed by Kelz
- KZ Designz
- Lady Mishka
- Lil Mz Brainstorm
- Maiden of Darkness
- Mariel Designs
- MellieBeans
- Michelle's Myths
- Midnight Shadow
- Misticheskya
- MistyLynn's Creations
- MMeliCrea Designz
- Moon Vixen Designs
- NaSionainne
- Ninaste
- Niqui Designs
- Pandora
- Picsfordesign
- Pink Paradox Productions
- Radyga Designs
- Redefined Designs
- Rissa's Designs
- Schnegge
- ScottishButterfly Creations
- Scrappin Krazy Designs
- Scrappin With Lil Ol Me
- Scraps and the City
- Scraps Dimensions
- Scraps From The Heart
- Scraps N Company
- Scraps with Attitude
- Shining Star Art
- Skyscraps
- Sleek N Sassy Designs
- Sophisticat Simone
- Souldesigner
- Soxsational Scraps
- Spazz
- Starlite and Soul
- Stella Felice
- Tammy Welt
- Tasha's Playground
- The PSP Project
- Thrifty Scraps by Gina
- Tiny Turtle Designs
- Upyourart
- Verymany
- Wendy Gerber
- Whisper In the Wind
- Wick3d Creationz
- Wicked Diabla
- Yude's Kreationz
Blog Archive
Saturday, March 30, 2013
LIL' PRINCESS EXTRAS


These Extra's were made using the amazing art by Bonnies Creations, which you can find here
These extra's were made by me and my own creativity. Please do not rip apart, destroy, alter them or claim them as your own. Thanks.
Labels:Bonnies Creations,Extras | 0
comments
Friday, March 29, 2013
TATTOO CHICK
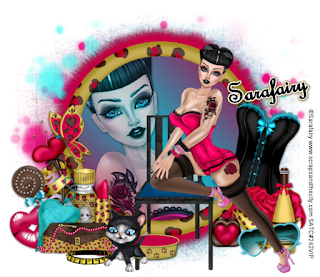
Supplies needed:
I am using the amazing art from Sarafairy for this tutorial, which you can find here
Scrapkit: I am using a matching kit from Hanna's Designs called "Gothic Sara" which you can get by going here
Mask 129 from Aqua which you can find on the Misfits Blog here
Plugins used: Xero-Radiance, Xero-Bad Dream, Lokas 3D Shadow
----------------------------
This tutorial is written for those who have working knowledge of PSPX2 (any version will do).
This tutorial was written by me on March 29, 2013. Please do not copy or paste on any other forum, website or blog provide link back to tut only. Please do not claim as your own. This tutorial is copyrighted to me. Any resemblance to any other tutorial is purely coincidental.
Ok - let's start and remember to save often.
Open up a 750 x 650 blank canvas (we can resize it later)
Select Frame 80 and paste in the center of the canvas
Select your magic wand tool and click in the center of your original frame (Add (Shift), RGB Value, Tolerance 25, Contiguous checked, Feather 0)
Selections, Modify, Expand by 5
Add new raster layer and flood-fill with gradient of choice (Linear style, Angle 45, Repeat 1)
Copy and paste close-up tube of choice on top of gradient layer
Select invert, delete, select none
Change close-up to Hard Light
Drop opacity on close-up down to 80%
Merge tube down onto gradient layer
Effects, Texture Effects, Blinds (Width 2, Opactity 15, Horizontal and Light from left/top checked)
Paste tube of choice where desired on top of frame
Apply Xero Radiance at setting of choice
Apply Lokas 3D Shadow at default settings
Select Element 46 - resize by 60%
Paste and position under tube layer
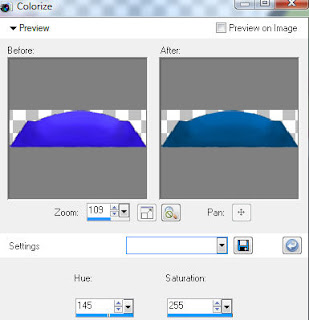
Select your magic wand and select the blue seat cover
Adjust, Hue and Saturation - I recolorized it with the following settings:
Select Element 47 (Corset) - resize by 50%
Image, Free Rotate Right by 15% and paste on right side below tube layer
Select Element 61 - resize by 50%
Paste and position on bottom right
Select Element 41 - resize by 40%
Paste and position on bottom right
Select Element 62 - resize by 55%
Paste and position on bottom left side
Select Element 78 - resize by 60%
Paste on bottom left side
Select Element 1 - resize by 50%
Image mirror and paste on bottom left side
Select Element 26 - paste and position in the center and move to the bottom layer
Select New raster layer and flood fill with color or gradient of choice
Move layer to the bottom
Apply Mask 129
Merge group and move to the bottom
Add any additional elements you like.
Add any dropshadows you like
Crop and resize as desired
Add copyright info, license number and name
You're done! Thanks for trying my tutorial!
Labels:Scraps and the City | 0
comments
TOXIC EASTER
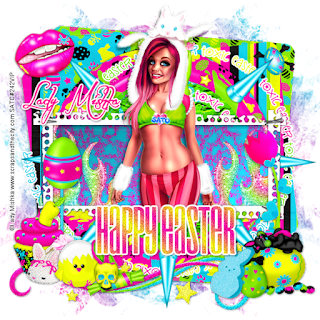
Supplies needed:
I am using the amazing art from Lady Mishka for this tutorial, which you can find here
Scrapkit: I am using an awesome kit from Toxic Desirez called "Toxic Easter" which you can get by going here
Template 225 from Millie which can be found here
Mask 305 by Terese which you can find here
Plugins used: Eyecandy 4000 - Marble, Eyecandy 4000 - Gradient Glow, Xero-Radiance, Lokas 3D Shadow
----------------------------
This tutorial is written for those who have working knowledge of PSPX2 (any version will do).
This tutorial was written by me on March 29, 2013. Please do not copy or paste on any other forum, website or blog provide link back to tut only. Please do not claim as your own. This tutorial is copyrighted to me. Any resemblance to any other tutorial is purely coincidental.
Ok - let's start and remember to save often.
Open the template and using your shortcut keys on your keyboard (SHIFT+D) duplicate the template as a new image. Close the original and delete the copywrite layer.
Adjust Canvas Size by 750 x 600 (you can resize later)
Select Wordart 8 layer and move to the bottom if you desire
Select all, float, defloat
Add new raster layer and flood-fill with color or gradient of choice
Select none
Adjust, Add/Remove Noise, Add Noise (Uniform checked, Noise 40%, Monochrome checked)
Apply Eyecandy Gradient Glow on fat default settings
Delete/Hide original wordart layer
Select Rectangle 7 layer
Select all, float, defloat
Add new raster layer and flood-fill with color of choice
Select none
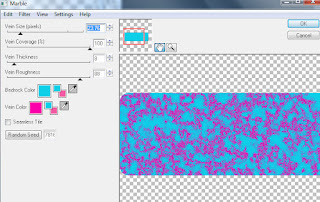
Apply Eyecandy Marble with the following settings:
Delete/Hide original rectangle layer
Select Frame 3 Element - resize by 95%
Paste and position on top of rectangle layer
Select Circle 6 layer
Select all, float, defloat
Add new raster layer and flood-fill with color of choice
Select none
Effects, Texture Effects, Crumpled Paper Texture with the following settings:
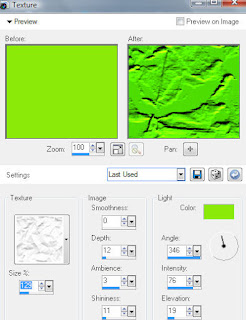
Delete/Hide original circle layer
Select Frame 2 Element - resize by 97%
Paste and position on top of circle layer
Select Circle 5 layer
Select all, float, defloat
Paste paper 5
Select invert, delete, select none
Delete/Hide original circle layer
Select Rectangle 4 layer
Select all, float, defloat
Paste paper 2
Select invert, delete, select none
Delete/Hide original rectangle layer
Select Rectangle 3 layer and repeat above steps
Select Square 2 layer
Select all, float, defloat
Paste paper 11
Select invert, delete, select none
Delete/Hide original square layer
Select Square 1 layer and repeat above steps
Select Square 10 layer
Select all, float, defloat
Paste paper 8
Select invert, delete, select none
Delete/Hide original square layer
Copy and paste tube of choice and position where desired
Apply Xero Radiance at setting of choice
Apply Lokas 3D Shadow at default settings
Select Sick Bunny Element - resize by 25%
Paste and position on bottom right side
Select Egg 2 Element - resize by 22%
Paste and position on bottom right side
Select Marshmellow Element - resize by 25%
Image mirror and paste on the bottom right side
Select Cupcake Element - resize by 35%
Paste and position on bottom left side
Select Shoe Element - resize by 25%
Paste and position on bottom left side
Select Egbert Element - resize by 25%
Paste and position on bottom left side
Select New raster layer and flood fill with color or gradient of choice
Move layer to the bottom of the template
Apply Mask 305
Merge group and move to the bottom
Add any additional elements you like.
Add any dropshadows you like
Crop and resize as desired
Add copyright info, license number and name
You're done! Thanks for trying my tutorial!
Labels:Lady Mishka,Scraps and the City | 0
comments
Tuesday, March 26, 2013
CRAZY BUNNY
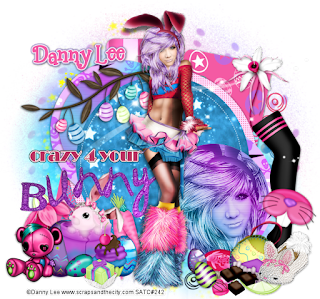
Supplies needed:
I am using the amazing art from Danny Lee for this tutorial, which you can find here
Scrapkit: I am using an awesome kit from Bibi's Collections called "Easter Bunny" which you can get by going here
Template 228 from Millie which can be found here
Spring Mask by Sabine which you can find on the Misfits Blog here
Plugins used: Eyecandy 4000 - Gradient Glow, Eyecandy 4000 - Glass, Xero-Radiance, Xero-Bad Dream, Lokas 3D Shadow
----------------------------
This tutorial is written for those who have working knowledge of PSPX2 (any version will do).
This tutorial was written by me on March 26, 2013. Please do not copy or paste on any other forum, website or blog provide link back to tut only. Please do not claim as your own. This tutorial is copyrighted to me. Any resemblance to any other tutorial is purely coincidental.
Ok - let's start and remember to save often.
Open the template and using your shortcut keys on your keyboard (SHIFT+D) duplicate the template as a new image. Close the original and delete the copywrite layer.
Adjust Canvas Size by 750 x 600 (you can resize later)
Select Wordart 12 layer
Select all, float, defloat
Add new raster layer and flood-fill with color of choice
Select none
Adjust, Add/Remove Noise, Add Noise (Uniform checked, Noise 55%, Monochrome checked)
Apply Eyecandy Glass at default settings
Delete/Hide original wordart layer
Select Wordart 11 layer
Select all, float, defloat
Add new raster layer and flood-fill with color of choice
Select none
Apply Eyecandy Gradient Glow at fat default settings (Glow Width 3)
Delete/Hide original wordart layer
Select Circle 10 layer
Select all, float, defloat
Add new raster layer and flood-fill with gradient of choice (Linear style, Angle 45, Repeat 2)
Paste close-up tube of choice on top of gradient and delete
Change closeups to Luminance (Legacy)
Apply Xero Bad Dream at default settings or random setting of choice
Drop opacity on close-up down to 80%
Apply dropshadow and merge down on top of gradient layer
Effects, Texture Effects, Blinds (Width 2, Opactity 15, Horizontal and Light from left/top checked)
Delete/Hide original circle layer
Select Circle 8 layer
Select all, float, defloat
Paste paper 6
Select invert, delete, select none
Delete/Hide original circle layer
Select Circle 7 layer
Select all, float, defloat
Paste paper 11
Select invert, delete, select none
Delete/Hide original circle layer
Select Circle 5 layer and repeat above steps
Select Element 136 - resize by 80%
Paste and position under top Circle 7 layer
Image, Duplicate, mirror and flip
Select Circle 6 layer
Select all, float, defloat
Add new raster layer and flood-fill with gradient of choice (Linear style, Angle 45, Repeat 2)
Select none
Effects, Texture Effects, Blinds (Width 2, Opactity 15, Horizontal and Light from left/top checked)
Delete/Hide original circle layer
Select Rectangle 4 layer
Select all, float, defloat
Paste paper 10
Select invert, delete, select none
Delete/Hide original rectangle layer
Select Circle 3 layer
Select all, float, defloat
Add new raster layer and flood-fill with color of choice
Select none
Apply Effects, Texture Effects, Weave (Gap size 2, Width 3, Opacity 5, Fill gaps checked, Change Gap Color to color of choice)
Delete/Hide original circle layer
Select Rectangle 2 layer
Select all, float, defloat
Paste paper 1
Select invert, delete, select none
Delete/Hide original rectangle layer
Select Rectangle 1 layer and repeat above steps
Copy and paste tube of choice and position where desired
Apply Xero Radiance at setting of choice
Apply Lokas 3D Shadow at default settings
Select Element 36 - resize by 50%
Paste and position on bottom left side
Select Element 69 - resize by 55%
Paste and position on bottom left side below element 36
Select Element 40 - resize by 50%
Paste and position on bottom left side behind element 69
Select Element 107 - image mirror and paste on right side
Select Element 71 - resize by 35%
Paste and position on bottom right side
Select Element 66 - resize by 60%
Paste and position on bottom right side below element 71
Select Element 53 - resize by 45%
Paste and position on top left side below tube layer
Select New raster layer and flood fill with color or gradient of choice
Move layer to the bottom of the template
Apply Spring Mask
Merge group and move to the bottom
Add any additional elements you like.
Add any dropshadows you like
Crop and resize as desired
Add copyright info, license number and name
You're done! Thanks for trying my tutorial!
Saturday, March 23, 2013
VERYLICIOUS
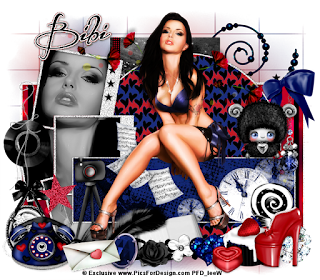
Supplies needed:
I am using the amazing Exclusive art from Very Many for this tutorial, which you can find here
Scrapkit: I am using an awesome kit from Bibi's Collections called "Verylicious" which you can get by going here
Template 417 from Missy which can be found here
Mask 191 from Insatiable Dreams which you can find here
Plugins used: Xero-Radiance, Xero-Bad Dream, Lokas 3D Shadow
----------------------------
This tutorial is written for those who have working knowledge of PSPX2 (any version will do).
This tutorial was written by me on March 23, 2013. Please do not copy or paste on any other forum, website or blog provide link back to tut only. Please do not claim as your own. This tutorial is copyrighted to me. Any resemblance to any other tutorial is purely coincidental.
Ok - let's start and remember to save often.
Open the template and using your shortcut keys on your keyboard (SHIFT+D) duplicate the template as a new image. Close the original and delete the copywrite layer.
Adjust Canvas Size by 800 x 700 (you can resize later)
Select Star 1 layer
Select all, float, defloat
Add new raster layer and flood-fill with color of choice
Select none
Adjust, Add/Remove Noise, Add Noise (Uniform checked, Noise 75%, Monochrome checked)
Delete/Hide original star layer
Select Star 2 layer and repeat above steps
Select Rectangle layer
Select all, float, defloat
Paste paper 8
Select invert, delete, select none
Delete/Hide original rectangle layer
Select Element 1 - resize by 35%
Paste and position on top of the rectange layer to the right
Change the opacity on the element to Hard Light
Select Rectangle Back layer
Adjust, Add/Remove Noise, Add Noise (Uniform checked, Noise 100%, Monochrome checked)
Select Frame layer
Adjust, Add/Remove Noise, Add Noise (Uniform checked, Noise 100%, Monochrome checked)
Select Frame Background layer
Select all, float, defloat
Paste close-up tube/tubes of choice on top of background and delete
Change closeups to Luminance (Legacy)
Apply Xero Bad Dream at default settings or random setting of choice
Drop opacity on close-up down to 80%
Apply dropshadow and merge down on top of background layer
Select Circle layer
Select all, float, defloat
Paste paper 1
Select invert, delete, select none
Delete/Hide original circle layer
Select Circle Back layer
Select all, float, defloat
Add new raster layer and flood-fill with color of choice
Select none
Adjust, Add/Remove Noise, Add Noise (Uniform checked, Noise 100%, Monochrome checked)
Delete/Hide original circle back layer
Select Thin Rectangle Center layer
Select all, float, defloat
Add new raster layer and flood-fill with color of choice
Select none
Apply Effects, Texture Effects, Weave (Gap size 2, Width 4, Opacity 5, Fill gaps checked, Change Gap Color to color of choice)
Delete/Hide original rectangle layer
Select Center Rectangle layer
Select all, float, defloat
Paste paper 7
Select invert, delete, select none
Delete/Hide original rectangle layer
Select Rectangle layer
Select all, float, defloat
Paste paper 15
Select invert, delete, select none
Delete/Hide original rectangle layer
Select Rectangle Back layer
Adjust, Add/Remove Noise, Add Noise (Uniform checked, Noise 100%, Monochrome checked)
Select Small Rectangle layer
Select all, float, defloat
Paste paper 16
Select invert, delete, select none
Delete/Hide original rectangle layer
Copy and paste tube of choice and position where desired
Apply Xero Radiance at setting of choice
Apply Lokas 3D Shadow at default settings
Select Element 75 - resize by 70%
Paste and position on bottom right side
Select Element 77 - resize by 45%
Paste and position on bottom right side below shoe element
Select Element 79 - resize by 45%
Paste and position on bottom left side
Select Element 9 - resize by 75%
Paste and position on bottom left side below tube layer
Select Element 45 and paste on top right side
Move element to bottom layer
Select New raster layer and flood fill with color or gradient of choice
Move layer to the bottom of the template
Apply Mask 191
Merge group and move to the bottom
Add any additional elements you like.
Add any dropshadows you like
Crop and resize as desired
Add copyright info, license number and name
You're done! Thanks for trying my tutorial!
Labels:Bibi's Collections | 0
comments
Friday, March 22, 2013
EASTER CHICK
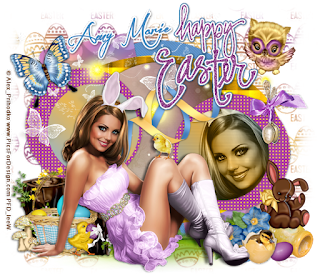
Supplies needed:
I am using the amazing art from Alex Prihodko for this tutorial, which you can find here
Scrapkit: I am using an awesome kit from Amy Marie called "Easter Chick" which you can get by going here
Template 217 from Millie which can be found here
Mask 52 from Myth which you can find on the Misfits Blog here
Plugins used: Penta - Jeans, Eyecandy 4000 - Gradient Glow, Xero-Radiance, Xero-Bad Dream, Lokas 3D Shadow
----------------------------
This tutorial is written for those who have working knowledge of PSPX2 (any version will do).
This tutorial was written by me on March 22, 2013. Please do not copy or paste on any other forum, website or blog provide link back to tut only. Please do not claim as your own. This tutorial is copyrighted to me. Any resemblance to any other tutorial is purely coincidental.
Ok - let's start and remember to save often.
Open the template and using your shortcut keys on your keyboard (SHIFT+D) duplicate the template as a new image. Close the original and delete the copywrite layer.
Adjust Canvas Size by 800 x 700 (you can resize later)
Select Wordart 10 layer and move where desired
Add new raster layer and flood-fill with color of choice
Reselect wordart layer
Select all, float, defloat
Go back and select color layer you just filled
Select invert, delete, select none
Adjust, Add/Remove Noise, Add Noise (Uniform checked, Noise 70%, Monochrome checked)
Apply Eyecandy Gradient Glow on fat default settings (Glow Width 3)
Delete/Hide original wordart layer
Select Circle 9 layer
Select all, float, defloat
Add new raster layer and flood-fill with gradient colors of choice (Linear style, Angle 45, Repeat 2)
Paste close-up tube of choice on top of gradient and delete
Change closeup to Luminance (Legacy)
Apply Xero Bad Dream at default settings or random setting of choice
Drop opacity on close-up down to 85%
Apply dropshadow and merge down on top of gradient layer
Effects, Texture Effects, Blinds (Width 2, Opactity 15, Horizontal and Light from left/top checked)
Delete/Hide original circle layer
Select Circle 8 layer and repeat above steps without adding a close-up
Select Circle 7 layer
Select all, float, defloat
Add new raster layer and flood-fill with color of choice
Select none
Apply Effects, Texture Effects, Weave (Gap size 3, Width 5, Opacity 5, Fill gaps checked, Change Gap Color to color of choice)
Delete/Hide original circle layer
Select Circle 6 layer and repeat above steps
Select Circle 5 layer
Select all, float, defloat
Paste paper 6
Select invert, delete, select none
Delete/Hide original circle layer
Select Oval 4 layer
Select all, float, defloat
Add new raster layer and flood-fill with color of choice
Select none
Apply Effects, Texture Effects, Daze Texture with the following settings:
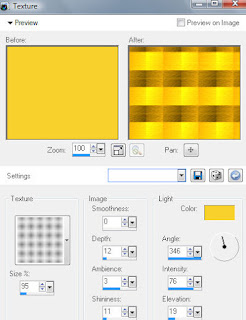
Delete/Hide original oval layer
Select Square 3 layer
Select all, float, defloat
Paste paper 1
Select invert, delete, select none
Delete/Hide original square layer
Select Square 2 layer and repeat above steps
Select Circel 1 layer
Select all, float, defloat
Add new raster layer and flood-fill with color of choice
Select none
Apply Penta - Jeans with the following settings:
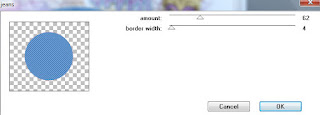
Delete/Hide original circle layer
Copy and paste tube of choice and position where desired
Apply Xero Radiance at setting of choice
Apply Lokas 3D Shadow at default settings
Select Element 61 - resize by 85%
Image, mirror and paste on the bottom left side behind tube layer
Select Element 30 - resize by 75%
Paste and position on bottom left below tube layer
Select Element 48 - resize by 40%
Paste and position on bottom right side
Select Element 15 - resize by 35%
Paste and position on bottom right side
Select Element 8 - resize by 55%
Image, mirror and paste on the bottom right side
Select New raster layer and flood fill with color or gradient of choice
Move layer to the bottom of the template
Apply Mask 52
Merge group and move to the bottom
Add any additional elements you like.
Add any dropshadows you like
Crop and resize as desired
Add copyright info, license number and name
You're done! Thanks for trying my tutorial!
Labels:Amy Marie | 0
comments
Wednesday, March 20, 2013
SEXY SONDRA
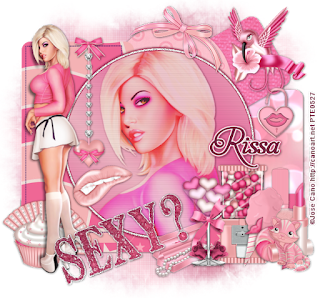
Supplies needed:
I am using the amazing art from Jose Cano for this tutorial, which you can find here
Scrapkit: I am using an awesome kit from Rissa's Designs called "Sondra" which you can get by going here
Template 50 from Rissa which can be found here
Mask 111 from Designs By Vaybs which you can find here
Plugins used: Eyecandy 4000 - Glass, Xero-Radiance, Xero-Bad Dream, Lokas 3D Shadow
----------------------------
This tutorial is written for those who have working knowledge of PSPX2 (any version will do).
This tutorial was written by me on March 20, 2013. Please do not copy or paste on any other forum, website or blog provide link back to tut only. Please do not claim as your own. This tutorial is copyrighted to me. Any resemblance to any other tutorial is purely coincidental.
Ok - let's start and remember to save often.
Open the template and using your shortcut keys on your keyboard (SHIFT+D) duplicate the template as a new image. Close the original and delete the copywrite layer.
Select "Sexy" Wordart layer
Select all, float, defloat
Add new raster layer and flood-fill with color or gradient of choice
Select none
Apply Eyecandy 4000 Glass at default settings
Delete/Hide original wordart layer
Select Sexy Wordart back 8 layer
Adjust, Add/Remove Noise, Add Noise (Uniform checked, Noise 100%, Monochrome checked)
Select Circle 7 layer
Select all, float, defloat
Add new raster layer and flood-fill with gradient colors of choice (Linear style, Angle 45, Repeat 2)
Paste close-up tube of choice on top of gradient and delete
Change closeup to Hard Light
Drop opacity on tube down to 65%
Apply Xero Bad Dream at default settings or random setting of choice
Apply dropshadow and merge down on top of gradient layer
Effects, Texture Effects, Blinds (Width 2, Opactity 15, Horizontal and Light from left/top checked)
Apply Eyecandy Gradient Glow on fat default settings (Glow Width 8 - change colors if you desire)
Delete/Hide original circle layer
Select Rectangle 5 layer
Select all, float, defloat
Paste paper 4
Select invert, delete, select none
Delete/Hide original rectangle layer
Select Circle 4 layer
Select all, float, defloat
Paste paper 9
Select invert, delete, select none
Delete/Hide circle layer
Select Square 3 layer
Select all, float, defloat
Paste paper 10
Select invert, delete, select none
Delete/Hide original square layer
Select Rectangle 2 layer
Select all, float, defloat
Paste paper 3
Select invert, delete, select none
Delete/Hide original rectangle layer
Select Square 1 layer
Select all, float, defloat
Paste paper 2
Select invert, delete, select none
Delete/Hide original square layer
Copy and paste tube of choice and position where desired
Apply Xero Radiance at setting of choice
Apply Lokas 3D Shadow at default settings
Select Hummingbird Element - resize by 35%
Paste and position on top right
Select Fan Element - resize by 45%
Image, Free Rotate Right by 20%
Paste and position on bottom left side behind tube layer
Select Cupcake 1 Element - resize by 25%
Paste and position on bottom left side below tube layer
Select Lipstick Element - resize by 40%
Paste and position on bottom right side
Select Gumball Machine Element - resize by 40%
Paste and position on bottom right side
Select New raster layer and flood fill with color or gradient of choice
Move layer to the bottom of the template
Apply Mask 111
Merge group and move to the bottom
Add any additional elements you like.
Add any dropshadows you like
Crop and resize as desired
Add copyright info, license number and name
You're done! Thanks for trying my tutorial!
Labels:Rissa's Designs | 0
comments
Tuesday, March 19, 2013
GRUNGE PRINCESS
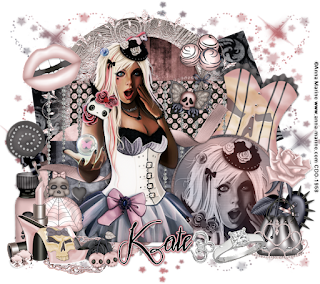
Supplies needed:
I am using the amazing art from Anna Marine for this tutorial, which you can find here
Scrapkit: I am using an awesome kit from Irish Princess Designs called "Princess Grunge" which you can get by going here
Template 172 from Tamie which can be found here
Mask 247 from Trese which you can find here
Plugins used: Eyecandy 4000 - Glass, Xero-Radiance, Xero-Bad Dream, Lokas 3D Shadow
----------------------------
This tutorial is written for those who have working knowledge of PSPX2 (any version will do).
This tutorial was written by me on March 19, 2013. Please do not copy or paste on any other forum, website or blog provide link back to tut only. Please do not claim as your own. This tutorial is copyrighted to me. Any resemblance to any other tutorial is purely coincidental.
Ok - let's start and remember to save often.
Open the template and using your shortcut keys on your keyboard (SHIFT+D) duplicate the template as a new image. Close the original and delete the copywrite layer.
Adjust Canvas Size by 800 x 800 (you can resize later)
Select Circle Frame Raster 9 layer
Select all, float, defloat
Add new raster layer and flood-fill with color or gradient of choice
Select none
Apply Eyecandy 4000 Glass at default settings
Delete/Hide original frame layer
Select Circle Raster 8 layer
Select all, float, defloat
Add new raster layer and flood-fill with gradient colors of choice (Linear style, Angle 45, Repeat 2)
Paste close-up tube of choice on top of gradient and delete
Change closeup to Luminance (Legacy)
Apply Xero Bad Dream at default settings or random setting of choice
Drop opacity on tube down to 75%
Apply dropshadow and merge down on top of gradient layer
Effects, Texture Effects, Blinds (Width 2, Opactity 15, Horizontal and Light from left/top checked)
Delete/Hide original circle layer
Select Rectangle Raster 2 layer
Select all, float, defloat
Paste paper 5
Select invert, delete, select none
Delete/Hide original rectangle layer
Select Circle Raster 10 layer
Select all, float, defloat
Paste paper 2
Select invert, delete, select none
Delete/Hide circle layer
Select Rectangle Raster 5 layer
Select all, float, defloat
Paste paper 9
Select invert, delete, select none
Delete/Hide original rectangle layer
Select Circle Raster 7 layer
Select all, float, defloat
Paste paper 6
Select invert, delete, select none
Delete/Hide original circle layer
Select Square Raster 4 layer
Select all, float, defloat
Paste paper 8
Select invert, delete, select none
Delete/Hide original square layer
Select Square Raster 3 layer and repeat above steps
Select Circle Raster 6 layer
Select all, float, defloat
Paste paper 3
Select invert, delete, select none
Delete/Hide original circle layer
Select GlitterMat Element
Paste and position on top of Circle Paper 3 layer
Copy and paste tube of choice and position where desired
Apply Xero Radiance at setting of choice
Apply Lokas 3D Shadow at default settings
Select Corset Element - resize by 55%
Image, Free Rotate Right by 15%
Paste and position on right side
Select Full Rose Element - resize by 45%
Image, Free Rotate Right by 15%
Paste and position on the right side above corset element
Select Purse Element - resize by 30%
Paste and position on bottom right side
Select Cupcake Element - resize by 40%
Paste and position on bottom left side
Select Lipstick Element - resize by 40%
Paste and position on bottom left side above cupcake element
Select Shoe Element - resize by 40%
Paste and position on bottom left side above lipstick element
Select New raster layer and flood fill with color or gradient of choice
Move layer to the bottom of the template
Apply Mask 247
Merge group and move to the bottom
Add any additional elements you like.
Add any dropshadows you like
Crop and resize as desired
Add copyright info, license number and name
You're done! Thanks for trying my tutorial!
Labels:Irish Princess Designs | 0
comments
SUGAR GIRL
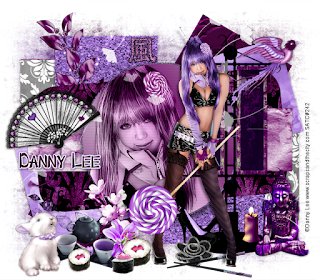
Supplies needed:
I am using the amazing art from Danny Lee for this tutorial, which you can find here
Scrapkit: I am using the matching kit from Bibi's Collections called "Sugar Girl" which you can get by going here
Template 188 from Kristin which can be found here
Mask 249 from Trese which you can find here
Plugins used: Xero-Radiance, Xero-Bad Dream, Lokas 3D Shadow
----------------------------
This tutorial is written for those who have working knowledge of PSPX2 (any version will do).
This tutorial was written by me on March 19, 2013. Please do not copy or paste on any other forum, website or blog provide link back to tut only. Please do not claim as your own. This tutorial is copyrighted to me. Any resemblance to any other tutorial is purely coincidental.
Ok - let's start and remember to save often.
Open the template and using your shortcut keys on your keyboard (SHIFT+D) duplicate the template as a new image. Close the original and delete the copywrite layer.
Adjust Canvas Size by 800 x 700 (you can resize later)
Select Copy of Raster 1 Circle layer
Select all, float, defloat
Add new raster layer and flood-fill with gradient colors of choice (Linear style, Angle 45, Repeat 2)
Paste close-up tube of choice on top of gradient and delete
Change closeup to Luminance (Legacy)
Apply Xero Bad Dream at default settings or random setting of choice
Apply dropshadow and merge down on top of gradient layer
Effects, Texture Effects, Blinds (Width 2, Opactity 15, Horizontal and Light from left/top checked)
Delete/Hide original circle layer
Select Copy (2) Back Circle layer
Select all, float, defloat
Add new raster layer and flood-fill with color of choice
Select none
Adjust, Add/Remove Noise, Add Noise (Uniform checked, Noise 70%, Monochrome checked)
Delete/Hide original circle layer
Select Rectangle Raster 9 layer
Select all, float, defloat
Paste paper 4
Select invert, delete, select none
Delete/Hide rectangle layer
Select Rounded Rectangle Raster 4 layer
Select all, float, defloat
Paste paper 6
Select invert, delete, select none
Delete/Hide original rectangle layer
Select Square Raster 5 layer
Select all, float, defloat
Paste paper 2
Select invert, delete, select none
Delete/Hide original square layer
Select Square Copy of Raster 5 layer and repeat above steps
Select Square Raster 6 layer
Select all, float, defloat
Paste paper 3
Select invert, delete, select none
Delete/Hide original square layer
Select Square Copy of Raster 6 layer and repeat above steps
Select Square Raster 7 layer
Select all, float, defloat
Add new raster layer and flood-fill with color of choice
Select none
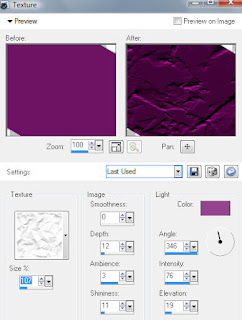
Effects, Texture Effects, Crumpled Paper Texture with the following settings:
Delete/Hide original square layer
Select Square Copy of Raster 7 layer and repeat above steps
Copy and paste tube of choice and position where desired
Apply Xero Radiance at setting of choice
Apply Lokas 3D Shadow at default settings
Select Element 65 - resize by 80%
Paste and position on right side behind tube layer
Select Element 6 - resize by 80%
Image, Free Rotate Left by 20%
Paste and position on left side
Select Element 63 - resize by 35%
Paste and position on bottom right side
Select Element 68 - resize by 55%
Paste and position on bottom left side
Select Element 17 - resize by 50%
Paste and position on bottom left side
Select Element 30 - resize by 45%
Paste and position on top right side
Select New raster layer and flood fill with color or gradient of choice
Move layer to the bottom of the template
Apply Mask 249
Merge group and move to the bottom
Add any additional elements you like.
Add any dropshadows you like
Crop and resize as desired
Add copyright info, license number and name
You're done! Thanks for trying my tutorial!
Wednesday, March 13, 2013
PRINCESSE
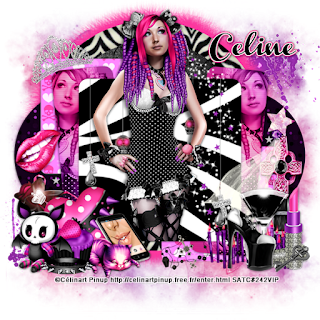
Supplies needed:
I am using the amazing art from Celineart Pinup for this tutorial, which you can find here
Scrapkit: I am using an awesome kit from Bibi's Collections called "Princesse" which you can get by going here
Template 214 from Millie which can be found here
Mask 22 from Gina Gems and which you can find here
Plugins used: Xero-Radiance, Xero-Bad Dream, Lokas 3D Shadow
----------------------------
This tutorial is written for those who have working knowledge of PSPX2 (any version will do).
This tutorial was written by me on March 13, 2013. Please do not copy or paste on any other forum, website or blog provide link back to tut only. Please do not claim as your own. This tutorial is copyrighted to me. Any resemblance to any other tutorial is purely coincidental.
Ok - let's start and remember to save often.
Open the template and using your shortcut keys on your keyboard (SHIFT+D) duplicate the template as a new image. Close the original and delete the copywrite layer.
Select Square 8 layer
Select all, float, defloat
Paste paper 11
Select invert, delete, select none
Delete/Hide original square layer
Select Rectangle 6 layer
Select all, float, defloat
Add new raster layer and flood-fill with gradient of choice (Linear style, Angle 45, Repeat 2)
Paste close-up tube of choice on top of gradient and delete
Change close-up to Luminance (Legacy)
Apply Xero Bad Dream at default settings or random setting of choice
Drop opacity down on tube to 85%
Apply dropshadow and merge close-up down on top of gradient layer
Effects, Texture Effects, Blinds (Width 2, Opactity 15, Horizontal and Light from left/top checked)
Delete/Hide original rectangle layer
Select Rectangle 7 layer and repeat above steps
Select Square 5 layer
Select all, float, defloat
Paste paper 5
Select invert, delete, select none
Delete/Hide original square layer
Select Square 4 layer and repeat above steps
Select Circel 2 layer
Select all, float, defloat
Paste paper 2
Select invert, delete, select none
Delete/Hide original circle layer
Select Circle 3 layer and repeat above steps
Select Circle 1 layer
Select all, float, defloat
Paste paper 6
Select invert, delete, select none
Delete/Hide original circle layer
Select Element 35 and paste on top of circle 1 layer
Copy and paste tube of choice and position where desired
Apply Lokas 3D Shadow at default settings
Select Element 70 - resize by 40%
Image, Free Rotate Left by 15%
Paste and position on top left
Select Element 22 - resize by 35%
Paste and position on bottom right side
Select Element 36 - resize by 40%
Paste and position on bottom right above cross element
Select Element 28 - resize by 55%
Paste and position on bottom right side
Select Element 34 - resize by 45%
Image, Free Rotate Left by 15%
Paste and position on bottom left side
Select Element 48 - resize by 55%
Paste and position on bottom left side
Select New raster layer and flood fill with color or gradient of choice
Move layer to the bottom of the template
Apply Mask 22 and merge group
Add any additional elements you like.
Add any dropshadows you like
Crop and resize as desired
Add copyright info, license number and name
You're done! Thanks for trying my tutorial!
SWEET BUNNY
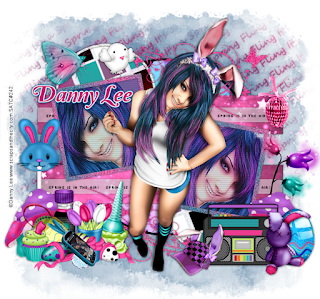
Supplies needed:
I am using the amazing art from Danny Lee for this tutorial, which you can find here
Scrapkit: I am using an awesome kit from Bibi's Collections called "Easter Bunny" which you can get by going here
Spring Template 1 from Melissa which can be found on the Misfits Blog here
Becky Mask 22 here
Spring Mask 134 from Aqua and which you can find on the Misfits Blog here
Plugins used: Xero-Radiance, Xero-Bad Dream, Lokas 3D Shadow
----------------------------
This tutorial is written for those who have working knowledge of PSPX2 (any version will do).
This tutorial was written by me on March 13, 2013. Please do not copy or paste on any other forum, website or blog provide link back to tut only. Please do not claim as your own. This tutorial is copyrighted to me. Any resemblance to any other tutorial is purely coincidental.
Ok - let's start and remember to save often.
Open the template and using your shortcut keys on your keyboard (SHIFT+D) duplicate the template as a new image. Close the original and delete the copywrite layer.
Adjust Canvas Size by 750 x 700 (you can resize later)
Select Merged Doodles layer
Add new raster layer and flood-fill with color of choice
Reselect Doodles layer
Select all, float, defloat
Select color layer you just filled
Select invert, delete, select none
Delete/Hide original doodle layer
Select Merged Frames layer
Select all, float, defloat
Add new raster layer and flood-fill with color or gradient of choice
Select none
Adjust, Add/Remove Noise, Add Noise (Uniform checked, Noise 50%, Monochrome checked)
Delete/Hide original frames layer
Select Frame Background 3 layer
Select all, float, defloat
Add new raster layer and flood-fill with gradient of choice (Linear style, Angle 45, Repeat 2)
Paste close-up tubes of choice on top of gradient and delete
Change close-ups to Hard Light
Apply Xero Bad Dream at default settings or random setting of choice
Drop opacity down on tube to 75%
Apply dropshadow and merge close-ups down on top of gradient layer
Effects, Texture Effects, Blinds (Width 2, Opactity 15, Horizontal and Light from left/top checked)
Delete/Hide original background layer
Select Merged Strips layer
Select all, float, defloat
Paste paper 5
Select invert, delete, select none
Delete/Hide original strips layer
Select Circle Frames layer
Select all, float, defloat
Add new raster layer and flood-fill with color of choice
Select none
Adjust, Add/Remove Noise, Add Noise (Uniform checked, Noise 100%, Monochrome checked)
Delete/Hide original frames layer
Select Raster 2 Circles layer
Select all, float, defloat
Paste paper 8
Select invert, delete, select none
Delete/Hide original circles layer
Select Circle Raster 5 layer
Select all, float, defloat
Paste paper 11
Select invert, delete, select none
Delete/Hide original circle layer
Copy and paste tube of choice and position where desired
Apply Lokas 3D Shadow at default settings
Select Element 17 - Image, mirror and paste on bottom right side
Select Element 48 - resize by 45%
Paste and position on bottom right
Select Element 83 - resize by 25%
Paste and position on bottom right above element 48
Select Element 101 - resize by 30%
Paste and position on bottom left
Select Element 87 - resize by 45%
Paste and position on bottom left side
Select Element 90 - resize by 40%
Paste and position on bottom left side above element 87
Select Element 66 - resize by 55%
Image, mirror and paste/position on bottom left above element 90
Select New raster layer and flood fill with color or gradient of choice
Move layer to the bottom of the template
Apply Spring Mask 134
Merge group
Select New Raster layer and flood-fill with color of choice
Move layer to the bottom of template
Apply Becky Mask 22
Merge group
Add any additional elements you like.
Add any dropshadows you like
Crop and resize as desired
Add copyright info, license number and name
You're done! Thanks for trying my tutorial!
Tuesday, March 12, 2013
EASTER BLISS
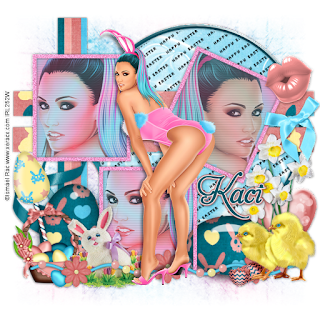
Supplies needed:
I am using the amazing art from Ismael Rac for this tutorial, which you can find here
Scrapkit: I am using an awesome kit from Scrappin Krazy Designs called "Easter Bliss" which you can get by going here
Spring Template 2 from Melissa which can be found on the Misfits Blog here
Mask 250 from Trese and which you can find here
Plugins used: Eyecandy - 4000 Glass, Xero-Radiance, Xero-Bad Dream, Lokas 3D Shadow
----------------------------
This tutorial is written for those who have working knowledge of PSPX2 (any version will do).
This tutorial was written by me on March 12, 2013. Please do not copy or paste on any other forum, website or blog provide link back to tut only. Please do not claim as your own. This tutorial is copyrighted to me. Any resemblance to any other tutorial is purely coincidental.
Ok - let's start and remember to save often.
Open the template and using your shortcut keys on your keyboard (SHIFT+D) duplicate the template as a new image. Close the original and delete the copywrite layer.
Adjust Canvas Size by 750 x 700 (you can resize later)
Select Raster Frame 1 layer
Select all, float, defloat
Add new raster layer and flood-fill with color of choice
Select none
Adjust, Add/Remove Noise, Add Noise (Uniform checked, Noise 65%, Monochrome checked)
Delete/Hide original frame layer
Select Merged Eggs layer
Select all, float, defloat
Paste paper 10
Select invert, delete, select none
Apply Eyecandy Glass at default settings
Delete/Hide original eggs layer
Select Frame Background 2 layer
Select all, float, defloat
Add new raster layer and flood-fill with gradient of choice (Sunburst style, Angle 0, Repeat 3)
Paste close-up tubes of choice on top of gradient and delete
Change close-ups to Hard Light
Apply Xero Bad Dream at default settings or random setting of choice
Drop opacity down on tube to 65%
Apply dropshadow and merge close-ups down on top of gradient layer
Effects, Texture Effects, Blinds (Width 2, Opactity 15, Horizontal and Light from left/top checked)
Delete/Hide original background layer
Select Merged Strips layer
Select all, float, defloat
Paste paper 8
Select invert, delete, select none
Delete/Hide original strips layer
Select Circle Frame layer
Select all, float, defloat
Add new raster layer and flood-fill with color of choice
Select none
Apply Eyecandy Glass at default settings
Delete/Hide original frame layer
Select Raster 5 Circle layer
Select all, float, defloat
Paste paper 13
Select invert, delete, select none
Delete/Hide original circle layer
Select Raster 3 strip layer
Select all, float, defloat
Paste paper 11
Select invert, delete, select none
Delete/Hide original strip layer
Copy and paste tube of choice and position where desired
Apply Lokas 3D Shadow at default settings
Select Element 18 - resize by 40%
Paste and position on bottom right side
Select Element 29 - resize by 35%
Paste and position on bottom right behind chick element
Image, Duplicate and resize by 80%
Reposition where desired
Select Element 15 - resize by 40%
Image mirror and paste on bottom left side
Select Element 28 - resize by 50%
Paste and position on bottom left side
Select New raster layer and flood fill with color or gradient of choice
Move layer to the bottom of the template
Apply Mask 250
Merge group and move to the bottom
Add any additional elements you like.
Add any dropshadows you like
Crop and resize as desired
Add copyright info, license number and name
You're done! Thanks for trying my tutorial!
Labels:Scrappin Krazy Designs | 0
comments
Sunday, March 10, 2013
WILD LITTLE GOTH
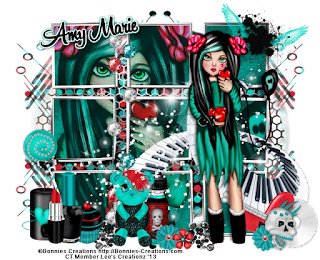
Supplies needed:
I am using the amazing art from Bonnies Creations for this tutorial, which you can find here
Scrapkit: I am a gorgeous kit from Amy Marie called "Wild One" which you can get by going here
Mask 279 from Trese which you can find here
Plugins used: Xero-Radiance, Xero-Bad Dream, Lokas 3D Shadow
----------------------------
This tutorial is written for those who have working knowledge of PSPX2 (any version will do).
This tutorial was written by me on March 10, 2013. Please do not copy or paste on any other forum, website or blog provide link back to tut only. Please do not claim as your own. This tutorial is copyrighted to me. Any resemblance to any other tutorial is purely coincidental.
Ok - let's start and remember to save often.
Open up a 800 x 800 blank canvas (we can resize it later)
Select Frame 5 and paste in the center of the canvas
Select your magic wand tool and click in the center of each frame (hold shift) (Add (Shift), RGB Value, Tolerance 25, Contiguous checked, Feather 0)
Selections, Modify, Expand by 2
Paste paper 7
Select invert, delete
Paste Close-up tube on top of paper where desired and delete
Select none
Change close-up to Hard Light
Drop opacity on close-up down to 70%
Apply Dropshadow on tube and merge down on top of paper
Move paper below frame layer
Paste tube of choice where desired on top of frame
Apply Xero Radiance at setting of choice
Apply Lokas 3D Shadow at default settings
Select Element 10 - resize by 45%
Image Free Rotate Right by 15%
Paste and position on top right side
Select Element 26 - Image Free Rotate Right by 20%
Paste and position on right side below tube layer
Select Element 8 - resize by 70%
Paste and position on bottom right side
Select Element 37 - resize by 50%
Image mirror and paste on the bottom right above element 8
Select Element 32 - resize by 50%
Paste and position on bottom left side
Select Element 35 - resize by 45%
Paste and position on bottom left side
Select Element 67 - resize by 90%
Paste in the center of canvas and move to the bottom layer
Select New raster layer and flood fill with color or gradient of choice
Move layer to the bottom of the template
Apply Mask 279
Merge group and move to the bottom
Add any additional elements you like.
Add any dropshadows you like
Crop and resize as desired
Add copyright info, license number and name
You're done! Thanks for trying my tutorial!
Labels:Amy Marie,Bonnies Creations | 0
comments
LADY FLAVORS
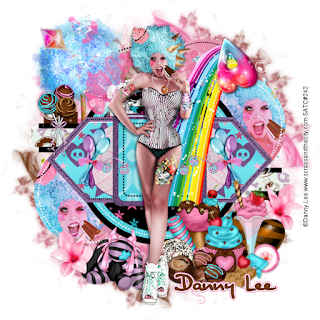
Supplies needed:
I am using the amazing art from Danny Lee for this tutorial, which you can find here
Scrapkit: I am using a matching kit from Designs by Joan called "Flavors" which you can get by going here
Template 143 from Pooker which can be found here
Mask 126 from Trese and which you can find here
Plugins used: Xero-Radiance, Xero-Bad Dream, Lokas 3D Shadow
----------------------------
This tutorial is written for those who have working knowledge of PSPX2 (any version will do).
This tutorial was written by me on March 10, 2013. Please do not copy or paste on any other forum, website or blog provide link back to tut only. Please do not claim as your own. This tutorial is copyrighted to me. Any resemblance to any other tutorial is purely coincidental.
Ok - let's start and remember to save often.
Open the template and using your shortcut keys on your keyboard (SHIFT+D) duplicate the template as a new image. Close the original and delete the copywrite layer.
Adjust Canvas Size by 800 x 800 (you can resize later)
Select White Square layer
Select all, float, defloat
Paste paper 1
Select invert, delete, select none
Delete/Hide original square layer
Select Pink Square layer
Select all, float, defloat
Add new raster layer and flood-fill with color of choice
Select none
Adjust, Add/Remove Noise, Add Noise (Uniform checked, Noise 65%, Monochrome checked)
Delete/Hide original square layer
Select Black Circle 1 layer
Select all, float, defloat
Paste paper 9
Select invert, delete, select none
Delete/Hide original circle layer
Select Black Circle 2 layer and repeat above steps
Select White Shape 1 layer
Select all, float, defloat
Paste paper 4
Select invert, delete, select none
Delete/Hide original shape layer
Select White Shape 2 layer and repeat above steps
Select Lt. Pink Shape 1 layer
Select all, float, defloat
Add new raster layer and flood-fill with color of choice
Select none
Adjust, Add/Remove Noise, Add Noise (Uniform checked, Noise 65%, Monochrome checked)
Delete/Hide original shape layer
Select Lt. Pink Shape2 layer and repeat above steps
Select White Circle layer
Select all, float, defloat
Paste paper 6
Select invert, delete, select none
Delete/Hide original circle layer
Select Pink Circle 1 layer
Select all, float, defloat
Add new raster layer and flood-fill with color of choice
Select none
Adjust, Add/Remove Noise, Add Noise (Uniform checked, Noise 45%, Monochrome checked)
Delete/Hide original circle layer
Select Pink Circle 2 layer
Select all, float, defloat
Add new raster layer and flood-fill with gradient of choice (style, Angle 45, Repeat 1)
Paste close-up tube of choice on top of gradient and delete
Change close-up to Hard Light
Apply Xero Bad Dream at default settings or random setting of choice
Drop opacity down on tube to 75%
Apply dropshadow and merge close-up down on top of gradient layer
Delete/Hide original circle layer
Select Pink Circle 3 layer and repeat above steps
Select Lt. Pink Circle 1 layer
Select all, float, defloat
Paste paper 7
Select invert, delete, select none
Delete/Hide original circle layer
Select Lt. Pink Circle 2 layer and repeat above steps
Select Pink Strips layer
Select all, float, defloat
Paste paper 8
Select invert, delete, select none
Delete/Hide original strips layer
Select Lt. Pink Boxes layer
Select all, float, defloat
Add new raster layer and flood-fill with color of choice
Select none
Delete/Hide original boxes layer
Copy and paste tube of choice and position where desired
Apply Lokas 3D Shadow at default settings
Select Flavors17 Element
Paste and position on top right side below tube layer
Select Flavors54 Element - resize by 85%
Paste and position on top right above element 17
Select Flavors10 Element - resize by 45%
Image mirror and paste on bottom left side
Select Flavors36 Element - resize by 45%
Paste and position on bottom left side
Image, mirror and reposition on right side
Select Flavors19 Element - resize by 85%
Image Free Rotate Right by 15%
Paste and position on bottom right side
Select Flavors11 Element - resize by 55%
Paste and position on bottom right side
Select Flavors18 Element - resize by 50%
Paste and position on bottom right side above element 19
Select Flavors74 Element - resize by 85%
Paste and position on top left below Black Circle 3 layer
Select New raster layer and flood fill with color or gradient of choice
Move layer to the bottom of the template
Apply Mask 126
Merge group and move to the bottom
Add any additional elements you like.
Add any dropshadows you like
Crop and resize as desired
Add copyright info, license number and name
You're done! Thanks for trying my tutorial!
Labels:Danny Lee,Scraps and the City | 0
comments
Saturday, March 9, 2013
JUST DANCE
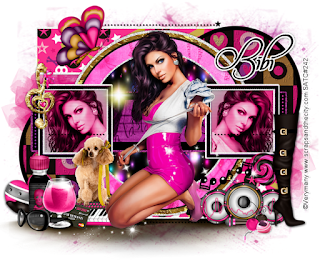
Supplies needed:
I am using the amazing art from VeryMany for this tutorial, which you can find here
Scrapkit: I am using an awesome kit from Bibi's Collections called "Just Dance" which you can get by going here
Template 332 from Missy which can be found here
Mask 112 from Trese and which you can find here
Plugins used: Xero-Radiance,Xero-Bad Dream, Lokas 3D Shadow
----------------------------
This tutorial is written for those who have working knowledge of PSPX2 (any version will do).
This tutorial was written by me on March 9, 2013. Please do not copy or paste on any other forum, website or blog provide link back to tut only. Please do not claim as your own. This tutorial is copyrighted to me. Any resemblance to any other tutorial is purely coincidental.
Ok - let's start and remember to save often.
Open the template and using your shortcut keys on your keyboard (SHIFT+D) duplicate the template as a new image. Close the original and delete the copywrite layer.
Adjust Canvas Size by 800 x 650 (you can resize later)
Select Trouble Wordart layer and delete if you desire
Select Frame 2 layer
Select your magic wand tool and select the middle of your frame (Add (Shift), RGB Value, Tolerance 20, Contiguous checked, Feather 0)
Add new raster layer and flood-fill with color of choice
Select none and merge down
Select Frame 1 layer and repeat above steps
Select Frame 1 background layer
Select all, float, defloat
Add new raster layer and flood-fill with color or gradient of choice
Select none
Add new raster layer and flood-fill with gradient of choice (style, Angle 45, Repeat 1)
Paste close-up tube of choice on top of gradient and delete
Change close-up to Luminance (Legacy)
Apply Xero Bad Dream at default settings or random setting of choice
Apply dropshadow and merge close-up down on top of gradient layer
Effects, Texture Effects, Blinds (Width 2, Opactity 15, Horizontal and Light from left/top checked)
Delete/Hide original frame background layer
Select Frame 2 background layer and repeat above steps
Select Rectangle Center 2 layer
Select all, float, defloat
Paste paper 11
Select invert, delete, select none
Delete/Hide original rectangle layer
Select Glittered Rectangle Center layer
Select all, float, defloat
Add new raster layer and flood-fill with color of choice
Select none
Adjust, Add/Remove Noise, Add Noise (Uniform checked, Noise 65%, Monochrome checked)
Delete/Hide original rectangle layer
Select Circle 3 layer
Select all, float, defloat
Paste paper 3
Select invert, delete, select none
Delete/Hide original circle layer
Select Glittered Circle Center3 layer
Select all, float, defloat
Add new raster layer and flood-fill with color of choice
Select none
Adjust, Add/Remove Noise, Add Noise (Uniform checked, Noise 80%, Monochrome checked)
Delete/Hide original circle layer
Select Circle2 layer
Select all, float, defloat
Paste paper 2
Select invert, delete, select none
Delete/Hide original circle layer
Select Glittered Circle Center 2 layer
Select all, float, defloat
Add new raster layer and flood-fill with color of choice
Select none
Adjust, Add/Remove Noise, Add Noise (Uniform checked, Noise 80%, Monochrome checked)
Delete/Hide original circle layer
Select Circle 1 layer
Select all, float, defloat
Paste paper 1
Select invert, delete, select none
Delete/Hide original circle layer
Select Glittered Circle Center layer
Select all, float, defloat
Add new raster layer and flood-fill with color of choice
Select none
Adjust, Add/Remove Noise, Add Noise (Uniform checked, Noise 80%, Monochrome checked)
Delete/Hide original circle layer
Select Glittered Circle Left layer
Select all, float, defloat
Paste paper 4
Select invert, delete, select none
Delete/Hide original circle layer
Select Glittered Circle Right layer and repeat above steps
Select Rectangle Left layer
Select all, float, defloat
Paste paper 7
Select invert, delete, select none
Delete/Hide original rectangle layer
Select Rectangle Right and repeat above steps
Copy and paste tube of choice and position where desired
Apply Lokas 3D Shadow at default settings
Select Element 28 - resize by 35%
Paste and position on bottom right
Select Element 70 - resize by 45%
Paste and position on bottom right above element 28
Select Element 71 - resize by 45%
Paste and position on bottom left side below tube layer
Select Element 40 - resize by 18%
Image, Free Rotate by 15%
Paste and position on bottom left
Select Element 68 - resize by 40%
Paste and position on bottom left side above element 40
Select Element 17 - resize by 80%
Paste and position on bottom and move layer down to the bottom layer
Select New raster layer and flood fill with color or gradient of choice
Move layer to the bottom of the template
Apply Mask 112
Merge group and move to the bottom
Add any additional elements you like.
Add any dropshadows you like
Crop and resize as desired
Add copyright info, license number and name
You're done! Thanks for trying my tutorial!
Wednesday, March 6, 2013
HAPPY SPRING
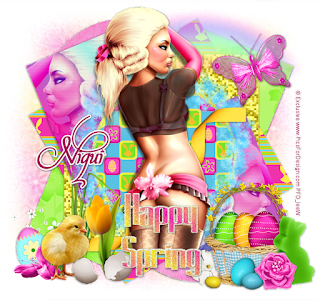
Supplies needed:
I am using the Exclusive art from Lady Mishka for this tutorial, which you can find here
Scrapkit: I am using an awesome kit from Niqui's Designs called "Blessed Easter" which you can get by going here
Template 8 from Angie which can be found on the Misfits Blog here
Easter/Spring Mask From Sabine and which you can find on the Misfits Blog here
Plugins used: Xero-Fritillary, Xero-Bad Dream, Lokas 3D Shadow
----------------------------
This tutorial is written for those who have working knowledge of PSPX2 (any version will do).
This tutorial was written by me on March 6, 2013. Please do not copy or paste on any other forum, website or blog provide link back to tut only. Please do not claim as your own. This tutorial is copyrighted to me. Any resemblance to any other tutorial is purely coincidental.
Ok - let's start and remember to save often.
Open the template and using your shortcut keys on your keyboard (SHIFT+D) duplicate the template as a new image. Close the original and delete the copywrite layer.
Adjust Canvas Size by 800 x 750 (you can resize later)
Select Happy Spring Wordart layer
Select all, float, defloat
Add new raster layer and flood-fill with color or gradient of choice
Select none
Adjust, Add/Remove Noise, Add Noise (Uniform checked, Noise 40%, Monochrome checked)
Delete/Hide wordart layer
Select Wordart Back layer
Adjust, Add/Remove Noise, Add Noise (Uniform checked, Noise 80%, Monochrome checked)
Select Wordart Green Back and delete
Select Center Circle layer
Select all, float, defloat
Paste paper 11
Select invert, delete, select none
Delete/Hide original circle layer
Select Center Circle Back layer
Select all, float, defloat
Add new raster layer and flood-fill with color of choice
Select none
Adjust, Add/Remove Noise, Add Noise (Uniform checked, Noise 40%, Monochrome checked)
Delete/Hide original Circle Back layer
Select Bottom Right Rectangle layer
Select all, float, defloat
Add new raster layer and flood-fill with gradient of choice (style, Angle 45, Repeat 2)
Paste close-up tube of choice on top of gradient and delete
Change close-up to Overlay
Apply Xero Bad Dream at default settings or random setting of choice
Apply dropshadow and merge close-up down on top of gradient layer
Effects, Texture Effects, Blinds (Width 2, Opactity 15, Horizontal and Light from left/top checked)
Delete/Hide original rectangle layer
Select Top Left Rectangle layer and repeat above steps
Select Center Square layer
Select all, float, defloat
Add new raster layer and flood-fill with color of choice
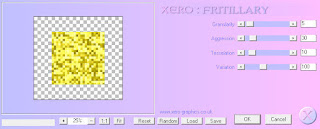
Apply Xero-Fritillary with the following settings:
Delete/Hide original square layer
Select Center Angled Square layer
Select all, float, defloat
Paste paper 10
Select invert, delete, select none
Delete/Hide original square layer
Select Top Right Textured Rectangle layer
Paste paper 9
Select invert, delete, select none
Delete/Hide original rectangle layer
Select Bottom Left Textured Rectangle layer and repeat above steps
Select Top Left Circle
Select all, float, defloat
Paste paper 4
Select invert, delete, select none
Delete/Hide original circle layer
Select Bottom Right Circle layer and repeat above steps
Copy and paste tube of choice and position where desired
Apply Lokas 3D Shadow at default settings
Select Element 9 - resize by 50%
Paste and position on bottom right side
Select Element 8 - resize by 20%
Paste and position on top of basket element
Select Elements 6 and 7 and repeat above step
Select your Lasso tool and make a selection around basket as shown:
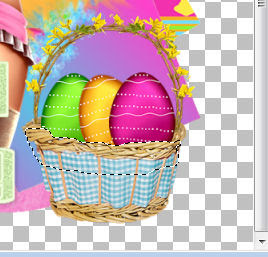
Select Egg Elements and delete
Select Element 1 - resize by 35%
Paste and position on bottom left side
Select Element 26 - resize by 25%
Paste and position on bottom left side
Select New raster layer and flood fill with color or gradient of choice
Move layer to the bottom of the template
Apply Sabine's Mask or Mask of Choice
Merge group and move to the bottom
Add any additional elements you like.
Add any dropshadows you like
Crop and resize as desired
Add copyright info, license number and name
You're done! Thanks for trying my tutorial!
Labels:Niqui Designs | 0
comments
Tuesday, March 5, 2013
STRIKE A POSE
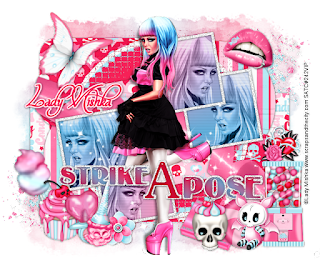
Supplies needed:
I am using the amazing art from Lady Mishka for this tutorial, which you can find here
Scrapkit: I am using an awesome kit from Toxic Desirez called "Skulltastic Candy" which you can get by going here
Template 454 from Missy which can be found here
Mask 22 from Beth here
Plugins used: Alien Skin-Eyecandy 5- Impact/Glass, Xero-Radiance, Xero-Bad Dream, Lokas 3D Shadow
----------------------------
This tutorial is written for those who have working knowledge of PSPX2 (any version will do).
This tutorial was written by me on March 5, 2013. Please do not copy or paste on any other forum, website or blog provide link back to tut only. Please do not claim as your own. This tutorial is copyrighted to me. Any resemblance to any other tutorial is purely coincidental.
Ok - let's start and remember to save often.
Open the template and using your shortcut keys on your keyboard (SHIFT+D) duplicate the template as a new image. Close the original and delete the copywrite layer.
Adjust Canvas Size by 800 x 650 (you can resize later)
Select Wordart layer
Select all, float, defloat
Add new raster layer and flood-fill with color or gradient of choice
Select none
Apply Eyecandy Impact - Glass at default settings
Delete/Hide original wordart layer
Select Wordart back layer
Adjust, Add/Remove Noise, Add Noise (Uniform checked, Noise 85%, Monochrome checked)
Select Frame layer
Adjust, Add/Remove Noise, Add Noise (Uniform checked, Noise 85%, Monochrome checked)
Select Frame Back layer
Select all, float, defloat
Add new raster layer and flood-fill with gradient of choice (Linear style, Angle 45, Repeat 2)
Paste close-up tubes of choice on top of gradient and delete
Change 2 closeups to Hard Light and 2 close-ups to Luminence (Legacy)
Apply Xero Bad Dream at default settings or random setting of choice
Drop opacity on close-ups down to 85%
Apply dropshadow and merge close-ups down on top of gradient layer
Effects, Texture Effect, Blinds (Width 2, Opactity 15, Horizontal and Light from left/top checked)
Delete/Hide original frame back layer
Select Square 1 layer
Select all, float, defloat
Paste paper 8
Select invert, delete, select none
Delete/Hide original square layer
Select Circle 1 layer
Select all, float, defloat
Add new raster layer and flood-fill with color of choice
Select none
Effects, Texture Effects, Mosaic - Antique with the following settings:
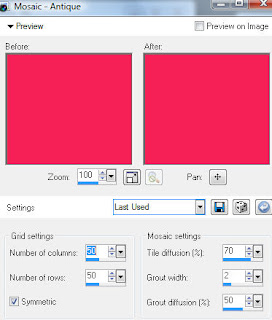
Delete/Hide original circle laye
Select Circle 2 layer
Select all, float, defloat
Add new raster layer and flood-fill with color of choice
Select none
Delete/Hide original circle layer
Select Rounded Edge Rect2 layer
Select all, float, defloat
Paste paper 6
Select invert, delete, select none
Delete/Hide original rect layer
Select Rounded Edge Rect layer and repeat above steps
Select Copy of Small Circle 1 layer
Select all, float, defloat
Paste paper 11
Select invert, delete, select none
Delete/Hide original circle frame layer
Select Small Circle 1 layer and repeat steps with same paper
Select Rectangle Left layer
Select all, float, defloat
Paste paper 4
Select invert, delete, select none
Delete/Hide original rectangle layer
Select Right Rectangle layer and repeat above steps
Copy and paste tube of choice and position where desired
Apply Lokas 3D Shadow at default settings
Select Ribbon Element
Image, Free Rotate Right by 25% and paste/position behind tube layer
Select Gumball Machine Element - resize by 35%
Paste and position on bottom right side
Select Skullie Bat Element - resize by 22%
Paste and position on bottom right side above gumball machine element
Select Cupcake Element - resize by 28%
Paste and position on bottom left side
Select Cotton Candy Element - resize by 32%
Image, Free Rotate Left by 25%
Paste and position on bottom left side behind cupcake element
Select Splatter Element - resize by 50%
Paste and position on bottom left side where desired and move to the bottom layer
Image, Duplicate, Mirror and Flip
Select New raster layer and flood fill with color or gradient of choice
Move layer to the bottom of the template
Apply Mask 22 or Mask of Choice
Merge group and move to the bottom
Add any additional elements you like.
Add any dropshadows you like
Crop and resize as desired
Add copyright info, license number and name
You're done! Thanks for trying my tutorial!
Labels:Lady Mishka,Scraps and the City | 0
comments
Subscribe to:
Posts
(Atom)

