I CT For


Friday, July 26, 2013
BEACH BABY

Supplies needed:
I am using the amazing art from Skyscraps Pinups for for this tutorial, which you can find here
Scrapkit: I am an awesome kit from Bibi's Collections which you can get by going here
Mask 4 from ButterflyFlutterby which you can find here
Plugins used: Xero-Radiance, Lokas 3D Shadow
----------------------------
This tutorial is written for those who have working knowledge of PSPX2 (any version will do).
This tutorial was written by me on July 26, 2013. Please do not copy or paste on any other forum, website or blog provide link back to tut only. Please do not claim as your own. This tutorial is copyrighted to me. Any resemblance to any other tutorial is purely coincidental.
Ok - let's start and remember to save often.
Open up a 750 x 650 blank canvas (we can resize it later)
Select Frame Element 49 - resize by 70%
Paste in the center of your canvas
Select your selections rectangle tool and select the middle portion of the frame (Mode: Add (Shift), Feather 0, Anti-alias checked)
Selections, Modify, Expand by 5
Paste paper 8
Select invert, delete, select none
Move paper below the frame
Paste tube of choice where desired
Apply Xero Radiance at setting of choice
Apply Lokas 3D Shadow at default settings
Select Element 41 - resize by 50%
Image mirror and paste on top right
Select Element 75 - image mirror and paste on right side
Select Element 63 - resize by 75%
Paste and position on the bottom and move to bottom layer
Select Element 26 - resize by 40%
Paste and position on bottom left
Select Element 62 - resize by 50%
Paste and position on bottom left
Select Element 55 - resize by 35%
Paste and position on bottom left
Select Element 52 - resize by 60%
Paste and position on bottom
Select Element 61 - resize by 20%
Paste and position on the bottom
Select Element 77 - resize by 50%
Paste and position on bottom
Select Element 31 - resize by 40%
Paste and position on the bottom
Select Element 94 - resize by 35%
Image Free Rotate Left by 15% and paste on the bottom
Select Element 53 - resize by 30%
Paste and position on the bottom
Select Element 65 - resize by 50%
Paste and position on bottom right
Select Element 19 - resize by 40%
Paste and position on bottom right
Select Element 81 - resize by 50%
Paste and position on top left
Select Element 56 and paste on top left
Paste paper 9
Apply Mask 4 and merge group
Add any additional elements you like.
Add any dropshadows you like
Crop and resize as desired
Add copyright info, license number and name
You're done! Thanks for trying my tutorial!
Wednesday, July 24, 2013
SEA MAIDEN

Supplies needed:
I am using the amazing art from Renee Biertempfel for for this tutorial, which you can find here
Scrapkit: I am an awesome matching kit Rennee Biertempfel 25-3 from Babycakes Scraps which you can get by going here
Mask 4 from Candy Treats which you can find here
Plugins used: Mura Meister - Copies, Xero-Radiance, Lokas 3D Shadow
----------------------------
This tutorial is written for those who have working knowledge of PSPX2 (any version will do).
This tutorial was written by me on July 24, 2013. Please do not copy or paste on any other forum, website or blog provide link back to tut only. Please do not claim as your own. This tutorial is copyrighted to me. Any resemblance to any other tutorial is purely coincidental.
Ok - let's start and remember to save often.
Open up a 750 x 650 blank canvas (we can resize it later)
Select Frame Element 11 - resize by 110%
Paste in the center of your canvas
Select your magic wand tool and click in the center of your frame (Add (Shift), RGB Value, Tolerance 25, Contiguous checked, Feather 0)
Selections, Modify, Expand by 5
Paste paper 5
Select invert, delete, select none
Select Element 9 - resize by 50%
Paste in the center of canvas and apply Mura Meister Copies with the following settings:

Select Element 10 and paste on top left
Paste tube of choice where desired
Apply Xero Radiance at setting of choice
Apply Lokas 3D Shadow at default settings
Select Element 30 - resize by 65%
Paste and position on top right
Select Element 18 and paste on bottom
Select Element 26 - resize by 40%
Paste and position on bottom left
Image duplicate and mirror
Select Element 29 - resize by 55%
Paste and position on bottom right
Select Element 20 - resize by 35%
Paste and position on bottom left
Select Element 2 - resize by 40%
Paste and position on bottom left
Select Element 15 - resize by 20%
Paste and position on bottom left
Select Element 3 - resize by 50%
Paste and position on bottom left
Select Element 17 - resize by 25%
Paste and position on bottom left
Select Element 24 - resize by 40%
Paste and position on right side
Paste paper 1
Apply Mask 4 and merge group
Add any additional elements you like.
Add any dropshadows you like
Crop and resize as desired
Add copyright info, license number and name
You're done! Thanks for trying my tutorial!
Tuesday, July 23, 2013
SUMMER HEAT

Supplies needed:
I am using the amazing art from Wendy Gerber for this tutorial, which you can find here
Scrapkit: I am an awesome matching kit from Black Widow Creationz called "Sheila" which you can get by going here
Summermask 4 from Rabid Bunny which you can find on the Misfits Blog here
Plugins used: Xero-Radiance, Lokas 3D Shadow
----------------------------
This tutorial is written for those who have working knowledge of PSPX2 (any version will do).
This tutorial was written by me on July 23, 2013. Please do not copy or paste on any other forum, website or blog provide link back to tut only. Please do not claim as your own. This tutorial is copyrighted to me. Any resemblance to any other tutorial is purely coincidental.
Ok - let's start and remember to save often.
Open up a 750 x 650 blank canvas (we can resize it later)
Select Frame Element 30 - resize by 75%
Paste in the center of your canvas
Select your magic wand tool and click in the center of your frame (Add (Shift), RGB Value, Tolerance 25, Contiguous checked, Feather 0)
Selections, Modify, Expand by 5
Paste paper 8
Select invert, delete,
Select Element 26 - resize by 80%
Delete, select none and move the element and paper layer under frame
Paste tube of choice where desired
Apply Xero Radiance at setting of choice
Apply Lokas 3D Shadow at default settings
Select Element 9 and paste on right side
Select Element 2 - resize by 40%
Paste and position on bottom right side
Select Element 27 - resize by 40%
Paste and position on bottom right
Select Element 40 - resize by 50%
Paste and position on bottom right
Select Element 17 - resize by 25%
Paste and position on bottom right
Select Element 14 - resize by 30%
Paste and position on bottom right
Select Element 20 - resize by 50%
Paste and position on bottom
Select Element 38 - resize by 40%
Paste and position on bottom
Select Element 24 - resize by 65%
Paste and position on bottom left
Select Element 4 - resize by 35%
Paste and position on bottom left
Select Element 11 - resize by 25%
Paste and position on bottom left
Select Element 5 - resize by 25%
Paste and position on bottom left
Select Element 15 - resize by 30%
Paste and position on bottom
Select Element 7 - resize by 25%
Paste and position on top left
Paste paper 5
Apply Mask 4 and merge group
Add any additional elements you like.
Add any dropshadows you like
Crop and resize as desired
Add copyright info, license number and name
You're done! Thanks for trying my tutorial!
Monday, July 22, 2013
WALK INTO THE LIGHT

Supplies needed:
I am using the amazing art from Martin Abel for this tutorial, which you can find here
'
Scrapkit: I am an awesome matching kit "Martin Abel 30-1" from Chichi's Designz which you can get by going here
Mask 11 from Melissaz Creationz which you can find here
Plugins used: Eyecandy 4000 - Gradient Glow, Xero-Radiance, Lokas 3D Shadow
----------------------------
This tutorial is written for those who have working knowledge of PSPX2 (any version will do).
This tutorial was written by me on July 22, 2013. Please do not copy or paste on any other forum, website or blog provide link back to tut only. Please do not claim as your own. This tutorial is copyrighted to me. Any resemblance to any other tutorial is purely coincidental.
Ok - let's start and remember to save often.
Open up a 750 x 650 blank canvas (we can resize it later)
Select Frame 3 - Resize by 75%
Paste in the center of your canvas and duplicate
On original frame Free Rotate Left by 15%
Select Duplicate frame and Free Rotate Right by 15%
Position frames so they look something like this:

Select your magic wand tool and click in the center of the original frame (Add (Shift), RGB Value, Tolerance 25, Contiguous checked, Feather 0)
Selections, Modify, Expand by 5
Paste paper 3
Select invert, delete, select none and move paper layer under frame
Select duplicate frame and repeat above steps
Paste tube of choice where desired
Apply Xero Radiance at setting of choice
Apply Lokas 3D Shadow at default settings
Select House Element - resize by 85%
Image mirror and paste on left side
Select Moon Element - resize by 40%
Paste and position on top left below house element
Select Tree Element - resize by 80%
Paste and position on left side below house element
Select Leaves Element - resize by 90%
Paste and position below house element
Duplicate leaves and reposition on bottom
Select Tombstone Element - resize by 80%
Paste and position on right side
Select Gargoyle Element - resize by 40%
Paste and position on house where desired
Select Skeleton Element - resize by 35%
Paste and position on top left
Select Wordart2 - resize by 65%
Apply Eyecandy Gradient Glow on fat default settings (Glow Width 3)
Paste and position where desired
Paste paper 5
Apply Mask 11 and merge group
Add any additional elements you like.
Add any dropshadows you like
Crop and resize as desired
Add copyright info, license number and name
You're done! Thanks for trying my tutorial!
Friday, July 19, 2013
CITY OF ANGELS

Supplies needed:
I am using the amazing art from Diana Gali for this tutorial, which you can find here
Scrapkit: I am using an awesome kit kit from Bibi's Collections called "City of Angels" which you can get by going here
Mask 10 from Mellissaz Creationz which you can find here
Plugins used: Alien Skin Xenofex 2 - Constellation, Xero-Radiance, Lokas 3D Shadow
----------------------------
This tutorial is written for those who have working knowledge of PSPX2 (any version will do).
This tutorial was written by me on July 19, 2013. Please do not copy or paste on any other forum, website or blog provide link back to tut only. Please do not claim as your own. This tutorial is copyrighted to me. Any resemblance to any other tutorial is purely coincidental.
Ok - let's start and remember to save often.
Open up a 750 x 650 blank canvas (we can resize it later)
Select Element 39 (frame) - resize by 85%
Paste in the center of your canvas
Select your magic wand tool and click in the center of the frame (Add (Shift), RGB Value, Tolerance 25, Contiguous checked, Feather 0)
Selections, Modify, Expand by 5
Paste paper 7
Select invert, delete, select none
Move paper under the frame
Select Element 74 - resize by 65%
Paste and position on the bottom of frame
Paste tube of choice where desired
Apply Xero Radiance at setting of choice
Apply Lokas 3D Shadow at default settings
Select Element 100 - resize by 55%
Paste and position behind the tube layer where desired
Select Element 1 and paste on top of frame element
Select Element 55 - resize by 30%
Image Free Rotate Left by 15% and paste on the topside of the frame
Apply Xenofex 2 - Constellations with the following settings:

Select Element 19 - resize by 50%
Paste and position on bottom right
Select Element 4 - resize by 50%
Paste and position o bottom right
Select Element 35 - resize by 40%
Paste and position on bottom right
Select Element 52 - resize by 40%
Image mirror and paste on bottom left
Select Element 40 - resize by 25%
Paste and position on bottom left
Select Element 42 - resize by 35%
Image Free Rotate Right by 15% and paste on bottom left
Select Element 23 - resize by 60%
Paste and position on the bottom below tube layer
Select Element 28 - resize by 60%
Paste and position in the center of canvas and move to bottom layer
If desired, you can apply same constellation settings from above
Paste paper 8 and move to bottom layer
Apply Mask 10 and merge group
Add any additional elements you like.
Add any dropshadows you like
Crop and resize as desired
Add copyright info, license number and name
You're done! Thanks for trying my tutorial!
Thursday, July 18, 2013
MIDNIGHT MISTRESS

Supplies needed:
I am using the amazing art from Anna Marine for this tutorial, which you can find here
Scrapkit: I am using an awesome kit kit from Irish Princess Designs called "Midnight Mistress" which you can get by going here
Mask 11 from Horseplays Pastures which you can find here
Folkvangar's Fantasy Backgrounds here
Plugins used: Xero-Radiance, Lokas 3D Shadow
----------------------------
This tutorial is written for those who have working knowledge of PSPX2 (any version will do).
This tutorial was written by me on July 18, 2013. Please do not copy or paste on any other forum, website or blog provide link back to tut only. Please do not claim as your own. This tutorial is copyrighted to me. Any resemblance to any other tutorial is purely coincidental.
Ok - let's start and remember to save often.
Open up a 750 x 650 blank canvas (we can resize it later)
Select Ruin Element
Paste in the center of your canvas
Select Scary Tree Element - resize by 75%
Paste and position on right side behind ruin element
Select Moon Element - resize by 30%
Paste and position on top right behind tree element
Paste tube of choice where desired
Apply Xero Radiance at setting of choice
Apply Lokas 3D Shadow at default settings
Select Cross Element - resize by 40%
Paste and position on right side
Select Skulls Element - resize by 20%
Paste and position on bottom right
Select Candles Element - resize by 50%
Paste and position on right side
Select Rose Element - resize by 15%
Paste and position on bottom
Select Bottle Element - resize by 20%
Paste and position on bottom
Select Cat Element - resize by 20%
Image mirror and paste in the center arch
Select Mask Element - resize by 20%
Image Free Rotate Left by 15% and paste on bottom
Select Box Element - resize by 25%
Paste and position on bottom
Select Ring Element - resize by 50%
Paste and position on bottom
Paste background paper of choice and move to bottom layer
Apply Mask 11 and merge group
Add any additional elements you like.
Add any dropshadows you like
Crop and resize as desired
Add copyright info, license number and name
You're done! Thanks for trying my tutorial!
Wednesday, July 17, 2013
FALLEN ANGEL

Supplies needed:
I am using the amazing art from Enamorte for this tutorial, which you can find here
Scrapkit: I am a beautiful matching kit Enamorte 18-3 from Babycake Scraps which you can get by going here
Mask 22 from Gina Gems which you can find here
Plugins used: Alien Skin Xenofex 2 Constellation (optional), Eyecandy 4000 - Gradient Glow, Xero-Radiance, Lokas 3D Shadow
----------------------------
This tutorial is written for those who have working knowledge of PSPX2 (any version will do).
This tutorial was written by me on July 17, 2013. Please do not copy or paste on any other forum, website or blog provide link back to tut only. Please do not claim as your own. This tutorial is copyrighted to me. Any resemblance to any other tutorial is purely coincidental.
Ok - let's start and remember to save often.
Open up a 750 x 650 blank canvas (we can resize it later)
Select Element 30 - Resize by 85%
Paste in the center of your canvas and move down a bit
Select Element 29 - resize by 65%
Paste and position on left side between the columns
Image duplicate and mirror
Select Element 5 - resize by 75%
Paste and position on right side behind element 30
Select Element 25 (moon) - resize by 65%
Paste and position on top right behind tree element
If desired, you can recolor with the following settings:

Paste tube of choice where desired
Apply Xero Radiance at setting of choice
Apply Lokas 3D Shadow at default settings
Select Element 28 - resize by 55%
Paste and position on bottom right side between columns
Image, duplicate and mirror
Select Element 9 - resize by 50%
Paste and position on bottom right
Effects, Edge Effects, Enhance
Select Element 27 - resize by 35%
Paste and position on bottom right
Select Element 17 - resize by 50%
Paste and position on bottom left
Select Element 2 - resize by 40%
Paste and position on bottom left
Select Element 24 - resize by 25%
Image Free Rotate Left by 15% and paste on bottom left
Select Element 31 (wordart) - resize by 80%
Paste and position in the center and move to the bottom
Apply Eyecandy Gradient Glow on fat default settings (Glow Width 3)
Select Element 3 - resize by 25%
Image Free Rotate Left by 15% and paste on left side
Apply Xenofex - Constellation with the following settings if desired:

Duplicate butterfly and resize by 80% - mirror and reposition
Select resized butterfly you reduced in size and again duplicate and resize by 80%
Reposition butterflies and apply above constellation settings (hit Random Seed button if you want to change how they sparkle)
Add new raster layer and flood-fill with color or gradient of choice
Apply Mask 4 and merge group
Add any additional elements you like.
Add any dropshadows you like
Crop and resize as desired
Add copyright info, license number and name
You're done! Thanks for trying my tutorial!
THE SWEETEST THING

Supplies needed:
I am using the amazing art from Ninaste for this tutorial, you can find her artwork here
Scrapkit: I am using an awesome kit from Hania's Designs called "Julie" which you can get by going here
Template 266 from Millie which can be found here
Mask 21 from Gina Gems which you can get it here
Plugins used: Eyecandy 4000- Gradient Glow, Penta - Jeans, Xero-Radiance, Xero - Bad Dream, Lokas 3D Shadow
----------------------------
This tutorial is written for those who have working knowledge of PSPX2 (any version will do).
This tutorial was written by me on July 17, 2013. Please do not copy or paste on any other forum, website or blog provide link back to tut only. Please do not claim as your own. This tutorial is copyrighted to me. Any resemblance to any other tutorial is purely coincidental.
Ok - let's start and remember to save often.
Open the template and using your shortcut keys on your keyboard (SHIFT+D) duplicate the template as a new image. Close the original and delete the copywrite layer.
Select Wordart layers and move up to the top if desired
Apply Eyecandy Gradient Glow on fat default settings (Glow Width 4)
Select Center Squares 7 layer
Select all, float, defloat
Add new raster layer and flood-fill with gradient of choice (Linear style, Angle 45, Repeat 2)
Paste close-up tubes of choice on top of gradient and delete
Select none
Change closeup to Luminance (Legacy)
Apply Xero Bad Dream at setting of choice
Drop tube opacity down to 75%
Apply dropshadow and merge tubes down on top of gradient layer
Effect, Texture Effects, Blinds (Width 2, Opactity 20, Horizontal and Light from left/top checked)
Delete/Hide original squares layer
Select Rectangle 6 layer
Select all, float, defloat
Add new raster layer and flood-fill with color of choice
Select none
Apply Penta - Jeans with the following settings:

Delete/hide original rectangle layer
Select Circle 5 layer
Select all, float, defloat
Add new raste layer and flood-fill with color of choice
Select none
Effect, Texture Effects, Blinds (Width 2, Opactity 20, Horizontal and Light from left/top checked)
Delete/Hide original circle layer
Select Circle 4 layer and repeat above steps
Select Circle 3 layer
Select all, float, defloat
Add new raster layer and flood-fill with color of choice
Effects, Texture Effect and Texture of choice
Delete/Hide original circle layer
Select Oval 2 layer
Select all, float, defloat
Paste paper 10
Select invert, delete, select none
Delete/Hide original oval layer
Select Square 1 layer
Select all, float, defloat
Paste paper 2
Select invert, delete, select none
Delete/Hide original square layer
Copy and paste tube of choice and position where desired
Apply Xero Radiance at setting of choice
Apply Lokas 3D Shadow at default settings
Select Element 69 - image mirror and paste on bottom below tube layer
Select Element 2 - resize by 50%
Image Free Rotate Left by 15% and paste on left side
Select Element 23 - resize by 50%
Paste and position on bottom left
Select Element 79 - resize by 45%
Paste and position on bottom left
Select Element 93 - resize by 25%
Paste and position on bottom left
Select Element 45 - resize by 25%
Paste and position on bottom left
Select Element 88 - resize by 35%
Paste and position on bottom left
Select Element 62 - resize by 40%
Paste and position on bottom right
Select Element 34 - resize by 40%
Paste and position on bottom right
Select Element 18 - resize by 70%
Paste and position on top
Select Select New raster layer and flood fill with color or gradient of choice
Move layer to the bottom of the template
Apply Mask 21
Merge group and move to the bottom
Add any additional elements you like.
Add any dropshadows you like
Crop and resize as desired
Add copyright info, license number and name
You're done! Thanks for trying my tutorial!
Tuesday, July 16, 2013
GOTHIC KISSES

Supplies needed:
I am using the amazing art from Wendy Gerber for this tutorial, you can find her artwork here
Scrapkit: I am using an awesome FTU kit from Gothic Inspirations called "Gothic Inspirations" which you can get by going here
Beautiful Creatures Template 9 from Cakes which can be found here
Grunge Mask 1 from Boundless Bliss. Unfortunately Theresa no longer has her site but I believe she allows her masks to be shared, you can get it here
Plugins used: Xero-Radiance, Xero - Bad Dream, Lokas 3D Shadow
----------------------------
This tutorial is written for those who have working knowledge of PSPX2 (any version will do).
This tutorial was written by me on July 16, 2013. Please do not copy or paste on any other forum, website or blog provide link back to tut only. Please do not claim as your own. This tutorial is copyrighted to me. Any resemblance to any other tutorial is purely coincidental.
Ok - let's start and remember to save often.
Open the template and using your shortcut keys on your keyboard (SHIFT+D) duplicate the template as a new image. Close the original and delete the copywrite layer.
Select Wordart ayer
Select all, float, defloat
Add new raster layer and flood-fill with gradient or color of choice
Select none
Apply Eyecandy Glass at default settings
Delete/Hide original wordart layer
Select Rectangle Raster 7 layer
Select all, float, defloat
Paste paper 2
Select invert, delete, select none
Delete/Hide original rectangle layer
Select Skinnyrect layer and repeat above steps
Select Largerect layer
Select all, float, defloat
Add new raster layer and flood-fill with gradient of choice (Linear style, Angle 45, Repeat 2)
Paste close-up tube of choice on top of gradient and delete
Select none
Change closeup to Luminance (Legacy)
Apply Xero Bad Dream at setting of choice
Apply dropshadow and merge tube down on top of gradient layer
Effect, Texture Effects, Blinds (Width 2, Opactity 20, Horizontal and Light from left/top checked)
Delete/Hide original rectangle layer
Select Fatrect layer
Select all, float, defloat
Paste paper 3
Select invert, delete, select none
Delete/Hide original rectangle layer
Select Another Circle layer
Select all, float, defloat
Paste Bonus paper
Select invert, delete, select none
Delete/Hide original circle layer
Select Circle layer and repeat above steps
Select Longrect layer
Select all, float, defloat
Paste paper 8
Select invert, delete, select none
Delete/Hide original rectangle layer
Select Smrect layer
Select all, float, defloat
Paste paper 4
Select invert, delete, select none
Delete/Hide original rectangle layer
Select Smrect2 layer and repeat above steps
Copy and paste tube of choice and position where desired
Apply Xero Radiance at setting of choice
Apply Lokas 3D Shadow at default settings
Select Candles Element - resize by 75%
Paste and position on left side
Select Skull Element - resize by 35%
Paste and position on bottom left
Select EnvelopeW Element - resize by 30%
Image Free Rotate Left by 15% and paste on bottom left
Select Feather Element - resize by 25%
Paste and position on bottom left
Select Heart Element - resize by 40%
Image Free Rotate Right by 15% and paste on bottom right
Select Polish Element - resize by 25%
Paste and position on bottom right
Select Lipstick Element - resize by 30%
Paste and position on bottom right
Select Kiss Element - resize by 30%
Paste and position on bottom right
Select Window Element - resize by 70%
Paste and position on right side below tube layer
Select Ribbon3 Element - resize by 85%
Paste and position on bottom
Select Splats Element - resize by 85%
Paste and position on left side and move to bottom layer
Select Select New raster layer and flood fill with color or gradient of choice
Move layer to the bottom of the template
Apply Grunge Mask 1
Merge group and move to the bottom
Add any additional elements you like.
Add any dropshadows you like
Crop and resize as desired
Add copyright info, license number and name
You're done! Thanks for trying my tutorial!
Monday, July 15, 2013
ZOMBIE GIRL

Supplies needed:
I am using the amazing art from Danny Lee for this tutorial, which you can find here
Scrapkit: I am an awesome kit from Bibi's Collections called "Zombie" which you can get by going here
Mask 4 from Butterfly Flutterby which you can find here
Plugins used: Xero-Radiance, Lokas 3D Shadow
----------------------------
This tutorial is written for those who have working knowledge of PSPX2 (any version will do).
This tutorial was written by me on July 15, 2013. Please do not copy or paste on any other forum, website or blog provide link back to tut only. Please do not claim as your own. This tutorial is copyrighted to me. Any resemblance to any other tutorial is purely coincidental.
Ok - let's start and remember to save often.
Open up a 750 x 650 blank canvas (we can resize it later)
Select Element 64 - Resize by 85%
Paste in the center of your canvas
Select Element 77 - resize by 50%
Paste and position on the bottom
Select Element 35 - resize by 45%
Paste and position in the center of element 64
Paste tube of choice where desired
Apply Xero Radiance at setting of choice
Apply Lokas 3D Shadow at default settings
Select Element 48 - resize by 55%
Image mirror and paste on top left
Select Element 24 - resize by 25%
Image Free Rotate Right by 15% and paste on bottom right
Select Element 72 - resize by 70%
Paste and position on bottom right
Select Element 31 - resize by 30%
Paste and position on bottom right
Select Element 47 - resize by 30%
Paste and position on bottom
Select Element 63 - resize by 25%
Paste and position on bottom
Select Element 6 - resize by 40%
Paste and position on bottom
Select Element 74 - resize by 40%
Paste and position on bottom left
Select Element 84 - resize by 15%
Paste and position on bottom left
Select Element 81 - resize by 15%
Paste paper 11
Apply Mask 4 and merge group
Add any additional elements you like.
Add any dropshadows you like
Crop and resize as desired
Add copyright info, license number and name
You're done! Thanks for trying my tutorial!
COWGIRL

Supplies needed:
I am using the amazing art from Diana Gali for this tutorial, which you can find here
Scrapkit: I am an awesome kit from Disturbed Scraps called "Cowgirl" which you can get by going here
Mask 179 here
Plugins used: Xero-Radiance, Lokas 3D Shadow
----------------------------
This tutorial is written for those who have working knowledge of PSPX2 (any version will do).
This tutorial was written by me on July 15, 2013. Please do not copy or paste on any other forum, website or blog provide link back to tut only. Please do not claim as your own. This tutorial is copyrighted to me. Any resemblance to any other tutorial is purely coincidental.
Ok - let's start and remember to save often.
Open up a 750 x 650 blank canvas (we can resize it later)
Select Bank Element 14 - Resize by 85%
Paste in the center of your canvas
Select Element 28 - resize by 30%
Paste and position in the center of bank element
Paste tube of choice where desired
Apply Xero Radiance at setting of choice
Apply Lokas 3D Shadow at default settings
Select Element 29 - resize by 40%
Paste and position on bottom left
Select Element 9 - resize by 40%
Paste and position on bottom right
Select Element 42 - resize by 30%
Paste and position on bottom right
Select Element 30 - resize by 30%
Paste and position on bottom right
Select Element 52 - resize by 20%
Image mirror and paste on bottom right
Select Element 110 - resize by 40%
Paste and position on bottom
Select Element 146 - resize by 20%
Paste and position on left bank window
Select Element 34 - resize by 30%
Paste and position on bottom
Select Element 18 - resize by 30%
Paste and position on bottom
Select Element 87 - resize by 20%
Paste and position on bottom left
Select Element 106 - resize by 25%
Image mirror and paste on bottom
Select Element 104 - resize by 30%
Paste and position on bottom
Select paper 9
Paste and position on bottom layer
Apply Mask 179 and merge group
Add any additional elements you like.
Add any dropshadows you like
Crop and resize as desired
Add copyright info, license number and name
You're done! Thanks for trying my tutorial!
Sunday, July 14, 2013
GOTHIC FAIRY SHOWOFF


Thursday, July 11, 2013
AMBIVALENCE

Supplies needed:
I am using the amazing art from Eclipsy for this tutorial, which you can't purchase at this time but can find other artwork from her here
Scrapkit: I am a gorgeous kit from Gothic Inspirations called "Ambivalence" which you can get by going here
Plugins used: Eyecandy 4000 - Gradient Glow, Xero-Radiance, Lokas 3D Shadow
----------------------------
This tutorial is written for those who have working knowledge of PSPX2 (any version will do).
This tutorial was written by me on July 11, 2013. Please do not copy or paste on any other forum, website or blog provide link back to tut only. Please do not claim as your own. This tutorial is copyrighted to me. Any resemblance to any other tutorial is purely coincidental.
Ok - let's start and remember to save often.
Open up a 750 x 650 blank canvas (we can resize it later)
Select Mask that is provided in the kit and paste in the center of the canvas
Select Gazebo Element - Resize by 85%
Effect, Edge Effect, Enhance
Select Tree2 Element - resize by 85%
Paste and position on left side below gazebo element
Paste tube of choice where desired on top of gazebo element
Apply Xero Radiance at setting of choice
Apply Lokas 3D Shadow at default settings
Select Lantern2 Element - resize by 20%
Paste and position on bottom left
Select Book Element - resize by 30%
Image Free Rotate Left by 15% and paste on bottom left
Select Hearts Element - resize by 20%
Paste and position on bottom left
Select Apple2 Element - resize by 20%
Paste and position on bottom left
Select Fan Element - resize by 40%
Image Free Rotate Right by 15% and paste on bottom right
Select Jar Element - resize by 30%
Paste and position on bottom right
Select Candles Element - resize by 35%
Paste and position on bottom
Select Rose Element - resize by 15%
Paste and position on bottom right
Select WordArt1 Element - resize by 50%
Paste and position on bottom and apply Eyecandy Gradient Glow on fat default settings (Glow Width 3)
Select FallingLeaves Element - resize by 25%
Paste and position on top right
Add any additional elements you like.
Add any dropshadows you like
Crop and resize as desired
Add copyright info, license number and name
You're done! Thanks for trying my tutorial!
Wednesday, July 10, 2013
TWILIGHT FANTASY

Supplies needed:
I am using the amazing art from Kurama Phoenix for this tutorial, which you can find here
Scrapkit: I am a gorgeous kit from Babycakes Scraps called "Twilight Fantasy" which you can get by going here
Mask 20 from Moonbeams & Spiderwebs which you can find here
Plugins used: Xero-Radiance, Xero-Bad Dream, Lokas 3D Shadow
----------------------------
This tutorial is written for those who have working knowledge of PSPX2 (any version will do).
This tutorial was written by me on July 10, 2013. Please do not copy or paste on any other forum, website or blog provide link back to tut only. Please do not claim as your own. This tutorial is copyrighted to me. Any resemblance to any other tutorial is purely coincidental.
Ok - let's start and remember to save often.
Open up a 750 x 650 blank canvas (we can resize it later)
Select Frame Element 37 and paste in the center of the canvas
Resize by 70%
Select your magic wand tool and click in the center of the frame (Add (Shift), RGB Value, Tolerance 25, Contiguous checked, Feather 0)
Selections, Modify, Expand by 5
Add new raster layer and flood-fill with gradient of choice Add new raster layer and flood-fill with gradient colors of choice (Linear style, Angle 45, Repeat 2)
Paste close-up of choice on top of gradient - select invert, delete, select none
Change close-up to Hard Light
Drop opacity down to 80%
Merge tube down on top of gradient layer and move below frame
Select Element 30 - resize by 40%
Paste and position on top of frame element
Paste tube of choice where desired on top of frame element
Apply Xero Radiance at setting of choice
Apply Lokas 3D Shadow at default settings
Select Element 54 - resize by 50%
Paste and position on top right above frame
Select Element 33 - resize by 35%
Image Free Rotate Left by 15% and paste on right side
Select Element 7 - resize by 45%
Paste and position on bottom right side
Select Element 41 - resize by 25%
Image Free Rotate Left by 15% and paste on right side
Select Element 29 - resize by 60%
Paste and position on bottom right
Select Element 14 - resize by 40%
Image Free Rotate Left by 15% and paste on bottom right
Select Element 55 - resize by 30%
Paste and position on bottom right
Select Element 32 - resize by 30%
Paste and position on bottom right
Select Element 25 - resize by 50%
Paste and position on bottom right
Select Element 18 - resize by 15%
Paste and position on bottom right
Select Element 10 - resize by 40% and paste on the bottom
Paste and position on top and apply gradient glow
Paste paper 8
Move layer to the bottom
Apply Mask 20
Merge group and move to the bottom
Add any additional elements you like.
Add any dropshadows you like
Crop and resize as desired
Add copyright info, license number and name
You're done! Thanks for trying my tutorial!
HAPPY DAY

Supplies needed:
I am using the amazing art from Derzi for this tutorial, which you can find here
Scrapkit: I am an awesome kit from Disturbed Scraps called "Summer Boy" which you can get by going here
Big Mask 19 from Vix which you can find here
Plugins used: Eyecandy 4000 - Gradient Glow, Xero-Radiance, Xero-Bad Dream, Lokas 3D Shadow
----------------------------
This tutorial is written for those who have working knowledge of PSPX2 (any version will do).
This tutorial was written by me on July 10, 2013. Please do not copy or paste on any other forum, website or blog provide link back to tut only. Please do not claim as your own. This tutorial is copyrighted to me. Any resemblance to any other tutorial is purely coincidental.
Ok - let's start and remember to save often.
Open up a 750 x 650 blank canvas (we can resize it later)
Select Frame Element 128 and paste in the center of the canvas
Resize by 80%
Select your magic wand tool and click in the center of the frame (Add (Shift), RGB Value, Tolerance 25, Contiguous checked, Feather 0)
Selections, Modify, Expand by 5
Paste paper 10
Select invert, delete, select none
Move paper below frame
Paste tube(s) of choice where desired on top of frame element
Apply Xero Radiance at setting of choice
Apply Lokas 3D Shadow at default settings
Select Element 44 - resize by 88%
Paste and position on left side below tube layers
Select Element 5 - resize by 75%
Paste and position on the bottom of frame below tube layers
Select Element 110 - resize by 60%
Paste and position on bottom of frame below tube layers
Select Element 40 and paste on bottom - move layer below frame/paper
Select Element 91 - resize by 45%
Paste and position on top left
Select Element 2 - resize by 40%
Paste and position on bottom right
Select Element 39 - resize by 30%
Paste and position on bottom right
Select Element 15 - resize by 25%
Paste and position on bottom right
Select Element 111 - resize by 30%
Paste and position on bottom of frame below tube layers
Select Element 78 - resize by 50%
Paste and position on bottom below tube layer
Select Element 8 - resize by 60%
Paste and position on bottom left
Select Element 114 - resize by 30%
Paste and position on bottom left side
Select Element 108 - resize by 25%
Paste and position on bottom left
Select Element 76 - resize by 20%
Paste and position on bottom left side
Select Element 89 - resize by 40%
Paste and position on the top and apply Eyecandy Gradient Glow on fat default settings (Glow width 3)
Select Element 90 - resize by 25%
Paste and position on top and apply gradient glow
Select New raster layer and flood fill with color or gradient of choice
Move layer to the bottom
Apply Mask 19
Merge group and move to the bottom
Add any additional elements you like.
Add any dropshadows you like
Crop and resize as desired
Add copyright info, license number and name
You're done! Thanks for trying my tutorial!
Monday, July 8, 2013
PIRATE MAP

Supplies needed:
I am using the amazing art from Diana Gali for this tutorial, which you can find here
Scrapkit: I am a gorgeous kit from Bibi's Collection called "Sea Pirate" which you can get by going here
Mask 5 from Zuzzanna which you can find here
Plugins used: Alien Skin Xenofex 2 - Burnt Edges, Xero-Radiance, Xero-Bad Dream, Lokas 3D Shadow
----------------------------
This tutorial is written for those who have working knowledge of PSPX2 (any version will do).
This tutorial was written by me on July 8, 2013. Please do not copy or paste on any other forum, website or blog provide link back to tut only. Please do not claim as your own. This tutorial is copyrighted to me. Any resemblance to any other tutorial is purely coincidental.
Ok - let's start and remember to save often.
Open up a 750 x 650 blank canvas (we can resize it later)
Select Element 1 and paste in the center of the canvas
Apply Alien Skin Burnt Edges with the following settings:

Paste tube of choice where desired on top of map element
Apply Xero Radiance at setting of choice
Apply Lokas 3D Shadow at default settings
Select Element 30 and paste on left side behind tube layer
Select Element 41 - resize by 75%
Image Free Rotate Right by 15% and paste on left side behind tube layer
Select Element 49 - resize by 60%
Paste and position on right side below tube layer
Select Element 14 - resize by 85%
Paste and position on bottom and move below map layer
Select Element 5 - resize by 50%
Paste and position on bottom left
Select Element 20 - resize by 35%
Paste and position on bottom left
Select Element 94 - resize by 40%
Paste and position on bottom left
Select Element 40 - resize by 30%
Paste and position on bottom left
Select Element 58 - resize by 25%
Paste and position on bottom left
Select Element 95 - resize by 45%
Paste and position on bottom left on top of skull element if you desire
Select Element 73 - resize by 25%
Paste and position on bottom right
Select Element 60 - resize by 45%
Paste and position on bottom right
Select Element 59 - resize by 40%
Paste and position on bottom right below ship element
Select Element 96 - resize by 65%
Paste and position on bottom
Select Element 80 - resize by 65%
Paste and position on bottom
Select Element 112 - resize by 60%
Paste and position on bottom
Paste paper 5
Move layer to the bottom
Apply Mask 5
Merge group and move to the bottom
Add any additional elements you like.
Add any dropshadows you like
Crop and resize as desired
Add copyright info, license number and name
You're done! Thanks for trying my tutorial!
TOXIC RAWK

Supplies needed:
I am using the amazing art from Martin Abel for this tutorial, which you can find here
Scrapkit: I am a stunning kit from Irish Princess Designs called "Toxic Rawk" which you can get by going here
Mask 238 from Weescotlass which you can find here
Plugins used: Xero-Radiance, Xero-Bad Dream, Lokas 3D Shadow
----------------------------
This tutorial is written for those who have working knowledge of PSPX2 (any version will do).
This tutorial was written by me on July 8, 2013. Please do not copy or paste on any other forum, website or blog provide link back to tut only. Please do not claim as your own. This tutorial is copyrighted to me. Any resemblance to any other tutorial is purely coincidental.
Ok - let's start and remember to save often.
Open up a 750 x 650 blank canvas (we can resize it later)
Select TR Frame and paste in the center of the canvas
Resize by 85%
Select your magic wand tool and click in the center of the top and bottom squares on the frame (Add (Shift), RGB Value, Tolerance 25, Contiguous checked, Feather 0)
Selections, Modify, Expand by 3
Paste paper 3
Select invert, delete, select none
No go back with your magic want and click in the center square of the frame
Selections, Modify, Expand by 3
Paste paper 5
Select invert, delete, select none
Merge paper layers together and move below frame layer
Paste tube of choice where desired on top of frame
Apply Xero Radiance at setting of choice
Apply Lokas 3D Shadow at default settings
Select Polish Element - resize by 30%
Paste and position on bottom left
Select Toxic Element - resize by 30%
Paste and position on bottom left
Select Punk Skull Element - resize by 25%
Paste and position on bottom left side
Select Bomb Element - resize by 25%
Paste and position on bottom
Select ToxicBrad1 Element - resize by 25%
Paste and position on bottom right
Select Bottle Element - resize by 45%
Paste and position on bottom right
Select Shoe Element - resize by 20%
Paste and position on bottom right
Select Gas Mask Element - resize by 20%
Paste and position on bottom
Select Turntable Element - resize by 40%
Paste and position on bottom
Select Ipod Element - resize by 20%
Paste and position on bottom
Select Fly Element - resize by 30%
Image Free Rotate Left by 15% and paste on top left
Select Notes Element - resize by 90%
Paste and position in the center where desired and move to bottom layer
Select New raster layer and flood fill with color or gradient of choice
Move layer to the bottom
Apply Mask 238
Merge group and move to the bottom
Add any additional elements you like.
Add any dropshadows you like
Crop and resize as desired
Add copyright info, license number and name
You're done! Thanks for trying my tutorial!
Friday, July 5, 2013
FUNKEE FRESH

Supplies needed:
I am using the amazing art from Spazz for this tutorial, which you can find here
Scrapkit: I am using an awesome kit from Lizquis Scraps called "Zoey" which you can get by going here
Template 373 from Missy which can be found here
Mask 241 from Weescotslass which you can find here
Plugins used: Eyecandy 4000- Glass, Xero-Radiance, Xero - Bad Dream, Lokas 3D Shadow
----------------------------
This tutorial is written for those who have working knowledge of PSPX2 (any version will do).
This tutorial was written by me on July 5, 2013. Please do not copy or paste on any other forum, website or blog provide link back to tut only. Please do not claim as your own. This tutorial is copyrighted to me. Any resemblance to any other tutorial is purely coincidental.
Ok - let's start and remember to save often.
Open the template and using your shortcut keys on your keyboard (SHIFT+D) duplicate the template as a new image. Close the original and delete the copywrite layer.
Adjust canvas size to 750 x 650 (you can resize later)
Select all Wordart and Exclamation marks layers and group them together
Then resize all layers by 75% and reposition them on bottom left
Select Wordart layer
Select all, float, defloat
Add new raster layer and flood-fill with colors of choice
Select none
Apply Eyecandy Glass at default settings
Delete/Hide original wordart layer
Select Exclamation marks and repeat above steps
Select Rectangle 3 layer
Select All, float, defloat
Paste paper 5
Select invert, delete, select none
Delete/hide original rectangle layer
Select Rectangle 2 layer
Select all, float, defloat
Add new raster layer and flood-fill with gradient or color of choice
Add close-up tube of choice - select invert, delete, select none
Change close-up to Hard Light and apply dropshadow
Merge down onto gradient layer
Delete/Hide original rectangle layer
Select Rectangle 1 layer
Select all, float, defloat
Add new raster layer and flood-fill with color or gradient of choice
Select none
Effect, Texture Effects, Blinds (Width 3, Opactity 20, Horizontal and Light from left/top checked)
Delete/Hide original rectangle layer
Select Stars layer
Select all, float, defloat
Add new raster layer and flood-fill with color of choice
Select none
Adjust, Add/Remove Noise, Add Noise (Uniform checked, Noise 65%, Monochrome checked)
Delete/Hide original stars layer
Select Circle layer
Select all, float, defloat
Paste paper 3
Select invert, delete, select none
Delete/Hide original circle layer
Copy and paste tube of choice and position where desired
Apply Xero Radiance at setting of choice
Apply Lokas 3D Shadow at default settings
Select Butterfly 2 Element - resize by 40%
Image Free Rotate Left by 15% and paste on top left
Select Skateboard Element - resize by 40%
Paste and position on bottom left
Select Pill Element - resize by 25%
Paste and position on bottom left
Select Jelly Element - resize by 30%
Paste and position on bottom right
Select Ipod Element - resize by 30%
Image Free Rotate Right by 15% and paste on bottom right
Select Soda Element - resize by 30%\
Paste and position on bottom right
Select Bracelet Element - resize by 25%
Paste and position on bottom right
Select Cupcake2 Element - resize by 30%
Paste and position on bottom right
Select Skull3 Element - resize by 30%
Paste and position on bottom right
Select Candy Element - resize by 25%
Paste and position on bottom
Select Select New raster layer and flood fill with color or gradient of choice
Move layer to the bottom of the template
Apply Mask 241
Merge group and move to the bottom
Add any additional elements you like.
Add any dropshadows you like
Crop and resize as desired
Add copyright info, license number and name
You're done! Thanks for trying my tutorial!
Thursday, July 4, 2013
DARK MANOR

Supplies needed:
I am using the amazing art from Jenga for this tutorial, which you can find here
Scrapkit: I am a stunning kit from Gothic Inspirations called "Dark Manor" which you can get by going here
Mask 11 from Melissaz Creationz which you can find here
Plugins used: Eyecandy 4000 - Gradient Glow, Xero-Radiance, Lokas 3D Shadow
----------------------------
This tutorial is written for those who have working knowledge of PSPX2 (any version will do).
This tutorial was written by me on July 4, 2013. Please do not copy or paste on any other forum, website or blog provide link back to tut only. Please do not claim as your own. This tutorial is copyrighted to me. Any resemblance to any other tutorial is purely coincidental.
Ok - let's start and remember to save often.
Open up a 750 x 650 blank canvas (we can resize it later)
Select Frame 4 and paste in the center of the canvas
Select your magic wand tool and click in the center of your frame covering all of the open areas you want to fill (Add (Shift), RGB Value, Tolerance 25, Contiguous checked, Feather 0)
Selections, Modify, Expand by 3
Paste paper 6
Select invert, delete
Paste tube of choice where desired on top of paper and delete, select none
Apply Xero Radiance at setting of choice
Apply Lokas 3D Shadow at default settings
Merge tube and paper below frame
Select Manor Element - resize by 55%
Paste and position on right side and move below frame layer
Select Moonbats Element - resize by 35%
Paste and position on top right below manor element
Select Grass Element - resize by 75%
Paste on the bottom and move to bottom layer
Image mirror
Select Roses1 Element - resize by 50%
Image mirror and paste on top right side
Select WordArt1 Element - resize by 80%
Paste and position on top of frame layer
Apply Eyecandy Gradient Glow on fat default settings (Glow Width 3)
Select Gargoyle1 Element - resize by 30%
Paste and position on bottom right side above frame layer
Select Book Element - resize by 25%
Image Free Rotate Left by 15% and paste on bottom
Select Candle1 Element - resize by 30%
Paste and position on bottom
Select Spider Element - resize by 25%
Paste and position on bottom
Select Rose Element - resize by 25%
Paste and position on bottom
Select PitwFire Element - resize by 30%
Paste and position where desired on the bottom
Select Mouse Element - resize by 35%
Paste and position on bottom left
Select Mask Element and paste in the center on the bottom layer
Paste paper 11
Apply MC Mask 11
Merge group and move to the bottom
Add any additional elements you like.
Add any dropshadows you like
Crop and resize as desired
Add copyright info, license number and name
You're done! Thanks for trying my tutorial!
Tuesday, July 2, 2013
FIREWORKS

Supplies needed:
I am using the amazing art from Jose Cano for this tutorial, which you can now find here
Scrapkit: I am using a stunning kit from Niqui's Designs called "Fireworks" which you can get by going here
Template 273 from Millie which can be found here
Mask 8 from Gina Gems which you can find here
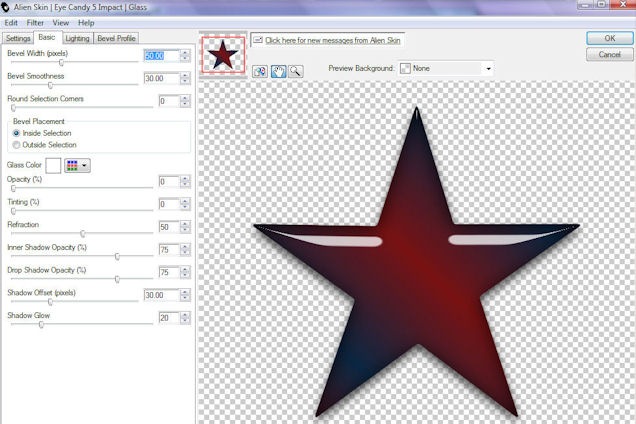
Plugins used: Alien Skin Eyecandy 5 Impact - Glass, Xero-Radiance, Xero - Bad Dream, Lokas 3D Shadow
----------------------------
This tutorial is written for those who have working knowledge of PSPX2 (any version will do).
This tutorial was written by me on July 2, 2013. Please do not copy or paste on any other forum, website or blog provide link back to tut only. Please do not claim as your own. This tutorial is copyrighted to me. Any resemblance to any other tutorial is purely coincidental.
Ok - let's start and remember to save often.
Open the template and using your shortcut keys on your keyboard (SHIFT+D) duplicate the template as a new image. Close the original and delete the copywrite layer.
Adjust canvas size to 750 x 650 (you can resize later)
Select Star 10 layer
Select All, float, defloat
Add new raster layer and flood-fill with color or gradient of choice
Select none
Apply Alien Skin Impact - Glass with the following settings:
Select Star 9 layer
Select all, float, defloat
Add new raster layer and flood-fill with color of choice
Select none
Delete/hide original star layer
Select Star 6, 7 and 8 layers and repeat above steps
Select Circle 5 layer
Select all, float, defloat
Paste paper 4
Select invert, delete, select none
Delete/hide original circle layer
Select Rectangle 4 layer
Select all, float, defloat
Paste paper 10
Select invert, delete, select none
Delete/hide original rectangle layer
Select Oval 3 layer
Select all, float, defloat
Paste paper 3
Select invert, delete, select none
Delete/hide original oval layer
Select Rectangle 2 layer
Select all, float, defloat
Add new raster layer and flood-fill with color of choice
Select none
Apply Effects, Texture effects, weave (Gap size 2, Width 5, Opacity 5, Fill gaps checked, Change Gap Color to color of choice)
Delete/Hide original rectangle layer
Select Circle 1 layer
Select all, float, defloat
Paste paper 5
Select invert, delete, select none
Delete/hide original circle layer
Copy and paste tube of choice and position where desired
Apply Xero Radiance at setting of choice
Apply Lokas 3D Shadow at default settings
Select Element 13 - resize by 40%
Paste and position on top left
Select Element 36 - resize by 50%
Image Free Rotate Left by 15% and paste on top right
Select Element 37 - resize by 40%
Paste and position on bottom left
Select Element 17 - resize by 25%
Paste and position on bottom right
Select Element 31 - resize by 25%
Paste and position on bottom right
Select Element 34 - resize by 30%
Image Free Rotate Right by 15% and paste on bottom right
Select Select New raster layer and flood fill with color or gradient of choice
Move layer to the bottom of the template
Apply Mask 8
Merge group and move to the bottom
Add any additional elements you like.
Add any dropshadows you like
Crop and resize as desired
Add copyright info, license number and name
You're done! Thanks for trying my tutorial!
Subscribe to:
Comments
(Atom)


