Labels
- Alikas Scraps
- All Dolled Up Store
- Amy Marie
- Annaica
- Arthur Crowe
- Babycakes Scraps
- Barbara Jensen
- Bibi's Collections
- Black Widow Creationz
- Blu Moon
- Bonnies Creations
- Bookwork Dezines
- Broken Sky Dezine
- Carita Creationz
- Carpe Diem Designs
- CDO
- Celinart Pinup
- Celine
- Chacha Creationz
- Charmed Designs
- Cherry Blossom Designs
- Chili Designz
- Cluster Frame
- Creative Misfits
- Creative Scraps by Crys
- Curious Creative Dreams
- Danny Lee
- Derzi
- Designs by Ali
- Designs by Joan
- Designs by Ketura
- Designs By Norella
- Designs by Vi
- Diana Gali
- Diry Art Designs
- Disturbed Scraps
- Dreaming With Bella
- Eclipse Creations
- Elegancefly
- Extras
- Fabulous Designz
- Forum Set
- Foxy's Designz
- Freek's Creation
- FTU
- FwTags
- Goldwasser
- Gothic Inspirations
- Gothic Raven Designs
- Graphfreaks
- Hania's Designs
- Happy Pumpkin Studios
- Horseplay's Pasture Designs
- indie-Zine
- Irish Princess Designs
- Ishika Chowdhury
- Kaci McVay
- Kajenna
- katharine
- Katherine
- Khloe Zoey
- Killer Kitty
- Kissing Kate
- KiwiFirestorm
- Kiya Designs
- Kizzed by Kelz
- KZ Designz
- Lady Mishka
- Lil Mz Brainstorm
- Maiden of Darkness
- Mariel Designs
- MellieBeans
- Michelle's Myths
- Midnight Shadow
- Misticheskya
- MistyLynn's Creations
- MMeliCrea Designz
- Moon Vixen Designs
- NaSionainne
- Ninaste
- Niqui Designs
- Pandora
- Picsfordesign
- Pink Paradox Productions
- Radyga Designs
- Redefined Designs
- Rissa's Designs
- Schnegge
- ScottishButterfly Creations
- Scrappin Krazy Designs
- Scrappin With Lil Ol Me
- Scraps and the City
- Scraps Dimensions
- Scraps From The Heart
- Scraps N Company
- Scraps with Attitude
- Shining Star Art
- Skyscraps
- Sleek N Sassy Designs
- Sophisticat Simone
- Souldesigner
- Soxsational Scraps
- Spazz
- Starlite and Soul
- Stella Felice
- Tammy Welt
- Tasha's Playground
- The PSP Project
- Thrifty Scraps by Gina
- Tiny Turtle Designs
- Upyourart
- Verymany
- Wendy Gerber
- Whisper In the Wind
- Wick3d Creationz
- Wicked Diabla
- Yude's Kreationz
Blog Archive
Thursday, August 29, 2013
FUNKY MISFIT
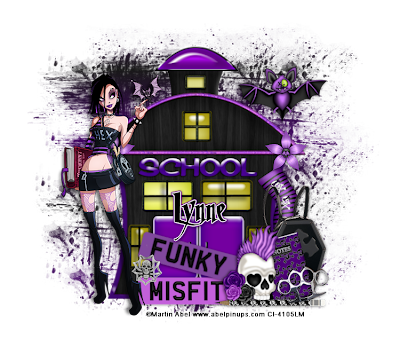
Supplies needed:
I am using the amazing art from Martin Abel for for this tutorial, which you can find here
Scrapkit: I am using a wicked matching kit from Babycakes Scraps which you can get by going here
Mask 192 from Weescotslass which you can find here
Plugins used: Xero-Radiance, Lokas 3D Shadow
----------------------------
This tutorial is written for those who have working knowledge of PSPX2 (any version will do).
This tutorial was written by me on August 29, 2013. Please do not copy or paste on any other forum, website or blog provide link back to tut only. Please do not claim as your own. This tutorial is copyrighted to me. Any resemblance to any other tutorial is purely coincidental.
Ok - let's start and remember to save often.
Open up a 750 x 650 blank canvas (we can resize it later)
Select Element 24 and paste in the center of the canvas
Resize by 110%
Paste tube of choice where desired
Apply Xero Radiance at setting of choice
Apply Lokas 3D Shadow at default settings
Select Element 19 - resize by 80%
Paste and position on right side
Select Element 16 - resize by 40%
Image Free Rotate Left by 15% and paste on bottom right
Select Element 9 - resize by 45%
Paste and position on botton right
Select Element 23 - resize by 35%
Image Free Rotate Left by 15% and paste on bottom right
Select Element 21 - resize by 50%
Image Free Rotate Right by 15% and paste on bottom
Select Element 22 - resize by 50%
Paste and position on bottom
Select Element 3 - resize by 25%
Paste and position on bottom left
Select Element 10 - resize by 40%
Image mirror and paste on right side
Select Element 18 - resize by 35%
Image Free Rotate Left by 90% and paste on bottom right
Select Element 6 - resize by 55%
Paste and position on top right
Add new raster layer and flood-fill with color or gradient of choice
Apply Mask 192 and merge group
Add any additional elements you like.
Add any dropshadows you like
Crop and resize as desired
Add copyright info, license number and name
You're done! Thanks for trying my tutorial!
Labels:Babycakes Scraps | 0
comments
BALLOON CHARIOT

Supplies needed:
I am using the amazing art from Jasmine Becket-Griffith for for this tutorial, which you can find here
Scrapkit: I am using a gorgeous matching kit from Abstract called Jasmine Becket-Griffith 140-1 which you can get by going here
Mask 451 from Vix which you can find here
Plugins used: Xero-Porcelain, Lokas 3D Shadow
----------------------------
This tutorial is written for those who have working knowledge of PSPX2 (any version will do).
This tutorial was written by me on August 28, 2013. Please do not copy or paste on any other forum, website or blog provide link back to tut only. Please do not claim as your own. This tutorial is copyrighted to me. Any resemblance to any other tutorial is purely coincidental.
Ok - let's start and remember to save often.
Open up a 750 x 650 blank canvas (we can resize it later)
Select Frame 1 and paste in the center of the canvas
I moved the frame up a bit about an inch
Select your magic wand tool and click in the center of the frame (Add (Shift), RGB Value, Tolerance 25, Contiguous checked, Feather 0)
Selections, Modify, Expand by 5
Paste paper 3
Select invert, delete
Paste close-up tube on top of paper layer where desired and delete
Select none
Change close-up to Luminance (Legacy)
Drop opacity on close-up down to 70%
Apply dropshadow and merge tube down on top of paper layer
Move paper layer below frame
Paste tube of choice where desired
Apply Xero Porcelain at setting of choice
Apply Lokas 3D Shadow at default settings
Select Element 10 - resize by 50%
Paste and position on bottom left
Select Element 6 - resize by 55%
Image Free Rotate Left by 15% and paste on bottom left
Select Element 8 - resize by 30%
Paste and position on bottom left
Select Element 19 - resize by 30%
Image Free Rotate Left by 15% and paste on bottom left
Select Element 14 - resize by 25%
Paste and position on bottom left
Image, duplicate, mirror and reposition where desired
Select duplicate flower and duplicate again - resize by 80% and reposition
Select Element 7 - resize by 25%
Paste and position on bottom left
Select Element 1 - resize by 30%
Paste and position on bottom left
Select Element 4 - resize by 50%
Paste and position on right side
Image duplicate, Free Rotate Left by 90% and flip
Reposition on bottom right
Select Element 13 - resize by 50%
Flip and reposition on bottom right
Select Element 11 - resize by 20%
Paste and position on bottom right
Select Element 3 - resize by 35%
Paste and position on bottom right
Paste Paper 4 on canvas and move to the bottom layer
Apply Mask 451 and merge group
Add any additional elements you like.
Add any dropshadows you like
Crop and resize as desired
Add copyright info, license number and name
You're done! Thanks for trying my tutorial!
Labels:CDO | 0
comments
Wednesday, August 28, 2013
AUTUMN FAIRY

Supplies needed:
I am using the amazing art from Diana Gali for for this tutorial, which you can find here
Scrapkit: I am using a gorgeous matching kit from Bibi's Collection called "Autumn Fairy" which you can get by going here
Mask 21 from Gina Gems which you can find here
Plugins used: Xero-Radiance, Lokas 3D Shadow
----------------------------
This tutorial is written for those who have working knowledge of PSPX2 (any version will do).
This tutorial was written by me on August 28, 2013. Please do not copy or paste on any other forum, website or blog provide link back to tut only. Please do not claim as your own. This tutorial is copyrighted to me. Any resemblance to any other tutorial is purely coincidental.
Ok - let's start and remember to save often.
Open up a 750 x 650 blank canvas (we can resize it later)
Select Frame Element 62 and paste in the center of the canvas
Resize by 75%
Select your magic wand tool and click in the center of each square in the window frame (Add (Shift), RGB Value, Tolerance 25, Contiguous checked, Feather 0)
Selections, Modify, Expand by 5
Paste paper 6
Select invert, delete, select none
Move paper layer below frame
Paste tube of choice where desired
Apply Xero Porcelain at setting of choice
Apply Lokas 3D Shadow at default settings
Select Element 68 - resize by 55%
Paste and position on right side
Select Element 53 - resize by 40%
Paste and position on top left
Select Element 35 - resize by 50%
Paste and position on bottom and move above frame layer
Select Element 43 - resize by 50%
Paste and position on bottom right
Select Element 27 - resize by 30%
Paste and position on bottom right
Select Element 70 - resize by 25%
Paste and position on bottom right
Select Element 37 - resize by 50%
Paste and position on bottom left
Select Element 26 - resize by 35%
Paste and position on bottom left
Select Element 22 - resize by 18%
Paste and position on bottom left
Select Element 78 - resize by 30%
Image Free Rotate Left by 15% and paste on top left
Select Element 74 - resize by 30%
Paste and position on top left
Paste Paper 5 on canvas and move to the bottom layer
Apply Mask 21 and merge group
Add any additional elements you like.
Add any dropshadows you like
Crop and resize as desired
Add copyright info, license number and name
You're done! Thanks for trying my tutorial!
THESE TEARS
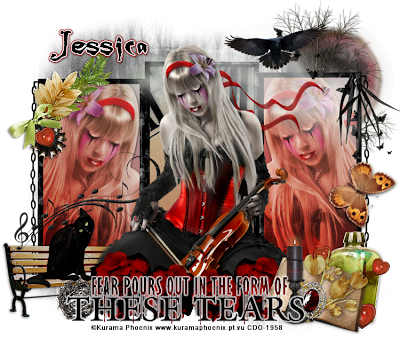
Supplies needed:
I am using the amazing art from Kurama Phoenix for for this tutorial, which you can find here
Scrapkit: I am using a wicked kit from Gothic Inspirations called "My Tears" which you can get by going here
Plugins used: Eyecandy 4000 - Gradient Glow, Xero-Radiance, Lokas 3D Shadow
----------------------------
This tutorial is written for those who have working knowledge of PSPX2 (any version will do).
This tutorial was written by me on August 28, 2013. Please do not copy or paste on any other forum, website or blog provide link back to tut only. Please do not claim as your own. This tutorial is copyrighted to me. Any resemblance to any other tutorial is purely coincidental.
Ok - let's start and remember to save often.
Open up a 750 x 650 blank canvas (we can resize it later)
Select Frame Element 2 and paste in the center of the canvas
Resize by 85%
Select your magic wand tool and click in the center rectangle in the frame (Add (Shift), RGB Value, Tolerance 25, Contiguous checked, Feather 0)
Selections, Modify, Expand by 5
Paste paper 5
Select invert, delete, select none
Select your magic wand tool again and click in the left and right rectangle of the frame
Seelctions, Modify, Expand by 5
Add new raster layer and flood-fill with color or gradient of choice (Linear style, Angle 45, Repeat 2)
Paste close-up tubes on top of gradient layer where desired and delete
Select none
Change close-up to Hard Light
Apply Xero Bad Dream
Drop opacity on close-ups down to 75%
Apply dropshadow and merge tubes down on top of gradient/color layer
Effect, Texture Effects, Blinds (Width 2, Opacity 20, Horizontal and Light from left/top checked)
Move layer below frame
Paste tube of choice where desired
Apply Xero Radiance at setting of choice
Apply Lokas 3D Shadow at default settings
Select Park Bench Element - resize by 50%
Image mirror and paste on bottom left
Select Cat Element - resize by 30%
Paste and position on bottom left
Select Roses Element - resize by 65%
Paste and position on bottom
Select These Tears Wordart - resize by 70%
Paste and position on bottom above roses and apply Eyecandy Gradient Glow on fat default settings (glow width 3)
Select Book Element - resize by 40%
Image Free Rotate Right by 15% and paste on bottom right
Select Bottle Element - resize by 40%
Paste and position on bottom right
Select Emb Element - resize by 30%
Image Free Rotate Right by 15% and paste on top of book element
Select Candle Element - resize by 30%
Paste and position on bottom right
Select Butterfly1 Element - resize by 25%
Paste and position on right side
Select Cluster Element - resize by 40%
Paste and position on top left
Select Crow Element - resize by 40%
Paste and position on top right
Select Moon Element - resize by 40%
Paste and position on top right corner and move to bottom layer
Select Tree Element - resize by 85%
Paste and position over moon element
Select Mask Element and paste on canvas and move to the bottom layer
Add any additional elements you like.
Add any dropshadows you like
Crop and resize as desired
Add copyright info, license number and name
You're done! Thanks for trying my tutorial!
Labels:Gothic Inspirations | 0
comments
Friday, August 23, 2013
WITCHY WOMAN
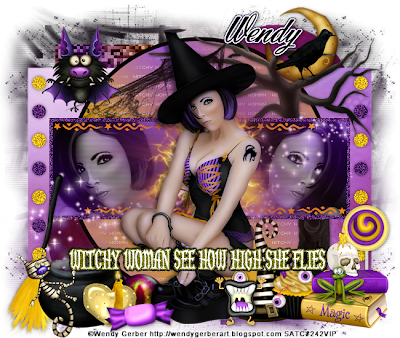
Supplies needed:
I am using the amazing art from Wendy Gerber for this tutorial which you can find here
Scrapkit: I am using an awesome kit from Bibi's Collection called "Enchanted Night" which you can get by going here
Template 78 from Rosey which can be found here
Hocus Pocus Mask from Kylie which you can get it here
Plugins used: Xero - Fritillary, Xero-Porcelain, Xero - Bad Dream, Lokas 3D Shadow
----------------------------
This tutorial is written for those who have working knowledge of PSPX2 (any version will do).
This tutorial was written by me on August 22, 2013. Please do not copy or paste on any other forum, website or blog provide link back to tut only. Please do not claim as your own. This tutorial is copyrighted to me. Any resemblance to any other tutorial is purely coincidental.
Ok - let's start and remember to save often.
Open the template and using your shortcut keys on your keyboard (SHIFT+D) duplicate the template as a new image. Close the original and delete the copywrite layer.
Select Left Circle Line layer
Add new raster layer and flood-fill with color(s) of choice
Select none
Adjust, Add/Remove Noise, Add Noise (Uniform checked, Noise 65%, Monochrome checked)
Delete/Hide original circle line layer
Select Right Circle Line layer and repeat above steps
Select Wordart layers and move down if desired
Select Star Lines layer
Add new raster layer and flood-fill with color of choice
Reselect star lines - select all, float, defloat
Go back and select color layer you just filled
Select invert, delete, select none
Delete/Hide original star lines layer
Select Black Rectangle layer
Select all, float, defloat
Add new raster layer and flood-fill with gradient of choice (Linear style, Angle 45, Repeat 2)
Paste close-up tubes of choice on top of gradient and delete
Select none
Change closeups to Luminance (Legacy)
Apply Xero Bad Dream at setting of choice
Drop opacity down to 80%
Apply dropshadow and merge tube down on top of gradient layer
Effect, Texture Effects, Blinds (Width 2, Opacity 20, Horizontal and Light from left/top checked)
Delete/Hide original rectangle layer
Select Orange Rectangle layer
Select all, float, defloat
Add new raster layer and flood-fill with color of choice
Select none
Adjust, Add/Remove Noise, Add Noise (Uniform checked, Noise 85%, Monochrome checked)
Delete/hide original rectangle layer
Select Orange Circle layer
Select all, float, defloat
Add new raster layer and flood-fill with color or gradient of choice
Select none
Delete/Hide original circle layer
Select Bottom Left Purple layer
Select all, float, defloat
Paste paper 2
Select invert, delete, select none
Delete/Hide original circle layer
Select Top Right Purple Circle and repeat above steps
Select Green Rectangle layer
Select all, float, defloat
Paste paper 1
Select invert, delete, select none
Delete/Hide original rectangle layer
Select Orange Fritillary layer
Select all, float, defloat
Add new raster layer and flood-fill with gradient of choice
Select none
Apply Xero Fritillary with the following settings:
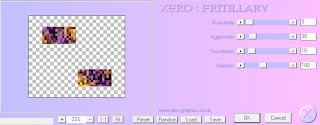
Delete/Hide original fritillary layer
Copy and paste tube of choice and position where desired
Apply Xero Radiance at setting of choice
Apply Lokas 3D Shadow at default settings
Select Element 16 - resize by 70%
Image mirror and paste on right side below center rectangle layer
Select Element 25 - resize by 45%
Paste and position on top right below tree element
Select Element 20 - resize by 35%
Paste and position on bottom left
Select Element 56 - resize by 50%
Paste and position on bottom left
Select Element 26 - resize by 30%
Paste and position on botton left
Select Element 12 - resize by 35%
Paste and position on bottom left
Select Element 69 - resize by 55%
Paste and position on bottom left
Select Element 43 - resize by 50%
Paste and position on botton left
Select Element 76 - resize by 50%
Paste and position on bottom right
Select Element 75 - resize by 35%
Image mirror and paste on bottom right
Select Element 63 - resize by 60%
Paste and position on bottom right
Select Element 9 - resize by 30%
Paste and position on bottom right
Select Element 59 - resize by 55%
Paste and position on bottom right
Select Select New raster layer and flood fill with color or gradient of choice
Move layer to the bottom of the template
Apply Hocus Pocus Mask
Merge group and move to the bottom
Add any additional elements you like.
Add any dropshadows you like
Crop and resize as desired
Add copyright info, license number and name
You're done! Thanks for trying my tutorial!
Thursday, August 22, 2013
LUCINDA
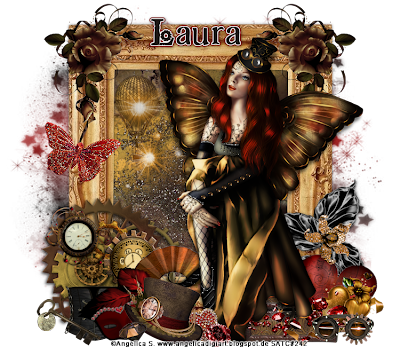
Supplies needed:
I am using the amazing art from Angelica S. for for this tutorial, which you can find here
Scrapkit: I am using a gorgeous kit from Tiny Turtle Designs called "Lucinda" which you can get by going here
Mask 25 from Witchys Heart which you can find on the Misfits Blog here
Plugins used: Xero-Radiance, Lokas 3D Shadow
----------------------------
This tutorial is written for those who have working knowledge of PSPX2 (any version will do).
This tutorial was written by me on August 22, 2013. Please do not copy or paste on any other forum, website or blog provide link back to tut only. Please do not claim as your own. This tutorial is copyrighted to me. Any resemblance to any other tutorial is purely coincidental.
Ok - let's start and remember to save often.
Open up a 750 x 650 blank canvas (we can resize it later)
Select Frame Element 30 and paste in the center of the canvas
Select your magic wand tool and click in the center of the frame (Add (Shift), RGB Value, Tolerance 25, Contiguous checked, Feather 0)
Selections, Modify, Expand by 5
Paste paper 36
Select invert, delete, select none
Move paper layer below frame
Select Element 89 - resize by 75%
Paste and position on top of paper layer where desired
Paste tube of choice where desired
Apply Xero Radiance at setting of choice
Apply Lokas 3D Shadow at default settings
Select Element 137 - resize by 50%
Paste and position on top left above frame
Image duplicate, mirror
Select Element 32 - resize by 50%
Paste and position on bottom left
Select Element 23 - resize by 25%
Paste and position on bottom left
Select Element 45 - resize by 25%
Paste and position on bottom left
Select Element 57 - resize by 25%
Image Free Rotate Left by 15% and paste on bottom left
Select Element 52 - resize by 25%
Paste and position on bottom left
Select Element 73 - resize by 30%
Image Free Rotate Right by 15% and paste on left side
Select Element 128 - resize by 40%
Image mirror and paste on right side
Select Element 143 - resize by 25%
Paste and position on top of leaf element
Select Element 66 - resize by 35%
Paste and position on bottom right
Select Element 69 - resize by 20%
Paste and position on bottom right
Select Element 80 - resize by 40%
Paste and position on bottom right
Select Element 72 - resize by 25%
Image Free Rotate Right by 15% and paste on left side
Add new raster layer and flood-fill with color or gradient of choice
Move layer to the bottom
Apply Mask 25 and merge group
Add any additional elements you like.
Add any dropshadows you like
Crop and resize as desired
Add copyright info, license number and name
You're done! Thanks for trying my tutorial!
S.O.S. BABE
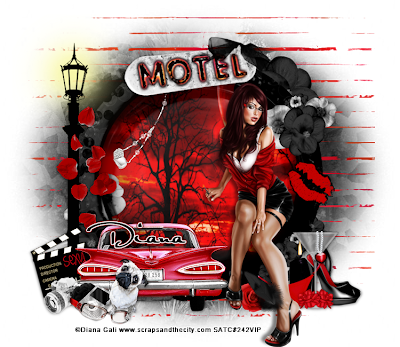
Supplies needed:
I am using the amazing art from Diana Gali for for this tutorial, which you can find here
Scrapkit: I am using a gorgeous matching kit from Bibi's Collection called "SOS Babe" which you can get by going here
Mask 1 from Horseplay's Pasture which you can find here
Plugins used: Xero-Radiance, Lokas 3D Shadow
----------------------------
This tutorial is written for those who have working knowledge of PSPX2 (any version will do).
This tutorial was written by me on August 22, 2013. Please do not copy or paste on any other forum, website or blog provide link back to tut only. Please do not claim as your own. This tutorial is copyrighted to me. Any resemblance to any other tutorial is purely coincidental.
Ok - let's start and remember to save often.
Open up a 750 x 650 blank canvas (we can resize it later)
Select Frame Element 3 and paste in the center of the canvas
Resize by 85%
Select your Freehand Selection tool and draw an area around the center of the circle (Add (Shift), Feather 0, Smoothing 4, Anti-alias checked)
Paste paper 7
Select invert, delete, select none
Move paper layer below frame
Paste tube of choice where desired
Apply Xero Radiance at setting of choice
Apply Lokas 3D Shadow at default settings
Select Element 18 - resize by 90%
Paste and position on left side
Select Element 62 - resize by 40%
Image Free Rotate Left by 10% and paste on top of the frame
Select Element 59 - resize by 35%
Paste and position on bottom left
Select Element 31 - resize by 45%
Paste and position on left side
Select Element 19 - resize by 40%
Image Free Rotate Left by 15% and paste on bottom left
Select Element 28 - resize by 30%
Paste and position on bottom left
Select Element 36 - resize by 40%
Paste and position on bottom left
Select Element 63 and paste on bottom left
Select Element 61 - resize by 50%
Paste and position on bottom left
Select Element 73 - resize by 40%
Paste and position on botton right
Select Element 26 - resize by 30%
Paste and position on bottom right
Select Element 32 - resize by 30%
Paste and position on bottom right
Select Element 35 - resize by 80%
Paste in the center of canvas and move to bottom layer
Paste Paper 11 on canvas and move to the bottom layer
Apply Mask 1 and merge group
Add any additional elements you like.
Add any dropshadows you like
Crop and resize as desired
Add copyright info, license number and name
You're done! Thanks for trying my tutorial!
Wednesday, August 21, 2013
EFFIN SEXII
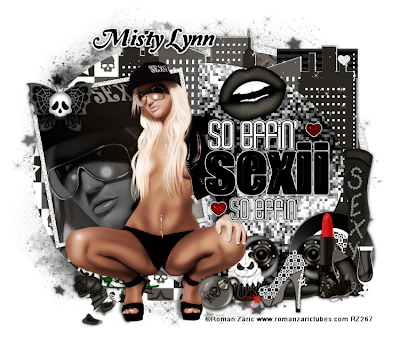
Supplies needed:
I am using the amazing art from Roman Zaric for this tutorial which you can find here
Scrapkit: I am using an awesome kit from Mistylynnn's Creations called "Kelly" which you can get by going here
Template 328 from Missy which can be found here
Mask 25 from Witchys Heart which you can get on the Misfits Blog here
Plugins used: Eyecandy 4000- Glass, Eyecandy 4000 - Gradient Glow, Xero-Radiance, Xero - Bad Dream, Lokas 3D Shadow
----------------------------
This tutorial is written for those who have working knowledge of PSPX2 (any version will do).
This tutorial was written by me on August 21, 2013. Please do not copy or paste on any other forum, website or blog provide link back to tut only. Please do not claim as your own. This tutorial is copyrighted to me. Any resemblance to any other tutorial is purely coincidental.
Ok - let's start and remember to save often.
Open the template and using your shortcut keys on your keyboard (SHIFT+D) duplicate the template as a new image. Close the original and delete the copywrite layer.
Select Wordart by Missy
Select all, float, defloat
Add new raster layer and flood-fill with colors of choice
Select none
Select your magic wand tool and select the letters in "Sexii" and heart layer (hold shift when selecting), (Add (Shift), RGB Value, Tolerance 25, Contiguous checked, Feather 0)
Apply Eyecandy Glass on default settings
Select none
Apply Eyecandy Gradient Glow on fat default settings (Glow Width 3)
Delete/Hide original wordart layer
Select Frame layer
Adjust, Add/Remove Noise, Add Noise (Uniform checked, Noise 85%, Monochrome checked)
Select Frame Background layer
Select all, float, defloat
Add new raster layer and flood-fill with gradient of choice (Linear style, Angle 45, Repeat 2)
Paste close-up tube of choice on top of gradient and delete
Select none
Change closeup to Luminance (Legacy)
Apply Xero Bad Dream at setting of choice
Drop opacity on close-up down to 65%
Apply dropshadow and merge tube down on top of gradient layer
Effect, Texture Effects, Blinds (Width 2, Opactity 20, Horizontal and Light from left/top checked)
Delete/Hide original background layer
Select Shape 1 layer
Select all, float, defloat
Add new raster layer and flood-fill with gradient of choice
Select none
Apply Xero Fritillary on the following settings:
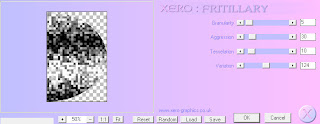
Delete/Hide original shape layer
Select Element 46 and paste on top right below shape layer
Select Rectangle layer
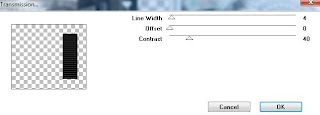
Apply VM Extravaganza - Transmission with the following settings:
Select Circle 3 layer
Select all, float, defloat
Paste paper 9
Select invert, delete, select none
Delete/Hide original circle layer
Select Circle 2 layer
Select all, float, defloat
Add new raster layer and flood-fill with color of choice
Adjust, Add/Remove Noise, Add Noise (Uniform checked, Noise 85%, Monochrome checked)
Delete/Hide original circle layer
Select Circle 1 layer
Select all, float, defloat
Paste paper 1
Select invert, delete, select none
Delete/Hide original circle layer
Copy and paste tube of choice and position where desired
Apply Xero Radiance at setting of choice
Apply Lokas 3D Shadow at default settings
Select Element 15 - resize by 70%
Paste and position on right side
Select Element 43 - resize by 40%
Paste and position on bottom right
Select Element 36 - resize by 50%
Paste and position on bottom right
Select Element 24 - resize by 40%
Paste and position on bottom right
Select Element 50 - resize by 30%
Paste and position on bottom right
Select Element 7 - resize by 25%
Paste and position on botton right
Select Element 38 - resize by 35%
Paste and position on bottom right
Select Element 17 - resize by 40%
Paste and position on bottom left
Select Element 2 - resize by 35%
Paste and position on top left
Select Element 35 - resize by 40%
Image Free Rotate Left by 15% and paste on top right
Select Select New raster layer and flood fill with color or gradient of choice
Move layer to the bottom of the template
Apply Mask 25
Merge group and move to the bottom
Add any additional elements you like.
Add any dropshadows you like
Crop and resize as desired
Add copyright info, license number and name
You're done! Thanks for trying my tutorial!
Labels:MistyLynn's Creations | 0
comments
AUTUMN SONG
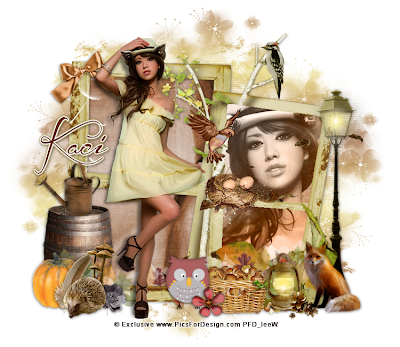
Supplies needed:
I am using an Exclusive artwork for for this tutorial, which you can find here
Scrapkit: I am using a gorgeous kit from Scrappin Krazy Designs which you can get by going here
Mask 34 from Moonbeams & Spiderwebs which you can find here
Plugins used: Xero-Radiance, Xero-Bad Dream, Lokas 3D Shadow
----------------------------
This tutorial is written for those who have working knowledge of PSPX2 (any version will do).
This tutorial was written by me on August 21, 2013. Please do not copy or paste on any other forum, website or blog provide link back to tut only. Please do not claim as your own. This tutorial is copyrighted to me. Any resemblance to any other tutorial is purely coincidental.
Ok - let's start and remember to save often.
Open up a 750 x 650 blank canvas (we can resize it later)
Select Element 21 and paste in the center of the canvas
Select your magic wand tool and click in center of the two right window frames (Add (Shift), RGB Value, Tolerance 25, Contiguous checked, Feather 0)
Selections, Modify, Expand by 5
Paste paper 12
Select invert, delete
Paste close-up tube on top of paper layer where desired and delete
Select none
Apply Xero Bad Dream at settings of choice
Drop opacity on close-up down to 75%
Merge close-up down on top of paper layer
Move paper layer below frame
Select your selections or freehand tool and draw a selection around the left two squares on the frame (Add (Shift), Feather 0, Anti-alias checked)
Paste paper 9
Select invert, delete, select none
Move paper below frame
Paste tube of choice where desired
Apply Xero Radiance at setting of choice
Apply Lokas 3D Shadow at default settings
Select Element 72 - resize by 65%
Paste and position on bottom left
Select Element 38 - resize by 40%
Paste and position on top of barrel element
Select Element 11 - resize by 30%
Paste and position on botton left
Select Element 12 - resize by 30%
Paste and position on bottom left
Select Element 43 - resize by 30%
Paste and position on bottom left
Select Element 23 and paste on right side
Select Element 16 and paste on bottom right
Select Element 14 - resize by 40%
Image mirror and paste on bottom right
Select Element 50 - resize by 30%
Paste and position on bottom right
Select Element 19 - resize by 50%
Paste and position on bottom right
Select Element 5 - resize by 25%
Paste and position on bottom
Select Element 6 - resize by 25%
Paste and position on the bottom
Select Element 68 - resize by 45%
Image Free Rotate Left by 15% and paste on top left
Select Element 17 - resize by 45%
Paste and position on the right of your window
Add new raster layer and flood-fill with color or gradient of choice
Move to bottom layer
Apply Mask 34 and merge group
Add any additional elements you like.
Add any dropshadows you like
Crop and resize as desired
Add copyright info, license number and name
You're done! Thanks for trying my tutorial!
Labels:Scrappin Krazy Designs | 0
comments
Tuesday, August 20, 2013
WICKEDNESS
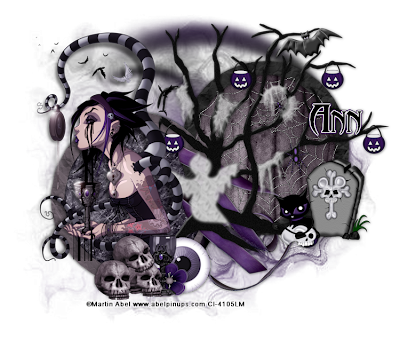
Supplies needed:
I am using the amazing art from Martin Abel for for this tutorial, which you can find here
Scrapkit: I am using a wicked matching kit from Foxy's Designz which you can get by going here
Mask 11 from Gina Gems which you can find here
Plugins used: Xero-Radiance, Lokas 3D Shadow
----------------------------
This tutorial is written for those who have working knowledge of PSPX2 (any version will do).
This tutorial was written by me on August 20, 2013. Please do not copy or paste on any other forum, website or blog provide link back to tut only. Please do not claim as your own. This tutorial is copyrighted to me. Any resemblance to any other tutorial is purely coincidental.
Ok - let's start and remember to save often.
Open up a 750 x 650 blank canvas (we can resize it later)
Select Frame 2 and paste in the center of the canvas
Resize frame by 70%
Select your magic wand tool and click in center of the right circle (Add (Shift), RGB Value, Tolerance 25, Contiguous checked, Feather 0)
Selections, Modify, Expand by 5
Paste paper 1
Select invert, delete
Paste Element 8 on top of paper layer where desired and delete
Select none
Effects, Edge Effects, Enhance
Move paper and element layer below frame
Select your magic wand tool and click the center of the left circle (Add (Shift), RGB Value, Tolerance 25, Contiguous checked, Feather 0)
Selections, Modify, Expand by 5
Paste paper 6
Select invert, delete, select none
Move paper below frame
Paste tube of choice where desired
Apply Xero Radiance at setting of choice
Apply Lokas 3D Shadow at default settings
Select Element 9 - resize by 55%
Paste and position on right side where desired
Select Element 7 - resize by 25%
Paste and position on botton right
Select Element 14 - resize by 30%
Paste and position below the tree element
Select Element 2 - resize by 25%
Paste and position on bottom left
Select Element 1 - resize by 15%
Paste and position on bottom left
Select Element 5 - resize by 30%
Paste and position on bottom left
Select Element 12 - resize by 15%
Paste and position on bottom left
Add new raster layer and flood-fill with color or gradient of choice
Move to bottom layer
Apply Mask 11 and merge group
Add any additional elements you like.
Add any dropshadows you like
Crop and resize as desired
Add copyright info, license number and name
You're done! Thanks for trying my tutorial!
Labels:CDO | 0
comments
DREAMS AND LOVE
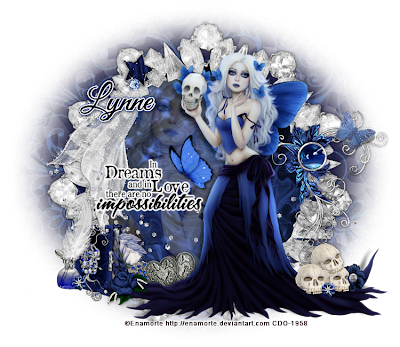
Supplies needed:
I am using the amazing art from Enamorte for for this tutorial, which you can find here
Scrapkit: I am using a gorgeous matching kit from Babycakes Scraps called which you can get by going here
Mask 1 from Horseplay's Pastures which you can find here
Plugins used: Eyecandy 4000 - Gradient Glow, Xero-Porcelain, Lokas 3D Shadow
----------------------------
This tutorial is written for those who have working knowledge of PSPX2 (any version will do).
This tutorial was written by me on August 20, 2013. Please do not copy or paste on any other forum, website or blog provide link back to tut only. Please do not claim as your own. This tutorial is copyrighted to me. Any resemblance to any other tutorial is purely coincidental.
Ok - let's start and remember to save often.
Open up a 750 x 650 blank canvas (we can resize it later)
Select Frame Element 3 and paste in the center of the canvas
Resize frame by 90%
Select your magic wand tool and click in the center of the frame (Add (Shift), RGB Value, Tolerance 25, Contiguous checked, Feather 0)
Selections, Modify, Expand by 5
Paste paper 6
Select invert, delete
Paste close-up tube on top of paper layer where desired and delete
Select none
Drop opacity on close-ups down to 35%
Apply dropshadow and merge tube down on top of paper layer
Move paper layer below frame
Paste tube of choice where desired
Apply Xero Porcelain at setting of choice
Apply Lokas 3D Shadow at default settings
Select Element 25 - resize by 75%
Paste and position on right side
Select Element 22 - resize by 65%
Paste and position on top left
Select Element 5 - resize by 45%
Paste and position on botton left
Select Element 2 - resize by 40%
Paste and position on bottom left
Select Element 12 - resize by 40%
Paste and postion on bottom left
Select Element 10 - resize by 30%
Image Free Rotate Left by 15% and paste on bottom left
Select Element 19 - resize by 25%
Paste and position on botton left
Select Element 26 - resize by 35%
Paste and position on bottom right
Select Element 4 - resize by 20%
Paste and position on bottom right
Select Wordart Element 28 - resize by 70%
Paste and position on left side
Apply Eyecandy Gradient Glow on fat default settings
Select Element 32 - resize by 55%
Paste and position on left side
Paste Paper 5 on canvas and move to the bottom layer
Apply Mask 1 and merge group
Add any additional elements you like.
Add any dropshadows you like
Crop and resize as desired
Add copyright info, license number and name
You're done! Thanks for trying my tutorial!
Labels:Babycakes Scraps | 0
comments
Monday, August 19, 2013
VICTORIAN SERENADE
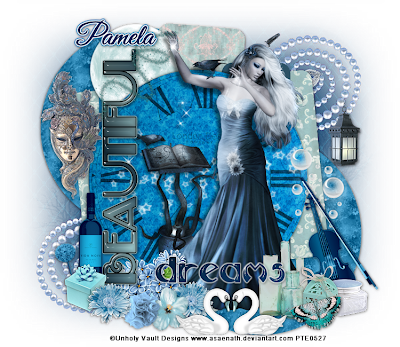
Supplies needed:
I am using the amazing art from Unholy Vault Designs for this tutorial. Unfortunately, you can no longer purchase this artwork.
Scrapkit: I am using a beautiful kit from Redefined Designs called "Victorian Blue" which you can get by going here
Template 294 from Millie which can be found here
Mask 11 from Horseplays Pastures which you can get it here
Plugins used: Eyecandy 4000- Glass, Eyecandy 4000 - Gradient Glow, Xero-Radiance, Lokas 3D Shadow
----------------------------
This tutorial is written for those who have working knowledge of PSPX2 (any version will do).
This tutorial was written by me on August 19, 2013. Please do not copy or paste on any other forum, website or blog provide link back to tut only. Please do not claim as your own. This tutorial is copyrighted to me. Any resemblance to any other tutorial is purely coincidental.
Ok - let's start and remember to save often.
Open the template and using your shortcut keys on your keyboard (SHIFT+D) duplicate the template as a new image. Close the original and delete the copywrite layer.
Select Star layers 10 and 11 and delete
Select Wordart 9 "dreams" layer
Select all, float, defloat
Add new raster layer and flood-fill with color of choice
Select none
Apply Eyecandy Glass at default settings
Delete/Hide original wordart layer
Select Wordart 8 "beautiful" layer
Select all, float, defloat
Add new raster layer and flood-fill with gradient color of choice
Select none
Apply Eyecandy Glass with same default settings
Apply Gradient Glow on fat default settings (Glow Width 3)
Delete/Hide original wordart layer
Select Circle 7 layer
Select all, float, defloat
Paste paper 4
Select invert, delete
Select Clock Element - resize by 70%
Paste and position on top of paper 4 layer and delete
Select none
Change element to overlay and drop opacity down to 70%
Delete/Hide original circle layer
Select Rectangle 6 layer
Select all, float, defloat
Add new raster layer and flood-fill with color of choice
Select none
Delete/Hide original rectangle layer
Select Rectangle 5 layer
Select all, float, defloat
Paste paper 5
Select invert, delete, select none
Delete/hide original rectangle layer
Select Rectangle 4 layer
Select all, float, defloat
Paste paper 14
Select invert, delete, select none
Delete/Hide original rectangle layer
Select Square 3 layer
Select all, float, defloat
Paste paper 8
Select invert, delete, select none
Delete/Hide original square layer
Select Circle 2 layer
Select all, float, defloat
Paste paper 2
Select invert, delete, select none
Delete/Hide origingal circle layer
Select Circle 1 layer and repeat above steps
Copy and paste tube of choice and position where desired
Apply Xero Radiance at setting of choice
Apply Lokas 3D Shadow at default settings
Select Moon Element - resize by 45%
Paste and position on top left
Select Mask Element - resize by 25%
Paste and position on left side
Adjust, Sharpness, Sharpen
Select Wine Element - resize by 8%
Paste and position on left side
Select Gift Element - resize by 15%
Paste and position on bottom left
Select Necklace Element - resize by 35%
Paste and position on bottom left and move to bottom layer
Image duplicate, mirror and flip
Select Flower 2 Element - resize by 15%
Paste and position on bottom left
Select Flower4 Element - resize by 15%
Paste and position next to flower2 element
Select Flower3 Element - resize by 15% and paste next to flower4
Select FloralHeart Element - resize by 40%
Image Free Rotate Left by 15% and paste on bottom left
Select Swans Element - resize by 35%
Paste and position on bottom
Select Violin Element - resize by 60%
Image Free Rotate Left by 15% and paste on bottom right
Select GlassWare Element - resize by 25%
Paste and position on bottom right
Select Cage Element - resize by 20%
Paste and position on botton right
Select Canster Element - resize by 15%
Paste and position on bottom right
Select Butterfly Element - resize by 25%
Image Free Rotate Left by 15% and paste on bottom right
Select Lantern Element - resize by 15%
Paste and position on right side
Paste paper 7 on the canvas
Move layer to the bottom of the template
Apply Mask 11
Merge group and move to the bottom
Add any additional elements you like.
Add any dropshadows you like
Crop and resize as desired
Add copyright info, license number and name
You're done! Thanks for trying my tutorial!
Labels:Redefined Designs | 0
comments
Sunday, August 18, 2013
SCI-FI BABE
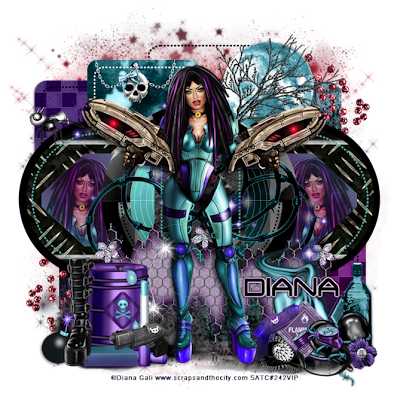
Supplies needed:
I am using the amazing art from Diana Gali for this tutorial which you can find here
Scrapkit: I am using an awesome kit from Disturbed Scraps called "Sci Fi Girl" which you can get by going here
Template 184 from Pooker which can be found here
Sparkle Mask from Witchys Heart which you can find on the Misfits Blog here
Plugins used: Xero-Radiance, Xero - Bad Dream, Lokas 3D Shadow
----------------------------
This tutorial is written for those who have working knowledge of PSPX2 (any version will do).
This tutorial was written by me on August 18, 2013. Please do not copy or paste on any other forum, website or blog provide link back to tut only. Please do not claim as your own. This tutorial is copyrighted to me. Any resemblance to any other tutorial is purely coincidental.
Ok - let's start and remember to save often.
Open the template and using your shortcut keys on your keyboard (SHIFT+D) duplicate the template as a new image. Close the original and delete the copywrite layer.
Select Grey Square layer
Select all, float, defloat
Paste paper 5
Select invert, delete, select none
Delete/Hide original square layer
Select White Circle layer
Select all, float, defloat
Paste paper 9
Select invert, delete, select none
Delete/Hide original circle layer
Select Lt. Pink Circle layer
Select all, float, defloat
Paste paper 8
Select invert, delete, select none
Delete/Hide original circle layer
Select Pink Circle layer and repeat above steps
Select Shape layer
Select all, float, defloat
Add new raster layer and flood-fill with gradient of choice (Linear style, Angle 45, Repeat 2)
Paste close-up tubes of choice on top of gradient and delete
Select none
Change closeups to Hard Light
Apply Xero Bad Dream at setting of choice
Drop opacity on close-ups down to 70%
Apply dropshadow and merge tubes down on top of gradient layer
Effect, Texture Effects, Blinds (Width 2, Opactity 20, Horizontal and Light from left/top checked)
Delete/Hide original shape layer
Select Pink Dotted layer
Add new raster layer and flood-fill with color of choice
Reselect dotted layer
Select all, float, defloat
Go back and select color layer you just filled
Select invert, delete, select none
Delete/Hide original dotted layer
Select White Circles layer
Select all, float, defloat
Paste paper 1
Select invert, delete, select none
Delete/hide original circles layer
Select Grey Squares layer
Select all, float, defloat
Paste paper 2
Select invert, delete, select none
Delete/Hide original squares layer
Select Pink Squares layer
Select all, float, defloat
Paste paper 13
Select invert, delete, select none
Delete/Hide original squares layer
Select Pink Rect layer
Select all, float, defloat
Paste paper 4
Select invert, delete, select none
Delete/Hide original rect layer
Select other Pink Rectangle layer and repeat above steps
Copy and paste tube of choice and position where desired
Apply Xero Radiance at setting of choice
Apply Lokas 3D Shadow at default settings
Select Element 85 and paste in the center of the canvas behind tube layer
Select Element 93 - resize by 65%
Paste and position towards the bottom below tube layer
Select Element 105 - resize by 85%
Paste and position on the bottom below tube layer
Select Element 82 - resize by 40%
Paste and position on top right corner
Select Element 83 - resize by 45%
Paste and position on top right corner
Select Element 26 - resize by 25%
Paste and positon on top left
Select Element 53 - resize by 40%
Paste and position on bottom left
Select Element 69 - resize by 40%
Paste and positon on bottom left
Select Element 52 - resize by 25%
Paste and position on bottom left
Select Element 45 - resize by 40%
Paste and position on bottom left
Select Element 30 - resize by 20%
Paste and position on bottom left
Select Element 33 - resize by 40%
Paste and position on bottom right
Select Element 42 - resize by 40%
Paste and position on bottom right
Select Element 28 - resize by 40%
Image Free Rotate Left by 15% and paste on bottom right
Select Element 10 - resize by 50%
Paste and position on bottom right
Select Element 39 - resize by 25%
Paste and position on bottom right
Select Element 97 - resize by 50%
Paste and position on bottom left and move to the bottom layer
Image Duplicate, mirror and flip
Select New raster layer and flood fill with color or gradient of choice
Move layer to the bottom of the template
Apply Witchys Heart Mask
Merge group and move to the bottom
Add any additional elements you like.
Add any dropshadows you like
Crop and resize as desired
Add copyright info, license number and name
You're done! Thanks for trying my tutorial!
Saturday, August 17, 2013
HAVE A CUPCAKE
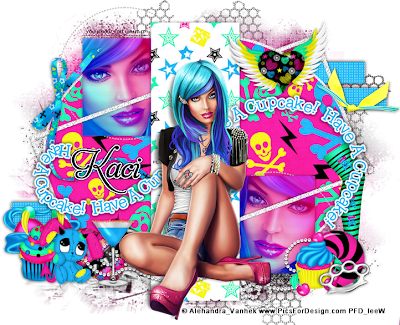
Supplies needed:
I am using the amazing art from Alehandra Vanhek for this tutorial which you can find here
Scrapkit: I am using an awesome kit from Scrappin Krazy Designs called "Have A Cupcake" which you can get by going here
Template 4 from Yvette which can be found here
Big Mask 19 from Vix which you can get it here
Plugins used: Penta-Color dot, Eyecandy 4000 - Gradient Glow, Xero-Radiance, Xero - Bad Dream, Lokas 3D Shadow
----------------------------
This tutorial is written for those who have working knowledge of PSPX2 (any version will do).
This tutorial was written by me on August 17, 2013. Please do not copy or paste on any other forum, website or blog provide link back to tut only. Please do not claim as your own. This tutorial is copyrighted to me. Any resemblance to any other tutorial is purely coincidental.
Ok - let's start and remember to save often.
Open the template and using your shortcut keys on your keyboard (SHIFT+D) duplicate the template as a new image. Close the original and delete the copywrite layer.
Select Element 31 and paste in the center of template
Apply Eyecandy Gradient Glow on fat default settings (Glow Width 3)
Select Grey Rectangle layer
Select all, float, defloat
Paste paper 8
Select invert, delete, select none
Delete/Hide original rectangle layer
Select Frames layer
Adjust, Add/Remove Noise, Add Noise (Uniform checked, Noise 75%, Monochrome checked)
Select Grey Squares layer
Select all, float, defloat
Add new raster layer and flood-fill with gradient of choice (Linear style, Angle 45, Repeat 2)
Paste close-up tubes of choice on top of gradient and delete
Select none
Change closeups to Overlay
Apply Xero Bad Dream at setting of choice
Apply dropshadow and merge tube down on top of gradient layer
Effect, Texture Effects, Blinds (Width 2, Opactity 20, Horizontal and Light from left/top checked)
Delete/Hide original squares layer
Select Oval layer
Select all, float, defloat
Paste paper 9
Select invert, delete, select none
Delete/hide original oval layer
Select Black Rectangles layer
Select all, float, defloat
Paste paper 4
Select invert, delete, select none
Apply Penta Colordot with the following settings:
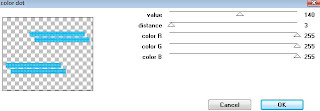
Delete/Hide original rectangles layer
Copy and paste tube of choice and position where desired
Apply Xero Radiance at setting of choice
Apply Lokas 3D Shadow at default settings
Select Element 24 - resize by 45%
Paste and position on bottom left
Select Element 2 - resize by 30%
Paste and position on bottom left
Select Element 1 - resize by 40%
Paste and position on bottom left
Select Element 27 - resize by 50%
Image Free Rotate Left by 15% and paste on bottom left
Select Element 57 - resize by 30%
Paste and position on bottom left
Select Element 55 - resize by 65%
Paste and position on bottom right
Select Element 20 - resize by 35%
Paste and position on bottom right
Select Element 23 - resize by 65%
Image mirror and paste on right side
Select Element 36 - resize by 30%
Image Free Rotate Left by 15% and paste on bottom right
Select Element 50 and paste on canvas where desired and move down to bottom layer
Select Select New raster layer and flood fill with color or gradient of choice
Move layer to the bottom of the template
Apply Mask 19
Merge group and move to the bottom
Add any additional elements you like.
Add any dropshadows you like
Crop and resize as desired
Add copyright info, license number and name
You're done! Thanks for trying my tutorial!
Labels:Scrappin Krazy Designs | 0
comments
WITHOUT YOU HERE
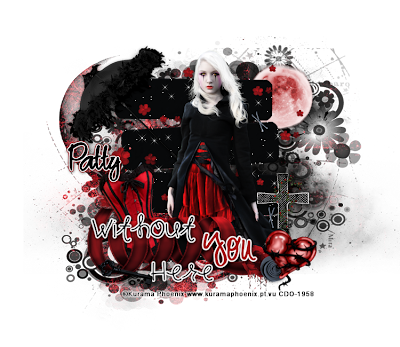
Supplies needed:
I am using the amazing art from Kurama Phoenix for for this tutorial, which you can find here
Scrapkit: I am using a stunning matching kit from Honored Scraps which you can get by going here
Mask 37 from Moonbeams and Spiderwebs which you can find here
Plugins used: Alien Skin Xenofex 2 - Constellation, Eyecandy 4000 - Gradient Glow, Xero-Radiance, Lokas 3D Shadow
----------------------------
This tutorial is written for those who have working knowledge of PSPX2 (any version will do).
This tutorial was written by me on August 17, 2013. Please do not copy or paste on any other forum, website or blog provide link back to tut only. Please do not claim as your own. This tutorial is copyrighted to me. Any resemblance to any other tutorial is purely coincidental.
Ok - let's start and remember to save often.
Open up a 750 x 650 blank canvas (we can resize it later)
Select Element 16 and paste in the center of the canvas
Apply Alien Skin Constellation with the following setting if desired:

Paste tube of choice where desired
Apply Xero Radiance at setting of choice
Apply Lokas 3D Shadow at default settings
Select Element 15 - resize by 80%
Paste and position in the center on top of element 16
Select Element 17 - resize by 65%
Paste and position on top left
Select Element 13 - resize by 90%
Paste and position on bottom
Select Element 3 - resize by 50%
Image Free Rotate Left by 15% and paste on bottom left
Select Element 9 - resize by 30%
Image Free Rotate Right by 15% and paste on bottom left
Select Element 4 - resize by 40%
Paste and position on bottom right
Select Element 8 - resize by 40%
Image Free Rotate Right by 15% and paste on bottom right
Select Element 5 - resize by 25%
Paste and position on bottom right
Select Element 10 - resize by 40%
Recolor if desired with the following settings:

Select Wordart 1 layer - resize by 55%
Paste and position on bottom left
Apply Eyecandy Gradient Glow on fat default settings (Glow Width 3)
Paste paper 1 and move to the bottom layer
Apply Mask 37 and merge group
Add any additional elements you like.
Add any dropshadows you like
Crop and resize as desired
Add copyright info, license number and name
You're done! Thanks for trying my tutorial!
Labels:CDO | 0
comments
Friday, August 16, 2013
A DARK NIGHT
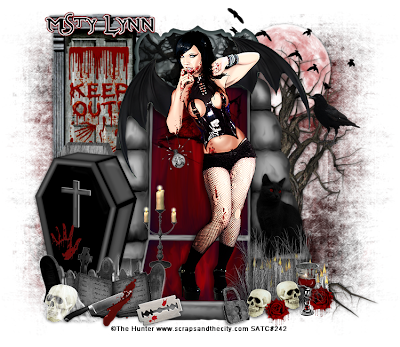
Supplies needed:
I am using the amazing art from The Hunter for for this tutorial, which you can find here
Scrapkit: I am using a wicked kit from Mistylynn's Creations called "A Dark Night" which you can get by going here
Mask 249 from Trese which you can find here
Plugins used: Xero-Radiance, Lokas 3D Shadow
----------------------------
This tutorial is written for those who have working knowledge of PSPX2 (any version will do).
This tutorial was written by me on August 16, 2013. Please do not copy or paste on any other forum, website or blog provide link back to tut only. Please do not claim as your own. This tutorial is copyrighted to me. Any resemblance to any other tutorial is purely coincidental.
Ok - let's start and remember to save often.
Open up a 750 x 650 blank canvas (we can resize it later)
Select Element 53 and paste in the center of the canvas
Move Element down about an inch from the bottom
Select Element 4 - resize by 45%
Paste and position on the top center of element 53
Paste tube of choice where desired
Apply Xero Radiance at setting of choice
Apply Lokas 3D Shadow at default settings
Select Element 76 - resize by 65%
Paste and position on top left
Select Element 2 - resize by 75%
Paste and position on bottom left
Select Element 72 - resize by 40%
Image mirror and paste on bottom left
Select your eraser tool and erase any overhanging bits
Select Element 64 - resize by 40%
Paste and position on the bottom left
Select Element 31 - resize by 25%
Paste and position on bottom left
Select Element 77 - resize by 35%
Paste and position on bottom left
Select Element 74 - resize by 30%
Image Free Rotate Left by 15%
Paste and position on bottom
Select Element 58 - resize by 40%
Paste and position on right side
Select Element 71 - resize by 55%
Paste and position on bottom right
Select Element 27 - resize by 25%
Paste and position on bottom right
Select Element 1 - resize by 45%
Paste and position on top right corner
Recolorize with the following settings if desired:
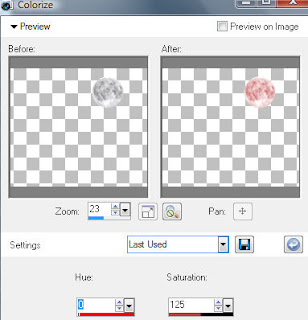
Select Element 18 - resize by 90%
Paste and position on right side
Select Element 28 - resize by 60%
Paste and position on top right over moon element
Paste paper 10 and move to the bottom layer
Apply Mask 249 and merge group
Add any additional elements you like.
Add any dropshadows you like
Crop and resize as desired
Add copyright info, license number and name
You're done! Thanks for trying my tutorial!
Labels:MistyLynn's Creations | 0
comments
Thursday, August 15, 2013
IMAGINE
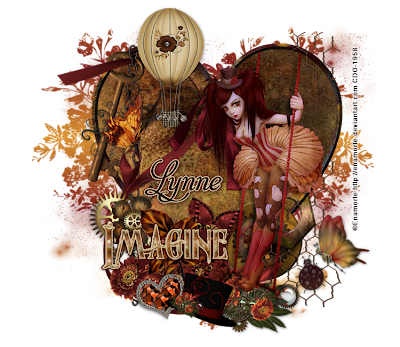
Supplies needed:
I am using the amazing art from Enamorte for for this tutorial, which you can find here
Scrapkit: I am using a gorgeous matching kit from Babycake Scraps which you can get by going here
Mask 49 from Spiderwebs & Moonbeams which you can find here
Plugins used: Eyecandy 4000 - Gradient Glow, Xero-Porcelain, Lokas 3D Shadow
----------------------------
This tutorial is written for those who have working knowledge of PSPX2 (any version will do).
This tutorial was written by me on August 15, 2013. Please do not copy or paste on any other forum, website or blog provide link back to tut only. Please do not claim as your own. This tutorial is copyrighted to me. Any resemblance to any other tutorial is purely coincidental.
Ok - let's start and remember to save often.
Open up a 750 x 650 blank canvas (we can resize it later)
Select Frame Element 3 and paste in the center of the canvas
Select your Freehand Selection tool and draw a selection around your frame area which should look something like this (Add (Shift), Feather 0, Smoothing 4, Anti-alias checked)
Paste paper 4
Select invert, delete, select none
Move paper layer below frame
Select Element 12 - resize by 50%
Paste and position on the top left
Paste tube of choice where desired
Apply Xero Porcelain at setting of choice
Apply Lokas 3D Shadow at default settings
Select Element 2 - resize by 35%
Image mirror and paste on left side
Select Element 16 - resize by 30%
Image Free Rotate Left by 15% and paste on left side
Select Element 11 - resize by 30%
Paste and position on bottom left
Select Element 25 - resize by 40%
Image Free Rotate Left by 15% and paste on bottom left
Select Element 27 - resize by 40%
Image Free Rotate Right by 15% and paste on the bottom
Select Element 4 - resize by 40%
Paste and position on bottom
Select Element 17 - resize by 40%
Image Free Rotate Right by 15% and paste on the bottom
Select Element 1 - resize by 55%
Paste and position on left side
Apply Eyecandy Gradient Glow on fat default setting (Glow Width 3)
Select Element 18 - resize by 55%
Paste and position on left side
Add new raster layer and flood-fill with color or gradient of choice
Move to the bottom layer
Apply Mask 49 and merge group
Add any additional elements you like.
Add any dropshadows you like
Crop and resize as desired
Add copyright info, license number and name
You're done! Thanks for trying my tutorial!
Labels:Babycakes Scraps | 0
comments
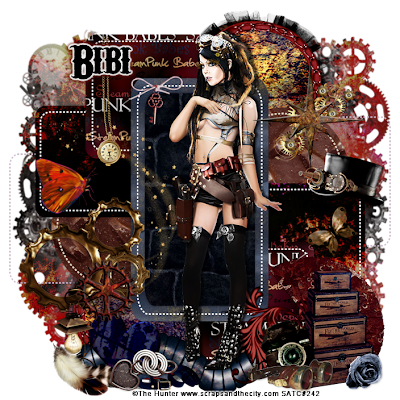
STEAMPUNK BABE
Supplies needed:
I am using the amazing art from The Hunter for this tutorial which you can find here
Scrapkit: I am using a stunning kit from Bibi's Collection called "Steampunk Babes" which you can get by going here
Template 186 from Pooker which can be found here
Mask 4 from Bitzy Beez Designz which you can find here
Plugins used: Xero-Radiance, Lokas 3D Shadow
----------------------------
This tutorial is written for those who have working knowledge of PSPX2 (any version will do).
This tutorial was written by me on August 15, 2013. Please do not copy or paste on any other forum, website or blog provide link back to tut only. Please do not claim as your own. This tutorial is copyrighted to me. Any resemblance to any other tutorial is purely coincidental.
Ok - let's start and remember to save often.
Open the template and using your shortcut keys on your keyboard (SHIFT+D) duplicate the template as a new image. Close the original and delete the copywrite layer.
Select White Rectangle layer
Select all, float, defloat
Paste paper 1
Select invert, delete, select none
Delete/Hide original rectangle layer
Select Pink Rectangle layer
Select all, float, defloat
Paste paper 10
Select invert, delete, select none
Delete/Hide original rectangle layer
Select Purple Squares layer
Select all, float, defloat
Paste paper 14
Select invert, delete, select none
Delete/hide original squares layer
Select Lt. Pink Squares layer
Select all, float, defloat
Paste paper 2
Select invert, delete, select none
Delete/Hide original squares layer
Select Purple Dotted Circles layer
Add new raster layer and flood-fill with color of choice
Reselect dotted circles
Select all, float, defloat
Select your color layer you just filled
Select invert, delete, select none
Delete/Hide original dotted circles layer
Select White Circles layer
Select all, float, defloat
Paste paper 13
Select invert, delete, select none
Delete/Hide original circles layer
Select Lt. Purple Circles layer
Select all, float, defloat
Paste paper 5
Select invert, delete, select none
Delete/Hide original circles layer
Select Element 112 - resize by 65%
Paste and position on Top Right circle
Image duplicate and reposition copy on top of bottom circle
Select Purple Dotted Outlines layer and repeat same steps from Dotted Circles
Copy and paste tube of choice and position where desired
Apply Xero Radiance at setting of choice
Apply Lokas 3D Shadow at default settings
Select Element 81 - resize by 40%
Paste and position on bottom left
Select Element 87 and paste on top of element 81 on left
Select Element 88 - resize by 45%
Image Free Rotate Right by 15% and paste on bottom left
Select Element 62 - resize by 20%
Paste and position on bottom left
Select Element 49 and paste on bottom left
Select Element 59 - resize by 25%
Paste and position on bottom left
Select Element 89 and paste on the bottom
Select Element 50 - resize by 50%
Paste and position on bottom right
Select Element 71 - resize by 30%
Image Free Rotate Left by 15% and paste on bottom right
Select Element 22 - resize by 50%
Paste and position on bottom right
Select Element 35 - resize by 40%
Image mirror and paste on right side
Select Element 2 - resize by 20%
Paste and position on top right
Select Element 102 and paste on right side
Select Element 10 - resize by 30%
Paste and position on left side
Paste paper 2 on canvas and move layer to the bottom of the template
Apply Mask 4
Merge group and move to the bottom
Add any additional elements you like.
Add any dropshadows you like
Crop and resize as desired
Add copyright info, license number and name
You're done! Thanks for trying my tutorial!
Labels:Bibi's Collections | 0
comments
Wednesday, August 14, 2013
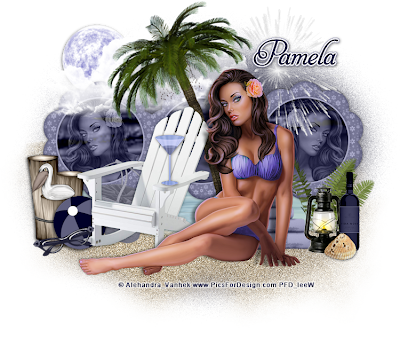
BLUE MOON
Supplies needed:
I am using the amazing art from Alehandra Vanhek for for this tutorial, which you can find here
Scrapkit: I am using a gorgeous kit from Redefined Designs called "Blue Moon" which you can get by going here
Mask 80 from Designs by Vaybs which you can find here
Plugins used: Xero-Porcelain, Lokas 3D Shadow
----------------------------
This tutorial is written for those who have working knowledge of PSPX2 (any version will do).
This tutorial was written by me on August 14, 2013. Please do not copy or paste on any other forum, website or blog provide link back to tut only. Please do not claim as your own. This tutorial is copyrighted to me. Any resemblance to any other tutorial is purely coincidental.
Ok - let's start and remember to save often.
Open up a 750 x 650 blank canvas (we can resize it later)
Select Frame 4 and paste in the center of the canvas
Select your magic wand tool and click in the center of each circle frame (Add (Shift), RGB Value, Tolerance 25, Contiguous checked, Feather 0)
Selections, Modify, Expand by 5
Paste paper 2
Select invert, delete
Paste close-up tubes on top of paper layer where desired and delete
Select none
Drop opacity on close-ups down to 65%
Apply dropshadow and merge tubes down on top of paper layer
Move paper layer below frame
Select Water Element - resize by 80%
Paste and position on the bottom
Paste tube of choice where desired
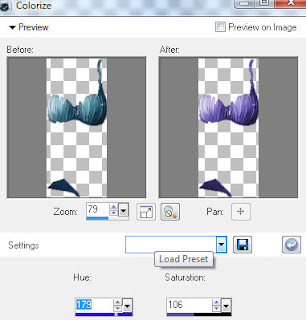
Select your magic wand tool and select the bathing suit area on tube if you want to recolor like I did with the following settings:
Apply Xero Porcelain at setting of choice
Apply Lokas 3D Shadow at default settings
Select Tree Element - resize by 50%
Image Free Rotate Left by 15% and paste behind tube layer
Select Moon Element - resize by 35%
Paste and position on top left
Recolor with the following settings if desired:
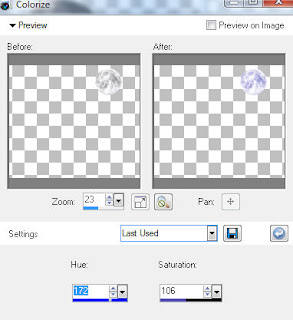
Select Clouds Element - resize by 65%
Paste and position on top left above moon element
Select Chair Element - resize by 30%
Paste and position on left side
Select Pelican Element - resize by 30%
Paste and position on left side
Select Ball Element - resize by 20%
Paste and position on bottom left side
Select Glasses Element - resize by 25%
Image Free Rotate Left by 15% and paste on bottom left
Select Fern Element - resize by 30%
Paste and position on bottom right
Select Wine Element - resize by 25%
Paste and position on bottom right
Select Lantern Element - resize by 10%
Paste and position on bottom right
Select Towels Element - resize by 25%
Paste and position on bottom right
Select Fireworks Element - resize by 50%
Paste and position on top right below tube layer
Select Sand Element and paste towards the bottom and move to bottom layer
Paste Paper 4 on canvas and move to the bottom layer
Apply Mask 80 and merge group
Add any additional elements you like.
Add any dropshadows you like
Crop and resize as desired
Add copyright info, license number and name
You're done! Thanks for trying my tutorial!
Labels:Redefined Designs | 0
comments
THE DARKEST ANGEL
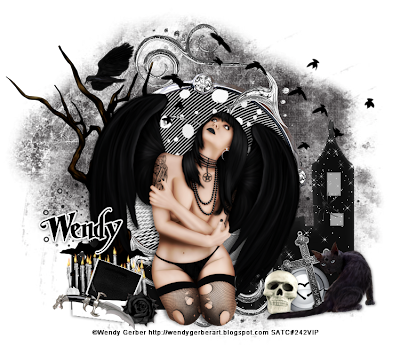
Supplies needed:
I am using the amazing art from Wendy Gerber for for this tutorial, which you can find here
Scrapkit: I am a wicked kit from Black Widow Creationz called "Dark Angel" which you can get by going here
Grunge Mask 1 from Boundless Bliss. Unfortunately Theresa no longer has her site but I believe she allows her masks to be shared, you can get it here
Plugins used: Xero-Radiance, Lokas 3D Shadow
----------------------------
This tutorial is written for those who have working knowledge of PSPX2 (any version will do).
This tutorial was written by me on August 14, 2013. Please do not copy or paste on any other forum, website or blog provide link back to tut only. Please do not claim as your own. This tutorial is copyrighted to me. Any resemblance to any other tutorial is purely coincidental.
Ok - let's start and remember to save often.
Open up a 750 x 650 blank canvas (we can resize it later)
Select Element 30 and paste in the center of the canvas
Move the element down a bit about 1 1/2 inches from the bottom
Select Frame Element 31 and paste in the center of the canvas
Select your magic wand tool and click in the center of the frame (Add (Shift), RGB Value, Tolerance 25, Contiguous checked, Feather 0)
Selections, Modify, Expand by 2
Paste paper 8
Select invert, delete, select none
Move paper layer below frame
Select Element 23 and reposition on the left side
Paste tube of choice where desired
Apply Xero Radiance at setting of choice
Apply Lokas 3D Shadow at default settings
Select Element 13 - resize by 30%
Paste and position on bottom left
Select Element 36 - resize by 30%
Paste and position on bottom left
Select Element 34 - resize by 30%
Paste and position on bottom left
Select Element 19 - resize by 20%
Paste and position on bottom left
Select Element 20 - resize by 35%
Paste and position on bottom right
Select Element 33 - resize by 45%
Paste and position on bottom right
Select Element 15 - resize by 25%
Paste and position on bottom right
Select Element 35 - resize by 40%
Image Free Rotate Left by 15% and paste on bottom right
Adjust, Sharpness, Sharpen
Select Element 16 - resize by 60%
Paste and position on top above tube
Paste Paper 2 on canvas and move to the bottom layer
Apply Grunge Mask and merge group
Add any additional elements you like.
Add any dropshadows you like
Crop and resize as desired
Add copyright info, license number and name
You're done! Thanks for trying my tutorial!
Labels:Scraps and the City,Wendy Gerber | 0
comments
Tuesday, August 13, 2013
BLACK HEART
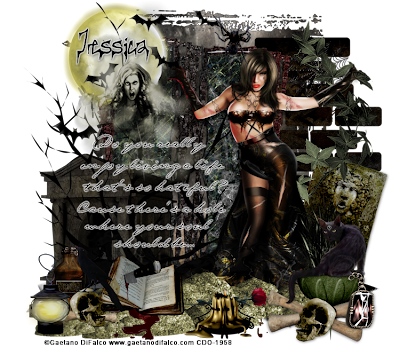
Supplies needed:
I am using the amazing art from Gaetano DiFalco for for this tutorial, which you can find here
Scrapkit: I am a wicked kit from Gothic Inspirations called "Black Heart" which you can get by going here
Plugins used: Xero-Radiance, Lokas 3D Shadow
----------------------------
This tutorial is written for those who have working knowledge of PSPX2 (any version will do).
This tutorial was written by me on August 13, 2013. Please do not copy or paste on any other forum, website or blog provide link back to tut only. Please do not claim as your own. This tutorial is copyrighted to me. Any resemblance to any other tutorial is purely coincidental.
Ok - let's start and remember to save often.
Open up a 750 x 650 blank canvas (we can resize it later)
Select GI Mask from the kit and paste in the center of the canvas
Resize by 90%
Select Bricks Element - resize by 50%
Paste and position on top right side
Select Frame 2 Element - resize by 80%
Paste and position in the center of the canvas
Select your magic wand tool and click in the center of each frame (Add (Shift), RGB Value, Tolerance 25, Contiguous checked, Feather 0)
Selections, Modify, Expand by 2
Paste paper 7
Select invert, delete, select none
Move paper layer below frame
Select Ivy2 Element - resize by 50%
Paste and position on top right corner
Paste tube of choice where desired
Apply Xero Radiance at setting of choice
Apply Lokas 3D Shadow at default settings
Select Moon Element - resize by 30%
Paste and position on top left corner
Select Bats Element - resize by 55%
Paste and position on top left
Select Ghoast Element - resize by 80%
Paste and position on left side
Select Tomb Element - resize by 40%
Paste and position on left side
Select Tree2 Element - resize by 75%
Image mirror and paste on left side
Select Rocks Element - mirror and paste on the bottom
Select Book Element - resize by 35%
Paste and position on bottom left side
Select Lamp Element - resize by 25%
Paste and position on bottom left
Select Bottle Element - resize by 20%
Paste and position on bottom left
Select Skull2 Element - resize by 15%
Image mirror and paste on bottom left
Select Candle Element - resize by 25%
Paste and position on bottom
Select Stone Element - resize by 25%
Image Free Rotate Right by 15% and paste on right side
Select Kitty Element - resize by 40%
Paste and position on bottom right
Select Bones Element - resize by 40%
Paste and position on bottom right
Select Skull2 Element - resize by 15%
Paste and position on bottom right
Select WordArt3 - resize by 55%
Paste and position on left side
Apply Eyecandy Gradient Glow on Medium default settings
Add any additional elements you like.
Add any dropshadows you like
Crop and resize as desired
Add copyright info, license number and name
You're done! Thanks for trying my tutorial!
Labels:Gothic Inspirations | 0
comments
Subscribe to:
Comments
(Atom)

