Labels
- Alikas Scraps
- All Dolled Up Store
- Amy Marie
- Annaica
- Arthur Crowe
- Babycakes Scraps
- Barbara Jensen
- Bibi's Collections
- Black Widow Creationz
- Blu Moon
- Bonnies Creations
- Bookwork Dezines
- Broken Sky Dezine
- Carita Creationz
- Carpe Diem Designs
- CDO
- Celinart Pinup
- Celine
- Chacha Creationz
- Charmed Designs
- Cherry Blossom Designs
- Chili Designz
- Cluster Frame
- Creative Misfits
- Creative Scraps by Crys
- Curious Creative Dreams
- Danny Lee
- Derzi
- Designs by Ali
- Designs by Joan
- Designs by Ketura
- Designs By Norella
- Designs by Vi
- Diana Gali
- Diry Art Designs
- Disturbed Scraps
- Dreaming With Bella
- Eclipse Creations
- Elegancefly
- Extras
- Fabulous Designz
- Forum Set
- Foxy's Designz
- Freek's Creation
- FTU
- FwTags
- Goldwasser
- Gothic Inspirations
- Gothic Raven Designs
- Graphfreaks
- Hania's Designs
- Happy Pumpkin Studios
- Horseplay's Pasture Designs
- indie-Zine
- Irish Princess Designs
- Ishika Chowdhury
- Kaci McVay
- Kajenna
- katharine
- Katherine
- Khloe Zoey
- Killer Kitty
- Kissing Kate
- KiwiFirestorm
- Kiya Designs
- Kizzed by Kelz
- KZ Designz
- Lady Mishka
- Lil Mz Brainstorm
- Maiden of Darkness
- Mariel Designs
- MellieBeans
- Michelle's Myths
- Midnight Shadow
- Misticheskya
- MistyLynn's Creations
- MMeliCrea Designz
- Moon Vixen Designs
- NaSionainne
- Ninaste
- Niqui Designs
- Pandora
- Picsfordesign
- Pink Paradox Productions
- Radyga Designs
- Redefined Designs
- Rissa's Designs
- Schnegge
- ScottishButterfly Creations
- Scrappin Krazy Designs
- Scrappin With Lil Ol Me
- Scraps and the City
- Scraps Dimensions
- Scraps From The Heart
- Scraps N Company
- Scraps with Attitude
- Shining Star Art
- Skyscraps
- Sleek N Sassy Designs
- Sophisticat Simone
- Souldesigner
- Soxsational Scraps
- Spazz
- Starlite and Soul
- Stella Felice
- Tammy Welt
- Tasha's Playground
- The PSP Project
- Thrifty Scraps by Gina
- Tiny Turtle Designs
- Upyourart
- Verymany
- Wendy Gerber
- Whisper In the Wind
- Wick3d Creationz
- Wicked Diabla
- Yude's Kreationz
Blog Archive
Saturday, November 30, 2013
TRUTH EXISTS
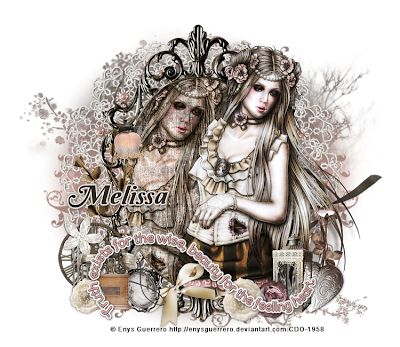
Supplies needed:
I am using the amazing art from Enys Guerrero for for this tutorial, which you can find here
Scrapkit: I am using a beautiful matching kit from WDDesignz "IB-EnysGuerrero-8-1" which you can get by going here
Mask 53 from Moonbeams and Spiderwebs which you can find here
Plugins used: Mura Meister - Copies, Eyecandy-Gradient Glow, Xero-Radiance, Xero-Bad Dream, Lokas 3D Shadow
----------------------------
This tutorial is written for those who have working knowledge of PSPX2 (any version will do).
This tutorial was written by me on November 30, 2013. Please do not copy or paste on any other forum, website or blog provide link back to tut only. Please do not claim as your own. This tutorial is copyrighted to me. Any resemblance to any other tutorial is purely coincidental.
Ok - let's start and remember to save often.
Open up a 750 x 650 blank canvas (we can resize it later)
Select Frame Element 24 and paste in the center of the canvas
Resize by 85%
Select your magic wand tool and click in the center of the Frame (Add (Shift), RGB Value, Tolerance 25, Contiguous checked, Feather 0)
Selections, Modify, Expand by 2
Paste paper 4
Select invert, delete,
Paste a close-up tube of choice on the top of paper where desired and delete, select none
Change close-up to Overlay
Apply Bad Dream on default settings of choice
Apply dropshadow and merge tube down on top of paper layer
Move paper/tube layer below frame
Paste tube of choice where desired
Apply Xero Radiance at setting of choice
Apply Lokas 3D Shadow at default settings
Select Element 16 - resize by 30%
Paste and position on top left
Select Element 14 - resize by 25%
Paste and position on bottom right
Select Element 17 - resize by 20%
Paste and position on bottom right
Select Element 19 - resize by 25%
Paste and position on bottom right
Select Element 7 - resize by 12%
Paste and position on bottom right
Select Element 12 - resize by 15%
Paste and position on bottom right
Select Element 22 - resize by 25%
Paste and position on bottom left
Select Element 13 - resize by 25%
Paste and position on bottom left
Select Element 18 - resize by 20%
Image Free Rotate Left by 15% and paste on bottom left
Select Element 21 - resize by 25%
Paste and position on bottom left
Select Element 12 - resize by 12%
Paste and position on bottom left
Select Element 3 - resize by 50%
Paste and position on bottom left
Select Element 1 - resize by 50%
Paste and position on bottom where desired
Apply Eyecandy Gradient Glow on fat default settings (Glow Width 3)
Select Element 10 - resize by 30%
Apply Mura Meister - Copies with the following Encircle setting:
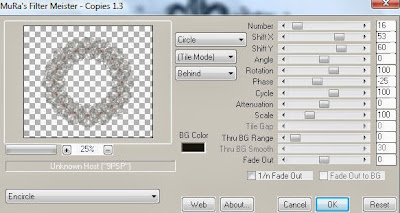
Move to the bottom layer
Add new raster layer and flood-fill with color or gradient of choice
Move to bottom layer
Apply Mask 53 and merge group
Add any additional elements you like.
Add any dropshadows you like
Sharpen any elements as needed
Crop and resize as desired
Add copyright info, license number and name
You're done! Thanks for trying my tutorial!
Labels:CDO | 0
comments
BREATH OF AUTUMN
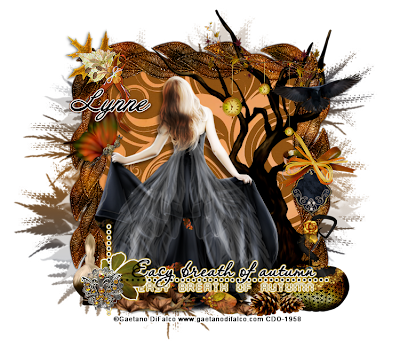
Supplies needed:
I am using the amazing art from Gaetano DiFalco for for this tutorial, which you can find here
Scrapkit: I am using a beautiful matching kit from Babycake Scraps "IB-GaetanoDiFalco-11-2" which you can get by going here
Fall Mask 12 from Dee which you can find here
Plugins used: Eyecandy 4000 - Gradient Glow, Xero-Radiance, Xero-Bad Dream, Lokas 3D Shadow
----------------------------
This tutorial is written for those who have working knowledge of PSPX2 (any version will do).
This tutorial was written by me on November 30, 2013. Please do not copy or paste on any other forum, website or blog provide link back to tut only. Please do not claim as your own. This tutorial is copyrighted to me. Any resemblance to any other tutorial is purely coincidental.
Ok - let's start and remember to save often.
Open up a 750 x 650 blank canvas (we can resize it later)
Select Frame Element 35 and paste in the center of the canvas
Select your magic wand tool and click in the center of the Frame (Add (Shift), RGB Value, Tolerance 25, Contiguous checked, Feather 0)
Selections, Modify, Expand by 5
Paste paper 3
Select invert, delete, select none
Move paper layer below frame
Paste tube of choice where desired
Apply Xero Radiance at setting of choice
Apply Lokas 3D Shadow at default settings
Select Element 29 - resize by 85%
Paste and position on right side below tube layer
Select Element 8 - resize by 65%
Paste and position on top right
Select Element 28 - resize by 40%
Paste and position on top right
Select Element 16 - resize by 65%
Paste and position on top left
Select Element 23 - resize by 50%
Paste and position on bottom right
Select Element 11 - resize by 55%
Paste and position on bottom right
Select Element 10 - resize by 30%
Paste and position on bottom right
Select Element 30 - resize by 50%
Paste and position on bottom left
Select Element 31 - resize by 40%
Paste and position on bottom left
Select Element 2 - resize by 55%
Paste and position on bottom left
Select Element 27 - resize by 90%
Paste and position on bottom where desired
Apply Eyecandy Gradient Glow on fat default settings (Glow Width 3)
Select Element 12 - resize by 55%
Paste and position on right side
Select Element 36 - resize by 30%
Paste and position on right side
Select Element 15 - resize by 55%
Paste and position on top left
Add new raster layer and flood-fill with color or gradient of choice
Move to bottom layer
Apply Mask 12 and merge group
Add any additional elements you like.
Add any dropshadows you like
Sharpen any elements as needed
Crop and resize as desired
Add copyright info, license number and name
You're done! Thanks for trying my tutorial!
Labels:Babycakes Scraps,CDO | 0
comments
Friday, November 29, 2013
ANGEL OF DEATH
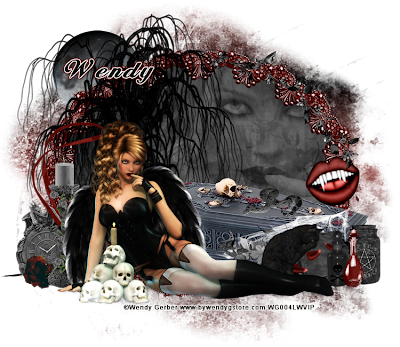
Supplies needed:
I am using the amazing art from Wendy Gerber for for this tutorial, which you can find here
Scrapkit: I am using a wicked kit from AmyMarie called "Angel of Death" which you can get by going here
GrungeMask from Boundless Bliss which you can find here
Plugins used: Xero-Radiance, Xero-Bad Dream, Lokas 3D Shadow
----------------------------
This tutorial is written for those who have working knowledge of PSPX2 (any version will do).
This tutorial was written by me on November 29, 2013. Please do not copy or paste on any other forum, website or blog provide link back to tut only. Please do not claim as your own. This tutorial is copyrighted to me. Any resemblance to any other tutorial is purely coincidental.
Ok - let's start and remember to save often.
Open up a 750 x 650 blank canvas (we can resize it later)
Select Frame Element 3 and paste in the center of the canvas
Resize by 90%
Select your magic wand tool and click in the center of the Frame (Add (Shift), RGB Value, Tolerance 25, Contiguous checked, Feather 0)
Selections, Modify, Expand by 5
Paste paper 1
Select invert, delete
Paste a close-up tube of choice on the top of paper where desired and delete, select none
Change close-up to Luminance (Legacy)
Drop opacity on tube down to 35%
Apply Bad Dream on default settings of choice
Apply dropshadow and merge tube down on top of paper layer
Move paper/tube layer below frame
Paste tube of choice where desired
Apply Xero Radiance at setting of choice
Apply Lokas 3D Shadow at default settings
Select Coffin Element and paste on bottom right side below tube layer
Select Jar Element - resize by 45%
Paste and position on bottom right
Select Bottle Element - resize by 30%
Paste and position on bottom right
Select Bottle 3 Element - resize by 30%
Paste and position on bottom right
Select Book Element - resize by 30%
Paste and position on bottom right
Select Rosepetals1 Element - resize by 25%
Paste and position on bottom right
Select Spiderweb Element - resize by 50%
Paste and position on bottom right
Select Cat Element - resize by 30%
Paste and position on bottom right
Select Candle4 Element - resize by 50%
Paste and position on bottom left side
Select Clock Element - resize by 40%
Paste and position on bottom left
Select Rose2 Element - resize by 20%
Paste and position on bottom left
Select Deadtree1 Element - resize by 80%
Image mirror and paste on left side and move below frame layer
Select Moon Element - resize by 40%
Paste and position on top left below tree layer
Select Vampteeth Element - resize by 40%
Image Free Rotate Left by 15% and paste on right side
Add new raster layer and flood-fill with color or gradient of choice
Move to bottom layer
Apply Grunge Mask and merge group
Add any additional elements you like.
Add any dropshadows you like
Sharpen any elements as needed
Crop and resize as desired
Add copyright info, license number and name
You're done! Thanks for trying my tutorial!
Labels:Wendy Gerber | 0
comments
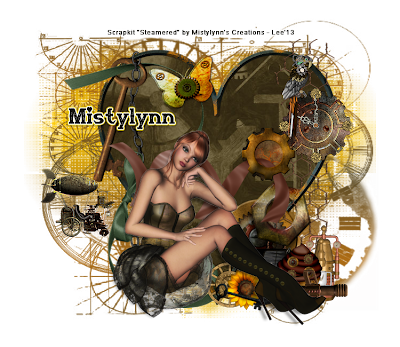
STEAMERED
Supplies needed:
Scrapkit: I am using an awesome kit from Mistylynn's Creations called "Steamered" which you can get by going here
Heart Mask 2 from Babs Bitzy Designs which you can find here
Masl 291 from Trese which you can find here
Plugins used: Xero-Radiance, Xero-Bad Dream, Lokas 3D Shadow
----------------------------
This tutorial is written for those who have working knowledge of PSPX2 (any version will do).
This tutorial was written by me on November 29, 2013. Please do not copy or paste on any other forum, website or blog provide link back to tut only. Please do not claim as your own. This tutorial is copyrighted to me. Any resemblance to any other tutorial is purely coincidental.
Ok - let's start and remember to save often.
Open up a 750 x 650 blank canvas (we can resize it later)
Select Frame Element 13 and paste in the center of the canvas
Resize by 85%
Select your Freehand Selections tool and Select the aread around the Frame (Add (Shift), Feather 0, Smoothing 4, Anti-alias checked)
Selections, Modify, Expand by 3
Paste paper 7
Select invert, delete, select none
Move paper layer below frame
Paste Tube Element 19 and paste where desired
Apply Xero Radiance at setting of choice
Apply Lokas 3D Shadow at default settings
Select Element 8 - resize by 35%
Paste and position on top right
Selecct Element 6 - resize by 25%
Paste and position on top right
Select Element 14 - resize by 40%
Paste and position on top right
Select Element 48 - resize by 30%
Image Free Rotate Left by 15% and paste on top left
Select Element 26 - resize by 40%
Paste and position on bottom right
Select Element 52 - resize by 25%
Paste and position on bottom right
Select Element 29 - resize by 30%
Paste and position on bottom right
Select Element 11 - resize by 20%
Paste and position on bottom right
Select Element 23 - resize by 25%
Paste and position on bottom right
Select Element 50 - resize by 35%
Image mirror and paste on left side
Add new raster layer and flood-fill with color of choice
Apply Mask 291 and merge group
Move to bottom layer
Add new raster layer and flood-fill with color of choice
Apply Heart Mask 2 and merge group
Move to bottom layer
Add any additional elements you like.
Add any dropshadows you like
Sharpen any elements as needed
Crop and resize as desired
Add copyright info, license number and name
You're done! Thanks for trying my tutorial!
Labels:MistyLynn's Creations | 0
comments
Thursday, November 28, 2013
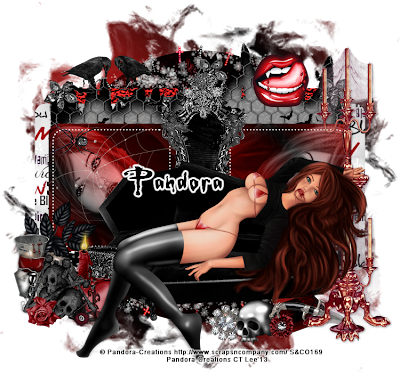
VAMPRIESS
Supplies needed:
I am using the amazing artwork from Pandora Creations for this tutorial which you can find here
Scrapkit: I am using a stunning kit from Bibi's Collections called "Vampire" which you can get by going here
Template 438 by Millie which can be found here
Mask 180 from Insatiable Dreams which you can find here
Plugins used: Xero-Radiance, Xero - Bad Dream, Lokas 3D Shadow
----------------------------
This tutorial is written for those who have working knowledge of PSPX2 (any version will do).
This tutorial was written by me on November 28, 2013. Please do not copy or paste on any other forum, website or blog provide link back to tut only. Please do not claim as your own. This tutorial is copyrighted to me. Any resemblance to any other tutorial is purely coincidental.
Ok - let's start and remember to save often.
Open the template and using your shortcut keys on your keyboard (SHIFT+D) duplicate the template as a new image. Close the original and delete the copywrite layer.
Select Square 8 layer
Select all, float, defloat
Add new raster layer and flood-fill with gradient or color of choice (Linear style, Angle 45, Repeat 2)
Paste close-up tube of choice on top of gradient and delete
Select none
Change closeups to Luminance (Legacy)
Apply Xero Bad Dream at setting of choice
Drop opacity down to 75% on tubes
Apply dropshadow and merge tube down on top of gradient layer
Effect, Texture Effects, Blinds (Width 2, Opactity 10, Horizontal and Light from left/top checked)
Delete/Hide original square layer
Select Square 7 layer and repeat above steps
Select Square 5 layer
Select all, float, defloat
Paste paper 7
Select invert, delete, select none
Delete/hide original square layer
Select Element 117 - resize by 80%
Paste and position on top of square 5 where desired
Select Rectangle 4 layer
Select all, float, defloat
Paste paper 9
Select invert, delete, select none
Delete/Hide original rectangle layer
Select Rectangle 3 layer and repeat above steps
Select Square 2 layer
Select all, float, defloat
Add new raster layer and flood-fill with color of choice
Select none
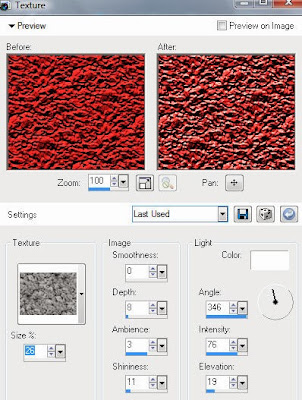
Apply Texture with the following Plant Leave texure settings:
Delete/Hide original square layer
Select Circle 1 layer
Select all, float, defloat
Paste paper 2
Select invert, delete, select none
Delete/Hide original circle layer
Select Element 38 and paste on top of circle layer
Copy and paste tube of choice and position where desired
Apply Xero Radiance at setting of choice
Apply Lokas 3D Shadow at default settings
Select Element 126 - resize by 35%
Paste and position on the center of template where desired
Select Element 99 - resize by 65%
Paste and position on right side
Select Element 121 - resize by 75%
Paste and position on the bottom center below tube layer
Select Element 132 - resize by 25%
Paste and position on bottom right
Select Element 6 - resize by 20%
Paste and position on bottom right
Select Element 10 and paste on bottom right
Select Element 107 - resize by 30%
Paste and position on bottom left
Select Element 28 - resize by 50%
Paste and position on bottom left
Select Element 115 - resize by 30%
Paste and position on bottom left
Select Element 34 - resize by 20%
Paste and position on botton left
Select Element 83 - resize by 45%
Paste and position on bottom left
Select Element 128 - resize by 25%
Paste and position on bottom left
Select Element 61 - resize by 45%
Paste and position on top right
Select Element 46 - resize by 45%
Paste and position on top left
Select New raster layer and flood fill with color or gradient of choice
Move layer to the bottom of the template
Apply Mask 180
Merge group and move to the bottom
Add any additional elements you like.
Add any dropshadows you like
Crop and resize as desired
Add copyright info, license number and name
You're done! Thanks for trying my tutorial!
Labels:Bibi's Collections,Pandora | 0
comments
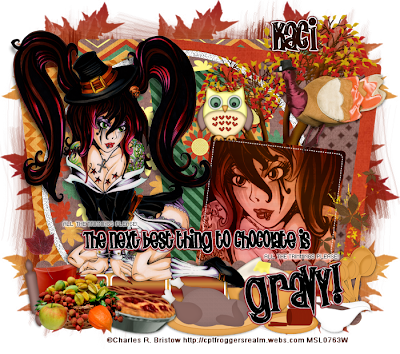
GOBBLE GOBBLE
Supplies needed:
I am using the amazing artwork from Charles Bristow for this tutorial which you can find here
Scrapkit: I am using a beautiful kit from Scrappin Krazy Designs called "Gobble Gobble" which you can get by going here
Mask 260 by Vix which can be found here
Mask 117 by Weescottslass which can be found here
Template from Dee which you can find here
Plugins used: Eyecandy 4000 - Glass, Eyecandy 4000 - Gradient Glow, Xero-Radiance, Xero - Bad Dream, Lokas 3D Shadow
----------------------------
This tutorial is written for those who have working knowledge of PSPX2 (any version will do).
This tutorial was written by me on November 28, 2013. Please do not copy or paste on any other forum, website or blog provide link back to tut only. Please do not claim as your own. This tutorial is copyrighted to me. Any resemblance to any other tutorial is purely coincidental.
Ok - let's start and remember to save often.
Open the template and using your shortcut keys on your keyboard (SHIFT+D) duplicate the template as a new image. Close the original and delete the copywrite layer.
Select Pixel words and apply Eyecandy Graident Glow on medium default settings (Glow Width 3)
Select "Gravy" Wordart layer
Apply Eyecandy Glass on default settings
Apply Eyecandy Gradient glow on fat default settings (Glow Width 3)
Select "the next best thing" Wordart layer
Apply same Gradient Glow
Select Blue Inside Frames layer
Select all, float, defloat
Add new raster layer and flood-fill with gradient of choice (Linear style, Angle 0, Repeat 2)
Select none
Effect, Texture Effects, Blinds (Width 2, Opacity 25, Horizontal and Light from left/top checked)
Delete/Hide original frames layer
Select Rust Strip layer
Select all, float, defloat
Add new raster layer and flood-fill with color of choice
Select none
Delete/Hide original strip layer
Select Brown Scalloped Shape layer
Select all, float, defloat
Paste paper 2
Select invert, delete, select none
Delete/Hide original scalloped layer
Select Small Blue Square layer
Select all, float, defloat
Add new raster layer and flood-fill with gradient or color of choice (Linear style, Angle 45, Repeat 2)
Paste close-up tube of choice on top of gradient and delete
Select none
Change closeups to Luminance (Legacy)
Apply Xero Bad Dream at setting of choice
Drop opacity down to 75% on tube
Apply dropshadow and merge tube down on top of gradient layer
Effect, Texture Effects, Blinds (Width 2, Opactity 15, Horizontal and Light from left/top checked)
Delete/Hide original square layer
Select Creme Circle layer
Select all, float, defloat
Paste paper 7
Select invert, delete, select none
Delete/Hide original circle layer
Select Brown Strip layer
Select all, float, defloat
Paste paper 11
Select invert, delete, select none
Delete/Hide original strip layer
Select Rust Circle layer
Select all, float, defloat
Paste paper 6
Select invert, delete, select none
Delete/Hide original circle layer
Select Creme Strip layer
Select all, float, defloat
Paste paper 10
Select invert, delete, select none
Delete/Hide original strip layer
Select Blue Rectanlge layer
Select all, float, defloat
Paste paper 9
Select all, float, defloat
Select none
Delete/Hide original rectangle layer
Select Brown Square layer
Select all, float, defloat
Paste paper 13
Select invert, delete, select none
Delete/Hide original square layer
Select Creme Square layer
Select all, float, defloat
Paste paper 14
Select invert, delete, select none
Delete/Hide original square layer
Copy and paste tube of choice and position where desired
Apply Xero Radiance at setting of choice
Apply Lokas 3D Shadow at default settings
Select Element 41 - resize by 85%
Paste and position on right side where desired
Select Element 50 - resize by 55%
Paste and position on top right
Select Element 13 - resize by 30%
Paste and position on bottom right below wordart
Select Element 29 - resize by 35%
Image mirror and paste on bottom right
Image Free Rotate Right by 10%
Select Element 27 - resize by 30%
Paste and position on bottom right
Select Element 30 - resize by 45%
Paste and position on bottom
Select Element 42 - resize by 45%
Image Free Rotate Right by 10% and paste on bottom
Select Element 37 - resize by 35%
Image mirror and paste on bottom left
Select Element 51 - resize by 40%
Paste and position on bottom left
Select Element 35 - resize by 20%
Paste and position on bottom left
Select Element 36 - resize by 16%
Paste and position on bottom left
Select Element 3 - resize by 25%
Paste and position on top right
Select New raster layer and flood fill with color or gradient of choice
Move layer to the bottom of the template
Apply Mask 117
Merge group and move to the bottom
Add new raster layer and flood-fill with color or gradient of choice
Apply Mask 260
Merge group and move to the bottom layer
Add any additional elements you like.
Add any dropshadows you like
Crop and resize as desired
Add copyright info, license number and name
You're done! Thanks for trying my tutorial!
Labels:Scrappin Krazy Designs | 0
comments
Wednesday, November 27, 2013
SANTA'S HELPER
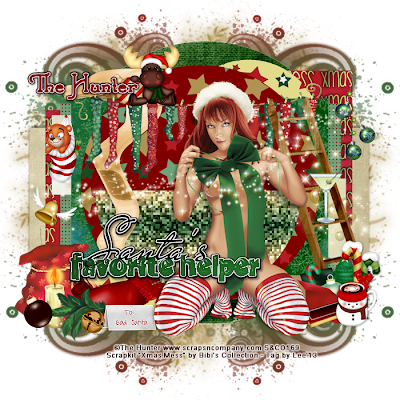
Supplies needed:
I am using the amazing artwork from The Hunter for this tutorial which you can find here
Scrapkit: I am using a beautiful matching kit from Bibi's Collections called "Xmas Mess" which you can get by going here
Masks 35 & 90 by Trese which can be found here
Template 43 from Cakes which you can find here
Plugins used: Xero - Fritillary, Xero-Radiance, Xero - Bad Dream, Lokas 3D Shadow
----------------------------
This tutorial is written for those who have working knowledge of PSPX2 (any version will do).
This tutorial was written by me on November 27, 2013. Please do not copy or paste on any other forum, website or blog provide link back to tut only. Please do not claim as your own. This tutorial is copyrighted to me. Any resemblance to any other tutorial is purely coincidental.
Ok - let's start and remember to save often.
Open the template and using your shortcut keys on your keyboard (SHIFT+D) duplicate the template as a new image. Close the original and delete the copywrite layer.
Select Wordart 1 layer
Select your selections tool and select "favorite helper" wording
Add new raster layer and flood-fill with color of choice
Select none
Apply Eyecandy Glass on default settings and merge down
Select Half Circle 4 layer
Select all, float, defloat
Add new raster layer and flood-fill with gradient of choice (Linear style, Angle 0, Repeat 2)
Select none
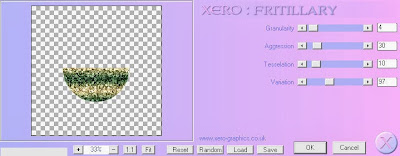
Apply Xero- Fritillary with the following settings:
Delete/Hide original circle layer
Select Red Circle 5 layer
Select all, float, defloat
Paste paper 10
Select invert, delete, select none
Delete/hide original circle layer
Select Square 6 layer
Select all, float, defloat
Paste paper 4
Select invert, delete, select none
Delete/Hide original square layer
Select Rectangles 7 layer
Select all, float, defloat
Paste paper 3
Select invert, delete, select none
Delete/Hide original rectangles layer
Select Circle 8 layer
Select all, float, defloat
Paste paper 9
Select invert, delete, select none
Delete/Hide original circle layer
Select Circle 9 layer and repeat above steps
Select Rectangle 10 layer
Select all, float, defloat
Add new raster layer and flood-fill with color of choice
Select none
Apply Effects, Texture Effects, Weave (Gap size 2, Width 4, Opacity 5, Fill gaps checked, change Gap and Weave color to one of choice)
Delete/Hide original rectangle layer
Select Rectangle 11 layer
Select all, float, defloat
Paste paper 5
Select invert, delete, select none
Delete/Hide original rectangle layer
Select Rectangle 12 layer and repeat above steps
Select Rectangle 13 layer
Select all, float, defloat
Paste paper 1
Select invert, delete, select none
Delete/Hide original rectangle layer
Select Square 14 layer
Select all, float, defloat
Paste paper 7
Select invert, delete, select none
Delete/Hide original square layer
Select Square 15 layer and repeat above steps
Select Circle 16 layer
Select all, float, defloat
Paste paper 8
Select all, float, defloat
Select none
Delete/Hide original circle layer
Select Element 46 - resize by 45%
Paste and position on left side above template
Select Element 36 - resize by 55%
Paste and position on top of template
Select Element 52 - resize by 40%
Paste and position on top of Element 36
Copy and paste tube of choice and position where desired
Apply Xero Radiance at setting of choice
Apply Lokas 3D Shadow at default settings
Select Element 33 - resize by 65%
Paste and position on right side
Select Element 50 - resize by 45%
Paste and position on bottom right
Select Element 1 - resize by 35%
Paste and position on bottom right
Select Element 6 - resize by 35%
Paste and position on bottom right
Select Element 34 - resize by 40%
Paste and position on bottom left
Select Element 51 - resize by 45%
Paste and position on bottom left
Select Element 18 - resize by 45%
Paste and position on bottom left
Select Element 53 - resize by 30%
Paste and position on bottom left
Select Element 24 - resize by 35%
Paste and position on bottom left
Select Element 39 - resize by 60%
Paste and position on bottom left
Select Element 44 - resize by 25%
Paste and position on bottom left
Select Element 59 - resize by 40%
Paste and position on top left
Select New raster layer and flood fill with color or gradient of choice
Move layer to the bottom of the template
Apply Mask 90
Merge group and move to the bottom
Add new raster layer and flood-fill with color of choice
Apply Mask 35
Merge group and move to the bottom layer
Add any additional elements you like.
Add any dropshadows you like
Crop and resize as desired
Add copyright info, license number and name
You're done! Thanks for trying my tutorial!
Labels:Bibi's Collections,Scraps N Company | 0
comments
Monday, November 25, 2013
FAIRY FANTASY
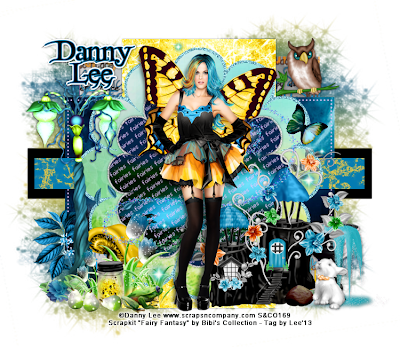
Supplies needed:
I am using the amazing artwork from Danny Lee for this tutorial which you can find here
Scrapkit: I am using a beautiful matching kit from Bibi's Collections called "Fairy Fantasy" which you can get by going here
Template by Adele which can be found on the Creative Addictions Blog here
Mask 16 from Gina Gems which you can find here
Plugins used: Penta - Color dots, Eyecandy 4000 - Marble, Xero-Radiance, Xero - Bad Dream, Lokas 3D Shadow
----------------------------
This tutorial is written for those who have working knowledge of PSPX2 (any version will do).
This tutorial was written by me on November 25, 2013. Please do not copy or paste on any other forum, website or blog provide link back to tut only. Please do not claim as your own. This tutorial is copyrighted to me. Any resemblance to any other tutorial is purely coincidental.
Ok - let's start and remember to save often.
Open the template and using your shortcut keys on your keyboard (SHIFT+D) duplicate the template as a new image. Close the original and delete the copywrite layer.
Adjust/resize canvas 750 x 650
Select Copy of Raster 2 layer
Select all, float defloat
Add new raster layer and flood-fill with color of choice
Paste and position Element 12 on top of layer where desired
Select invert, delete, select none
Delete/Hide original shape layer
Select Raster 9 layer
Select all, float, defloat
Add new raster layer and flood-fill with color of choice
Select none
Adjust, Add/Remove Noise, Add Noise (Uniform checked, Noise 75%, Monochrome checked)
Delete/Hide original shape layer
Select Raster 2 layer
Select all, float, defloat
Paste paper 1
Select invert, delete, select none
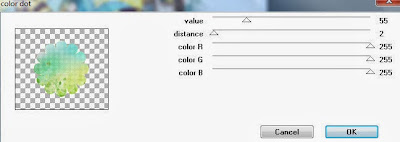
Apply Penta - colordots with the following settings:
Delete/Hide original shape layer
Select Raster 8 layer
Select all, float, defloat
Add new raster layer and flood-fill with color of choice
Select none
Adjust, Add/Remove Noise, Add Noise (Uniform checked, Noise 75%, Monochrome checked)
Select Raster 5 Strip layer
Select all, float, defloat
Add new raster layer and flood-fill with color of choice
Select none
Apply Eyecandy - Marble with the following settings:
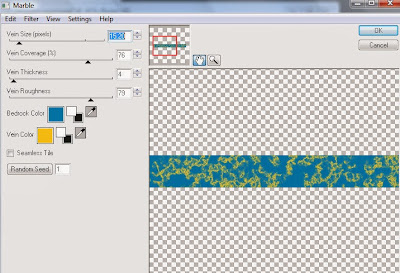
Delete/Hide original strip layer
Select Copy (3) of Raster 4 layer
Select all, float, defloat
Paste paper 7
Select invert, delete, select none
Delete/hide original rectangle layer
Select Copy (2) Raster 4 layer and repeat above steps
Select Raster 4 Rectangle layer
Select all, float, defloat
Paste paper 2
Select invert, delete, select none
Delete/Hide original rectangle layer
Select Copy of Raster 4 Rectangle layer and repeat above steps
Select Raster 3 Rectangle layer
Select all, float, defloat
Paste paper 6
Select invert, delete, select none
Delete/Hide original rectangle layer
Select Copy of Raster 3 Rectangle layer and repeat above steps
Select Raster 6 Strip layer
Select all, float, defloat
Add new raster layer and flood-fill with color of choice
Select none
Delete/Hide original strip layer
Copy and paste tube of choice and position where desired
Apply Xero Radiance at setting of choice
Apply Lokas 3D Shadow at default settings
Select Element 27 - resize by 30%
Paste and position on bottom right side
Select Element 58 - resize by 35%
Paste and position on bottom right side
Select Element 26 - resize by 30%
Image mirror and paste on bottom right
Select Element 13 - resize by 88%
Paste and position on left side
Select Element 35 - resize by 40%
Paste and position on bottom left
Select Element 22 - resize by 20%
Image mirror and paste on bottom left
Select Element 28 - resize by 25%
Paste and position on bottom left
Select Element 62 - resize by 25%
Paste and position on bottom left
Select Element 29 - resize by 30%
Paste and position on bottom left
Select Element 2 - resize by 45%
Paste and position on bottom left
Select Element 18 - resize by 50%
Paste and position on top right
Select New raster layer and flood fill with color or gradient of choice
Move layer to the bottom of the template
Apply Mask 16
Merge group and move to the bottom
Add any additional elements you like.
Add any dropshadows you like
Crop and resize as desired
Add copyright info, license number and name
You're done! Thanks for trying my tutorial!
Labels:Bibi's Collections,Scraps N Company | 0
comments
Saturday, November 23, 2013
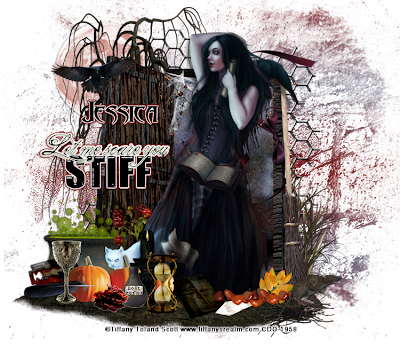
WITCHCRAFT
Supplies needed:
I am using the amazing art from Tiffany Toland Scott for for this tutorial, which you can find here
Scrapkit: I am using a stunning kit from Gothic Inspirations called "WitchCraft" which you can get by going here
Mask 96 from Trese which you can find here
Plugins used: Eyecandy 4000 - Gradient Glow, Xero-Radiance, Lokas 3D Shadow
----------------------------
This tutorial is written for those who have working knowledge of PSPX2 (any version will do).
This tutorial was written by me on November 23, 2013. Please do not copy or paste on any other forum, website or blog provide link back to tut only. Please do not claim as your own. This tutorial is copyrighted to me. Any resemblance to any other tutorial is purely coincidental.
Ok - let's start and remember to save often.
Open up a 750 x 650 blank canvas (we can resize it later)
Select Doorway Element and paste in the center of the canvas
Resize by 55%
Select your Select tool and select the area around the empty door Frame (Selection type - rectangle, (Add (Shift) Feather 0, Anti-alias checked)
Paste paper 4
Select invert, delete, select none
Move paper layer below frame
Paste tube of choice where desired
Apply Xero Radiance at setting of choice
Apply Lokas 3D Shadow at default settings
Select Tree3 Element - resize by 85%
Paste and position on left side and move to bottom layer
Select Moon Element - resize by 30%
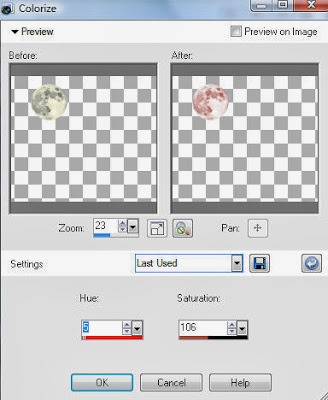
Paste and position on top left and move to bottom layer
Colorize with the following settings if you desire:
Select Grass Element - resize by 50%
Paste and position on bottom right
Select Broom Element - resize by 65%
Paste and position on right side
Select AgateStones Element - resize by 35%
Paste and position on bottom left
Select Leaves2 Element - resize by 15%
Paste and position on bottom left
Select Cauldron Element - resize by 35%
Paste and position on bottom left
Select Pumpkins Element - resize by 35%
Paste and position on bottom left
Select Razor Element - resize by 25%
Image Free Rotate Left by 15% and paste on bottom left
Select Candle1 Element - resize by 25%
Paste and position on bottom left
Select Calice Element - resize by 20%
Paste and position on bottom left (remember to sharpen element)
Select Potion Element - resize by 15%
Paste and position on bottom left
Select SandsOfTime Element - resize by 25%
Paste and position on bottom left
Select DriedFloral Element - resize by 15%
Paste and position on bottom left
Select Feather Element - resize by 20%
Paste and position on bottom left
Select Book1 Element - resize by 20%
Paste and position on bottom
Select Raven2 Element - resize by 25%
Paste and position on top left
Select Wordart2 Element - resize by 45%
Paste and position on left side
Apply Eyecandy Gradient Glow on fat default settings
Select Mesh Element - resize by 70%
Paste on canvas and move to the bottom layer
Add new raster layer and flood-fill with color or gradient of choice
Move to bottom layer
Apply Mask 96 and merge group
Add any additional elements you like.
Add any dropshadows you like
Sharpen any elements as needed
Crop and resize as desired
Add copyright info, license number and name
You're done! Thanks for trying my tutorial!
Labels:Gothic Inspirations | 1 comments
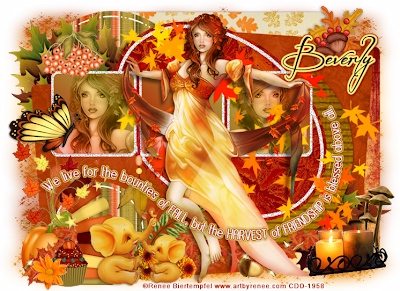
AUTUMN SUNSET
Supplies needed:
I am using the amazing artwork from Renee Biertempfel for this tutorial which you can find here
Scrapkit: I am using a beautiful kit from HorsePlay's Pasture Designs called "Autumn Sunset" which you can get by going here
Harvest Template by Dee which can be found here
Mask 1 from Rieka Rafita which you can find here
Plugins used: Eyecandy 4000 - Gradient Glow, Xero-Radiance, Xero - Bad Dream, Lokas 3D Shadow
----------------------------
This tutorial is written for those who have working knowledge of PSPX2 (any version will do).
This tutorial was written by me on November 23, 2013. Please do not copy or paste on any other forum, website or blog provide link back to tut only. Please do not claim as your own. This tutorial is copyrighted to me. Any resemblance to any other tutorial is purely coincidental.
Ok - let's start and remember to save often.
Open the template and using your shortcut keys on your keyboard (SHIFT+D) duplicate the template as a new image. Close the original and delete the copywrite layer.
Select Wordart White layer
Apply Eyecandy Gradient Glow on fat default settings
Select Green Squares layer
Select all, float, defloat
Add new raster layer and flood-fill with gradient or color of choice (Linear style, Angle 45, Repeat 2)
Paste close-up tubes of choice on top of gradient and delete
Select none
Change closeups to Luminance (Legacy)
Apply Xero Bad Dream at setting of choice
Drop opacity down to 75% on tubes
Apply dropshadow and merge tube down on top of gradient layer
Effect, Texture Effects, Blinds (Width 2, Opactity 10, Horizontal and Light from left/top checked)
Delete/Hide original sqaures layer
Select White Squares layer layer
Adjust, Add/Remove Noise, Add Noise (Uniform checked, Noise 75%, Monochrome checked)
Select Small Yellow Circle layer
Select all, float, defloat
Paste paper 12
Select invert, delete, select none
Delete/hide original circle layer
Select White oval frame layer
Adjust, Add/Remove Noise, Add Noise (Uniform checked, Noise 75%, Monochrome checked)
Select Orange Oval layer
Select all, float, defloat
Paste paper 7
Select invert, delete, select none
Delete/Hide original oval layer
Select Left Red Square layer
Select all, float, defloat
Paste paper 5
Select invert, delete, select none
Delete/Hide original square layer
Select Green Square layer and repeat above steps
Select Top Yellow Circle layer
Select all, float, defloat
Paste paper 12
Select invert, delete, select none
Delete/Hide original circle layer
Select Right Large Yellow Circle layer
Select all, float, defloat
Paste paper 10
Select invert, delete, select none
Delete/Hide original circle layer
Select Top Red Square layer
Select all, float, defloat
Paste paper 14
Select invert, delete, select none
Delete/Hide original square layer
Select Yellow Square layer
Select all, float, defloat
Paste paper 1
Select invert, delete, select none
Delete/Hide original square layer
Select Bottom Red Square layer
Select all, float, defloat
Paste paper 3
Select invert, delete, select none
Delete/Hide original square layer
Copy and paste tube of choice and position where desired
Apply Xero Radiance at setting of choice
Apply Lokas 3D Shadow at default settings
Select Element 55 and paste on right side where desired below tube layer
Select Element 74 - resize by 50%
Paste and position on bottom right
Select Element 68 - resize by 45%
Paste and position on bottom right
Select Element 15 - resize by 40%
Paste and position on bottom left side
Select Element 23 - resize by 55%
Paste and position on bottom left side
Select Element 45 - resize by 45%
Image mirror and paste on bottom left
Select Element 22 - resize by 45%
Paste and position on bottom left
Select Element 67 - resize by 30%
Paste and position on bottom left
Select Element 17 - resize by 25%
Paste and position on bottom left
Select Element 18 - resize by 35%
Paste and position on top left
Select Element 35 - resize by 45%
Paste and position on top left
Select Element 53 - resize by 30%
Paste and position on top right
Select New raster layer and flood fill with color or gradient of choice
Move layer to the bottom of the template
Apply Mask 1
Merge group and move to the bottom
Add any additional elements you like.
Add any dropshadows you like
Crop and resize as desired
Add copyright info, license number and name
You're done! Thanks for trying my tutorial!
Labels:Horseplay's Pasture Designs | 0
comments
Monday, November 11, 2013
WITCHES DEN
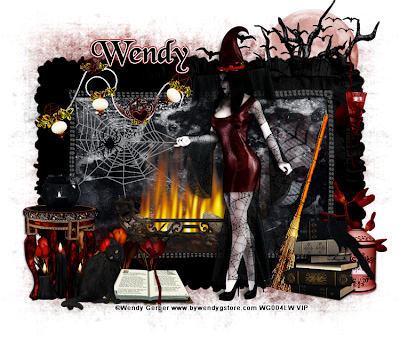
Supplies needed:
I am using the amazing art from Wendy Gerber for for this tutorial, which you can find here
Scrapkit: I am using a stunning FTU kit from Vaybs Designs called "The Witches Den" which you can get by going here
Mask 249 from Trese which you can find here
Plugins used: Xero-Radiance, Lokas 3D Shadow
----------------------------
This tutorial is written for those who have working knowledge of PSPX2 (any version will do).
This tutorial was written by me on November 11, 2013. Please do not copy or paste on any other forum, website or blog provide link back to tut only. Please do not claim as your own. This tutorial is copyrighted to me. Any resemblance to any other tutorial is purely coincidental.
Ok - let's start and remember to save often.
Open up a 750 x 650 blank canvas (we can resize it later)
Select Frame Element 6 and paste in the center of the canvas
Select your magic wand tool and click in each of the center square of the Frame (Add (Shift), RGB Value, Tolerance 25, Contiguous checked, Feather 0)
Selections, Modify, Expand by 5
Paste paper 7
Select invert, delete
Paste a close-up tube of choice on the top of paper on the right side where desired and delete, select none
Change close-up to screen
Drop opacity on tube down to 85%
Apply dropshadow and merge tube down on top of paper layer
Move paper/tube layer below frame
Select Element 80 - resize by 80%
Paste and position on bottom center of frame
Select Element 57 - resize by 45%
Paste and position on top left
Effects, Texture Effects, Emboss
Select Element 75 - resize by 45%
Image Free Rotate Left by 20% and paste on top left
Select Element 34 - resize by 55%
Paste and position on top right below frame layer
Colorize with the following settings if desired:
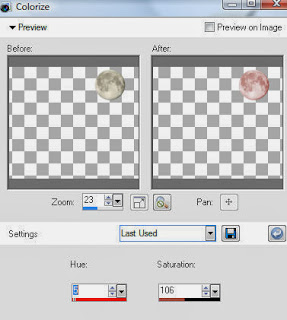
Select Element 77 and paste on top right
Select Element 39 - resize by 75%
Paste and position on top right below frame layer
Paste tube of choice where desired
Apply Xero Radiance at setting of choice
Apply Lokas 3D Shadow at default settings
Select Element 2 - resize by 55%
Paste and position on bottom left
Select Element 33 - resize by 40%
Paste and position on left side
Select Element 76 - resize by 40%
Paste and position on bottom left
Select Element 38 - resize by 55%
Paste and position on bottom left
Select Element 3 - resize by 45%
Paste and position on bottom left
Select Element 20 - resize by 55%
Paste and position on bottom right
Select Element 65 - resize by 55%
Paste and position on bottom right
Select Element 37 - resize by 55%
Paste and position on bottom right
Select Element 81 - resize by 80%
Paste and position on bottom right
Select Element 12 - resize by 65%
Paste and position on top right
Add new raster layer and flood-fill with color or gradient of choice
Move to bottom layer
Apply Mask 249 and merge group
Add any additional elements you like.
Add any dropshadows you like
Sharpen any elements as needed
Crop and resize as desired
Add copyright info, license number and name
You're done! Thanks for trying my tutorial!
Labels:FTU,Wendy Gerber | 0
comments
Friday, November 8, 2013
BEYOND DARKNESS
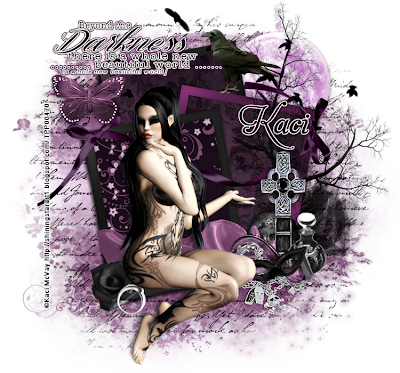
Supplies needed:
I am using the amazing art from Shining Star Art for this tutorial, which you can find here
Scrapkit: I am using a beautiful kit from Scrappin Krazy Designs called "Raven" which you can get by going here
Mask 20 from Moonbeams and Spiderwebs which you can find here
Plugins used: Xero-Radiance, Eyecandy 4000 - Gradient Glow, Lokas 3D Shadow
----------------------------
This tutorial is written for those who have working knowledge of PSPX2 (any version will do).
This tutorial was written by me on November 8, 2013. Please do not copy or paste on any other forum, website or blog provide link back to tut only. Please do not claim as your own. This tutorial is copyrighted to me. Any resemblance to any other tutorial is purely coincidental.
Ok - let's start and remember to save often.
Open up a 750 x 650 blank canvas (we can resize it later)
Select Frame Element 12 and paste in the center of the canvas
Select your magic wand tool and click in each of the center of the left square (Add (Shift), RGB Value, Tolerance 25, Contiguous checked, Feather 0)
Selections, Modify, Expand by 5
Paste paper 2
Select invert, delete, select none
Move paper layer below frame
Select your magic wand tool and click in each of the center of the top and bottom right squares (Add (Shift), RGB Value, Tolerance 25, Contiguous checked, Feather 0)
Selections, Modify, Expand by 5
Paste paper 16
Select invert, delete, select none
Move paper layer below frame
Select Element 60 - resize by 65%
Paste and position on bottom of frame
Paste tube of choice where desired
Apply Xero Radiance at setting of choice
Apply Lokas 3D Shadow at default settings
Select Element 7 - resize by 50%
Paste and position on top right
Recolor with the following settings if desired:
Select Element 25 - resize by 85%
Paste and position on right side
Select Element 40 and paste on top where desired
Select Element 41 - resize by 60%
Paste and position on bottom right
Select Element 19 - resize by 45%
Paste and position on bottom right
Select Element 47 - resize by 35%
Image Free Rotate Left by 15% and paste on bottom right
Select Element 43 - resize by 35%
Image mirror and paste on bottom right
Select Element 36 - resize by 30%
Paste and position on bottom right
Select Element 3 - resize by 40%
Image mirror and paste on bottom left
Select Element 28 - resize by 15%
Paste and position on bottom left
Select Element 33 - resize by 40%
Paste and position on top left
Select Element 30 - resize by 50%
Paste and position on top left
Apply Eyecandy Gradient Glow on fat default settings
Select Element 35 and paste in the center of canvas
Move to bottom layer
Add new raster layer and flood-fill with color or gradient of choice
Move to bottom layer
Apply Mask 20 and merge group
Add any additional elements you like.
Add any dropshadows you like
Sharpen any elements as needed
Crop and resize as desired
Add copyright info, license number and name
You're done! Thanks for trying my tutorial!
Subscribe to:
Comments
(Atom)


