Labels
- Alikas Scraps
- All Dolled Up Store
- Amy Marie
- Annaica
- Arthur Crowe
- Babycakes Scraps
- Barbara Jensen
- Bibi's Collections
- Black Widow Creationz
- Blu Moon
- Bonnies Creations
- Bookwork Dezines
- Broken Sky Dezine
- Carita Creationz
- Carpe Diem Designs
- CDO
- Celinart Pinup
- Celine
- Chacha Creationz
- Charmed Designs
- Cherry Blossom Designs
- Chili Designz
- Cluster Frame
- Creative Misfits
- Creative Scraps by Crys
- Curious Creative Dreams
- Danny Lee
- Derzi
- Designs by Ali
- Designs by Joan
- Designs by Ketura
- Designs By Norella
- Designs by Vi
- Diana Gali
- Diry Art Designs
- Disturbed Scraps
- Dreaming With Bella
- Eclipse Creations
- Elegancefly
- Extras
- Fabulous Designz
- Forum Set
- Foxy's Designz
- Freek's Creation
- FTU
- FwTags
- Goldwasser
- Gothic Inspirations
- Gothic Raven Designs
- Graphfreaks
- Hania's Designs
- Happy Pumpkin Studios
- Horseplay's Pasture Designs
- indie-Zine
- Irish Princess Designs
- Ishika Chowdhury
- Kaci McVay
- Kajenna
- katharine
- Katherine
- Khloe Zoey
- Killer Kitty
- Kissing Kate
- KiwiFirestorm
- Kiya Designs
- Kizzed by Kelz
- KZ Designz
- Lady Mishka
- Lil Mz Brainstorm
- Maiden of Darkness
- Mariel Designs
- MellieBeans
- Michelle's Myths
- Midnight Shadow
- Misticheskya
- MistyLynn's Creations
- MMeliCrea Designz
- Moon Vixen Designs
- NaSionainne
- Ninaste
- Niqui Designs
- Pandora
- Picsfordesign
- Pink Paradox Productions
- Radyga Designs
- Redefined Designs
- Rissa's Designs
- Schnegge
- ScottishButterfly Creations
- Scrappin Krazy Designs
- Scrappin With Lil Ol Me
- Scraps and the City
- Scraps Dimensions
- Scraps From The Heart
- Scraps N Company
- Scraps with Attitude
- Shining Star Art
- Skyscraps
- Sleek N Sassy Designs
- Sophisticat Simone
- Souldesigner
- Soxsational Scraps
- Spazz
- Starlite and Soul
- Stella Felice
- Tammy Welt
- Tasha's Playground
- The PSP Project
- Thrifty Scraps by Gina
- Tiny Turtle Designs
- Upyourart
- Verymany
- Wendy Gerber
- Whisper In the Wind
- Wick3d Creationz
- Wicked Diabla
- Yude's Kreationz
Blog Archive
Friday, October 31, 2014
HALLOWEEN FLIGHT
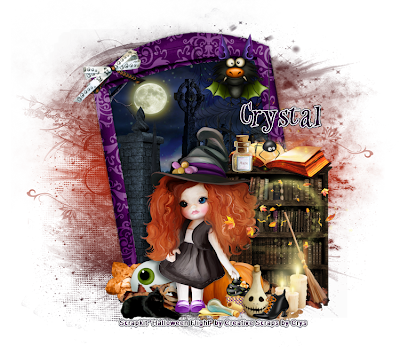
Supplies needed:
Scrapkit: I am using a stunning kit from Creative Scraps by Crys called "Halloween Flight" which you can get by going here
Mask 21 from Moonbeams & Spiderwebs which you can find here
Plugins: Lokas 3D Shadow
----------------------------
This tutorial is written for those who have working knowledge of PSPX2 (any version will do).
This tutorial was written by me on October 31, 2014. Please do not copy or paste on any other forum, website or blog provide link back to tut only. Please do not claim as your own. This tutorial is copyrighted to me. Any resemblance to any other tutorial is purely coincidental.
Ok - let's start and remember to save often.
Open up a 750 x 650 blank canvas (we can resize it later)
Select Frame Element 2 and paste in the center of the canvas
Resize by 85%
Select your magic wand tool and click in the center of the Frame (Add (Shift), RGB Value, Tolerance 25, Contiguous checked, Feather 0)
Selections, Modify, Expand by 5
Paste paper 13
Select invert, delete, select none
Move paper below frame
Select Element 34 - resize by 55%
Paste and position on bottom right
Select Element 25 - resize by 65%
Paste and position on bottom where desired
Select Element 48 - resize by 40%
Paste and position above bookcase element
Select Element 33 - resize by 45%
Paste and position on top of bookcase element
Select Element 11 - resize by 15%
Paste and position on top of bookcase element
Select Element 12 - resize by 30%
Paste and position on bottom right
Select Element 9 - resize by 30%
Paste and position on bottom right
Select Element 52 - resize by 15%
Paste and position on bottom right
Select Element 18 - resize by 20%
Paste and position on bottom right
Select Element 27 - resize by 35%
Paste and position on bottom
Select Element 6 - resize by 20%
Paste and position on bottom
Select Element 30 - resize by 65%
Paste and position on bottom
Select Element 41 - resize by 20%
Paste and position on bottom left
Select Element 61 - resize by 20%
Paste and position on bottom left
Select Element 5 - resize by 25%
Paste and position on bottom left
Select Element 41 - resize by 30%
Paste and position on top left
Select Element 44 - resize by 30%
Paste and position on top right
Add new raster layer and flood-fill with gradient or color of choice
Apply Mask 21 or mask of choice
Merge group and move to the bottom layer
Add any dropshadows you like
Sharpen any elements as needed
Crop and resize as desired
Add copyright info, license number and name
You're done! Thanks for trying my tutorial!
Labels:Creative Scraps by Crys | 0
comments
Thursday, October 30, 2014
HECHICERA MAGGIE
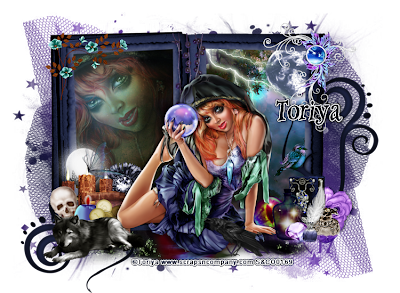
Supplies needed:
I am using the exclusive artwork from Toriya for for this tutorial which you can find here
Scrapkit: I am using a stunning kit from Bibi's Collections called "Hechicera" which you can get by going here
Halloween Mask from Vix which you can find here
Plugins: Lokas 3D Shadow
----------------------------
This tutorial is written for those who have working knowledge of PSPX2 (any version will do).
This tutorial was written by me on October 30, 2014. Please do not copy or paste on any other forum, website or blog provide link back to tut only. Please do not claim as your own. This tutorial is copyrighted to me. Any resemblance to any other tutorial is purely coincidental.
Ok - let's start and remember to save often.
Open up a 750 x 650 blank canvas (we can resize it later)
Select Frame Element 75 and paste in the center of the canvas
Resize by 75% and move down about 1/2 inch
Select your magic wand tool and click in the right center of the Frame (Add (Shift), RGB Value, Tolerance 25, Contiguous checked, Feather 0)
Selections, Modify, Expand by 5
Paste Element 1
Select invert, delete, select none
Move below frame
Select magic wand and click in the center of the left side of the frame
Selections, Modify, Expand by 5
Paste paper 1
Select invert, delete
Paste close-up tube of choice on top of paper layer and delete
Select none
Change close-up to Overlay
Drop opacity down to 65%
Merge down on paper and below frame
Select Element 2 - resize by 50%
Paste and position on the top right below frame
Select Element 10 - resize by 40%
Paste and position on top right where desired
Select Element 69 - resize by 25%
Paste and position on top left
Select Element 98 - resize by 50%
Paste and position on bottom where desired
Paste tube of choice where desired
Apply Lokas 3D Shadow at default settings
Select Element 79 - resize by 40%
Image mirror and paste on top right
Select Element 66 - resize by 15%
Paste and position bottom right
Select Element 61 - resize by 30%
Paste and position on bottom right
Select Element 82 - resize by 20%
Paste and position on bototm right
Select Element 76 - resize by 25%
Paste and position on bottom right
Select Element 26 - resize by 35%
Paste and position on bottom right
Select Element 7 - resize by 40%
Paste and position on bottom right
Select Element 83 - resize by 40%
Image Free Rotate Left by 15% and paste on bottom right
Select Element 46 - resize by 40%
Paste and position on bottom left
Select Element 48 - resize by 15%
Paste and position on bottom left
Select Element 49 - resize by 30%
Paste and position on bottom left
Select Element 56 - resize by 25%
Image Free Rotate Left by 15% and paste on bottom left
Select Element 62 - resize by 20%
Paste and position on bottom left
Select Element 85 - resize by 30%
Paste and position on bottom left
Select Element 31 - resize by 25%
Paste and position on bottom left
Add new raster layer and flood-fill with gradient or color of choice
Apply Halloween Mask or mask of choice
Merge group and move to the bottom layer
Add any dropshadows you like
Sharpen any elements as needed
Crop and resize as desired
Add copyright info, license number and name
You're done! Thanks for trying my tutorial!
Labels:Bibi's Collections,Scraps N Company | 0
comments
Wednesday, October 29, 2014
GLORIOUS AUTUMN
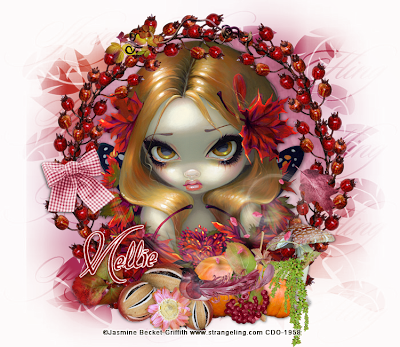
Supplies needed:
I am using the exclusive artwork from Jasmine Becket-Griffith for this tutorial which you can find here
Scrapkit: I am using a stunning kit from MellieBeans called "Autumn Glorious Autumn" which you can get by going here
Fall Mask from Ella which you can find on the Misfits Blog here
Plugins: Lokas 3D Shadow
----------------------------
This tutorial is written for those who have working knowledge of PSPX2 (any version will do).
This tutorial was written by me on October 29, 2014. Please do not copy or paste on any other forum, website or blog provide link back to tut only. Please do not claim as your own. This tutorial is copyrighted to me. Any resemblance to any other tutorial is purely coincidental.
Ok - let's start and remember to save often.
Open up a 750 x 650 blank canvas (we can resize it later)
Select Frame Element 21 and paste in the center of the canvas
Resize by 75%
Select your magic wand tool and click in the center of the Frame (Add (Shift), RGB Value, Tolerance 25, Contiguous checked, Feather 0)
Selections, Modify, Expand by 3
Paste paper 9
Select invert, delete, select none
Move paper below frame
Paste tube of choice where desired
Apply Lokas 3D Shadow at default settings
Select Element 22 - resize by 40%
Paste and position on top frame
Select Element 31 - resize by 22%
Image Free Rotate Left by 15% and paste on left side
Select Element 14 - resize by 30%
Image mirror and paste on bottom left
Select Element 23 - resize by 30%
Paste and position on bottom left
Select Element 2 - resize by 15%
Paste and position on bottom
Select Element 18 - resize by 35%
Paste and position on bottom
Select Element 12 - resize by 25%
Paste and position on bottom
Select Element 24 - resize by 27%
Paste and position on bottom
Select Element 6 - resize by 25%
Paste and position on bottom right
Select Element 20 - resize by 25%
Paste and position on bottom right
Select Element 7 - resize by 50%
Image mirror and paste on the bottom of frame
Add new raster layer and flood-fill with gradient or color of choice
Apply Fall Mask or mask of choice
Merge group and move to the bottom layer
Add any dropshadows you like
Sharpen any elements as needed
Crop and resize as desired
Add copyright info, license number and name
You're done! Thanks for trying my tutorial!
Labels:MellieBeans | 0
comments
Tuesday, October 28, 2014
SABRINA THE WITCH
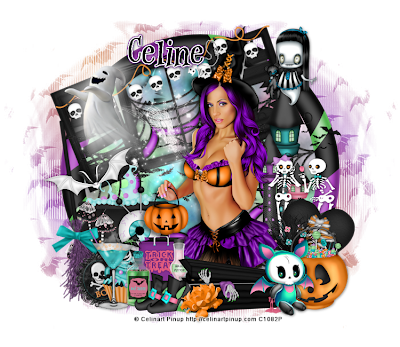
Supplies needed:
I am using the exclusive artwork from Celinart Pinup for for this tutorial which you can find here
Scrapkit: I am using a stunning kit from Pink Paradox Productions called "Trick & Treat" which you can get by going here
Halloween Mask from Tonya which you can find on the Misfits Blog here
Plugins: Lokas 3D Shadow
----------------------------
This tutorial is written for those who have working knowledge of PSPX2 (any version will do).
This tutorial was written by me on October 28, 2014. Please do not copy or paste on any other forum, website or blog provide link back to tut only. Please do not claim as your own. This tutorial is copyrighted to me. Any resemblance to any other tutorial is purely coincidental.
Ok - let's start and remember to save often.
Open up a 750 x 650 blank canvas (we can resize it later)
Select Frame Element 1 and paste in the center of the canvas
Resize by 65%
Select your magic wand tool and click in the center of the Frame (Add (Shift), RGB Value, Tolerance 25, Contiguous checked, Feather 0)
Selections, Modify, Expand by 5
Paste paper 17
Select invert, delete, select none
Move paper below frame
Select Element 17 - resize by 50%
Paste and position in the center and drop below frame
Select Frame Element 16 - resize by 45%
Image Free Rotate Left by 15% and paste on top left
Select Element 111 - resize by 45%
Image Free Rotate Left by 15% and paste on top left
Select Element 17 - resize by 30%
Paste and position on top left
Select Element 4 - resize by 20%
Paste and position on top right
Select Element 118 - resize by 30%
Image mirror and paste on right side
Paste tube of choice where desired
Apply Lokas 3D Shadow at default settings
Select Element 22 - resize by 18%
Paste and position on right side
Select Element 94 - resize by 20%
Image Free Rotate Right by 15% and paste on bottom right
Select Element 68 - resize by 12%
Paste and position on bottom right
Select Element 6 - resize by 22%
Image mirror and paste on bottom right
Select Element 92 - resize by 25%
Paste and position on bottom
Select Element 129 - resize by 12%
Paste and position on bottom
Select Element 30 - resize by 22%
Paste and position on left side
Select Element 88 - resize by 25%
Paste and position on bottom left
Select Element 40 - resize by 40%
Image Free Rotate Left by 8% and paste on bottom left
Select Element 87 - resize by 15%
Image Free Rotate Left by 15% and paste on bottom left
Select Element 52 - resize by 15%
Paste and position on bottom left
Select Element 76 - resize by 20%
Paste and position on bottom left
Select Element 79 - resize by 15%
Paste and position on bottom left
Select Element 86 - resize by 15%
Paste and position on bottom left
Select Element 89 - resize by 25%
Paste and position on bottom left
Select Element 38 - resize by 15%
Paste and position on bottom
Add new raster layer and flood-fill with gradient or color of choice
Apply Halloween Mask or mask of choice
Merge group and move to the bottom layer
Add any dropshadows you like
Sharpen any elements as needed
Crop and resize as desired
Add copyright info, license number and name
You're done! Thanks for trying my tutorial!
Saturday, October 25, 2014
CANDY GIRL
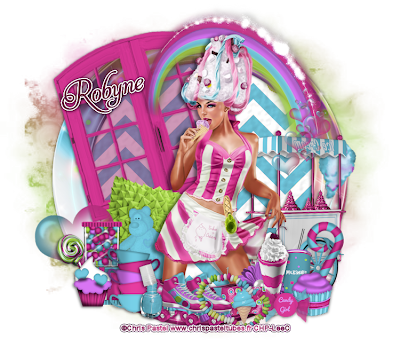
Supplies needed:
I am using the exclusive artwork from Chris Pastel for for this tutorial which you can find here
Scrapkit: I am using a stunning kit from Whisper in the Wind called "Candy Girl" which you can get by going here
Mask 21 from Gina Gems which you can find here
Plugins: Lokas 3D Shadow
----------------------------
This tutorial is written for those who have working knowledge of PSPX2 (any version will do).
This tutorial was written by me on October 25, 2014. Please do not copy or paste on any other forum, website or blog provide link back to tut only. Please do not claim as your own. This tutorial is copyrighted to me. Any resemblance to any other tutorial is purely coincidental.
Ok - let's start and remember to save often.
Open up a 750 x 650 blank canvas (we can resize it later)
Select Frame Element 3 and paste in the center of the canvas
Resize by 75%
Select your magic wand tool and click in the center of the Frame (Add (Shift), RGB Value, Tolerance 25, Contiguous checked, Feather 0)
Selections, Modify, Expand by 5
Paste paper 19
Select invert, delete, select none
Move paper below frame
Select Element 14 - resize by 40%
Image Free Rotate Left by 15% and paste on top where desired
Select Element 84 - resize by 50%
Paste and position on top right
Select Element 85 - resize by 40%
Image mirror and paste on right side
Paste tube of choice where desired
Apply Lokas 3D Shadow at default settings
Select Element 66 - resize by 25%
Image Free Rotate Right by 15% and paste on bottom left
Select Element 62 - resize by 20%
Image Free Rotate Left by 15% and paste on bottom left
Select Element 43 - resize by 20%
Paste and position on bottom left
Select Element 27 - resize by 20%
Paste and position on bottom left
Select Element 30 - resize by 12%
Paste and position on bottom left
Select Element 28 - resize by 15%
Paste and position on bottom left
Select Element 79 - resize by 15%
Paste and position on bottom left
Select Element 44 - resize by 20%
Paste and position on bottom
Select Element 99 - resize by 20%
Paste and position on bottom
Select Element 45 - resize by 20%
Image Free Rotate Right by 15% and paste bottom right
Select Element 93 - resize by 20%
Paste and position on bottom right
Select Element 87 - resize by 12%
Paste and position on bottom right
Select Element 31 - resize by 22%
Paste and position on bottom right
Select Element 69 - resize by 12%
Paste and position on bottom right
Select Element 54 - resize by 12%
Paste and position on bottom right
Select Element 42 - resize by 45%
Paste and position on bottom right
Add new raster layer and flood-fill with gradient or color of choice
Apply Mask 21 or mask of choice
Merge group and move to the bottom layer
Add any dropshadows you like
Sharpen any elements as needed
Crop and resize as desired
Add copyright info, license number and name
You're done! Thanks for trying my tutorial!
Labels:Whisper In the Wind | 0
comments
Friday, October 24, 2014
CARNIVAL OF SOULS
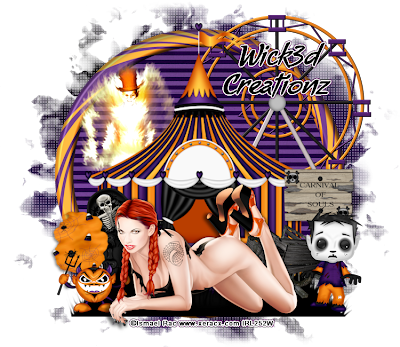
Supplies needed:
I am using the exclusive artwork from Ismael Rac for for this tutorial which you can find here
Scrapkit: I am using a wicked kit from Wick3d Creationz called "Carnival of Souls" which you can get by going here
Mask 134 from Designs by Vaybs which you can find here
Plugins: VM Transmission, Lokas 3D Shadow
----------------------------
This tutorial is written for those who have working knowledge of PSPX2 (any version will do).
This tutorial was written by me on October 24, 2014. Please do not copy or paste on any other forum, website or blog provide link back to tut only. Please do not claim as your own. This tutorial is copyrighted to me. Any resemblance to any other tutorial is purely coincidental.
Ok - let's start and remember to save often.
Open up a 750 x 650 blank canvas (we can resize it later)
Select Frame Element 19 and paste in the center of the canvas
Resize by 80%
Select your magic wand tool and click in the center of the Frame (Add (Shift), RGB Value, Tolerance 25, Contiguous checked, Feather 0)
Selections, Modify, Expand by 5
Paste paper 7
Select invert, delete, select none
Apply VM Transmission with the following settings:
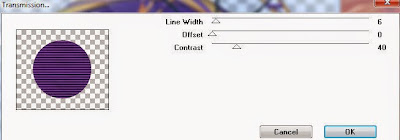
Move paper below frame
Select Element 5 - paste and position on top right above frame
Select Element 3 - resize by 115%
Paste and position in the center of canvas
Select Element 15 - resize by 40%
Paste and position on top left
Select Element 11 - resize by 55%
Paste and postion on bottom of frame
Select Element 9 - resize by 55%
Paste and position on bottom right
Select Element 12 - resize by 50%
Paste and position on bottom left
Paste tube of choice where desired
Apply Lokas 3D Shadow at default settings
Select Element 18 - resize by 50%
Paste and position on bottom right
Select Element 6 - resize by 40%
Image Free Rotate Left by 15% and paste on bottom left
Select Element 24 - resize by 35%
Paste and position on bottom left
Add new raster layer and flood-fill with gradient or color of choice
Apply Mask 134 or mask of choice
Merge group and move to the bottom layer
Add any dropshadows you like
Sharpen any elements as needed
Crop and resize as desired
Add copyright info, license number and name
You're done! Thanks for trying my tutorial!
Labels:Wick3d Creationz | 0
comments
Thursday, October 23, 2014
WITCH IN TRAINING


New CT Tags using the wicked Mega Halloween Kit by Scrappin Krazy Designs

You can find where to purchase the kit here
Labels:Scrappin Krazy Designs | 0
comments
Wednesday, October 22, 2014
HALLO WITCH
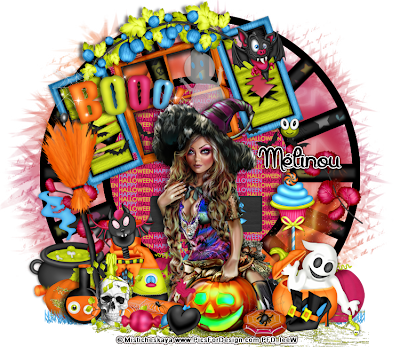
Supplies needed:
I am using the exclusive artwork from Misticheskaya for for this tutorial which you can find here
Scrapkit: I am using a stunning kit from MMeliCrea Designz called "Hallo Family" which you can get by going here
Halloween Mask 2 from Uchy which you can find on the Misfits Blog here
Plugins: Lokas 3D Shadow
----------------------------
This tutorial is written for those who have working knowledge of PSPX2 (any version will do).
This tutorial was written by me on October 22, 2014. Please do not copy or paste on any other forum, website or blog provide link back to tut only. Please do not claim as your own. This tutorial is copyrighted to me. Any resemblance to any other tutorial is purely coincidental.
Ok - let's start and remember to save often.
Open up a 750 x 650 blank canvas (we can resize it later)
Select Frame Element 1 and paste in the center of the canvas
Select your magic wand tool and click in the center of the Frame (Add (Shift), RGB Value, Tolerance 25, Contiguous checked, Feather 0)
Selections, Modify, Expand by 5
Paste paper 10
Select invert, delete, select none
Move paper below frame
Select Element 24- resize by 75%
Image Free Rotate Left by 15% and paste on top where desired
Select Element 92 - resize by 55%
Paste and position on top of frame
Select Element 100 - resize by 50%
Paste and position on top left
Select Element 72 - resize by 20%
Paste and position on top right
Select Element 52 - paste and position on the bottom of frame
Paste tube of choice where desired
Apply Lokas 3D Shadow at default settings
Select Element 94 - resize by 30%
Paste and position on right side of frame
Image duplicate and reposition on left side of frame
Select Element 80 - resize by 40%
Paste and position on right side
Select Element 48- resize by 45%
Paste and position on bottom right
Select Element 96 - resize by 20%
Paste and position on bottom right
Select Element 86 - resize by 15%
Paste and position on bottom right
Select Element 67 - resize by 48%
Paste and position on bottom left
Select Element 44 - resize by 30%
Paste and position on bottom left
Select Element 91 - resize by 20%
Paste and position on bottom left
Select Element 31 - resize by 35%
Paste and position on bottom left
Select Element 45 - resize by 20%
Paste and position on bottom left
Select Element 85 - resize by 15%
Paste and position on bottom left
Select Element 29 - resize by 20%
Paste and position on bottom
Add new raster layer and flood-fill with gradient or color of choice
Apply Halloween Mask 2 or mask of choice
Merge group and move to the bottom layer
Add any dropshadows you like
Sharpen any elements as needed
Crop and resize as desired
Add copyright info, license number and name
You're done! Thanks for trying my tutorial!
Labels:MMeliCrea Designz | 0
comments
Tuesday, October 21, 2014
AUTUMN SPICE

Supplies needed:
I am using the exclusive artwork from Picsfordesign for for this tutorial which you can find here
Scrapkit: I am using a stunning kit from Pink Paradox Productions called "Autumn Spice" which you can get by going here
Mask 20 from Moonbeams and Spiderwebs which you can find here
Plugins: Xero - Radiance, Lokas 3D Shadow
----------------------------
This tutorial is written for those who have working knowledge of PSPX2 (any version will do).
This tutorial was written by me on October 21, 2014. Please do not copy or paste on any other forum, website or blog provide link back to tut only. Please do not claim as your own. This tutorial is copyrighted to me. Any resemblance to any other tutorial is purely coincidental.
Ok - let's start and remember to save often.
Open up a 750 x 650 blank canvas (we can resize it later)
Select Frame Element 11 and paste in the center of the canvas
Resize by 65%
Select your magic wand tool and click in the center of the Frame (Add (Shift), RGB Value, Tolerance 25, Contiguous checked, Feather 0)
Selections, Modify, Expand by 5
Paste paper 30
Select invert, delete, select none
Move paper below frame
Select Element 154- resize by 35%
Paste and position on the center of the canvas above paper layer
Select Element 118 - resize by 30%
Paste and position on left side of frame
Select Element 1 - resize by 50%
Paste and position on top right
Paste tube of choice where desired
Apply Xero - Radiance on default setting of choice
Apply Lokas 3D Shadow at default settings
Select Element 117 - resize by 25%
Paste and position on right side of frame
Select Element 45 - resize by 40%
Paste and position on bottom right
Select Element 50 - resize by 15%
Paste and position on bottom right
Select Element 21 - resize by 25%
Paste and position on bottom right
Select Element 42 - resize by 15%
Paste and position on bottom right
Select Element 114 - resize by 10%
Paste and position on bottom right
Select Element 49 - resize by 15%
Paste and position on bottom right
Select Element 7 - resize by 22%
Paste and position on bottom right
Select Element 33 - resize by 30%
Paste and position on bottom where desired
Select Element 62 - resize by 25%
Image mirror and paste on bottom left
Select Element 48 - resize by 15%
Image Free Rotate Left by 15% and paste on bottom left
Select Element 12 - resize by 15%
Paste and position on bottom left
Select Element 10 - resize by 20%
Image mirror and paste on bottom left
Select Element 47 - resize by 15%
Paste and position on bottom left
Select Element 20 - resize by 15%
Paste and position on bottom left
Select Element 19 - resize by 15%
Paste and position on bottom left
Add new raster layer and flood-fill with gradient or color of choice
Apply Mask 259 or mask of choice
Merge group and move to the bottom layer
Add any dropshadows you like
Sharpen any elements as needed
Crop and resize as desired
Add copyright info, license number and name
You're done! Thanks for trying my tutorial!
Labels:Pink Paradox Productions | 0
comments
Monday, October 20, 2014
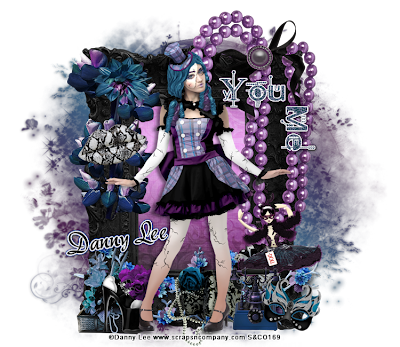
BROKEN DOLL
Supplies needed:
I am using the amazing art from Danny Lee for for this tutorial which is no longer available. You can view his other tubes here
Scrapkit: I am using a stunning kit from Kizzed by Kelz called "Doll Mask" which you can get by going here
Mask 20 from Moonbeams and Spiderwebs which you can find on here
Plugins: Lokas 3D Shadow
----------------------------
This tutorial is written for those who have working knowledge of PSPX2 (any version will do).
This tutorial was written by me on October 20, 2014. Please do not copy or paste on any other forum, website or blog provide link back to tut only. Please do not claim as your own. This tutorial is copyrighted to me. Any resemblance to any other tutorial is purely coincidental.
Ok - let's start and remember to save often.
Open up a 750 x 650 blank canvas (we can resize it later)
Select Frame Element 110 and paste in the center of the canvas
Select your magic wand tool and click in the center of the Frame (Add (Shift), RGB Value, Tolerance 25, Contiguous checked, Feather 0)
Selections, Modify, Expand by 5
Paste paper 12
Select invert, delete, select none
Move paper below frame
Select Element 65 - resize by 55%
Paste and position on top left above frame
Select Element 80 - resize by 20%
Paste and position on top left
Select Element 74 - resize by 30%
Paste and position on top right
Apply Eyecandy Gradient Glow on fat default settings (Glow Width 3)
Select Element 84 - resize by 80%
Paste and position on bottom above frame
Paste tube of choice where desired
Apply Xero - Radiance on default setting of choice
Apply Lokas 3D Shadow at default settings
Select Element 53 - resize by 22%
Image Free Rotate Left by 15% and paste on left side
Select Element 116 - resize by 30%
Paste and position on bottom left
Select Element 54 - resize by 15%
Paste and position on bottom left
Select Element 18 - resize by 22%
Paste and position on bottom left
Select Element 71 - resize by 30%
Paste and position on bottom right
Select Element 25 - resize by 20%
Image Free Rotate Right by 15% and paste on bottom right
Select Element 121 - resize by 20%
Paste and position on bottom right
Select Element 87 - resize by 25%
Paste and position on bottom below tube layer
Add new raster layer and flood-fill with gradient or color of choice
Apply Mask 20 or mask of choice
Merge group and move to the bottom layer
Add any dropshadows you like
Sharpen any elements as needed
Crop and resize as desired
Add copyright info, license number and name
You're done! Thanks for trying my tutorial!
Labels:Scraps N Company | 0
comments
Sunday, October 19, 2014
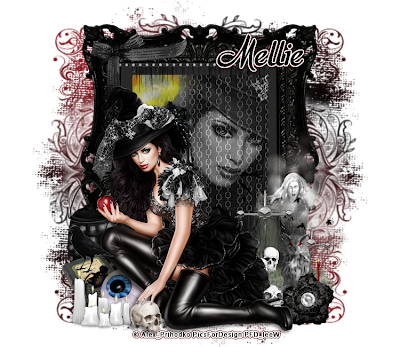
DARKNESS
Supplies needed:
I am using the amazing art from Alex Prihodko for for this tutorial which you can find here
Scrapkit: I am using a stunning kit from MellieBeans called "Darkness" which you can get by going here
Mask 259 from Trese which you can find here
Plugins: Xero - Radiance, Lokas 3D Shadow
----------------------------
This tutorial is written for those who have working knowledge of PSPX2 (any version will do).
This tutorial was written by me on October 14, 2014. Please do not copy or paste on any other forum, website or blog provide link back to tut only. Please do not claim as your own. This tutorial is copyrighted to me. Any resemblance to any other tutorial is purely coincidental.
Ok - let's start and remember to save often.
Open up a 750 x 650 blank canvas (we can resize it later)
Select Frame Element 24 and paste in the center of the canvas
Resize by 75%
Select your magic wand tool and click in the center of the Frame (Add (Shift), RGB Value, Tolerance 25, Contiguous checked, Feather 0)
Selections, Modify, Expand by 5
Paste paper 10
Select invert, delete,
Paste close-up tube of choice on paper where desired and delete
Select none
Change the close-up to Luminance (Legacy) and drop opacity down to 50%
Merge down on paper layer
Move paper below frame
Select Element 7 - resize by 30%
Paste and position on the center of the canvas
Select Element 76 - resize by 30%
Paste and position on top left below frame
Select Element 26 - resize by 30%
Paste and position on top left
Paste tube of choice where desired
Apply Xero - Radiance on default setting of choice
Apply Lokas 3D Shadow at default settings
Select Element 15 - resize by 40%
Paste and position on bottom right
Select Element 10 - resize by 40%
Paste and position on bottom right
Select Element 14 - resize by 20%
Paste and position on bottom right
Select Element 29 - resize by 15%
Paste and position on bottom right
Select Element 20 - resize by 22%
Select Element 4 - resize by 25%
Paste and position on bottom left
Paste and position on bottom left
Select Element 17 - resize by 20%
Paste and position on bottom left
Select Element 19 - resize by 12%
Paste and position on bottom left
Select Element 2 - resize by 16%
Paste and position on bottom left
Select Element 22 - resize by 20%
Paste and position on bottom left
Add new raster layer and flood-fill with gradient or color of choice
Apply Mask 259 or mask of choice
Merge group and move to the bottom layer
Add any dropshadows you like
Sharpen any elements as needed
Crop and resize as desired
Add copyright info, license number and name
You're done! Thanks for trying my tutorial!
Labels:MellieBeans | 0
comments
Thursday, October 16, 2014
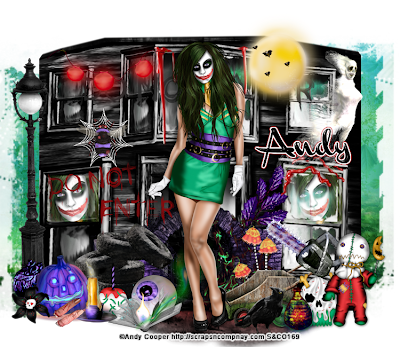
JOKER
Supplies needed:
I am using the amazing art from Andy Cooper for for this tutorial which you can find here
Scrapkit: I am using a stunning kit from Bibi's Collections called "Spooky" which you can get by going here
Plugins: Lokas 3D Shadow
----------------------------
This tutorial is written for those who have working knowledge of PSPX2 (any version will do).
This tutorial was written by me on October 16, 2014. Please do not copy or paste on any other forum, website or blog provide link back to tut only. Please do not claim as your own. This tutorial is copyrighted to me. Any resemblance to any other tutorial is purely coincidental.
Ok - let's start and remember to save often.
Open up a 750 x 650 blank canvas (we can resize it later)
Select Element 20 and paste in the center of the canvas
Resize by 65%
Select Element 13 - resize by 65%
Paste and position in the center of canvas
Select your selection tool and draw a square around the bottom windows on element (Rectangle, Mode:Replace, Feather 0, Anti-alias checked)
Paste close-up tubes of choice in the center of selection
Select invert, delete, select none
Change opacity on tubes to Screen
Select Element 80 - resize by 25%
Paste and position on top left
Select Element 10 - paste and position on top center where desired
Select Element 7 - resize by 25%
Paste and position on left side
Select Element 14 - resize by 30%
Paste and position on top right
Select Element 94 - resize by 20%
Paste and position on top right
Select Element 108 - resize by 15%
Paste and position on left side
Select Element 103 - resize by 25%
Paste and position on left side
Select Element 28 - resize by 50%
Paste and position on bottom
Select Element 42 - resize by 40%
Paste and position on bottom below house element
Paste tube of choice where desired
Apply Lokas 3D Shadow at default settings
Select Element 18 - resize by 50%
Paste and position on left side
Select Element 12 - resize by 30%
Paste and position on bottom left
Select Element 97 - resize by 22%
Paste and position on bottom left
Select Element 16 - resize by 35%
Paste and position on bottom left
Select Element 69 - resize by 25%
Paste and position on bottom left
Select Element 1 - resize by 30%
Paste and position on bottom left
Select Element 93 - resize by 20%
Paste and position on bottom left
Select Element 71 - resize by 28%
Paste and position on bottom left
Select Element 92 - resize by 30%
Paste and position on bottom
Select Element 83 - resize by 30%
Paste and position on bottom
Select Element 53 - resize by 25%
Image mirror and paste on bottom right
Select Element 15 - resize by 40%
Paste and position on bottom right
Select Element 56 - resize by 35%
Paste and position on bottom right
Select Element 67 - resize by 25%
Paste and position on bottom right
Select Element 109 - resize by 25%
Paste and position on bottom right
Select Element 58 - resize by 25%
Paste and position on bottom right
Add any dropshadows you like
Sharpen any elements as needed
Crop and resize as desired
Add copyright info, license number and name
You're done! Thanks for trying my tutorial!
Labels:Bibi's Collections,Scraps N Company | 0
comments
Tuesday, October 14, 2014
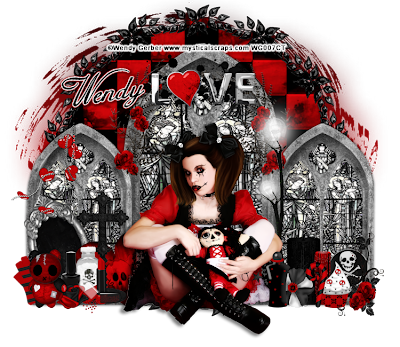
POPPET
Supplies needed:
I am using the amazing art from Wendy Gerber for for this tutorial which you can find here
Scrapkit: I am using a stunning kit from Whisper in the Wind called "Poppet" which you can get by going here
Mask 15 from Weescotlass which you can find here
Plugins: Lokas 3D Shadow
----------------------------
This tutorial is written for those who have working knowledge of PSPX2 (any version will do).
This tutorial was written by me on October 14, 2014. Please do not copy or paste on any other forum, website or blog provide link back to tut only. Please do not claim as your own. This tutorial is copyrighted to me. Any resemblance to any other tutorial is purely coincidental.
Ok - let's start and remember to save often.
Open up a 750 x 650 blank canvas (we can resize it later)
Select Frame 4 Element and paste in the center of the canvas
Resize by 80%
Select your magic wand tool and click in the center of the Frame (Add (Shift), RGB Value, Tolerance 25, Contiguous checked, Feather 0)
Selections, Modify, Expand by 3
Paste paper 10
Select invert, delete, select none
Move paper below frame
Select Element 74 - resize by 85%
Paste and position on the center of the canvas
Select Element 76 - resize by 30%
Image Free Rotate Right by 15% and paste on top left where desired
Image duplicate and mirror
Select Element 58 - resize by 30%
Paste and position on top center where desired
Paste tube of choice where desired
Apply Lokas 3D Shadow at default settings
Select Element 50 - resize by 25%
Paste and position on left side
Select Element 71 - resize by 25%
Image Free Rotate Left by 15% and paste on bottom left
Select Element 66 - resize by 50%
Paste and position on bottom left
Select Element 32 - resize by 15%
Paste and position on bottom left
Select Element 35 - resize by 15%
Paste and position on bottom left
Select Element 19 - resize by 12%
Paste and position on bottom left
Select Element 44 - resize by 12%
Paste and position on bottom left
Select Element 33 - resize by 20%
Image Free Rotate Left by 15% and paste on bottom left
Select Element 52 - resize by 12%
Paste and position on bottom left
Select Element 77 - resize by 20%
Select Element 8 - resize by 50%
Paste and position on right side
Image mirror and paste on bottom right
Select Element 48 - resize by 15%
Paste and position on bottom right
Select Element 42 - resize by 12%
Paste and position on bottom right
Select Element 78 - resize by 20%
Paste and position on bottom right
Select Element 39 - resize by 12%
Paste and position on bottom right
Select Element 26 - resize by 15%
Paste and position on bottom right
Select Element 70 - resize by 15%
Paste and position on bottom right
Add new raster layer and flood-fill with gradient or color of choice
Apply Mask 15 or mask of choice
Merge group and move to the bottom layer
Add any dropshadows you like
Sharpen any elements as needed
Crop and resize as desired
Add copyright info, license number and name
You're done! Thanks for trying my tutorial!
Labels:Wendy Gerber,Whisper In the Wind | 0
comments
Saturday, October 11, 2014
COLD ETERNAL
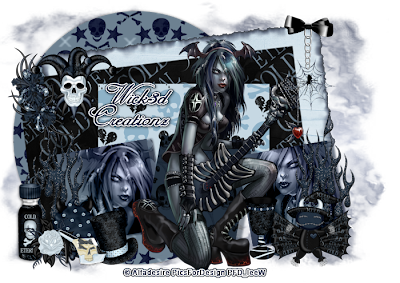
Supplies needed:
I am using the amazing artwork from Alfadesire for this tutorial which you can find here
Scrapkit: I am using a wicked freebi kit from Wick3d Creationz which you can exclusively get here
Template from Stylicious Twinky which you can find here
Mask 31 from Gina Gems which you can find here
Plugins used: Xero - Bad Dream, Alien Skin Xenofex 2 - Burnt Edges, Lokas 3D Shadow
----------------------------
This tutorial is written for those who have working knowledge of PSPX2 (any version will do).
This tutorial was written by me on October 11, 2014. Please do not copy or paste on any other forum, website or blog provide link back to tut only. Please do not claim as your own. This tutorial is copyrighted to me. Any resemblance to any other tutorial is purely coincidental.
Ok - let's start and remember to save often.
Open the template and using your shortcut keys on your keyboard (SHIFT+D) duplicate the template as a new image. Close the original and delete the copywrite layer.
Adjust canvas to 750 x 600
Select Square Raster 11 layer
Select all, float, defloat
Add new raster layer and flood-fill with gradient of choice (style, Angle 45, Repeat 2)
Add Close-up tube of choice and paste on top of gradient layer
Select invert, delete, select none
Change close-up to Luminance Legacy
Apply Xero Bad Dream on default setting of choice
Apply dropshadow and merge tube down on top of gradient
Effect, Texture Effects, Blinds (Width 2, Opactity 15, Horizontal and Light from left/top checked)
Delete/Hide original square layer
Select Square 9 layer and repeat above steps
Select Square Raster 10 layer
Select all, float, defloat
Paste paper 1
Select invert, delete, select none
Delete/Hide original square layer
Select Square Raster 4 layer
Select all, float, defloat
Paste paper 3
Select invert, delete, select none
Delete/Hide original square layer
Select Rectangle Raster 3 layer
Select all, float, defloat
Paste paper 8
Select invert, delete, select none
Delete/Hide original rectangle layer
Select Rectangle Raster 2 layer
Select all, float, defloat
Paste paper 6
Select invert, delete, select none
Apply Xenofex 2 - Burnt Edges with the following settings:
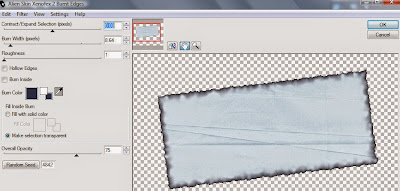
Delete/hide original rectangle layer
Select Circle Raster 1 layer
Select all, float, defloat
Paste paper 4
Select invert, delete, select none
Delete/Hide original circle layer
Copy and paste tube of choice and position below wordart layer
Apply Lokas 3D Shadow at default settings
Select Jester Element - resize by 40%
Paste and position on top left
Select Web Element - resize by 40%
Paste and position on top right
Select Flame Element - resize by 40%
Paste and position on bottom left
Image duplicate, mirror and reposition on bottom right
Select Poison Element - resize by 25%
Paste and position on bottom left
Select Devils CC Element - resize by 30%
Paste and position on bottom left
Select Rose Element - resize by 25%
Paste and position on bottom left
Select Shoe Element - resize by 25%
Paste and position on bottom left
Select Hat Element - resize by 22%
Paste and position on bottom left
Select Demon Element - resize by 40%
Paste and position on bottom right
Select Chalice Element - resize by 40%
Paste and position on bottom right
Select Orchid Element - resize by 35%
Paste and position on top left
Add new raster layer and flood-fill with gradient of choice
Apply Mask 31 or mask of choice
Merge group and move to the bottom layer
Add any additional elements you like.
Add any dropshadows you like
Crop and resize as desired
Add copyright info, license number and name
You're done! Thanks for trying my tutorial!
Labels:FTU,Wick3d Creationz | 0
comments
Friday, October 10, 2014
THANKSGIVING
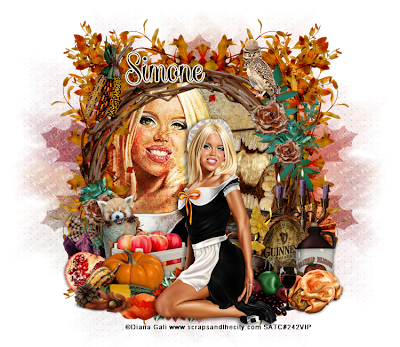
Supplies needed:
I am using the amazing art from DiHalim for for this tutorial which you can find here
Scrapkit: I am using a beautiful kit from Sophisticat Simone called "Thanksgiving" which you can get by going here
Fall Mask from Tonya which you can find on the Misfits Blog here
Plugins: Lokas 3D Shadow
----------------------------
This tutorial is written for those who have working knowledge of PSPX2 (any version will do).
This tutorial was written by me on October 10, 2014. Please do not copy or paste on any other forum, website or blog provide link back to tut only. Please do not claim as your own. This tutorial is copyrighted to me. Any resemblance to any other tutorial is purely coincidental.
Ok - let's start and remember to save often.
Open up a 750 x 650 blank canvas (we can resize it later)
Select Frame 1 Element and paste in the center of the canvas
Select your magic wand tool and click in the center of the Frame (Add (Shift), RGB Value, Tolerance 25, Contiguous checked, Feather 0)
Selections, Modify, Expand by 5
Paste paper 2
Select invert, delete
Paste Close-up tube of choice on top of paper and delete
Select none
Change close-up to Hard Light
Apply dropshadow and merge down on top of paper layer
Move paper below frame
Select Frame 4 Element - resize by 65%
Paste and position in the center of canvas
Select Element 36 - resize by 40%
Paste and position on right side below frame layer
Select Element 6 - resize by 30%
Paste and position on top left
Select Element 24 - resize by 25%
Paste and position on top right
Paste tube of choice where desired
Apply Lokas 3D Shadow at default settings
Select Element 55 - resize by 25%
Paste and position on bottom left
Select Element 67 - resize by 40%
Image mirror and paste on bottom left
Select Element 23 - resize by 20%
Paste and position on bottom left
Select Element 65 - resize by 35%
Paste and position on bottom left
Select Element 44 - resize by 25%
Paste and position on bottom left
Select Element 39 - resize by 20%
Paste and position on bottom left
Select Element 58 - resize by 25%
Paste and position on bottom right
Select Element 11 - resize by 35%
Paste and position on bottom right
Select Element 41 - resize by 40%
Paste and position on bottom right
Select Element 81 - resize by 40%
Paste and position on bottom right
Select Element 66 - resize by 40%
Paste and position on bottom right
Select Element 3 - resize by 40%
Paste and position on bottom right
Select Element 29 - resize by 25%
Paste and position on bottom right
Paste paper 11 on canvas
Apply Fall Mask or mask of choice
Merge group and move to the bottom layer
Add any dropshadows you like
Sharpen any elements as needed
Crop and resize as desired
Add copyright info, license number and name
You're done! Thanks for trying my tutorial!
Labels:Sophisticat Simone | 1 comments
Thursday, October 9, 2014
ROSE ANGEL
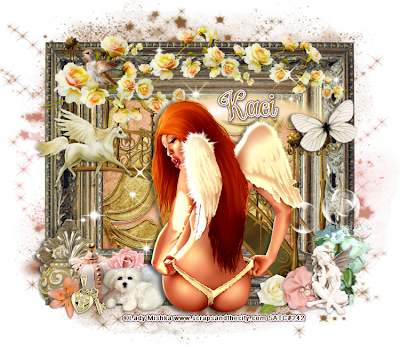
Supplies needed:
I am using the amazing art from Lady Mishka for for this tutorial which is not available right now
Scrapkit: I am using a stunning kit from Scrappin Krazy Designs called "Rose Angel" which you can get by going here
Sparkle Mask from Witchys heart which you can find on the Misfits Blog here
Plugins: Lokas 3D Shadow
----------------------------
This tutorial is written for those who have working knowledge of PSPX2 (any version will do).
This tutorial was written by me on October 9, 2014. Please do not copy or paste on any other forum, website or blog provide link back to tut only. Please do not claim as your own. This tutorial is copyrighted to me. Any resemblance to any other tutorial is purely coincidental.
Ok - let's start and remember to save often.
Open up a 750 x 650 blank canvas (we can resize it later)
Select Element 48 and paste in the center of the canvas
Resize by 85%
Select your magic wand tool and click in the center of the Frame (Add (Shift), RGB Value, Tolerance 25, Contiguous checked, Feather 0)
Selections, Modify, Expand by 5
Paste paper 8
Select invert, delete, select none
Move paper below frame
Select Element 77 - resize by 80%
Paste and position above frame where desired
Select Element 59 - paste and position on top of frame
Select Element 65 - resize by 40%
Paste and position on top left
Select Element 27 - paste and position on top right
Paste tube of choice where desired
Apply Lokas 3D Shadow at default settings
Select Element 31 - resize by 40%
Image Free Rotate Left by 15% and paste on top right
Select Element 67 - resize by 25%
Paste and position on top left
Select Element 12 - resize by 305
Paste and position on bottom left
Select Element 40 - resize by 30%
Paste and position on bottom left
Select Element 16 - resize by 50%
Paste and position on bottom left
Select Element 1 - resize by 25%
Paste and position on bottom left
Select Element 2 - resize by 30%
Paste and position on bottom left
Select Element 23 - resize by 20%
Paste and position on bottom left
Select Element 15 - resize by 20%
Paste and position on bottom left
Select Element 13 - resize by 40%
Paste and position on bottom right
Select Element 41 - resize by 30%
Paste and position on bottom right
Select Element 17 - resize by 25%
Paste and position on bottom right
Select Element 10 - resize by 20%
Paste and position on bottom right
Select new raster layer and flood fill with color or gradient of choice
Apply Exclusive Mask or mask of choice
Merge group and move to the bottom layer
Add any dropshadows you like
Sharpen any elements as needed
Crop and resize as desired
Add copyright info, license number and name
You're done! Thanks for trying my tutorial!
Labels:Scrappin Krazy Designs | 0
comments
Monday, October 6, 2014
GET YOUR WITCHIN ON
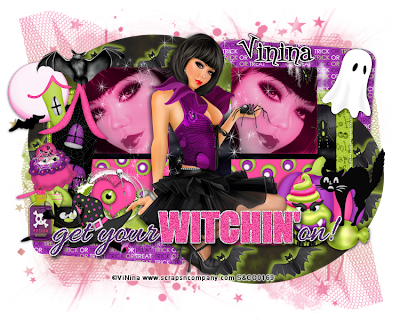
Supplies needed:
I am using the amazing artwork from the Halloween Collab by ViNina for this tutorial which you can find here
Scrapkit: I am part of a stunning Mega Halloween Collab kit from MMeliCrea Designz which you can get by going here
Template 674 from Millie which you can find here
Halloween Mask from Vix which you can find here
Plugins used: Lokas 3D Shadow
----------------------------
This tutorial is written for those who have working knowledge of PSPX2 (any version will do).
This tutorial was written by me on October 6, 2014. Please do not copy or paste on any other forum, website or blog provide link back to tut only. Please do not claim as your own. This tutorial is copyrighted to me. Any resemblance to any other tutorial is purely coincidental.
Ok - let's start and remember to save often.
Open the template and using your shortcut keys on your keyboard (SHIFT+D) duplicate the template as a new image. Close the original and delete the copywrite layer.
Adjust canvas to 750 x 600
Select Wordart 15 layer
Select your magic wand and select "Witchin" wording
Add new raster layer and flood-fill with color of choice
Adjust, Add/Remove Noise, Add Noise (Uniform checked, Noise 55%, Monochrome checked)
Merge down on top of original wordart layer
Select Square 13 layer
Select all, float, defloat
Paste paper 7
Select invert, delete, select none
Delete/hide original square layer
Select Square 12 layer and repeat above steps
Select Square 11 layer
Select all, float, defloat
Add new raster layer and flood-fill with gradient of choice (style, Angle 45, Repeat 2)
Add Close-up tube of choice and paste on top of gradient layer
Select invert, delete, select none
Change close-up to Luminance Legacy and drop opacity down to 80%
Apply Xero Bad Dream on default setting of choice
Apply dropshadow and merge tube down on top of gradient
Effect, Texture Effects, Blinds (Width 2, Opactity 15, Horizontal and Light from left/top checked)
Delete/Hide original square layer
Select Square 10 layer and repeat above steps
Select Rectangle 9 layer
Select all, float, defloat
Paste paper 10
Select invert, delete, select none
Delete/Hide original rectangle layer
Select Square 6 layer
Select all, float, defloat
Paste paper 2
Select invert, delete, select none
Delete/Hide original square layer
Select Square 5 layer and repeat above steps
Select Oval 4 layer
Select all, float, defloat
Paste paper 6
Select invert, delete, select none
Delete/Hide original oval layer
Select Oval 3 and repeat above steps
Select Square 2 layer
Select all, float, defloat
Paste paper 9
Select invert, delete, select none
Delete/hide original square layer
Select Square 1 layer and repeat above steps
Copy and paste tube of choice and position below wordart layer
Apply Lokas 3D Shadow at default settings
Select Element 13 - resize by 60%
Paste and position on left side
Select Element 10 - resize by 15%
Paste and position on top left
Select Element 39 - resize by 25%
Image Free Rotate Left by 15% and paste on left side
Select Element 47 - resize by 22%
Paste and position on bottom left
Select Element 34 - resize by 25%
Paste and position on bottom left
Select Element 45 - resize by 22%
Paste and position on bottom left
Select Element 21 - resize by 15%
Paste and position on bottom left
Select Element 23 - resize by 30%
Paste and position on top right
Select Element 50 - resize by 30%
Paste and position on bottom right
Select Element 40 - resize by 25%
Paste and position on bottom right
Select Element 42 - resize by 20%
Paste and position on bottom right
Select Element 35 - resize by 25%
Paste and position on bottom right
Add new raster layer and flood-fill with gradient of choice
Apply Halloween Mask or mask of choice
Merge group and move to the bottom layer
Add any additional elements you like.
Add any dropshadows you like
Crop and resize as desired
Add copyright info, license number and name
You're done! Thanks for trying my tutorial!
Labels:MMeliCrea Designz,Scraps N Company | 0
comments
Saturday, October 4, 2014
LADY VAMP
Supplies needed:
I am using the amazing artwork from Celinart Pinup for this tutorial which you can find here
Scrapkit: I am using a stunning kit from Pink Paradox Productions called "Vampire Bride" which you can get by going here
Template from Stylicious Twinky which you can find here
Mask 37 from Gina Gems which you can find here
Plugins used: Lokas 3D Shadow
----------------------------
This tutorial is written for those who have working knowledge of PSPX2 (any version will do).
This tutorial was written by me on October 4, 2014. Please do not copy or paste on any other forum, website or blog provide link back to tut only. Please do not claim as your own. This tutorial is copyrighted to me. Any resemblance to any other tutorial is purely coincidental.
Ok - let's start and remember to save often.
Open the template and using your shortcut keys on your keyboard (SHIFT+D) duplicate the template as a new image. Close the original and delete the copywrite layer.
Adjust canvas to 750 x 600
Select Rectangle Raster 4 layer
Select all, float, defloat
Add new raster layer and flood-fill with gradient of choice (style, Angle 45, Repeat 2)
Add Close-up tubes of choice and paste on top of gradient layer
Select invert, delete, select none
Change close-ups to Luminance Legacy and drop opacity down to 85%
Apply Xero Bad Dream on default setting of choice
Apply dropshadow and merge tubes down on top of gradient
Effect, Texture Effects, Blinds (Width 2, Opactity 15, Horizontal and Light from left/top checked)
Delete/Hide original rectangle layer
Select Promoted Selection Circle layer
Select all, float, defloat
Paste paper 18
Select invert, delete, select none
Delete/Hide original circle layer
Select Frame Element 18 - resize by 65%
Paste and position on top of circle layer
Select Rectangle Raster 2 layer
Select all, float, defloat
Paste paper 20
Select invert, delete, select none
Delete/Hide original rectangle layer
Select Rectangle Raster 1 layer
Select all, float, defloat
Paste paper 7
Select invert, delete, select none
Delete/Hide original rectangle layer
Select Element 118 - resize by 30%
Paste and position in the center below wordart layer
Select Element 68 - resize by 40%
Image Free Rotate Left by 15% and paste in the center of canvas below wordart
Select Element 12 - resize by 15%
Paste and position on right side above stair element
Copy and paste tube of choice and position where desired
Apply Lokas 3D Shadow at default settings
Select Element 143 - resize by 20%
Paste and position on top rigth below frame layer
Select Element 7 - resize by 15%
Paste and position on top right
Select Element 32 - resize by 8%
Paste and position on top right
Select Element 153 - resize by 15%
Paste and position on top left
Image duplicate and mirror
Select Element 50 - resize by 20%
Paste and position on bottom right
Select Element 40 - resize by 20%
Paste and position on bottom right
Select Element 48 - resize by 15%
Paste and position on bottom right
Select Element 25 - resize by 15%
Paste and position on bottom right
Select Element 35 - resize by 10%
Paste and position on bottom right
Select Element 28 - resize by 30%
Paste and position on bottom right
Select Element 151 - resize by 15%
Paste and position on bottom right
Select Element 64 - resize by 15%
Paste and position on bottom
Select Element 14 - resize by 20%
Paste and position on bottom
Select Element 52 - resize by 20%
Paste and position on bottom left
Select Element 26 - resize by 20%
Paste and position on bottom left
Select Element 42 - resize by 20%
Paste and position on bottom left
Select Element 36 - resize by 15%
Paste and position on bottom left
Select Element 37 - resize by 15%
Paste and position on bottom left
Paste paper 13
Apply Mask 37 or mask of choice
Merge group and move to the bottom layer
Add any additional elements you like.
Add any dropshadows you like
Crop and resize as desired
Add copyright info, license number and name
You're done! Thanks for trying my tutorial!
Friday, October 3, 2014
JACK'S BACK
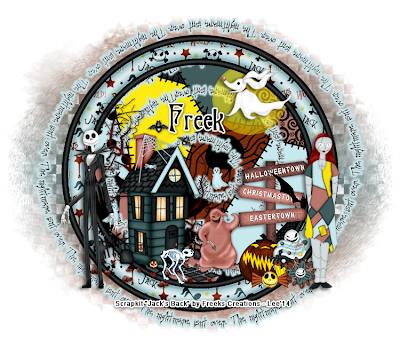
Supplies needed:
Scrapkit: I am using a wicked kit from Freeks Creation called "Jacks Back" which you can get by going here
Mask 315 from Aqua which you can find on the Misfit blog here
Plugins: Lokas 3D Shadow
----------------------------
This tutorial is written for those who have working knowledge of PSPX2 (any version will do).
This tutorial was written by me on October 3, 2014. Please do not copy or paste on any other forum, website or blog provide link back to tut only. Please do not claim as your own. This tutorial is copyrighted to me. Any resemblance to any other tutorial is purely coincidental.
Ok - let's start and remember to save often.
Open up a 750 x 650 blank canvas (we can resize it later)
Select Frame Element 27 and paste in the center of the canvas
Resize by 90%
Select Frame Element and paste on canvas - resize by 80%
Select your magic wand tool and click in the center of the Frame (Add (Shift), RGB Value, Tolerance 25, Contiguous checked, Feather 0)
Selections, Modify, Expand by 5
Paste paper 2
Select invert, delete, select none
Move paper below frame
Select Wordart Element and paste in the center of canvas below frame
Select House Element - resize by 75%
Paste and position on bottom left
Select Moon Element - resize by 30%
Paste and position on top right
Select Zero Element - resize by 30%
Paste and position on top left
Select Sally Element - resize by 55%
Paste and position on bottom right
Select Sign Element - resize by 40%
Paste and position on bottom right
Select Jack O Lantern Element - resize by 25%
Paste and position on bottom right
Select Cupcake Element - resize by 20%
Paste and position on bottom right
Select Candy Element - resize by 30%
Paste and position on bottom right
Select Flower Element - resize by 15%
Paste and position on bottom right
Select Oogie Element - resize by 25%
Paste and position on bottom where desired
Select Cat Element - resize by 20%
Paste and position on bottom where desired
Select Jack Element - resize by 55%
Paste and position on left side
Select new raster layer and flood fill with color or gradient of choice
Apply Mask 315 or mask of choice
Merge group and move to the bottom layer
Add any dropshadows you like
Sharpen any elements as needed
Crop and resize as desired
Add copyright info, license number and name
You're done! Thanks for trying my tutorial!
Labels:Freek's Creation | 0
comments
Subscribe to:
Comments
(Atom)


