Labels
- Alikas Scraps
- All Dolled Up Store
- Amy Marie
- Annaica
- Arthur Crowe
- Babycakes Scraps
- Barbara Jensen
- Bibi's Collections
- Black Widow Creationz
- Blu Moon
- Bonnies Creations
- Bookwork Dezines
- Broken Sky Dezine
- Carita Creationz
- Carpe Diem Designs
- CDO
- Celinart Pinup
- Celine
- Chacha Creationz
- Charmed Designs
- Cherry Blossom Designs
- Chili Designz
- Cluster Frame
- Creative Misfits
- Creative Scraps by Crys
- Curious Creative Dreams
- Danny Lee
- Derzi
- Designs by Ali
- Designs by Joan
- Designs by Ketura
- Designs By Norella
- Designs by Vi
- Diana Gali
- Diry Art Designs
- Disturbed Scraps
- Dreaming With Bella
- Eclipse Creations
- Elegancefly
- Extras
- Fabulous Designz
- Forum Set
- Foxy's Designz
- Freek's Creation
- FTU
- FwTags
- Goldwasser
- Gothic Inspirations
- Gothic Raven Designs
- Graphfreaks
- Hania's Designs
- Happy Pumpkin Studios
- Horseplay's Pasture Designs
- indie-Zine
- Irish Princess Designs
- Ishika Chowdhury
- Kaci McVay
- Kajenna
- katharine
- Katherine
- Khloe Zoey
- Killer Kitty
- Kissing Kate
- KiwiFirestorm
- Kiya Designs
- Kizzed by Kelz
- KZ Designz
- Lady Mishka
- Lil Mz Brainstorm
- Maiden of Darkness
- Mariel Designs
- MellieBeans
- Michelle's Myths
- Midnight Shadow
- Misticheskya
- MistyLynn's Creations
- MMeliCrea Designz
- Moon Vixen Designs
- NaSionainne
- Ninaste
- Niqui Designs
- Pandora
- Picsfordesign
- Pink Paradox Productions
- Radyga Designs
- Redefined Designs
- Rissa's Designs
- Schnegge
- ScottishButterfly Creations
- Scrappin Krazy Designs
- Scrappin With Lil Ol Me
- Scraps and the City
- Scraps Dimensions
- Scraps From The Heart
- Scraps N Company
- Scraps with Attitude
- Shining Star Art
- Skyscraps
- Sleek N Sassy Designs
- Sophisticat Simone
- Souldesigner
- Soxsational Scraps
- Spazz
- Starlite and Soul
- Stella Felice
- Tammy Welt
- Tasha's Playground
- The PSP Project
- Thrifty Scraps by Gina
- Tiny Turtle Designs
- Upyourart
- Verymany
- Wendy Gerber
- Whisper In the Wind
- Wick3d Creationz
- Wicked Diabla
- Yude's Kreationz
Blog Archive
Wednesday, December 31, 2014
CALACA
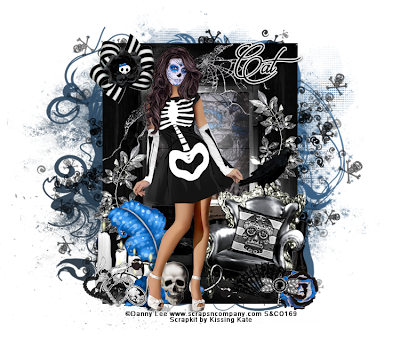
Supplies needed:
I am using the stunning artwork from Danny Lee for this tutorial which you can find here
Scrapkit: I am using a stunning kit from Kissing Kate called "Calaca" which you can get by going here
Mask 32 from Moonbeams and Spiderwebs which you can find here
Plugins: Lokas 3D Shadow
----------------------------
This tutorial is written for those who have working knowledge of PSPX2 (any version will do).
This tutorial was written by me on December 31, 2014. Please do not copy or paste on any other forum, website or blog provide link back to tut only. Please do not claim as your own. This tutorial is copyrighted to me. Any resemblance to any other tutorial is purely coincidental.
Ok - let's start and remember to save often.
Open up a 750 x 650 blank canvas (we can resize it later)
Select Element 38 and paste in the center of the canvas
Resize by 75%
Select your selections tool and select the center portion of the window Frame (Add (Shift), RGB Value, Tolerance 25, Contiguous checked, Feather 0)
Paste paper 7
Select invert, delete
Add close-up tube of choice on top of paper layer and delete
Select none
Change Close-up to overlay and merge down on paper layer
Move paper below window frame
Select Element 2 - resize by 25%
Paste and position on top left above frame
Select Element 51 - resize by 15%
Paste and position on top of bow element
Select Element 5 - resize by 40%
Paste and position on bottom right
Select Element 58 - resize by 18%
Image Free Rotate Right by 15% and paste on top of chair element
Paste tube of choice where desired
Apply Lokas 3D Shadow at default settings
Select Element 49 - resize by 35%
Paste and position on right side
Image duplicate and mirror - reposition on left where desired
Select Element 41 - resize by 15%
Paste and position on bottom right
Select Element 55 - resize by 35%
Image Free Rotate Right by 15% and paste on bottom right
Select Element 10 - resize by 15%
Paste and position on bottom right
Select Element 25 - resize by 25%
Paste and position on bottom left
Select Element 21 - resize by 30%
Paste and position on bottom left
Select Element 31 - resize by 30%
Paste and position on bottom left
Select Element 16 - resize by 20%
Paste and position on bottom left
Select Element 40 - resize by 20%
Paste and position on bottom left
Select Element 3 - resize by 20%
Paste and position on bottom left
Select Element 20 - resize by 16%
Paste and position on bottom where desired
Select Element 56 - resize by 90%
Paste and position on center of canvas
Move to bottom layer
Add new raster layer and flood-fill with color or gradient of choice
Apply Mask 32 or mask of choice
Merge group and move to the bottom layer
Add any dropshadows you like
Sharpen any elements as needed
Crop and resize as desired
Add copyright info, license number and name
You're done! Thanks for trying my tutorial!
Labels:Kissing Kate,Scraps N Company | 0
comments
Tuesday, December 30, 2014
SWEET NEW YEAR
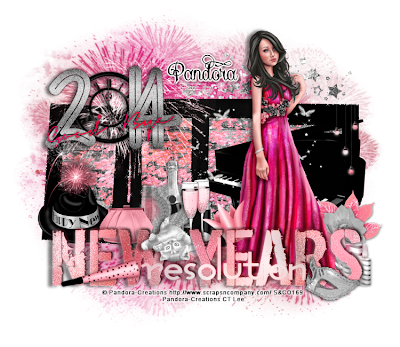
Supplies needed:
I am using the stunning artwork from Pandora Creations for this tutorial which you can find here
Scrapkit: I am using a stunning kit from Bibi's Collections called "Sweet New Year" which you can get by going here
Patriotic Mask 4 from Dee which you can find here
Plugins: Lokas 3D Shadow
----------------------------
This tutorial is written for those who have working knowledge of PSPX2 (any version will do).
This tutorial was written by me on December 30, 2014. Please do not copy or paste on any other forum, website or blog provide link back to tut only. Please do not claim as your own. This tutorial is copyrighted to me. Any resemblance to any other tutorial is purely coincidental.
Ok - let's start and remember to save often.
Open up a 750 x 650 blank canvas (we can resize it later)
Select Frame Element 78 and paste in the center of the canvas
Resize by 65%
Select your magic wand tool and click in the center of each rectangle frame (Add (Shift), RGB Value, Tolerance 25, Contiguous checked, Feather 0)
Selections, Modify, Expand by 5
Paste paper 3
Select invert, delete, select none
Move paper below frame
Select Element 85 - resize by 65%
Paste and position on top of paper layer
Select Element 67 - resize by 50%
Paste and position on top left above frame
Select Element 24 - resize by 55%
Paste and position on right side of frame
Select Element 98 - resize by 20%
Paste and position on top right
Erase any excess on the top after you position where desired
Paste tube of choice where desired
Apply Lokas 3D Shadow at default settings
Select Element 77 - paste and position on bottom
Select Element 49 - resize by 25%
Paste and position on bottom left
Select Element 61 - resize by 25%
Paste and position on bottom left
Select Element 13 - resize by 55%
Paste and position on bottom left
Select Element 47 - resize by 25%
Paste and position on bottom left
Select Element 48 - resize by 25%
Paste and position on bottom where desired
Select Element 8 - resize by 25%
Paste and position on bottom where desired
Select Element 45 - resize by 40%
Paste and position on bottom
Select Element 2 - resize by 22%
Paste and position on bottom right
Select Element 104 - resize by 22%
Paste and position on bottom right
Select Element 14 - resize by 30%
Paste and position on bottom right
Select Element 103 - resize by 15%
Paste and position on bottom right
Select Element 65 - resize by 80%
Paste and position on top right and move to bottom layer
Add new raster layer and flood-fill with color or gradient of choice
Apply Mask 4 or mask of choice
Merge group and move to the bottom layer
Add any dropshadows you like
Sharpen any elements as needed
Crop and resize as desired
Add copyright info, license number and name
You're done! Thanks for trying my tutorial!
Friday, December 26, 2014
HATING CHRISTMAS
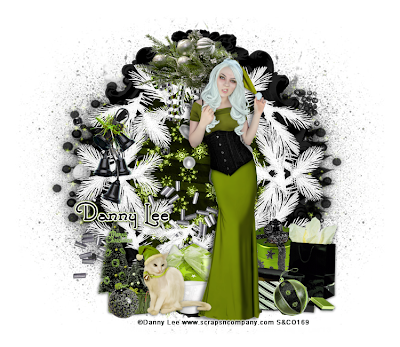
Supplies needed:
I am using the stunning artwork from Danny Lee for this tutorial which you can find here
Scrapkit: I am using a stunning kit from Kizzed by Kelz called "Hating Christmas" which you can get by going here
Mask 100 from Millie which you can find here
Plugins: Lokas 3D Shadow
----------------------------
This tutorial is written for those who have working knowledge of PSPX2 (any version will do).
This tutorial was written by me on December 26, 2014. Please do not copy or paste on any other forum, website or blog provide link back to tut only. Please do not claim as your own. This tutorial is copyrighted to me. Any resemblance to any other tutorial is purely coincidental.
Ok - let's start and remember to save often.
Open up a 750 x 650 blank canvas (we can resize it later)
Select Frame Element 32 and paste in the center of the canvas
Resize by 90%
Select your magic wand tool and click in the center of the Frame (Add (Shift), RGB Value, Tolerance 25, Contiguous checked, Feather 0)
Selections, Modify, Expand by 5
Paste paper 7
Select invert, delete, select none
Move paper below frame
Select Element 115 - resize by 85%
Paste and position on top of paper layer
Select Element 88 - resize by 85%
Paste and position on top of frame
Select Element 14 - resize by 35%
Paste and position on top of frame
Select Element 13 - resize by 30%
Paste and position on top left
Paste tube of choice where desired
Apply Lokas 3D Shadow at default settings
Select Element 19 - resize by 30%
Paste and position on bottom right
Select Element 2 - resize by 25%
Paste and position on bottom right
Select Element 15 - resize by 15%
Paste and position on bottom right
Select Element 113 - resize by 30%
Paste and position on bottom left
Select Element 10 - resize by 12%
Image Free Rotate Left by 15% and paste on bottom left
Select Element 116 - resize by 25%
Paste and position on bottom left
Select Element 44 - resize by 15%
Paste and position on bottom left
Select Element 114 - resize by 25%
Paste and position on bottom left
Paste paper 13 on canvase
Apply Mask 100 or mask of choice
Merge group and move to the bottom layer
Add any dropshadows you like
Sharpen any elements as needed
Crop and resize as desired
Add copyright info, license number and name
You're done! Thanks for trying my tutorial!
Labels:Scraps N Company | 0
comments
Tuesday, December 23, 2014
MODERN CHRISTMAS
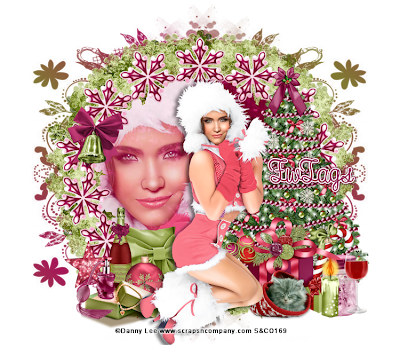
Supplies needed:
I am using the stunning artwork from Danny Lee for this tutorial which you can find here
Scrapkit: I am using a stunning kit from FwTags Creations called "Modern Christmas" which you can get by going here
Mask 104 from Millie which you can find here
Plugins: Lokas 3D Shadow, Mura Meister - Copies
----------------------------
This tutorial is written for those who have working knowledge of PSPX2 (any version will do).
This tutorial was written by me on December 23, 2014. Please do not copy or paste on any other forum, website or blog provide link back to tut only. Please do not claim as your own. This tutorial is copyrighted to me. Any resemblance to any other tutorial is purely coincidental.
Ok - let's start and remember to save often.
Open up a 750 x 650 blank canvas (we can resize it later)
Select Frame Element 2 and paste in the center of the canvas
Resize by 60%
Select your magic wand tool and click in the center of the Frame (Add (Shift), RGB Value, Tolerance 25, Contiguous checked, Feather 0)
Selections, Modify, Expand by 5
Paste paper 4
Select invert, delete
Paste close-up tube on top of paper layer and delete
Select none
Change close-up to screen
Drop opacity on tube down to 90%
Apply dropshadow and merge down on paper layer
Move paper below frame
Select Element 18 - resize by 12%
Paste and position on top of canvas
Apply Mura Meister Copies on the following encircle settings:
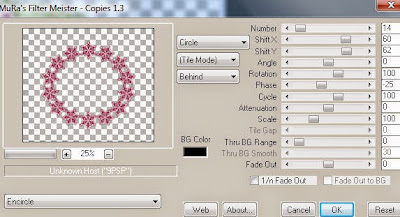
Select Element 26 - resize by 45%
Paste and position on right side
Select Element 13 - resize by 15%
Paste and position on top left
Paste tube of choice where desired
Apply Lokas 3D Shadow at default settings
Select Element 61 - resize by 15%
Paste and position on bottom right
Select Element 40 - resize by 15%
Paste and position on bottom right
Select Element 33 - resize by 15%
Paste and position on bottom right
Select Element 20 - resize by 25%
Paste and position on bottom right
Select Element 7 - resize by 15%
Paste and position on bottom righy
Select Element 37 - resize by 15%
Paste and position on bottom right
Select Element 24 - resize by 15%
Paste and position on bottom right
Select Element 60 - resize by 20%
Paste and position on bottom left
Select Element 62 - resize by 20%
Paste and position on bottom left
Select Element 16 - resize by 13%
Paste and position on bottom left
Select Element 58 - resize by 20%
Paste and position on bottom left
Select Element 59 - resize by 15%
Paste and position on bottom left
Select Element 42 - resize by 12%
Paste and position on bottom left
Add new raster layer and flood-fill with color or gradient of choice
Apply Mask 104 or mask of choice
Merge group and move to the bottom layer
Add any dropshadows you like
Sharpen any elements as needed
Crop and resize as desired
Add copyright info, license number and name
You're done! Thanks for trying my tutorial!
Labels:FwTags,Scraps N Company | 0
comments
CELEBRATION
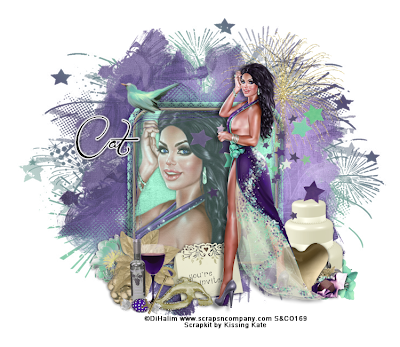
Supplies needed:
I am using the stunning artwork from DiHalim for this tutorial which you can find here
Scrapkit: I am using a stunning kit from Kissing Kate called "Celebration" which you can get by going here
Patriotic Mask 3 from Dee which you can find here
Plugins: Lokas 3D Shadow
----------------------------
This tutorial is written for those who have working knowledge of PSPX2 (any version will do).
This tutorial was written by me on December 23, 2014. Please do not copy or paste on any other forum, website or blog provide link back to tut only. Please do not claim as your own. This tutorial is copyrighted to me. Any
resemblance to any other tutorial is purely coincidental.
Ok - let's start and remember to save often.
Open up a 750 x 650 blank canvas (we can resize it later)
Select Frame Element 2 and paste in the center of the canvas
Resize by 75%
Select your magic wand tool and click in the center of the Frame (Add (Shift), RGB Value, Tolerance 25, Contiguous checked, Feather 0)
Selections, Modify, Expand by 5
Paste paper 1
Select invert, delete
Paste close-up tube on top of paper layer and delete
Select none
Drop opacity on tube down to 70%
Apply dropshadow and merge down on paper layer
Move paper below frame
Select Element 23 - resize by 25%
Paste and position on top left
Select Element 63 - resize by 30%
Paste and position on top right
Select Element 47 - resize by 50%
Paste and position on top right side
Paste tube of choice where desired
Apply Lokas 3D Shadow at default settings
Select Element 49 - resize by 35%
Paste and position on bottom right
Select Element 68 - resize by 22%
Paste and position on bottom right
Select Element 7 - resize by 15%
Paste and position on bottom right
Select Element 16 - resize by 20%
Paste and position on bottom left
Select Element 43 - resize by 25%
Paste and position on bottom left
Select Element 62 - resize by 30%
Paste and position on bottom left
Select Element 20 - resize by 20%
Paste and position on bottom left
Select Element 67 - resize by 25%
Paste and position on bottom left
Select Element 27 - resize by 20%
Paste and position on bottom left
Select Element 24 - resize by 15%
Paste and position on bottom left
Select Element 45 - resize by 25%
Paste and position on bottom
Add new raster layer and flood-fill with color or gradient of choice
Apply Mask 3 or mask of choice
Merge group and move to the bottom layer
Add any dropshadows you like
Sharpen any elements as needed
Crop and resize as desired
Add copyright info, license number and name
You're done! Thanks for trying my tutorial!
Labels:Kissing Kate,Scraps N Company | 0
comments
WINTER WONDERLAND
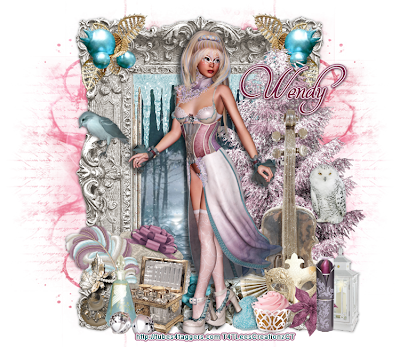
Supplies needed:
I am using the stunning artwork from Wendy Gerber for this tutorial which you can find here
Scrapkit: I am using a stunning kit from Pink Paradox Productions called "Winter Wonderland" which you can get by going here
Mask 251 from Trese which you can find here
Plugins: Lokas 3D Shadow
----------------------------
This tutorial is written for those who have working knowledge of PSPX2 (any version will do).
This tutorial was written by me on December 23, 2014. Please do not copy or paste on any other forum, website or blog provide link back to tut only. Please do not claim as your own. This tutorial is copyrighted to me. Any resemblance to any other tutorial is purely coincidental.
Ok - let's start and remember to save often.
Open up a 750 x 650 blank canvas (we can resize it later)
Select Frame Element 9 and paste in the center of the canvas
Resize by 60%
Select your magic wand tool and click in the center of the Frame (Add (Shift), RGB Value, Tolerance 25, Contiguous checked, Feather 0)
Selections, Modify, Expand by 5
Paste paper 14
Select invert, delete, select none
Move paper below frame
Select Element 126 - resize by 26%
Paste and position on top of frame
Select Element 129 - resize by 20%
Paste and position on top left
Image duplicate and mirror
Select Element 180 - resize by 50%
Paste and position on right side
Select Element 64 - resize by 50%
Paste and position on right side
Paste tube of choice where desired
Apply Lokas 3D Shadow at default settings
Select Element 7 - resize by 15%
Paste and position on bottom right
Select Element 60 - resize by 25%
Paste and position on bottom right
Select Element 35 - resize by 30%
Paste and position on bottom right
Select Element 29 - resize by 15%
Paste and position on bottom right
Select Element 141 - resize by 15%
Paste and position on bottom right
Select Element 50 - resize by 12%
Paste and position on bottom right
Select Element 72 - resize by 20%
Image mirror and paste on bottom
Select Element 45 - resize by 15%
Paste and position on bottom
Select Element 82 - resize by 25%
Paste and position on bottom left
Select Element 67 - resize by 20%
Paste and position on bottom left
Select Element 58 - resize by 22%
Paste and position on bottom left
Select Element 71 - resize by 22%
Paste and position on bottom left
Select Element 57 - resize by 20%
Paste and position on bottom left
Select Element 91 - resize by 15%
Paste and position on bottom left
Select Element 5 - resize by 15%
Paste and position on left side
Select Element 145 - resize by 15%
Paste and position on bottom below tube layer
Paste paper 25 on canvas
Apply Mask 251 or mask of choice
Merge group and move to the bottom layer
Add any dropshadows you like
Sharpen any elements as needed
Crop and resize as desired
Add copyright info, license number and name
You're done! Thanks for trying my tutorial!
Thursday, December 18, 2014
CHRISTMAS PUPPIES
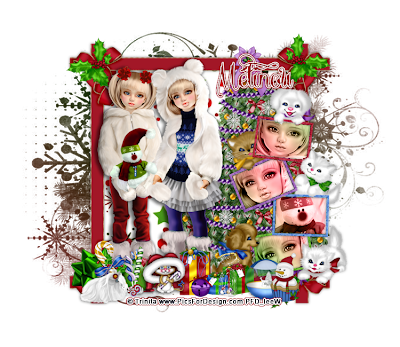
Supplies needed:
I am using the stunning artwork from Trinita for this tutorial which you can find here
Scrapkit: I am using a beautiful kit from MMeliCrea Designz called "Christmas Puppies" which you can get by going here
Winter Mask 1 from Dee which you can find here
Plugins: Lokas 3D Shadow
----------------------------
This tutorial is written for those who have working knowledge of PSPX2 (any version will do).
This tutorial was written by me on December 18, 2014. Please do not copy or paste on any other forum, website or blog provide link back to tut only. Please do not claim as your own. This tutorial is copyrighted to me. Any resemblance to any other tutorial is purely coincidental.
Ok - let's start and remember to save often.
Open up a 750 x 650 blank canvas (we can resize it later)
Select Frame Element 5 and paste in the center of the canvas
Resize by 75%
Select your magic wand tool and click in the center of the Frame (Add (Shift), RGB Value, Tolerance 25, Contiguous checked, Feather 0)
Selections, Modify, Expand by 5
Paste paper 7
Select invert, delete, select none
Move paper below frame
Select Frame Element 7 - resize by 60%
Paste and position on right side
Select your magic wand tool and click in the center of the Frame
(Add (Shift), RGB Value, Tolerance 25, Contiguous checked,
Feather 0)
Selections, Modify, Expand by 2
Add new raster layer and flood-fill each square with color or gradient of choice
Paste close-up tubes on top colored layer where desired
Select invert, delete, Select none
Change tubes to Luminance (Legacy)
Apply dropshadow and merge tubes down on colored layer
Move below frame
Select Element 48 - resize by 15%
Paste and position on top right
Image duplicate and mirror
Paste tube of choice where desired
Apply Lokas 3D Shadow at default settings
Select Element 107 - resize by 15%
Paste and position on bottom left
Select Element 61 - resize by 15%
Paste and position on bottom left
Select Element 38 - resize by 15%
Paste and position on bottom left
Select Element 70 - resize by 15%
Paste and position on bottom left
Select Element 55 - resize by 15%
Paste and position on bottom left
Select Element 83 - resize by 15%
Paste and position on bottom
Select Element 3 - resize by 22%
Paste and position on bottom
Select Element 45 - resize by 12%
Paste and position on bottom
Select Element 58 - resize by 15%
Paste and position on bottom right
Select Element 16 - resize by 15%
Paste and position on bottom right
Add new raster layer and flood-fill with color or gradient of choice
Apply Mask 1 or mask of choice
Merge group and move to the bottom layer
Add any dropshadows you like
Sharpen any elements as needed
Crop and resize as desired
Add copyright info, license number and name
You're done! Thanks for trying my tutorial!
Labels:MMeliCrea Designz | 0
comments
Sunday, December 14, 2014
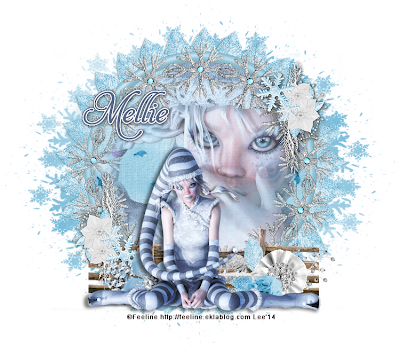
WINTER BLUES
Supplies needed:
I am using the stunning artwork from Feeline for this tutorial which you can find here
Scrapkit: I am using a beautiful from MellieBeans called "Winter Blues" which you can get by going here
Mask 95 from Millie which you can find here
Plugins: Mura Meister - Copies, Lokas 3D Shadow
----------------------------
This tutorial is written for those who have working knowledge of PSPX2 (any version will do).
This tutorial was written by me on December 14, 2014. Please do not copy or paste on any other forum, website or blog provide link back to tut only. Please do not claim as your own. This tutorial is copyrighted to me. Any resemblance to any other tutorial is purely coincidental.
Ok - let's start and remember to save often.
Open up a 750 x 650 blank canvas (we can resize it later)
Select Frame Element 12 and paste in the center of the canvas
Resize by 85%
Select your magic wand tool and click in the center of the Frame
(Add (Shift), RGB Value, Tolerance 25, Contiguous checked,
Feather 0)
Selections, Modify, Expand by 5
Paste paper 7
Select invert, delete
Paste close-up tube on top of paper where desired and delete
Select none
Drop opacity on tube down to 70%
Apply dropshadow and merge down on paper layer
Move paper below frame
Select Element 33 - resize by 25%
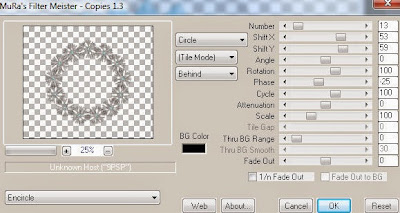
Apply Mura Meister on the following encircle settings:
Select Element 1 - resize by 30%
Paste and position on bottom left
Image duplicate, mirror and reposition on top right
Select Element 18 - resize by 60%
Paste and position on bottom of frame
Paste tube of choice where desired
Apply Lokas 3D Shadow at default settings
Select Element 13 - resize by 40%
Paste and position on bottom right
Select Element 35 - resize by 15%
Paste and position on bottom right
Select Element 5 - resize by 40%
Image Free Rotate Left by 25% and paste on bottom right
Select Element 34 - resize by 15%
Paste and position on bottom left
Select Element 25 - resize by 25%
Paste and position on bottom left
Select Element 30 - Paste and position on top of canvas where desired
Add new raster layer and flood-fill with color or gradient of choice
Apply Mask 95 or mask of choice
Merge group and move to the bottom layer
Add any dropshadows you like
Sharpen any elements as needed
Crop and resize as desired
Add copyright info, license number and name
You're done! Thanks for trying my tutorial!
Labels:MellieBeans | 0
comments
Saturday, December 13, 2014
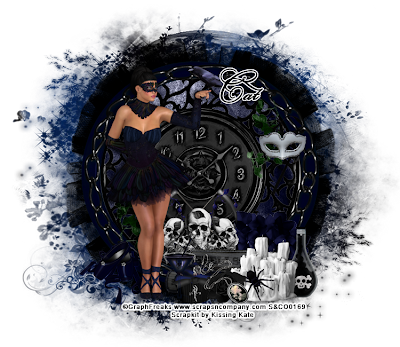
RAVEN
Supplies needed:
I am using the stunning artwork from Graphfreaks for this tutorial which you can find here
Scrapkit: I am using a stunning kit from Kissing Kate called "Raven" which you can get by going here
Mask 20 from Moonbeams & Spiderwebs which you can find here
Plugins: Lokas 3D Shadow
----------------------------
This tutorial is written for those who have working knowledge of PSPX2 (any version will do).
This tutorial was written by me on December 13, 2014. Please do not copy or paste on any other forum, website or blog provide link back to tut only. Please do not claim as your own. This tutorial is copyrighted to me. Any resemblance to any other tutorial is purely coincidental.
Ok - let's start and remember to save often.
Open up a 750 x 650 blank canvas (we can resize it later)
Select Frame Element 3 and paste in the center of the canvas
Resize by 85%
Select your magic wand tool and click in the center of the Frame (Add (Shift), RGB Value, Tolerance 25, Contiguous checked, Feather 0)
Selections, Modify, Expand by 5
Paste paper 1
Select invert, delete, select none
Select Element 61 - paste and position on top of canvas and move below frame layer
Select Element 3 - resize by 30%
Paste and position on top right
Image duplicate, mirror and reposition on bottom left
Select Element 37 - resize by 25%
Paste and position on top right
Select Element 25 - resize by 30%
Paste and position on bottom of frame
Paste tube of choice where desired
Apply Lokas 3D Shadow at default settings
Select Element 34 - resize by 25%
Paste and position on bottom right
Select Element 32 - resize by 22%
Paste and position on bottom right
Select Element 63 - resize by 40%
Paste and position on bottom right
Select Element 57 - resize by 15%
Paste and position on bottom right
Select Element 14 - resize by 30%
Paste and position on bottom
Select Element 60 - resize by 15%
Paste and position on bottom
Select Element 4 - resize by 20%
Image mirror and paste on bottom
Select Element 9 - resize by 20
Paste and position on bottom
Select Element 23 - resize by 30%
Paste and position on bottom
Select Element 26 - resize by 25%
Paste and position on bottom left
Paste paper 5 on canvas
Apply Mask 20 or mask of choice
Merge group and move to the bottom layer
Add any dropshadows you like
Sharpen any elements as needed
Crop and resize as desired
Add copyright info, license number and name
You're done! Thanks for trying my tutorial!
Labels:Kissing Kate,Scraps N Company | 0
comments
Thursday, December 11, 2014
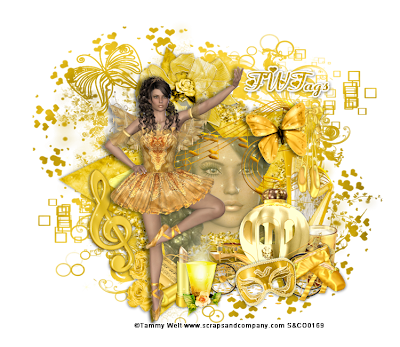
GOLDEN GIRL
Supplies needed:
I am using the stunning artwork from Tammy Welt for this tutorial which you can find here
Scrapkit: I am using a stunning kit from FwTags Creations called "Golden Dance" which you can get by going here
Mask 39 from Moonbeams & Spiderwebs which you can find here
Plugins: Lokas 3D Shadow
----------------------------
This tutorial is written for those who have working knowledge of PSPX2 (any version will do).
This tutorial was written by me on December 11, 2014. Please do not copy or paste on any other forum, website or blog provide link back to tut only. Please do not claim as your own. This tutorial is copyrighted to me. Any resemblance to any other tutorial is purely coincidental.
Ok - let's start and remember to save often.
Open up a 750 x 650 blank canvas (we can resize it later)
Select Element 31 and paste in the center of the canvas
Resize by 65%
Image Free Rotate Left by 15%
Select your magic wand tool and click in the center of the Frame (Add (Shift), RGB Value, Tolerance 25, Contiguous checked, Feather 0)
Selections, Modify, Expand by 5
Paste paper 6
Select invert, delete
Paste Close-up tube of choice on paper layer and delete
Drop opacity on tube down to 60% and merge down on paper layer
Move paper below frame
Select Element 68 - resize by 35%
Paste and position on top right above frame
Select Element 24 - resize by 15%
Image Free Rotate Left by 15% and paste on top right
Select Element 23 - resize by 28%
Select Element 29 - resize by 25%
Paste and position on top left
Image Free Rotate Left by 15% and paste on bottom left
Paste tube of choice where desired
Apply Lokas 3D Shadow at default settings
Select Element 26 - resize by 30%
Paste and position on bottom right
Select Element 22 - resize by 35%
Paste and position on bottom right
Select Element 8 - resize by 15%
Paste and position on bottom right
Select Element 11 - resize by 15%
Paste and position on bottom right
Select Element 42 - resize by 15%
Image Free Rotate Left by 15% and paste on bottom right
Select Element 1 - resize by 15%
Paste and position on bottom left
Select Element 72 - resize by 15%
Image mirror and paste on bottom left
Select Element 35 - resize by 25%
Paste and position on bottom
Paste paper 2 on canvas
Apply Mask 39 or mask of choice
Merge group and move to the bottom layer
Add any dropshadows you like
Sharpen any elements as needed
Crop and resize as desired
Add copyright info, license number and name
You're done! Thanks for trying my tutorial!
Labels:FwTags,Scraps N Company | 0
comments
Monday, December 8, 2014
WONDER XMAS
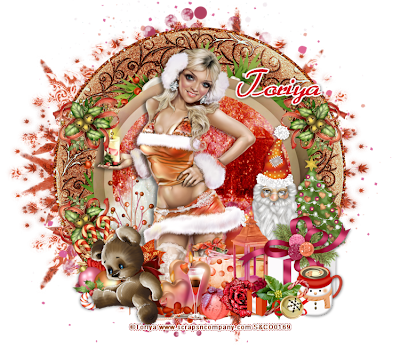
Supplies needed:
I am using the stunning artwork from Toriya for this tutorial which you can find here
Scrapkit: I am using a stunning kit from Bibi's Collections called "Wonder Xmas" which you can get by going here
Mask 85 from Millie which you can find here
Plugins: Lokas 3D Shadow
----------------------------
This tutorial is written for those who have working knowledge of PSPX2 (any version will do).
This tutorial was written by me on December 8, 2014. Please do not copy or paste on any other forum, website or blog provide link back to tut only. Please do not claim as your own. This tutorial is copyrighted to me. Any resemblance to any other tutorial is purely coincidental.
Ok - let's start and remember to save often.
Open up a 750 x 650 blank canvas (we can resize it later)
Select Frame Element 26 and paste in the center of the canvas
Resize by 65%
Select your magic wand tool and click in the center of the Frame (Add (Shift), RGB Value, Tolerance 25, Contiguous checked, Feather 0)
Selections, Modify, Expand by 5
Paste paper 2
Select invert, delete, select none
Move paper below frame
Select Element 132 - resize by 55%
Paste and position on top of frame layer
Select Element 23 - resize by 30%
Paste and position on top left
Duplicate element 3 more times and position around the frame where desired
Select Element 46 - resize by 35%
Paste on right side
Paste tube of choice where desired
Apply Lokas 3D Shadow at default settings
Select Element 2 - resize by 35%
Image mirror and paste on bottom right
Select Element 61 - resize by 30%
Paste and position on bottom right
Select Element 52 - resize by 50%
Paste and position on bottom right
Select Element 89 - resize by 25%
Paste and position on bottom right
Select Element 17 - resize by 30%
Paste and postion on bottom right
Select Element 82 - resize by 20%
Paste and position on bottom right
Select Element 93 - resize by 25%
Image mirror and paste on bottom left
Select Element 71 - resize by 15%
Paste and position on bottom left
Select Element 106 - resize by 22%
Paste and position on bottom left
Select Element 122 - resize by 40%
Paste and position on bottom left
Select Element 77 - resize by 35%
Paste and position on bottom left
Select Element 111 - resize by 25%
Paste and position on bottom left
Select Element 27 - resize by 15%
Paste and position on bottom left
Select Element 40 - resize by 25%
Paste and position on bottom left
Select Element 124 - resize by 90%
Paste and position in the center of canvas and move to bottom layer
Paste paper 4 on canvas
Apply Mask 85 or mask of choice
Merge group and move to the bottom layer
Add any dropshadows you like
Sharpen any elements as needed
Crop and resize as desired
Add copyright info, license number and name
You're done! Thanks for trying my tutorial!
Labels:Bibi's Collections,Scraps N Company | 0
comments
Sunday, December 7, 2014
LOSER
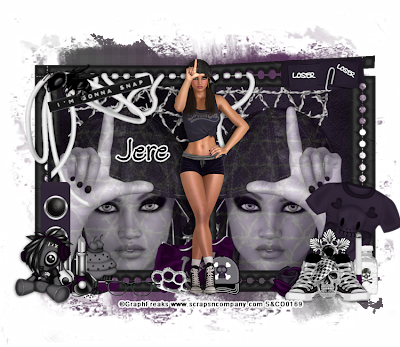
Supplies needed:
I am using the stunning artwork from GraphFreaks for this tutorial which you can find here
Scrapkit: I am using a stunning kit from Whisper in the Wind called "Loser" which you can get by going here
Mask 34 from Becky which you can find here
Plugins: Lokas 3D Shadow
----------------------------
This tutorial is written for those who have working knowledge of PSPX2 (any version will do).
This tutorial was written by me on December 7, 2014. Please do not copy or paste on any other forum, website or blog provide link back to tut only. Please do not claim as your own. This tutorial is copyrighted to me. Any resemblance to any other tutorial is purely coincidental.
Ok - let's start and remember to save often.
Open up a 750 x 650 blank canvas (we can resize it later)
Select Frame Element 2 and paste in the center of the canvas
Resize by 85%
Select your magic wand tool and click in the center of the Frame (Add (Shift), RGB Value, Tolerance 25, Contiguous checked, Feather 0)
Selections, Modify, Expand by 5
Paste paper 3
Select invert, delete
Select Element 29 - resize by 75%
Paste and position on top of paper layer and delete
Add Close-up tubes of choice and paste on top of paper layer
Delete, select none
Change close-ups to Luminance (Legacy) and drop opacity down to 90%
Move paper and tubes below frame
Select Element 2 - resize by 20%
Paste and position on top right
Select Element 88 - resize by 25%
Image Free Rotate Left by 15% and paste on top left
Paste tube of choice where desired
Apply Lokas 3D Shadow at default settings
Select Element 6 - resize by 25%
Image Free Rotate Right by 15% and paste on bottom right
Select Element 33 - resize by 12%
Paste and position on bottom right
Select Element 17 - resize by 20%
Paste and position on bottom right
Select Element 25 - resize by 20%
Paste and position on bottom right
Select Element 73 - resize by 12%
Paste and postion on bottom right
Select Element 19 - resize by 15%
Paste and position on bottom right
Select Element 93 - resize by 20%
Paste and position on bottom below tube layer
Select Element 60 - resize by 10%
Paste and position on bottom
Select Element 20 - resize by 20%
Image Free Rotate Right by 15% and paste on bottom
Select Element 30 - resize by 30%
Paste and position on bottom left
Select Element 5 - resize by 20%
Paste and position on bottom left
Select Element 95 - resize by 15%
Paste and position on bottom left
Select Element 42 - resize by 15%
Paste and position on bottom left
Select Element 45 - resize by 12%
Paste and position on bottom left
Select Element 94 - resize by 15%
Paste and position on bottom left
Paste paper 1 on canvas
Apply Mask 34 or mask of choice
Merge group and move to the bottom layer
Add any dropshadows you like
Sharpen any elements as needed
Crop and resize as desired
Add copyright info, license number and name
You're done! Thanks for trying my tutorial!
LET IT SNOW
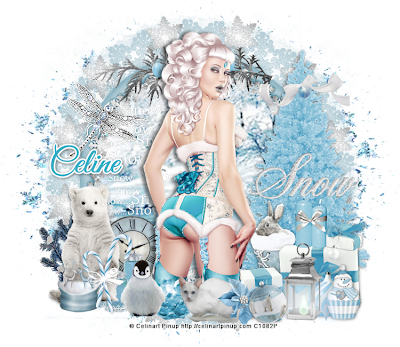
Supplies needed:
I am using the stunning artwork from Celinart Pinup for this tutorial which you can find here
Scrapkit: I am using a stunning kit from Pink Paradox Productions called "Let it Snow" which you can get by going here
Mask 95 from Millie which you can find here
Plugins: Lokas 3D Shadow
----------------------------
This tutorial is written for those who have working knowledge of PSPX2 (any version will do).
This tutorial was written by me on December 7, 2014. Please do not copy or paste on any other forum, website or blog provide link back to tut only. Please do not claim as your own. This tutorial is copyrighted to me. Any resemblance to any other tutorial is purely coincidental.
Ok - let's start and remember to save often.
Open up a 750 x 650 blank canvas (we can resize it later)
Select Frame Element 15 and paste in the center of the canvas
Resize by 65%
Select your magic wand tool and click in the center of the Frame (Add (Shift), RGB Value, Tolerance 25, Contiguous checked, Feather 0)
Selections, Modify, Expand by 5
Paste paper 7
Select invert, delete, select none
Move paper below frame
Select Element 158 - resize by 35%
Paste and position on left side above paper layer
Select Frame Element 12 - resize by 60%
Paste and position on 1st frame
Select Element 117 - resize by 45%
Paste and position on top of frame
Select Element 23 - resize by 20%
Paste and position on top left
Select Element 124 - resize by 48%
Paste and position on right side
Select Element 140 - resize by 22%
Paste and position on top right
Paste tube of choice where desired
Apply Lokas 3D Shadow at default settings
Select Element 143 - resize by 22%
Paste and position on right side
Select Element 44 - resize by 30%
Paste and position on bottom right
Select Element 10 - resize by 25%
Paste and position on bottom right
Select Element 37 - resize by 15%
Paste and position on bottom right
Select Element 33 - resize by 15%
Paste and position on bottom right
Select Element 63 resize by 15%
Paste and position on bottom right
Select Element 38 - resize by 25%
Paste and position on bottom right
Select Element 48 - resize by 12%
Image Free Rotate Left by 15% and paste on bottom right
Select Element 107 - resize by 25%
Paste and position on bottom left
Select Element 14 - resize by 25%
Paste and position on bottom left
Select Element 35 - resize by 15%
Paste and position on bottom left
Select Element 64 - resize by 25%
Paste and position on bottom left
Select Element 34 - resize by 15%
Paste and position on bottom left
Select Element 31 - resize by 25%
Paste and position on bottom left
Select Element 18 - resize by 15%
Paste and position on bottom left
Select Element 89 - resize by 15%
Paste and position on bottom
Select Element 7 - resize by 18%
Paste and position on bottom
Select Element 99 - resize by 15%
Paste and position on bottom
Paste paper 19 on canvas
Apply Mask 95 or mask of choice
Merge group and move to the bottom layer
Add any dropshadows you like
Sharpen any elements as needed
Crop and resize as desired
Add copyright info, license number and name
You're done! Thanks for trying my tutorial!
Subscribe to:
Comments
(Atom)

