Labels
- Alikas Scraps
- All Dolled Up Store
- Amy Marie
- Annaica
- Arthur Crowe
- Babycakes Scraps
- Barbara Jensen
- Bibi's Collections
- Black Widow Creationz
- Blu Moon
- Bonnies Creations
- Bookwork Dezines
- Broken Sky Dezine
- Carita Creationz
- Carpe Diem Designs
- CDO
- Celinart Pinup
- Celine
- Chacha Creationz
- Charmed Designs
- Cherry Blossom Designs
- Chili Designz
- Cluster Frame
- Creative Misfits
- Creative Scraps by Crys
- Curious Creative Dreams
- Danny Lee
- Derzi
- Designs by Ali
- Designs by Joan
- Designs by Ketura
- Designs By Norella
- Designs by Vi
- Diana Gali
- Diry Art Designs
- Disturbed Scraps
- Dreaming With Bella
- Eclipse Creations
- Elegancefly
- Extras
- Fabulous Designz
- Forum Set
- Foxy's Designz
- Freek's Creation
- FTU
- FwTags
- Goldwasser
- Gothic Inspirations
- Gothic Raven Designs
- Graphfreaks
- Hania's Designs
- Happy Pumpkin Studios
- Horseplay's Pasture Designs
- indie-Zine
- Irish Princess Designs
- Ishika Chowdhury
- Kaci McVay
- Kajenna
- katharine
- Katherine
- Khloe Zoey
- Killer Kitty
- Kissing Kate
- KiwiFirestorm
- Kiya Designs
- Kizzed by Kelz
- KZ Designz
- Lady Mishka
- Lil Mz Brainstorm
- Maiden of Darkness
- Mariel Designs
- MellieBeans
- Michelle's Myths
- Midnight Shadow
- Misticheskya
- MistyLynn's Creations
- MMeliCrea Designz
- Moon Vixen Designs
- NaSionainne
- Ninaste
- Niqui Designs
- Pandora
- Picsfordesign
- Pink Paradox Productions
- Radyga Designs
- Redefined Designs
- Rissa's Designs
- Schnegge
- ScottishButterfly Creations
- Scrappin Krazy Designs
- Scrappin With Lil Ol Me
- Scraps and the City
- Scraps Dimensions
- Scraps From The Heart
- Scraps N Company
- Scraps with Attitude
- Shining Star Art
- Skyscraps
- Sleek N Sassy Designs
- Sophisticat Simone
- Souldesigner
- Soxsational Scraps
- Spazz
- Starlite and Soul
- Stella Felice
- Tammy Welt
- Tasha's Playground
- The PSP Project
- Thrifty Scraps by Gina
- Tiny Turtle Designs
- Upyourart
- Verymany
- Wendy Gerber
- Whisper In the Wind
- Wick3d Creationz
- Wicked Diabla
- Yude's Kreationz
Blog Archive
Tuesday, March 31, 2015
APPLE OF SIN
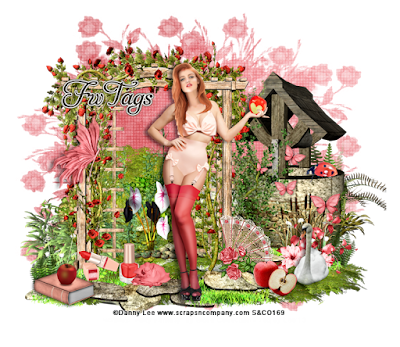
Supplies needed:
I am using the stunning artwork from Danny Lee for this tutorial which you can find here
I am using a beautiful kit from FwTags Creations called "Apple of Sin" which you can get by going here
Mask 226 from Weescotlass which you can find here
Plugins: Lokas 3D Shadow
----------------------------
This tutorial is written for those who have working knowledge of PSPX2 (any version will do).
This tutorial was written by me on March 31, 2015. Please do not copy or paste on any other forum, website or blog provide link back to tut only. Please do not claim as your own. This tutorial is copyrighted to me. Any resemblance to any other tutorial is purely coincidental.
Ok - let's start and remember to save often.
Open up a 750 x 650 blank canvas (we can resize it later)
Select Element 28 and paste in the center of the canvas
Resize by 75%
Paste and position in the center of the canvas
Select Element 75 - resize by 50%
Paste and position on left side of canvas
Select Element 17 - resize by 18%
Paste and position on left side
Paste tube of choice where desired
Apply Lokas 3D Shadow at default settings
Select Element 36 - resize by 20%
Paste and position on right side
Select Element 44 - resize by 8%
Paste and position on right side
Select Element 41 - resize by 20%
Paste and position on bottom right
Select Element 60 - resize by 15%
Paste and position on bottom right
Select Element 1 - resize by 10%
Paste and position on bottom right
Select Element 77 - resize by 15%
Paste and position on bottom right
Select Element 70 - resize by 15%
Image mirror and paste on bottom left
Select Element 78 - resize by 10%
Paste and position bottom left
Select Element 79 - resize by 10%
Paste and position on bottom left
Select Element 24 - resize by 10%
Paste and position on bottom left
Paste paper 2 on canvas
Apply Mask 226 or mask of choice
Merge group and move to the bottom layer
Add any dropshadows you like
Sharpen any elements as needed
Crop and resize as desired
Add copyright info, license number and name
You're done! Thanks for trying my tutorial!
Labels:FwTags,Scraps N Company | 0
comments
Monday, March 30, 2015
1920'S GIRL
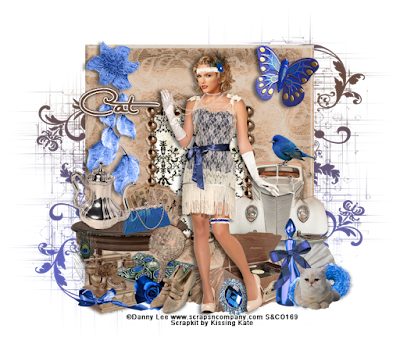
Supplies needed:
I am using the stunning artwork from Danny Lee for this tutorial which you can find here
I am using a beautiful kit from Kissing Kate called "1920's Girl" which you can get by going here
Mask 52 from Moonbeams and Spiderwebs which you can find here
Plugins: Lokas 3D Shadow
----------------------------
This tutorial is written for those who have working knowledge of PSPX2 (any version will do).
This tutorial was written by me on March 30, 2015. Please do not copy or paste on any other forum, website or blog provide link back to tut only. Please do not claim as your own. This tutorial is copyrighted to me. Any resemblance to any other tutorial is purely coincidental.
Ok - let's start and remember to save often.
Open up a 750 x 650 blank canvas (we can resize it later)
Select Frame Element 2 and paste in the center of the canvas
Resize by 75%
Select your selections tool and select the center of the Frame (Add (Shift), RGB Value, Tolerance 25, Contiguous checked, Feather 0)
Select modify, expand by 5
Paste paper 9
Select invert, delete, select none
Move paper below frame
Select Element 63 - resize by 40%
Paste and position on top left above frame
Select Element 45 - resize by 25%
Paste and position on top left
Select Element 22 - resize by 25%
Image Free Rotate Right by 15% and paste on top right
Select Element 25 - resize by 35%
Paste and position on right side
Select Element 70 - resize by 20%
Paste and position on right side
Paste tube of choice where desired
Apply Lokas 3D Shadow at default settings
Select Element 73 - resize by 35%
Image Free Rotate Right by 15% and paste on bottom right
Select Element 11 - resize by 20%
Paste and position on bottom right
Select Element 19 - resize by 15%
Paste and position on bottom right
Select Element 58 - resize by 30%
Paste and position on bottom right
Select Element 27 - resize by 35%
Paste and position on bottom right
Select Element 37 - resize by 40%
Paste and position on bottom left
Select Element 52 - resize by 25%
Paste and position on table element
Select Element 26 - resize by 20%
Paste and position on left side
Select Element 1 - resize by 30%
Paste and position on left side
Select Element 59 - resize by 25%
Paste and position on bottom left
Select Element 56 - resize by 40%
Paste and position on bottom left
Select Element 34 - resize by 15%
Paste and position on bottom left
Select Element 50 - resize by 30%
Image mirror and paste on bottom left
Select Element 33 - resize by 25%
Paste and position on bottom left
Select Element 2 - resize by 30%
Image mirror and paste on bottom left
Select Element 68 - resize by 40%
Image Free Rotate Left by 15% and paste on bottom
Add new raster layer and flood-fill with color or gradient of choice
Apply Mask 52 or mask of choice
Merge group and move to the bottom layer
Add any dropshadows you like
Sharpen any elements as needed
Crop and resize as desired
Add copyright info, license number and name
You're done! Thanks for trying my tutorial!
Labels:Kissing Kate,Scraps N Company | 0
comments
Saturday, March 28, 2015
ROYAL GOTHIC LOVE
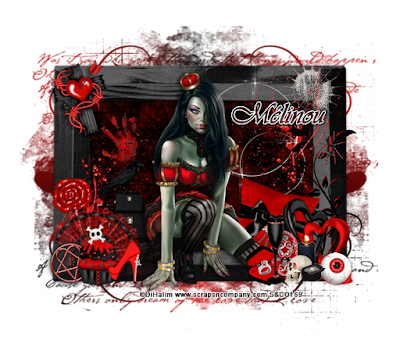
Supplies needed:
I am using the stunning artwork from DiHalim for this tutorial which you can find here
I am using a wicked kit from MMeliCrea Designz called "Gothic Love Wedding" which you can get by going here
Mask 113 from Trese which you can find here
Plugins: Lokas 3D Shadow
----------------------------
This tutorial is written for those who have working knowledge of PSPX2 (any version will do).
This tutorial was written by me on March 28, 2015. Please do not copy or paste on any other forum, website or blog provide link back to tut only. Please do not claim as your own. This tutorial is copyrighted to me. Any resemblance to any other tutorial is purely coincidental.
Ok - let's start and remember to save often.
Open up a 750 x 650 blank canvas (we can resize it later)
Select Frame Element 4 and paste in the center of the canvas
Resize by 85%
Select your selections tool and select the center of the Frame (Add (Shift), RGB Value, Tolerance 25, Contiguous checked, Feather 0)
Select modify, expand by 5
Paste paper 3
Select invert, delete, select none
Move paper below frame
Select Element 159 - resize by 25%
Paste and position on top left above frame
Select Element 163 - resize by 30%
Paste and position on top right above frame
Select Element 14 - resize by 15%
Paste and position on left side above paper layer
Select Element 181 - resize by 45%
Paste and position on right side above paper layer
Paste tube of choice where desired
Apply Lokas 3D Shadow at default settings
Select Element 112 - resize by 25%
Image Free Rotate Right by 15% and paste and bottom right
Select Frame Element 6 - resize by 20%
Paste and position on bottom right
Select Element 109 - resize by 15%
Image mirror and paste on bottom right
Select Element 101 - resize by 20%
Paste and position on bottom right
Select Element 122 - resize by 15%
Paste and position on bottom right
Select Element 155 - resize by 20%
Paste and position on bottom right
Select Element 152 - resize by 12%
Paste and position on bottom right
Select Element 72 - resize by 25%
Image Free Rotate Left by 15% and paste on bottom left
Select Element 147 - resize by 30%
Image Free Rotate Right by 15% and paste on bottom left
Select Element 111 - resize by 25%
Paste and position on bottom left
Select Element 177 - resize by 15%
Paste and position on left side
Select Element 108 - resize by 15%
Paste and position on bottom left
Select Element 78 - resize by 20%
Paste and position on bottom left
Select Element 135 - resize by 15%
Paste and position on bottom left
Select Element 2 - resize by 15%
Paste and position on right side
Add new raster layer and flood-fill with color or gradient of choice
Apply Mask 113 or mask of choice
Merge group and move to the bottom layer
Add any dropshadows you like
Sharpen any elements as needed
Crop and resize as desired
Add copyright info, license number and name
You're done! Thanks for trying my tutorial!
Labels:MMeliCrea Designz,Scraps N Company | 0
comments
Thursday, March 26, 2015
SERIOUSLY PUNK
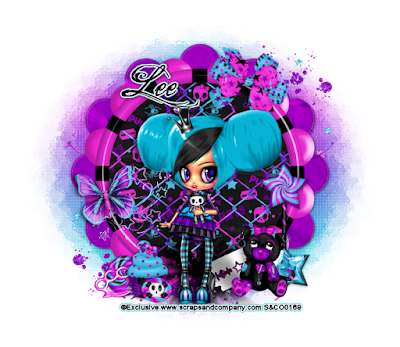
Supplies needed:
I am using the an Exclusive tube from Lady Mishka for this tutorial which you can find here
I am using a wicked kit from Toxic Desirez called "Flirty Punk" which you can get by going here
Mask 451 from Vix which you can find here
Plugins: Lokas 3D Shadow
----------------------------
This tutorial is written for those who have working knowledge of PSPX2 (any version will do).
This tutorial was written by me on March 26, 2015. Please do not copy or paste on any other forum, website or blog provide link back to tut only. Please do not claim as your own. This tutorial is copyrighted to me. Any resemblance to any other tutorial is purely coincidental.
Ok - let's start and remember to save often.
Open up a 750 x 650 blank canvas (we can resize it later)
Select Frame Element 2 and paste in the center of the canvas
Resize by 75%
Select your selections tool and select the center of the Frame (Add (Shift), RGB Value, Tolerance 25, Contiguous checked, Feather 0)
Select modify, expand by 5
Paste paper 21
Select invert, delete, select none
Move paper below frame
Select Wire Element - resize by 75%
Paste and position on top of paper layer
Select Bow 3 Element - resize by 30%
Image Free Rotate Right by 15% and paste on top right
Select Butterfly Element - resize by 25%
Paste and position on left side where desired
Paste tube of choice where desired
Apply Lokas 3D Shadow at default settings
Select Candy 2 Element - resize by 25%
Paste and position on bottom left side
Select Knuckles Element - resize by 15%
Image Free Rotate Left by 15% and paste on bottom left
Select Cupcake Element - resize by 20%
Paste and position on bottom left
Select Candy 1 Element - resize by 20%
Paste and position on bottom left
Select Lollipop 2 Element - resize by 35%
Paste and position on bottom right
Select Gem Element - resize by 80%
Image Free Rotate Left by 15% and paste on bottom right
Select Kitty Element - resize by 20%
Paste and position on bottom Right
Select Razor Blade Element - resize by 30%
Image Free Rotate Left by 15% and paste on bottom right
Add new raster layer and flood-fill with color or gradient of choice
Apply Mask 451 or mask of choice
Merge group and move to the bottom layer
Add any dropshadows you like
Sharpen any elements as needed
Crop and resize as desired
Add copyright info, license number and name
You're done! Thanks for trying my tutorial!
Labels:Scraps N Company | 0
comments
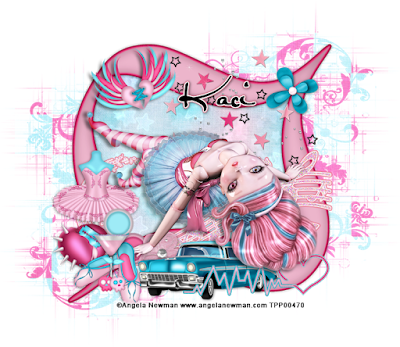
ROCKABILLY BALLERINA
Supplies needed:
I am using the stunning artwork from Angela Newman for this tutorial which you can find here
I am using a wicked kit from Scrappin Krazy Designs called "Rockabilly Ballerina" which you can get by going here
Mask 52 from Moonbeams and Spiderwebs which you can find here
Plugins: Lokas 3D Shadow, Eyecandy 4000 - Gradient Glow
----------------------------
This tutorial is written for those who have working knowledge of PSPX2 (any version will do).
This tutorial was written by me on March 26, 2015. Please do not copy or paste on any other forum, website or blog provide link back to tut only. Please do not claim as your own. This tutorial is copyrighted to me. Any resemblance to any other tutorial is purely coincidental.
Ok - let's start and remember to save often.
Open up a 750 x 650 blank canvas (we can resize it later)
Select Frame Element 53 and paste in the center of the canvas
Resize by 88%
Select your selections tool and select the center of the Frame (Add (Shift), RGB Value, Tolerance 25, Contiguous checked, Feather 0)
Select modify, expand by 5
Paste paper 7
Select invert, delete, select none
Move paper below frame
Select Element 76 - resize by 50%
Paste and position on top right above frame
Select Element 43 - resize by 40%
Paste and position on top right above frame
Select Element 13 - resize by 35%
Image Free Rotate Left by 15% and paste on top left
Select Element 61 - resize by 75%
Paste and position on bottom above frame where desired
Adjust, Add/Remove Noise, Add Noise (Noise 50%, Uniform checked, Monocrome unchecked)
Apply Eyecandy Gradient Glow on fat default settings (Glow Width 3)
Paste tube of choice where desired
Apply Lokas 3D Shadow at default settings
Select Element 42 - resize by 45%
Paste and position on left side
Select Element 33 - resize by 30%
Paste and position on bottom left
Select Element 29 - resize by 25%
Image Free Rotate Left by 15% and paste on bottom left
Select Element 1 - resize by 30%
Paste and position on bottom left
Select Element 2 - resize by 30%
Paste and position on bottom left
Select Element 5 - resize by 15%
Paste and position on bottom left
Select Element 15 - resize by 45
Paste and position bottom where desired
Select Element 7 - resize by 50%
Paste and position on bottom
Paste paper 1 on canvas
Apply Mask 52 or mask of choice
Merge group and move to the bottom layer
Add any dropshadows you like
Sharpen any elements as needed
Crop and resize as desired
Add copyright info, license number and name
You're done! Thanks for trying my tutorial!
Labels:Scrappin Krazy Designs | 0
comments
Wednesday, March 25, 2015
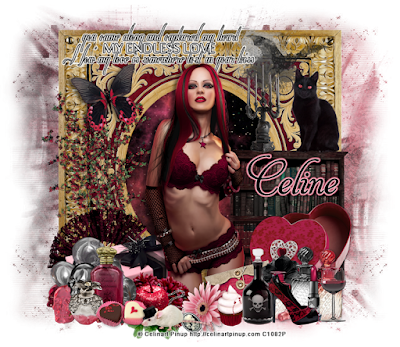
ETERNAL KISS
Supplies needed:
I am using the stunning artwork from Celinart Pinup for this tutorial which you can find here
I am using a wicked kit from Pink Paradox Productions called "Eternal Kiss" which you can get by going here
Mask from Kylie which you can find here
Plugins: Lokas 3D Shadow, Eyecandy 4000 - Gradient Glow
----------------------------
This tutorial is written for those who have working knowledge of PSPX2 (any version will do).
This tutorial was written by me on March 25, 2015. Please do not copy or paste on any other forum, website or blog provide link back to tut only. Please do not claim as your own. This tutorial is copyrighted to me. Any resemblance to any other tutorial is purely coincidental.
Ok - let's start and remember to save often.
Open up a 750 x 650 blank canvas (we can resize it later)
Select Frame Element 6 and paste in the center of the canvas
Resize by 55%
Select your selections tool and select the center of the Frame (Add (Shift), RGB Value, Tolerance 25, Contiguous checked, Feather 0)
Select modify, expand by 5
Paste paper 28
Select invert, delete, select none
Move paper below frame
Select Element 163 - resize by 20%
Paste and position on top left above frame
Apply Eyecandy Gradient Glow on fat default settings (Glow Width 3)
Select Element 159 - resize by 22%
Paste and position on top right above frame
Select Element 155 - resize by 30%
Paste and position on left side of frame
Select Element 6 - resize by 25%
Image Free Rotate Left by 15% and paste on top left
Select Element 105 - resize by 30%
Paste and position on bottom right
Select Element 74 - resize by 25%
Paste and position on top of bookcase element
Select Element 14 - resize by 20%
Paste and position on top of bookcase element
Paste tube of choice where desired
Apply Lokas 3D Shadow at default settings
Select Element 29 - resize by 25%
Paste and position on bottom left
Select Element 47 - resize by 30%
Paste and position on bottom left
Select Element 15 - resize by 20%
Paste and position on bottom left
Select Element 35 - resize by 20%
Paste and position on bottom left
Select Element 38 - resize by 20%
Paste and position on bottom left
Select Element 137 - resize by 20%
Paste and position on bottom left
Select Element 41 - resize by 12%
Paste and position bottom left
Select Element 44 - resize by 15%
Paste and position on bottom left
Select Element 13 - resize by 20%
Paste and position on bottom left
Select Element 133 - resize by 15%
Paste and position on bottom
Select Element 17 - resize by 20%
Paste and position on bottom
Select Element 43 - resize by 15%
Paste and position on bottom
Select Element 48 - resize by 25%
Image mirror and paste and on bottom right
Select Element 45 - resize by 20%
Paste and position on bottom right
Select Element 40 - resize by 15%
Paste and position on bottom right
Select Element 36 - resize by 15%
Paste and position on bottom right
Select Element 124 - resize by 12%
Paste and position on bottom right
Select Element 46 - resize by 20%
Paste and position on bottom right
Select Element 18 - resize by 15%
Paste and position on bottom right
Select Element 56 - resize by 18%
Paste and position on bottom right
Paste paper 53 on canvas
Apply Kylie Mask or mask of choice
Merge group and move to the bottom layer
Add any dropshadows you like
Sharpen any elements as needed
Crop and resize as desired
Add copyright info, license number and name
You're done! Thanks for trying my tutorial!
Friday, March 20, 2015
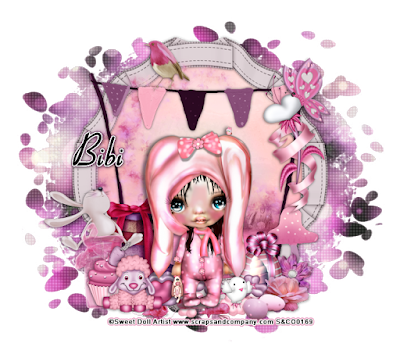
SWEET BUNNY
Supplies needed:
I am using the stunning artwork from Sweet Doll Artist for this tutorial which you can find here
I am using a beautiful kit from Bibi's Collections called "Bunny Girl" which you can get by going here
Easter Mask 1 which you can find on the Misfits Blog here
Plugins: Lokas 3D Shadow
----------------------------
This tutorial is written for those who have working knowledge of PSPX2 (any version will do).
This tutorial was written by me on March 20, 2015. Please do not copy or paste on any other forum, website or blog provide link back to tut only. Please do not claim as your own. This tutorial is copyrighted to me. Any resemblance to any other tutorial is purely coincidental.
Ok - let's start and remember to save often.
Open up a 750 x 650 blank canvas (we can resize it later)
Select Frame Element 20 and paste in the center of the canvas
Resize by 70%
Select your selections tool and select the center of the Frame (Add (Shift), RGB Value, Tolerance 25, Contiguous checked, Feather 0)
Select modify, expand by 5
Paste paper 2
Select invert, delete, select none
Move paper below frame
Select Element 53 - resize by 75%
Paste and position on left side above paper layer
Select Element 75 - resize by 30%
Paste and position on top of frame
Select Element 82 - resize by 15%
Paste and position on top where desired
Select Element 12 - resize by 30%
Paste and position on right side above frame
Select Element 17 - resize by 30%
Paste and postion on bottom of frame where desired
Paste tube of choice where desired
Apply Lokas 3D Shadow at default settings
Select Element 36 - resize by 65%
Paste and position on bottom left
Select Element 56 - resize by 40%
Paste and position on bottom left
Select Element 93 - resize by 30%
Paste and position on bottom left
Select Element 14 - resize by 25%
Paste and position on bottom left
Select Element 1 - resize by 25%
Paste and position on bottom left
Select Element 98 - resize by 15%
Paste and position bottom left
Select Element 76 - resize by 35%
Image mirror and paste on bottom right
Select Element 6 - resize by 15%
Paste and position on bottom right
Select Element 11 - resize by 40%
Paste and position on bottom right
Select Element 84 - resize by 15%
Paste and position on bottom right
Select Element 87 - resize by 25%
Paste and position on bottom right
Select Element 8 - resize by 35%
Paste and position on bottom right
Paste paper 3 on canvas
Apply Mask 1 or mask of choice
Merge group and move to the bottom layer
Add any dropshadows you like
Sharpen any elements as needed
Crop and resize as desired
Add copyright info, license number and name
You're done! Thanks for trying my tutorial!
Labels:Bibi's Collections,Scraps N Company | 0
comments
Thursday, March 19, 2015
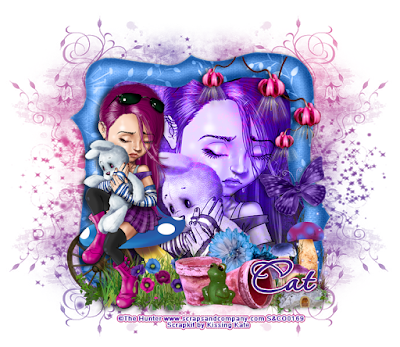
FAIRYLAND
Supplies needed:
I am using the stunning artwork from The Hunter for this tutorial which you can find here
I am using a beautiful kit from Kissing Kate called "Fairyland" which you can get by going here
Mask 22 from Moonbeams and Spiderwebs which you can find here
Plugins: Lokas 3D Shadow
----------------------------
This tutorial is written for those who have working knowledge of PSPX2 (any version will do).
This tutorial was written by me on March 19, 2015. Please do not copy or paste on any other forum, website or blog provide link back to tut only. Please do not claim as your own. This tutorial is copyrighted to me. Any resemblance to any other tutorial is purely coincidental.
Ok - let's start and remember to save often.
Open up a 750 x 650 blank canvas (we can resize it later)
Select Frame Element 1 and paste in the center of the canvas
Resize by 65%
Select your selections tool and select the center of the Frame (Add (Shift), RGB Value, Tolerance 25, Contiguous checked, Feather 0)
Select modify, expand by 5
Paste paper 2
Select invert, delete
Paste close-up tube on top right on paper and delete, select none
Change close-up to Luminance (Legacy) and apply dropshadow
Merge close-up down onto paper layer
Move paper below frame
Select Element 28 - resize by 40%
Image mirror and paste on top right above frame
Paste tube of choice where desired
Apply Lokas 3D Shadow at default settings
Select Element 42 - resize by 55%
Image mirror and paste on bottom left
Select Element 23 - resize by 20%
Paste and position on bottom left
Select Element 12 - resize by 40%
Paste and position on bottom right
Select Element 22 - resize by 18%
Paste and position on bottom right
Select Element 31 - resize by 25%
Image mirror and paste on bottom right
Select Element 48 - resize by 40%
Paste and position on bottom
Select Element 9 - resize by 50%
Paste and position bottom
Select Element 17 - resize by 25%
Image Free Rotate Left by 15% and paste on right side
Add new raster layer and flood-fill with color or gradient of choice
Apply Mask 22 or mask of choice
Merge group and move to the bottom layer
Add any dropshadows you like
Sharpen any elements as needed
Crop and resize as desired
Add copyright info, license number and name
You're done! Thanks for trying my tutorial!
Labels:Kissing Kate,Scraps N Company | 0
comments
Tuesday, March 17, 2015
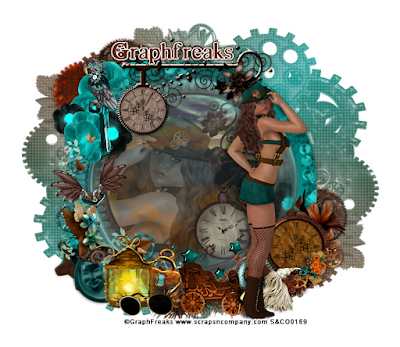
STEAMPUNK'D
Supplies needed:
I am using the gorgeous artwork from Graphfreaks for this tutorial which you can find here
I am using a stunning kit from Disturbed Scraps called "Steampunk'd" which you can get by going here
Mask 121 from Bitzy Beez Designz which you can find here
Plugins: Lokas 3D Shadow
----------------------------
This tutorial is written for those who have working knowledge of PSPX2 (any version will do).
This tutorial was written by me on March 17, 2015. Please do not copy or paste on any other forum, website or blog provide link back to tut only. Please do not claim as your own. This tutorial is copyrighted to me. Any resemblance to any other tutorial is purely coincidental.
Ok - let's start and remember to save often.
Open up a 750 x 650 blank canvas (we can resize it later)
Select Frame Element 93 and paste in the center of the canvas
Resize by 65%
Select your eclipse tool and select the center of the Frame (Show Nodes Checked, Create on Vector checked, Width 5)
Paste paper 7
Select invert, delete
Paste Close-up tube of choice on paper and delete
Select none
Change close-up to Luminance (Legacy)
Drop opacity down to 75% and merge down on paper
Move paper below frame
Select Element 91 - resize by 50%
Paste and position below frame layer
Select Element 51 - resize by 45%
Paste and position on of canvas
Select Element 60 - resize by 30%
Paste and position on top left
Select Element 70 - resize by 30%
Paste and position on bottom of frame
Paste tube of choice where desired
Apply Lokas 3D Shadow at default settings
Select Element 44 - resize by 25%
Image Free Rotate Left by 15% and paste on left side
Select Element 79 - resize by 40%
Image mirror and paste on bottom left
Select Element 12 - resize by 35%
Image Free Rotate Left by 15% and paste on bottom left
Select Element 90 - resize by 35%
Paste and position on bottom left
Select Element 47 - resize by 25%
Paste and position on bottom left
Select Element 85 - resize by 25%
Paste and position bottom left
Select Element 29 - resize by 25%
Paste and position on bottom
Select Element 38 - resize by 25%
Image mirror and paste on bottom right
Select Element 24 - resize by 25%
Paste and position on bottom right
Select Element 43 - resize by 25%
Paste and position on bottom right
Add new raster layer and flood-fill with color or gradient of choice
Apply Mask 121 or mask of choice
Merge group and move to the bottom layer
Add any dropshadows you like
Sharpen any elements as needed
Crop and resize as desired
Add copyright info, license number and name
You're done! Thanks for trying my tutorial!
Labels:Graphfreaks,Scraps N Company | 0
comments
Monday, March 16, 2015
TOXIC
Supplies needed:
I am using the Exclusive artwork from Picsfordesign for this tutorial which you can find here
I am using a wicked kit from Freek's Creations called "Toxic" which you can get by going here
Mask 133 from Aqua which you can find on the Misfits Blog here
Plugins: Lokas 3D Shadow
----------------------------
This tutorial is written for those who have working knowledge of PSPX2 (any version will do).
This tutorial was written by me on March 16, 2015. Please do not copy or paste on any other forum, website or blog provide link back to tut only. Please do not claim as your own. This tutorial is copyrighted to me. Any resemblance to any other tutorial is purely coincidental.
Ok - let's start and remember to save often.
Open up a 750 x 650 blank canvas (we can resize it later)
Select Frame Element and paste in the center of the canvas
Resize by 72%
Select your selections tool and select the center of the Frame (Add (Shift), RGB Value, Tolerance 25, Contiguous checked, Feather 0)
Select modify, expand by 5
Paste paper 6
Select invert, delete, select none
Move paper below frame
Select Word Art 2 - resize by 65%
Paste and position on top of paper layer
Select Butterfly Element - resize by 45%
Paste and position on top right
Select Splatter Element - resize by 50%
Paste and position on bottom right
Paste tube of choice where desired
Apply Lokas 3D Shadow at default settings
Select Drum Element - resize by 55%
Paste and position on bottom right
Select Mask Element - resize by 25%
Paste and position above drum element
Select Plant Element - resize by 55%
Paste and position on bottom right
Select Cupcake Element - resize by 25%
Paste and position on bottom right
Select Voodoo Element - resize by 25%
Paste and position on bottom right
Select Goggles Element - resize by 25%
Paste and position bottom right
Select Brass Knuckles Element - resize by 25%
Paste and position on bottom left
Select Poison Element - resize by 35%
Paste and position on bottom left
Add new raster layer and flood-fill with color or gradient of choice
Apply Mask 133 or mask of choice
Merge group and move to the bottom layer
Add any dropshadows you like
Sharpen any elements as needed
Crop and resize as desired
Add copyright info, license number and name
You're done! Thanks for trying my tutorial!
Labels:Freek's Creation | 0
comments
Thursday, March 12, 2015
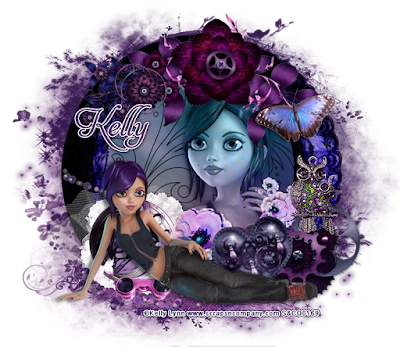
AMY
Supplies needed:
I am using the stunning artwork from Kelly Lynn for this tutorial which you can find here
I am using a wicked kit from Devilish Designz called "Cyber Purple" which you can get by going here
Mask 20 from Moonbeams and Spiderwebs which you can find here
Plugins: Lokas 3D Shadow
----------------------------
This tutorial is written for those who have working knowledge of PSPX2 (any version will do).
This tutorial was written by me on March 12, 2015. Please do not copy or paste on any other forum, website or blog provide link back to tut only. Please do not claim as your own. This tutorial is copyrighted to me. Any resemblance to any other tutorial is purely coincidental.
Ok - let's start and remember to save often.
Open up a 750 x 650 blank canvas (we can resize it later)
Select Frame Element 1 and paste in the center of the canvas
Resize by 65%
Select your selections tool and select the center of each square in the Frame (Add (Shift), RGB Value, Tolerance 25, Contiguous checked, Feather 0)
Select modify, expand by 5
Paste paper 5
Select invert, delete
Paste close-up tube on paper and delete, select none
Change close-up to Luminance (Legacy) and apply dropshadow
Move paper and close-up below frame
Select Element 49 - resize by 55%
Paste and position on top of paper layer
Select Frame Element 2 - resize by 65%
Paste and position on top of frame 1 layer
Select Element 16 - resize by 65%
Image mirror and paste on top of frame
Select Element 13 - resize by 30%
Image mirror and paste on top of frame
Select Element 23 - resize by 50%
Paste and position on bottom
Paste tube of choice where desired
Apply Lokas 3D Shadow at default settings
Select Element 26 - resize by 30%
Paste and position on top right
Select Element 39 - resize by 35%
Paste and position on bottom left
Select Element 50 - resize by 35%
Image mirror and paste on bottom left
Select Element 3 - resize by 20%
Paste and position on bottom left
Select Element 22 - resize by 30%
Paste and position on bottom right
Select Element 19 - resize by 25%
Image Free Rotate Left by 15% and paste on bottom right
Select Element 43 - resize by 25%
Paste and position bottom right
Add new raster layer and flood-fill with color of choice
Apply Mask 20 or mask of choice
Merge group and move to the bottom layer
Add any dropshadows you like
Sharpen any elements as needed
Crop and resize as desired
Add copyright info, license number and name
You're done! Thanks for trying my tutorial!
Labels:Scraps N Company | 0
comments
Wednesday, March 11, 2015
GREEN QUEEN

Supplies needed:
I am using the stunning artwork from Pandora Creations for this tutorial which you can find here
I am using a beautiful kit from Bibi's Collections called "Green Queen" which you can get by going here
Mask 16 from Gina Gems which you can find here
Plugins: Lokas 3D Shadow
----------------------------
This tutorial is written for those who have working knowledge of PSPX2 (any version will do).
This tutorial was written by me on March 11, 2015. Please do not copy or paste on any other forum, website or blog provide link back to tut only. Please do not claim as your own. This tutorial is copyrighted to me. Any resemblance to any other tutorial is purely coincidental.
Ok - let's start and remember to save often.
Open up a 750 x 650 blank canvas (we can resize it later)
Select Frame Element 40 and paste in the center of the canvas
Resize by 60%
Select all, float defloat
Paste close-up tube on top of element
Select invert, delete, select none
Change close-up to Luminance (Legacy) and drop opacity down to 44%
Select Element 45 - resize by 30%
Paste and position on top left
Select Element 134 - resize by 35%
Paste and position on top right
Select Element 85 - resize by 30%
Paste and position on top right
Select Element 124 - resize by 30%
Paste and position on bottom right
Select Element 104 - resize by 40%
Paste and position on bottom left
Paste tube of choice where desired
Apply Lokas 3D Shadow at default settings
Select Element 42 - resize by 18%
Paste and position on right side
Select Element 15 - resize by 40%
Paste and position on bottom right
Select Element 77 - resize by 40%
Image mirror and paste on bottom right
Select Element 30 - resize by 25%
Paste and position on bottom right
Select Element 119 - resize by 20%
Paste and position on bottom right
Select Element 53 - resize by 15%
Paste and position on bottom right
Select Element 102 - resize by 75%
Paste and position on bottom right
Select Element 57 - resize by 30%
Paste and position bottom left
Select Element 80 - resize by 20%
Paste and position on bottom left
Add new raster layer and flood-fill with color or gradient of choice
Apply Mask 16 or mask of choice
Merge group and move to the bottom layer
Add any dropshadows you like
Sharpen any elements as needed
Crop and resize as desired
Add copyright info, license number and name
You're done! Thanks for trying my tutorial!
Labels:Bibi's Collections,Pandora | 0
comments
Monday, March 9, 2015
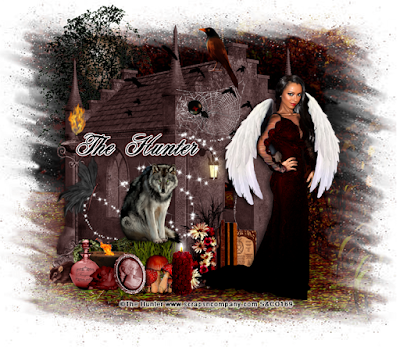
BONNIE
Supplies needed:
I am using the stunning artwork from The Hunter for this tutorial which you can find here
I am using a wicked kit from FwTags Creations called "Bonnie" which you can get by going here
Edge Mask from which you can find here
Plugins: Lokas 3D Shadow
----------------------------
This tutorial is written for those who have working knowledge of PSPX2 (any version will do).
This tutorial was written by me on March 9, 2015. Please do not copy or paste on any other forum, website or blog provide link back to tut only. Please do not claim as your own. This tutorial is copyrighted to me. Any resemblance to any other tutorial is purely coincidental.
Ok - let's start and remember to save often.
Open up a 750 x 650 blank canvas (we can resize it later)
Select Element 41 and paste in the center of the canvas
Resize by 55%
Select Element 52 - resize by 55%
Paste and position on left side below crypt element
Select Element 70 - resize by 35%
Paste and position on top of crypt element
Select Element 44 - resize by 15%
Paste and position on top of crypt element
Select Element 45 - resize by 15%
Paste and position on crypt element where desired
Select Element 26 - resize by 15%
Paste and position on top of web element where desired
Paste tube of choice where desired
Apply Lokas 3D Shadow at default settings
Select Element 40 - resize by 40%
Paste and position on bottom left
Select Element 56 - resize by 25%
Paste and position on bottom left
Select Element 43 - resize by 18%
Paste and position on log element
Select Element 36 - resize by 15%
Paste and position on bottom left
Select Element 2 - resize by 15%
Paste and position on bottom left
Select Element 82 - resize by 12%
Paste and position on bottom left
Select Element 31 - resize by 10%
Paste and position bottom left
Select Element 81 - resize by 10%
Image Free Rotate Left by 15% and paste on bottom left
Select Element 25 - resize by 15%
Paste and position on bottom left
Select Element 7 - resize by 15%
Paste and position on bottom
Select Element 18 - resize by 22%
Paste and position on bottom
Select Element 68 - resize by 15%
Paste and position on bottom right side
Select Element 29 - resize by 15%
Paste and position on left side
Paste paper 2 on canvas
Apply Edge Mask or mask of choice
Merge group and move to the bottom layer
Add any dropshadows you like
Sharpen any elements as needed
Crop and resize as desired
Add copyright info, license number and name
You're done! Thanks for trying my tutorial!
Labels:FwTags,Scraps N Company | 0
comments
Wednesday, March 4, 2015
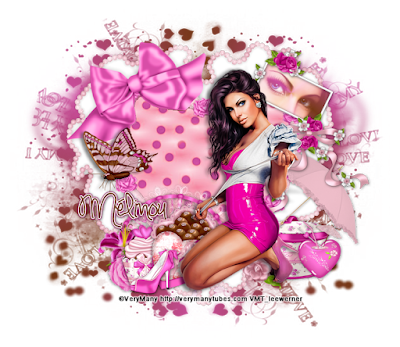
ROMANTIC ROSES
Supplies needed:
I am using the stunning artwork from Verymany for this tutorial which you can find here
I am using a beautiful kit from MMeliCrea Designz called "Romantic Roses" which you can get by going here
Mask M1 from Kylie which you can find on the Misfits Blog here
Plugins: Lokas 3D Shadow
----------------------------
This tutorial is written for those who have working knowledge of PSPX2 (any version will do).
This tutorial was written by me on March 4, 2015. Please do not copy or paste on any other forum, website or blog provide link back to tut only. Please do not claim as your own. This tutorial is copyrighted to me. Any resemblance to any other tutorial is purely coincidental.
Ok - let's start and remember to save often.
Open up a 750 x 650 blank canvas (we can resize it later)
Select Frame Element 6 and paste in the center of the canvas
Resize by 80%
Select your selections tool and select the center of the Frame (Add (Shift), RGB Value, Tolerance 25, Contiguous checked, Feather 0)
Select modify, expand by 5
Paste paper 1
Select invert, delete, select none
Move paper below frame
Select Frame Element 7 - resize by 50%
Paste and position on top right above frame layer
Select your selections tool and select the center of the Frame (Add (Shift), RGB Value, Tolerance 25, Contiguous checked, Feather 0)
Select modify, expand by 3
Add new raster layer and flood-fill with color or gradient of choice
Paste close-up tube of choice on top of color/gradient layer and delete
Select none
Change close-up to screen and merge on top of color layer
Move layer below frame
Select Element 93 - resize by 35%
Image mirror and paste on bottom right
Select Element 14 - resize by 22%
Paste and position on top left
Paste tube of choice where desired
Apply Lokas 3D Shadow at default settings
Select Element 83 - resize by 22%
Paste and position on bottom right
Select Element 80 - resize by 18%
Paste and position on bottom right
Select Element 60 - resize by 15%
Paste and position on bottom right
Select Element 86 - resize by 40%
Image Free Rotate Left by 15% and paste on bottom left
Select Element 97 - resize by 25%
Paste and position bottom left
Select Element 102 - resize by 20%
Paste and position on bottom left
Select Element 67 - resize by 15%
Paste and position on bottom left
Select Element 52 - resize by 12%
Paste and position on bottom left
Select Element 88 - resize by 15%
Paste and position on bottom left
Add new raster layer and flood-fill with color or gradient of choice
Apply Mask M1 or mask of choice
Merge group and move to the bottom layer
Add any dropshadows you like
Sharpen any elements as needed
Crop and resize as desired
Add copyright info, license number and name
You're done! Thanks for trying my tutorial!
Labels:MMeliCrea Designz | 0
comments
STARDUST
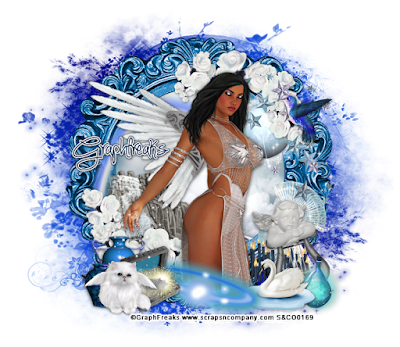
Supplies needed:
I am using the stunning artwork from Graphfreaks for this tutorial which you can find here
I am using a beautiful kit from Mariel Designs called "Angel Dust" which you can get by going here
Mask 20 from Moonbeams and Spiderwebs which you can find here
Plugins: Lokas 3D Shadow
----------------------------
This tutorial is written for those who have working knowledge of PSPX2 (any version will do).
This tutorial was written by me on March 4, 2015. Please do not copy or paste on any other forum, website or blog provide link back to tut only. Please do not claim as your own. This tutorial is copyrighted to me. Any resemblance to any other tutorial is purely coincidental.
Ok - let's start and remember to save often.
Open up a 750 x 650 blank canvas (we can resize it later)
Select Frame Element 2 and paste in the center of the canvas
Resize by 85%
Select your selections tool and select the center of the Frame (Add (Shift), RGB Value, Tolerance 25, Contiguous checked, Feather 0)
Select modify, expand by 5
Paste paper 4
Select invert, delete, select none
Move paper below frame
Select Element 9 - resize by 30%
Paste and position on top right above paper layer
Select Element 32 - resize by 50%
Paste and position on top right above frame
Image duplicate, mirror and flip
Select Element 14 - resize by 45%
Paste and position on top right
Select Element 22 - resize by 20%
Paste and position on top right
Select Element 69 - resize by 45%
Paste and position on left side
Select Element 26 - resize by 45%
Image mirror and paste on top left
Paste tube of choice where desired
Apply Lokas 3D Shadow at default settings
Select Element 50 - resize by 25%
Paste and position on bottom right
Select Element 54 - resize by 30%
Paste and position on bottom right
Select Element 30 - resize by 25%
Image Free Rotate Left by 15% and paste on bottom right
Select Element 19 - resize by 20%
Paste and position on bottom right
Select Element 2 - resize by 20%
Paste and position on bottom right
Select Element 68 - resize by 30%
Image mirror and paste on bottom right
Select Element 35 - resize by 45%
Paste and position bottom
Select Element 46 - resize by 25%
Paste and position on bottom left
Select Element 1 - resize by 45%
Paste and position on bottom left
Select Element 49 - resize by 25%
Paste and position on bottom left
Add new raster layer and flood-fill with color or gradient of choice
Apply Mask 20 or mask of choice
Merge group and move to the bottom layer
Add any dropshadows you like
Sharpen any elements as needed
Crop and resize as desired
Add copyright info, license number and name
You're done! Thanks for trying my tutorial!
Labels:Graphfreaks,Scraps N Company | 0
comments
Tuesday, March 3, 2015
PINK STEAM

Supplies needed:
I am using the stunning artwork from Andy Cooper for this tutorial which you can find here
I am using a stunning Collab kit from Bibi's Collections called "Steampunks" which you can get by going here
Mask 36 from Millie which you can find here
Plugins: Lokas 3D Shadow
----------------------------
This tutorial is written for those who have working knowledge of PSPX2 (any version will do).
This tutorial was written by me on March 3, 2015. Please do not copy or paste on any other forum, website or blog provide link back to tut only. Please do not claim as your own. This tutorial is copyrighted to me. Any resemblance to any other tutorial is purely coincidental.
Ok - let's start and remember to save often.
Open up a 750 x 650 blank canvas (we can resize it later)
Select Element 38 - resize by 52%
Paste and position in the center of canvas
Select Frame Element 97 and paste in the center of the canvas
Resize by 50%
Select your selections tool and select the center of the Frame (Add (Shift), RGB Value, Tolerance 25, Contiguous checked, Feather 0)
Select modify, expand by 5
Paste paper 4
Select invert, delete, select none
Move paper below frame
Select Element 80 - resize by 40%
Paste and position on right side
Effect, Edge Effects, Enhance
Select Element 110 - resize by 40%
Paste and position on left side above frame
Select Element 105 - resize by 50%
Paste and position on bottom right
Paste tube of choice where desired
Apply Lokas 3D Shadow at default settings
Select Element 12 - resize by 25%
Paste and position on right side above stool element
Select Element 47 - resize by 40%
Paste and position on right side above stool element
Select Element 106 - resize by 40%
Paste and position on bottom right
Select Element 76 - resize by 35%
Paste and position on bottom right
Select Element 3 - resize by 50%
Paste and position on bottom right
Select Element 58 - resize by 30%
Paste and position on bottom left
Select Element 68 - resize by 40%
Paste and position bottom left
Select Element 102 - resize by 25%
Paste and position on bottom left
Select Element 109 - resize by 35%
Image Free Rotate Left by 15% and paste on top right
Paste paper 3 on canvas
Apply Mask 36 or mask of choice
Merge group and move to the bottom layer
Add any dropshadows you like
Sharpen any elements as needed
Crop and resize as desired
Add copyright info, license number and name
You're done! Thanks for trying my tutorial!
Labels:Bibi's Collections,Scraps N Company | 0
comments
Monday, March 2, 2015
DEVIL WOMAN
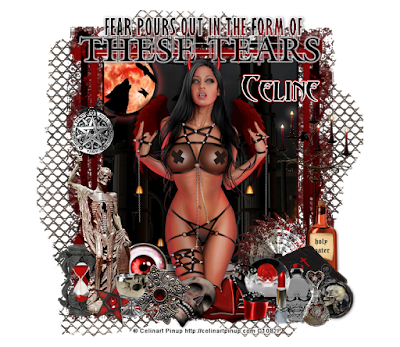
I am using the stunning artwork from Celinart Pinup for this tutorial which you can find here
I am using a wicked kit from Pink Paradox Productions called "Devil Woman" which you can get by going here
Plugins: Lokas 3D Shadow, Eyecandy 4000 - Gradient Glow
----------------------------
This tutorial is written for those who have working knowledge of PSPX2 (any version will do).
This tutorial was written by me on March 2, 2015. Please do not copy or paste on any other forum, website or blog provide link back to tut only. Please do not claim as your own. This tutorial is copyrighted to me. Any resemblance to any other tutorial is purely coincidental.
Ok - let's start and remember to save often.
Open up a 750 x 650 blank canvas (we can resize it later)
Select Frame Element 9 and paste in the center of the canvas
Resize by 55%
Select your selections tool and select the center of Frame (Add (Shift), RGB Value, Tolerance 25, Contiguous checked, Feather 0)
Select modify, expand by 5
Paste paper 38
Select invert, delete, select none
Move paper below frame
Select Element 106 - resize by 20%
Paste and position on top left below frame
Select Element 196 - resize by 25%
Paste and position on top center above frame
Apply Eyecandy Gradient Glow on medium default settings (Glow Width 3)
Select Element 71 - resize by 50%
Paste and position on right side
Paste tube of choice where desired
Apply Lokas 3D Shadow at default settings
Select Element 107 - resize by 20%
Paste and position on bottom right
Select Element 65 - resize by 20%
Paste and position on bottom right
Select Element 68 - resize by 20%
Paste and position on bottom right
Select Element 81 - resize by 15%
Image Free Rotate Right by 15% and paste on bottom right
Select Element 61 - resize by 15%
Paste and position on bottom right
Select Element 62 - resize by 15%
Paste and position on bottom right
Select Element 27 - resize by 15%
Paste and position on bottom right
Select Element 51 - resize by 15%
Paste and position on bottom right
Select Element 32 - resize by 15%
Paste and position on bottom right
Select Element 104 - resize by 15%
Paste and position on bottom
Select Element 141 - resize by 15%
Paste and position on left side above frame
Select Element 87 - resize by 20%
Paste and position on bottom left
Select Element 15 - resize by 30%
Paste and position on bottom left
Select Element 100 - resize by 15%
Image Free Rotate Right by 15% and paste on bottom left
Select Element 25 - resize by 30%
Paste and position on bottom left
Select Element 54 - resize by 25%
Paste and position on bottom left
Select Element 129 - resize by 20%
Paste and position on bottom left
Select Element 21 - resize by 15%
Paste and position on bottom
Select Element 185 - resize by 80%
Paste and position on canvas
Move to the bottom layer
Add any dropshadows you like
Sharpen any elements as needed
Crop and resize as desired
Add copyright info, license number and name
You're done! Thanks for trying my tutorial!
Subscribe to:
Comments
(Atom)


