Labels
- Alikas Scraps
- All Dolled Up Store
- Amy Marie
- Annaica
- Arthur Crowe
- Babycakes Scraps
- Barbara Jensen
- Bibi's Collections
- Black Widow Creationz
- Blu Moon
- Bonnies Creations
- Bookwork Dezines
- Broken Sky Dezine
- Carita Creationz
- Carpe Diem Designs
- CDO
- Celinart Pinup
- Celine
- Chacha Creationz
- Charmed Designs
- Cherry Blossom Designs
- Chili Designz
- Cluster Frame
- Creative Misfits
- Creative Scraps by Crys
- Curious Creative Dreams
- Danny Lee
- Derzi
- Designs by Ali
- Designs by Joan
- Designs by Ketura
- Designs By Norella
- Designs by Vi
- Diana Gali
- Diry Art Designs
- Disturbed Scraps
- Dreaming With Bella
- Eclipse Creations
- Elegancefly
- Extras
- Fabulous Designz
- Forum Set
- Foxy's Designz
- Freek's Creation
- FTU
- FwTags
- Goldwasser
- Gothic Inspirations
- Gothic Raven Designs
- Graphfreaks
- Hania's Designs
- Happy Pumpkin Studios
- Horseplay's Pasture Designs
- indie-Zine
- Irish Princess Designs
- Ishika Chowdhury
- Kaci McVay
- Kajenna
- katharine
- Katherine
- Khloe Zoey
- Killer Kitty
- Kissing Kate
- KiwiFirestorm
- Kiya Designs
- Kizzed by Kelz
- KZ Designz
- Lady Mishka
- Lil Mz Brainstorm
- Maiden of Darkness
- Mariel Designs
- MellieBeans
- Michelle's Myths
- Midnight Shadow
- Misticheskya
- MistyLynn's Creations
- MMeliCrea Designz
- Moon Vixen Designs
- NaSionainne
- Ninaste
- Niqui Designs
- Pandora
- Picsfordesign
- Pink Paradox Productions
- Radyga Designs
- Redefined Designs
- Rissa's Designs
- Schnegge
- ScottishButterfly Creations
- Scrappin Krazy Designs
- Scrappin With Lil Ol Me
- Scraps and the City
- Scraps Dimensions
- Scraps From The Heart
- Scraps N Company
- Scraps with Attitude
- Shining Star Art
- Skyscraps
- Sleek N Sassy Designs
- Sophisticat Simone
- Souldesigner
- Soxsational Scraps
- Spazz
- Starlite and Soul
- Stella Felice
- Tammy Welt
- Tasha's Playground
- The PSP Project
- Thrifty Scraps by Gina
- Tiny Turtle Designs
- Upyourart
- Verymany
- Wendy Gerber
- Whisper In the Wind
- Wick3d Creationz
- Wicked Diabla
- Yude's Kreationz
Blog Archive
-
▼
2015
(197)
-
▼
June
(24)
- XMAS IN JULY
- NERVOUS BREAKDOWN
- BEACH FIREWORKS
- MADDIE HATTER
- GOTHIC DINA
- BLACK BUTTERFLY
- TURTLE BABE
- ROCK STAR LIFE
- ORIYA
- GO GO GIRL
- MISS DISGUSTED
- POWER GIRL
- SUMMER FANTASY
- MELODY DE MAYET
- MILITARY BABE
- AMERICAN BEAUTY
- MERMAID TALES
- ALFAMERMAID
- SWEET SIREN
- TOXIC PINK
- STEAMPUNK GWEN
- SHARON
- MIDNIGHT SERENADE
- MEGAN
-
▼
June
(24)
Tuesday, June 30, 2015
XMAS IN JULY
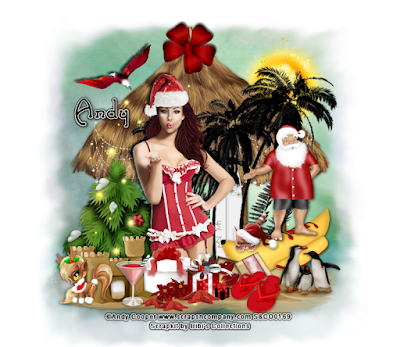
Supplies needed:
I am using the stunning artwork from Andy Cooper for this tutorial which you can find here
Scrapkit: I am using a stunning kit from Bibi's Collections called "Xmas in July" which you can get by going here
Plugins: Lokas 3D Shadow
----------------------------
This tutorial is written for those who have working knowledge of PSPX2 (any version will do).
This tutorial was written by me on June 30, 2014. Please do not copy or paste on any other forum, website or blog provide link back to tut only. Please do not claim as your own. This tutorial is copyrighted to me. Any resemblance to any other tutorial is purely coincidental.
Ok - let's start and remember to save often.
Open up a 750 x 650 blank canvas (we can resize it later)
Select Element 70 - resize by 55%
Paste and position in the center of the canvas
Select Element 76 - resize by 50%
Paste and position in the center of the canvas
Change to Overlay
Select Element 41 - paste and position in the center of the canvas where desired
Select Element 47 - resize by 45%
Paste and position on the top of the hut element where desired
Select Element 12 - resize by 50%
Paste and position on the top right below hut element
Select Element 27 - resize by 55%
Paste and position on the bottom below palm tree element
Select Element 44 - resize by 80%
Paste and position on the right side where desired
Select Element 31 - resize by 55%
Select Element 35 - resize by 30%
Paste and position on top of hut element where desired
Image duplicate and mirror
Paste and position on the top left
Select Element 58 - resize by 30%
Paste and position on bottom left
Select Element 71 - resize by 50%
Paste and position on the bottom where desired
Paste tube of choice where desired
Apply Lokas 3D Shadow at default settings
Select Element 4 - resize by 25%
Paste and position on bottom right side
Select Element 52 - resize by 20%
Paste and position on the right side above boat element
Select Element 54 - resize by 30%
Paste and position on the right side above boat element
Select Element 62 - resize by 30%
Paste and position on the bottom right
Select Element 74 - resize by 20%
Paste and position on the bottom right
Select Element 72 - resize by 25%
Paste and position on the bottom left
Select Element 80 - resize by 15%
Paste and position on the bottom left
Select Element 48 - resize by 25%
Paste and position on the bottom left
Select Element 49 - resize by 35%
Paste and position on the bottom
Select Element 55 - resize by 25%
Paste and position on the bottom
Select Element 9 - resize by 18%
Paste and position on the bottom
Select Element 17 - resize by 55%
Paste and position on the bottom
Select Element 51 - resize by 15%
Paste and position on the bottom
Add any dropshadows you like
Sharpen any elements as needed
Crop and resize as desired
Add copyright info, license number and name
You're done! Thanks for trying my tutorial!
Labels:Scraps N Company | 0
comments
Sunday, June 28, 2015
NERVOUS BREAKDOWN
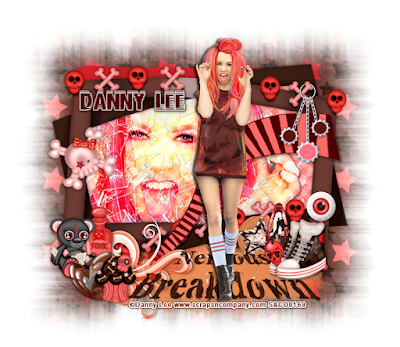
Supplies needed:
I am using the stunning artwork from Danny Lee for this tutorial which you can find here
Scrapkit: I am using a stunning kit from Disturbed Scraps called "Nervous Breakdown" which you can get by going here
Mask 7 which you can find here
Plugins: Lokas 3D Shadow
----------------------------
This tutorial is written for those who have working knowledge of PSPX2 (any version will do).
This tutorial was written by me on June 28, 2014. Please do not copy or paste on any other forum, website or blog provide link back to tut only. Please do not claim as your own. This tutorial is copyrighted to me. Any resemblance to any other tutorial is purely coincidental.
Ok - let's start and remember to save often.
Open up a 750 x 650 blank canvas (we can resize it later)
Select Element 65 - resize by 65%
Paste and position in the center of the canvas
Select your magic wand tool and select the center of the frame (Add (Shift), RGB Value, Tolerance 25, Contiguous checked, Feather 0)
Selections, Modify, Expand by 5
Paste paper 2
Select invert, delete
Paste close-up tube on top of paper where desired and delete
Select none
Change close-up tube to Hard Light
Apply drop shadow and merge down on paper layer
Move paper layer below window frame layer
Select Element 78 - resize by 55%
Paste and position above paper/close-tube where desired
Select Element 56 - resize by 70%
Paste and position on top right
Select Element 29 - resize by 25%
Image Free Rotate Left and paste on left side
Select Element 60 - resize by 55%
Paste and position on the bottom
Select Element 77 - resize by 45%
Paste and position on the bottom where desired
Paste tube of choice where desired
Apply Lokas 3D Shadow at default settings
Select Element 27 - resize by 30%
Paste and position on bottom right side
Select Element 8 - resize by 25%
Paste and position on the bottom right
Select Element 33 - resize by 30%
Paste and position on the bottom right
Select Element 19 - resize by 20%
Paste and position on the bottom right
Select Element 13 - resize by 20%
Paste and position on the bottom right
Select Element 37 - resize by 25%
Paste and position on the bottom left
Select Element 5 - resize by 25%
Paste and position on the bottom left
Select Element 53 - resize by 30%
Paste and position on the bottom left
Select Element 49 - resize by 20%
Paste and position on the bottom left
Select Element 26 - resize by 202%
Paste and position on the bottom left
Select Element 4- resize by 30%
Paste and position on the top right
Paste paper 11 on canvas
Apply Mask 7 or mask of choice
Merge group and move to the bottom layer
Add any dropshadows you like
Sharpen any elements as needed
Crop and resize as desired
Add copyright info, license number and name
You're done! Thanks for trying my tutorial!
Labels:Scraps N Company | 0
comments
Friday, June 26, 2015
BEACH FIREWORKS


Labels:Pink Paradox Productions | 0
comments
MADDIE HATTER
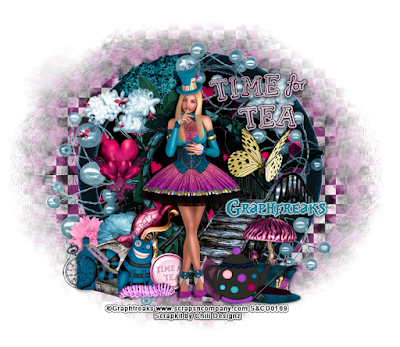
Supplies needed:
I am using the stunning artwork from Graphfreaks for this tutorial which you can find here
Scrapkit: I am using a stunning kit from Chili Designz called "Maddie Hatter" which you can get by going here
Mask 315 from Aqua which you can find on the Misfits Blog here
Plugins: Lokas 3D Shadow
----------------------------
This tutorial is written for those who have working knowledge of PSPX2 (any version will do).
This tutorial was written by me on June 26, 2014. Please do not copy or paste on any other forum, website or blog provide link back to tut only. Please do not claim as your own. This tutorial is copyrighted to me. Any resemblance to any other tutorial is purely coincidental.
Ok - let's start and remember to save often.
Open up a 750 x 650 blank canvas (we can resize it later)
Select Frame Element 5 - paste and position in the center of the canvas
Select your magic wand tool and select the center of the frame (Add (Shift), RGB Value, Tolerance 25, Contiguous checked, Feather 0)
Selections, Modify, Expand by 5
Paste paper 18
Select invert, delete select none
Move paper layer below window frame layer
Select Frame Element 10 - paste on top of frame 5 and reposition where desired
Select Greenery Element - resize by 20%
Paste and position on top left below frame 10
Select WA2 Element - resize by 45%
Paste and position on top right
Apply Eyecandy 4000 - Gradient Glow on fat default settings (Glow Width 3)
Select Bridge Element - resize by 45%
Paste and position on bottom right
Select Butterly Element- resize by 55%
Paste and position on right side where desired
Select Deco6 Element - resize by 45%
Paste and position on left side
Paste tube of choice where desired
Apply Lokas 3D Shadow at default settings
Select Mushroom 2 Element - resize by 25%
Paste and position on the bottom right side
Select Hat 3 Element - resize by 30%
Paste and position on the bottom right
Select Teapot Element - resize by 30%
Paste and position on the bottom right
Select Deco 3 Element - resize by 40%
Image Free Rotate Left by 15% and paste on the bottom
Select Flower 4 Element - resize by 25%
Paste and position on bottom left
Select Bottle Element - resize by 40%
Paste and position on the bottom left
Select Stamp Element - resize by 25%
Paste and position on the bottom left
Select Books 2 Element - resize by 40%
Paste and position on the bottom left
Select Cat Element - resize by 40%
Paste and position on the bottom left
Select Flower 5 Element - resize by 30%
Paste and position on the bottom left
Select Mushroom 4 Element - resize by 35%
Paste and position on the bottom left
Select Brad 3 Element - resize by 75%
Paste and position on the bottom
Select Caterpillar Element - resize by 55%
Paste and position on the bottom
Paste paper 11 on canvas
Apply Mask 315 or mask of choice
Merge group and move to the bottom layer
Add any dropshadows you like
Sharpen any elements as needed
Crop and resize as desired
Add copyright info, license number and name
You're done! Thanks for trying my tutorial!
Labels:Chili Designz,Graphfreaks | 0
comments
Wednesday, June 24, 2015
GOTHIC DINA
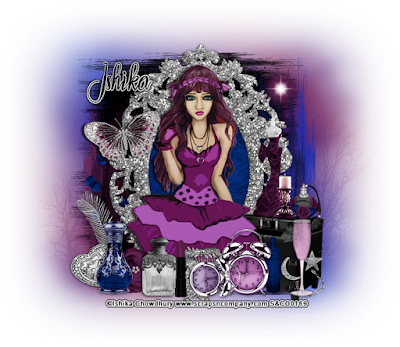
Supplies needed:
I am using the stunning artwork from Ishika Chowdhury for this tutorial which you can find here
Scrapkit: I am using a stunning kit from Whisper In The Wind called "Gothic Dina" which you can get by going here
Mask 11 from Horseplay's Pasture which you can find here
Plugins: Lokas 3D Shadow
----------------------------
This tutorial is written for those who have working knowledge of PSPX2 (any version will do).
This tutorial was written by me on June 24, 2014. Please do not copy or paste on any other forum, website or blog provide link back to tut only. Please do not claim as your own. This tutorial is copyrighted to me. Any resemblance to any other tutorial is purely coincidental.
Ok - let's start and remember to save often.
Open up a 750 x 650 blank canvas (we can resize it later)
Select Element 94 - resize by 65%
Paste and position in the center of the canvas
Select Frame 1 Element - resize by 65%
Paste and position in the center of the canvas
Select your magic wand tool and select the center portion of the frame (Add (Shift), RGB Value, Tolerance 25, Contiguous checked, Feather 0)
Selections, Modify, Expand by 5
Paste paper 1
Select invert, delete select none
Move paper layer below window frame layer
Select Element 88 - resize by 45%
Paste and position bottom left below the frame layer
Image duplicate, mirror and flip
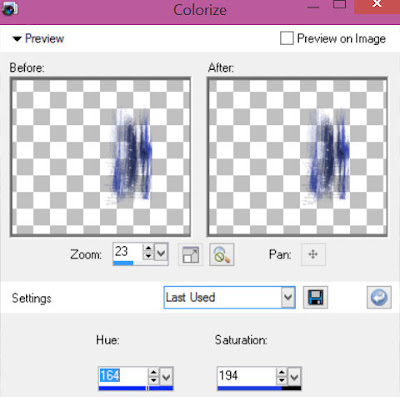
Colorize element with the following settings:
Select Element 31 - resize by 20%
Paste and position on top left
Select Element 65 - resize by 25%
Paste and position on the bottom right
Paste tube of choice where desired
Apply Lokas 3D Shadow at default settings
Select Element 13 - resize by 25%
Paste and position on the right side
Select Element 54 - resize by 15%
Paste and position on the right side
Select Element 95 - resize by 22%
Paste and position on the right side
Select Element 87 - resize by 13%
Image Free Rotate Left by 15% and paste on bottom right
Select Element 62 - resize by 20%
Paste and position on the bottom right
Select Element 63 - resize by 15%
Paste and position on bottom right
Select Element 4 - resize by 22%
Paste and position on the bottom
Select Element 27 - resize by 20%
Paste and position on the bottom left
Select Element 17 - resize by 12%
Image Free Rotate Left by 15% and paste on bottom left
Select Element 30 - resize by 22%
Paste and position on the bottom left
Select Element 1 - resize by 12%
Paste and position on the bottom left
Select Element 10 - resize by 15%
Paste and position on the bottom
Select Element 50 - resize by 15%
Paste and position on the bottom
Add new raster layer and flood-fill with color or gradient of choice
Apply Mask 11 or mask of choice
Merge group and move to the bottom layer
Add any dropshadows you like
Sharpen any elements as needed
Crop and resize as desired
Add copyright info, license number and name
You're done! Thanks for trying my tutorial!
Labels:Scraps N Company | 0
comments
Monday, June 22, 2015
BLACK BUTTERFLY
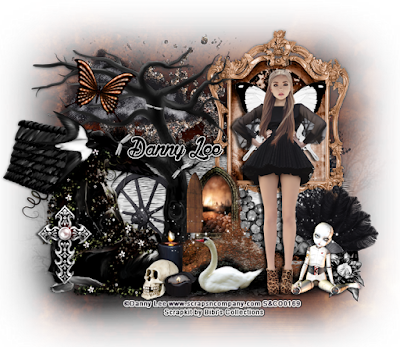
Supplies needed:
I am using the stunning artwork from Danny Lee for this tutorial which you can find here
Scrapkit: I am using a stunning kit from Bibi's Collections Productions called "Black Butterfly" which you can get by going here
Mask 11 from Horseplay's Pasture which you can find here
Plugins: Lokas 3D Shadow
----------------------------
This tutorial is written for those who have working knowledge of PSPX2 (any version will do).
This tutorial was written by me on June 22, 2014. Please do not copy or paste on any other forum, website or blog provide link back to tut only. Please do not claim as your own. This tutorial is copyrighted to me. Any resemblance to any other tutorial is purely coincidental.
Ok - let's start and remember to save often.
Open up a 750 x 650 blank canvas (we can resize it later)
Select Element 12 - resize by 65%
Paste and position in the center of the canvas and move down about an inch
Select Element 63 - resize by 50%
Paste and position on top left
Select Element 84 - resize by 50%
Paste and position on top right
Select your magic wand tool and select center of the frame (Add (Shift), RGB Value, Tolerance 25, Contiguous checked, Feather 0)
Selections, Modify, Expand by 5
Paste paper 9
Select invert, delete select none
Move paper layer below window frame layer
Select Element 20 - resize by 50%
Paste and position on top left
Select Element 30 - resize by 65%
Paste and position on left side
Select Element 25 - resize by 35%
Paste and position on bottom right
Select Element 77 - resize by 55%
Paste and position on bottom left
Select Element 5 - resize by 50%
Paste and position on the bottom left below the tree element
Select Element 73 - resize by 45%
Paste and position on the bottom where desired
Paste tube of choice where desired
Apply Lokas 3D Shadow at default settings
Select Element 27 - resize by 45%
Image Free Rotate Right by 15% and paste on bottom right
Select Element 46 - resize by 30%
Image mirror and paste on the bottom right
Select Element 75 - resize by 30%
Paste and position on bottom right
Select Element 71 - resize by 30%
Paste and position on bottom left
Select Element 68 - resize by 15%
Paste and position on the bottom
Select Element 24 - resize by 35%
Paste and position on the bottom
Select Element 79 - resize by 20%
Paste and position on the left side
Select Element 64 - resize by 20%
Image Free Rotate Right by 15% and paste on the top left
Paste paper 2 on canvas
Apply Mask 11 or mask of choice
Merge group and move to the bottom layer
Add any dropshadows you like
Sharpen any elements as needed
Crop and resize as desired
Add copyright info, license number and name
You're done! Thanks for trying my tutorial!
Labels:Bibi's Collections,Scraps N Company | 0
comments
Sunday, June 21, 2015
TURTLE BABE
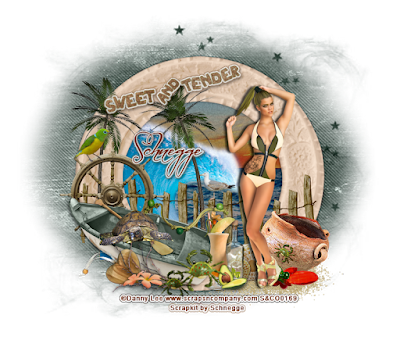
Supplies needed:
I am using the stunning artwork from Danny Lee for this tutorial which you can find here
Scrapkit: I am using a beautiful kit from Schnegge called "Turtle" which you can get by going here
Mask 8 from Gina Gems which you can find here
Plugins: Lokas 3D Shadow, Eyecandy 4000 - Gradient Glow
----------------------------
This tutorial is written for those who have working knowledge of PSPX2 (any version will do).
This tutorial was written by me on June 21, 2014. Please do not copy or paste on any other forum, website or blog provide link back to tut only. Please do not claim as your own. This tutorial is copyrighted to me. Any resemblance to any other tutorial is purely coincidental.
Ok - let's start and remember to save often.
Open up a 750 x 650 blank canvas (we can resize it later)
Select Frame Element 43 - resize by 65%
Paste and position in the center of thee canvas
Select your magic wand tool and select center of the frame (Add (Shift), RGB Value, Tolerance 25, Contiguous checked, Feather 0)
Selections, Modify, Expand by 5
Paste paper 4
Select invert, delete select none
Move paper layer below window frame layer
Select Element 54 - resize by 40%
Paste and position on on the left side below the frame
Select Element 52 - resize by 65%
Paste and position on the bottom of the frame
Select Element 2 - resize by 45%
Paste and position on the bottom right below the frame
Select Element 13 - resize by 45%
Paste and position on the top left above frame
Select Element 28 - resize by 40%
Image Free Rotate Left by 15% and paste on top left
Apply Eyecandy Gradient Glow on fat default settings (Glow Width 3)
Select Element 56 - resize by 35%
Paste and position on left side
Select Element 38 - resize by 25%
Paste and position on left side
Select Element 55 - resize by 55%
Image Free Rotate Right by 15% and paste on bottom left
Paste tube of choice where desired
Apply Lokas 3D Shadow at default settings
Select Element 58- resize by 30%
Paste and position on bottom right
Select Element 35 - resize by 30%
Paste and position on bottom right
Select Element 16 - resize by 25%
Paste and position on bottom right
Select Element 45 - resize by 30%
Paste and position on bottom left above boat element
Select Element 33 - resize by 30%
Paste and position on bottom left
Select Element 47 - resize by 22%
Image mirror and paste on the bottom left
Select Element 60 - resize by 30%
Paste and position on the bottom
Select Element 17 - resize by 30%
Paste and position on the bottom
Select Element 32 - resize by 25%
Paste and position on the bottom
Select Element 42 - resize by 30%
Paste and position in the center above the fence element
Paste paper 1 on canvas
Apply Mask 8 or mask of choice
Merge group and move to the bottom layer
Add any dropshadows you like
Sharpen any elements as needed
Crop and resize as desired
Add copyright info, license number and name
You're done! Thanks for trying my tutorial!
Labels:Schnegge | 0
comments
Saturday, June 20, 2015
ROCK STAR LIFE
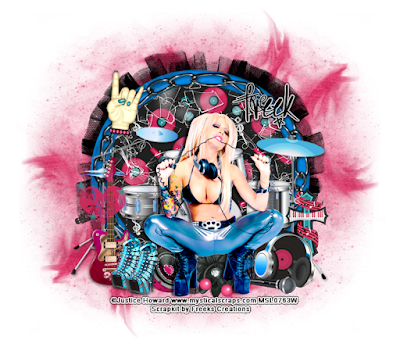
Supplies needed:
I am using the stunning artwork from Justice Howard for this tutorial which you can find here
Scrapkit: I am using a stunning kit from Freeks Creations called "Rock Star" which you can get by going here
Mask 36 from Millie which you can find here
Plugins: Lokas 3D Shadow
----------------------------
This tutorial is written for those who have working knowledge of PSPX2 (any version will do).
This tutorial was written by me on June 20, 2014. Please do not copy or paste on any other forum, website or blog provide link back to tut only. Please do not claim as your own. This tutorial is copyrighted to me. Any resemblance to any other tutorial is purely coincidental.
Ok - let's start and remember to save often.
Open up a 750 x 650 blank canvas (we can resize it later)
Select Frame Element - resize by 75%
Paste and position in the center of the canvas
Select your magic wand tool and select the center of the frame (Add (Shift), RGB Value, Tolerance 25, Contiguous checked, Feather 0)
Selections, Modify, Expand by 5
Paste paper 2
Select invert, delete select none
Move paper layer below window frame layer
Select your magic wand tool and select the green color portions of the frame
If desired colorize with the following settings:

Select Broken Glass Element - resize by 75%
Paste and position on top of paper layer
Select Drums Element - paste and position on the bottom of the frame
Select Metal Horns Element - resize by 25%
Paste and position on the top left
Paste tube of choice where desired
Apply Lokas 3D Shadow at default settings
Select Splash Element - resize by 22%
Paste and position on the bottom left
Select Guitar Element - resize by 40%
Paste and position on bottom left
Select Shoes Element - resize by 22%
Paste and position on bottom left
Select Speakers 2 Element - resize by 22%
Paste and position on bottom left
Select Cross Element - resize by 30%
Paste and position on the bottom right
Select Record Element - resize by 22%
Paste and position on the bottom right
Select Headphones Element - resize by 20%
Image Free Rotate Right by 15% and paste on the bottom right
Select Microphone Element - resize by 20%
Paste and position on the bottom right
Select Flowers 4 Element - resize by 20%
Paste and position on the bottom below tube
Select Body Jewelry 2 Element - resize by 12%
Image Free Rotate Right by 15% and paste on the bottom below tube
Paste paper 6 on canvas
Apply Mask 36 or mask of choice
Merge group and move to the bottom layer
Add any dropshadows you like
Sharpen any elements as needed
Crop and resize as desired
Add copyright info, license number and name
You're done! Thanks for trying my tutorial!
Labels:Freek's Creation | 0
comments
Friday, June 19, 2015
ORIYA


CT Tags using the stunning tube from Graphfreaks which you can find here
Labels:Graphfreaks | 0
comments
GO GO GIRL
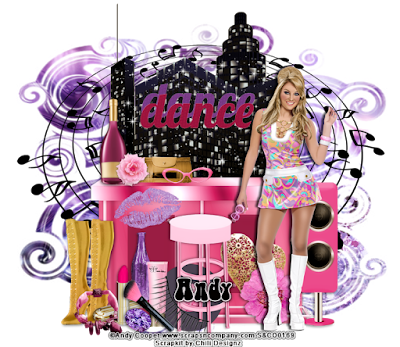
Supplies needed:
I am using the stunning artwork from Andy Cooper for this tutorial which you can find here
Scrapkit: I am using a stunning kit from Chili Designz called "GoGo" which you can get by going here
Mask 78 from Trese which you can find here
Plugins: Lokas 3D Shadow
----------------------------
This tutorial is written for those who have working knowledge of PSPX2 (any version will do).
This tutorial was written by me on June 19, 2014. Please do not copy or paste on any other forum, website or blog provide link back to tut only. Please do not claim as your own. This tutorial is copyrighted to me. Any resemblance to any other tutorial is purely coincidental.
Ok - let's start and remember to save often.
Open up a 750 x 650 blank canvas (we can resize it later)
Select Cityscape Element - resize by 55%
Paste and position in the center of the canvas and move up towards the top
Select Sparkles 2 Element - resize by 45%
Paste and position on top of cityscape element
Select Bar Element - resize by 75%
Paste and position on the bottom above the cityscape element
Select Music Element - resize by 95%
Paste and position on the canvas and move behind the cityscape where desired
Select WA 2 Element - resize by 65%
Paste and position on top of the cityscape element
Select WA Element - resize by 65%
Paste and position on top of the WA 2 element and stagger it
Select Speaker 2 Element - resize by 55%
Paste and position on the bottom right
Select Heart 2 Element - resize by 55%
Image Free Rotate Right by 15% and paste on the bottom right
Select Flower 3 Element - resize by 40%
Paste and position on the bottom right
Paste tube of choice where desired
Apply Lokas 3D Shadow at default settings
Select Boots Element - resize by 55%
Paste and position on the bottom left
Select Lipstick Element - resize by 50%
Paste and position on bottom left
Select Bracelet Element - resize by 30%
Paste and position on bottom left
Select Bottle Element - resize by 40%
Paste and position on the bottom left
Select Jewel Element - resize by 65%
Paste and position on bottom left
Select Lipgloss Element - resize by 45%
Paste and position on the bottom
Select LP Element - resize by 40%
Paste and position on the bottom
Select Barchair Element - resize by 50%
Paste and position on the bottom
Select Eyelash 2 Element - resize by 40%
Paste and position on the bottom
Select Brush Element - resize by 40%
Paste and position on the bottom
Select Bottle 2 Element - resize by 42%
Paste and position on the bar element
Select Clutch Element - resize by 40%
Paste and position on the bar element
Select Flower 2 Element - resize by 22%
Paste and position on the bar element
Select Glasses Element - resize by 30%
Paste and position on the bar element
Select Lips Element - resize by 55%
Paste and position on the bar element
Paste paper 8 on canvas
Apply Mask 78 or mask of choice
Merge group and move to the bottom layer
Add any dropshadows you like
Sharpen any elements as needed
Crop and resize as desired
Add copyright info, license number and name
You're done! Thanks for trying my tutorial!
Thursday, June 18, 2015
MISS DISGUSTED
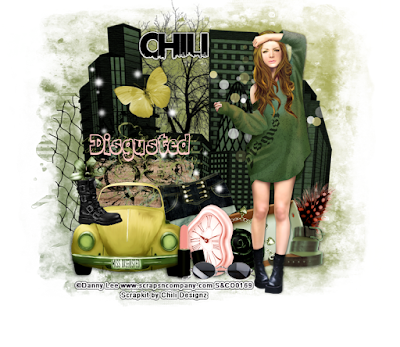
Supplies needed:
I am using the stunning artwork from Danny Lee for this tutorial which you can find here
Scrapkit: I am using a stunning kit from Chili Designz called "Natasja" which you can get by going here
Grunge Mask 119 from Designs by Vaybs which you can find here
Plugins: Lokas 3D Shadow
----------------------------
This tutorial is written for those who have working knowledge of PSPX2 (any version will do).
This tutorial was written by me on June 18, 2014. Please do not copy or paste on any other forum, website or blog provide link back to tut only. Please do not claim as your own. This tutorial is copyrighted to me. Any resemblance to any other tutorial is purely coincidental.
Ok - let's start and remember to save often.
Open up a 750 x 650 blank canvas (we can resize it later)
Select Cityscape Element - resize by 65%
Paste and position in the center of the canvas
Select Tree 2 Element - resize by 40%
Paste and position on the top center below cityscape element
Select Bokeh Element - resize by 28%
Paste and position on right side above cityscape element
Select Sparkles Element - resize by 65%
Paste and position on left side above cityscape
Select Cardboard Element - resize by 40%
Paste and position on the bottom left
Select Graffiti 2 Element - resize by 40%
Paste and position on bottom left
Select Car Element - resize by 45%
Paste and position on bottom left
Select Boot Element - resize by 30%
Paste and position on bottom left above car element
Paste tube of choice where desired
Apply Lokas 3D Shadow at default settings
Select Lipstick Element - resize by 40%
Paste and position on the bottom
Select Pants Element - resize by 40%
Image Free Rotate Left by 15% and paste on bottom where desired
Select Clock Element - resize by 40%
Paste and position on the bottom
Select Glasses Element - resize by 40%
Paste and position on the bottom
Select Feather 2 Element - resize by 35%
Paste and position on the bottom right
Select Box 2 Element - resize by 35%
Image Free Rotate Left by 15% and paste on bottom right below tube
Select Belt Element - resize by 30%
Paste and position on the bottom right
Select Bracelet Element - resize by 30%
Paste and position on bottom right
Select Flower Element - resize by 35%
Paste and position on the bottom
Select Butterfly 2 Element - resize by 50%
Paste and position on top left
Select WA3 Element -resize by 65%
Paste and position on left side where desired
Select Net Element - resize by 40%
Paste and position on the left side and move to bottom layer
Add new raster layer and flood-fill with color or gradient of choice
Apply Mask 119 or mask of choice
Merge group and move to the bottom layer
Add any dropshadows you like
Sharpen any elements as needed
Crop and resize as desired
Add copyright info, license number and name
You're done! Thanks for trying my tutorial!
Labels:Chili Designz,Scraps N Company | 0
comments
Wednesday, June 17, 2015
POWER GIRL
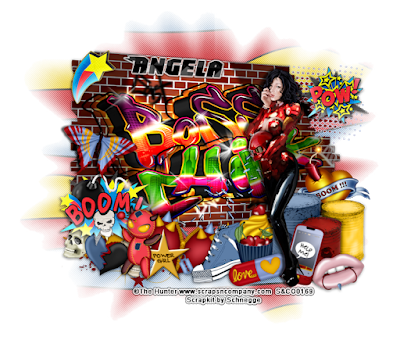
Supplies needed:
I am using the stunning artwork from The Hunter for this tutorial which you can find here
Scrapkit: I am using a stunning kit from Schnegge Productions called "Power Girl" which you can get by going here
Mask 17 from Horseplay's Pasture which you can find here
Plugins: Lokas 3D Shadow
----------------------------
This tutorial is written for those who have working knowledge of PSPX2 (any version will do).
This tutorial was written by me on June 17, 2014. Please do not copy or paste on any other forum, website or blog provide link back to tut only. Please do not claim as your own. This tutorial is copyrighted to me. Any resemblance to any other tutorial is purely coincidental.
Ok - let's start and remember to save often.
Open up a 750 x 650 blank canvas (we can resize it later)
Select Element 2 - resize by 65%
Paste and position in the center of the canvas and move up about 2 inches from top
Select Element 13 - resize by 35%
Paste and position on top right below brick building element
Select Element 27 - resize by 30%
Paste and position on top right
Select Element 36 - resize by 30%
Paste and position on top left
Select Element 63 - resize by 40%
Image Free Rotate Right by 15% and paste on left side
Select Element 12 - resize by 40%
Paste and position on bottom right
Select Element 65 - resize by 40%
Paste and position on right side below barrels element
Select Element 56 - resize by 30%
Image Free Rotate Left by 15% and paste on bottom right
Select Element 57 - resize by 25%
Image Free Rotate Right by 15% and paste on bottom right
Paste tube of choice where desired
Apply Lokas 3D Shadow at default settings
Select Element 55 - resize by 35%
Paste and position on bottom left
Select Element 62 - resize by 30%
Paste and position on bottom left
Select Element 59 - resize by 40%
Image Free Rotate Right by 15% and paste on the bottom
Select Element 53 - resize by 30%
Paste and position on the bottom
Select Element 39 - resize by 35%
Image Free Rotate Left by 15% and paste on the bottom
Select Element 64 - resize by 30%
Paste and position on the bottom
Select Element 61 - resize by 40%
Image Free Rotate Left by 15% and paste on the bottom
Select Element 3 - resize by 35%
Paste and position on the bottom
Paste paper 10 on canvas
Apply Mask 17 or mask of choice
Merge group and move to the bottom layer
Add any dropshadows you like
Sharpen any elements as needed
Crop and resize as desired
Add copyright info, license number and name
You're done! Thanks for trying my tutorial!
Labels:Schnegge | 0
comments
Tuesday, June 16, 2015
SUMMER FANTASY
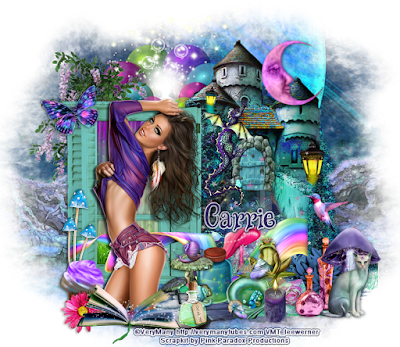
Supplies needed:
I am using the stunning artwork from Very Many for this tutorial which you can find here
Scrapkit: I am using a stunning kit from Pink Paradox Productions called "Summer Fantasy" which you can get by going here
Mask 111 from Designs by Vaybs which you can find here
Plugins: Lokas 3D Shadow
----------------------------
This tutorial is written for those who have working knowledge of PSPX2 (any version will do).
This tutorial was written by me on June 16, 2014. Please do not copy or paste on any other forum, website or blog provide link back to tut only. Please do not claim as your own. This tutorial is copyrighted to me. Any resemblance to any other tutorial is purely coincidental.
Ok - let's start and remember to save often.
Open up a 750 x 650 blank canvas (we can resize it later)
Select Element 89 - resize by 40%
Paste and position on the right side of the canvas
Select Element 27 - resize by 35%
Paste and position on left side where desired
Select your magic wand tool and select the square window portions of the window frame (Add (Shift), RGB Value, Tolerance 25, Contiguous checked, Feather 0)
Selections, Modify, Expand by 5
Paste paper 24
Select invert, delete select none
Move paper layer below window frame layer
Select Element 178 - resize by 45%
Paste and position on top left below frame
Select Element 191 - resize by 30%
Paste and position on top left below the window frame
Select Element 5 - resize by 18%
Image Free Rotate Left and paste on top left
Select Element 99 - resize by 15%
Image Free Rotate Left by 15% and paste on top right
Select Element 186 - resize by 45%
Paste and position on bottom where desired
Paste tube of choice where desired
Apply Lokas 3D Shadow at default settings
Select Element 10 - resize by 20%
Paste and position on right side
Select Element 168 - resize by 25%
Paste and position on bottom left
Select Element 32 - resize by 12%
Paste and position on bottom left
Select Element 52 - resize by 25%
Paste and position on bottom left
Select Element 112 - resize by 12%
Paste and position on bottom left
Select Element 16 - resize by 15%
Paste and position on the bottom
Select Element 37 - resize by 12%
Paste and position on the bottom
Select Element 36 - resize by 15%
Paste and position on the bottom
Select Element 171 - resize by 12%
Paste and position on the bottom
Select Element 21 - resize by 12%
Paste and position on the bottom
Select Element 169 - resize by 15%
Paste and position on the bottom right
Select Element 2 - resize by 15%
Paste and position on bottom right
Select Element 40 - resize by 20%
Paste and position on bottom right
Select Element 113 - resize by 12%
Paste and position on bottom right
Select Element 50 - resize by 15%
Paste and position on bottom right
Select Element 7 - resize by 15%
Paste and position on bottom right
Paste paper 48 on canvas
Apply Mask 111 or mask of choice
Merge group and move to the bottom layer
Add any dropshadows you like
Sharpen any elements as needed
Crop and resize as desired
Add copyright info, license number and name
You're done! Thanks for trying my tutorial!
Labels:Pink Paradox Productions | 0
comments
Monday, June 15, 2015
MELODY DE MAYET

Supplies needed:
I am using the stunning artwork from Graphfreaks for this tutorial which you can find here
Scrapkit: I am using a beautiful kit from Bibi's Collections called "Melody De Mayet" which you can get by going here
Plugins: Lokas 3D Shadow
----------------------------
This tutorial is written for those who have working knowledge of PSPX2 (any version will do).
This tutorial was written by me on June 15, 2014. Please do not copy or paste on any other forum, website or blog provide link back to tut only. Please do not claim as your own. This tutorial is copyrighted to me. Any resemblance to any other tutorial is purely coincidental.
Ok - let's start and remember to save often.
Open up a 750 x 650 blank canvas (we can resize it later)
Select Element 63 - resize by 65%
Paste and position in the center of the canvas
Select Element 23 - resize by 45%
Paste and position in the center of the canvas
Select Element 107 - resize by 45%
Paste and position right side below the bridge element
Select Element 22 - resize by 40%
Image mirror and paste on the right side below bridge element
Select Element 16 - resize by 55%
Paste and position on the left side below bridge element
Select Element 99 - resize by 18%
Paste on right side below bridge element
Paste tube of choice where desired
Apply Lokas 3D Shadow at default settings
Select Element 65 - resize by 30%
Paste and position on left side
Select Element 24 - resize by 25%
Paste and position on left side
Select Element 89 - resize by 15%
Paste and position on bottom left
Select Element 5 - resize by 25%
Paste and position on bottom left
Select Element 17 - resize by 20%
Image Free Rotate Left by 15% and paste on bottom left
Select Element 37 - resize by 35%
Paste and position on bottom left
Select Element 97 - resize by 40%
Paste and position on top right
Select Element 6 - resize by 15%
Paste and position on right side
Select Element 38 - resize by 15%
Paste and position on the bottom right
Select Element 18 - resize by 35%
Paste and position on the bottom right
Select Element 47 - resize by 20%
Paste and position on the bottom right
Select Element 36 - resize by 15%
Paste and position on the bottom below tube layer
Select Element 109 - resize by 25%
Paste and position on the top left
Add any dropshadows you like
Sharpen any elements as needed
Crop and resize as desired
Add copyright info, license number and name
You're done! Thanks for trying my tutorial!
Labels:Bibi's Collections,Graphfreaks | 0
comments
Sunday, June 14, 2015
MILITARY BABE
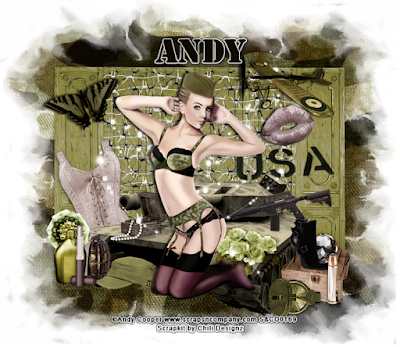
Supplies needed:
I am using the stunning artwork from Andy Cooper for this tutorial which you can find here
Scrapkit: I am using a stunning kit from Chili Designz called "Military Burlesque" which you can get by going here
Mask 328 which you can find here
Plugins: Lokas 3D Shadow
----------------------------
This tutorial is written for those who have working knowledge of PSPX2 (any version will do).
This tutorial was written by me on June 14, 2014. Please do not copy or paste on any other forum, website or blog provide link back to tut only. Please do not claim as your own. This tutorial is copyrighted to me. Any resemblance to any other tutorial is purely coincidental.
Ok - let's start and remember to save often.
Open up a 750 x 650 blank canvas (we can resize it later)
Select Screen Element 61 - resize by 75%
Paste and position in the center of the canvas
Select Barb Wire Element - resize by 40%
Paste and position in the center of the screen element
Select Tank 3 Element - resize by 75%
Paste and position on the bottom of the screen
Select Plane Element - resize by 30%
Paste and position on top right
Select Lips Element - resize by 65%
Image Free Rotate Left by 15% and paste on top right
Paste tube of choice where desired
Apply Lokas 3D Shadow at default settings
Select WA Element - resize by 65%
Paste and position on right side
Select Corset 2 Element - resize by 45%
Image Free Rotate Left by 15% and paste on left side below tank element
Select Rosette Element - resize by 35%
Paste and position on bottom left
Select Bottle Element - resize by 35%
Paste and position on bottom left
Select Granate Element - resize by 35%
Paste and position on bottom left
Select Lipstick Element - resize by 45%
Paste and position on bottom left
Select Cap Element - resize by 40%
Paste and position on bottom left
Select Jewelry Box Element - resize by 25%
Paste and position on the left side above tank element
Select Gun Element - resize by 35%
Paste and position on the right side above tank element
Select Ammobox Element - resize by 35%
Paste and position on the bottom right
Select Jewel Element - resize by 75%
Paste and position on the bottom right above ammo box
Select Boot Element - resize by 35%
Paste and position on the bottom right above the ammo box
Select Bullet Element - resize by 45%
Paste and position on bottom right
Select Compass Element - resize by 40%
Paste and position on bottom right
Select Flowers Element - resize by 30%
Paste and position on right side above tank element
Select Butterfly Element - resize by 50%
Image Free Rotate Left by 15% and paste on top left
Paste paper 2 on canvas
Apply Mask 3 or mask of choice
Merge group and move to the bottom layer
Add any dropshadows you like
Sharpen any elements as needed
Crop and resize as desired
Add copyright info, license number and name
You're done! Thanks for trying my tutorial!
Labels:Chili Designz,Scraps N Company | 0
comments
AMERICAN BEAUTY
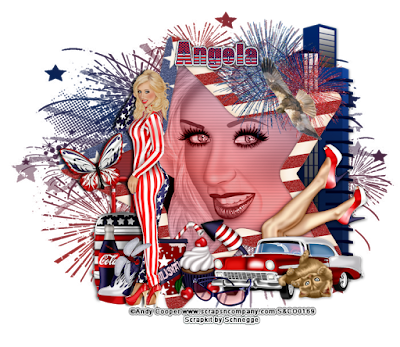
Supplies needed:
I am using the stunning artwork from Andy Cooper for this tutorial which you can find here
Scrapkit: I am using a stunning kit from Schnegge called "Beauty American" which you can get by going here
Patriotic Mask 3 from Dee which you can find here
Plugins: Lokas 3D Shadow
----------------------------
This tutorial is written for those who have working knowledge of PSPX2 (any version will do).
This tutorial was written by me on June 14, 2014. Please do not copy or paste on any other forum, website or blog provide link back to tut only. Please do not claim as your own. This tutorial is copyrighted to me. Any resemblance to any other tutorial is purely coincidental.
Ok - let's start and remember to save often.
Open up a 750 x 650 blank canvas (we can resize it later)
Select Frame Element 61 - resize by 80%
Paste and position in the center of the canvas
Select your magic wand tool and click in the center of the frame (Add (Shift), RGB Value, Tolerance 25, Contiguous checked, Feather 0)
Selections, Modify, Expand by 5
Add new raster layer and flood-fill with color or gradient of choice
Paste close-up tube of choice on color/gradient layer
Select invert, delete, select none
Change close-up to Luminance (Legacy)
Apply dropshadow and Merge down on color layer
Effect, Texture Effects, Blinds (Width 2, Opacity 20, Horizontal and Light from left/top checked)
Move paper layer below frame layer
Select Element 66 - resize by 60%
Paste and position on right side below frame
Select Element 13 - resize by 45%
Paste and position on top right
Select Element 12 - resize by 35%
Paste and position on top right
Select Element 58 - resize by 35%
Paste and position on top right
Paste tube of choice where desired
Apply Lokas 3D Shadow at default settings
Select Element 59 - resize by 45%
Paste and position on bottom right
Select Element 51 - resize by 35%
Paste and position on bottom right below car element
Select Element 38 - resize by 25%
Paste and position on bottom right
Select Element 46 - resize by 40%
Image Free Rotate Left by 15% and paste on left side
Select Element 64 - resize by 40%
Paste and position on bottom left
Select Element 70 - resize by 35%
Paste and position on bottom left
Select Element 48 - resize by 20%
Paste and position on bottom left
Select Element 69 - resize by 25%
Paste and position on the bottom left
Select Element 54 - resize by 30%
Paste and position on the bottom
Select Element 47 - resize by 30%
Paste and position on the bottom
Select Element 39 - resize by 25%
Paste and position on the bottom
Select Element 45 - resize by 25%
Paste and position on the bottom
Add new raster layer and flood-fill with color or gradient of choice
Apply Mask 3 or mask of choice
Merge group and move to the bottom layer
Add any dropshadows you like
Sharpen any elements as needed
Crop and resize as desired
Add copyright info, license number and name
You're done! Thanks for trying my tutorial!
Labels:Schnegge,Scraps N Company | 0
comments
MERMAID TALES
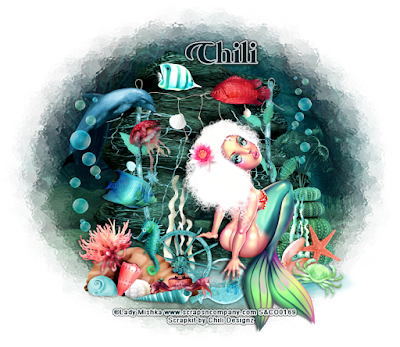
Supplies needed:
I am using the stunning artwork from Lady Mishka for this tutorial which you can find here
Scrapkit: I am using a stunning kit from Chili's Designz called "Mermaid Tales" which you can get by going here
Mask 451 from Vix which you can find here
Plugins: Lokas 3D Shadow
----------------------------
This tutorial is written for those who have working knowledge of PSPX2 (any version will do).
This tutorial was written by me on June 14, 2014. Please do not copy or paste on any other forum, website or blog provide link back to tut only. Please do not claim as your own. This tutorial is copyrighted to me. Any resemblance to any other tutorial is purely coincidental.
Ok - let's start and remember to save often.
Open up a 750 x 650 blank canvas (we can resize it later)
Select Stones Element - resize by 80%
Paste and position in the center of the canvas
Select Deco 5 Element - resize by 40%
Paste and position on top of the stones element
Select Deco Element - resize by 45%
Paste and position on top of stones element
Select Sea Anemone 4 Element - resize by 25%
Paste and position on right side
Select Deco 4 Element - resize by 40%
Paste and position on bottom right
Select Water Element - resize by 55%
Paste and position on bottom where desired
Paste tube of choice where desired
Apply Lokas 3D Shadow at default settings
Select Fish 3 Element - resize by 30%
Paste and position on top where desired
Select Fish 7 Element - resize by 45%
Paste and position on the top right
Select Dolphin Element - resize by 45%
Image Free Rotate Left by 15% and paste on the top left
Select Goble 3 Element - resize by 25%
Paste and position on the top left
Select Plant 2 Element - resize by 30%
Paste and position on bottom where desired
Image duplicate and resize by 75% and move to bottom right
Select Starfish 4 Element - resize by 30%
Paste and position on the bottom right side
Select Shell 11 Element - resize by 18%
Paste and position on the bottom right
Select Crab Element - resize by 35%
Paste and position on the bottom right
Select Stones 2 Element - resize by 35%
Paste and position on the bottom left
Select Sea Anemone 7 Element - resize by 25%
Image mirror and paste on bottom left
Select Shelle 2 Element - resize by 35%
Paste and position on the bottom left
Select Shell 12 Element - resize by 35%
Paste and position on the bottom left
Select Shell 10 Element - resize by 20%
Paste and position on the bottom left
Select Seahorse Element - resize by 30%
Paste and position on the bottom left
Select Wheel Element - resize by 30%
Paste and position on the bottom where desired
Select Crab 2 Element - resize by 40%
Paste and position on the bottom where desired
Select Shell 3 Element - resize by 30%
Paste and position on the bottom where desired
Select Bottle Element - resize by 35%
Paste and position on the bottom where desired
Select Fish 8 Element - resize by 50%
Paste and position on left side
Paste paper 7 on canvas
Apply Mask 451 or mask of choice
Merge group and move to the bottom layer
Select Bubbles Element - resize by 30%
Paste and position on left side
Image duplicate, mirror and resize by 75%
Reposition on top right where desired
Add any dropshadows you like
Sharpen any elements as needed
Crop and resize as desired
Add copyright info, license number and name
You're done! Thanks for trying my tutorial!
Labels:Chili Designz | 0
comments
Thursday, June 11, 2015
ALFAMERMAID
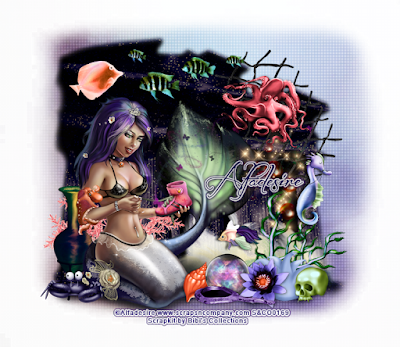
Supplies needed:
I am using the stunning artwork from Alfadesire for this tutorial which you can find here
Scrapkit: I am using a stunning kit from Bibi's Collections called "AlfaMermaid" which you can get by going here
Mask 79 from Designs by Vaybs which you can find here
Plugins: Lokas 3D Shadow
----------------------------
This tutorial is written for those who have working knowledge of PSPX2 (any version will do).
This tutorial was written by me on June 11, 2014. Please do not copy or paste on any other forum, website or blog provide link back to tut only. Please do not claim as your own. This tutorial is copyrighted to me. Any resemblance to any other tutorial is purely coincidental.
Ok - let's start and remember to save often.
Open up a 750 x 650 blank canvas (we can resize it later)
Select Element 87 - resize by 65%
Paste and position in the center of the canvas
Select Element 17 - resize by 50%
Paste and position on top right
Select Element 41 - paste and position on bottom right
Select Element 88 - resize by 45%
Paste and position on bottom left
Select Element 62 - resize by 45%
Paste and position on bottom left
Paste tube of choice where desired
Apply Lokas 3D Shadow at default settings
Select Element 60 - resize by 50%
Paste and position on top left
Select Element 89 - resize by 25%
Paste and position on the top where desired
Select Element 22 - resize by 55%
Paste and position on the top right
Select Element 26 - resize by 20%
Paste and position on the bottom left
Select Element 61 - resize by 45%
Paste and position on the right side
Select Element 25 - resize by 20%
Paste and position on the right side
Select Element 90 - resize by 55%
Paste and position on the bottom right
Select Element 67 - resize by 20%
Paste and position on the bottom right
Select Element 24 - resize by 40%
Paste and position on the bottom right
Select Element 16 - resize by 20%
Paste and position on bottom right
Select Element 18 - resize by 25%
Paste and position on the bottom
Select Element 94 - resize by 30%
Paste and position on the bottom
Select Element 18 - resize by 22%
Paste and position on the bottom
Select Element 92 - resize by 20%
Paste and position on the bottom
Select Element 33 - resize by 50%
Paste and position in the center of the canvas where desired
Paste paper 8 on canvas
Apply Mask 79 or mask of choice
Merge group and move to the bottom layer
Add any dropshadows you like
Sharpen any elements as needed
Crop and resize as desired
Add copyright info, license number and name
You're done! Thanks for trying my tutorial!
Labels:Bibi's Collections | 0
comments
SWEET SIREN
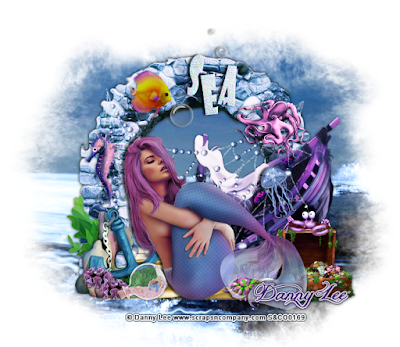
Supplies needed:
I am using the stunning artwork from Danny Lee for this tutorial which you can find here
Scrapkit: I am using a stunning kit from Designs by Joan called "Sweet Siren" which you can get by going here
Mask 111 from Designs by Vaybs which you can find here
Plugins: Lokas 3D Shadow
----------------------------
This tutorial is written for those who have working knowledge of PSPX2 (any version will do).
This tutorial was written by me on June 11, 2014. Please do not copy or paste on any other forum, website or blog provide link back to tut only. Please do not claim as your own. This tutorial is copyrighted to me. Any resemblance to any other tutorial is purely coincidental.
Ok - let's start and remember to save often.
Open up a 750 x 650 blank canvas (we can resize it later)
Select Element 23 - paste and position in the center of the canvas
Select Element 10 - resize by 75%
Paste and position in the center of the canvas
Select Element 80 - resize by 30%
Paste and position on top where desired
Adjust, Add/Remove Noise, Add Noise (Uniform checked, Noise 35%, Monochrome unchecked)
Select Element 34 - resize by 45%
Paste and position on top right
Select Element 72 - resize by 40%
Paste and position on right side
Select Element 42 - resize by 30%
Paste and position on bottom right
Select Element 9 - resize by 45%
Paste and position on bottom where desired
Select Element 75 - resize by 25%
Paste and position on bottom left
Paste tube of choice where desired
Apply Lokas 3D Shadow at default settings
Select Element 30 - resize by 25%
Paste and position on right side
Select Element 14 - resize by 20%
Paste and position on bottom right
Select Element 50 - resize by 25%
Paste and position on bottom right below tube
Select Element 60 - resize by 15%
Paste and position on bottom right below tube
Select Element 69 - resize by 25%
Paste and position on bottom left below anchor element
Select Element 37 - resize by 22%
Paste and position on bottom left
Select Element 52 - resize by 20%
Paste and position on left side
Select Element 41 - resize by 20%
Paste and position on top left
Paste paper 2 on canvas
Apply Mask 111 or mask of choice
Merge group and move to the bottom layer
Add any dropshadows you like
Sharpen any elements as needed
Crop and resize as desired
Add copyright info, license number and name
You're done! Thanks for trying my tutorial!
Labels:Scraps N Company | 0
comments
Wednesday, June 10, 2015
TOXIC PINK
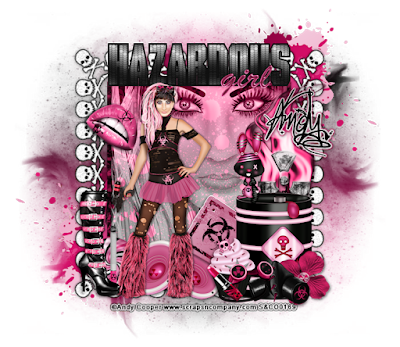
Supplies needed:
I am using the stunning artwork from Andy Cooper for this tutorial which you can find here
Scrapkit: I am using a stunning kit from Disturbed Scraps called "Toxic Pink Babe" which you can get by going here
Mask 36 from Millie which you can find here
Plugins: Lokas 3D Shadow
----------------------------
This tutorial is written for those who have working knowledge of PSPX2 (any version will do).
This tutorial was written by me on June 10, 2014. Please do not copy or paste on any other forum, website or blog provide link back to tut only. Please do not claim as your own. This tutorial is copyrighted to me. Any resemblance to any other tutorial is purely coincidental.
Ok - let's start and remember to save often.
Open up a 750 x 650 blank canvas (we can resize it later)
Select Frame Element 72 - resize by 125%
Paste and position in the center of the canvas
Select your magic wand tool and click in the center the square in the frame (Add (Shift), RGB Value, Tolerance 25, Contiguous checked, Feather 0)
Selections, Modify, Expand by 3
Paste paper 6
Select invert, delete
Paste close-up tube of choice on paper layer
Delete, select none
Change close-up to Luminance (Legacy) and drop opacity down to 75%
Apply dropshadow and Merge down on paper layer
Move paper layer below frame layer
Select Element 74 - resize by 45%
Paste and position on top of frame
Select Element 28 - resize by 22%
Paste and position on top left
Select Element 39 - resize by 40%
Paste and position on bottom left
Select Element 18 - resize by 25%
Paste and position on bottom left
Select Element 38 - resize by 25%
Paste and position on bottom left
Select Element 3 - resize by 35%
Paste and position on bottom where desired
Paste tube of choice where desired
Apply Lokas 3D Shadow at default settings
Select Element 19 - resize by 40%
Paste and position on bottom right
Select Element 36 - resize by 40%
Paste and position on right side below barrel element
Select Element 26 - resize by 25%
Paste and position on top of barrel element
Select Element 53 - resize by 25%
Paste and position on bottom right
Select Element 12 - resize by 25%
Paste and position on bottom right
Select Element 16 - resize by 25%
Paste and position on bottom right
Select Element 27 - resize by 22%
Paste and position on bottom right
Select Element 33 - resize by 15%
Paste and position on the bottom right
Select Element 13 - resize by 35%
Paste and position on left side of barrel element
Select Element 65 - resize by 50%
Image mirror and paste on top right - move to bottom layer
Image duplicate, mirror and flip
Add new raster layer and flood-fill with color or gradient of choice
Apply Mask 36 or mask of choice
Merge group and move to the bottom layer
Add any dropshadows you like
Sharpen any elements as needed
Crop and resize as desired
Add copyright info, license number and name
You're done! Thanks for trying my tutorial!
Labels:Scraps N Company | 0
comments
Monday, June 8, 2015
STEAMPUNK GWEN
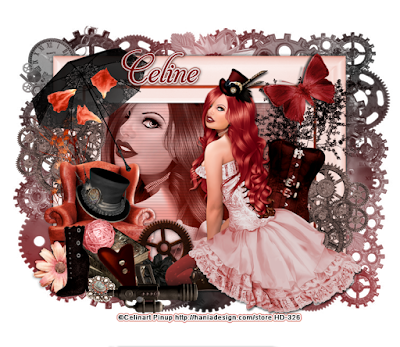
Supplies needed:
I am using the stunning artwork from Celinart Pinup for this tutorial which you can find here
Scrapkit: I am using a stunning kit from Chili's Designz called "Celine" which you can get by going here
Mask 124 from Bitzy Beez Designz which you can find here
Plugins: Lokas 3D Shadow
----------------------------
This tutorial is written for those who have working knowledge of PSPX2 (any version will do).
This tutorial was written by me on June 8, 2014. Please do not copy or paste on any other forum, website or blog provide link back to tut only. Please do not claim as your own. This tutorial is copyrighted to me. Any resemblance to any other tutorial is purely coincidental.
Ok - let's start and remember to save often.
Open up a 750 x 650 blank canvas (we can resize it later)
Select Frame Element 3 - resize by 120%
Paste and position in the center of the canvas
Select your magic wand tool and click in the center the square in the frame (Add (Shift), RGB Value, Tolerance 25, Contiguous checked, Feather 0)
Selections, Modify, Expand by 5
Paste paper 14
Select invert, delete
Paste close-up tube of choice on paper layer
Delete, select none
Change close-up to Luminance (Legacy) and add dropshadow
Merge down on paper layer
Effect, Texture Effects, Blinds (Width 2, Opactity 20, Horizontal and Light from left/top checked)
Move paper layer below frame layer
Select Parasol Element - resize by 50%
Paste and position on top left
Select Flower Leaves Element - resize by 45%
Paste and position on top left
Select Flower Deco 2 Element - resize by 30%
Paste and position on top right
Select Butterfly 2 Element - resize by 55%
Paste and position on top right
Paste tube of choice where desired
Apply Lokas 3D Shadow at default settings
Select Cogs Element - resize by 40%
Paste and position on right side
Image duplicate and mirror and flip
Reposition on left side where desired
Select Corset Element - resize by 55%
Image Free Rotate Right by 15% and paste on right side
Select Chair Element - resize by 45%
Paste and position on bottom left
Select Hat 2 Element - resize by 35%
Paste and position on chair element
Select Flower 2 Element - resize by 45%
Paste and position on bottom left
Select Boot Element - resize by 50%
Paste and position on bottom left
Select Books Element - resize by 45%
Paste and position on bottom left
Select Deco 3 Element - resize by 35%
Paste and position on top of books element
Select Jewel 2 Element - resize by 35%
Paste and position on bottom left
Select Button Element - resize by 55%
Image Free Rotate Left by 15% and paste on bottom left
Select Cog 6 Element - resize by 35%
Paste and position on the bottom
Select Flower 7 Element - resize by 25%
Paste and position on the bottom
Select Deco Element - resize by 30%
Paste and position on the bottom
Add new raster layer and flood-fill with color or gradient of choice
Apply Mask 124 or mask of choice
Merge group and move to the bottom layer
Add any dropshadows you like
Sharpen any elements as needed
Crop and resize as desired
Add copyright info, license number and name
You're done! Thanks for trying my tutorial!
Labels:Celinart Pinup,Chili Designz | 0
comments
Sunday, June 7, 2015
SHARON
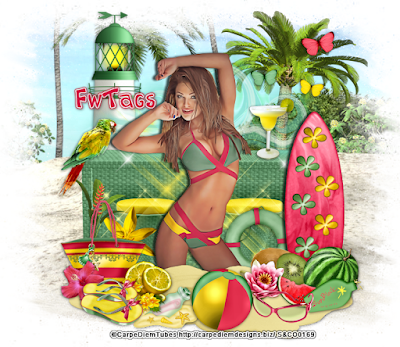
Supplies needed:
I am using the stunning artwork from Carpe Diem for this tutorial which you can find here
Scrapkit: I am using a stunning kit from FwTags Creations called "Sharon" which you can get by going here
DMask 6 from Gina Gems which you can find here
Plugins: Lokas 3D Shadow
----------------------------
This tutorial is written for those who have working knowledge of PSPX2 (any version will do).
This tutorial was written by me on June 7, 2014. Please do not copy or paste on any other forum, website or blog provide link back to tut only. Please do not claim as your own. This tutorial is copyrighted to me. Any resemblance to any other tutorial is purely coincidental.
Ok - let's start and remember to save often.
Open up a 750 x 650 blank canvas (we can resize it later)
Select Element 2 - resize by 55%
Paste and position in the center of the canvas
Select Element 62 - resize by 55%
Paste and position on top left below bar element
Select Element 7 - resize by 55%
Paste and position on top right below bar element
Select Element 54 - resize by 20%
Paste and position on top right
Select Element 27 - resize by 65%
Paste and position in the center of canvas where desired
Select Element 11 - resize by 50%
Paste and position in the center of canvas
Paste tube of choice where desired
Apply Lokas 3D Shadow at default settings
Select Element 9 - resize by 65%
Paste and position on the bottom where desired
Select Element 53 - resize by 45%
Paste and position on bottom right
Select Element 26 - resize by 18%
Paste and position on bottom right
Select Element 16 - resize by 20%
Paste and position on bottom right
Select Element 17 - resize by 15%
Image mirror and paste on bottom right
Select Element 41 - resize by 15%
Paste and position on bottom right
Select Element 33 - resize by 12%
Paste and position on bottom right
Select Element 35 - resize by 15%
Paste and position on bottom right
Select Element 43 - resize by 15%
Paste and position on the bottom
Select Element 6 - resize by 20%
Paste and position on bottom left
Select Element 61 - resize by 22%
Paste and position on bottom left
Select Element 45 - resize by 12%
Paste and position on bottom left
Select Element 34- resize by 15%
Paste and position on bottom left
Select Element 38 - resize by 15%
Paste and position on bottom left
Select Element 65 - resize by 15%
Paste and position on bottom left
Select Element 32 - resize by 20%
Paste and position on left side
Select Element 3 - resize by 15%
Paste and position on right side above bar element
Paste paper 1 on canvas
Apply Mask 6 or mask of choice
Merge group and move to the bottom layer
Add any dropshadows you like
Sharpen any elements as needed
Crop and resize as desired
Add copyright info, license number and name
You're done! Thanks for trying my tutorial!
Labels:FwTags,Scraps N Company | 0
comments
Wednesday, June 3, 2015
MIDNIGHT SERENADE
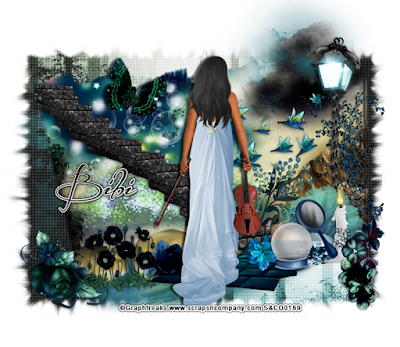
Supplies needed:
I am using the stunning artwork from Graphfreaks for this tutorial which you can get free with a $5.00 purchase here
Scrapkit: I am using a stunning kit from Bibi's Collections called "Patrizia Fairy" which you can get by going here
Mask 252 from Weescotlass which you can find here
Plugins: Lokas 3D Shadow
----------------------------
This tutorial is written for those who have working knowledge of PSPX2 (any version will do).
This tutorial was written by me on June 3, 2014. Please do not copy or paste on any other forum, website or blog provide link back to tut only. Please do not claim as your own. This tutorial is copyrighted to me. Any resemblance to any other tutorial is purely coincidental.
Ok - let's start and remember to save often.
Open up a 750 x 650 blank canvas (we can resize it later)
Select Element 98 - resize by 68%
Paste and position in the center of the canvas
Select Element 43 - resize by 85%
Paste and position on the top left
Select Element 76 - resize by 40%
Paste and position on the right hand side
Select Element 66 - resize by 35%
Paste and position on top right
Select Element 106 - resize by 55%
Paste and position on top right
Select Element 103 - resize by 50%
Paste and position on bottom right above staircase layer
Select Element 30 - resize by 40%
Paste and position on the center right
Select Element 71 - resize by 25%
Paste and position on right side below staircase elememt
Select Element 92 - resize by 40%
Paste and position on center lefthand side
Select Element 37 - resize by 35%
Paste and position on top left
Select Element 38 - resize by 30%
Image Free Rotate Right by 15% and paste on top left
Select Element 107 - resize by 40%
Paste and position on bottom where desired
Paste tube of choice where desired
Apply Lokas 3D Shadow at default settings
Select Element 68 - resize by 30%
Image mirror and flip and paste on bottom left
Select Element 2 - resize by 35%
Paste and position on bottom left
Select Element 80 - resize by 25%
Paste and position on bottom right
Select Element 85 - resize by 40%
Image Free Rotate Right by 15% and paste on bottom right
Select Element 32 - resize by 40%
Paste and position on bottom right
Select Element 86 - resize by 35%
Paste and position on bottom right
Select Element 111 - resize by 35%
Image Free Rotate Left by 15% and paste on bottom right
Select Element 110 - resize by 25%
Paste and position on bottom right
Select Element 105 - resize by 25%
Paste and position on the bottom right
Select Element 104 - resize by 15%
Paste and position on bottom where desired
Paste paper 4 on canvas
Apply Mask 252 or mask of choice
Merge group and move to the bottom layer
Select Element 74 - resize by 40%
Paste and position on bottom right
Add any dropshadows you like
Sharpen any elements as needed
Crop and resize as desired
Add copyright info, license number and name
You're done! Thanks for trying my tutorial!
Labels:Bibi's Collections,Graphfreaks | 0
comments
Subscribe to:
Comments
(Atom)

