Labels
- Alikas Scraps
- All Dolled Up Store
- Amy Marie
- Annaica
- Arthur Crowe
- Babycakes Scraps
- Barbara Jensen
- Bibi's Collections
- Black Widow Creationz
- Blu Moon
- Bonnies Creations
- Bookwork Dezines
- Broken Sky Dezine
- Carita Creationz
- Carpe Diem Designs
- CDO
- Celinart Pinup
- Celine
- Chacha Creationz
- Charmed Designs
- Cherry Blossom Designs
- Chili Designz
- Cluster Frame
- Creative Misfits
- Creative Scraps by Crys
- Curious Creative Dreams
- Danny Lee
- Derzi
- Designs by Ali
- Designs by Joan
- Designs by Ketura
- Designs By Norella
- Designs by Vi
- Diana Gali
- Diry Art Designs
- Disturbed Scraps
- Dreaming With Bella
- Eclipse Creations
- Elegancefly
- Extras
- Fabulous Designz
- Forum Set
- Foxy's Designz
- Freek's Creation
- FTU
- FwTags
- Goldwasser
- Gothic Inspirations
- Gothic Raven Designs
- Graphfreaks
- Hania's Designs
- Happy Pumpkin Studios
- Horseplay's Pasture Designs
- indie-Zine
- Irish Princess Designs
- Ishika Chowdhury
- Kaci McVay
- Kajenna
- katharine
- Katherine
- Khloe Zoey
- Killer Kitty
- Kissing Kate
- KiwiFirestorm
- Kiya Designs
- Kizzed by Kelz
- KZ Designz
- Lady Mishka
- Lil Mz Brainstorm
- Maiden of Darkness
- Mariel Designs
- MellieBeans
- Michelle's Myths
- Midnight Shadow
- Misticheskya
- MistyLynn's Creations
- MMeliCrea Designz
- Moon Vixen Designs
- NaSionainne
- Ninaste
- Niqui Designs
- Pandora
- Picsfordesign
- Pink Paradox Productions
- Radyga Designs
- Redefined Designs
- Rissa's Designs
- Schnegge
- ScottishButterfly Creations
- Scrappin Krazy Designs
- Scrappin With Lil Ol Me
- Scraps and the City
- Scraps Dimensions
- Scraps From The Heart
- Scraps N Company
- Scraps with Attitude
- Shining Star Art
- Skyscraps
- Sleek N Sassy Designs
- Sophisticat Simone
- Souldesigner
- Soxsational Scraps
- Spazz
- Starlite and Soul
- Stella Felice
- Tammy Welt
- Tasha's Playground
- The PSP Project
- Thrifty Scraps by Gina
- Tiny Turtle Designs
- Upyourart
- Verymany
- Wendy Gerber
- Whisper In the Wind
- Wick3d Creationz
- Wicked Diabla
- Yude's Kreationz
Blog Archive
Thursday, July 30, 2015
GLITTER MERMAID
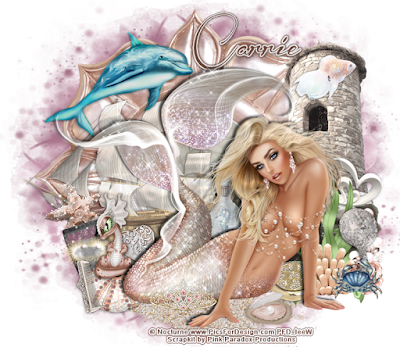
Supplies needed:
I am using the stunning artwork from Nocturne for this tutorial which you can find here
Scrapkit: I am using a stunning kit from Pink Paradox Productions called "Glitter of the Sea" which you can get by going here
Mask 10 from Melissaz Creations which you can find here
Plugins: Lokas 3D Shadow
----------------------------
This tutorial is written for those who have working knowledge of PSPX2 (any version will do).
This tutorial was written by me on July 30, 2015. Please do not copy or paste on any other forum, website or blog provide link back to tut only. Please do not claim as your own. This tutorial is copyrighted to me. Any resemblance to any other tutorial is purely coincidental.
Ok - let's start and remember to save often.
Open up a 750 x 650 blank canvas (we can resize it later)
Select Frame 15 - resize by 65%
Paste and position in the center of the canvas
Select your magic wand tool and select the center of the frame (Add (Shift), RGB Value, Tolerance 25, Contiguous checked, Feather 0)
Selections, Modify, Expand by 5
Paste paper 44
Select invert, delete, select none
Move paper below frame
Select Element 60 - resize by 40%
Paste and position on the top right above frame
Select Element 95 - resize by 30%
Select Element 53 - resize by 15%
Paste and position on the left side
Paste and position on the bottom right
Select Element 92 - resize by 45%
Paste and position on the bottom below the frame
Select Element 102 - resize by 25%
Paste and position on the bottom right
Select Element 101 - resize by 20%
Paste and position on the bottom right
Select Element 62 - resize by 40%
Paste and position on the left side
Paste tube of choice where desired
Apply Lokas 3D Shadow at default settings
Select Element 29 - resize by 20%
Paste and position on the bottom right
Select Element 12 - resize by 15%
Paste and position on the bottom right
Select Element 33 - resize by 15%
Paste and position on the bottom right
Select Element 70 - resize by 18%
Paste and position on the left side
Select Element 50 - resize by 25%
Paste and position on the bottom left
Select Element 81 - resize by 20%
Paste and position on the bottom left
Select Element 4 - resize by 20%
Paste and position on the bottom left
Select Element 47 - resize by 15%
Image Free Rotate Left by 15% and paste on the bottom left
Select Element 30 - resize by 15%
Paste and position on the bottom left
Select Element 72 - resize by 12%
Paste and position on the bottom
Select Element 28 - resize by 20%
Paste and position on the bottom where desired
Select Element 10 - resize by 35%
Paste and position on the top left
Select Element 15 - resize by 20%
Paste and position on the top right
Paste paper 7 on canvas
Apply Mask 20 or mask of choice
Merge group and move to the bottom layer
Add any dropshadows you like
Sharpen any elements as needed
Crop and resize as desired
Add copyright info, license number and name
You're done! Thanks for trying my tutorial!
Labels:Pink Paradox Productions | 0
comments
Wednesday, July 29, 2015
LISTEN TO YOUR HEART
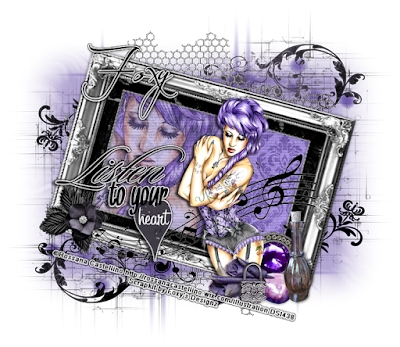
Supplies needed:
I am using the stunning artwork from Rossana Castellino for this tutorial which you can find here
Scrapkit: I am using a stunning kit from Foxy's Designz called "IB-RossanaCastellino-4-1" which you can get by going here
Sparkle Mask 145 from Aqua which you can find on the Misfits Blog here
Mask 52 from Moonbeams and Spiderwebs which you can find here
Plugins: Lokas 3D Shadow, Eyecandy 4000 - Gradient Glow
----------------------------
This tutorial is written for those who have working knowledge of PSPX2 (any version will do).
This tutorial was written by me on July 29, 2015. Please do not copy or paste on any other forum, website or blog provide link back to tut only. Please do not claim as your own. This tutorial is copyrighted to me. Any resemblance to any other tutorial is purely coincidental.
Ok - let's start and remember to save often.
Open up a 750 x 650 blank canvas (we can resize it later)
Select Frame Element 3 - resize by 75%
Paste and position in the center of the canvas
Image Free Rotate Right by 15%
Select your magic wand tool and select the center of the frame (Add (Shift), RGB Value, Tolerance 25, Contiguous checked, Feather 0)
Selections, Modify, Expand by 5
Paste paper 1
Select invert, delete
Paste close-up tube on top of paper where desired and delete
Select none
Drop opacity down on close-up to 50%
Apply drop shadow and merge down on paper layer
Effect, Texture Effects, Blinds (Width 2, Opactity 20, Horizontal and Light from left/top checked)
Move paper layer below window frame layer
Select Element 10 - resize by 50%
Paste and position on the bottom above frame
Select WordArt 1 - resize by 50%
Paste and position on the bottom left
Apply Eyecandy Gradient Glow on fat default settings (Glow width 3)
Paste tube of choice where desired
Apply Lokas 3D Shadow at default settings
Select Element 11 - resize by 35%
Paste and position on the bottom right
Select Element 16 - resize by 25%
Paste and position on the bottom right
Select Element 5 - resize by 40%
Paste and position on the bottom right
Select Element 7 - resize by 40%
Paste and position on the bottom right
Select Element 13 - resize by 45%
Paste and position on the bottom right
Select Element 14 - resize by 40%
Image Free Rotate Left by 15% and paste on bottom left
Select Element 8 - resize by 15%
Paste and position on the bottom left
Select Element 15 - paste and position in the center of the canvas
Move to the bottom layer
Add new raster layer and flood-fill with color of choice
Apply Sparkle mask 145 and merge group and move below element 15
Paste paper 5 on canvas
Apply Mask 52 or mask of choice
Add any dropshadows you like
Sharpen any elements as needed
Crop and resize as desired
Add copyright info, license number and name
You're done! Thanks for trying my tutorial!
Labels:Foxy's Designz | 0
comments
AFRO BIKINI
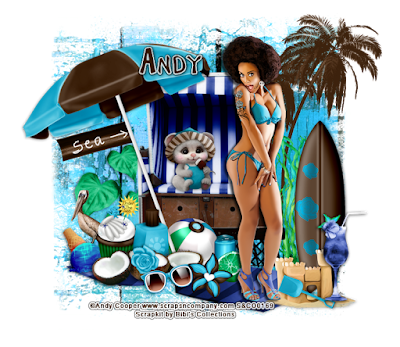
Supplies needed:
I am using the stunning artwork from Andy Cooper for this tutorial which you can find here
Scrapkit: I am using a stunning kit from Bibi's Collections called "Bikini Afro" which you can get by going here
Plugins: Lokas 3D Shadow
----------------------------
This tutorial is written for those who have working knowledge of PSPX2 (any version will do).
This tutorial was written by me on July 29, 2015. Please do not copy or paste on any other forum, website or blog provide link back to tut only. Please do not claim as your own. This tutorial is copyrighted to me. Any resemblance to any other tutorial is purely coincidental.
Ok - let's start and remember to save often.
Open up a 750 x 650 blank canvas (we can resize it later)
Select Element 3 - resize by 50%
Paste and position in the center of the canvas
Select Element 53 - resize by 80%
Paste and position on top right
Select Element 37 - resize by 65%
Paste and position in the center of the canvas
Select Element 56 - resize by 35%
Paste and position on the bottom of the chair element
Select Element 9 - resize by 40%
Paste and position on the bottom right
Select Element 58 - resize by 55%
Image Free Rotate Left by 15% and paste on left side
Select Element 51 - resize by 40%
Paste and position on bottom left
Select Element 27 - resize by 65%
Image Free Rotate Left by 20% and paste on left side
Select Element 68 - resize by 40%
Paste and position on the bottom right
Select Element 64 - resize by 20%
Paste and position in the center above chair element
Select Element 47 - resize by 80%
Paste and position on the bottom left
Paste tube of choice where desired
Apply Lokas 3D Shadow at default settings
Select Element 63 - resize by 20%
Paste and position on the bottom right
Select Element 54 - resize by 40%
Paste and position on the bottom right
Select Element 22 - resize by 20%
Paste and position on the bottom right
Select Element 23 - resize by 25%
Paste and position on the bottom left
Select Element 8 - resize by 20%
Paste and position on the bottom left
Select Element 39 - resize by 25%
Paste and position on the bottom left
Select Element 41 - resize by 25%
Paste and position on the bottom left
Select Element 31 - resize by 25%
Paste and position on bottom left
Select Element 19 - resize by 25%
Paste and position on the bottom
Select Element 20 - resize by 20%
Paste and position on the bottom
Select Element 55 - resize by 30%
Paste and position on the bottom
Select Element 42 - resize by 15%
Paste and position on the bottom
Select Element 38 - resize by 30%
Paste and position on the bottom
Add any dropshadows you like
Sharpen any elements as needed
Crop and resize as desired
Add copyright info, license number and name
You're done! Thanks for trying my tutorial!
Labels:Bibi's Collections | 0
comments
Monday, July 27, 2015
BLACK HAT
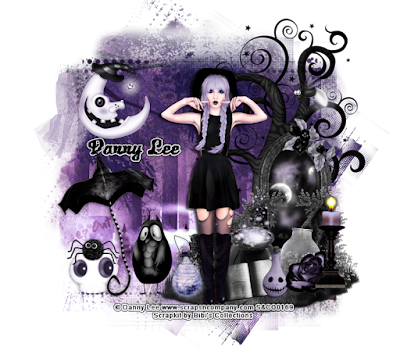
Supplies needed:
I am using the stunning artwork from Danny Lee for this tutorial which you can find here
Scrapkit: I am using a stunning kit from Bibi's Collections called "Black Hat" which you can get by going here
Plugins: Lokas 3D Shadow
----------------------------
This tutorial is written for those who have working knowledge of PSPX2 (any version will do).
This tutorial was written by me on July 27, 2015. Please do not copy or paste on any other forum, website or blog provide link back to tut only. Please do not claim as your own. This tutorial is copyrighted to me. Any resemblance to any other tutorial is purely coincidental.
Ok - let's start and remember to save often.
Open up a 750 x 650 blank canvas (we can resize it later)
Select Element 70 - resize by 60%
Paste and position in the center of the canvas
Select Element 67 - resize by 35%
Paste and position on top right
Select Element 29 - resize by 50%
Paste and position on the bottom right
Select Element 25 - resize by 40%
Paste and position on the top left
Select Element 19 - resize by 25%
Paste and position on the top right
Paste tube of choice where desired
Apply Lokas 3D Shadow at default settings
Select Element 59 - resize by 30%
Paste and position on the right side
Select Element 57 - resize by 30%
Paste and position on the bottom right
Select Element 51 - resize by 20%
Paste and position on the bottom right
Select Element 2 - resize by 20%
Paste and position on the bottom right
Select Element 28 - resize by 25%
Paste and position on the bottom right
Select Element 14 - resize by 40%
Paste and position on the bottom right
Select Element 60 - resize by 25%
Paste and position on the bottom right
Select Element 21 - resize by 50%
Paste and position on the bottom left
Select Element 24 - resize by 20%
Paste and position on the bottom left above skull element
Select Element 15 - resize by 40%
Image Free Rotate Left by 15% and paste on bottom left
Select Element 37 - resize by 35%
Paste and position on the bottom
Select Element 46 - resize by 40%
Paste and position on the bottom
Add any dropshadows you like
Sharpen any elements as needed
Crop and resize as desired
Add copyright info, license number and name
You're done! Thanks for trying my tutorial!
Labels:Bibi's Collections | 0
comments
Saturday, July 25, 2015
BLONDE STEAMPUNK
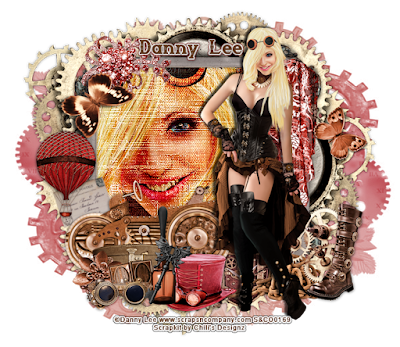
Supplies needed:
I am using the stunning artwork from Danny Lee for this tutorial which you can find here
Scrapkit: I am using a stunning kit from Chili's Designz called "Steampunk Blonde" which you can get by going here
Mask 121 from Babs Bitzy Designz which you can find here
Plugins: Lokas 3D Shadow
----------------------------
This tutorial is written for those who have working knowledge of PSPX2 (any version will do).
This tutorial was written by me on July 25, 2015. Please do not copy or paste on any other forum, website or blog provide link back to tut only. Please do not claim as your own. This tutorial is copyrighted to me. Any resemblance to any other tutorial is purely coincidental.
Ok - let's start and remember to save often.
Open up a 750 x 650 blank canvas (we can resize it later)
Select Frame 5 Element - paste and position in the center of the canvas
Select your magic wand tool and select the center of the frame (Add (Shift), RGB Value, Tolerance 25, Contiguous checked, Feather 0)
Selections, Modify, Expand by 5
Paste paper 12
Select invert, delete
Paste close-up tube on top of paper where desired and delete
Select none
Change close-up tube to Hard Light
Apply drop shadow and merge down on paper layer
Move paper layer below window frame layer
Select Jewel 4 Element - resize by 50%
Paste and position on the top left above frame
Select Cloth Element - resize by 45%
Paste and position on the top right
Select Butterfly Element - resize by 65%
Paste and position on the top left
Select Balloon Element - resize by 25%
Paste and position on the left side
Select Butterfly 2 Element - resize by 50%
Paste and position on the right side
Paste tube of choice where desired
Apply Lokas 3D Shadow at default settings
Select Car Element - resize by 55%
Paste and position on the bottom left
Select Card Element - resize by 30%
Image Free Rotate Left by 15% and paste on left side below car element
Select Box Element - resize by 40%
Paste and position on the bottom left
Select Flower 8 Element - resize by 30%
Paste and position on the bottom left
Select Deco Element - resize by 20%
Paste and position on the bottom left
Select Glasses Element - resize by 30%
Paste and position on the bottom left
Select Bottle Element - resize by 40%
Paste and position on the bottom left
Select Hat 2 Element - resize by 35%
Paste and position on the bottom
Select Heart Element - resize by 50%
Paste and position on the bottom below tube layer
Select Key Element - resize by 45%
Paste and position on the bottom left
Select Cogs 2 Element - resize by 50%
Paste and position on the bottom right
Select Chains Element - resize by 40%
Image mirror and paste on the bottom right
Select Boot Element - resize by 40%
Image mirror and paste on bottom right
Add new raster layer and flood-fill with color or gradient of choice
Apply Mask 121 or mask of choice
Merge group and move to the bottom layer
Add any dropshadows you like
Sharpen any elements as needed
Crop and resize as desired
Add copyright info, license number and name
You're done! Thanks for trying my tutorial!
Labels:Chili Designz | 0
comments
GAME OVER
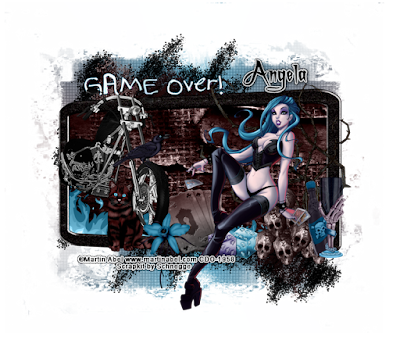
Supplies needed:
I am using the stunning artwork from Martin Abel for this tutorial which you can find here
Scrapkit: I am using a stunning kit from Schnegge called "IB-MartinAbel-34-1" which you can get by going here
Mask 34 from Becky which you can find here
Plugins: Lokas 3D Shadow
----------------------------
This tutorial is written for those who have working knowledge of PSPX2 (any version will do).
This tutorial was written by me on July 25, 2015. Please do not copy or paste on any other forum, website or blog provide link back to tut only. Please do not claim as your own. This tutorial is copyrighted to me. Any resemblance to any other tutorial is purely coincidental.
Ok - let's start and remember to save often.
Open up a 750 x 650 blank canvas (we can resize it later)
Select Frame 2 Element - resize by 75%
Paste and position in the center of the canvas
Select your magic wand tool and select the center of the frame (Add (Shift), RGB Value, Tolerance 25, Contiguous checked, Feather 0)
Selections, Modify, Expand by 5
Paste paper 1
Select invert, delete, select none
Move paper below frame
Select Element 9 - resize by 80%
Paste and position on the bottom below the frame
Select Element 2 - resize by 50%
Paste and position on the right side above frame
Select Wordart 1 Element - resize by 45%
Paste and position on the top left
Select Element 1 - resize by 45%
Image Free Rotate Right by 15% and paste on top left
Select Element 16 - resize by 30%
Paste and position the left side above bike element
Select Element 6 - resize by 40%
Paste and position on the bottom right
Paste tube of choice where desired
Apply Lokas 3D Shadow at default settings
Select Element 7 - resize by 35%
Paste and position on the bottom right
Select Element 15 - resize by 30%
Paste and position on the bottom right
Select Element 18 - resize by 35%
Paste and position on the bottom left
Select Element 12 - resize by 35%
Paste and position on the bottom below tube
Select Element 10 - resize by 25%
Image Free Rotate Left by 15% and paste on the bottom below tube
Select Element 13 - resize by 30%
Paste and position on the bottom
Select Element 4 -paste and position in the center of the canvas
Move to the bottom layer
Add new raster layer and flood-fill with color or gradient of choice
Apply Mask 34 or mask of choice
Merge group and move to the bottom layer
Add any dropshadows you like
Sharpen any elements as needed
Crop and resize as desired
Add copyright info, license number and name
You're done! Thanks for trying my tutorial!
Labels:Schnegge | 0
comments
Friday, July 24, 2015
GOTHICA
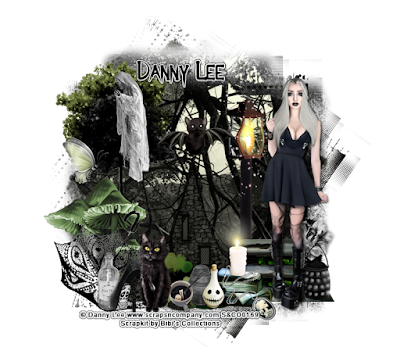
Supplies needed:
I am using the stunning artwork from Danny Lee for this tutorial which you can find here
Scrapkit: I am using a stunning kit from Bibi's Collections called "Gothica" which you can get by going here
Mask 6 from Bibi's Collections CU Mask Pack 6 which you can find here
Plugins: Lokas 3D Shadow
----------------------------
This tutorial is written for those who have working knowledge of PSPX2 (any version will do).
This tutorial was written by me on July 24, 2015. Please do not copy or paste on any other forum, website or blog provide link back to tut only. Please do not claim as your own. This tutorial is copyrighted to me. Any resemblance to any other tutorial is purely coincidental.
Ok - let's start and remember to save often.
Open up a 750 x 650 blank canvas (we can resize it later)
Select Mask 6 Embellishment - resize by 55%
Paste and position in the center of the canvas
Select Element 17 - resize by 30%
Paste and position on the top left
Select Element 74 - resize by 35%
Paste and position on the top left above tree element
Select Element 40 - resize by 40%
Paste and position on the left side
Select Element 27 - resize by 40%
Image mirror and paste on the right side
Select Element 15 - resize by 30%
Paste and position on the bottom right
Paste tube of choice where desired
Apply Lokas 3D Shadow at default settings
Select Element 60 - resize by 30%
Paste and position on the bottom right
Select Element 64 - resize by 20%
Paste and position on the bottom right
Select Element 56 - resize by 35%
Paste and position on the bottom right
Select Element 57 - resize by 20%
Paste and position on the bottom right above book element
Select Element 4 - resize by 40%
Paste and position on the bottom right
Select Element 78 - resize by 35%
Paste and position on the bottom left
Adjust, Hue and Saturation, Colorize with the following settings:
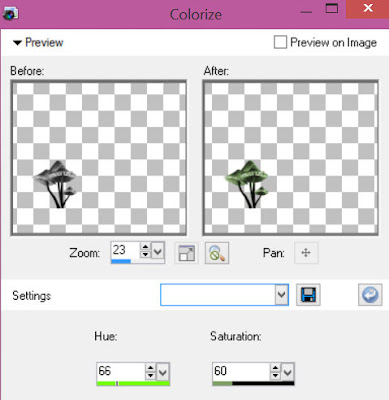
Select Element 6 - resize by 30%
Paste and position on the bottom left
Select Element 5 - resize by 45%
Paste and position on the bottom left
Select Element 132 - resize by 40%
Paste and position on the bottom left
Select Element 66 - resize by 40%
Paste and position on the bottom left
Select Element 49 - resize by 30%
Paste and position on the bottom left
Select Element 62 - resize by 30%
Paste and position on the bottom
Select Element 72 - resize by 12%
Paste and position on the bottom
Select Element 133 - resize by 15%
Paste and position on the bottom
Select Element 55 - resize by 30%
Paste and position on the top center
Add any dropshadows you like
Sharpen any elements as needed
Crop and resize as desired
Add copyright info, license number and name
You're done! Thanks for trying my tutorial!
Labels:Bibi's Collections | 0
comments
GEISHA GOTH
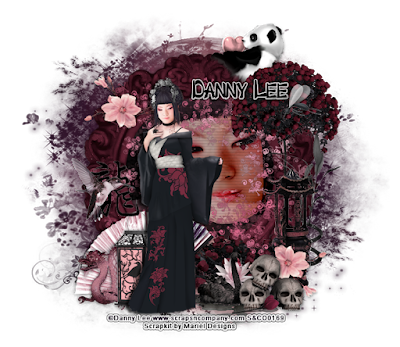
Supplies needed:
I am using the stunning artwork from Danny Le for this tutorial which you can find here
Scrapkit: I am using a stunning kit from Mariel Designs called "Geisha Goth" which you can get by going here
Mask 20 from Moonbeams and Spiderwebs which you can find here
Plugins: Lokas 3D Shadow
----------------------------
This tutorial is written for those who have working knowledge of PSPX2 (any version will do).
This tutorial was written by me on July 24, 2015. Please do not copy or paste on any other forum, website or blog provide link back to tut only. Please do not claim as your own. This tutorial is copyrighted to me. Any resemblance to any other tutorial is purely coincidental.
Ok - let's start and remember to save often.
Open up a 750 x 650 blank canvas (we can resize it later)
Select Frame 5 Element - resize by 75%
Paste and position in the center of the canvas
Select your magic wand tool and select the center of the frame (Add (Shift), RGB Value, Tolerance 25, Contiguous checked, Feather 0)
Selections, Modify, Expand by 5
Paste paper 8
Select invert, delete
Paste close-up tube on top of paper where desired and delete
Select none
Change close-up tube to Hard Light and drop opacity down to 70%
Apply drop shadow and merge down on paper layer
Effect, Texture Effects, Blinds (Width 2, Opactity 20, Horizontal and Light from left/top checked)
Move paper layer below window frame layer
Select Frame 6 Element - resize by 70%
Paste and position on top of the frame
Select Element 28 - resize by 55%
Paste and position on the top right
Select Element 36 - resize by 25%
Paste and position on the top right below tree element
Select Element 1 - resize by 40%
Paste and position on the bottom right
Select Element 34 - resize by
Paste and position on the top left
Image duplicate mirror and flip (reposition on the bottom where desired)
Paste tube of choice where desired
Apply Lokas 3D Shadow at default settings
Select Element 27 - resize by 55%
Paste and position on the bottom below tube layer
Select Element 26 - resize by 20%
Paste and position on the bottom right
Select Element 13 - resize by 15%
Paste and position on the bottom right
Select Element 66 - resize by 40%
Paste and position on the bottom right
Select Element 65 - resize by 15%
Paste and position on the bottom right
Select Element 14 - resize by 50%
Paste and position on the bottom left below tube layer
Select Element 15 - resize by 25%
Paste and position on the bottom left
Select Element 21 - resize by 30%
Paste and position on the bottom left
Select Element 30 - resize by 20%
Paste and position on the left side
Select Element 61 - resize by 20%
Paste and position on the left side
Paste paper 7 on canvas
Apply Mask 20 or mask of choice
Merge group and move to the bottom layer
Add any dropshadows you like
Sharpen any elements as needed
Crop and resize as desired
Add copyright info, license number and name
You're done! Thanks for trying my tutorial!
Labels:Scraps N Company | 0
comments
Thursday, July 23, 2015
COOL SUMMER
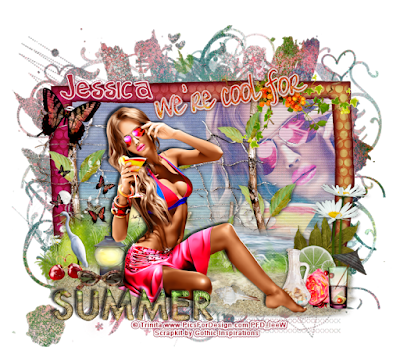
Supplies needed:
I am using the stunning artwork from Trinita for this tutorial which you can find here
Scrapkit: I am using a stunning kit from Gothic Inspirations called "Cool For The Summer" which you can get by going here
Mask 5 which you can find here
Plugins: Lokas 3D Shadow, Eyecandy 4000 - Gradient Glow
----------------------------
This tutorial is written for those who have working knowledge of PSPX2 (any version will do).
This tutorial was written by me on July 23, 2015. Please do not copy or paste on any other forum, website or blog provide link back to tut only. Please do not claim as your own. This tutorial is copyrighted to me. Any resemblance to any other tutorial is purely coincidental.
Ok - let's start and remember to save often.
Open up a 750 x 650 blank canvas (we can resize it later)
Select Frame Element 3 - resize by 75%
Paste and position in the center of the canvas
Select your magic wand tool and select the center of the frame (Add (Shift), RGB Value, Tolerance 25, Contiguous checked, Feather 0)
Selections, Modify, Expand by 5
Paste paper 10
Select invert, delete
Paste close-up tube on top of paper where desired and delete
Select none
Change close-up tube to Overlay
Apply drop shadow and merge down on paper layer
Effect, Texture Effects, Blinds (Width 2, Opactity 20, Horizontal and Light from left/top checked)
Move paper layer below window frame layer
Select Fence Net Element - resize by 75%
Paste and position on left side above frame where desired
Select Beach Scene Element - resize by 75%
Paste and position on bottom of frame where desired
Select Grapes Element - resize by 40%
Paste and position on the top right
Select WA6 Element - resize by 45%
Paste and position on top right
Apply Eyecandy Gradient Glow on fat default settings (Glow Width 3)
Select Butterfly Element - resize by 25%
Image Free Rotate Right by 15% and paste on top left
Paste tube of choice where desired
Apply Lokas 3D Shadow at default settings
Select Leaves Element - resize by 25%
Paste and position on bottom right side
Select Sunflowers Element - resize by 35%
Paste and position on the bottom right
Select Lime Element - resize by 15%
Paste and position on the bottom right
Select Vodka Tonic Element - resize by 22%
Paste and position on the bottom right
Select Rose 2 Element - resize by 15%
Paste and position on the bottom right
Select Bottle Element - resize by 20%
Paste and position on the bottom right
Select Butterflies Element - resize by 25%
Paste and position on the left side
Select Cherries 1 Element - resize by 12%
Paste and position on the bottom left
Select Lantern Element - resize by 22%
Paste and position on the bottom left
Select Sunglasses Element - resize by 15%
Paste and position on the bottom left
Select WA1 Element - resize by 45%
Paste and position on the bottom left
Paste paper 8 on canvas
Apply Mask 5 or mask of choice
Merge group and move to the bottom layer
Add any dropshadows you like
Sharpen any elements as needed
Crop and resize as desired
Add copyright info, license number and name
You're done! Thanks for trying my tutorial!
Labels:Gothic Inspirations | 1 comments
Wednesday, July 22, 2015
UNDERWATER TREASURE
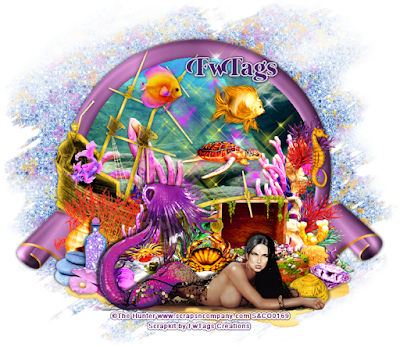
Supplies needed:
I am using the stunning artwork from The Hunter for this tutorial which you can find here
Scrapkit: I am using a stunning kit from FwTags Creations called "Underwater Treasure" which you can get by going here
Mask 1 from Kel's which you can find here
Plugins: Lokas 3D Shadow
----------------------------
This tutorial is written for those who have working knowledge of PSPX2 (any version will do).
This tutorial was written by me on July 22, 2015. Please do not copy or paste on any other forum, website or blog provide link back to tut only. Please do not claim as your own. This tutorial is copyrighted to me. Any resemblance to any other tutorial is purely coincidental.
Ok - let's start and remember to save often.
Open up a 750 x 650 blank canvas (we can resize it later)
Select Frame Element 2 - resize by 80%
Paste and position in the center of the canvas
Select your magic wand tool and select the center of the frame (Add (Shift), RGB Value, Tolerance 25, Contiguous checked, Feather 0)
Selections, Modify, Expand by 5
Paste paper 2
Select invert, delete, select none
Move paper layer below window frame layer
Select Element 30 - resize by 45%
Paste and position on top of frame
Select Element 28 - resize by 65%
Paste and position on the bottom below the frame
Select Element 79 - resize by 50%
Image mirror and paste on left side
Select Element 17- resize by 35%
Paste and position on the left side below the ship element
Select Element 19 - resize by 12%
Paste and position on left side
Select Element 16 - resize by 25%
Paste and position on bottom left
Select Element 14 - resize by 40%
Paste and position on the right side
Select Element 50 - resize by 12%
Image Free Rotate Left by 15% and paste on the bottom left
Select Element 36 - resize by 12%
Paste and position on the bottom left
Select Element 42 - resize by 15%
Paste and position on the bottom left
Select Element 11 - resieze by 30%
Paste and position on the bottom left
Select Element 60 - resize by 8%
Paste and position on the bottom left
Select Element 3 - resize by 25%
Paste and position on the bottom right
Paste tube of choice where desired
Apply Lokas 3D Shadow at default settings
Select Element 21 - resize by 15%
Paste and position on the bottom below tube layer
Select Element 68 - resize by 10%
Image Free Rotate Right by 15% and paste on the bottom right
Select Element 71 - resize by 10%
Paste and position on the bottom right below tube
Select Element 78 - resize by 15%
Paste and position on the right side
Select Element 12 - resize by 20%
Paste and position in the center where desired
Select Element 4 - resize by 12%
Paste and position on the top left
Select Element 83 - resize by 15%
Paste and position on the top right
Paste paper 5 on canvas
Apply Mask 1 or mask of choice
Merge group and move to the bottom layer
Add any dropshadows you like
Sharpen any elements as needed
Crop and resize as desired
Add copyright info, license number and name
You're done! Thanks for trying my tutorial!
Labels:FwTags | 0
comments
Tuesday, July 21, 2015
HARASS
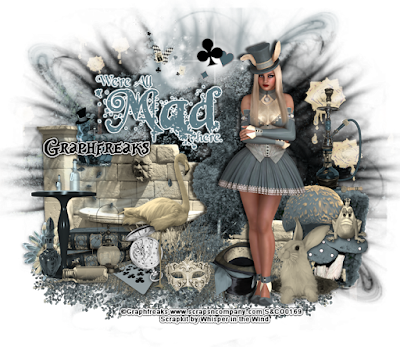
Supplies needed:
I am using the stunning artwork from Graphfreaks for this tutorial which you can find here
Scrapkit: I am using a stunning kit from Whisper in the Wind called "Harass" which you can get by going here
Mask 127 from Trese which you can find here
Plugins: Lokas 3D Shadow, Eyecandy 4000 - Gradient Glow
----------------------------
This tutorial is written for those who have working knowledge of PSPX2 (any version will do).
This tutorial was written by me on July 21, 2015. Please do not copy or paste on any other forum, website or blog provide link back to tut only. Please do not claim as your own. This tutorial is copyrighted to me. Any resemblance to any other tutorial is purely coincidental.
Ok - let's start and remember to save often.
Open up a 750 x 650 blank canvas (we can resize it later)
Select Element 67 - resize by 75%
Paste and position on the left side towards the bottom
Select Element 11 - resize by 40%
Paste and position on left side where desired
Select Element 22 - resize by 40%
Paste and position on the bottom right below wall element
Select Element 6 - resize by 25%
Paste and position on the right side
Select Element 3 - resize by 50%
Paste and position in the center of the wall where desired
Select Element 84 - resize by 75%
Paste and position on the bottom
Paste tube of choice where desired
Apply Lokas 3D Shadow at default settings
Select Element 82 - resize by 25%
Paste and position on bottom right side
Select Element 23 - resize by 15%
Paste and position on the bottom right
Select Element 85 - resize by 25%
Paste and position on the bottom right above mushroom element
Select Element 79 - resize by 25%
Paste and position on the bottom right
Select Element 88 - resize by 30%
Paste and position on the bottom left
Select Element 74 - resize by 15%
Image mirror and paste on bottom left
Select Element 80 - resize by 15%
Paste and position on the bottom left
Select Element 62 - resize by 20%
Paste and position on the bottom left
Select Element 68 - resize by 20%
Paste and position on the bottom left
Select Element 81 - resize by 15%
Paste and position on the bottom left
Select Element 21 - resize by 15%
Paste and position on the bottom
Select Element 53 - resize by 12%
Paste and position on the bottom
Select Element 16 - resize by 35%
Paste and position on the bottom
Select Element 50 - resize by 15%
Paste and position on the bottom
Select Element 12 - resize by 12%
Paste and position on the bottom
Select Element 8 - resize by 15%
Paste and position on left side above wall
Select Element 99 - resize by 30%
Paste and position in the top center where desired
Apply Eyecandy Gradient Glow on fat default settings (Glow Width 3)
Select Element 13 - resize by 40%
Paste and position on top where desired
Select Element 33 - resize by 20%
Paste and position on top where desired
Paste paper 2 on canvas
Apply Mask 127 or mask of choice
Merge group and move to the bottom layer
Add any dropshadows you like
Sharpen any elements as needed
Crop and resize as desired
Add copyright info, license number and name
You're done! Thanks for trying my tutorial!
Labels:Graphfreaks | 0
comments
Monday, July 20, 2015
DIVINE
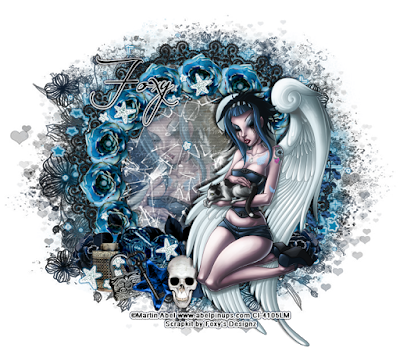
Supplies needed:
I am using the stunning artwork from Martin Abel for this tutorial which you can find here
Scrapkit: I am using a stunning kit from Foxy's Designz called "IB-Martin Abel 49-1" which you can get by going here
Floral Mask 2 from Dee which you can find here
Mask 25 from Witchysheart which you can find here
Plugins: Lokas 3D Shadow, Mura Meister - Copies, Eyecandy 4000 Gradient Glow
----------------------------
This tutorial is written for those who have working knowledge of PSPX2 (any version will do).
This tutorial was written by me on July 20, 2015. Please do not copy or paste on any other forum, website or blog provide link back to tut only. Please do not claim as your own. This tutorial is copyrighted to me. Any resemblance to any other tutorial is purely coincidental.
Ok - let's start and remember to save often.
Open up a 750 x 650 blank canvas (we can resize it later)
Select Frame Element 3 - resize by 75%
Paste and position in the center of the canvas
Select your magic wand tool and select the center of the frame (Add (Shift), RGB Value, Tolerance 25, Contiguous checked, Feather 0)
Selections, Modify, Expand by 5
Paste paper 4
Select invert, delete
Paste close-up tube on top of paper where desired and delete
Select none
Change close-up tube to Screen and drop opacity down to 75%
Apply drop shadow and merge down on paper layer
Effect, Texture Effects, Blinds (Width 2, Opactity 20, Horizontal and Light from left/top checked)
Move paper layer below window frame layer
Select Element 15 - resize by 65%
Paste and position on top below frame layer where desired
Select Element 1 - resize by 25%
Paste and position in the center of the canvas
Apply Mura Meister Copies on the following settings:
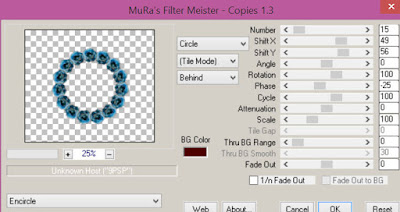
Paste tube of choice where desired
Apply Lokas 3D Shadow at default settings
Select Element 7 - resize by 55%
Paste and position on bottom left below tube layer
Select Element 9 - resize by 55%
Image Free Rotate Right by 15% and paste on bottom left
Select Element 10 - resize by 35%
Paste and position on the bottom left
Select Element 11 - resize by 30%
Paste and position on the bottom left
Select Element 6 - resize by 40%
Paste and position on the bottom left
Select Element 12 - resize by 40%
Image Free Rotate Left by 15% and paste on bottom left
Select Element 3 - resize by 30%
Paste and position on the bottom
Select Element 4 - resize by 22%
Paste and position on the bottom left
Image duplicate, mirror and reposition on bottom right where desired
Select Element 5 - resize by 30%
Paste and position on the bottom left
Adjust, Add/Remove Noise, Add Noise (Uniform checked, Noise 75%, Monochrome checked)
Apply Eyecandy Gradient Glow on fat default settings (Glow Width 3)
Image duplicate, mirror and flip - reposition on top left
Paste paper 6 on canvas
Apply Floral Mask 2 or mask of choice
Merge group and move to the bottom layer
Add new raster layer and flood-fill with color of choice
Apply Mask 25 and merge group
Apply Eyecandy Gradient Glow on same fat default settings
Add any dropshadows you like
Sharpen any elements as needed
Crop and resize as desired
Add copyright info, license number and name
You're done! Thanks for trying my tutorial!
Labels:Foxy's Designz | 0
comments
Wednesday, July 15, 2015
JAIRY ROMANCE
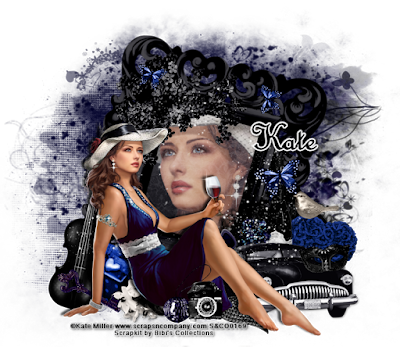
Supplies needed:
I am using the amazing art from Kate Miller for for this tutorial, which you can find here
Scrapkit: I am a stunning kit from Bibi's Collections called Jairy which you can get by going here
Mask 19 from Moonbeams and Spiderwebs which you can find here
Plugins used: Lokas 3D Shadow
----------------------------
This tutorial is written for those who have working knowledge of PSPX2 (any version will do).
This tutorial was written by me on July 15, 2015. Please do not copy or paste on any other forum, website or blog provide link back to tut only. Please do not claim as your own. This tutorial is copyrighted to me. Any resemblance to any other tutorial is purely coincidental.
Ok - let's start and remember to save often.
Open up a 750 x 650 blank canvas (we can resize it later)
Select Frame Element 18 - resize by 75%
Paste and position on the right side of the canvas
Image Free Rotate Right by 15%
Select your magic wand tool and select the center of the frame (Add (Shift), RGB Value, Tolerance 25, Contiguous checked, Feather 0)
Selections, Modify, Expand by 5
Paste paper 3
Select invert, delete
Paste close-up tube of choice on top of paper layer and delete
Select none
Change close-up to Screen and apply dropshadow
Drop opacity down to 80%
Merge down onto paper layer
Move paper layer below the frame
Select Element 4 - resize by 50%
Image flip and mirror and paste on the top of left of the frame
Select Element 26 - resize by 65%
Paste and position on the top of the frame where desired
Select Element 28 - resize by 40%
Image mirror and paste on the bottom right
Select Element 108 - resize by 65%
Paste and position on the center of the canvas where desired
Select Element 24 - resize by 30%
Paste and position on the bottom left
Select Element 41 - resize by 40%
Paste and position on the bottom left
Paste tube of choice where desired
Apply Lokas 3D Shadow at default settings
Select Element 22 - resize by 45%
Image Free Rotate Right by 15% and paste on right side below car element
Select Element 69 - resize by 25%
Paste and position on the right side above floral heart element
Select Element 23 - resize by 40%
Paste and position on the right side below car element
Select Element 73 - resize by 15%
Paste and position on the right side below car element
Select Element 64 - resize by 25%
Paste and position on bottom below the tube layer
Select Element 50 - resize by 20%
Paste and position on the bottom below the tube
Select Element 36 - resize by 30%
Paste and position on the bottom below tube
Select Element 76 - resize by 30%
Paste and position on the bottom left below tube
Paste paper 8 on canvas
Apply Mask 19 and merge group (reposition mask if you'd like)
Add any additional elements you like.
Add any dropshadows you like
Crop and resize as desired
Add copyright info, license number and name
You're done! Thanks for trying my tutorial!
Labels:Bibi's Collections,Scraps N Company | 0
comments
Sunday, July 12, 2015
FORBIDDEN MEMORIES
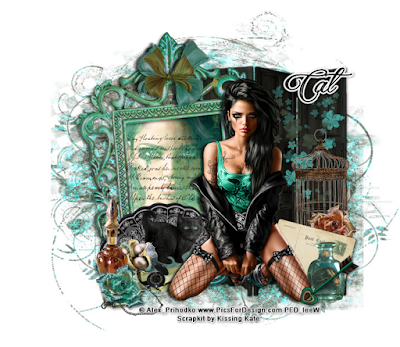
Supplies needed:
I am using the amazing art from Alex Prihodko for for this tutorial, which you can find here
Scrapkit: I am a stunning kit from Kissing Kate called Forbidden Memories which you can get by going here and here
Grunge Lace Mask 2 from Kate which you can find here
Plugins used: Lokas 3D Shadow
----------------------------
This tutorial is written for those who have working knowledge of PSPX2 (any version will do).
This tutorial was written by me on July 12, 2015. Please do not copy or paste on any other forum, website or blog provide link back to tut only. Please do not claim as your own. This tutorial is copyrighted to me. Any resemblance to any other tutorial is purely coincidental.
Ok - let's start and remember to save often.
Open up a 750 x 650 blank canvas (we can resize it later)
Select Element 44 - resize by 65%
Paste and position on the right side of the canvas
Select Frame 2 Element - resize by 65%
Paste and position on the left side of the canvas
Select your magic wand tool and select the center of the frame (Add (Shift), RGB Value, Tolerance 25, Contiguous checked, Feather 0)
Paste paper 5
Select invert, delete
Paste close-up tube of choice on top of paper layer and delete
Select none
Change close-up to Screen and apply dropshadow
Merge down onto paper layer
Move paper layer below the frame
Select Element 10 - resize by 30%
Paste and position on the top of the frame
Select Element 23 - resize by 40%
Image mirror and paste and position the right side above screen element
Select Element 53 - resize by 40%
Paste and position on the left side above the frame layer
Select Element 13 - resize by 40%
Paste and position on the right side
Select Element 12 - resize by 30%
Image Free Rotate Right by 15% and paste on bottom right
Select Element 4 - resize by 20%
Paste and position on the right side below envelope element
Select Element 60 - resize by 22%
Paste and position on the bottom right
Paste tube of choice where desired
Apply Lokas 3D Shadow at default settings
Select Element 19 - resize by 25%
Paste and position on the bottom right
Select Element 11 - resize by 40%
Image Free Rotate Left by 15% and paste on bottom left
Select Element 31 - resize by 30%
Paste and position on bottom left
Select Element 64 - resize by 35%
Paste and position on the bottom left
Select Element 35 - resize by 15%
Paste and position on bottom left
Select Element 16 - resize by 20%
Paste and position on the bottom left
Select Element 1 - resize by 20%
Paste and position on the bottom left
Select Element 32 - resize by 30%
Paste and position on the bottom left
Paste paper 1 on canvas
Apply Mask 2 and merge group (reposition mask if you'd like)
Add any additional elements you like.
Add any dropshadows you like
Crop and resize as desired
Add copyright info, license number and name
You're done! Thanks for trying my tutorial!
Labels:Kissing Kate | 0
comments
Saturday, July 11, 2015
DEAD OF NIGHT
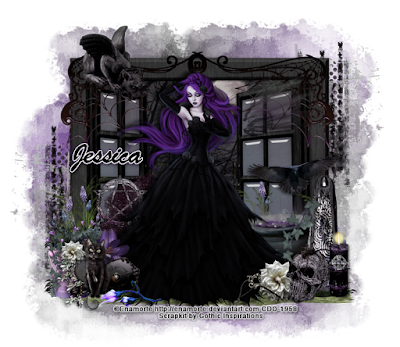
Supplies needed:
I am using the amazing art from Enamorte for for this tutorial, which you can find here
Scrapkit: I am a stunning Collab kit called "Dead Of Night" from Gothic Inspirations which you can get by going here
Mask 22 from Becky which you can find here
Plugins used: Lokas 3D Shadow
----------------------------
This tutorial is written for those who have working knowledge of PSPX2 (any version will do).
This tutorial was written by me on July 11, 2015. Please do not copy or paste on any other forum, website or blog provide link back to tut only. Please do not claim as your own. This tutorial is copyrighted to me. Any resemblance to any other tutorial is purely coincidental.
Ok - let's start and remember to save often.
Open up a 750 x 650 blank canvas (we can resize it later)
Select Window Element - resize by 75%
Paste in the center of your canvas
Select your Selections tool on the Rectangle type and select the center of the window element
Paste paper 3 on canvas
Select invert, delete, select none
Move paper layer below the window frame
Select Topper Element - resize by 70%
Paste and position on the top of the window frame
Select Gargoyle Element - resize by 25%
Paste and position on top left
Select Shadow Element - resize by 25%
Paste and position on the top right
Select Lawn Element - resize by 85%
Paste and position the bottom of the window frame
Select Couldron Element - resize by 40%
Paste and position on the bottom right
Select Pent Element - resize by 18%
Paste and position on the bottom left window
Paste tube of choice where desired
Apply Lokas 3D Shadow at default settings
Select Standing Stone Element - resize by 40%
Paste and position on the bottom right
Select Candle 2 Element - resize by 25%
Paste and position on the bottom right
Select Skull Element - resize by 22%
Paste and position on bottom right
Select Spider Element - resize by 15%
Paste and position on bottom right above skull element
Select Flower 2 Element - resize by 15%
Paste and position on bottom right
Select Ivy 1 Element - resize by 22%
Paste and position on the bottom right
Select Key Element - resize by 20%
Paste and position on the bottom right
Select Pot Element - resize by 35%
Paste and position on the bottom left
Select Cluster Element - resize by 25%
Paste and position on the bottom left
Select Hand Mirror Element - resize by 25%
Paste and position on the bottom left
Select Kitty Element - resize by 25%
Paste and position on the bottom left
Select Flower Bud 3 Element - resize by 25%
Paste and position on the bottom left
Select Crow Element - resize by 30%
Paste and position on the right side
Select Smudged 2 Element - resize by 35%
Paste and position on the top right
Move element to the bottom layer
Image duplicate, mirror and flip
Add new raster layer and flood-fill with color or gradient of choice
Apply Mask 22 and merge group
Add any additional elements you like.
Add any dropshadows you like
Crop and resize as desired
Add copyright info, license number and name
You're done! Thanks for trying my tutorial!
Labels:Gothic Inspirations | 1 comments
Friday, July 10, 2015
MELANIE
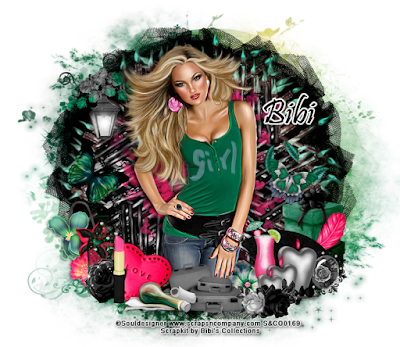
Supplies needed:
I am using the amazing art from Souldesigner for for this tutorial, which you can find here
Scrapkit: I am a gorgeous kit from Bibi's Collections called Melanie which you can get by going here
Mask 20 from Moonbeams and Spiderwebs which you can find here
Plugins used: Lokas 3D Shadow
----------------------------
This tutorial is written for those who have working knowledge of PSPX2 (any version will do).
This tutorial was written by me on July 10, 2015. Please do not copy or paste on any other forum, website or blog provide link back to tut only. Please do not claim as your own. This tutorial is copyrighted to me. Any resemblance to any other tutorial is purely coincidental.
Ok - let's start and remember to save often.
Open up a 750 x 650 blank canvas (we can resize it later)
Select Element 81 - resize by 80%
Paste in the center of your canvas
Select Element 80 - resize by 75%
Paste and position in the center of the canvas
Select Element 61 - paste and position in the center of the canvas
Select Element 18 - resize by 18%
Paste and position on top left
Select Element 87 - resize by 45%
Paste and position on the left side
Paste tube of choice where desired
Apply Lokas 3D Shadow at default settings
Select Element 73 - resize by 30%
Paste and position on bottom right
Select Element 59 - resize by 40%
Image Free Rotate Right by 15% and paste on bottom right
Select Element 29 - resize by 15%
Image Free Rotate Right by 15% and paste on bottom right
Select Element 97 - resize by 25%
Paste and position on bottom right
Select Element 10 - resize by 20%
Paste and position on bottom right
Select Element 34 - resize by 25%
Paste and position on bottom right
Select Element 54 - resize by 25%
Paste and position on the bottom right
Select Element 8 - resize by 20%
Paste and position on the bottom left
Select Element 31 - resize by 15%
Paste and position on bottom left
Select Element 9 - resize by 15%
Paste and position on the bottom left
Select Element 72 - resize by 40%
Paste and position on the bottom left
Select Element 84 - resize by 25%
Paste and position on the bottom left
Select Element 58 - resize by 55%
Image Free Rotate Right by 15% and paste on bottom left
Select Element 96 - resize by 25%
Paste and position on the bottom left
Select Element 19 - resize by 22%
Paste and position on the bottom
Select Element 23 - resize by 20%
Paste and position on the bottom where desired
Select Element 36 - resize by 20%
Paste and position on the bottom
Select Element 22 - resize by 25%
Paste and position on the right side
Paste paper 1 on canvas
Apply Mask 20 and merge group
Add any additional elements you like.
Add any dropshadows you like
Crop and resize as desired
Add copyright info, license number and name
You're done! Thanks for trying my tutorial!
Labels:Bibi's Collections,Scraps N Company | 0
comments
Wednesday, July 8, 2015
SNAPSHOT
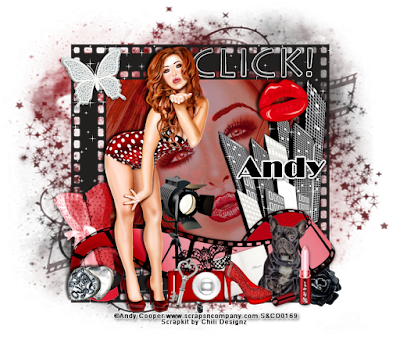
Supplies needed:
I am using the amazing art from Danny Lee for for this tutorial, which you can find here
Scrapkit: I am a gorgeous kit from Chili Designz which you can get by going here
Mask 39 from Millie which you can find here
Plugins used: Lokas 3D Shadow, Eyecandy 4000 - Gradient Glow
----------------------------
This tutorial is written for those who have working knowledge of PSPX2 (any version will do).
This tutorial was written by me on July 6, 2015. Please do not copy or paste on any other forum, website or blog provide link back to tut only. Please do not claim as your own. This tutorial is copyrighted to me. Any resemblance to any other tutorial is purely coincidental.
Ok - let's start and remember to save often.
Open up a 750 x 650 blank canvas (we can resize it later)
Select Frame Element 9 - resize by 85%
Paste in the center of your canvas
Select your magic wand tool and click in the center of your frame (Add (Shift), RGB Value, Tolerance 25, Contiguous checked, Feather 0)
Selections, Modify, Expand by 5
Paste paper 9
Select invert, delete
Paste close-up tube of choice on paper layer and delete
Select none
Change close-up to screen and drop opacity down to 55%
Apply dropshadow and merge down on paper layer
Move paper/closeup layer below frame
Select Filmstrip 2 Element - resize by 65%
Paste and position on the bottom of the frame
Select WA 4 Element - paste and position on the top right
Apply Eyecandy Gradient Glow on fat default settings (Glow Width 3)
Select Butterfly Element - resize by 50%
Image Free Rotate Left by 15% and paste on top left
Select Lips Element - resize by 65%
Image Free Rotate Left by 15% and paste on top right where desired
Select Building Element - resize by 40%
Paste and position on the right side below film strip where desired
Select Corset Element - resize by 50%
Image Free Rotate Left by 15% and paste on bottom left below flimstrip
Paste tube of choice where desired
Apply Lokas 3D Shadow at default settings
Select Flower 5 Element - resize by 30%
Paste and position on bottom right
Select Puppy Element - resize by 45%
Paste and position on bottom right
Select Lipstick Element - resize by 55%
Paste and position on bottom right
Select Diary Element - resize by 25%
Paste and position on bottom right
Select Shoe Element resize by 40%
Paste and position on bottom right
Select Box Element - resize by 30%
Paste and position on bottom left
Select Projector Element - resize by 45%
Paste and position on the bottom below tube layer
Select Camera Element - resize by 35%
Paste and position on bottom left
Select Mask Element - resize by 25%
Paste and position on the bottom
Select Key Element - resize by 35%
Image Free Rotate Right by 15% and paste on the bottom
Add new raster layer and flood-fill with color or gradient of choice
Apply Mask 39 and merge group
Add any additional elements you like.
Add any dropshadows you like
Crop and resize as desired
Add copyright info, license number and name
You're done! Thanks for trying my tutorial!
Labels:Chili Designz | 0
comments
Friday, July 3, 2015
SAILOR SWEET
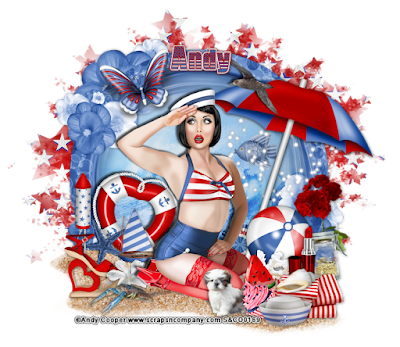
Supplies needed:
I am using the stunning artwork from Andy Cooper for this tutorial which you can find here
Scrapkit: I am using a stunning kit from Designs by Joan called "Sailor Sweet" which you can get by going here
Star Mask 2 from Dee which you can find here
Plugins: Lokas 3D Shadow
----------------------------
This tutorial is written for those who have working knowledge of PSPX2 (any version will do).
This tutorial was written by me on July 2, 2015. Please do not copy or paste on any other forum, website or blog provide link back to tut only. Please do not claim as your own. This tutorial is copyrighted to me. Any resemblance to any other tutorial is purely coincidental.
Ok - let's start and remember to save often.
Open up a 750 x 650 blank canvas (we can resize it later)
Select Frame Element 45 - resize by 75%
Paste and position in the center of the canvas
Select your Freehand tool and draw a circle around the frame Mode: Replace, Feather 0, Anti-alias checked
Paste paper 2
Select invert, delete, select none
Move paper layer below window frame layer
Select Element 6 - resize by 50%
Paste and position on top of paper layer where desired
Select Element 60 - resize by 20%
Paste and position on top of paper layer
Select Element 46 - resize by 30%
Image Free Rotate Left by 15% and paste on top left
Select Element 87 - resize by 55%
Paste and position on the bottom where desired
Select Element 22 - resize by 60%
Paste and position on right side where desired
Paste tube of choice where desired
Apply Lokas 3D Shadow at default settings
Select Element 47 - resize by 25%
Image mirror and paste on right side
Select Element 57 - resize by 25%
Paste and position on the bottom right
Select Element 36 - resize by 25%
Paste and position on the bottom right
Select Element 77 - resize by 30%
Paste and position on the bottom right
Select Element 98 - resize by 25%
Paste and position on the bottom right
Select Element 88 - resize by 25%
Paste and position on the bottom right
Select Element 76 - resize by 20%
Paste and position on the bottom right
Select Element 30 - resize by 20%
Paste and position on the bottom right
Select Element 67 - resize by 30%
Paste and position on the bottom right
Select Element 75 - resize by 20%
Paste and position on the bottom
Select Element 48 - resize by 30%
Paste and position on the bottom left
Select Element 34 - resize by 30%
Image Free Rotate Right by 15% and paste on bottom left
Select Element 69 - resize by 25%
Paste and position on bottom left
Select Element 91 - resize by 20%
Paste and position on bottom left
Select Element 78 - resize by 15%
Paste and position on bottom left
Select Element 61 - resize by 15%
Paste and position on bottom left
Select Element 84 - resize by 25%
Paste and position on bottom left
Select Element 74 - resize by 30%
Paste and position on top right
Paste paper 6 on canvas
Apply Mask 2 or mask of choice
Merge group and move to the bottom layer
Add any dropshadows you like
Sharpen any elements as needed
Crop and resize as desired
Add copyright info, license number and name
You're done! Thanks for trying my tutorial!
Labels:Scraps N Company | 0
comments
Thursday, July 2, 2015
VACATION
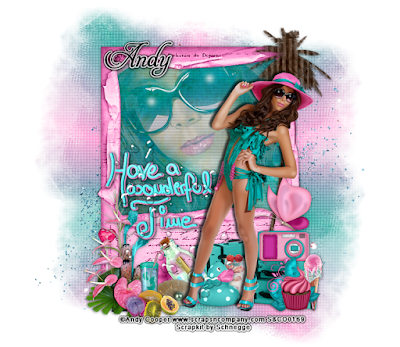
Supplies needed:
I am using the stunning artwork from Andy Cooper for this tutorial which you can find here
Scrapkit: I am using a stunning kit from Schnegge called "Vacation" which you can get by going here
Mask 50 from Millie which you can find here
Plugins: Lokas 3D Shadow
----------------------------
This tutorial is written for those who have working knowledge of PSPX2 (any version will do).
This tutorial was written by me on July 2, 2015. Please do not copy or paste on any other forum, website or blog provide link back to tut only. Please do not claim as your own. This tutorial is copyrighted to me. Any resemblance to any other tutorial is purely coincidental.
Ok - let's start and remember to save often.
Open up a 750 x 650 blank canvas (we can resize it later)
Select Frame Element 46 - resize by 65%
Paste and position in the center of the canvas
Select your magic wand tool and select the center of the frame (Add (Shift), RGB Value, Tolerance 25, Contiguous checked, Feather 0)
Selections, Modify, Expand by 5
Paste paper 6
Select invert, delete
Paste close-up tube on top of paper where desired and delete
Select none
Change close-up tube to Screen
Apply drop shadow and merge down on paper layer
Effect, Texture Effects, Blinds (Width 2, Opactity 20, Horizontal and Light from left/top checked)
Move paper layer below window frame layer
Select Element 41 - resize by 65%
Paste and position on top right where desired
Select Element 37 - resize by 45%
Paste and position on bottom right
Select Element 50 - resize by 40%
Paste and position on left side where desired
Select Element 22 - resize by 40%
Paste and position on the bottom right
Paste tube of choice where desired
Apply Lokas 3D Shadow at default settings
Select Element 18 - resize by 25%
Paste and position on bottom right side
Select Element 28 - resize by 20%
Paste and position on the bottom right
Select Element 61 - resize by 22%
Paste and position on the bottom right
Select Element 39 - resize by 35%
Paste and position on the bottom left
Select Element 62 - resize by 20%
Paste and position on the bottom left
Select Element 48 - resize by 20%
Paste and position on the bottom left
Select Element 49 - resize by 20%
Paste and position on the bottom left
Select Element 8 - resize by 22%
Paste and position on the bottom left
Select Element 58 - resize by 20%
Paste and position on the bottom left
Select Element 6 - resize by 22%
Paste and position on the bottom
Select Element 38 - resize by 25%
Paste and position on the bottom
Select Element 23 - resize by 70%
Paste and position on the canvas and move to bottom layer
Add new raster layer and flood-fil with color or gradient of choice
Apply Mask 50 or mask of choice
Merge group and move to the bottom layer
Add any dropshadows you like
Sharpen any elements as needed
Crop and resize as desired
Add copyright info, license number and name
You're done! Thanks for trying my tutorial!
Labels:Schnegge | 0
comments
Subscribe to:
Comments
(Atom)


