Labels
- Alikas Scraps
- All Dolled Up Store
- Amy Marie
- Annaica
- Arthur Crowe
- Babycakes Scraps
- Barbara Jensen
- Bibi's Collections
- Black Widow Creationz
- Blu Moon
- Bonnies Creations
- Bookwork Dezines
- Broken Sky Dezine
- Carita Creationz
- Carpe Diem Designs
- CDO
- Celinart Pinup
- Celine
- Chacha Creationz
- Charmed Designs
- Cherry Blossom Designs
- Chili Designz
- Cluster Frame
- Creative Misfits
- Creative Scraps by Crys
- Curious Creative Dreams
- Danny Lee
- Derzi
- Designs by Ali
- Designs by Joan
- Designs by Ketura
- Designs By Norella
- Designs by Vi
- Diana Gali
- Diry Art Designs
- Disturbed Scraps
- Dreaming With Bella
- Eclipse Creations
- Elegancefly
- Extras
- Fabulous Designz
- Forum Set
- Foxy's Designz
- Freek's Creation
- FTU
- FwTags
- Goldwasser
- Gothic Inspirations
- Gothic Raven Designs
- Graphfreaks
- Hania's Designs
- Happy Pumpkin Studios
- Horseplay's Pasture Designs
- indie-Zine
- Irish Princess Designs
- Ishika Chowdhury
- Kaci McVay
- Kajenna
- katharine
- Katherine
- Khloe Zoey
- Killer Kitty
- Kissing Kate
- KiwiFirestorm
- Kiya Designs
- Kizzed by Kelz
- KZ Designz
- Lady Mishka
- Lil Mz Brainstorm
- Maiden of Darkness
- Mariel Designs
- MellieBeans
- Michelle's Myths
- Midnight Shadow
- Misticheskya
- MistyLynn's Creations
- MMeliCrea Designz
- Moon Vixen Designs
- NaSionainne
- Ninaste
- Niqui Designs
- Pandora
- Picsfordesign
- Pink Paradox Productions
- Radyga Designs
- Redefined Designs
- Rissa's Designs
- Schnegge
- ScottishButterfly Creations
- Scrappin Krazy Designs
- Scrappin With Lil Ol Me
- Scraps and the City
- Scraps Dimensions
- Scraps From The Heart
- Scraps N Company
- Scraps with Attitude
- Shining Star Art
- Skyscraps
- Sleek N Sassy Designs
- Sophisticat Simone
- Souldesigner
- Soxsational Scraps
- Spazz
- Starlite and Soul
- Stella Felice
- Tammy Welt
- Tasha's Playground
- The PSP Project
- Thrifty Scraps by Gina
- Tiny Turtle Designs
- Upyourart
- Verymany
- Wendy Gerber
- Whisper In the Wind
- Wick3d Creationz
- Wicked Diabla
- Yude's Kreationz
Blog Archive
Sunday, January 31, 2016
CUPID

Supplies needed:
I am using the stunning artwork from KiwiBG for this tutorial which you can find here
Scrapkit: I am using a stunning kit from Schnegge called "Cupid" which you can get by going here
Mask M1 from Kylie which you can find here
Plugins: Lokas 3D Shadow, Eyecandy - Gradient Glow
----------------------------
This tutorial is written for those who have working knowledge of PSPX2 (any version will do).
This tutorial was written by me on January 31, 2016. Please do not copy or paste on any other forum, website or blog provide link back to tut only. Please do not claim as your own. This tutorial is copyrighted to me. Any resemblance to any other tutorial is purely coincidental.
Ok - let's start and remember to save often.
Open up a 750 x 650 blank canvas (we can resize it later)
Select Frame Element 26 - paste and position in the center of the canvas
Select your magic wand tool and select the center of the frame (Add (Shift), RGB Value, Tolerance 25, Contiguous checked, Feather 0)
Selections, Modify, Expand by 5
Paste paper 3
Select invert, delete
Paste close-up tube on paper layer and delete
Select none
Change close-up to Screen
Apply dropshadow and merge down on paper layer
Effect, Texture Effects, Blinds (Width 3, Opactity 15, Horizontal and Light from left/top checked)
Move paper layer below frame layer
Select Element 23 - resize by 40%
Paste and position on the top center of the frame
Select Element 13 - resize by 55%
Image Free Rotate Right by 15% and paste on the top left
Apply Eyecandy Gradient Glow on fat default settings
Select Element 19 - resize by 40%
Paste and position on the right side
Select Element 55 - resize by 25%
Paste and position on the left side
Select Element 31 - resize by 65%
Paste and position on the bottom of the frame where desired
Select Element 28 - resize by 30%
Paste and position on the bottom right
Paste tube of choice where desired
Apply Lokas 3D Shadow at default settings
Select Element 58 - resize by 30%
Paste and position on the bottom below tube
Select Element 29 - resize by 35%
Paste and position on the bottom
Select Element 48 - resize by 40%
Paste and position on the bottom
Select Element 25 - resize by 40%
Image Free Rotate Left by 15% and paste on the bottom left
Select Element 18 - resize by 45%
Paste and position on the bottom left
Select Element 20 - resize by 30%
Paste and position on the bottom left
Select Element 62 - resize by 30%
Paste and paste on the bottom left
Select Element 24 - resize by 40%
Paste and position on the bottom left
Select Element 43 - resize by 40%
Paste and position on the bottom left
Select Element 52 - resize by 25%
Paste and position on the bottom left
Select Element 44 - resize by 30%
Paste and position on the bottom left
Paste paper 1 on canvas
Apply Mask M1 or mask of choice
Merge group and move to the bottom layer
Add any dropshadows you like
Sharpen any elements as needed
Crop and resize as desired
Add copyright info, license number and name
You're done! Thanks for trying my tutorial!
Labels:Schnegge,Scraps N Company | 0
comments
Sunday, January 24, 2016
WINTER ANGEL
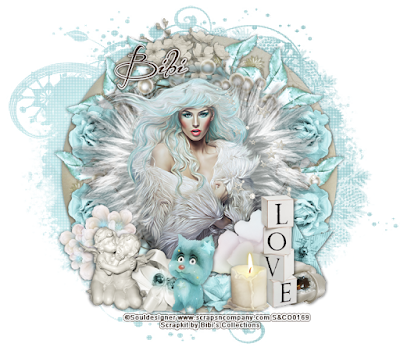
Supplies needed:
I am using the stunning artwork from Souldesigner for this tutorial which you can find here
Scrapkit: I am using a stunning kit from Bibi's Collections called "Winter Angel" which you can get by going here
Winter Mask 3 from Dee which you can find here
Plugins: Lokas 3D Shadow
----------------------------
This tutorial is written for those who have working knowledge of PSPX2 (any version will do).
This tutorial was written by me on January 24, 2016. Please do not copy or paste on any other forum, website or blog provide link back to tut only. Please do not claim as your own. This tutorial is copyrighted to me. Any resemblance to any other tutorial is purely coincidental.
Ok - let's start and remember to save often.
Open up a 750 x 650 blank canvas (we can resize it later)
Select Frame Element 24 - resize by 85%
Paste and position in the center of the canvas
Select your magic wand tool and select the center of the frame (Add (Shift), RGB Value, Tolerance 25, Contiguous checked, Feather 0)
Selections, Modify, Expand by 5
Paste paper 12
Select invert, delete,select none
Move paper layer below frame layer
Select Element 18 - resize by 75%
Paste and position on the center of the canvas
Select Element 19 - resize by 85%
Paste and position on the top center of the canvas
Select Element 85 - resize by 30%
Paste and position on the top where desired
Select Element 55 - resize by 25%
Paste and position on the top left side where desired
Duplicate 3x and reposition around the frame where desired
Paste tube of choice where desired
Apply Lokas 3D Shadow at default settings
Select Element 46 - resize by 40%
Paste and position on the bottom left
Select Element 11 - resize by 25%
Paste and position on the bottom left
Select Element 36 - resize by 20%
Paste and position on the bottom right
Select Element 28 - resize by 20%
Paste and position on the bottom right
Select Element 71 - resize by 35%
Paste and position on the bottom right
Select Element 38 - resize by 30%
Paste and position on the bottom right
Select Element 14 - resize by 15%
Paste and paste on the bottom
Select Element 56 - resize by 15%
Paste and position on the bottom
Select Element 95 - resize by 30%
Paste and position on the bottom
Select Element 35 - resize by 40%
Paste and position on the bottom
Paste paper 9 on canvas
Apply Mask 3 or mask of choice
Merge group and move to the bottom layer
Add any dropshadows you like
Sharpen any elements as needed
Crop and resize as desired
Add copyright info, license number and name
You're done! Thanks for trying my tutorial!
Labels:Bibi's Collections | 0
comments
BEARY LOVE
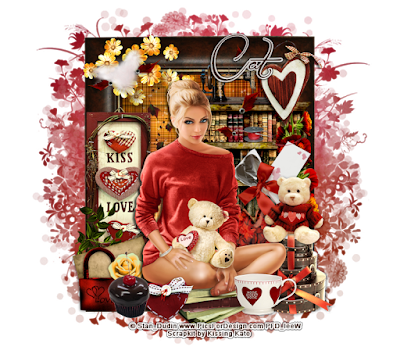
Supplies needed:
I am using the stunning artwork from Stan Dudin for this tutorial which you can find here
Scrapkit: I am using a stunning kit from Kissing Kate called "I Love You Beary Much" which you can get by going here
Mask 2 from Dee which you can find here
Plugins: Lokas 3D Shadow
----------------------------
This tutorial is written for those who have working knowledge of PSPX2 (any version will do).
This tutorial was written by me on January 24, 2016. Please do not copy or paste on any other forum, website or blog provide link back to tut only. Please do not claim as your own. This tutorial is copyrighted to me. Any resemblance to any other tutorial is purely coincidental.
Ok - let's start and remember to save often.
Open up a 750 x 650 blank canvas (we can resize it later)
Select Frame Element 3 - resize by 75%
Paste and position in the center of the canvas
Select your magic wand tool and select the center of the frame (Add (Shift), RGB Value, Tolerance 25, Contiguous checked, Feather 0)
Selections, Modify, Expand by 5
Paste paper 4
Select invert, delete, selec none
Move paper layer below frame layer
Select Element 79 - resize by 35%
Paste and position on the top left
Select Element 18 - resize by 20%
Paste and position on the top left
Select Element 57 - resize by 40%
Paste and position on the right side
Select Element 59 - resize by 25%
Paste and position on the top right
Select Element 26 - resize by 25%
Paste and position on the top where desired
Select Element 19 - resize by 30%
Paste and position on the right side
Select Element 28 - resize by 25%
Paste and position on top of the bookcase element
Select Element 14 - resize by 25%
Paste and position on the bottom right
Select Element 25 - resize by 20%
Paste and position on the bottom right
Select Element 31 - resize by 20%
Paste and position on the right side below bear element
Paste tube of choice where desired
Apply Lokas 3D Shadow at default settings
Select Element 42 - resize by 30%
Image Free Rotate Left by 15% and paste on the bottom right below tube
Select Element 46 - resize by 20%
Paste and position on the bottom right
Select Element 77 - resize by 25%
Paste and position on the bottom below tube layer
Select Element 66 - resize by 40%
Paste and position on the left side below tube layer
Select Element 8 - resize by 25%
Paste and position on the bottom left
Select Element 7 - resize by 20%
Image Free Rotate Left by 15% and paste on the bottom left
Select Element 4 - resize by 20%
Paste and paste on the bottom left
Select Element 61 - resize by 25%
Paste and position on the bottom left
Select Element 74 - resize by 15%
Paste and position on the bottom left
Select Element 6 - resize by 20%
Paste and position on the bottom left
Paste paper 8 on canvas
Apply Mask 2 or mask of choice
Merge group and move to the bottom layer
Add any dropshadows you like
Sharpen any elements as needed
Crop and resize as desired
Add copyright info, license number and name
You're done! Thanks for trying my tutorial!
Labels:Kissing Kate | 0
comments
Saturday, January 23, 2016
NAUGHTY POLICE
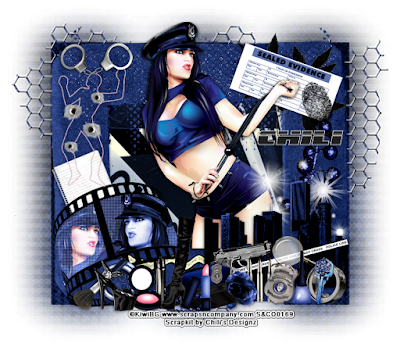
Supplies needed:
I am using the stunning artwork from KiwiBG for this tutorial which you can find here
Scrapkit: I am using a stunning kit from Chili's Designz called "Naughty Police" which you can get by going here
Mask 45 from Vix which you can find here
Plugins: Lokas 3D Shadow, Penta - Color dots
----------------------------
This tutorial is written for those who have working knowledge of PSPX2 (any version will do).
This tutorial was written by me on January 23, 2016. Please do not copy or paste on any other forum, website or blog provide link back to tut only. Please do not claim as your own. This tutorial is copyrighted to me. Any resemblance to any other tutorial is purely coincidental.
Ok - let's start and remember to save often.
Open up a 750 x 650 blank canvas (we can resize it later)
Select Frame Element 5 - resize by 65%
Paste and position in the center of the canvas
Select your magic wand tool and select the center of the frame (Add (Shift), RGB Value, Tolerance 25, Contiguous checked, Feather 0)
Selections, Modify, Expand by 5
Paste paper 6
Select invert, delete, select none
Move paper layer below frame layer
Apply Penta Color dot with the following settings to paper:

Select Frame Element 2 - resize by 30%
Paste and position on the bottom left
Select your magic wand tool and select both squares in the frame (Add (Shift), RGB Value, Tolerance 25, Contiguous checked, Feather 0)
Selections, Modify, Expand by 2
Paste paper 8
Select invert, delete
Paste close-up tubes of choice on top of the paper layer and delete
Select none
Change close-up tubes to Luminence (Legacy) and screen and merge on top of paper layer
Move below the frame
Select Tagbg Element - resize by 40%
Paste and position on the top right
Image duplicate and mirrior
Select Leaves 3 Element - resize by 30%
Paste and position on the top right
Select Note 2 Element - resize by 50%
Paste and position on the top right
Select Fingerprint Element - resize by 22%
Paste and position on the top right
Select Cuffs 2 Element - resize by 40%
Paste and position on the top left
Select Deco6 Element - resize by 40%
Paste and position on the top left
Select Holes Element - resize by 55%
Paste and position on the top left
Select Deco3 Element - resize by 65%
Paste and position on the right side
Paste tube of choice where desired
Apply Lokas 3D Shadow at default settings
Select City Element - resize by 30%
Paste and position on the bottom right
Select Sparkles 4 Element - resize by 45%
Paste and position on the bottom right
Select Deco Element - resize by 30%
Paste and position on the bottom right
Select Key Element - resize by 30%
Paste and position on the bottom right
Select Magny Element - resize by 30%
Paste and position on the bottom right
Select Ribbon 4 Element - resize by 30%
Image Free Rotate Left by 15% and paste on the bottom right
Select Polish Element - resize by 30%
Paste and paste on the bottom right
Select Badge Element - resize by 40%
Image Free Rotate Right by 15% and paste on the bottom right
Select Bullets Element - resize by 30%
Paste and position on the bottom
Select Gun Element - resize by 40%
Paste and position on the bottom
Select Flower 6 - resize by 20%
Paste and position on the bottom
Select Hat Element - resize by 45%
Paste and position on the bottom
Select Lipstick Element - resize by 30%
Paste and position on the bottom
Select Notes 3 Element - resize by 40%
Image Free Rotate Left by 15% and paste on the left side
Select Ribbon 2 Element - resize by 30%
Paste and position on the bottom left
Select Button 2 Element - paste and position on the bottom left
Select Brush Element - resize by 40%
Paste and position on the bottom left
Select Show Element - resize by 30%
Paste and position on the bottom left
Select Rouge Element - resize by 25%
Paste and position on the bottom left
Select Bullet Element - resize by 50%
Paste and position on the bottom
Select Boot Element - resize by 45%
Paste and position on the bottom
Select Wire Element - resize by 88%
Paste and position on the center of the canvas
Move to the bottom layer
Paste paper 15 on canvas
Apply Mask 45 or mask of choice
Merge group and move to the bottom layer
Add any dropshadows you like
Sharpen any elements as needed
Crop and resize as desired
Add copyright info, license number and name
You're done! Thanks for trying my tutorial!
Labels:Chili Designz,Scraps N Company | 0
comments
Sunday, January 17, 2016
FALLEN ANGEL
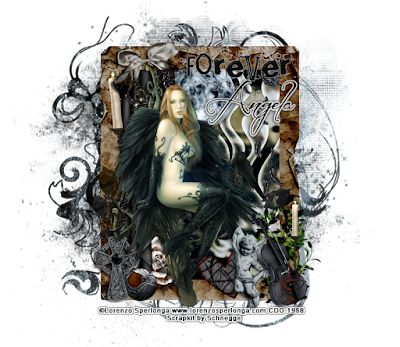
Supplies needed:
I am using the stunning artwork from Lorenzo Sperlonga for this tutorial which you can find here
Scrapkit: I am using a stunning kit from Schnegge called "IB-LorenzoSperlonga 73-1" which you can get by going here
Mask 32 from Moonbeams and Spiderwebs which you can find here
Plugins: Lokas 3D Shadow
----------------------------
This tutorial is written for those who have working knowledge of PSPX2 (any version will do).
This tutorial was written by me on January 17, 2016. Please do not copy or paste on any other forum, website or blog provide link back to tut only. Please do not claim as your own. This tutorial is copyrighted to me. Any resemblance to any other tutorial is purely coincidental.
Ok - let's start and remember to save often.
Open up a 750 x 650 blank canvas (we can resize it later)
Select Frame Element 1 - Paste and position in the center of the canvas
Select your magic wand tool and select the center of the frame (Add (Shift), RGB Value, Tolerance 25, Contiguous checked, Feather 0)
Selections, Modify, Expand by 5
Paste paper 5
Select invert, delete, select none
Move paper layer below frame layer
Select Moon Element - resize by 40%
Paste and position on the top where desired below the frame
Select Bow 1 Element - resize by 40%
Image Free Rotate Left by 15% and paste on the top left
Select Wordart Element - resize by 50%
Paste and position on the top right where desired
Select Feathers Element - resize by 45%
Paste and position on the right side
Select Leaves Element - resize by 40%
Paste and position on the bottom right
Select Rose 1 Element - resize by 30%
Paste and position on the bottom right
Select Candle Element - resize by 45%
Paste and position on the bottom right
Select Angel Element - resize by 40%
Paste and position on the bottom right
Paste tube of choice where desired
Apply Lokas 3D Shadow at default settings
Select Foliage Element - resize by 40%
Paste and position on the bottom left
Select Cross Element - resize by 40%
Paste and position on the bottom left
Select Button Element - resize by 40%
Paste and position on the bottom left
Select Heart Element - resize by 40%
Image Free Rotate Left by 15% and paste on the bottom
Paste paper 2 on canvas
Apply Mask 32 or mask of choice
Merge group and move to the bottom layer
Add any dropshadows you like
Sharpen any elements as needed
Crop and resize as desired
Add copyright info, license number and name
You're done! Thanks for trying my tutorial!
Labels:Schnegge | 0
comments
Saturday, January 16, 2016
LADY SOUL
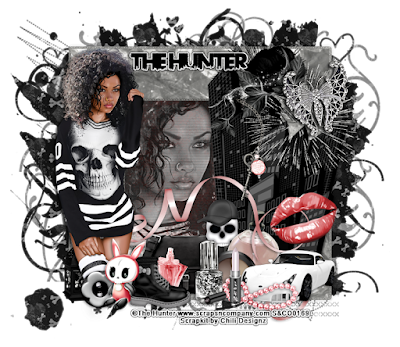
Supplies needed:
I am using the stunning artwork from The Hunter for this tutorial which you can find here
Scrapkit: I am using a stunning kit from Chili Designz called "Lady Soul" which you can get by going here
Mask 5 from which you can find here
Plugins: Lokas 3D Shadow
----------------------------
This tutorial is written for those who have working knowledge of PSPX2 (any version will do).
This tutorial was written by me on January 16, 2016. Please do not copy or paste on any other forum, website or blog provide link back to tut only. Please do not claim as your own. This tutorial is copyrighted to me. Any resemblance to any other tutorial is purely coincidental.
Ok - let's start and remember to save often.
Open up a 750 x 650 blank canvas (we can resize it later)
Select Frame Element 7 - resize by 65%
Paste and position in the center of the canvas
Select your magic wand tool and select the center of the frame (Add (Shift), RGB Value, Tolerance 25, Contiguous checked, Feather 0)
Selections, Modify, Expand by 5
Paste paper 6
Select invert, delete
Paste close-up tube on paper layer and delete
Select none
Change close-up to Luminance (Legacy) and drop opacity down to 85%
Apply dropshadow and merge down on paper layer
Effect, Texture Effects, Blinds (Width 3, Opactity 15, Horizontal and Light from left/top checked)
Move paper layer below frame layer
Select Cityscrap2 Element - resize by 50%
Paste and position on the right side
Select Bling 2 Element - resize by 30%
Paste and position on the top right
Select Bling 3 Element - resize by 30%
Paste and position on the top right where desired
Select Deco 4 Element - resize by 30%
Paste and position on the top right
Select Butterfly Element - resize by 50%
Paste and position on the top right
Select Ribbon Element - resize by 45%
Paste and position on the bottom of the frame
Select Lips Element - resize by 75%
Image Free Rotate Left by 15% and paste on the bottom right
Paste tube of choice where desired
Apply Lokas 3D Shadow at default settings
Select Car Element - resize by 40%
Paste and position on the bottom right
Select Perfume 2 Element - resize by 55%
Paste and position on the bottom right
Select Powder Element - resize by 40%
Paste and position on the bottom
Select Pearls Element - resize by 25%
Paste and position on the bottom right
Select Lipstick Element - resize by 40%
Paste and position on the bottom
Select Bag Element - resize by 45%
Paste and position on the bottom l
Select Polish 3 Element - resize by 55%
Paste and paste on the bottom
Select Skull 3 Element - resize by 40%
Paste and position on the bottom
Select Perfume Element - resize by 30%
Paste and position on the bottom
Select Boots Element - resize by 40%
Paste and position on the bottom
Select Lamp Element - resize by 30%
Paste and position on the bottom left
Select Button 2 Element - paste and position on the bottom left
Select Teddy Element - resize by 30%
Paste and position on the bottom left
Paste paper 3 on canvas
Apply Mask 5 or mask of choice
Merge group and move to the bottom layer
Add any dropshadows you like
Sharpen any elements as needed
Crop and resize as desired
Add copyright info, license number and name
You're done! Thanks for trying my tutorial!
Labels:Chili Designz,Scraps N Company | 0
comments
SNOW ANGEL
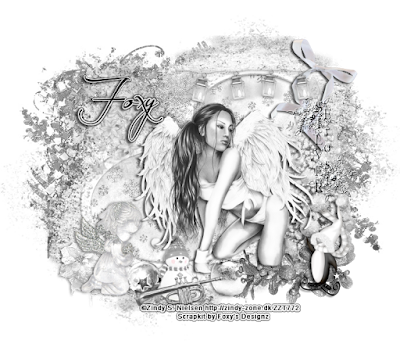
Supplies needed:
I am using the stunning artwork from Zindy Nielsen for this tutorial which is no longer available for purchase. You can find her artwork here.
Scrapkit: I am using a stunning Collab kit from Foxy's Designz called "Silver Frost" which you can get by going here
Winter Mask 7 from Dee which you can find here
Plugins: Lokas 3D Shadow
----------------------------
This tutorial is written for those who have working knowledge of PSPX2 (any version will do).
This tutorial was written by me on January 16, 2016. Please do not copy or paste on any other forum, website or blog provide link back to tut only. Please do not claim as your own. This tutorial is copyrighted to me. Any resemblance to any other tutorial is purely coincidental.
Ok - let's start and remember to save often.
Open up a 750 x 650 blank canvas (we can resize it later)
Select Frame Element 2 - resize by 85%
Paste and position in the center of the canvas
Select your magic wand tool and select the center of each of the circles in the frame (Add (Shift), RGB Value, Tolerance 25, Contiguous checked, Feather 0)
Selections, Modify, Expand by 5
Paste paper 8
Select invert, delete, select none
Move paper layer below frame layer
Select Element 27 - resize by 40%
Paste and position on the top left
Select Element 21 - resize by 40%
Paste and position on the top right
Select Element 44 - resize by 35%
Paste and position on the top right
Select Element 35 - resize by 55%
Paste and position on the right side
Select WordArt 1 Element - resize by 40%
Paste and position on the right side
Select Element 29 - resize by 45%
Paste and position on the bottom right
Select Element 36 - resize by 40%
Paste and position on the bottom right
Paste tube of choice where desired
Apply Lokas 3D Shadow at default settings
Select Element 15 - resize by 20%
Paste and position on the bottom below tube
Select Element 18 - resize by 25%
Paste and position on the bottom left
Select Element 31 - resize by 35%
Paste and position on the bottom left
Select Element 28 - resize by 20%
Paste and position on the bottom left
Select Element 19 - resize by 30%
Paste and position on the bottom
Select Element 43 - resize by 45%
Image Free Rotate Left by 15% and paste on the bottom
Paste paper 5 on canvas
Apply Mask 7 or mask of choice
Merge group and move to the bottom layer
Add any dropshadows you like
Sharpen any elements as needed
Crop and resize as desired
Add copyright info, license number and name
You're done! Thanks for trying my tutorial!
Labels:Foxy's Designz | 0
comments
Sunday, January 10, 2016
IN LOVE
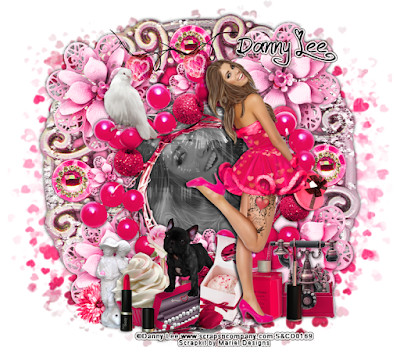
Supplies needed:
I am using the stunning artwork from Danny Lee for this tutorial which you can find here
Scrapkit: I am using a stunning kit from Mariel called "In Love For New Year" which you can get by going here
Heart Burst Mask from Essex Girl which you can find here
Plugins: Lokas 3D Shadow
----------------------------
This tutorial is written for those who have working knowledge of PSPX2 (any version will do).
This tutorial was written by me on January 10, 2016. Please do not copy or paste on any other forum, website or blog provide link back to tut only. Please do not claim as your own. This tutorial is copyrighted to me. Any resemblance to any other tutorial is purely coincidental.
Ok - let's start and remember to save often.
Open up a 750 x 650 blank canvas (we can resize it later)
Select Frame Element 1 - paste and position in the center of the canvas
Select your magic wand tool and select the center of the frame (Add (Shift), RGB Value, Tolerance 25, Contiguous checked, Feather 0)
Selections, Modify, Expand by 5
Paste paper 9
Select invert, delete
Paste close-up tube on paper layer and delete
Select none
Change close-up to Luminance (Legacy) and drop opacity down to 50%
Apply dropshadow and merge down on paper layer
Move paper layer below frame layer
Select Frame Element 5 - resize by 75%
Paste and position on the top center of the canvas
Select Element 61 - resize by 40%
Paste and position on the top where desired
Select Element 81 - resize by 25%
Paste and position on the top left
Select Element 7 - resize by 25%
Paste and position on the bottom right
Select Element 80 - resize by 25%
Paste and position on the bottom right
Select Element 56 - resize by 30%
Paste and position on the bottom
Paste tube of choice where desired
Apply Lokas 3D Shadow at default settings
Select Element 8 - resize by 15%
Paste and position on the bottom left
Select Element 67 - resize by 30%
Paste and position on the bottom left
Select Element 65 - resize by 25%
Paste and position on the bottom left
Select Element 112 - resize by 20%
Paste and position on the bottom left
Select Element 63 - resize by 25%
Paste and position on the bottom left
Select Element 2 - resize by 30%
Paste and position on the bottom
Select Element 106 - resize by 25%
Paste and paste on the bottom
Select Element 113 - resize by 25%
Paste and position on the bottom
Paste paper 1 on canvas
Apply Heart Burst mask or mask of choice
Merge group and move to the bottom layer
Add any dropshadows you like
Sharpen any elements as needed
Crop and resize as desired
Add copyright info, license number and name
You're done! Thanks for trying my tutorial!
Labels:Scraps N Company | 0
comments
Saturday, January 9, 2016
WINTER SOLSTICE
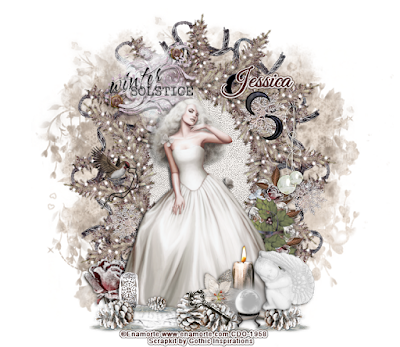
Supplies needed:
I am using the stunning artwork from Enamorte for this tutorial which you can find here
Scrapkit: I am using a stunning kit from Gothic Inspirations called "Winter Solstice" which you can get by going here
Mask 2 from Rachel Designs which you can find here
Plugins: Lokas 3D Shadow
----------------------------
This tutorial is written for those who have working knowledge of PSPX2 (any version will do).
This tutorial was written by me on January 9, 2016. Please do not copy or paste on any other forum, website or blog provide link back to tut only. Please do not claim as your own. This tutorial is copyrighted to me. Any resemblance to any other tutorial is purely coincidental.
Ok - let's start and remember to save often.
Open up a 750 x 650 blank canvas (we can resize it later)
Select AltFrame Element - resize by 40%
Paste and position in the center of the canvas
Select your magic wand tool and select the center of the frame (Add (Shift), RGB Value, Tolerance 25, Contiguous checked, Feather 0)
Selections, Modify, Expand by 5
Paste paper 10
Select invert, delete, select none
Effects, Edge Effect, Enhance
Effects, Photo Effects, Sepia witht the following settings:
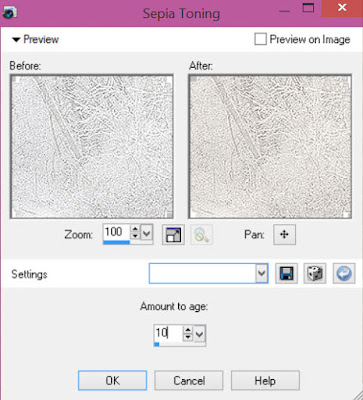
Move paper layer below frame layer
Select Cluster Element - resize by 25%
Paste and position on the top left
Select Snowflake Element - resize by 20%
Paste and position on the right side where desired
Image duplicate - resize by 80% and reposition copy of snowflake on right side
Select Moonphases Element - resize by 20%
Paste and position on the top right
Select SwagCorner Element - resize by 65%
Image mirror and flip and position on the bottom right
Select Balls Element - resize by 30%
Paste and position on the right side
Select Birdwkey Element - resize by 30%
Paste and position on the left side
Paste tube of choice where desired
Apply Lokas 3D Shadow at default settings
Select Pinecones Element - resize by 50%
Paste and position on the bottom
Select Angel Element - resize by 20%
Paste and position on the bottom right
Select Candle Element - resize by 25%
Paste and position on the bottom right
Select Looking Glass Element - resize by 20%
Paste and position on the bottom right
Select Poinsettia Element - resize by 20%
Paste and position on the bottom right
Select Key Element - resize by 15%
Paste and position on the bottom
Select MusicPages Element - resize by 25%
Paste and paste on the bottom
Select RoseBud Element - resize by 20%
Paste and position on the bottom left
Select Design Element - resize by 15%
Paste and position on the bottom left
Paste paper 1 on canvas
Apply Photo Effect Sepia coloring with above settings if desired
Apply Mask 2 or mask of choice
Merge group and move to the bottom layer
Add any dropshadows you like
Sharpen any elements as needed
Crop and resize as desired
Add copyright info, license number and name
You're done! Thanks for trying my tutorial!
Labels:Gothic Inspirations | 1 comments
Saturday, January 2, 2016
NEW YEAR 2016
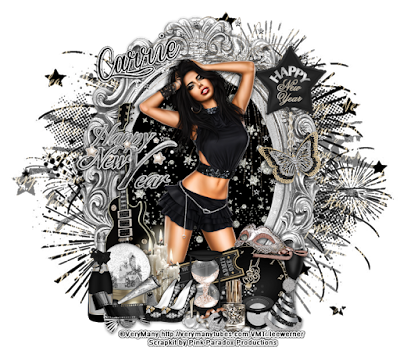
Supplies needed:
I am using the stunning artwork from Verymany for this tutorial which you can find here
Scrapkit: I am using a stunning kit from Pink Paradox Productions called "New Year 2016" which you can get by going here
Patriotic Mask 3 from Dee which you can find here
Plugins: Lokas 3D Shadow
----------------------------
This tutorial is written for those who have working knowledge of PSPX2 (any version will do).
This tutorial was written by me on January 2, 2016. Please do not copy or paste on any other forum, website or blog provide link back to tut only. Please do not claim as your own. This tutorial is copyrighted to me. Any resemblance to any other tutorial is purely coincidental.
Ok - let's start and remember to save often.
Open up a 750 x 650 blank canvas (we can resize it later)
Select Frame Element 14 - resize by 65%
Paste and position in the center of the canvas
Select your magic wand tool and select the center of the frame (Add (Shift), RGB Value, Tolerance 25, Contiguous checked, Feather 0)
Selections, Modify, Expand by 5
Paste paper 26
Select invert, delete, select none
Move paper layer below frame layer
Select Element 148 - resize by 25%
Image Free Rotate Left by 15% and paste on the right side
Select Element 42 - resize by 40%
Paste and position on the left side
Select Element 123 - resize by 30%
Paste and position on the left side
Paste tube of choice where desired
Apply Lokas 3D Shadow at default settings
Select Element 11 - resize by 25%
Paste and position on the bottom right
Select Element 35 - resize by 20%
Image Free Rotate Right by 15% and paste on the bottom right
Select Element 23 - resize by 15%
Paste and position on the bottom right
Select Element 30 - resize by 30%
Paste and position on the bottom right
Select Element 17 - resize by 20%
Paste and position on the bottom right above clock element
Select Element 58 - resize by 20%
Image Free Rotate Left by 15% and paste on the bottom
Select Element 32 - resize by 20%
Paste and paste on the bottom
Select Element 27 - resize by 20%
Paste and position on the bottom
Select Element 48 - resize by 25%
Paste and position on the bottom
Select Element 26 - resize by 15%
Paste and position on the bottom
Select Element 34 - resize by 20%
Paste and position on the bottom left
Select Element 9 - resize by 25%
Paste and position on the bottom left
Select Element 62 - resize by 20%
Paste and position on the bottom left
Select Element 16 - resize by 20%
Paste and position on the bottom left
Select Element 45 - resize by 20%
Paste and position on the bottom left
Paste paper 27 on canvas
Apply Mask 3 or mask of choice
Merge group and move to the bottom layer
Add any dropshadows you like
Sharpen any elements as needed
Crop and resize as desired
Add copyright info, license number and name
You're done! Thanks for trying my tutorial!
Labels:Pink Paradox Productions | 0
comments
LOVELY LOLA
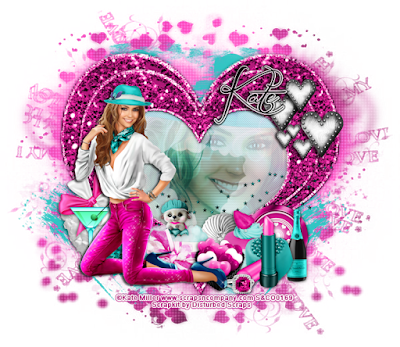
Supplies needed:
I am using the stunning artwork from Kate Miller for this tutorial which you can find here
Scrapkit: I am using a stunning kit from Disturbed Scraps called "Lovely Lola" which you can get by going here
Mask M1 from Kylie which you can find on the Misfits Blog here
Plugins: Lokas 3D Shadow
----------------------------
This tutorial is written for those who have working knowledge of PSPX2 (any version will do).
This tutorial was written by me on January 2, 2016. Please do not copy or paste on any other forum, website or blog provide link back to tut only. Please do not claim as your own. This tutorial is copyrighted to me. Any resemblance to any other tutorial is purely coincidental.
Ok - let's start and remember to save often.
Open up a 750 x 650 blank canvas (we can resize it later)
Select Frame Element 77 - resize by 75%
Paste and position in the center of the canvas
Select your magic wand tool and select the center of the frame (Add (Shift), RGB Value, Tolerance 25, Contiguous checked, Feather 0)
Selections, Modify, Expand by 5
Paste paper 4
Select invert, delete
Paste close-up tube on paper layer and delete
Select none
Change close-up to Hard Light and drop opacity down to 60%
Apply dropshadow and merge down on paper layer
Effect, Texture Effects, Blinds (Width 3, Opactity 15, Horizontal and Light from left/top checked)
Move paper layer below frame layer
Select Element 72 - resize by 65%
Paste and position below frame layer
Repeat Frame 77 - resize by 65%
Paste on top layer of frame
Select Element 34 - resize by 30%
Paste and position on the top right side
Select Element 69 - resize by 45%
Paste and position on the bottom where desired
Select Element 10 - resize by 20%
Paste and position on the bottom right
Select Element 13 - resize by 25%
Paste and position on the bottom right
Select Element 37 - resize by 30%
Paste and position on the bottom right
Select Element 24 - resize by 30%
Paste and position on the bottom right
Select Element 17 - resize by 30%
Paste and position on the bottom right
Select Element 19 - resize by 30%
Paste and position on the bottom
Select Element 26 - resize by 30%
Paste and position on the bottom
Paste tube of choice where desired
Apply Lokas 3D Shadow at default settings
Select Element 30 - resize by 22%
Paste and position on the bottom below tube
Select Element 35 - resize by 25%
Paste and position on the bottom
Select Element 41 - resize by 15%
Paste and position on the bottom
Select Element 31 - resize by 30%
Image Free Rotate Right by 15% and paste on the bottom left
Select Element 48 - resize by 30%
Paste and position on the bottom left
Select Element 14 - resize by 30%
Paste and position on the bottom left
Select Element 70 - resize by 55%
Paste and paste on the right and move to bottom layer
Image duplicate, mirror and reposition where desired
Paste paper 2 on canvas
Apply Mask M1 or mask of choice
Merge group and move to the bottom layer
Add any dropshadows you like
Sharpen any elements as needed
Crop and resize as desired
Add copyright info, license number and name
You're done! Thanks for trying my tutorial!
Labels:Scraps N Company | 0
comments
Friday, January 1, 2016
LONG WINTER NIGHT
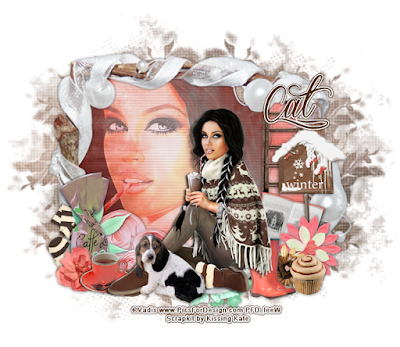
Supplies needed:
I am using the stunning artwork from Vadis for this tutorial which you can find here
Scrapkit: I am using a stunning kit from Kissing Kate called "Cold Days" which you can get by going here
Mask 2 from Dee which you can find here
Plugins: Lokas 3D Shadow
----------------------------
This tutorial is written for those who have working knowledge of PSPX2 (any version will do).
This tutorial was written by me on January 1, 2016. Please do not copy or paste on any other forum, website or blog provide link back to tut only. Please do not claim as your own. This tutorial is copyrighted to me. Any resemblance to any other tutorial is purely coincidental.
Ok - let's start and remember to save often.
Open up a 750 x 650 blank canvas (we can resize it later)
Select Frame Element 2 - resize by 85%
Paste and position in the center of the canvas
Select your magic wand tool and select the center of the frame (Add (Shift), RGB Value, Tolerance 25, Contiguous checked, Feather 0)
Selections, Modify, Expand by 5
Paste paper 5
Select invert, delete
Paste close-up tube on paper layer and delete
Select none
Change close-up to Hard Light and drop opacity down to 40%
Apply dropshadow and merge down on paper layer
Effect, Texture Effects, Blinds (Width 3, Opactity 15, Horizontal and Light from left/top checked)
Move paper layer below frame layer
Select Element 5 - resize by 60%
Paste and position on the right side
Select Element 10 - resize by 25%
Image Free Rotate Right by 15% and paste on the bottom right
Select Element 58 - resize by 50%
Paste and position on the bottom right
Select Element 37 - resize by 25%
Paste and position on the bottom right
Select Element 59 - resize by 15%
Paste and position on the bottom right
Select Element 41 - resize by 15%
Paste and position on the bottom right
Select Element 23 - resize by 30%
Paste and position on the bottom right
Paste tube of choice where desired
Apply Lokas 3D Shadow at default settings
Select Element 36 - resize by 30%
Paste and position on the bottom below tube
Select Element 57 - resize by 25%
Paste and position on the bottom
Select Element 9 - resize by 20%
Paste and position on the bottom left
Select Element 47 - resize by 25%
Paste and position on the bottom left
Select Element 24 - resize by 30%
Paste and position on the bottom left
Select Element 2 - resize by 30%
Paste and position on the bottom left
Select Element 21 - resize by 20%
Paste and paste on the bottom left
Select Element 6 - resize by 20%
Paste and position on the bottom left
Paste paper 1 on canvas
Apply Mask 2 or mask of choice
Merge group and move to the bottom layer
Add any dropshadows you like
Sharpen any elements as needed
Crop and resize as desired
Add copyright info, license number and name
You're done! Thanks for trying my tutorial!
Labels:Kissing Kate | 0
comments
Subscribe to:
Comments
(Atom)

