Labels
- Alikas Scraps
- All Dolled Up Store
- Amy Marie
- Annaica
- Arthur Crowe
- Babycakes Scraps
- Barbara Jensen
- Bibi's Collections
- Black Widow Creationz
- Blu Moon
- Bonnies Creations
- Bookwork Dezines
- Broken Sky Dezine
- Carita Creationz
- Carpe Diem Designs
- CDO
- Celinart Pinup
- Celine
- Chacha Creationz
- Charmed Designs
- Cherry Blossom Designs
- Chili Designz
- Cluster Frame
- Creative Misfits
- Creative Scraps by Crys
- Curious Creative Dreams
- Danny Lee
- Derzi
- Designs by Ali
- Designs by Joan
- Designs by Ketura
- Designs By Norella
- Designs by Vi
- Diana Gali
- Diry Art Designs
- Disturbed Scraps
- Dreaming With Bella
- Eclipse Creations
- Elegancefly
- Extras
- Fabulous Designz
- Forum Set
- Foxy's Designz
- Freek's Creation
- FTU
- FwTags
- Goldwasser
- Gothic Inspirations
- Gothic Raven Designs
- Graphfreaks
- Hania's Designs
- Happy Pumpkin Studios
- Horseplay's Pasture Designs
- indie-Zine
- Irish Princess Designs
- Ishika Chowdhury
- Kaci McVay
- Kajenna
- katharine
- Katherine
- Khloe Zoey
- Killer Kitty
- Kissing Kate
- KiwiFirestorm
- Kiya Designs
- Kizzed by Kelz
- KZ Designz
- Lady Mishka
- Lil Mz Brainstorm
- Maiden of Darkness
- Mariel Designs
- MellieBeans
- Michelle's Myths
- Midnight Shadow
- Misticheskya
- MistyLynn's Creations
- MMeliCrea Designz
- Moon Vixen Designs
- NaSionainne
- Ninaste
- Niqui Designs
- Pandora
- Picsfordesign
- Pink Paradox Productions
- Radyga Designs
- Redefined Designs
- Rissa's Designs
- Schnegge
- ScottishButterfly Creations
- Scrappin Krazy Designs
- Scrappin With Lil Ol Me
- Scraps and the City
- Scraps Dimensions
- Scraps From The Heart
- Scraps N Company
- Scraps with Attitude
- Shining Star Art
- Skyscraps
- Sleek N Sassy Designs
- Sophisticat Simone
- Souldesigner
- Soxsational Scraps
- Spazz
- Starlite and Soul
- Stella Felice
- Tammy Welt
- Tasha's Playground
- The PSP Project
- Thrifty Scraps by Gina
- Tiny Turtle Designs
- Upyourart
- Verymany
- Wendy Gerber
- Whisper In the Wind
- Wick3d Creationz
- Wicked Diabla
- Yude's Kreationz
Blog Archive
Sunday, February 28, 2016
ROCK WINGS

Supplies needed:
I am using the stunning artwork from Andy Cooper for this tutorial which you can find here
Scrapkit: I am using a stunning kit from Disturbed Scraps called "Today Your Love, Tommorrow The World" which you can get by going here
Mask 22 from Becky which you can find here
Plugins: Lokas 3D Shadow
----------------------------
This tutorial is written for those who have working knowledge of PSPX2 (any version will do).
This tutorial was written by me on February 28, 2016. Please do not copy or paste on any other forum, website or blog provide link back to tut only. Please do not claim as your own. This tutorial is copyrighted to me. Any resemblance to any other tutorial is purely coincidental.
Ok - let's start and remember to save often.
Open up a 750 x 650 blank canvas (we can resize it later)
Select Frame Element 73 - resize by 85%
Paste and position in the center of the canvas
Select your magic wand tool and select the center of the frame (Add (Shift), RGB Value, Tolerance 25, Contiguous checked, Feather 0)
Selections, Modify, Expand by 5
Paste paper 11
Select invert, delete, select none
Move paper layer below frame layer
Select Element 35 - resize by 80%
Paste and position in the center of the frame where desired
Select Element 60 - resize by 35%
Paste and position behind the city element where desired
Select Element 48 - resize by 55%
Paste and position on the top right
Select Element 40 - resize by 80%
Paste and position on the bottom of the frame
Select Element 31 - resize by 30%
Paste and position on the top left
Select Element 66 - resize by 45%
Paste and position on the right side
Paste tube of choice where desired
Apply Lokas 3D Shadow at default settings
Select Element 20 - resize by 30%
Paste and position on the bottom right
Select Element 11 - resize by 30%
Paste and position on the bottom
Select Element 22 - resize by 40%
Paste and position on the bottom center
Select Element 15 - resize by 30%
Paste and position on the bottom
Select Element 5 - resize by 25%
Paste and position on the bottom
Select Element 14 - resize by 25%
Paste and position on the bottom
Select Element 47 - resize by 40%
Paste and paste on the bottom left
Select Element 21 - resize by 25%
Paste and position on the bottom left
Select Element 26 - resize by 25%
Paste and position on the bottom left
Select Element 36 - resize by 25%
Paste and position on the bottom left
Select Element 10 - resize by 20%
Paste and position on the bottom left
Select Element 12 - resize by 25%
Paste and position on the bottom
Select Element 17 - resize by 30%
Paste and position on the left side
Select Element 24 - resize by 30%
Paste and position on the left side
Select Element 70 - resize by 30%
Image Free Rotate Left by 15% and paste on the top left
Paste paper 9 on canvas
Apply Mask 22 or mask of choice
Merge group and move to the bottom layer
Add any dropshadows you like
Sharpen any elements as needed
Crop and resize as desired
Add copyright info, license number and name
You're done! Thanks for trying my tutorial!
Labels:Scraps N Company | 0
comments
Saturday, February 27, 2016
WILD STRANGER
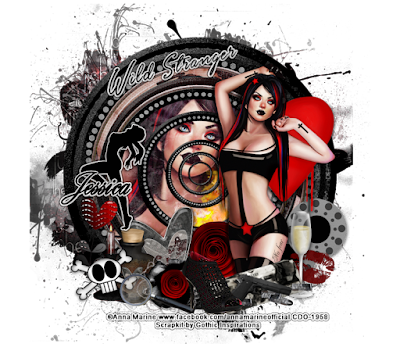
Supplies needed:
I am using the stunning artwork from Anna Marine for this tutorial which you can find here
Scrapkit: I am using a stunning kit from Gothic Inspirations called "Wild Stranger" which you can get by going here
Plugins: Lokas 3D Shadow
----------------------------
This tutorial is written for those who have working knowledge of PSPX2 (any version will do).
This tutorial was written by me on February 27, 2016. Please do not copy or paste on any other forum, website or blog provide link back to tut only. Please do not claim as your own. This tutorial is copyrighted to me. Any resemblance to any other tutorial is purely coincidental.
Ok - let's start and remember to save often.
Open up a 750 x 650 blank canvas (we can resize it later)
Select Mask Element - resize by 85%
Paste and position in the center of the canvas
Select Frame 1 Element - resize by 65%
Paste and position in the center of the canvas
Select your magic wand tool and select the center of the frame (Add (Shift), RGB Value, Tolerance 25, Contiguous checked, Feather 0)
Selections, Modify, Expand by 5
Paste paper 2
Select invert, delete
Paste close-up tube on paper layer and delete
Select none
Change close-up to Screen
Apply dropshadow and merge down on paper layer
Move paper layer below frame layer
Select Tunnel Frame Element - resize by 85%
Paste and position on the top center of the frame
Select Flames Element - resize by 40%
Paste and position on the bottom right below tunnel frame
Select WA 11 Element - resize by 30%
Image Free Rotate Left by 15% and paste and position on the top left
Apply Eyecandy Gradient Glow on fat default settings
Select Silhouette Element - resize by 30%
Paste and position on the left side
Apply same gradient glow settings
Select Film Element - resize by 30%
Paste and position on the bottom right
Select Kiss 1 Element - resize by 20%
Paste and position on the bottom right
Paste tube of choice where desired
Apply Lokas 3D Shadow at default settings
Select Champagne Element - resize by 30%
Paste and position on the bottom right
Select Florette Element - resize by 20%
Paste and position on the bottom below tube layer
Select Newspaper Element - resize by 30%
Image Free Rotate Left by 15% and paste on the bottom above tube layer
Select Piece Element - resize by 22%
Image Free Rotate Right by 15% and paste on the bottom
Select HeartAlt Element - resize by 25%
Image Free Rotate Left by 15% and paste on the bottom
Select Shoe Element - resize by 30%
Paste and position on the bottom
Select Doodle 2 Element - resize by 40%
Paste and paste on the bottom left
Select Candle Element - resize by 25%
Paste and position on the bottom left
Select Bottle Element - resize by 25%
Paste and position on the bottom left
Select CrossBones Element - resize by 20%
Image Free Rotate Left by 15% and paste on the bottom left
Select Cluster 3 Element - resize by 20%
Paste and position on the bottom
Select MagnifyingGlass Element - resize by 25%
Paste and position on the bottom left
Add any dropshadows you like
Sharpen any elements as needed
Crop and resize as desired
Add copyright info, license number and name
You're done! Thanks for trying my tutorial!
Labels:Gothic Inspirations | 1 comments
Sunday, February 21, 2016
CONTEMPLATION

Supplies needed:
I am using the stunning artwork from KiwiBG for this tutorial which you can find here
Scrapkit: I am using a stunning kit from Schnegge called "Contemplation" which you can get by going here
Mask 46 which you can find here
Plugins: Lokas 3D Shadow
----------------------------
This tutorial is written for those who have working knowledge of PSPX2 (any version will do).
This tutorial was written by me on February 21, 2016. Please do not copy or paste on any other forum, website or blog provide link back to tut only. Please do not claim as your own. This tutorial is copyrighted to me. Any resemblance to any other tutorial is purely coincidental.
Ok - let's start and remember to save often.
Open up a 750 x 650 blank canvas (we can resize it later)
Select Element 17 - resize by 85%
Paste and position in the center of the canvas
Select Element 5 - resize by 75%
Paste and position in the center of the canvas
Select Frame Element 7 - resize by 55%
Paste and position in the center of the canvas
Image Free Rotate Left by 15%
Select your magic wand tool and select the center of the frame (Add (Shift), RGB Value, Tolerance 25, Contiguous checked, Feather 0)
Selections, Modify, Expand by 5
Paste paper 1
Select invert, delete, select none
Move paper layer below frame layer
Select Element 63 - resize by 55%
Paste and position on the right side
Select Element 58 - resize by 40%
Image Free Rotate Right by 15% and paste on the right side
Select Element 26 - resize by 30%
Paste and position on the bottom right
Select Element 20 - resize by 30%
Paste and position on the bottom right
Select Element 38 - resize by 35%
Paste and position on the bottom right
Select Element 24 - resize by 30%
Paste and position on the bottom right
Paste tube of choice where desired
Apply Lokas 3D Shadow at default settings
Select Element 21 - resize by 40%
Paste and position on the bottom right
Select Element 36 - resize by 25%
Paste and position on the bottom right
Select Element 4 - resize by 25%
Paste and position on the bottom
Select Element 41 - resize by 25%
Paste and position on the bottom
Select Element 64 - resize by 30%
Paste and position on the bottom
Select Element 62 - resize by 30%
Image Free Rotate Left by 30% and paste on the bottom left
Select Element 29 - resize by 25%
Paste and position on the bottom left
Select Element 22 - resize by 30%
Paste and paste on the bottom left
Select Element 35 - resize by 20%
Paste and position on the bottom left
Select Element 16 - resize by 40%
Paste and position on the bottom left
Select Element 52 - resize by 40%
Paste and position on the bottom left
Select Element 51 - resize by 35%
Paste and position on the bottom
Select Element 44 - resize by 30%
Paste and position on the bottom
Select Element 59 - resize by 40%
Paste and position on the top left
Select Element 10 - resize by 30%
Paste and position on the top left
Select Element 23 - resize by 40%
Image Free Rotate Left by 15% and paste on the bottom where desired
Paste paper 2 on canvas
Apply Mask 46 or mask of choice
Merge group and move to the bottom layer
Add any dropshadows you like
Sharpen any elements as needed
Crop and resize as desired
Add copyright info, license number and name
You're done! Thanks for trying my tutorial!
Labels:Schnegge,Scraps N Company | 0
comments
Saturday, February 20, 2016
HEARTS DESIRE
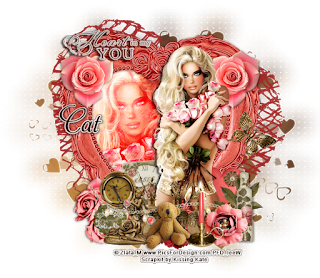
Supplies needed:
I am using the stunning artwork from Zlata_M for this tutorial which you can find here
Scrapkit: I am using a stunning kit Collab from Kissing Kate called "My Hearts Desire" which you can get by going here
Mask 88 from Designs by Vaybs which you can find here
Plugins: Lokas 3D Shadow, Eyecandy 4000 - Gradient Glow
----------------------------
This tutorial is written for those who have working knowledge of PSPX2 (any version will do).
This tutorial was written by me on February 20, 2016. Please do not copy or paste on any other forum, website or blog provide link back to tut only. Please do not claim as your own. This tutorial is copyrighted to me. Any resemblance to any other tutorial is purely coincidental.
Ok - let's start and remember to save often.
Open up a 750 x 650 blank canvas (we can resize it later)
Select Element 6 - Paste and position on the canvas
Select Frame Element 5 - resize by 75%
Paste and position in the center of the canvas
Select your magic wand tool and select the center of the frame (Add (Shift), RGB Value, Tolerance 25, Contiguous checked, Feather 0)
Selections, Modify, Expand by 5
Paste paper 8
Select invert, delete
Paste close-up tube on paper layer and delete
Select none
Change close-up to Overlay
Apply dropshadow and merge down on paper layer
Move paper layer below frame layer
Select Element 16 - resize by 25%
Paste and position on the top right
Image duplicate and mirror
Select Element 23 - resize by 35%
Paste and position on the top left
Apply Eyecandy Gradient Glow on fat default settings (Glow width 3)
Select Element 2 - resize by 20%
Paste and position on the right side
Select Element 8 - resize by 25%
Paste and position on the bottom right
Select Element 20 - resize by 20%
Paste and position on the bottom right
Select Element 3 - resize by 25%
Paste and position on the bottom right
Paste tube of choice where desired
Apply Lokas 3D Shadow at default settings
Select Element 25 - resize by 20%
Paste and position on the bottom right
Select Element 30 - resize by 30%
Paste and position on the bottom
Select Element 11 - resize by 20%
Image Free Rotate Left by 15% and paste on the bottom left
Select Element 35 - resize by 15%
Image Free Rotate Left by 15% and paste on the bottom left
Select Element 7 - resize by 25%
Paste and position on the bottom left
Select Element 29 - resize by 50%
Paste and position on the bottom where desired
Select Element 4 - resize by 20%
Paste and paste on the bottom left below the tube
Select Element 21 - resize by 25%
Paste and position on the bottom
Select Element 32 - resize by 22%
Paste and position on the bottom
Paste paper 7 on canvas
Apply Mask 88 or mask of choice
Merge group and move to the bottom layer
Add any dropshadows you like
Sharpen any elements as needed
Crop and resize as desired
Add copyright info, license number and name
You're done! Thanks for trying my tutorial!
Labels:Kissing Kate | 0
comments
Sunday, February 7, 2016
MY VALENTINE
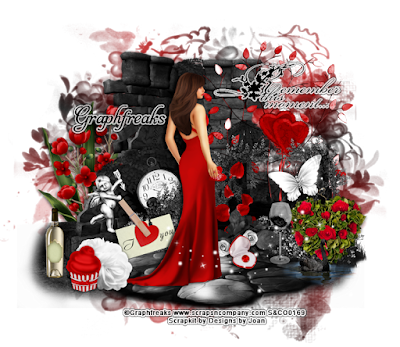
Supplies needed:
I am using the stunning artwork from Graphfreaks for this tutorial which you can find here
Scrapkit: I am using a stunning kit from Designs by Joan called "My Valentine" which you can get by going here
Mask 3 from Rachel Designs which you can find here
Plugins: Lokas 3D Shadow, Eyecandy - Gradient Glow
----------------------------
This tutorial is written for those who have working knowledge of PSPX2 (any version will do).
This tutorial was written by me on February 7, 2016. Please do not copy or paste on any other forum, website or blog provide link back to tut only. Please do not claim as your own. This tutorial is copyrighted to me. Any resemblance to any other tutorial is purely coincidental.
Ok - let's start and remember to save often.
Open up a 750 x 650 blank canvas (we can resize it later)
Select Element 56 - resize by 65%
Paste and position in the center of the canvas
Select Element 23 - resize by 40%
Paste and position on the top center of the frame
Select Element 15 - resize by 65%
Paste and position on te bottom right
Select Element 58 - resize by 45%
Paste and position on the bottom where desired
Select Element 47 - resize by 55%
Paste and position on the top right
Select Element 37 - resize by 30%
Paste and position on the right side
Select Element 65 - resize by 30%
Paste and position on the right side
Select Element 49 - resize by 35%
Paste and position on the bottom right
Select Element 78 - resize by 30%
Paste and position on the bottom right
Select Element 70 - resize by 25%
Paste and position in the center of the canvas where desired
Select Element 64 - resize by 25%
Paste and position on the bottom
Paste tube of choice where desired
Apply Lokas 3D Shadow at default settings
Select Element 6 - resize by 20%
Paste and position on the bottom
Select Element 10 - resize by 40%
Paste and position on the left side
Select Element 22 - resize by 30%
Paste and position on the left side
Select Element 11 - resize by 25%
Paste and position on the bottom left
Select Element 72 - resize by 22%
Paste and position on the bottom left
Select Element 81 - resize by 25%
Paste and paste on the bottom left
Select Element 31 - resize by 20%
Paste and position on the left side
Select Element 68 - resize by 30%
Paste and position on the bottom left
Select Element 75 - resize by 55%
Paste and position on the bottom right
Select Element 82 - resize by 35%
Paste and position on the top right
Apply Gradient Glow on fat default settings (Glow width 3)
Add new raster layer and flood-fill with color or gradient of choice
Apply Mask 3 or mask of choice
Merge group and move to the bottom layer
Add any dropshadows you like
Sharpen any elements as needed
Crop and resize as desired
Add copyright info, license number and name
You're done! Thanks for trying my tutorial!
Labels:Graphfreaks | 0
comments
Saturday, February 6, 2016
XOXO
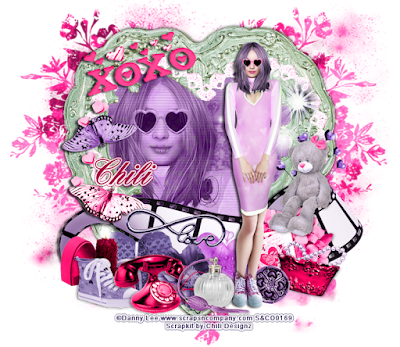
Supplies needed:
I am using the stunning artwork from Danny Lee for this tutorial which you can find here
Scrapkit: I am using a stunning Collab kit from Chili Designz called "Valentine Wishes" which you can get by going here
Mask 49 from Moonbeam and Spiderwebs which you can find here
Plugins: Lokas 3D Shadow
----------------------------
This tutorial is written for those who have working knowledge of PSPX2 (any version will do).
This tutorial was written by me on February 6, 2016. Please do not copy or paste on any other forum, website or blog provide link back to tut only. Please do not claim as your own. This tutorial is copyrighted to me. Any resemblance to any other tutorial is purely coincidental.
Ok - let's start and remember to save often.
Open up a 750 x 650 blank canvas (we can resize it later)
Select Frame Element 6 - resize by 75%
Paste and position in the center of the canvas
Select your magic wand tool and select the center of the frame (Add (Shift), RGB Value, Tolerance 25, Contiguous checked, Feather 0)
Selections, Modify, Expand by 5
Paste paper 5
Select invert, delete
Paste close-up tube on paper layer and delete
Select none
Change close-up to Luminence (Legacy) and drop opacity down to 80%
Apply dropshadow and merge down on paper layer
Effect, Texture Effects, Blinds (Width 3, Opactity 15, Horizontal and Light from left/top checked)
Move paper layer below frame layer
Select Heart Frame Element - resize by 75%
Paste and position on the top of the frame
Select WA2 Element - resize by 40%
Image Free Rotate Left by 15% and paste on the top left
Select Film Element - resize by 85%
Paste and position on the bottom above the frame layer
Select Hearts Element - resize by 30%
Paste and position on the left side
Select Butterfly 3 Element - resize by 40%
Paste and position on the left side
Select Sparkles 3 Element - resize by 40%
Paste and position on the right side
Paste tube of choice where desired
Apply Lokas 3D Shadow at default settings
Select Deco 5 Element - resize by 30%
Paste and position on the right side
Select Teddy Element - resize by 45%
Paste and position on the right side
Select Flower Element - resize by 40%
Paste and position on the bottom right
Select Deco 2 Element - resize by 30%
Paste and position on the bottom right
Select Pearls 2 Element - resize by 30%
Paste and position on the bottom right
Select Card Element - resize by 35%
Paste and position on the bottom right
Select Button Element - resize by 65%
Paste and paste on the bottom right
Select Heart Element - resize by 50%
Paste and position on the bottom
Select Flower 3 Element - resize by 35%
Paste and position on the bottom
Select Perfume Element - resize by 40%
Paste and position on the bottom
Select Butterfly 2 Element - resize by 40%
Paste and position on the bottom left
Select Boxes 2 Element - resize by 30%
Paste and position on the bottom left
Select Heart 5 Element - resize by 40%
Paste and position on the bottom left
Select Candle Element - resize by 30%
Paste and position on the bottom left
Select Show Element - resize by 40%
Paste and position on the bottom left
Select Phone Element - resize by 55%
Paste and position on the bottom
Select Deco 4 - resize by 55%
Paste and position on the bottom above film element
Paste paper 12 on canvas
Apply Mask 49 or mask of choice
Merge group and move to the bottom layer
Add any dropshadows you like
Sharpen any elements as needed
Crop and resize as desired
Add copyright info, license number and name
You're done! Thanks for trying my tutorial!
Labels:Chili Designz,Scraps N Company | 0
comments
Monday, February 1, 2016
NO LOVE HERE
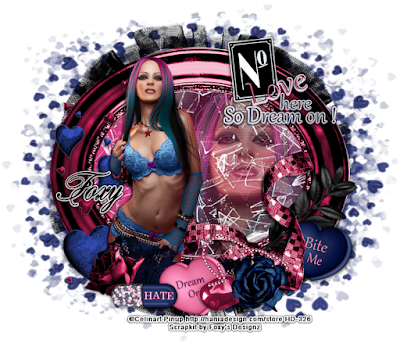
Supplies needed:
I am using the stunning artwork from Celinart Pinup for this tutorial which you can find here
Scrapkit: I am using a stunning kit from Foxy's Designz called "IB-AnnaMarineFebruary2015" which you can get by going here
Heart Burst Mask from Essex Girl which you can find here
Plugins: Lokas 3D Shadow, Eyecandy - Gradient Glow
----------------------------
This tutorial is written for those who have working knowledge of PSPX2 (any version will do).
This tutorial was written by me on February 1, 2016. Please do not copy or paste on any other forum, website or blog provide link back to tut only. Please do not claim as your own. This tutorial is copyrighted to me. Any resemblance to any other tutorial is purely coincidental.
Ok - let's start and remember to save often.
Open up a 750 x 650 blank canvas (we can resize it later)
Select Frame Element 2 - resize by 75%
Paste and position in the center of the canvas
Select your magic wand tool and select the center of the frame (Add (Shift), RGB Value, Tolerance 25, Contiguous checked, Feather 0)
Selections, Modify, Expand by 5
Paste paper 4
Select invert, delete
Paste close-up tube on paper layer and delete
Select none
Drop opacity on close-up down to 60%
Apply dropshadow and merge down on paper layer
Effect, Texture Effects, Blinds (Width 3, Opactity 15, Horizontal and Light from left/top checked)
Move paper layer below frame layer
Select Element 19 - resize by 65%
Paste and position on the center below the frame
Select Element 16 - resize by 65%
Paste and position on the left side
Select WordArt1 Element - resize by 55%
Paste and position on the top right
Apply Eyecandy Gradient Glow on fat default settings
Select Element 7 - resize by 60%
Paste and position on the bottom right
Paste tube of choice where desired
Apply Lokas 3D Shadow at default settings
Select Element 8 - resize by 45%
Image mirror and paste on the bottom right
Select Element 2 - resize by 30%
Image Free Rotate Right by 15% and paste on the bottom right
Select Element 5 - resize by 25%
Paste and position on the bottom
Select Element 15 - resize by 45%
Image Free Rotate Left by 15% and paste on the bottom
Select Element 1 - resize by 30%
Image Free Rotate Left by 15% and paste on the bottom
Select Element 10 - resize by 55%
Paste and position on the bottom
Select Element 18 - resize by 50%
Paste and paste on the bottom
Select Frame Element 3 - resize by 90%
Paste and position in the center of the canvas
Move to the bottom layer
Paste paper 5 on canvas
Apply Heart Burst Mask or mask of choice
Merge group and move to the bottom layer
Add any dropshadows you like
Sharpen any elements as needed
Crop and resize as desired
Add copyright info, license number and name
You're done! Thanks for trying my tutorial!
Labels:Foxy's Designz | 0
comments
Subscribe to:
Comments
(Atom)

