Labels
- Alikas Scraps
- All Dolled Up Store
- Amy Marie
- Annaica
- Arthur Crowe
- Babycakes Scraps
- Barbara Jensen
- Bibi's Collections
- Black Widow Creationz
- Blu Moon
- Bonnies Creations
- Bookwork Dezines
- Broken Sky Dezine
- Carita Creationz
- Carpe Diem Designs
- CDO
- Celinart Pinup
- Celine
- Chacha Creationz
- Charmed Designs
- Cherry Blossom Designs
- Chili Designz
- Cluster Frame
- Creative Misfits
- Creative Scraps by Crys
- Curious Creative Dreams
- Danny Lee
- Derzi
- Designs by Ali
- Designs by Joan
- Designs by Ketura
- Designs By Norella
- Designs by Vi
- Diana Gali
- Diry Art Designs
- Disturbed Scraps
- Dreaming With Bella
- Eclipse Creations
- Elegancefly
- Extras
- Fabulous Designz
- Forum Set
- Foxy's Designz
- Freek's Creation
- FTU
- FwTags
- Goldwasser
- Gothic Inspirations
- Gothic Raven Designs
- Graphfreaks
- Hania's Designs
- Happy Pumpkin Studios
- Horseplay's Pasture Designs
- indie-Zine
- Irish Princess Designs
- Ishika Chowdhury
- Kaci McVay
- Kajenna
- katharine
- Katherine
- Khloe Zoey
- Killer Kitty
- Kissing Kate
- KiwiFirestorm
- Kiya Designs
- Kizzed by Kelz
- KZ Designz
- Lady Mishka
- Lil Mz Brainstorm
- Maiden of Darkness
- Mariel Designs
- MellieBeans
- Michelle's Myths
- Midnight Shadow
- Misticheskya
- MistyLynn's Creations
- MMeliCrea Designz
- Moon Vixen Designs
- NaSionainne
- Ninaste
- Niqui Designs
- Pandora
- Picsfordesign
- Pink Paradox Productions
- Radyga Designs
- Redefined Designs
- Rissa's Designs
- Schnegge
- ScottishButterfly Creations
- Scrappin Krazy Designs
- Scrappin With Lil Ol Me
- Scraps and the City
- Scraps Dimensions
- Scraps From The Heart
- Scraps N Company
- Scraps with Attitude
- Shining Star Art
- Skyscraps
- Sleek N Sassy Designs
- Sophisticat Simone
- Souldesigner
- Soxsational Scraps
- Spazz
- Starlite and Soul
- Stella Felice
- Tammy Welt
- Tasha's Playground
- The PSP Project
- Thrifty Scraps by Gina
- Tiny Turtle Designs
- Upyourart
- Verymany
- Wendy Gerber
- Whisper In the Wind
- Wick3d Creationz
- Wicked Diabla
- Yude's Kreationz
Blog Archive
Saturday, June 25, 2016
LIGHT FROM WITHIN
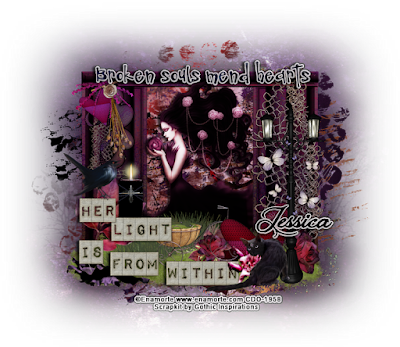
Supplies needed:
I am using the stunning artwork from Enamorte for this tutorial which you can find here
Scrapkit: I am using a stunning kit from Gothic Inspirations called "Suzanne's Light" which you can get by going here
Mask 11 from Horseplay's Pasture which you can find here
Plugins: Lokas 3D Shadow
----------------------------
This tutorial is written for those who have working knowledge of PSPX2 (any version will do).
This tutorial was written by me on June 25, 2016. Please do not copy or paste on any other forum, website or blog provide link back to tut only. Please do not claim as your own. This tutorial is copyrighted to me. Any resemblance to any other tutorial is purely coincidental.
Ok - let's start and remember to save often.
Open up a 750 x 650 blank canvas (we can resize it later)
Select Smudge Element - paste and position in the center of the canvas
Select Window Element - resize by 55%
Paste and position in the center of the canvas
Select your magic wand tool and select the center of the window frame (Add (Shift), RGB Value, Tolerance 25, Contiguous checked, Feather 0)
Selections, Modify, Expand by 5
Paste paper 6
Select invert, delete, select none
Move paper layer below frame layer
Select Mesh Element - resize by 50%
Image mirror and paste on the right side of the frame
Select Cluster 2 Element - resize by 40%
Paste and position on the top left
Select WA3 Element - resize by 50%
Paste and position on the top
Apply Eyecandy Gradient Glow on fat default settings (Glow width 3)
Paste tube of choice where desired
Apply Lokas 3D Shadow at default settings
Select Grass Element - resize by 65%
Paste and position on the bottom
Select Lanterns Element - resize by 45%
Paste and position on the right side
Select Rose Element - resize by 15%
Image mirror and paste on the bottom right
Select Heart Element - resize by 25%
Paste and position on the bottom right
Select Flower 1 Element - resize by 20%
Paste and position on the bottom
Select Kitty Element - resize by 30%
Paste and position on the bottom right
Select Garden Bike Element - resize by 25%
Paste and paste on the bottom
Select Cluster 1 Element - resize by 30%
Image Free Rotate Right by 15% and paste on the bottom
Select WA5 Element - resize by 40%
Paste and position on the bottom left
Select Blackbird Element - resize by 22%
Paste and position on the left side
Select Fabric Flower Element - resize by 30%
Paste and position on the bottom left
Select Candle 1 Element - resize by 25%
Paste and position on the left side
Select Butterflies Element - resize by 22%
Paste and position on the right side
Paste paper 9 on canvas
Apply Mask 11 or mask of choice
Merge group and move to the bottom layer
Add any dropshadows you like
Sharpen any elements as needed
Crop and resize as desired
Add copyright info, license number and name
You're done! Thanks for trying my tutorial!

Labels:Gothic Inspirations | 0
comments
USA LOVE
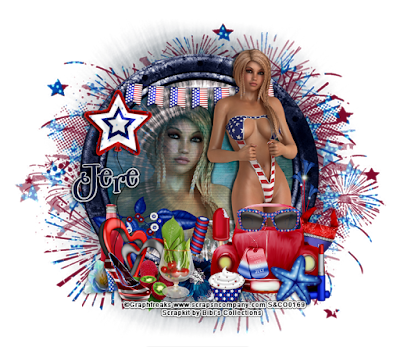
Supplies needed:
I am using the stunning artwork from Graphfreaks for this tutorial which you can find here
Scrapkit: I am using a stunning kit from Bibi's Collections called "USA Love" which you can get by going here
Patriotic Mask 3 from Dee which you can find here
Plugins: Lokas 3D Shadow
----------------------------
This tutorial is written for those who have working knowledge of PSPX2 (any version will do).
This tutorial was written by me on June 25, 2016. Please do not copy or paste on any other forum, website or blog provide link back to tut only. Please do not claim as your own. This tutorial is copyrighted to me. Any resemblance to any other tutorial is purely coincidental.
Ok - let's start and remember to save often.
Open up a 750 x 650 blank canvas (we can resize it later)
Select Frame Element 192 - resize by 85%
Paste and position in the center of the canvas
Select your magic wand tool and select the center of the frame (Add (Shift), RGB Value, Tolerance 25, Contiguous checked, Feather 0)
Selections, Modify, Expand by 5
Paste paper 29
Select invert, delete
Paste close-up tube on paper layer and delete
Select none
Drop close-up to Hard Light
Apply dropshadow and merge down on paper layer
Effect, Texture Effects, Blinds (Width 3, Opactity 15, Horizontal and Light from left/top checked)
Move paper layer below frame layer
Select Element 166 - resize by 55%
Paste and position in the center of the canvas below frame
Select Element 19 - resize by 35%
Paste and position on the top
Select Element 60 - resize by 40%
Paste and position on the left side
Select Element 157 - resize by 45%
Paste and position on the bottom
Select Element 8 - resize by 40%
Paste and position on the bottom left
Select Element 88 - resize by 40%
Paste and position on the bottom right
Paste tube of choice where desired
Apply Lokas 3D Shadow at default settings
Select Element 215 - resize by 65%
Paste and position on the bottom right
Select Element 123 - resize by 45%
Paste and position on the bottom right
Select Element 204 - resize by 30%
Paste and position on the bottom right on car element
Select Element 32 - resize by 30%
Image mirror and paste on the bottom right
Select Element 207 - resize by 30%
Paste and position on the bottom right
Select Element 240 - resize by 50%
Paste and paste on the bottom on car element
Select Element 251 - resize by 20%
Paste and position on the bottom
Select Element 220 - resize by 25%
Paste and position on the bottom
Select Element 191 - resize by 40%
Paste and position on the bottom left
Select Element 168 - resize by 20%
Paste and position on the bottom left
Select Element 77 - resize by 25%
Paste and position on the bottom left
Select Element 1 - resize by 35%
Paste and position on the bottom left
Select Element 160 - resize by 40%
Paste and position on the bottom left
Select Element 202 - resize by 25%
Paste and position on the bottom
Select Element 156 - resize by 40%
Paste and position on the bottom
Select Element 210 - resize by 25%
Paste and position on the bottom
Paste paper 12 on canvas
Apply Mask 3 or mask of choice
Merge group and move to the bottom layer
Add any dropshadows you like
Sharpen any elements as needed
Crop and resize as desired
Add copyright info, license number and name
You're done! Thanks for trying my tutorial!

Labels:Bibi's Collections,Graphfreaks | 0
comments
Friday, June 24, 2016
STEAMPUNK METALS

Supplies needed:
I am using the stunning artwork from Danny Lee for this tutorial which you can find here
Scrapkit: I am using a stunning kit from Bibi's Collections called "Steampunk Metals" which you can get by going here
Mask 122 from Babs Bitzy Designz which you can find here
Plugins: Lokas 3D Shadow
----------------------------
This tutorial is written for those who have working knowledge of PSPX2 (any version will do).
This tutorial was written by me on June 24, 2016. Please do not copy or paste on any other forum, website or blog provide link back to tut only. Please do not claim as your own. This tutorial is copyrighted to me. Any resemblance to any other tutorial is purely coincidental.
Ok - let's start and remember to save often.
Open up a 750 x 650 blank canvas (we can resize it later)
Select Element 34 - resize by 45%
Paste and position in the center of the canvas
Select Frame Element 36 - resize by 85%
Paste and position in the center of the canvas
Select your magic wand tool and select the center of the frame (Add (Shift), RGB Value, Tolerance 25, Contiguous checked, Feather 0)
Selections, Modify, Expand by 5
Paste paper 4
Select invert, delete
Paste close-up tube on paper layer and delete
Select none
Drop close-up to Hard Light
Apply dropshadow and merge down on paper layer
Effect, Texture Effects, Blinds (Width 3, Opactity 15, Horizontal and Light from left/top checked)
Move paper layer below frame layer
Select Element 24 - resize by 75%
Paste and position in the center of the canvas above frame
Select Element 120 - resize by 25%
Paste and position on the top left
Select Element 54 - resize by 25%
Paste and position on the bottom left
Select Element 119 - resize by 30%
Paste and position on the bottom right
Select Element 79 - resize by 30%
Paste and position on the bottom right
Select Element 84 - resize by 35%
Paste and position on the bottom
Paste tube of choice where desired
Apply Lokas 3D Shadow at default settings
Select Element 29 - resize by 30%
Paste and position on the bottom left
Select Element 51 - resize by 25%
Image Free Rotate Right by 15% and paste on the bottom left
Select Element 75 - resize by 25%
Image Free Rotate Left by 15% and paste on the bottom
Select Element 49 - resize by 40%
Paste and position on the bottom
Select Element 30 - resize by 25%
Paste and position on the bottom
Select Element 37 - resize by 30%
Paste and paste on the bottom
Select Element 25 - resize by 20%
Paste and position on the bottom
Select Element 17 - resize by 30%
Paste and position on the bottom
Select Element 20 - resize by 20%
Paste and position on the bottom right
Select Element 77 - resize by 30%
Paste and position on the top
Apply Eyecandy Gradient glow on fat default settings (glow width 3)
Paste paper 11 on canvas
Apply Mask 122 or mask of choice
Merge group and move to the bottom layer
Add any dropshadows you like
Sharpen any elements as needed
Crop and resize as desired
Add copyright info, license number and name
You're done! Thanks for trying my tutorial!

Labels:Bibi's Collections | 0
comments
Thursday, June 23, 2016
ARACHNID

Supplies needed:
I am using the stunning artwork from Danny Lee for this tutorial which you can find here
Scrapkit: I am using a stunning kit from A Lil Mz Brainstorm called "Arachnid Woman" which you can get by going here
Mask 12 from Tonya which you can find here
Plugins: Lokas 3D Shadow
----------------------------
This tutorial is written for those who have working knowledge of PSPX2 (any version will do).
This tutorial was written by me on June 21, 2016. Please do not copy or paste on any other forum, website or blog provide link back to tut only. Please do not claim as your own. This tutorial is copyrighted to me. Any resemblance to any other tutorial is purely coincidental.
Ok - let's start and remember to save often.
Open up a 750 x 650 blank canvas (we can resize it later)
Select Element 23 - resize by 85%
Paste and position on the right side of the canvas
Select Element 32 - resize by 65%
Paste and position on the left side
Select Element 89 - resize by 55%
Paste and position on the right side
Select Element 87 - resize by 65%
Paste and position on the right side
Select Element 119 - resize by 30%
Paste and position on the top right
Select Element 17 - resize by 30%
Paste and position on the right side
Select Element 43 - resize by 65%
Paste and position on the bottom right
Select Element 44 - resize by 75%
Paste and position on the bottom left
Select Element 37 - resize by 22%
Image Free Rotate Left by 15% and paste on the top left
Select Element 85 - resize by 55%
Paste and position on the bottom left
Paste tube of choice where desired
Apply Lokas 3D Shadow at default settings
Select Element 73 - resize by 15%
Image mirror and paste on the bottom left
Select Element 57 - resize by 40%
Paste and position on the bottom left
Select Element 61 - resize by 25%
Paste and position on the bottom right
Select Element 74 - resize by 15%
Paste and position on the bottom right
Select Element 111 - resize by 22%
Paste and position on the bottom
Select Element 56 - resize by 25%
Paste and paste on the right side
Select Element 42 - paste and position on the top of the canvas
Move to the bottom layer
Paste paper 7 on canvas
Apply Mask 12 or mask of choice
Merge group and move to the bottom layer
Add any dropshadows you like
Sharpen any elements as needed
Crop and resize as desired
Add copyright info, license number and name
You're done! Thanks for trying my tutorial!

Labels:Scraps N Company | 0
comments
Thursday, June 16, 2016
BY MY PIRATE
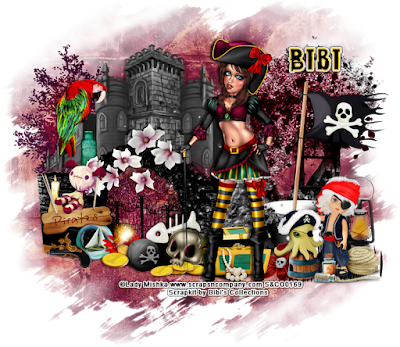
Supplies needed:
I am using the stunning artwork from Lady Mishka for this tutorial which you can find here
Scrapkit: I am using a stunning kit from Bibi's Collections called "Be My Pirate" which you can get by going here
Mask 1 from Kel's Playland which you can find here
Plugins: Lokas 3D Shadow
----------------------------
This tutorial is written for those who have working knowledge of PSPX2 (any version will do).
This tutorial was written by me on June 15, 2016. Please do not copy or paste on any other forum, website or blog provide link back to tut only. Please do not claim as your own. This tutorial is copyrighted to me. Any resemblance to any other tutorial is purely coincidental.
Ok - let's start and remember to save often.
Open up a 750 x 650 blank canvas (we can resize it later)
Select Element 69 - resize by 65%
Paste and position on the top left
Select Element 71 - resize by 45%
Paste and position on the right side
Select Element 73 - resize by 50%
Paste and position on the bottom left
Select Element 67 - resize by 40%
Paste and position on the bottom left
Select Element 72 - resize by 50%
Paste and position on the top left behind castle element
Select Element 36 - resize by 40%
Paste and position on the right side
Select Element 133 - resize by 20%
Paste and position on top of the gate element where desired
Select Element 56 - paste and position on the bottom right where desired
Paste tube of choice where desired
Apply Lokas 3D Shadow at default settings
Select Element 21 - resize by 40%
Paste and position on the bottom right
Select Element 48 - resize by 20%
Paste and position on the bottom right
Select Element 64 - resize by 15%
Paste and position on the bottom right
Select Element 30 - resize by 25%
Paste and position on the bottom below tube layer
Select Element 110 - resize by 20%
Paste and position on the top left
Select Element 50 - resize by 30%
Paste and paste on the bottom left
Select Element 1 - resize by 15%
Paste and position on the bottom left
Select Element 40 - resize by 15%
Paste and position on the bottom left
Select Element 23 - resize by 15%
Paste and position on the bottom left
Select Element 97 - resize by 20%
Paste and position on the bottom
Select Element 32 - resize by 25%
Paste and position on the bottom
Select Element 20 - resize by 20%
Paste and position on the bottom
Select Element 16 - resize by 30%
Paste and position on the bottom
Select Element 33 - resize by 20%
Paste and position on the bottom
Select Element 60 - resize by 40%
Image Free Rotate Left by 15% and paste on the bottom
Paste paper 4 on canvas
Apply Mask 1 or mask of choice
Merge group and move to the bottom layer
Add any dropshadows you like
Sharpen any elements as needed
Crop and resize as desired
Add copyright info, license number and name
You're done! Thanks for trying my tutorial!

Labels:Bibi's Collections | 0
comments
Monday, June 13, 2016
HIPPIE GOLD
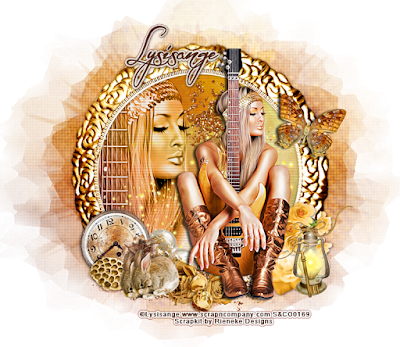
Supplies needed:
I am using the stunning artwork from Lysisange for this tutorial which you can find here
Scrapkit: I am using a stunning kit from Rieneke Designs called "Hippie Gold" which you can get by going here
Circle 1 Mask from Tonya which you can find on the Misfits Blog here
Plugins: Lokas 3D Shadow
----------------------------
This tutorial is written for those who have working knowledge of PSPX2 (any version will do).
This tutorial was written by me on June 13, 2016. Please do not copy or paste on any other forum, website or blog provide link back to tut only. Please do not claim as your own. This tutorial is copyrighted to me. Any resemblance to any other tutorial is purely coincidental.
Ok - let's start and remember to save often.
Open up a 750 x 650 blank canvas (we can resize it later)
Select Frame Element 42 - resize by 85%
Paste and position in the center of the canvas
Select your magic wand tool and select the center of the frame (Add (Shift), RGB Value, Tolerance 25, Contiguous checked, Feather 0)
Selections, Modify, Expand by 5
Paste paper 6
Select invert, delete
Paste close-up of choice on paper layer and delete
Change close-up to Luminence (Legacy)
Apply dropshadow of choice and merge down on paper layer
Move paper layer below frame layer
Effect, Texture Effects, Blinds (Width 2, Opacity 15, Horizontal and Light from left/top checked)
Select Element 30 - resize by 40%
Paste and position on the top of the frame where desired
Select Element 59 - resize by 55%
Paste and position on the bottom of the frame
Select Element 10 - resize by 25%
Image Free Rotate Right by 15% and paste on the top right side
Select Element 17 - resize by 30%
Paste and position on the bottom right
Select Element 40 - resize by 20%
Paste and position on the bottom right
Select Element 23 - resize by 40%
Paste and position on the bottom right
Select Element 39 - resize by 20%
Paste and position on the bottom right
Select Element 60 - resize by 25%
Paste and position on the bottom
Paste tube of choice where desired
Apply Lokas 3D Shadow at default settings
Select Element 51 - resize by 15%
Paste and position on the bottom
Select Element 57 - resize by 25%
Paste and position on the bottom left
Select Element 34 - resize by 15%
Paste and position on the bottom
Select Element 7 - resize by 20%
Paste and position on the bottom
Select Element 20 - resize by 15%
Paste and position on the bottom
Select Element 22 - resize by 20%
Paste and paste on the bottom left
Paste paper 4 on canvas
Apply Mask 1 or mask of choice
Merge group and move to the bottom layer
Add any dropshadows you like
Sharpen any elements as needed
Crop and resize as desired
Add copyright info, license number and name
You're done! Thanks for trying my tutorial!

Labels:Scraps N Company | 0
comments
Sunday, June 12, 2016
MECHANIKA
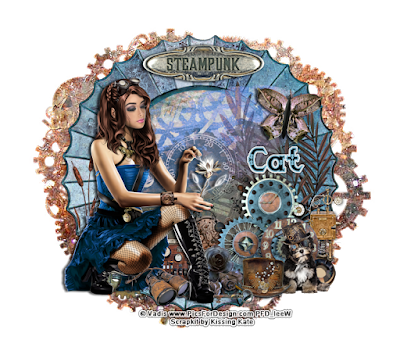
Supplies needed:
I am using the stunning artwork from Vadis for this tutorial which you can find here
Scrapkit: I am using a stunning kit from Kissing Kate called "Mechanika" which you can get by going here
Steampunk Mask 122 from Babs Bitzy Designz which you can find here
Plugins: Lokas 3D Shadow
----------------------------
This tutorial is written for those who have working knowledge of PSPX2 (any version will do).
This tutorial was written by me on June 12, 2016. Please do not copy or paste on any other forum, website or blog provide link back to tut only. Please do not claim as your own. This tutorial is copyrighted to me. Any resemblance to any other tutorial is purely coincidental.
Ok - let's start and remember to save often.
Open up a 750 x 650 blank canvas (we can resize it later)
Select Frame Element 1 - resize by 75%
Paste and position in the center of the canvas
Select your magic wand tool and select the center of the frame (Add (Shift), RGB Value, Tolerance 25, Contiguous checked, Feather 0)
Selections, Modify, Expand by 5
Paste paper 7
Select invert, delete, select none
Move paper layer below frame layer
Select Spray 3a Element - resize by 75%
Paste and position on the top of the frame where desired
Select Element 48 - resize by 40%
Paste and position on the top of the frame
Select Element 10b - resize by 50%
Paste and position on the right side
Select Element 35 - resize by 30%
Paste and position on the bottom right
Select Element 2 - resize by 25%
Paste and position on the bottom right
Select Element 50 - resize by 40%
Paste and position on the bottom left
Select Element 70 - resize by 30%
Paste and position on the bottom
Select Element 69 - resize by 15%
Paste and position on the bottom
Select Element 55 - resize by 20%
Paste and position on the bottom
Select Element 44 - resize by 15%
Paste and position on the bottom
Paste tube of choice where desired
Apply Lokas 3D Shadow at default settings
Select Element 61 - resize by 25%
Paste and position on the top right
Select Element 72 - resize by 25%
Paste and position on the bottom right
Select Element 9 - resize by 25%
Paste and position on the bottom right
Select Element 45 - resize by 20%
Paste and position on the bottom
Select Element 41 - resize by 15%
Paste and position on the bottom
Select Element 29 - resize by 20%
Paste and paste on the bottom
Paste paper 5 on canvas
Apply Mask 122 or mask of choice
Merge group and move to the bottom layer
Add any dropshadows you like
Sharpen any elements as needed
Crop and resize as desired
Add copyright info, license number and name
You're done! Thanks for trying my tutorial!

Labels:Kissing Kate | 0
comments
Monday, June 6, 2016
DARK ROSE
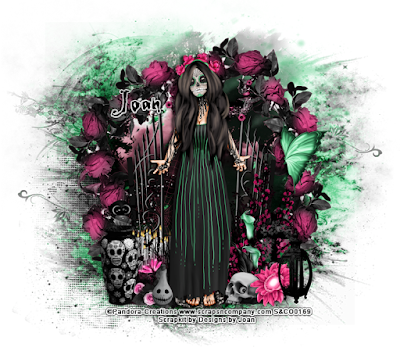
Supplies needed:
I am using the stunning artwork from Pandora Creations for this tutorial which you can find here
Scrapkit: I am using a stunning Collab kit from Designs by Joan called "Dark Roses" which you can get by going here
Mask 21 from Moonbeams and Spiderwebs which you can find here
Plugins: Lokas 3D Shadow
----------------------------
This tutorial is written for those who have working knowledge of PSPX2 (any version will do).
This tutorial was written by me on June 6, 2016. Please do not copy or paste on any other forum, website or blog provide link back to tut only. Please do not claim as your own. This tutorial is copyrighted to me. Any resemblance to any other tutorial is purely coincidental.
Ok - let's start and remember to save often.
Open up a 750 x 650 blank canvas (we can resize it later)
Select Element 52 - resize by 50%
Paste and position in the center of the canvas
Select Frame Element 12 - resize by 75%
Paste and position in the center of the canvas
Select Element 17 - resize by 45%
Paste and position on in the center of the frame
Select Element 37 - resize by 20%
Paste and position on the top right
Select Element 21 - resize by 30%
Paste and position on the right side
Select Element 22 - resize by 40%
Paste and position on the bottom
Select Element 48 - resize by 25%
Paste and position on the bottom right
Select Element 20 - resize by 15%
Paste and position on the bottom right
Paste tube of choice where desired
Apply Lokas 3D Shadow at default settings
Select Element 55 - resize by 25%
Paste and position on the bottom right
Select Element 70 - resize by 20%
Paste and position on the bottom right
Select Element 22 - resize by 12%
Paste and position on the bottom
Select Element 35 - resize by 25%
Paste and position on the bottom right
Select Element 14 - resize by 20%
Paste and paste on the bottom
Select Element 43 - resize by 40%
Paste and position on the bottom left
Select Element 64 - resize by 25%
Paste and position on the bottom left
Select Element 68 - resize by 20%
Paste and position on the bottom left
Select Element 32 - resize by 20%
Paste and position on the bottom
Paste paper 1 on canvas
Apply Mask 21 or mask of choice
Merge group and move to the bottom layer
Add any dropshadows you like
Sharpen any elements as needed
Crop and resize as desired
Add copyright info, license number and name
You're done! Thanks for trying my tutorial!

Labels:Scraps N Company | 0
comments
Sunday, June 5, 2016
MIDNIGHT STEAMPUNK
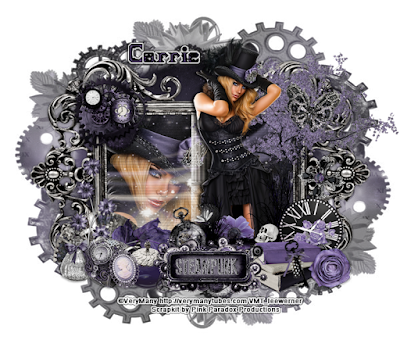
Supplies needed:
I am using the stunning artwork from Verymany for this tutorial which you can find here
Scrapkit: I am using a stunning kit from Pink Paradox Productions called "Midnight Steampunk" which you can get by going here
Steampunk Mask 1 from Babs Bitzy Designz which you can find here
Plugins: Lokas 3D Shadow
----------------------------
This tutorial is written for those who have working knowledge of PSPX2 (any version will do).
This tutorial was written by me on June 5, 2016. Please do not copy or paste on any other forum, website or blog provide link back to tut only. Please do not claim as your own. This tutorial is copyrighted to me. Any resemblance to any other tutorial is purely coincidental.
Ok - let's start and remember to save often.
Open up a 750 x 650 blank canvas (we can resize it later)
Select Frame Element 15 - resize by 65%
Paste and position in the center of the canvas
Select your magic wand tool and select the center of the frame (Add (Shift), RGB Value, Tolerance 25, Contiguous checked, Feather 0)
Selections, Modify, Expand by 5
Paste paper 9
Select invert, delete
Paste close-up tube on paper layer and delete
Select none
Drop close-up to Screen
Apply dropshadow and merge down on paper layer
Effect, Texture Effects, Blinds (Width 3, Opactity 15, Horizontal and Light from left/top checked)
Move paper layer below frame layer
Select Element 110 - resize by 15%
Paste and position on the top left
Select Element 170 - resize by 40%
Paste and position on the right side
Select Element 2 - resize by 30%
Image Free Rotate Right by 15% and paste on the top right
Select Element 39 - resize by 20%
Paste and position on the right side
Select Element 93 - resize by 30%
Paste and position on the bottom right
Select Element 172 - resize by 20%
Image Free Rotate Right by 15% and paste on the bottom right
Select Element 127 - resize by 20%
Paste and position on the bottom right
Paste tube of choice where desired
Apply Lokas 3D Shadow at default settings
Select Element 167 - resize by 12%
Paste and position on the bottom right
Select Element 4 - resize by 15%
Paste and position on the bottom right
Select Element 22 - resize by 12%
Paste and position on the bottom
Select Element 35 - resize by 25%
Paste and position on the bottom
Select Element 31 - resize by 15%
Image Free Rotate Left by 15% and paste on the bottom
Select Element 65 - resize by 25%
Image Free Rotate Left by 15% and paste on the bottom left
Select Element 138 - resize by 25%
Paste and paste on the bottom left
Select Element 78 - resize by 20%
Paste and position on the bottom left
Select Element 166 - resize by 20%
Paste and position on the bottom
Select Element 32 - resize by 20%
Paste and position on the bottom left
Select Element 37 - resize by 15%
Paste and position on the bottom
Select Element 74 - resize by 15%
Image Free Rotate Right by 15% and paste on the bottom left
Paste paper 39 on canvas
Apply Mask 1 or mask of choice
Merge group and move to the bottom layer
Add any dropshadows you like
Sharpen any elements as needed
Crop and resize as desired
Add copyright info, license number and name
You're done! Thanks for trying my tutorial!

Labels:Pink Paradox Productions | 0
comments
Saturday, June 4, 2016
PATRIOTIC PUP
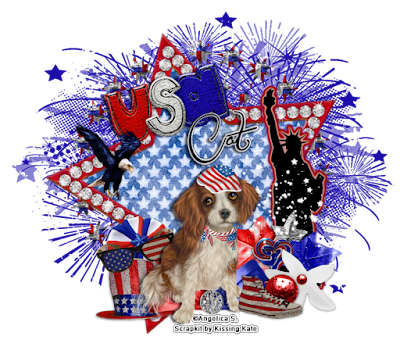
Supplies needed:
I am using the stunning artwork from Angelica S. for this tutorial which you can find here
Scrapkit: I am using a stunning kit from Kissing Kate called "I Love the USA" which you can get by going here
Patriot Mask 3 from Dee which you can find here
Plugins: Lokas 3D Shadow
----------------------------
This tutorial is written for those who have working knowledge of PSPX2 (any version will do).
This tutorial was written by me on June 4, 2016. Please do not copy or paste on any other forum, website or blog provide link back to tut only. Please do not claim as your own. This tutorial is copyrighted to me. Any resemblance to any other tutorial is purely coincidental.
Ok - let's start and remember to save often.
Open up a 750 x 650 blank canvas (we can resize it later)
Select Frame Element 3 - resize by 75%
Paste and position in the center of the canvas
Image Free Rotate Left by 15%
Select your magic wand tool and select the center of the frame (Add (Shift), RGB Value, Tolerance 25, Contiguous checked, Feather 0)
Selections, Modify, Expand by 5
Paste paper 1
Select invert, delete, select none
Move paper layer below frame layer
Select Element 25 - resize by 65%
Paste and position on the right side
Select Element 15 - resize by 40%
Image Free Rotate Left by 15% and paste on the top left
Select Element 1 - resize by 45%
Paste and position on the bottom right
Select Element 52 - resize by 30%
Paste and position on the bottom right
Select Element 44 - resize by 25%
Paste and position on the bottom right
Select Element 13 - resize by 30%
Paste and position on the bottom right
Select Element 29 - resize by 40%
Paste and position on the bottom
Paste tube of choice where desired
Apply Lokas 3D Shadow at default settings
Select Element 14 - resize by 20%
Paste and position on the bottom left
Select Element 39 - resize by 25%
Paste and position on the top left
Select Element 19 - resize by 40%
Paste and position on the bottom left
Select Element 26 - resize by 30%
Paste and position on the bottom left
Select Element 55 - resize by 25%
Image Free Roate Left by 15% and paste on the bottom left
Select Element 30 - resize by 105%
Paste and paste in the center of the canvas
Move to the bottom layer
Add new raster layer and flood-fill with color of choice
Apply Mask 3 or mask of choice
Merge group and move to the bottom layer
Add any dropshadows you like
Sharpen any elements as needed
Crop and resize as desired
Add copyright info, license number and name
You're done! Thanks for trying my tutorial!
Labels:Kissing Kate | 0
comments
Subscribe to:
Comments
(Atom)

