Labels
- Alikas Scraps
- All Dolled Up Store
- Amy Marie
- Annaica
- Arthur Crowe
- Babycakes Scraps
- Barbara Jensen
- Bibi's Collections
- Black Widow Creationz
- Blu Moon
- Bonnies Creations
- Bookwork Dezines
- Broken Sky Dezine
- Carita Creationz
- Carpe Diem Designs
- CDO
- Celinart Pinup
- Celine
- Chacha Creationz
- Charmed Designs
- Cherry Blossom Designs
- Chili Designz
- Cluster Frame
- Creative Misfits
- Creative Scraps by Crys
- Curious Creative Dreams
- Danny Lee
- Derzi
- Designs by Ali
- Designs by Joan
- Designs by Ketura
- Designs By Norella
- Designs by Vi
- Diana Gali
- Diry Art Designs
- Disturbed Scraps
- Dreaming With Bella
- Eclipse Creations
- Elegancefly
- Extras
- Fabulous Designz
- Forum Set
- Foxy's Designz
- Freek's Creation
- FTU
- FwTags
- Goldwasser
- Gothic Inspirations
- Gothic Raven Designs
- Graphfreaks
- Hania's Designs
- Happy Pumpkin Studios
- Horseplay's Pasture Designs
- indie-Zine
- Irish Princess Designs
- Ishika Chowdhury
- Kaci McVay
- Kajenna
- katharine
- Katherine
- Khloe Zoey
- Killer Kitty
- Kissing Kate
- KiwiFirestorm
- Kiya Designs
- Kizzed by Kelz
- KZ Designz
- Lady Mishka
- Lil Mz Brainstorm
- Maiden of Darkness
- Mariel Designs
- MellieBeans
- Michelle's Myths
- Midnight Shadow
- Misticheskya
- MistyLynn's Creations
- MMeliCrea Designz
- Moon Vixen Designs
- NaSionainne
- Ninaste
- Niqui Designs
- Pandora
- Picsfordesign
- Pink Paradox Productions
- Radyga Designs
- Redefined Designs
- Rissa's Designs
- Schnegge
- ScottishButterfly Creations
- Scrappin Krazy Designs
- Scrappin With Lil Ol Me
- Scraps and the City
- Scraps Dimensions
- Scraps From The Heart
- Scraps N Company
- Scraps with Attitude
- Shining Star Art
- Skyscraps
- Sleek N Sassy Designs
- Sophisticat Simone
- Souldesigner
- Soxsational Scraps
- Spazz
- Starlite and Soul
- Stella Felice
- Tammy Welt
- Tasha's Playground
- The PSP Project
- Thrifty Scraps by Gina
- Tiny Turtle Designs
- Upyourart
- Verymany
- Wendy Gerber
- Whisper In the Wind
- Wick3d Creationz
- Wicked Diabla
- Yude's Kreationz
Blog Archive
Sunday, October 30, 2016
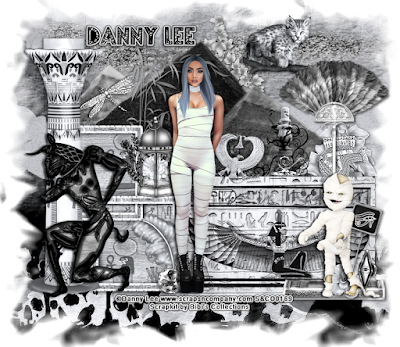
OH MUMMY
Supplies needed:
I am using the stunning artwork from Danny Lee for this tutorial which you can find here
Scrapkit: I am using a stunning kit from Bibi's Collections called "Oh Mummy" which you can get by going here
DmMask 104 which you can find here
Plugins: Lokas 3D Shadow
----------------------------
This tutorial is written for those who have working knowledge of PSPX2 (any version will do).
This tutorial was written by me on October 30, 2016. Please do not copy or paste on any other forum, website or blog provide link back to tut only. Please do not claim as your own. This tutorial is copyrighted to me. Any resemblance to any other tutorial is purely coincidental.
Ok - let's start and remember to save often.
Open up a 750 x 650 blank canvas (we can resize it later)
Select Element 54 - resize by 65%
Paste and position on towards the top of the canvas
Select Element 29 - resize by 40%
Paste and position on the bottom left
Select Element 26 - resize by 30%
Paste and position on the bottom right
Select Element 2 - resize by 45%
Paste and position on the left side
Select Element 108 - resize by 25%
Paste and position on the bottom left
Select Element 22 - resize by 30%
Paste and position on the right side
Select Element 53 - resize by 65%
Paste and position on the left side where desired
Select Element 20 - resize by 30%
Paste and position in the center where desired
Paste tube of choice where desired
Apply Lokas 3D Shadow at default settings
Select Element 63 - resize by 40%
Paste and position on the right side
Select Element 5 - resize by 40%
Paste and position on the right side
Select Element 27 - resize by 25%
Paste and position on the top right below the fan element
Select Element 56 - resize by 75%
Paste and position on the bottom right
Select Element 89 - resize by 30%
Paste and paste on the bottom right
Select Element 107 - resize by 20%
Paste and position on the bottom right
Select Element 92 - resize by 30%
Paste and position on the bottom right
Select Element 72 - resize by 25%
Paste and position on the right side
Select Element 60 - resize by 25%
Paste and position in the center where desired
Select Element 30 - resize by 25%
Paste and position on the bottom
Select Element 76 - resize by 15%
Paste and position on the bottom
Select Element 19 - resize by 20%
Paste and position on the top left
Select Element 42 - resize by 75%
Paste and position on the top and move to the bottom layer
Paste paper 12 on canvas
Apply Mask 104 or mask of choice
Merge group and move to the bottom layer
Add any dropshadows you like
Sharpen any elements as needed
Crop and resize as desired
Add copyright info, license number and name
You're done! Thanks for trying my tutorial!

Labels:Bibi's Collections | 0
comments
Saturday, October 29, 2016
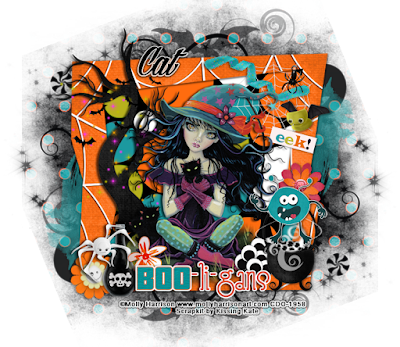
BOOLIGANS
Supplies needed:
I am using the stunning artwork from Molly Harrison for this tutorial which you can find here
Scrapkit: I am using a stunning Collab kit from Kissing Kate called "Booligans" which you can get by going here
Halloween Mask 4 from Toxic Desirez which you can find here
Plugins: Lokas 3D Shadow
----------------------------
This tutorial is written for those who have working knowledge of PSPX2 (any version will do).
This tutorial was written by me on October 29, 2016. Please do not copy or paste on any other forum, website or blog provide link back to tut only. Please do not claim as your own. This tutorial is copyrighted to me. Any resemblance to any other tutorial is purely coincidental.
Ok - let's start and remember to save often.
Open up a 750 x 650 blank canvas (we can resize it later)
Select Frame Element 2 - resize by 85%
Paste and position in the center of the canvas
Select your magic wand tool and select the center of the frame (Add (Shift), RGB Value, Tolerance 25, Contiguous checked, Feather 0)
Selections, Modify, Expand by 5
Paste paper 8
Select invert, delete, select none
Select Element 30 - resize by 55%
Paste and position on the left side
Select Element 32 - resize by 30%
Paste and position on the top left
Select Element 13 - resize by 50%
Paste and position on the left side
Select Element 4 - resize by 20%
Paste and position on the top right
Select Element 19 - resize by 30%
Paste and position on the top right
Select Element 40 - resize by 30%
Paste and position on the top right
Paste tube of choice where desired
Apply Lokas 3D Shadow at default settings
Select Element 38 - resize by 15%
Paste and position on the top right
Select Element 8 - resize by 20%
Image Free Rotate Right by 15% and paste on the top right
Select Element 2 - resize by 25%
Paste and position on the bottom right
Select Element 6 - resize by 15%
Paste and position on the right side
Select Element 35 - resize by 20%
Paste and paste on the bottom right
Select Element 43 - resize by 22%
Paste and position on the bottom right
Select Element 9 - resize by 20%
Paste and position on the bottom left
Select Element 44 - resize by 20%
Paste and position on the bottom left
Select Element 45 - resize by 20%
Image mirror and paste on the bottom left
Select Element 17 - resize by 30%
Paste and position on the bottom
Select Element 51 - resize by 50%
Paste and position on the bottom
Select Element 49 - resize by 40%
Paste and position on the bottom left and move to the botto layer
Image duplicate, mirror and flip
Paste paper 7 on canvas
Apply Mask 4 or mask of choice
Merge group and move to the bottom layer
Add any dropshadows you like
Sharpen any elements as needed
Crop and resize as desired
Add copyright info, license number and name
You're done! Thanks for trying my tutorial!

Labels:Kissing Kate | 0
comments
Friday, October 28, 2016
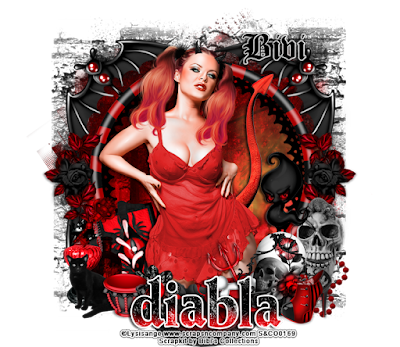
WICKED DIABLA
Supplies needed:
I am using the stunning artwork from Lysisange or this tutorial which you can find here
Scrapkit: I am using a stunning kit from Bibi's Collections called "Diabla" which you can get by going here
Plugins: Lokas 3D Shadow
----------------------------
This tutorial is written for those who have working knowledge of PSPX2 (any version will do).
This tutorial was written by me on October 28, 2016. Please do not copy or paste on any other forum, website or blog provide link back to tut only. Please do not claim as your own. This tutorial is copyrighted to me. Any resemblance to any other tutorial is purely coincidental.
Ok - let's start and remember to save often.
Open up a 750 x 650 blank canvas (we can resize it later)
Select Element 16 - paste and position in the center of the canvas
Select Element 41 - resize by 55%
Image mirror and paste in the center of the canvas
Select Frame Element 1 - resize by 65%
Paste and position in the center of the canvas
Select Element 56 - resize by 25%
Paste and position on the right side of the frame
Image duplicate and mirror
Select Element 54 - resize by 80%
Paste and position on the right side below the frame
Select Element 76 - resize by 20%
Paste and position on the bottom right
Select Element 86 - resize by 25%
Paste and position on the bottom right
Select Element 40 - resize by 30%
Paste and position on right side
Paste tube of choice where desired
Apply Lokas 3D Shadow at default settings
Select Element 39 - resize by 30%
Paste and position on the bottom right
Select Element 88 - resize by 25%
Paste and position on the bottom right
Select Element 30 - resize by 20%
Paste and position on the bottom
Select Element 71 - resize by 30%
Paste and position on the bottom
Select Element 48 - resize by 30%
Paste and paste on the bottom
Select Element 4 - resize by 25%
Paste and position on the bottom
Select Element 73 - resize by 20%
Image Free Rotate Left by 5% and paste on the bottom left
Select Element 65 - resize by 40%
Paste and position on the bottom left
Select Element 78 - resize by 20%
Paste and position on the bottom left
Select Element 72 - resize by 45%
Image mirror and paste on the bottom left
Select Element 82 - resize by 25%
Paste and position on the bottom left
Select Element 70 - resize by 40%
Paste and position on the bottom
Select Element 87 - resize by 30%
Paste and position on the bottom left
Select Element 62 - resize by 20%
Paste and position on the bottom
Add any dropshadows you like
Sharpen any elements as needed
Crop and resize as desired
Add copyright info, license number and name
You're done! Thanks for trying my tutorial!

Labels:Bibi's Collections | 0
comments
Wednesday, October 26, 2016
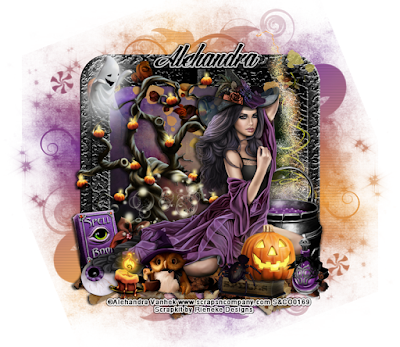
WITCHY INES
Supplies needed:
I am using the stunning artwork from Alehandra Vanhek or this tutorial which you can find here
Scrapkit: I am using a stunning kit from Rieneke Designs called "Ines" which you can get by going here
Halloween Mask 4 from Toxic Desirez which you can find here
Plugins: Lokas 3D Shadow
----------------------------
This tutorial is written for those who have working knowledge of PSPX2 (any version will do).
This tutorial was written by me on October 26, 2016. Please do not copy or paste on any other forum, website or blog provide link back to tut only. Please do not claim as your own. This tutorial is copyrighted to me. Any resemblance to any other tutorial is purely coincidental.
Ok - let's start and remember to save often.
Open up a 750 x 650 blank canvas (we can resize it later)
Select Frame Element 20 - resize by 75%
Paste and position in the center of the canvas
Select your magic wand tool and select the center of the frame (Add (Shift), RGB Value, Tolerance 25, Contiguous checked, Feather 0)
Selections, Modify, Expand by 5
Paste paper 2
Select invert, delete, select none
Move paper layer below frame layer
Select Element 3 - resize by 75%
Paste and position on the top of the frame
Select Element 51 - resize by 75%
Paste and position on the top right side
Select Element 27 - resize by 65%
Paste and position on the left side
Select Element 48 - resize by 40%
Paste and position on the top left
Select Element 50 - resize by 45%
Paste and position on the bottom right
Select Element 23 - resize by 75%
Paste and position on the bottom
Paste tube of choice where desired
Apply Lokas 3D Shadow at default settings
Select Element 26 - resize by 20%
Paste and position on the bottom right
Select Element 12 - resize by 30%
Paste and position on the bottom right below tube layer
Select Element 46 - resize by 22%
Paste and position on the bottom left
Select Element 28 - resize by 15%
Paste and position on the bottom left
Select Element 1 - resize by 15%
Paste and paste on the bottom left
Select Element 53 - resize by 20%
Paste and position on the bottom left
Select Element 40 - resize by 25%
Paste and position on the bottom
Select Element 52 - resize by 15%
Paste and position on the bottom
Select Element 9 - resize by 35%
Paste and position on the canvas where desired
Add new raster layer and flood-fill with gradient or color of choice
Apply Mask 4 or mask of choice
Merge group and move to the bottom layer
Add any dropshadows you like
Sharpen any elements as needed
Crop and resize as desired
Add copyright info, license number and name
You're done! Thanks for trying my tutorial!

Labels:Scraps N Company | 0
comments
Sunday, October 23, 2016
PUMPKIN BABE

Supplies needed:
I am using the stunning artwork from Fiodorova Maria or this tutorial which you can find here
Scrapkit: I am using a stunning kit from Bibi's Collections called "Pumpkin Babe" which you can get by going here
Mask 21 from Moonbeams and Spiderwebs which you can find here
Plugins: Lokas 3D Shadow
----------------------------
This tutorial is written for those who have working knowledge of PSPX2 (any version will do).
This tutorial was written by me on October 23, 2016. Please do not copy or paste on any other forum, website or blog provide link back to tut only. Please do not claim as your own. This tutorial is copyrighted to me. Any resemblance to any other tutorial is purely coincidental.
Ok - let's start and remember to save often.
Open up a 750 x 650 blank canvas (we can resize it later)
Select Frame Element 87 - resize by 65%
Paste and position in the center of the canvas
Select your magic wand tool and select the center of the frame (Add (Shift), RGB Value, Tolerance 25, Contiguous checked, Feather 0)
Selections, Modify, Expand by 5
Paste paper 10
Select invert, delete, select none
Move paper layer below frame layer
Select Element 100 - resize by 20%
Paste and position on the top left
Select Element 29 - resize by 35%
Paste and position on the left side
Select Element 113 - resize by 65%
Paste and position on the right side
Select Element 20 - resize by 30%
Image mirror and paste and position on the right side
Select Element 34 - resize by 20%
Paste and position on the right side
Select Element 35 - resize by 20%
Paste and position on the top right
Paste tube of choice where desired
Apply Lokas 3D Shadow at default settings
Select Element 104 - resize by 8%
Paste and position on the bottom right
Select Element 94 - resize by 25%
Paste and position on the bottom right
Select Element 37 - resize by 15%
Paste and position on the bottom right
Select Element 31 - resize by 20%
Paste and position on the bottom right
Select Element 39 - resize by 40%
Paste and paste on the bottom left
Select Element 47 - resize by 15%
Paste and position on the left side
Select Element 90 - resize by 20%
Paste and position on the bottom left
Select Element 45 - resize by 20%
Paste and position on the bottom left
Select Element 65 - resize by 20%
Paste and position on the bottom
Select Element 40 - resize by 25%
Image Free Rotate by 15% and paste on the bottom below the tube layer
Select Element 2 - resize by 22%
Paste and position on the bottom
Select Element 41 - resize by 30%
Paste and position on the bottom
Select Element 54 - resize by 6%
Paste and position on the bottom
Select Element 19 - resize by 15%
Image Free Rotate Left by 15% and paste and position on the top left
Paste paper 8 on canvas
Apply Mask 21 or mask of choice
Merge group and move to the bottom layer
Add any dropshadows you like
Sharpen any elements as needed
Crop and resize as desired
Add copyright info, license number and name
You're done! Thanks for trying my tutorial!

Labels:Bibi's Collections | 0
comments
Saturday, October 22, 2016
DIABLA
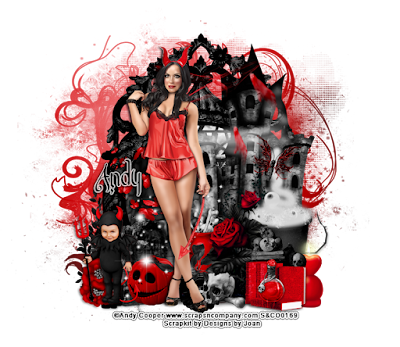
Supplies needed:
I am using the stunning artwork from Andy Cooper for this tutorial which you can find here
Scrapkit: I am using a stunning kit from Designs by Joan called "Diabla" which you can get by going here
Mask 32 from Moonbeams and Spiderwebs which you can find here
Plugins: Lokas 3D Shadow
----------------------------
This tutorial is written for those who have working knowledge of PSPX2 (any version will do).
This tutorial was written by me on October 22, 2016. Please do not copy or paste on any other forum, website or blog provide link back to tut only. Please do not claim as your own. This tutorial is copyrighted to me. Any resemblance to any other tutorial is purely coincidental.
Ok - let's start and remember to save often.
Open up a 750 x 650 blank canvas (we can resize it later)
Select Frame Element 10 -
Paste and position in the center of the canvas
Select your magic wand tool and select the center of the frame (Add (Shift), RGB Value, Tolerance 25, Contiguous checked, Feather 0)
Selections, Modify, Expand by 5
Paste paper 1
Select invert, delete, select none
Move paper layer below frame layer
Select Element 62 - resize by 40%
Paste and position on the right side
Select Element 65 - resize by 30%
Paste and position on the top right
Select Element 64 - resize by 40%
Paste and position on the bottom right
Select Element 56 - resize by 40%
Paste and position on the bottom
Select Element 51 - resize by 25%
Paste and position on the bottom
Select Element 42 - resize by 25%
Paste and position on the bottom
Select Element 76 - resize by 20%
Paste and position on the left side
Paste tube of choice where desired
Apply Lokas 3D Shadow at default settings
Select Element 15 - resize by 30%
Paste and position on the bottom right
Select Element 38 - resize by 25%
Paste and position on the bottom right
Select Element 55 - resize by 25%
Paste and position on the bottom right
Select Element 52 - resize by 20%
Paste and position on the bottom right
Select Element 53 - resize by 20%
Paste and paste on the bottom left
Select Element 44 - resize by 25%
Paste and position on the bottom left
Select Element 72 - resize by 25%
Paste and position on the bottom
Select Element 5 - resize by 30%
Paste and position on the bottom left
Select Element 73 - resize by 25%
Image Free Rotate Right by 15% and paste on the right side
Paste paper 4 on canvas
Apply Mask 32 or mask of choice
Merge group and move to the bottom layer
Add any dropshadows you like
Sharpen any elements as needed
Crop and resize as desired
Add copyright info, license number and name
You're done! Thanks for trying my tutorial!

Labels:Scraps N Company | 0
comments
Wednesday, October 19, 2016
GOTH DEMON

Supplies needed:
I am using the stunning artwork from Danny Lee for this tutorial which you can find here
Scrapkit: I am using a stunning kit from Rieneke Designs called "The Goth Demon" which you can get by going here
Mask 209 from Simone which you can find here
Plugins: Lokas 3D Shadow
----------------------------
This tutorial is written for those who have working knowledge of PSPX2 (any version will do).
This tutorial was written by me on October 19, 2016. Please do not copy or paste on any other forum, website or blog provide link back to tut only. Please do not claim as your own. This tutorial is copyrighted to me. Any resemblance to any other tutorial is purely coincidental.
Ok - let's start and remember to save often.
Open up a 750 x 650 blank canvas (we can resize it later)
Select Element 40
Paste and position in the center of the canvas
Select Element 6 - resize by 75%
Paste and position on the right side below the gate element
Select Element 8
Paste and position on the bottom
Select Element 42 - resize by 30%
Paste and position on the bottom
Select Element 28
Paste and position on the bottom below gate element
Select Element 48 - resize by 30%
Paste and position on the top where desired
Select Element 35 - resize by 25%
Paste and position on the top right
Select Element 33 - resize by 50%
Paste and position on the bottom left
Select Element 24 - resize by 25%
Paste and position on the top left
Paste tube of choice where desired
Apply Lokas 3D Shadow at default settings
Select Element 15 - resize by 40%
Paste and position on the bottom right
Select Element 47 - resize by 20%
Paste and position on the bottom right
Select Element 46 - resize by 15%
Paste and position on the bottom right
Select Element 14 - resize by 20%
Paste and position on the bottom right
Select Element 26 - resize by 30%
Paste and paste on the bottom right
Select Element 34 - resize by 25%
Paste and position on the bottom
Select Element 13 - resize by 30%
Paste and position on the bottom left
Select Element 1 - resize by 20%
Paste and position on the bottom left
Select Element 12 - resize by 45%
Paste and position on the bottom right
Paste paper 7 on canvas
Apply Mask 209 or mask of choice
Merge group and move to the bottom layer
Add any dropshadows you like
Sharpen any elements as needed
Crop and resize as desired
Add copyright info, license number and name
You're done! Thanks for trying my tutorial!

Labels:Scraps N Company | 0
comments
Sunday, October 16, 2016
FORBIDDEN EVIL

Supplies needed:
I am using the stunning artwork from Ismael Rac for this tutorial which you can find here
Scrapkit: I am using a stunning kit from Bibi's Collections called "Forbiden Evil" which you can get by going here
Mask 206 from Simone which you can find here
Plugins: Lokas 3D Shadow
----------------------------
This tutorial is written for those who have working knowledge of PSPX2 (any version will do).
This tutorial was written by me on October 16, 2016. Please do not copy or paste on any other forum, website or blog provide link back to tut only. Please do not claim as your own. This tutorial is copyrighted to me. Any resemblance to any other tutorial is purely coincidental.
Ok - let's start and remember to save often.
Open up a 750 x 650 blank canvas (we can resize it later)
Select Frame Element 84 - resize by 40%
Paste and position in the center of the canvas
Select your magic wand tool and select the center of the frame (Add (Shift), RGB Value, Tolerance 25, Contiguous checked, Feather 0)
Selections, Modify, Expand by 5
Paste paper 1
Select invert, delete, select none
Move paper layer below frame layer
Select Element 25 - resize by 45%
Paste and position on the top right
Select Element 34 - resize by 45%
Paste and position on the left side
Select Element 1 - resize by 20%
Paste and position on the left side
Select Element 104 - resize by 40%
Image Free Rotate Left by 15% and paste on the top left
Select Element 22 - resize by 20%
Paste and position on the right side
Select Element 5 - resize by 55%
Paste and position on the bottom
Select Element 42 - resize by 25%
Paste and position on the top right
Paste tube of choice where desired
Apply Lokas 3D Shadow at default settings
Select Element 68 - resize by 20%
Paste and position on the bottom right
Select Element 98 - resize by 35%
Paste and position on the bottom right
Select Element 12 - resize by 15%
Paste and position on the bottom right
Select Element 101 - resize by 25%
Paste and position on the bottom left
Select Element 31 - resize by 30%
Paste and paste on the bottom left
Select Element 113 - resize by 25%
Image Free Rotate Left by 15% and paste on the bottom left
Select Element 9 - resize by 30%
Paste and position on the bottom left
Select Element 3 - resize by 30%
Paste and position on the bottom left
Select Element 72 - resize by 20%
Paste and position on the bottom
Select Element 85 - resize by 10%
Paste and position on the bottom
Select Element 62 - resize by 15%
Paste and position on the bottom
Select Element 39 - resize by 15%
Image Free Rotate Right by 15% and paste on the bottom
Select Element 100 - resize by 15%
Paste and position in the center where desired
Paste paper 5 on canvas
Apply Mask 206 or mask of choice
Merge group and move to the bottom layer
Add any dropshadows you like
Sharpen any elements as needed
Crop and resize as desired
Add copyright info, license number and name
You're done! Thanks for trying my tutorial!

Labels:Bibi's Collections | 0
comments
Saturday, October 15, 2016
PUMPKINS AND POTIONS
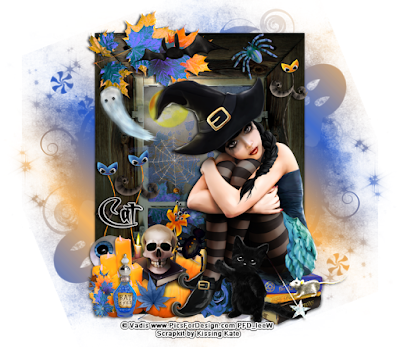
Supplies needed:
I am using the stunning artwork from Vadis for this tutorial which you can find here
Scrapkit: I am using a stunning kit from Kissing Kate called "Pumpkins and Potions" which you can get by going here
Halloween Mask 4 from Toxic Desirez which you can find here
Plugins: Lokas 3D Shadow
----------------------------
This tutorial is written for those who have working knowledge of PSPX2 (any version will do).
This tutorial was written by me on October 15, 2016. Please do not copy or paste on any other forum, website or blog provide link back to tut only. Please do not claim as your own. This tutorial is copyrighted to me. Any resemblance to any other tutorial is purely coincidental.
Ok - let's start and remember to save often.
Open up a 750 x 650 blank canvas (we can resize it later)
Select Element 43 - resize by 65%
Paste and position in the center of the canvas
Select your selection wand tool and select the center of the frame (Rectangle (Add Shift), Feather 0, Anti-alias checked)
Paste paper 3
Select invert, delete, select none
Move paper layer below window element layer
Select Element 44 - resize by 25%
Paste and position on the top left
Select Element 72 - resize by 20%
Paste and position in the center of the window frame where desired
Select Element 25 - resize by 35%
Paste and position on the top left
Select Element 64 - resize by 30%
Paste and position on top left
Select Element 10 - resize by 20%
Paste and position on the top left
Select Element 74 - resize by 15%
Paste and position on the top right
Select Element 58 - resize by 25%
Paste and position on the top right
Paste tube of choice where desired
Apply Lokas 3D Shadow at default settings
Select Element 57 - resize by 30%
Paste and position on the bottom left
Select Element 8 - resize by 15%
Paste and position on the bottom left
Select Element 11 - resize by 40%
Paste and position on the bottom left
Select Element 53 - resize by 20%
Paste and position on the bottom left
Select Element 40 - resize by 20%
Paste and paste on the bottom
Select Element 51 - resize by 250%
Paste and position on the bottom
Select Element 50 - resize by 20%
Paste and position on the bottom
Select Element 39 - resize by 15%
Paste and position on the bottom
Select Element 75 - resize by 25%
Paste and position on the bottom right below tube layer
Select Element 52 - resize by 20%
Paste and position on the bottom right
Select Element 79 - resize by 20%
Paste and position on the bottom right
Select Element 30 - resize by 15%
Paste and position on the bottom below tube layer
Add new raster layer and flood-fill with color or gradient of choice
Apply Mask 4 or mask of choice
Merge group and move to the bottom layer
Add any dropshadows you like
Sharpen any elements as needed
Crop and resize as desired
Add copyright info, license number and name
You're done! Thanks for trying my tutorial!

Labels:Kissing Kate | 0
comments
Friday, October 14, 2016
GOTHIC DE LA MUERTA
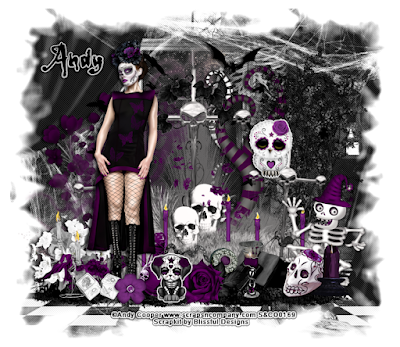
Supplies needed:
I am using the stunning artwork from Andy Cooper for this tutorial which you can find here
Scrapkit: I am using a stunning kit from Blissful Designs called "Gothic Skull" which you can get by going here
DmMask 104 from which you can find here
Plugins: Lokas 3D Shadow, Penta - Jeans
----------------------------
This tutorial is written for those who have working knowledge of PSPX2 (any version will do).
This tutorial was written by me on October 14, 2016. Please do not copy or paste on any other forum, website or blog provide link back to tut only. Please do not claim as your own. This tutorial is copyrighted to me. Any resemblance to any other tutorial is purely coincidental.
Ok - let's start and remember to save often.
Open up a 750 x 650 blank canvas (we can resize it later)
Select Element 30 -
Paste and position on the bottom of the canvas
Select Element 19 - Paste and position in the center where desired
Select Element 46 - resize by 55%
Paste and position on the right side
Select Element 22 - resize by 75%
Paste and position on the right side
Select Element 48 - resize by 55%
Paste and position on the left side
Select Element 8 - resize by 30%
Paste and position in the center above cross element
Select Element 27 - resize by 30%
Paste and position on the bottom left
Paste tube of choice where desired
Apply Lokas 3D Shadow at default settings
Select Element 35 - resize by 30%
Paste and position on the bottom left
Select Element 40 - resize by 25%
Paste and position on the bottom left
Select Element 67 - resize by 40%
Paste and position on the bottom right
Select Element 41 - resize by 40%
Paste and position on the bottom right
Select Element 63 - resize by 15%
Paste and paste on the bottom right
Select Element 72 - resize by 30%
Paste and position on the bottom
Select Element 36 - resize by 30%
Paste and position on the bottom
Select Element 61 - resize by 30%
Paste and position on the bottom
Select Element 43 - resize by 30%
Paste and position on the bottom
Select Element 71 - resize by 20%
Paste and position on the bottom
Select Element 4 - resize by 20%
Paste and position on the bottom
Select Element 79 - resize by 20%
Paste and position on the bottom
Select Element 7 - resize by 25%
Paste and position on the bottom
Select Element 2 - resize by 20%
Paste and position on the right side
Paste paper 2 on canvas
Apply Mask 104 or mask of choice
Merge group and move to the bottom layer
Resize by 95%
Apply Penta - Jeans on default settings
Add any dropshadows you like
Sharpen any elements as needed
Crop and resize as desired
Add copyright info, license number and name
You're done! Thanks for trying my tutorial!

Labels:Scraps N Company | 0
comments
Sunday, October 9, 2016
SAUCY YING

Supplies needed:
I am using the stunning artwork from Selisan Al-Gaib for this tutorial which you can find here
Scrapkit: I am using a stunning kit from Kizzed by Kelz called "Ying" which you can get by going here
Mask 4 from Dee which you can find here
Plugins: Lokas 3D Shadow
----------------------------
This tutorial is written for those who have working knowledge of PSPX2 (any version will do).
This tutorial was written by me on October 9, 2016. Please do not copy or paste on any other forum, website or blog provide link back to tut only. Please do not claim as your own. This tutorial is copyrighted to me. Any resemblance to any other tutorial is purely coincidental.
Ok - let's start and remember to save often.
Open up a 750 x 650 blank canvas (we can resize it later)
Select Frame Element 97
Paste and position in the center of the canvas
Select your magic wand tool and select the center of the frame (Add (Shift), RGB Value, Tolerance 25, Contiguous checked, Feather 0)
Selections, Modify, Expand by 75
Paste paper 10
Select invert, delete, select none
Move paper layer below frame layer
Select Element 51 - resize by 65%
Paste and position on the top of the paper layer
Select Element 39 - resize by 75%
Paste and position on the right side
Select Element 45 - resize by 75%
Paste and position on the top of the frame
Select Element 118 - resize by 55%
Image mirror and paste on the top right
Select Element 60 - resize by 30%
Paste and position on the bottom right
Image, duplicate, mirror and flip
Select Element 8 - resize by 50%
Paste and position on the bottom left
Select Element 62 - resize by 30%
Paste and position on the bottom left
Select Element 41 - resize by 40%
Paste and position on the bottom
Paste tube of choice where desired
Apply Lokas 3D Shadow at default settings
Select Element 66 - resize by 55%
Paste and position on the bottom left
Select Element 54 - resize by 15%
Paste and position on the bottom left
Select Element 23 - resize by 20%
Paste and position on the bottom left
Select Element 28 - resize by 15%
Paste and position on the bottom left
Select Element 121 - resize by 25%
Paste and paste on the bottom right
Select Element 71 - resize by 30%
Paste and position on the bottom right
Select Element 127 - resize by 15%
Paste and position on the bottom right
Select Element 103 - resize by 15%
Paste and position on the bottom
Select Element 75 - resize by 25%
Paste and position on the bottom
Select Element 35 - resize by 20%
Paste and position on the bottom
Select Element 11 - resize by 20%
Paste and position on the bottom
Select Element 46 - resize by 25%
Paste and position on the bottom
Select Element 67 - resize by 25%
Paste and position on the bottom
Select Element 56 - resize by 20%
Paste and position on the bottom
Select Element 69 - resize by 20%
Paste and position on the top right
Select Element 4 - resize by 35%
Paste and position on the canvas where desired
Paste paper 2 on canvas
Apply Mask 4 or mask of choice
Merge group and move to the bottom layer
Add any dropshadows you like
Sharpen any elements as needed
Crop and resize as desired
Add copyright info, license number and name
You're done! Thanks for trying my tutorial!

Labels:Scraps N Company | 0
comments
AUTUMN PICKLES
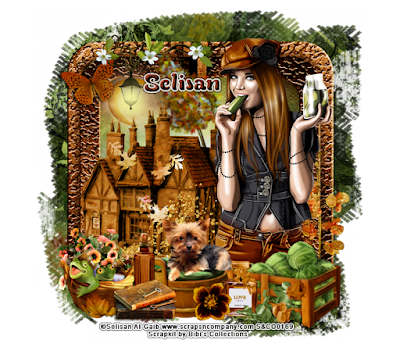
Supplies needed:
I am using the stunning artwork from Selisan Al-Gaib for this tutorial which you can find here
Scrapkit: I am using a stunning kit from Bibi's Collections called "Sossy" which you can get by going here
Plugins: Lokas 3D Shadow
----------------------------
This tutorial is written for those who have working knowledge of PSPX2 (any version will do).
This tutorial was written by me on October 9, 2016. Please do not copy or paste on any other forum, website or blog provide link back to tut only. Please do not claim as your own. This tutorial is copyrighted to me. Any resemblance to any other tutorial is purely coincidental.
Ok - let's start and remember to save often.
Open up a 750 x 650 blank canvas (we can resize it later)
Select Element 110 - resize by 52%
Paste and position in the center of the canvas
Select Frame Element 85 - resize by 55%
Paste and position in the center of the canvas
Select your magic wand tool and select the center of the frame (Add (Shift), RGB Value, Tolerance 25, Contiguous checked, Feather 0)
Selections, Modify, Expand by 5
Paste paper 3
Select invert, delete, select none
Move paper layer below frame layer
Select Element 87 - resize by 20%
Paste and position on the top left above paper layer
Select Element 56 - resize by 25%
Image Free Rotate Left by 15% and paste on the top where desired
Select Element 23 - resize by 40%
Paste and position on the bottom left
Select Element 101 - resize by 30%
Paste and position on the top left
Select Element 12 - resize by 15%
Image Free Rotate left by 15% and paste on the top left
Select Element 37 - resize by 22%
Paste and position on the bottom right
Paste tube of choice where desired
Apply Lokas 3D Shadow at default settings
Select Element 47 - resize by 25%
Paste and position on the bottom right
Select Element 6 - resize by 10%
Paste and position on the bottom right
Select Element 48 - resize by 25%
Paste and position on the bottom
Select Element 4 - resize by 25%
Paste and paste on the bottom
Select Element 5 - resize by 20%
Paste and position on the bottom
Select Element 22 - resize by 10%
Paste and position on the bottom
Select Element 15 - resize by 8%
Paste and position on the bottom
Select Element 7 - resize by 15%
Paste and position on the bottom left
Select Element 96 - resize by 20%
Image mirror and paste on the bottom left
Select Element 9 - resize by 15%
Paste and position on the bottom left
Select Element 107 - resize by 20%
Paste and position on the bottom left
Select Element 42 - resize by 15%
Paste and position on the left side
Add any dropshadows you like
Sharpen any elements as needed
Crop and resize as desired
Add copyright info, license number and name
You're done! Thanks for trying my tutorial!

Labels:Bibi's Collections | 0
comments
Sunday, October 2, 2016
PUMPKIN HARVEST
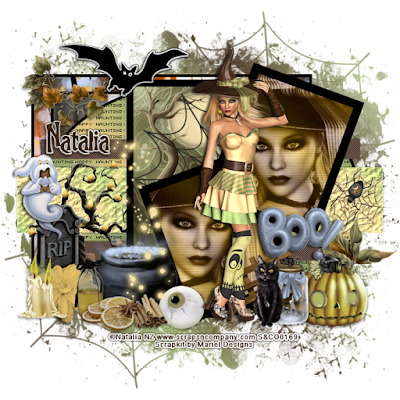
Supplies needed:
I am using the amazing artwork from Natalia NZ for this tutorial which is part of the Halloween Pumpkin Harvest Collab that you can find here
Scrapkit: I am using a stunning kit from Mariel's Designs from the same Collab called "Halloween Pumpkin Harvest" which you can get by going here
Template 2 from BettyCreationz which you can find here
Halloween Mask 6 from Toxic Desirez which you can find here
Plugins used: Penta - Jeans, Eyecandy 4000 - Gradient Glow, Lokas 3D Shadow
----------------------------
This tutorial is written for those who have working knowledge of PSPX2 (any version will do).
This tutorial was written by me on October 2, 2016. Please do not copy or paste on any other forum, website or blog provide link back to tut only. Please do not claim as your own. This tutorial is copyrighted to me. Any resemblance to any other tutorial is purely coincidental.
Ok - let's start and remember to save often.
Open the template and using your shortcut keys on your keyboard (SHIFT+D) duplicate the template as a new image. Close the original and delete the copywrite layer.
Select Rectangle Raster 15 layer
Select all, float, defloat
Add new raster layer and flood-fill with color or gradient of choice (Linear style, Angle 45, Repeat 2)
Paste close-up tube of choice on top of gradient and delete
Change tubes to Luminence - Legacy
Apply Xero Radiance at default settings or random setting of choice
Drop opacity down on tubes to 80%
Apply dropshadow and merge close-ups down on top of gradient layer
Effect, Texture Effects, Blinds (Width 2, Opactity 25, Horizontal and Light from left/top checked)
Delete/Hide original rectangle layer
Select Rectangle Raster 13 and repeat above steps
Select Rectangle Raster 1 layer
Select all, float, defloat
Paste Element 31 on top
Select invert, delete, select none
Delete/Hide original rectangle layer
Select Rectangle Raster 3 layer
Select all, float, defloat
Paste paper 5
Select invert, delete, select none
Delete/Hide original rectangle layer
Select Oval Raster 6 layer
Select all, float, defloat
Add new raster layer and flood-fill with gradient color of choice
Select none
Delete/Hide original oval layer
Select Rectangle Raster 8 layer
Select all, fload, defloat
Add new raster layer and flood-fill with gradient color of choice
Select none
Apply Effects, Texture Effects, Texture with the following Hatch Lump Texture:
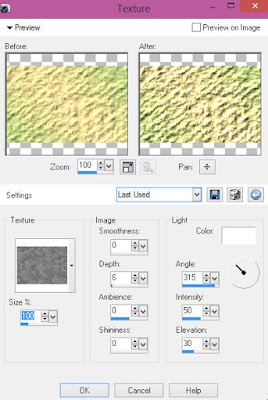
Select Rectangles Raster 9 layer
Select all, float, defloat
Add new raster layer and flood-fill with color of choice
Select none
Apply Penta Jeans with the following settings:
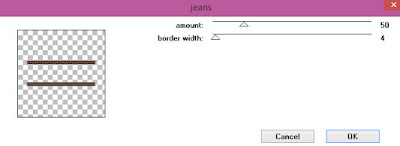
Select Rectangle Raster 10 layer
Select all, float, defloat
Paste paper 2
Select invert, delete, select none
Delete/hide rectangle raster 10
Select Element 20 - resize by 40%
Paste and position on the top of the paper layer where desired
Copy and paste tube of choice and position where desired
Apply Lokas 3D Shadow at default settings
Select Element 16 - resize by 30%
Paste and position on the top left
Select Element 1 - resize by 40%
Paste and position on left side
Select Element 26 - resize by 25%
Paste and position on left side
Select Element 5 - resize by 25%
Paste and position on bottom left
Select Element 28 - resize by 20%
Paste and position on bottom left
Select Element 38 - resize by 30%
Paste and position on bottom
Select Element 77 - resize by 20%
Paset and position on bottom left
Select Element 67 - resize by 25%
Paste and position on bottom
Select Element 81 - resize by 15%
Paste and position on bottom
Select Element 40 - resize by 20%
Paste and position on right side
Select Element 27 - resize by 25%
Paste and position on right side
Select Element 14 - resize by 25%
Image Free Rotate Right by 15% and paste on the bottom right
Select Element 18 - resize by 22%
Image mirror and paste on the bottom right
Select Element 70 - resize by 20%
Paste and position on the bottom right
Select Element 83 - resize by 25%
Paste and position on the bottom below tube layer
Select Element 78 - resize by 22%
Paste and position on the bottom
Select Element 84 - resize by 65%
Paste and position on the canvas where desired
Select Bat Raster 17 Element
Apply Eyecandy Gradient Glow on fat default settings
Select new raster layer and flood fill with color or gradient of choice
Move layer to the bottom of the template
Apply Mask 6 or mask of choice
Merge group and move to the bottom layer
Add any additional elements you like.
Add any dropshadows you like
Crop and resize as desired
Add copyright info, license number and name
You're done! Thanks for trying my tutorial!

Labels:Scraps N Company | 0
comments
Saturday, October 1, 2016
BOOTIFUL NIGHTMARE
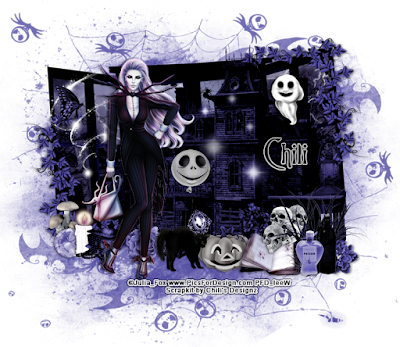
Supplies needed:
I am using the stunning artwork from Julia Fox for this tutorial which you can find here
Scrapkit: I am using a stunning kit from Chili Designz called "BootiFall" which you can get by going here
Halloween Mask 7 from Toxic Desirez which you can find here
Plugins: Lokas 3D Shadow
----------------------------
This tutorial is written for those who have working knowledge of PSPX2 (any version will do).
This tutorial was written by me on October 1, 2016. Please do not copy or paste on any other forum, website or blog provide link back to tut only. Please do not claim as your own. This tutorial is copyrighted to me. Any resemblance to any other tutorial is purely coincidental.
Ok - let's start and remember to save often.
Open up a 750 x 650 blank canvas (we can resize it later)
Select Frame Element 1 - resize by 65%
Paste and position in the center of the canvas
Move frame up about 1 inch from the top
Select your magic wand tool and select the center of each square in the frame (Add (Shift), RGB Value, Tolerance 25, Contiguous checked, Feather 0)
Selections, Modify, Expand by 5
Paste paper 1
Select invert, delete, select none
Move paper layer below frame layer
Select Ivy Element - resize by 30%
Image Free Rotate Left by 10% and paste on the top right above frame
Image duplicate, mirror and flip
Reposition ivy where desired on bottom left
Select House Element - resize by 55%
Paste and position on the right side of the frame
Select Lamp Element - resize by 30%
Paste and position on the right side
Select Grass Element - resize by 30%
Paste and position on the bottom right
Select Flower 6 Element - resize by 20%
Paste and position on the bottom right
Select Bottle 3 Element - resize by 30%
Paste and position on the bottom right
Select Skulls Element - resize by 25%
Paste and position on the bottom right below grass element
Select Book Element - resize by 25%
Paste and position on the bottom right
Select Bottle Element - resize by 30%
Paste and position on the bottom right
Paste tube of choice where desired
Apply Lokas 3D Shadow at default settings
Select Sparkles 3 Element - resize by 75%
Paste and position on the canvas where desired
Select Pumpkin Element - resize by 30%
Paste and position on the bottom
Select Balloon Element - resize by 30%
Paste and position on the canvas where desired
Select Ghost Element - resize by 25%
Paste and position on the top right
Select Gem2 Element - resize by 20%
Image Free Rotate Left by 15% and paste on the bottom
Select Cat Element - resize by 25%
Paste and position on the bottom
Select Sparkles Element - resize by 40%
Paste and position on the top left
Select Butterfly 2 Element - resize by 30%
Paste and position on the top left
Select Mushrooms Element - resize by 20%
Paste and position on the bottom left
Select Gem Element - resize by 65%
Paste and position on the bottom left
Select Candle Element - resize by 30%
Paste and position on the bottom left
Select Chest Element - resize by 25%
Paste and position on the bottom left
Select Flower Element - resize by 30%
Paste and position on the bottom below tube layer
Select Element 20 - resize by 15%
Add new raster layer and flood-fill with color of choice
Apply Mask 7 or mask of choice
Merge group and move to the bottom layer
Add any dropshadows you like
Sharpen any elements as needed
Crop and resize as desired
Add copyright info, license number and name
You're done! Thanks for trying my tutorial!

Labels:Chili Designz | 0
comments
Subscribe to:
Comments
(Atom)


