Labels
- Alikas Scraps
- All Dolled Up Store
- Amy Marie
- Annaica
- Arthur Crowe
- Babycakes Scraps
- Barbara Jensen
- Bibi's Collections
- Black Widow Creationz
- Blu Moon
- Bonnies Creations
- Bookwork Dezines
- Broken Sky Dezine
- Carita Creationz
- Carpe Diem Designs
- CDO
- Celinart Pinup
- Celine
- Chacha Creationz
- Charmed Designs
- Cherry Blossom Designs
- Chili Designz
- Cluster Frame
- Creative Misfits
- Creative Scraps by Crys
- Curious Creative Dreams
- Danny Lee
- Derzi
- Designs by Ali
- Designs by Joan
- Designs by Ketura
- Designs By Norella
- Designs by Vi
- Diana Gali
- Diry Art Designs
- Disturbed Scraps
- Dreaming With Bella
- Eclipse Creations
- Elegancefly
- Extras
- Fabulous Designz
- Forum Set
- Foxy's Designz
- Freek's Creation
- FTU
- FwTags
- Goldwasser
- Gothic Inspirations
- Gothic Raven Designs
- Graphfreaks
- Hania's Designs
- Happy Pumpkin Studios
- Horseplay's Pasture Designs
- indie-Zine
- Irish Princess Designs
- Ishika Chowdhury
- Kaci McVay
- Kajenna
- katharine
- Katherine
- Khloe Zoey
- Killer Kitty
- Kissing Kate
- KiwiFirestorm
- Kiya Designs
- Kizzed by Kelz
- KZ Designz
- Lady Mishka
- Lil Mz Brainstorm
- Maiden of Darkness
- Mariel Designs
- MellieBeans
- Michelle's Myths
- Midnight Shadow
- Misticheskya
- MistyLynn's Creations
- MMeliCrea Designz
- Moon Vixen Designs
- NaSionainne
- Ninaste
- Niqui Designs
- Pandora
- Picsfordesign
- Pink Paradox Productions
- Radyga Designs
- Redefined Designs
- Rissa's Designs
- Schnegge
- ScottishButterfly Creations
- Scrappin Krazy Designs
- Scrappin With Lil Ol Me
- Scraps and the City
- Scraps Dimensions
- Scraps From The Heart
- Scraps N Company
- Scraps with Attitude
- Shining Star Art
- Skyscraps
- Sleek N Sassy Designs
- Sophisticat Simone
- Souldesigner
- Soxsational Scraps
- Spazz
- Starlite and Soul
- Stella Felice
- Tammy Welt
- Tasha's Playground
- The PSP Project
- Thrifty Scraps by Gina
- Tiny Turtle Designs
- Upyourart
- Verymany
- Wendy Gerber
- Whisper In the Wind
- Wick3d Creationz
- Wicked Diabla
- Yude's Kreationz
Blog Archive
Sunday, March 19, 2017
DEAD HOLLOWIE


Labels:Extras,Scraps N Company | 0
comments
Saturday, March 18, 2017
BLOOMING BUTTERFLY
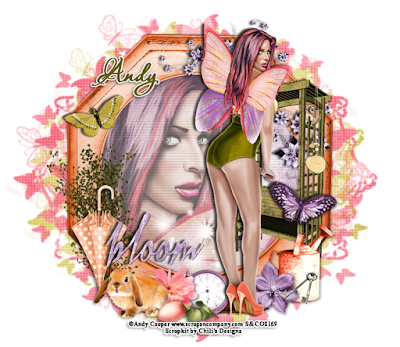
Supplies needed:
I am using the stunning artwork from Andy Cooper for this tutorial which you can find here
Scrapkit: I am using a stunning Collab kit from Chili's Designz called "Butterflies" which you can get by going here
Mask 2 from Kissing Kate which you can find here
Plugins: Lokas 3D Shadow
----------------------------
This tutorial is written for those who have working knowledge of PSPX2 (any version will do).
This tutorial was written by me on March 18 , 2017. Please do not copy or paste on any other forum, website or blog provide link back to tut only. Please do not claim as your own. This tutorial is copyrighted to me. Any resemblance to any other tutorial is purely coincidental.
Ok - let's start and remember to save often.
Open up a 750 x 650 blank canvas (we can resize it later)
Select Frame Element 8 - resize by 75%
Paste and position in the center of the canvas
Select your magic wand tool and select the center of the frame (Add (Shift), RGB Value, Tolerance 25, Contiguous checked, Feather 0)
Selections, Modify, Expand by 5
Paste paper 2
Select invert, delete
Paste close-up tube on paper layer and delete
Select none
Drop opacity down to 60%
Apply dropshadow and merge down on paper layer
Effect, Texture Effects, Blinds (Width 3, Opactity 15, Horizontal and Light from left/top checked)
Move paper layer below frame layer
Select Vine Element - resize by 40%
Image Free Rotate Left by 15% and paste on the top right
Select Trellis 2 Element - resize by 50%
Paste and position on the right side
Select Deco Element - resize by 40%
Paste and position on the right side
Select Can Element - resize by 40%
Paste and position on the bottom right
Select Butterfly 7 Element - resize by 40%
Image mirror and paste on the bottom right
Select Flower 5 Element - resize by 25%
Paste and position on the bottom right
Select Key Element - resize by 25%
Paste and position on the bottom right
Select Sparkles Element - resize by 50%
Paste and position on the bottom
Paste tube of choice where desired
Apply Lokas 3D Shadow at default settings
Select Butterfly 2 Element - resize by 40%
Paste and position on the top left
Select Greenery 3 Element - resize by 45%
Paste and position on the bottom left
Select Parapluie Element - resize by 45%
Paste and position on the bottom left
Select Clock Element - resize by 40%
Paste and position on the bottom
Select Element 20 - resize by 40%
Paste and position on the bottom
Select Flower Element - resize by 25%
Paste and paste on the bottom
Select WA Element - resize by 40%
Paste and position on the bottom left
Select Rabbit 2 Element - resize by 50%
Paste and position on the bottom left
Select Bud Element - resize by 30%
Paste and position on the bottom
Paste paper 8 on the canvas
Apply Mask 2 or mask of choice
Merge group and move to the bottom layer
Resize by 110%
Paste paper 5 on canvas
Apply same mask and merge group
Resize by 105% and rotate left by 15%
Add any dropshadows you like
Sharpen any elements as needed
Crop and resize as desired
Add copyright info, license number and name
You're done! Thanks for trying my tutorial!

Labels:Chili Designz,Scraps N Company | 0
comments
Tuesday, March 14, 2017
THE LOOK
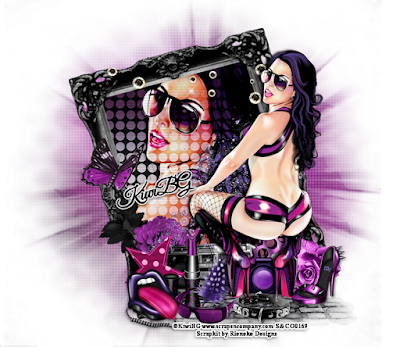
Supplies needed:
I am using the stunning artwork from KiwiBG for this tutorial which you can find here
Scrapkit: I am using a stunning kit from Rieneke Designs called "The Look" which you can get by going here
Mask 71 from Gina Gems which you can find here
Plugins: Lokas 3D Shadow
----------------------------
This tutorial is written for those who have working knowledge of PSPX2 (any version will do).
This tutorial was written by me on March 14 , 2017. Please do not copy or paste on any other forum, website or blog provide link back to tut only. Please do not claim as your own. This tutorial is copyrighted to me. Any resemblance to any other tutorial is purely coincidental.
Ok - let's start and remember to save often.
Open up a 750 x 650 blank canvas (we can resize it later)
Select Frame Element 32 - resize by 80%
Paste and position in the center of the canvas
Image Free Rotate Left by 15%
Select your magic wand tool and select the center of the frame (Add (Shift), RGB Value, Tolerance 25, Contiguous checked, Feather 0)
Selections, Modify, Expand by 5
Paste paper 7
Select invert, delete
Paste close-up tube on paper layer and delete
Select none
Drop close-up to Hard Light
Apply dropshadow and merge down on paper layer
Effect, Texture Effects, Blinds (Width 3, Opactity 15, Horizontal and Light from left/top checked)
Move paper layer below frame layer
Select Element 19 - resize by 65%
Image mirror and paste on the top of the frame
Select Element 16 - resize by 60%
Paste and position on the bottom where desired
Select Element 26 - resize by 55%
Paste and position on the bottom right below the frame
Select Element 51- resize by 22%
Paste and position on the left side
Select Element 20 - resize by 25%
Paste and position on the bottom right
Select Element 37 - resize by 20%
Paste and position on the bottom right
Select Element 56 - resize by 30%
Paste and position on the bottom
Select Element 22 - resize by 20%
Paste and position on the bottom
Paste tube of choice where desired
Apply Lokas 3D Shadow at default settings
Select Element 21 - resize by 25%
Paste and position on the bottom left
Select Element 59 - resize by 20%
Paste and position on the bottom left
Select Element 58 - resize by 25%
Paste and position on the bottom left
Select Element 4 - resize by 20%
Paste and position on the bottom left
Select Element 3 - resize by 25%
Paste and position on the bottom
Select Element 46 - resize by 25%
Paste and paste on the bottom
Select Element 31 - resize by 22%
Paste and position on the bottom
Select Element 5 - resize by 20%
Image mirror and paste on the bottom right
Select Element 8 - resize by 20%
Paste and position on the bottom
Paste paper 2 on the canvas
Apply Mask 71 or mask of choice
Merge group and move to the bottom layer
Add any dropshadows you like
Sharpen any elements as needed
Crop and resize as desired
Add copyright info, license number and name
You're done! Thanks for trying my tutorial!

Labels:Scraps N Company | 0
comments
SKATER CAT

These extra's were made by me and my own creativity. Please do not rip apart, destroy, alter them or claim them as your own. Thanks

Labels:Extras,Scraps N Company | 0
comments
FRENCH MAID
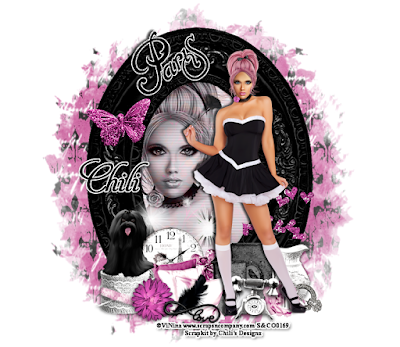
Supplies needed:
I am using the stunning artwork from ViNina for this tutorial which you can find here
Scrapkit: I am using a stunning kit from Chili's Designz called "French Maiden" which you can get by going here
Mask from Kissing Kate which you can find here
Plugins: Lokas 3D Shadow, Eyecandy - Gradient Glow
----------------------------
This tutorial is written for those who have working knowledge of PSPX2 (any version will do).
This tutorial was written by me on March 14 , 2017. Please do not copy or paste on any other forum, website or blog provide link back to tut only. Please do not claim as your own. This tutorial is copyrighted to me. Any resemblance to any other tutorial is purely coincidental.
Ok - let's start and remember to save often.
Open up a 750 x 650 blank canvas (we can resize it later)
Select Frame Element 2 - resize by 75%
Paste and position in the center of the canvas
Select your magic wand tool and select the center of the frame (Add (Shift), RGB Value, Tolerance 25, Contiguous checked, Feather 0)
Selections, Modify, Expand by 5
Paste paper 5
Select invert, delete
Paste close-up tube on paper layer and delete
Select none
Drop close-up to Luminance (Legacy)
Apply Xero Radiance on default settings
Apply dropshadow and merge down on paper layer
Effect, Texture Effects, Blinds (Width 3, Opactity 15, Horizontal and Light from left/top checked)
Move paper layer below frame layer
Select WA Element - resize by 30%
Paste and position in on the top where desired
Apply Eyecandy Gradient Glow on fat default settings
Select Butterfly Element - resize by 50%
Paste and position on the top left
Select Hearts Element - resize by 30%
Paste and position on the bottom right
Select Sparkles 3 Element - resize by 45%
Paste and position on the bottom
Select Kande Element - resize by 40%
Paste and position on the bottom right
Select Books Element - resize by 35%
Paste and position on the bottom right
Select Broche Element - resize by 30%
Paste and position on the bottom right
Select Phone Element - resize by 35%
Paste and position on the bottom right
Paste tube of choice where desired
Apply Lokas 3D Shadow at default settings
Select Roll Element - resize by 45%
Paste and position on the bottom left
Select Puppy Element - resize by 40%
Paste and position on the bottom left
Select Clock Element - resize by 40%
Paste and position on the bottom
Select Pillows Element - resize by 45%
Paste and position on the bottom
Select Flower 3 Element - resize by 25%
Paste and position on the bottom
Select Feather 3 Element - resize by 30%
Paste and paste on the bottom
Select Deco Element - resize by 40%
Paste and position on the bottom
Paste paper 9 on the canvas
Apply Mask or mask of choice
Merge group and move to the bottom layer
Add any dropshadows you like
Sharpen any elements as needed
Crop and resize as desired
Add copyright info, license number and name
You're done! Thanks for trying my tutorial!

Labels:Chili Designz | 0
comments
Saturday, March 11, 2017
VAMPIRE KISS
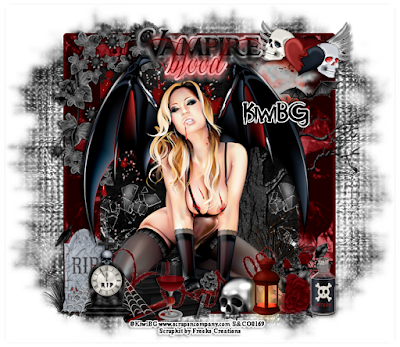
Supplies needed:
I am using the stunning artwork from KiwiBG for this tutorial which you can find here
Scrapkit: I am using a stunning kit from Freeks Creations called "Jen" which you can get by going here
Mask 14 from Artmama which you can find here
Plugins: Lokas 3D Shadow, Eyecandy - Gradient Glow
----------------------------
This tutorial is written for those who have working knowledge of PSPX2 (any version will do).
This tutorial was written by me on March 11 , 2017. Please do not copy or paste on any other forum, website or blog provide link back to tut only. Please do not claim as your own. This tutorial is copyrighted to me. Any resemblance to any other tutorial is purely coincidental.
Ok - let's start and remember to save often.
Open up a 750 x 650 blank canvas (we can resize it later)
Select Frame Element 2 - resize by 75%
Paste and position in the center of the canvas
Select your magic wand tool and select the center of the frame (Add (Shift), RGB Value, Tolerance 25, Contiguous checked, Feather 0)
Selections, Modify, Expand by 5
Paste paper 9
Select invert, delete, select none
Move paper layer below frame layer
Select Blood 3 Element - paste and position on top of the paper layer where desired
Select Glass Element - resize by 40%
Paste and position on the bottom of the paper layer
Image duplicate and mirror
Select Leaves Element - resize by 45%
Paste and position on the top left
Select Heart Element - resize by 30%
Paste and position on the top right
Select Tree Element - resize by 75%
Paste and position on the right side
Select WordArt 2 Element - resize by 50%
Paste and position on the top
Apply Eyecandy Gradient Glow on fat default settings (Glow width 3)
Paste tube of choice where desired
Apply Lokas 3D Shadow at default settings
Select Flowers Element - resize by 30%
Paste and position on the bottom right
Select Bottle 1 Element - resize by 20%
Paste and position on the bottom right
Select Coffin Element - resize by 40%
Paste and position on the bottom
Select Grave Element - resize by 40%
Paste and position on the bottom left
Select Clock Element - resize by 40%
Paste and position on the bottom left
Select Ribbon 1 Element - resize by 50%
Paste and paste on the bottom
Select Lantern Element - resize by 30%
Paste and position on the bottom
Select Skull 2 Element - resize by 25%
Paste and position on the bottom
Select Blood 2 Element - resize by 20%
Paste and position on the bottom
Select Wine Element - resize by 25%
Paste and position on the bottom
Select Key Element - resize by 20%
Image Free Rotate Right by 15% and paste on the bottom
Paste paper 4 on the canvas
Apply Mask 14 or mask of choice
Merge group and move to the bottom layer
Add any dropshadows you like
Sharpen any elements as needed
Crop and resize as desired
Add copyright info, license number and name
You're done! Thanks for trying my tutorial!

Labels:Scraps N Company | 0
comments
Friday, March 10, 2017
IRISH LOVE

These Extra's were made using the amazing artwork by Danny Lee and kit by Disturbed Scraps called "Eat Drink and Be Irish". You can purchase the kit here and the tube here
These extra's were made by me and my own creativity. Please do not rip apart, destroy, alter them or claim them as your own. Thanks

Labels:Extras,Scraps and the City | 0
comments
ST. PATRICKS OBSESSION

Supplies needed:
I am using the stunning artwork from Danny Lee for this tutorial which you can find here
Scrapkit: I am using a stunning kit from Bibi's Collections called "St Patricks Obsession" which you can get by going here
Mask 2 from Dee which you can find here
Plugins: Lokas 3D Shadow, Xero - Radiance
----------------------------
This tutorial is written for those who have working knowledge of PSPX2 (any version will do).
This tutorial was written by me on March 10 , 2017. Please do not copy or paste on any other forum, website or blog provide link back to tut only. Please do not claim as your own. This tutorial is copyrighted to me. Any resemblance to any other tutorial is purely coincidental.
Ok - let's start and remember to save often.
Open up a 750 x 650 blank canvas (we can resize it later)
Select Frame Element 94 - resize by 65%
Paste and position in the center of the canvas
Select your magic wand tool and select the center of the frame (Add (Shift), RGB Value, Tolerance 25, Contiguous checked, Feather 0)
Selections, Modify, Expand by 5
Paste paper 7
Select invert, delete
Paste close-up tube on paper layer and delete
Select none
Drop close-up to Screen and drop opacity down to 50%
Apply Xero Radiance on default settings
Apply dropshadow and merge down on paper layer
Effect, Texture Effects, Blinds (Width 3, Opactity 15, Horizontal and Light from left/top checked)
Move paper layer below frame layer
Select Element 18 - resize by 75%
Paste and position in the center of the canvas
Select Element 76 - resize by 30%
Paste and position on the top right
Select Element 79 - resize by 15%
Paste and position on the top left
Select Element 22 - resize by 40%
Image Free Rotate Right by 15% and paste on the bottom right
Select Element 33 - resize by 20%
Image Free Rotate Right by 15% and paste on the bottom right
Select Element 44 - resize by 15%
Paste and position on the bottom
Select Element 43 - resize by 20%
Paste and position on the bottom
Select Element 16 - resize by 40%
Paste and position on the right side where desired
Paste tube of choice where desired
Apply Lokas 3D Shadow at default settings
Select Element 50 - resize by 30%
Paste and position on the bottom left
Select Element 2 - resize by 30%
Paste and position on the bottom left
Select Element 61 - resize by 12%
Paste and position on the bottom left
Select Element 42 - resize by 30%
Paste and position on the bottom
Select Element 20 - resize by 40%
Paste and position on the bottom
Select Element 45 - resize by 20%
Paste and paste on the bottom
Select Element 15 - resize by 40%
Paste and position on the bottom
Paste paper 1 on the canvas
Apply Mask 2 or mask of choice
Merge group and move to the bottom layer
Add any dropshadows you like
Sharpen any elements as needed
Crop and resize as desired
Add copyright info, license number and name
You're done! Thanks for trying my tutorial!

Labels:Bibi's Collections | 0
comments
Monday, March 6, 2017
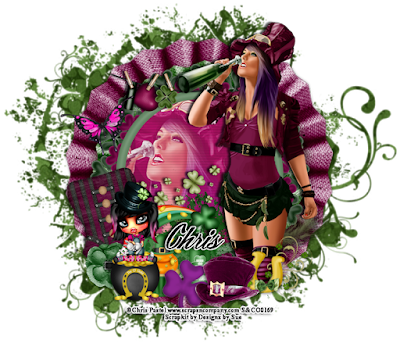
ST. PATTY POSSION
Supplies needed:
I am using the stunning artwork from Chris Pastel for this tutorial which you can find here
Scrapkit: I am using a stunning kit from Designz by Sue called "St. Patty Possion 2" which you can get by going here
St. Patricks Day Mask 3 from Dee which you can find here
Plugins: Lokas 3D Shadow
----------------------------
This tutorial is written for those who have working knowledge of PSPX2 (any version will do).
This tutorial was written by me on March 6 , 2017. Please do not copy or paste on any other forum, website or blog provide link back to tut only. Please do not claim as your own. This tutorial is copyrighted to me. Any resemblance to any other tutorial is purely coincidental.
Ok - let's start and remember to save often.
Open up a 750 x 650 blank canvas (we can resize it later)
Select Element 38 - resize by 85%
Paste and position in the center of the canvas
Select Frame Element 2 - resize by 85%
Paste and position in the center of the canvas
Select your magic wand tool and select the center of the frame (Add (Shift), RGB Value, Tolerance 25, Contiguous checked, Feather 0)
Selections, Modify, Expand by 5
Paste paper 6
Select invert, delete
Paste close-up tube on paper layer and delete
Select none
Drop close-up to Screen
Apply dropshadow and merge down on paper layer
Effect, Texture Effects, Blinds (Width 3, Opactity 15, Horizontal and Light from left/top checked)
Move paper layer below frame layer
Select Element 3 - resize by 40%
Paste and position on the top of the frame
Select Element 34 - resize by 45%
Image Free Rotate Left by 15% and paste on the top left
Select Element 15 - resize by 50%
Paste and position on the bottom
Select Element 40 - resize by 55%
Paste and position on the bottom of the frame where desired
Paste tube of choice where desired
Apply Lokas 3D Shadow at default settings
Select Element 8 - resize by 40%
Image Free Rotate Right by 15% and paste on the bottom right
Select Element 7 - resize by 20%
Paste and position on the bottom
Select Element 31 - resize by 30%
Paste and position on the bottom
Select Element 11 - resize by 20%
Paste and position on the bottom
Select Element 45 - resize by 15%
Paste and paste on the bottom
Select Element 19 - resize by 30%
Image Free Rotate Left by 15% and paste on the bottom left
Select Element 12 - resize by 15%
Paste and position on the bottom left
Select Element 17 - resize by 35%
Paste and position on the bottom left
Select Element 39 - resize by 30%
Paste and position on the bottom left
Paste paper 4 on the canvas
Apply Mask 3 or mask of choice
Merge group and move to the bottom layer
Add any dropshadows you like
Sharpen any elements as needed
Crop and resize as desired
Add copyright info, license number and name
You're done! Thanks for trying my tutorial!

Labels:Scraps N Company | 0
comments
Sunday, March 5, 2017
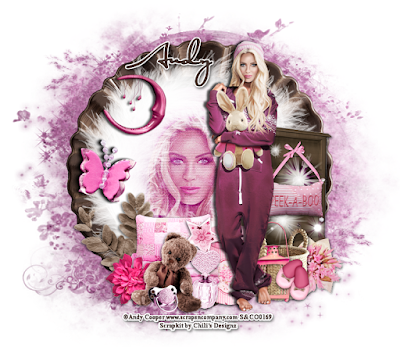
MAMELUKE 2
Supplies needed:
I am using the stunning artwork from Andy Cooper for this tutorial which you can find here
Scrapkit: I am using a stunning kit from Chili's Designz called "Mameluke" which you can get by going here
Mask 20 from Moonbeams and Spiderwebs which you can find here
Plugins: Lokas 3D Shadow
----------------------------
This tutorial is written for those who have working knowledge of PSPX2 (any version will do).
This tutorial was written by me on March 5 , 2017. Please do not copy or paste on any other forum, website or blog provide link back to tut only. Please do not claim as your own. This tutorial is copyrighted to me. Any resemblance to any other tutorial is purely coincidental.
Ok - let's start and remember to save often.
Open up a 750 x 650 blank canvas (we can resize it later)
Select Frame Element 3 - resize by 65%
Paste and position in the center of the canvas
Select your magic wand tool and select the center of the frame (Add (Shift), RGB Value, Tolerance 25, Contiguous checked, Feather 0)
Selections, Modify, Expand by 5
Paste paper 8
Select invert, delete
Paste close-up tube on paper layer and delete
Select none
Drop close-up to Overlay
Apply dropshadow and merge down on paper layer
Effect, Texture Effects, Blinds (Width 3, Opactity 15, Horizontal and Light from left/top checked)
Move paper layer below frame layer
Select Circle Element - resize by 60%
Paste and position on the top of the frame
Select Moon 4 Element - resize by 25%
Image Free Rotate Right by 15% and paste on the top left
Select Dresser Element - resize by 55%
Paste and position on the right side
Select Deco Element - resize by 20%
Paste and position on the right side
Select Sparkles 3 Element - resize by 55%
Paste and position on the right side
Paste tube of choice where desired
Apply Lokas 3D Shadow at default settings
Select Flower 3 Element - resize by 25%
Paste and position on the bottom right
Select Basket Element - resize by 40%
Paste and position on the bottom right
Select Slippers Element - resize by 30%
Paste and position on the bottom right
Select Lamp 3 Element - resize by 30%
Paste and position on the bottom right
Select Box 3 Element - resize by 40%
Paste and paste on the bottom below tube layer
Select Pillow 5 Element - resize by 30%
Paste and position on the bottom
Select Perfume Element - resize by 30%
Paste and position on the bottom
Select Star 5 Element - resize by 25%
Paste and position on the bottom
Select Butterfly 2 Element - resize by 50%
Paste and position on the left side
Select Greenery 5 Element - resize by 30%
Image mirror and paste on the bottom left
Select Flower 6 Element - resize by 25%
Paste and position on the bottom left
Select Teddy Element - resize by 40%
Paste and position on the bottom
Select Pacifier Element - resize by 30%
Paste and position on the bottom
Paste paper 4 on the canvas
Apply Mask 20 or mask of choice
Merge group and move to the bottom layer
Add any dropshadows you like
Sharpen any elements as needed
Crop and resize as desired
Add copyright info, license number and name
You're done! Thanks for trying my tutorial!

Labels:Chili Designz | 0
comments
JUST HOLD ON

These extra's were made by me and my own creativity. Please do not rip apart, destroy, alter them or claim them as your own. Thanks

Labels:Extras,Scraps N Company | 0
comments
Saturday, March 4, 2017
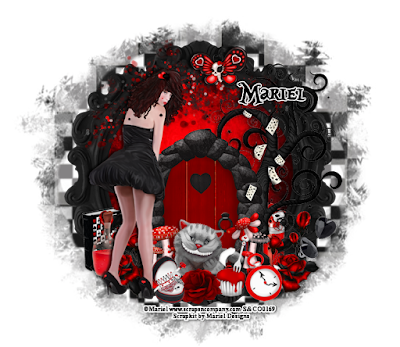
DARK ALICE
Supplies needed:
I am using the stunning artwork from Mariel for this tutorial which you can find here
Scrapkit: I am using a stunning Collab kit from Mariel called "Dark Alice" which you can get by going here
Mask 176 from Aqua which you can find here
Plugins: Lokas 3D Shadow
----------------------------
This tutorial is written for those who have working knowledge of PSPX2 (any version will do).
This tutorial was written by me on March 4 , 2017. Please do not copy or paste on any other forum, website or blog provide link back to tut only. Please do not claim as your own. This tutorial is copyrighted to me. Any resemblance to any other tutorial is purely coincidental.
Ok - let's start and remember to save often.
Open up a 750 x 650 blank canvas (we can resize it later)
Select Frame 2 - resize by 85%
Paste and position in the center of the canvas
Select your magic wand tool and select the center of the frame (Add (Shift), RGB Value, Tolerance 25, Contiguous checked, Feather 0)
Selections, Modify, Expand by 5
Paste paper 5
Select invert, delete, select none
Move paper layer below frame layer
Select Element 31 - resize by 55%
Paste and position on the right side
Select Element 38 - resize by 25%
Paste and position on the bottom right
Select Element 13 - resize by 50%
Paste and position on the bottom center of the frame
Select Element 40 - resize by 75%
Paste and position on the top of the frame
Select Element 45 - resize by 20%
Paste and position on the top
Select Element 6 - resize by 30%
Paste and position on the right side
Select Element 21 - resize by 30%
Paste and position on the bottom right
Image duplicate and mirror
Paste tube of choice where desired
Apply Lokas 3D Shadow at default settings
Select Element 52 - resize by 15%
Paste and position on the bottom right
Select Element 54 - resize by 25%
Paste and position on the bottom
Select Element 10 - resize by 20%
Paste and position on the bottom
Select Element 23 - resize by 15%
Paste and position on the bottom
Select Element 49 - resize by 15%
Paste and paste on the bottom
Select Element 50 - resize by 20%
Paste and position on the bottom left
Select Element 47 - resize by 25%
Paste and position on the bottom left
Select Element 35 - resize by 15%
Paste and position on the bottom right
Paste paper 4 on the canvas
Apply Mask 176 or mask of choice
Merge group and move to the bottom layer
Add any dropshadows you like
Sharpen any elements as needed
Crop and resize as desired
Add copyright info, license number and name
You're done! Thanks for trying my tutorial!

Labels:Scraps N Company | 0
comments
AMLETTE

Supplies needed:
I am using the stunning artwork from Selisan Al-Gaib for this tutorial which you can find here
Scrapkit: I am using a stunning kit from Bibi's Collections called "Amlette" which you can get by going here
Mask 4 from Butterfly Flutterby which you can find here
Plugins: Lokas 3D Shadow
----------------------------
This tutorial is written for those who have working knowledge of PSPX2 (any version will do).
This tutorial was written by me on March 4 , 2017. Please do not copy or paste on any other forum, website or blog provide link back to tut only. Please do not claim as your own. This tutorial is copyrighted to me. Any resemblance to any other tutorial is purely coincidental.
Ok - let's start and remember to save often.
Open up a 750 x 650 blank canvas (we can resize it later)
Select Frame Element 23 - resize by 75%
Paste and position in the center of the canvas
Select your magic wand tool and select the center of the frame (Add (Shift), RGB Value, Tolerance 25, Contiguous checked, Feather 0)
Selections, Modify, Expand by 5
Paste paper 1
Select invert, delete, select none
Move paper layer below frame layer
Select Element 1 - resize by 35%
Paste and position on the left side
Select Element 28 - resize by 25%
Paste and position on the top right
Select Element 95 - resize by 15%
Paste and position on the top right
Select Element 89 - resize by 15%
Paste and position on the top left
Select Element 58 - resize by 30%
Image Free Rotate Left by 15% and paste on the left side
Paste tube of choice where desired
Apply Lokas 3D Shadow at default settings
Select Element 20 - resize by 20%
Paste and position on the bottom left
Select Element 24 - resize by 20%
Paste and position on the bottom left
Select Element 52 - resize by 15%
Image Free Rotate Right by 15% and paste on the left side
Select Element 55 - resize by 20%
Paste and position on the bottom right
Select Element 11 - resize by 20%
Paste and paste on the bottom right
Select Element 3 - resize by 15%
Paste and position on the bottom right
Select Element 63 - resize by 15%
Paste and position on the bottom right
Select Element 88 - resize by 20%
Paste and position on the bottom right
Select Element 78 - resize by 12%
Paste and position on the bottom
Select Element 69 - resize by 12%
Paste and position on the bottom
Select Element 7 - resize by 8%
Paste and position on the bottom
Paste paper 8 on the canvas
Apply Mask 4 or mask of choice
Merge group and move to the bottom layer
Add any dropshadows you like
Sharpen any elements as needed
Crop and resize as desired
Add copyright info, license number and name
You're done! Thanks for trying my tutorial!

Labels:Bibi's Collections | 0
comments
Subscribe to:
Comments
(Atom)


