Labels
- Alikas Scraps
- All Dolled Up Store
- Amy Marie
- Annaica
- Arthur Crowe
- Babycakes Scraps
- Barbara Jensen
- Bibi's Collections
- Black Widow Creationz
- Blu Moon
- Bonnies Creations
- Bookwork Dezines
- Broken Sky Dezine
- Carita Creationz
- Carpe Diem Designs
- CDO
- Celinart Pinup
- Celine
- Chacha Creationz
- Charmed Designs
- Cherry Blossom Designs
- Chili Designz
- Cluster Frame
- Creative Misfits
- Creative Scraps by Crys
- Curious Creative Dreams
- Danny Lee
- Derzi
- Designs by Ali
- Designs by Joan
- Designs by Ketura
- Designs By Norella
- Designs by Vi
- Diana Gali
- Diry Art Designs
- Disturbed Scraps
- Dreaming With Bella
- Eclipse Creations
- Elegancefly
- Extras
- Fabulous Designz
- Forum Set
- Foxy's Designz
- Freek's Creation
- FTU
- FwTags
- Goldwasser
- Gothic Inspirations
- Gothic Raven Designs
- Graphfreaks
- Hania's Designs
- Happy Pumpkin Studios
- Horseplay's Pasture Designs
- indie-Zine
- Irish Princess Designs
- Ishika Chowdhury
- Kaci McVay
- Kajenna
- katharine
- Katherine
- Khloe Zoey
- Killer Kitty
- Kissing Kate
- KiwiFirestorm
- Kiya Designs
- Kizzed by Kelz
- KZ Designz
- Lady Mishka
- Lil Mz Brainstorm
- Maiden of Darkness
- Mariel Designs
- MellieBeans
- Michelle's Myths
- Midnight Shadow
- Misticheskya
- MistyLynn's Creations
- MMeliCrea Designz
- Moon Vixen Designs
- NaSionainne
- Ninaste
- Niqui Designs
- Pandora
- Picsfordesign
- Pink Paradox Productions
- Radyga Designs
- Redefined Designs
- Rissa's Designs
- Schnegge
- ScottishButterfly Creations
- Scrappin Krazy Designs
- Scrappin With Lil Ol Me
- Scraps and the City
- Scraps Dimensions
- Scraps From The Heart
- Scraps N Company
- Scraps with Attitude
- Shining Star Art
- Skyscraps
- Sleek N Sassy Designs
- Sophisticat Simone
- Souldesigner
- Soxsational Scraps
- Spazz
- Starlite and Soul
- Stella Felice
- Tammy Welt
- Tasha's Playground
- The PSP Project
- Thrifty Scraps by Gina
- Tiny Turtle Designs
- Upyourart
- Verymany
- Wendy Gerber
- Whisper In the Wind
- Wick3d Creationz
- Wicked Diabla
- Yude's Kreationz
Blog Archive
Monday, May 29, 2017
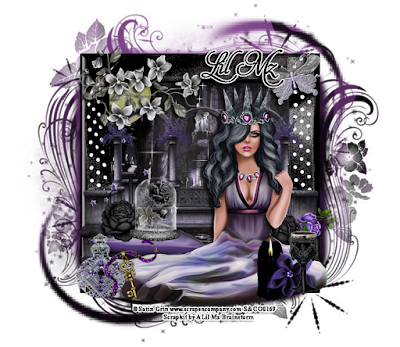
MEREDIN
Supplies needed:
I am using the stunning artwork from Satin Grin for this tutorial which you can find here
Scrapkit: I am using a stunning kit from A Lil Mz Brainstorm called "Meriden" which you can get by going here
Mask 5 from Splitz Designs which you can find here
Plugins: Lokas 3D Shadow
----------------------------
This tutorial is written for those who have working knowledge of PSPX2 (any version will do).
This tutorial was written by me on May 29, 2017. Please do not copy or paste on any other forum, website or blog provide link back to tut only. Please do not claim as your own. This tutorial is copyrighted to me. Any resemblance to any other tutorial is purely coincidental.
Ok - let's start and remember to save often.
Open up a 750 x 650 blank canvas (we can resize it later)
Select Frame Element 75 - resize by 85%
Paste and position in the center of the canvas
Select your magic wand tool and select the center of the frame (Add (Shift), RGB Value, Tolerance 25, Contiguous checked, Feather 0)
Selections, Modify, Expand by 5
Paste paper 7
Select invert, delete, select none
Move paper layer below frame layer
Select Element 57 - resize by 75%
Paste and position in the center above the frame
Select Element 66 - resize by 20%
Paste and position on the top left below the frame
Select Element 68 - resize by 40%
Paste and position on the top left
Select Element 46 - resize by 20%
Image Free Rotate Left by 15% and paste on the top right
Select Element 51 - resize by 76%
Paste and position on the bottom center
Select Element 29 - resize by 40%
Paste and position on the bottom left
Paste tube of choice where desired
Apply Lokas 3D Shadow at default settings
Select Element 30 - resize by 150%
Paste and position on the bottom left
Select Element 82 - resize by 20%
Paste and position on the bottom left above pillow element
Select Element 20 - resize by 20%
Paste and position on the bottom left
Select Element 10 - resize by 20%
Image Free Rotate Left by 15% and paste on the bottom left
Select Element 7 - resize by 20%
Paste and position on the bottom right
Select Element 6 - resize by 25%
Paste and paste on the bottom right
Select Element 32 - resize by 15%
Paste and position on the bottom right
Select Element 98 - resize by 20%
Paste and position on the bottom right
Select Element 65 - resize by 30%
Paste and position on the bottom right
Paste paper 5 on the canvas
Apply Mask 5 or mask of choice
Merge group and move to the bottom layer
Add any dropshadows you like
Sharpen any elements as needed
Crop and resize as desired
Add copyright info, license number and name
You're done! Thanks for trying my tutorial!

Labels:Lil Mz Brainstorm,Scraps N Company | 0
comments
Sunday, May 28, 2017
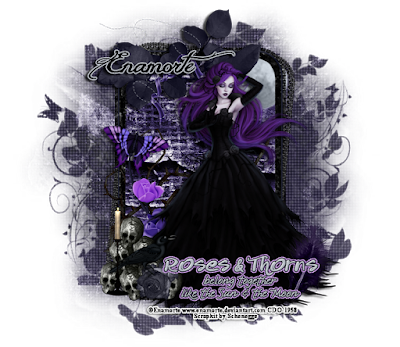
WICKED THORN
Supplies needed:
I am using the stunning artwork from Enamorte for this tutorial which you can find here
Scrapkit: I am using a stunning kit from Schnegge Scraps called "IB Enamorte 48-1" which you can get by going here
Mask 26 from Splitz Designz which you can find here
Plugins: Lokas 3D Shadow, Eyecandy 4000 - Gradient Glow
----------------------------
This tutorial is written for those who have working knowledge of PSPX2 (any version will do).
This tutorial was written by me on May 28, 2017. Please do not copy or paste on any other forum, website or blog provide link back to tut only. Please do not claim as your own. This tutorial is copyrighted to me. Any resemblance to any other tutorial is purely coincidental.
Ok - let's start and remember to save often.
Open up a 750 x 650 blank canvas (we can resize it later)
Select Frame Element 2 - resize by 75%
Paste and position in the center of the canvas
Select your magic wand tool and select the center of the frame (Add (Shift), RGB Value, Tolerance 25, Contiguous checked, Feather 0)
Selections, Modify, Expand by 5
Paste paper 5
Select invert, delete, select none
Move paper layer below frame layer
Select Element 7 - resize by 50%
Paste and position on the top left
Select Element 12 - resize by 30%
Paste and position on the top left
Select Element 18 - resize by 45%
Image Free Rotate Right by 15% and paste on the left side
Select Element 2 - resize by 50%
Paste and position on the bottom left
Select Element 9 - resize by 30%
Paste and position on the top right below the frame layer
Paste tube of choice where desired
Apply Lokas 3D Shadow at default settings
Select Element 11 - resize by 40%
Paste and position on the left side
Select Element 8 - resize by 40%
Paste and position on the bottom left
Select Element 5 - resize by 30%
Paste and position on the bottom left
Select Element 4 - resize by 40%
Paste and position on the bottom left
Select Element 3 - resize by 30%
Image Free Rotate Right by 15% and paste on the bottom right
Select Wordart Element - resize by 50%
Paste and paste on the bottom
Apply Eyecandy Gradient Glow on fat default settings (glow width 3)
Paste paper 4 on the canvas
Apply Mask 26 or mask of choice
Merge group and move to the bottom layer
Add any dropshadows you like
Sharpen any elements as needed
Crop and resize as desired
Add copyright info, license number and name
You're done! Thanks for trying my tutorial!

Labels:Schnegge | 0
comments
MAGIC ALICE
Supplies needed:
I am using the stunning artwork from Alehandra Vanhek for this tutorial which you can find here
Scrapkit: I am using a stunning kit from Bibi's Collections called "Magic Alice" which you can get by going here
Plugins: Lokas 3D Shadow, Harry's Filters (optional), Eyecandy 4000 - Gradient Glow
----------------------------
This tutorial is written for those who have working knowledge of PSPX2 (any version will do).
This tutorial was written by me on May 28, 2017. Please do not copy or paste on any other forum, website or blog provide link back to tut only. Please do not claim as your own. This tutorial is copyrighted to me. Any resemblance to any other tutorial is purely coincidental.
Ok - let's start and remember to save often.
Open up a 750 x 650 blank canvas (we can resize it later)
Select Mask Element 9 - resize by 75%
Paste and position in the center of the canvas
Select Element 8 - resize by 45%
Paste and position in the center of the canvas
Select your Freehand Selection tool and draw around the center of the element (Freehand (Replace), Feather 0, Range 10, Smoothing 0)
Paste paper 18
Select invert, delete, select none
Move paper layer below the element layer
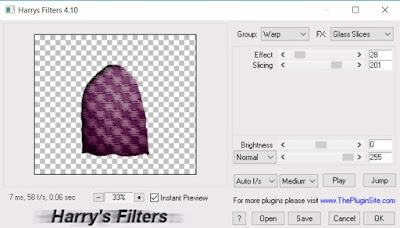
Apply Harrys Filters (optional) with the following settings:
Select Element 40 - resize by 30%
Paste and position on the right side
Select Element 45 - resize by 20%
Paste and position on the bottom where desired
Select Element 32 - resize by 15%
Paste and position on the bottom right
Select Element 39 - resize by 15%
Paste and position on the left side
Select Element 37 - resize by 15%
Paste and position on the top right
Paste tube of choice where desired
Apply Lokas 3D Shadow at default settings
Select Element 58 - resize by 25%
Paste and position on the bottom left
Select Element 82 - resize by 15%
Paste and position on the bottom left
Select Element 60 - resize by 20%
Paste and position on the bottom left
Select Element 73 - resize by 35%
Paste and position on the bottom left
Apply Eyecandy Gradient Glow on fat default settings (Glow width 3)
Select Element 48 - resize by 15%
Paste and position on the bottom right
Select Element 33 - resize by 15%
Paste and paste on the bottom right
Select Element 19 - resize by 15%
Paste and position on the bottom right
Select Element 99 - resize by 20%
Image Free Rotate Right by 15% and paste on the bottom right
Select Element 83 - resize by 12%
Paste and position on the bottom right
Select Element 6 - resize by 20%
Paste and position on the bottom
Select Element 42 - resize by 15%
Paste and position on the bottom
Select Element 51 - resize by 15%
Paste and position on the bottom
Select Element 26 - resize by 25%
Paste and position on the bottom
Select Element 105 - resize by 20%
Paste and position on the bottom
Select Element 52 - resize by 20%
Paste and position on the bottom
Add any dropshadows you like
Sharpen any elements as needed
Crop and resize as desired
Add copyright info, license number and name
You're done! Thanks for trying my tutorial!

Labels:Bibi's Collections | 0
comments
METAL BABE

These Extra's were made using the amazing artwork by Danny Lee and kit by Rieneke Designs called "I Love Metal ". You can purchase the kit here and the tube here
These extra's were made by me and my own creativity. Please do not rip apart, destroy, alter them or claim them as your own. Thanks

Labels:Extras,Scraps N Company | 0
comments
Saturday, May 27, 2017
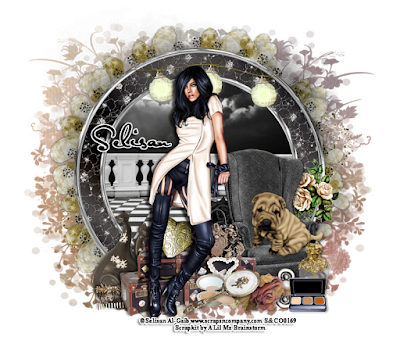
ILLY SHANEE
Supplies needed:
I am using the stunning artwork from Selisan Al-Gaib for this tutorial which you can find here
Scrapkit: I am using a stunning kit from A Lil Mz Brainstorm called "Illy Shanee" which you can get by going here
Floral Mask 1 from Dee which you can find here
Plugins: Lokas 3D Shadow
----------------------------
This tutorial is written for those who have working knowledge of PSPX2 (any version will do).
This tutorial was written by me on May 27, 2017. Please do not copy or paste on any other forum, website or blog provide link back to tut only. Please do not claim as your own. This tutorial is copyrighted to me. Any resemblance to any other tutorial is purely coincidental.
Ok - let's start and remember to save often.
Open up a 750 x 650 blank canvas (we can resize it later)
Select Element 55- resize by 103%
Paste and position in the center of the canvas
Select Element 45 - resize by 110%
Paste and position in the center of the canvas
Select Frame Element 68 - resize by 85%
Paste and position in the center of the canvas
Select your magic wand tool and select the center of the frame (Add (Shift), RGB Value, Tolerance 25, Contiguous checked, Feather 0)
Selections, Modify, Expand by 5
Paste paper 7
Select invert, delete, select none
Move paper layer below frame layer
Select Element 13 - resize by 50%
Paste and position on the top of the frame
Select Element 25 - resize by 50%
Paste and position on the right side
Select Element 62 - resize by 45%
Paste and position on the bottom
Select Element 60 - resize by 25%
Paste and position on the bottom
Select Element 19 - resize by 20%
Paste and position on the bottom
Paste tube of choice where desired
Apply Lokas 3D Shadow at default settings
Select Element 27 - resize by 40%
Paste and position on the bottom left
Select Element 103 - resize by 15%
Paste and position on the bottom left
Select Element 61 - resize by 25%
Paste and position on the right side below the chair element
Select Element 70 - resize by 25%
Paste and position on the right side above chair element
Select Element 10 - resize by 20%
Paste and position on the bottom right
Select Element 83 - resize by 12%
Paste and paste on the bottom right
Select Element 14 - resize by 15%
Paste and position on the bottom right
Select Element 32 - resize by 15%
Paste and position on the bottom right
Select Element 104 - resize by 12%
Paste and position on the bottom
Select Element 22 - resize by 12%
Paste and postion on the bottom
Select Element 20 - resize by 25%
Paste and position on the bottom
Paste paper 2 on the canvas
Apply Mask 1 or mask of choice
Merge group and move to the bottom layer
Add any dropshadows you like
Sharpen any elements as needed
Crop and resize as desired
Add copyright info, license number and name
You're done! Thanks for trying my tutorial!

Labels:Lil Mz Brainstorm | 0
comments
BEAUTY WATER

Supplies needed:
I am using the stunning artwork from Andy Cooper for this tutorial which you can find here
Scrapkit: I am using a stunning kit from Bibi's Collections called "Beauty Water" which you can get by going here
Circle Mask 1 from Tonya which you can find here
Plugins: Lokas 3D Shadow
----------------------------
This tutorial is written for those who have working knowledge of PSPX2 (any version will do).
This tutorial was written by me on May 27, 2017. Please do not copy or paste on any other forum, website or blog provide link back to tut only. Please do not claim as your own. This tutorial is copyrighted to me. Any resemblance to any other tutorial is purely coincidental.
Ok - let's start and remember to save often.
Open up a 750 x 650 blank canvas (we can resize it later)
Select Frame Element 39 - resize by 75%
Paste and position in the center of the canvas
Select your magic wand tool and select the center of the frame (Add (Shift), RGB Value, Tolerance 25, Contiguous checked, Feather 0)
Selections, Modify, Expand by 5
Paste paper 9
Select invert, delete
Paste close-up tube on paper layer and delete
Select none
Chage the closeup to Screen and drop opacity down to 60%
Apply dropshadow and merge down on paper layer
Effect, Texture Effects, Blinds (Width 3, Opactity 15, Horizontal and Light from left/top checked)
Move paper layer below frame layer
Select Element 67 - resize by 25%
Image Free Rotate Left by 15% and paste on the top of the frame
Erase and excess bits that go over the frame
Select Element 22 - resize by 25%
Paste and position on the bottom left
Select Element 27 - resize by 25%
Paste and position on the top right
Select Element 74 - resize by 35%
Paste and position on the bottom
Select Element 82 - resize by 35%
Paste and position on the bottom of the frame
Select Element 8 - resize by 45%
Paste and position on the bottom right
Select Element 98 - resize by 22%
Paste and position on the right side
Select Element 19 - resize by 25%
Paste and position on the bottom left
Select Element 32 - resize by 30%
Paste and position on the bottom right
Select Element 13 - resize by 30%
Imag mirror and paste on the bottom left
Select Element 76 - resize by 30%
Paste and position on the bottom right
Paste tube of choice where desired
Apply Lokas 3D Shadow at default settings
Select Element 58 - resize by 25%
Paste and position on the right side
Select Element 69 - resize by 15%
Paste and position on the bottom right
Select Element 90 - resize by 12%
Paste and position on the bottom right
Select Element 33 - resize by 30%
Paste and position on the bottom right
Select Element 16 - resize by 15%
Paste and position on the bottom left
Select Element 24 - resize by 22%
Paste and paste on the bottom left
Select Element 11 - resize by 15%
Paste and position on the bottom left
Select Element 43 - resize by 15%
Paste and position on the bottom left
Select Element 46 - resize by 12%
Paste and position on the bottom
Select Element 9 - resize by 20%
Paste and position on the bottom
Add new raster layer and flood-fill with gradient of choice
Apply Mask 1 or mask of choice
Merge group and move to the bottom layer
Add any dropshadows you like
Sharpen any elements as needed
Crop and resize as desired
Add copyright info, license number and name
You're done! Thanks for trying my tutorial!

Labels:Bibi's Collections | 0
comments
Friday, May 26, 2017
DARK MERMAID

Supplies needed:
I am using the stunning artwork from Julia Fox for this tutorial which you can find here
Scrapkit: I am using a stunning kit from Disturbed Scraps called "Dark Mermaid Sea" which you can get by going here
Mask 12 from Babes Designs which you can find here
Plugins: Lokas 3D Shadow
----------------------------
This tutorial is written for those who have working knowledge of PSPX2 (any version will do).
This tutorial was written by me on May 26, 2017. Please do not copy or paste on any other forum, website or blog provide link back to tut only. Please do not claim as your own. This tutorial is copyrighted to me. Any resemblance to any other tutorial is purely coincidental.
Ok - let's start and remember to save often.
Open up a 750 x 650 blank canvas (we can resize it later)
Select Frame Element 73 - resize by 85%
Paste and position in the center of the canvas
Select your magic wand tool and select the center of the frame (Add (Shift), RGB Value, Tolerance 25, Contiguous checked, Feather 0)
Selections, Modify, Expand by 5
Paste paper 6
Select invert, delete, select none
Move paper layer below frame layer
Select Element 56 - resize by 55%
Image Free Rotate Left by 15% and paste on the top of the frame
Select Element 22 - resize by 25%
Paste and position on the top center of the frame
Select Element 67 - Paste and position on the bottom
Select Element 47 - resize by 65%
Paste and position on the bottom right
Select Element 42 - resize by 40%
Paste and position on the bottom
Select Element 30 - resize by 25%
Paste and position on the bottom
Select Element 38 - resize by 25%
Image Free Rotate Left by 15% and paste on the bottom right
Select Element 7 - resize by 35
Paste and position on the bottom right
Select Element 5 - resize by 25%
Image Free Rotate Left by 15% and paste on the bottom left
Select Element 29 - resize by 25%
Paste and position on the bottom left
Paste tube of choice where desired
Apply Lokas 3D Shadow at default settings
Select Element 3 - resize by 20%
Paste and position on bottom right
Select Element 27 - resize by 20%
Image Free Rotate Left by 15% and paste on the bottom right
Select Element 48 - resize by 20%
Paste and position on the bottom right
Select Element 62 - resize by 25%
Paste and position on the bottom right
Select Element 26 - resize by 30%
Paste and position on the right side
Select Element 55 - resize by 12%
Paste and paste on the bottom
Select Element 24 - resize by 25%
Paste and position on the bottom
Select Element 57 - resize by 12%
Paste and position on the bottom
Select Element 76 - resize by 85%
Paste and position on the canvas where desired
Paste paper 1 on the canvas
Apply Mask 12 or mask of choice
Merge group and move to the bottom layer
Add any dropshadows you like
Sharpen any elements as needed
Crop and resize as desired
Add copyright info, license number and name
You're done! Thanks for trying my tutorial!

Labels:Scraps N Company | 0
comments
Sunday, May 21, 2017
STYLISH DIVA

These Extra's were made using the amazing artwork by Toriya and kit by Disturbed Scraps called "Always Stylish ". You can purchase the kit here and the tube here
These extra's were made by me and my own creativity. Please do not rip apart, destroy, alter them or claim them as your own. Thanks

Labels:Scraps N Company | 0
comments
PINK MERMAID
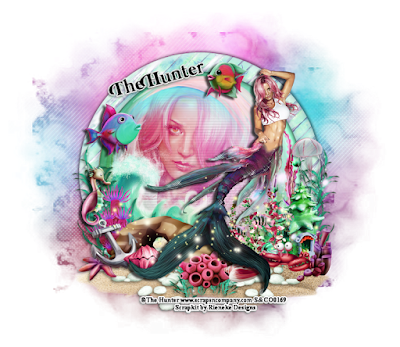
Supplies needed:
I am using the stunning artwork from The Hunter for this tutorial which you can find here
Scrapkit: I am using a stunning kit from Rieneke Designs called "Mermaid 6" which you can get by going here
Mask 21 from Gina Gems which you can find here
Plugins: Lokas 3D Shadow
----------------------------
This tutorial is written for those who have working knowledge of PSPX2 (any version will do).
This tutorial was written by me on May 21, 2017. Please do not copy or paste on any other forum, website or blog provide link back to tut only. Please do not claim as your own. This tutorial is copyrighted to me. Any resemblance to any other tutorial is purely coincidental.
Ok - let's start and remember to save often.
Open up a 750 x 650 blank canvas (we can resize it later)
Select Frame Element 37 - resize by 85%
Paste and position in the center of the canvas
Select your magic wand tool and select the center of the frame (Add (Shift), RGB Value, Tolerance 25, Contiguous checked, Feather 0)
Selections, Modify, Expand by 5
Paste paper 6
Select invert, delete
Paste close-up tube on paper layer and delete
Select none
Chage the closeup to Screen
Apply dropshadow and merge down on paper layer
Effect, Texture Effects, Blinds (Width 3, Opactity 15, Horizontal and Light from left/top checked)
Move paper layer below frame layer
Select Element 22 - resize by 110%
Paste and position in the center below the frame
Select Element 28 - resize by 85%
Paste and position on the bottom
Select Element 48 - resize by 40%
Paste and position on the bottom left above the frame
Select Element 25 - resize by 85%
Paste and position on the bottom
Select Element 8 - resize by 30%
Paste and position on the bottom right
Select Element 38 - resize by 20%
Paste and position on the bottom right
Select Element 39 - resize by 25%
Paste and position on the bottom right
Select Element 16 - resize by 25%
Paste and position on the bottom left
Select Element 17 - resize by 40%
Paste and position on the bottom left
Paste tube of choice where desired
Apply Lokas 3D Shadow at default settings
Select Element 41 - resize by 20%
Paste and position on the left side
Select Element 43 - resize by 15%
Paste and position on the bottom left
Select Element 45 - resize by 20%
Paste and position on the bottom left
Select Element 46 - resize by 15%
Paste and position on the bottom left
Select Element 19 - resize by 20%
Paste and position on the bottom right
Select Element 6 - resize by 20%
Paste and paste on the bottom
Select Element 2 - resize by 20%
Paste and position on the top left
Select Element 3 - resize by 15%
Paste and position on the top right
Select Element 10 - resize by 75%
Paste and position on the canvas where desired
Paste paper 8 on the canvas
Apply Mask 21 or mask of choice
Merge group and move to the bottom layer
Add any dropshadows you like
Sharpen any elements as needed
Crop and resize as desired
Add copyright info, license number and name
You're done! Thanks for trying my tutorial!

Labels:Scraps N Company | 0
comments
SCHOOL DAYS
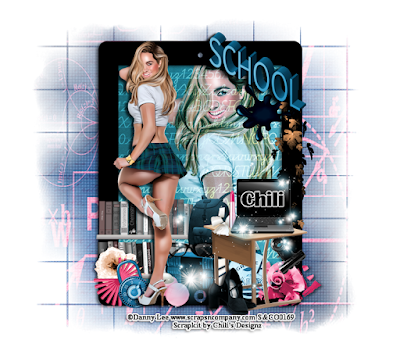
Supplies needed:
I am using the stunning artwork from Danny Lee for this tutorial which you can find here
Scrapkit: I am using a stunning kit from Chili's Designz called "School Days" which you can get by going here
Mask 191 from Insatiable Dreams which you can find here
Plugins: Lokas 3D Shadow
----------------------------
This tutorial is written for those who have working knowledge of PSPX2 (any version will do).
This tutorial was written by me on May 21, 2017. Please do not copy or paste on any other forum, website or blog provide link back to tut only. Please do not claim as your own. This tutorial is copyrighted to me. Any resemblance to any other tutorial is purely coincidental.
Ok - let's start and remember to save often.
Open up a 750 x 650 blank canvas (we can resize it later)
Select Frame Element 3 - resize by 85%
Paste and position in the center of the canvas
Select your magic wand tool and select the center of the frame (Add (Shift), RGB Value, Tolerance 25, Contiguous checked, Feather 0)
Selections, Modify, Expand by 5
Paste paper 8
Select invert, delete
Paste close-up tube on paper layer and delete
Select none
Change closeup to Hard Light
Apply dropshadow and merge down on paper layer
Move paper layer below frame layer
Select WA2 Element - resize by 40%
Paste and position on the top right
Select Greenery 2 Element - resize by 30%
Paste and position on the right side of the frame
Select Splotz Element - resize by 40%
Paste and position on the top right
Select Books Element - resize by 35%
Paste and position on the bottom left
Select Bits2 Element - resize by 40%
Paste and position on the bottom right
Select Books 2 Element - resize by 35%
Paste and position on the bottom
Select Bag2 Element - resize by 40%
Paste and position on the bottom above the Books 2 element
Select Table Element - resize by 50%
Paste and position on the bottom right
Paste tube of choice where desired
Apply Lokas 3D Shadow at default settings
Select Laptop Element - resize by 25%
Paste and position on right side above table element
Select Lipstick Element - resize by 30%
Paste and position on the top of the table element
Select Bits 3 Element - resize by 25%
Paste and position on top of the table element
Select Clips2 Element - resize by 40%
Paste and position on the bottom right
Select Flower 5 Element - resize by 30%
Paste and position on the bottom left
Select Pencils Element - resize by 25%
Paste and paste on the bottom left
Select Lock Element - resize by 35%
Image Free Rotate Left by 15% and paste on the bottom left
Select Lipbalm Element - resize by 30%
Paste and position on the bottom
Select Shoes Element - resize by 40%
Paste and position on the bottom
Select Glasses Element - resize by 30%
Paste and position on the bottom
Select Sparkles 5 Element - resize by 45%
Paste and position on the canvas where desired
Paste paper 3 on the canvas
Apply Mask 191 or mask of choice
Merge group and move to the bottom layer
Add any dropshadows you like
Sharpen any elements as needed
Crop and resize as desired
Add copyright info, license number and name
You're done! Thanks for trying my tutorial!

Labels:Chili Designz | 0
comments
Sunday, May 14, 2017
DAFFODIL FAIRY
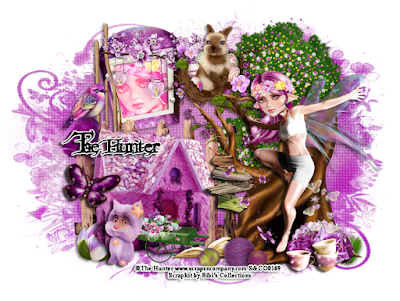
Supplies needed:
I am using the stunning artwork from The Hunter for this tutorial which you can find here
Scrapkit: I am using a stunning kit from Bibi's Collections called "Daffodils" which you can get by going here
Mask 3 from Dee which you can find here
Plugins: Lokas 3D Shadow
----------------------------
This tutorial is written for those who have working knowledge of PSPX2 (any version will do).
This tutorial was written by me on May 14, 2017. Please do not copy or paste on any other forum, website or blog provide link back to tut only. Please do not claim as your own. This tutorial is copyrighted to me. Any resemblance to any other tutorial is purely coincidental.
Ok - let's start and remember to save often.
Open up a 750 x 650 blank canvas (we can resize it later)
Select Element 27 - resize by 25%
Paste and position on the left side
Select your magic wand tool and select the center of the window (Add (Shift), RGB Value, Tolerance 25, Contiguous checked, Feather 0)
Selections, Modify, Expand by 5
Paste paper 9
Select invert, delete
Paste close-up tube on paper layer and delete
Select none
Change close-up to Overlay
Apply dropshadow and merge down on paper layer
Move paper layer below window layer
Select Element 88 - resize by 45%
Paste and position on the right side
Select Element 8 - resize by 20%
Paste and position on the top left
Select Element 61 - resize by 18%
Paste and position on the top right
Select Element 49 - resize by 30%
Paste and position on the right side
Select Element 87 - resize by 35%
Paste and position on the bottom left
Select Element 53 - resize by 20%
Paste and position on the bottom left
Select Element 52 - resize by 20%
Paste and position on the bottom
Paste tube of choice where desired
Apply Lokas 3D Shadow at default settings
Select Element 9 - resize by 10%
Paste and position on the bottom right
Select Element 14 - resize by 15%
Paste and position on the bottom right
Select Element 33 - resize by 12%
Paste and position on the bottom right
Select Element 96 - resize by 12%
Paste and position on the bottom left
Select Element 98 - resize by 15%
Paste and position on the bottom left
Select Element 67 - resize by 20%
Image Free Rotate Right by 15% and paste on the bottom left
Select Element 84 - resize by 18%
Paste and paste on the bottom
Select Element 24 - resize by 25%
Paste and position on the bottom
Select Element 72 - resize by 10%
Paste and position on the bottom
Select Element 92 - resize by 20%
Paste and position on the left side
Select Element 25 - resize by 15%
Paste and position on the bottom where desired
Paste paper 5 on the canvas
Apply Mask 3 or mask of choice
Merge group and move to the bottom layer
Add any dropshadows you like
Sharpen any elements as needed
Crop and resize as desired
Add copyright info, license number and name
You're done! Thanks for trying my tutorial!

Labels:Bibi's Collections | 0
comments
Saturday, May 13, 2017
ROCKIN ZOE

These Extra's were made using the amazing artwork by Alehandra Vanhek and kit by Reineke Designs called "Hat and High Heels ". You can purchase the kit here and the tube here
These extra's were made by me and my own creativity. Please do not rip apart, destroy, alter them or claim them as your own. Thanks

Labels:Extras,Scraps N Company | 0
comments
ASIAN VINTAGE
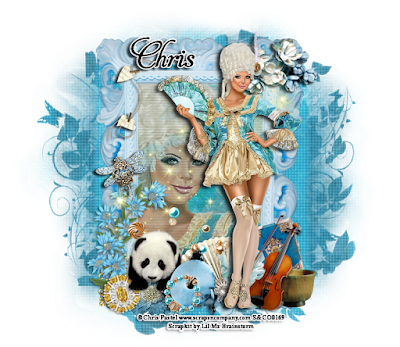
Supplies needed:
I am using the stunning artwork from Chris Pastel for this tutorial which you can find here
Scrapkit: I am using a stunning kit from Lil Mz Brainstorm called "Asian Vintage" which you can get by going here
Mask 26 from Splitz Designs which you can find here
Plugins: Lokas 3D Shadow
----------------------------
This tutorial is written for those who have working knowledge of PSPX2 (any version will do).
This tutorial was written by me on May 13, 2017. Please do not copy or paste on any other forum, website or blog provide link back to tut only. Please do not claim as your own. This tutorial is copyrighted to me. Any resemblance to any other tutorial is purely coincidental.
Ok - let's start and remember to save often.
Open up a 750 x 650 blank canvas (we can resize it later)
Select Frame Element 99 - resize by 85%
Paste and position in the center of the canvas
Select your magic wand tool and select the center of the frame (Add (Shift), RGB Value, Tolerance 25, Contiguous checked, Feather 0)
Selections, Modify, Expand by 5
Paste paper 2
Select invert, delete
Paste close-up tube on paper layer and delete
Select none
Drop opacity on tube down to 75%
Apply dropshadow and merge down on paper layer
Effect, Texture Effects, Blinds (Width 3, Opactity 15, Horizontal and Light from left/top checked)
Move paper layer below frame layer
Select Element 37 - resize by 30%
Paste and position on the top right
Select Element 23 - resize by 30%
Image Free Rotate Right by 15% and paste on the top left
Select Element 24 - resize by 40%
Paste and position on the bottom
Select Element 83 - resize by 20%
Image Free Rotate Left by 15% and paste on the bottom right
Select Element 86 - resize by 15%
Paste and position on the bottom right
Select Element 94 - resize by 30%
Paste and position on the bottom right
Select Element 29 - resize by 30%
Paste and position on the bottom
Select Element 34 - resize by 30%
Paste and position on the bottom
Paste tube of choice where desired
Apply Lokas 3D Shadow at default settings
Select Element 78 - resize by 20%
Paste and position on the left side
Select Element 76 - resize by 40%
Paste and position on the bottom left
Select Element 9 - resize by 12%
Image Free Rotate Left by 15% and paste on the bottom left
Select Element 84 - resize by 20%
Paste and position on the bottom
Select Element 42 - resize by 20%
Paste and position on the bottom
Select Element 16 - resize by 15%
Paste and paste on the bottom
Select Element 50 - resize by 20%
Paste and position on the bottom
Select Element 102 - resize by 75%
Paste and position on the canvas where desired
Paste paper 6 on the canvas
Apply Mask 26 or mask of choice
Merge group and move to the bottom layer
Add any dropshadows you like
Sharpen any elements as needed
Crop and resize as desired
Add copyright info, license number and name
You're done! Thanks for trying my tutorial!

Labels:Lil Mz Brainstorm,Scraps N Company | 0
comments
Sunday, May 7, 2017
ROCKIN SEXY

These Extra's were made using the amazing artwork by Alehandra Vanhek and kit by Disturbed Scraps called "Rockin Sexy". You can purchase the kit here and the tube here
These extra's were made by me and my own creativity. Please do not rip apart, destroy, alter them or claim them as your own. Thanks

Labels:Scraps N Company | 0
comments
CURVY FAIRY
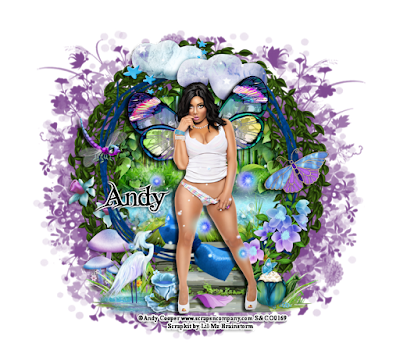
Supplies needed:
I am using the stunning artwork from Andy Cooper for this tutorial which you can find here
Scrapkit: I am using a stunning kit from Lil Mz Brainstorm called "Fairy Curvy" which you can get by going here
Mask 4 from Dee which you can find here
Plugins: Lokas 3D Shadow
----------------------------
This tutorial is written for those who have working knowledge of PSPX2 (any version will do).
This tutorial was written by me on May 7, 2017. Please do not copy or paste on any other forum, website or blog provide link back to tut only. Please do not claim as your own. This tutorial is copyrighted to me. Any resemblance to any other tutorial is purely coincidental.
Ok - let's start and remember to save often.
Open up a 750 x 650 blank canvas (we can resize it later)
Select Frame Element 42 - resize by 85%
Paste and position in the center of the canvas
Select your magic wand tool and select the center of the frame (Add (Shift), RGB Value, Tolerance 25, Contiguous checked, Feather 0)
Selections, Modify, Expand by 5
Paste paper 7
Select invert, delete, select none
Move paper layer below frame layer
Select Element 38 - resize by 75%
Paste and positon in the center of the canvas above frame
Select Eleent 18 - resize by 30%
Image mirror and paste on the bottom left below element 38
Select Element 123 - resize by 45%
Paste and position on the top
Select Element 81 - resize by 20%
Paste and position on top left
Select Element 41 - resize by 20%
Paste and position on the right side
Select Element 60 - resize by 40%
Paste and position on the bottom
Paste tube of choice where desired
Apply Lokas 3D Shadow at default settings
Select Element - resize by 20%
Paste and position on the bottom left
Select Element 14 - resize by 20%
Paste and position on the bottom left
Select Element 40 - resize by 20%
Paste and position on the bottom right
Select Element 102 - resize by 20%
Paste and position on the bottom right
Select Element 9 - resize by 20%
Paste and position on the bottom
Select Element 50 - resize by 20%
Paste and paste on the bottom left
Select Element 79 - resize by 25%
Paste and position on the bottom left
Select Element 65 - resize by 30%
Paste and position on the bottom left
Select Element 66 - resize by 30%
Select Element 30 - resize by 20%
Paste and position on the bottom left
Paste and position on the bottom right
Select Element 5 - resize by 20%
Image mirror and paste on the bottom right
Select Element 84 - resize by 15%
Paste and position on the bottom
Select Element 63 - resize by 55%
Paste and position on the canvas where desired
Add new raster layer and flood-fill with color of choice
Apply Mask4 or mask of choice
Merge group and move to the bottom layer
Add any dropshadows you like
Sharpen any elements as needed
Crop and resize as desired
Add copyright info, license number and name
You're done! Thanks for trying my tutorial!

Labels:Lil Mz Brainstorm,Scraps N Company | 0
comments
Monday, May 1, 2017
EMILY

Supplies needed:
I am using the stunning artwork from Alehandra Vanhek for this tutorial which you can find here
Scrapkit: I am using a stunning kit from Bibi's Collections called "Emily 2" which you can get by going here
Plugins: Lokas 3D Shadow
----------------------------
This tutorial is written for those who have working knowledge of PSPX2 (any version will do).
This tutorial was written by me on May 1, 2017. Please do not copy or paste on any other forum, website or blog provide link back to tut only. Please do not claim as your own. This tutorial is copyrighted to me. Any resemblance to any other tutorial is purely coincidental.
Ok - let's start and remember to save often.
Open up a 750 x 650 blank canvas (we can resize it later)
Select Element 39 - resize by 60%
Paste and position in the center of the canvas
Select Frame Element 9
Paste and position in the center of the canvas
Select your magic wand tool and select the center of the frame (Add (Shift), RGB Value, Tolerance 25, Contiguous checked, Feather 0)
Selections, Modify, Expand by 5
Paste paper 8
Select invert, delete, select none
Move paper layer below frame layer
Select Element 119 - resize by 65%
Image Free Rotate Right by 15% and paste on the bottom right above the frame
Select Element 58 - resize by 35%
Paste and position on the top of the frame where desired
Select Element 82 - resize by 40%
Paste and position on the top right
Select Element 55 - resize by 12%
Paste and position on the top left
Paste tube of choice where desired
Apply Lokas 3D Shadow at default settings
Select Element 42 - resize by 15%
Paste and position on the bottom left
Select Element 40 - resize by 25%
Paste and position on the bottom left
Select Element 25 - resize by 30%
Paste and position on the bottom left
Select Element 62 - resize by 20%
Paste and position on the bottom right
Select Element 15 - resize by 40%
Paste and position on the bottom right
Select Element 60 - resize by 12%
Paste and paste on the bottom right
Select Element 21 - resize by 20%
Paste and position on the bottom right
Select Element 1 - resize by 30%
Paste and position on the bottom right
Select Element 90 - resize by 20%
Paste and position on the bottom right
Select Element 28 - resize by 20%
Paste and position on the bottom
Select Element 6 - resize by 25%
Image Free Rotate Right by 15% and paste on the bottom
Select Element 115 - resize by 35%
Paste and position on the left side
Add any dropshadows you like
Sharpen any elements as needed
Crop and resize as desired
Add copyright info, license number and name
You're done! Thanks for trying my tutorial!

Labels:Bibi's Collections | 0
comments
STEAMPUNK MERMAID

These Extra's were made using the amazing artwork by Julia Fox and kit by Lil Mz Brainstorm called "Steampunk Mermaid". You can purchase the kit here and the tube here
These extra's were made by me and my own creativity. Please do not rip apart, destroy, alter them or claim them as your own. Thanks

Labels:Scraps N Company | 0
comments
Subscribe to:
Comments
(Atom)


