Labels
- Alikas Scraps
- All Dolled Up Store
- Amy Marie
- Annaica
- Arthur Crowe
- Babycakes Scraps
- Barbara Jensen
- Bibi's Collections
- Black Widow Creationz
- Blu Moon
- Bonnies Creations
- Bookwork Dezines
- Broken Sky Dezine
- Carita Creationz
- Carpe Diem Designs
- CDO
- Celinart Pinup
- Celine
- Chacha Creationz
- Charmed Designs
- Cherry Blossom Designs
- Chili Designz
- Cluster Frame
- Creative Misfits
- Creative Scraps by Crys
- Curious Creative Dreams
- Danny Lee
- Derzi
- Designs by Ali
- Designs by Joan
- Designs by Ketura
- Designs By Norella
- Designs by Vi
- Diana Gali
- Diry Art Designs
- Disturbed Scraps
- Dreaming With Bella
- Eclipse Creations
- Elegancefly
- Extras
- Fabulous Designz
- Forum Set
- Foxy's Designz
- Freek's Creation
- FTU
- FwTags
- Goldwasser
- Gothic Inspirations
- Gothic Raven Designs
- Graphfreaks
- Hania's Designs
- Happy Pumpkin Studios
- Horseplay's Pasture Designs
- indie-Zine
- Irish Princess Designs
- Ishika Chowdhury
- Kaci McVay
- Kajenna
- katharine
- Katherine
- Khloe Zoey
- Killer Kitty
- Kissing Kate
- KiwiFirestorm
- Kiya Designs
- Kizzed by Kelz
- KZ Designz
- Lady Mishka
- Lil Mz Brainstorm
- Maiden of Darkness
- Mariel Designs
- MellieBeans
- Michelle's Myths
- Midnight Shadow
- Misticheskya
- MistyLynn's Creations
- MMeliCrea Designz
- Moon Vixen Designs
- NaSionainne
- Ninaste
- Niqui Designs
- Pandora
- Picsfordesign
- Pink Paradox Productions
- Radyga Designs
- Redefined Designs
- Rissa's Designs
- Schnegge
- ScottishButterfly Creations
- Scrappin Krazy Designs
- Scrappin With Lil Ol Me
- Scraps and the City
- Scraps Dimensions
- Scraps From The Heart
- Scraps N Company
- Scraps with Attitude
- Shining Star Art
- Skyscraps
- Sleek N Sassy Designs
- Sophisticat Simone
- Souldesigner
- Soxsational Scraps
- Spazz
- Starlite and Soul
- Stella Felice
- Tammy Welt
- Tasha's Playground
- The PSP Project
- Thrifty Scraps by Gina
- Tiny Turtle Designs
- Upyourart
- Verymany
- Wendy Gerber
- Whisper In the Wind
- Wick3d Creationz
- Wicked Diabla
- Yude's Kreationz
Blog Archive
Friday, June 30, 2017
NATIVE DARK
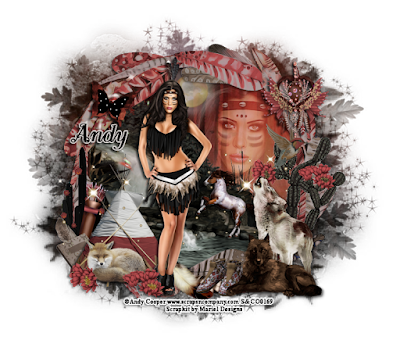
Supplies needed:
I am using the stunning artwork from Andy Cooper for this tutorial which you can find here
Scrapkit: I am using a stunning kit from Mariel Designs called "Native Dark" which you can get by going here
Mask 27 from Splitz Designs which you can find here
Plugins: Lokas 3D Shadow
----------------------------
This tutorial is written for those who have working knowledge of PSPX2 (any version will do).
This tutorial was written by me on June 29, 2017. Please do not copy or paste on any other forum, website or blog provide link back to tut only. Please do not claim as your own. This tutorial is copyrighted to me. Any resemblance to any other tutorial is purely coincidental.
Ok - let's start and remember to save often.
Open up a 750 x 650 blank canvas (we can resize it later)
Select Frame Element 1 - resize by 85%
Paste and position in the center of the canvas
Select your magic wand tool and select the center of the frame (Add (Shift), RGB Value, Tolerance 25, Contiguous checked, Feather 0)
Selections, Modify, Expand by 5
Paste paper 1
Select invert, delete
Paste close-up tube on paper layer and delete
Select none
Chage the closeup to Screen and drop opacity down to 55%
Apply dropshadow and merge down on paper layer
Move paper layer below frame layer
Select Element 60 - resize by 55%
Paste and position on the left side below the frame layer
Select Element 83 - resize by 25%
Paste and position on the top below frame
Select Element 35 - resize by 30%
Paste and position on the top right
Select Element 106 - resize by 40%
Paste and position on the bottom left
Select Element 42 - resize by 30%
Image Free Rotate Right by 15% and paste on the bottom left
Select Element 56 - resize by 50%
Paste and position on the bottom left
Select Element 26 - resize by 20%
Paste and position on the bottom left
Paste tube of choice where desired
Apply Lokas 3D Shadow at default settings
Select Element 73 - resize by 20%
Paste and position on the bottom left
Select Element 6 - resize by 30%
Paste and position on the bottom left
Select Element 1 - resize by 30%
Paste and position on the bottom right
Select Element 31 - resize by 45%
Paste and position on the bottom right
Select Element 109 - resize by 25%
Paste and position on the bottom
Select Element 92 - resize by 15%
Paste and paste on the bottom
Select Element 87 - resize by 20%
Paste and position on the bottom
Select Element 10 - resize by 15%
Image Free Rotate Right by 15% and paste on the top left
Select Element 48 - resize by 15%
Paste and position on the right side
Select Element 79 - resize by 75%
Paste and position on the canvas where desired
Paste paper 2 on the canvas
Apply Mask 27 or mask of choice
Merge group and move to the bottom layer
Add any dropshadows you like
Sharpen any elements as needed
Crop and resize as desired
Add copyright info, license number and name
You're done! Thanks for trying my tutorial!

Labels:Scraps N Company | 0
comments
MERMAID YUMI

These Extra's were made using the amazing artwork by KiwiBG and FTU kit by Bibi's Collections called "Anarchy Mermaid". You can purchase the kit here and the tube here
These extra's were made by me and my own creativity. Please do not rip apart, destroy, alter them or claim them as your own. Thanks

Labels:Extras,Scraps N Company | 0
comments
Thursday, June 29, 2017
CAMOUFLAGE
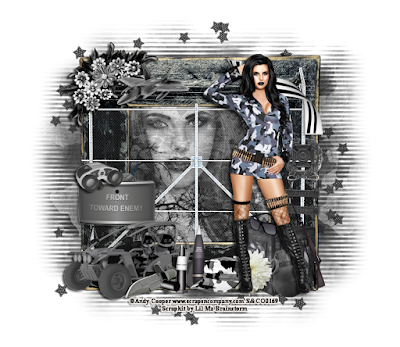
Supplies needed:
I am using the stunning artwork from Andy Cooper for this tutorial which you can find here
Scrapkit: I am using a stunning kit from Lil Mz Brainstorm called "Bullet Camouflage" which you can get by going here
Plugins: Lokas 3D Shadow
----------------------------
This tutorial is written for those who have working knowledge of PSPX2 (any version will do).
This tutorial was written by me on June 29, 2017. Please do not copy or paste on any other forum, website or blog provide link back to tut only. Please do not claim as your own. This tutorial is copyrighted to me. Any resemblance to any other tutorial is purely coincidental.
Ok - let's start and remember to save often.
Open up a 750 x 650 blank canvas (we can resize it later)
Select Frame Element 8 - resize by 85%
Paste and position in the center of the canvas
Select your magic wand tool and select the center of the frame (Add (Shift), RGB Value, Tolerance 25, Contiguous checked, Feather 0)
Selections, Modify, Expand by 5
Paste paper 15
Select invert, delete
Paste close-up tube on paper layer and delete
Select none
Chage the closeup to Luminance (Legacy) and drop opacity down to 65%
Apply dropshadow and merge down on paper layer
Effect, Texture Effects, Blinds (Width 3, Opactity 15, Horizontal and Light from left/top checked)
Move paper layer below frame layer
Select Element 12 - resize by 40%
Paste and position above the paper layer where desired
Select Element 107 - resize by 75%
Paste and position on the on top of the frame layer
Select Element 22 - resize by 30%
Paste and position on the top left
Select Element 100 - resize by 25%
Paste and position on the top left
Select Element 35 - resize by 30%
Paste and position on the top right
Select Element 72 - resize by 25%
Paste and position on the right side
Select Element 87 - resize by 25%
Paste and position on the bottom right
Paste tube of choice where desired
Apply Lokas 3D Shadow at default settings
Select Element 3 - resize by 30%
Paste and position on the bottom right
Select Element 66 - resize by 15%
Image Free Rotate Left by 15% and paste on the bottom right
Select Element 43 - resize by 15%
Paste and position on the bottom right
Select Element 45 - resize by 25%
Paste and position on the bottom left
Select Element 80 - resize by 45%
Paste and position on the bottom left
Select Element 89 - resize by 15%
Paste and paste on the left side
Select Element 59 - resize by 25%
Paste and position on the bottom
Select Element 9 - resize by 15%
Paste and position on the bottom
Select Element 46 - resize by 20%
Paste and position on the bottom
Select Element 63 - resize by 20%
Paste and position on the bottom
Select Element 36 - resize by 95%
Paste and position in the center of the canvas and drop to the bottom layer
Paste paper 12 on the canvas
Apply Mask 23 or mask of choice
Merge group and move to the bottom layer
Add any dropshadows you like
Sharpen any elements as needed
Crop and resize as desired
Add copyright info, license number and name
You're done! Thanks for trying my tutorial!

Labels:Lil Mz Brainstorm | 0
comments
GOTHIC STYLE

These tags were made by me and my own creativity. Please do not rip apart, destroy, alter them or claim them as your own. Thanks

Labels:Bibi's Collections | 0
comments
Sunday, June 25, 2017
WICKED MERMAID
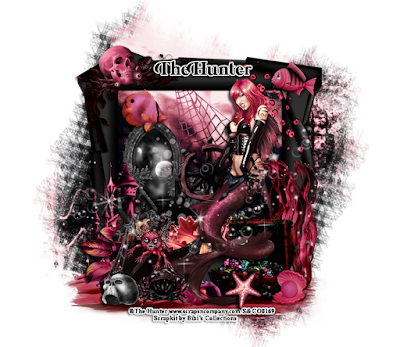
Supplies needed:
I am using the stunning artwork from The Hunter for this tutorial which you can find here
Scrapkit: I am using a stunning kit from Bibi's Collections called "Dark Mermaid 3" which you can get by going here
Plugins: Lokas 3D Shadow
----------------------------
This tutorial is written for those who have working knowledge of PSPX2 (any version will do).
This tutorial was written by me on June 25, 2017. Please do not copy or paste on any other forum, website or blog provide link back to tut only. Please do not claim as your own. This tutorial is copyrighted to me. Any resemblance to any other tutorial is purely coincidental.
Ok - let's start and remember to save often.
Open up a 750 x 650 blank canvas (we can resize it later)
Select Element 94 - resize by 75%
Paste and position in the center of the canvas
Select Frame Element 102 - resize by 70%
Paste and position in the center of the canvas
Select Element 50 - resize by 45%
Paste and position on the left side below the frame layer
Select Element 107 - resize by 50%
Paste and position on the top center below the frame
Select Element 4 - resize by 25%
Paste and position in the center where desired
Select Element 32 - resize by 40%
Paste and position on the top right
Select Element 9 - resize by 15%
Paste and position on the top right
Select Element 53 - resize by 40%
Paste and position on the top left
Select Element 71 - resize by 40%
Paste and position on the bottom right
Select Element 48 - resize by 45%
Paste and position on the bottom
Select Element 11 - resize by 20%
Image mirror and paste on the bottom right
Paste tube of choice where desired
Apply Lokas 3D Shadow at default settings
Select Element 30 - resize by 20%
Paste and position on the bottom left
Select Element 83 - resize by 20%
Paste and position on the bottom left
Select Element 5 - resize by 20%
Paste and position on the bottom
Select Element 13 - resize by 30%
Paste and position on the bottom left
Select Element 91 - resize by 15%
Paste and position on the bottom left
Select Element 96 - resize by 15%
Paste and paste on the bottom
Select Element 80 - resize by 15%
Paste and position on the bottom
Select Element 82 - resize by 12%
Paste and position on the bottom right
Select Element 104 - resize by 15%
Paste and position on the bottom right
Select Element 81 - resize by 8%
Paste and position on the top left
Select Element 98 - resize by 75%
Paste and position on the canvas where desired
Add any dropshadows you like
Sharpen any elements as needed
Crop and resize as desired
Add copyright info, license number and name
You're done! Thanks for trying my tutorial!

Labels:Bibi's Collections | 0
comments
AMAZON WARRIOR
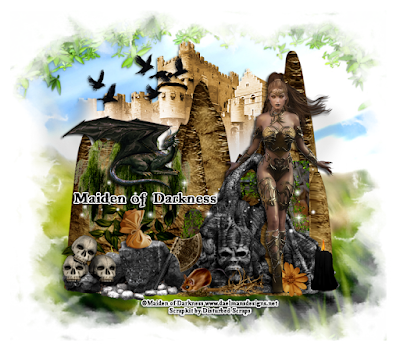
Supplies needed:
I am using the stunning artwork from Maiden of Darkness for this tutorial which you can find here
Scrapkit: I am using a stunning kit from Disturbed Scraps called "Brave Warrior" which you can get by going here
DMSK Mask 328 from Moonbeams and Spiderwebs which you can find here
Plugins: Lokas 3D Shadow
----------------------------
This tutorial is written for those who have working knowledge of PSPX2 (any version will do).
This tutorial was written by me on June 25, 2017. Please do not copy or paste on any other forum, website or blog provide link back to tut only. Please do not claim as your own. This tutorial is copyrighted to me. Any resemblance to any other tutorial is purely coincidental.
Ok - let's start and remember to save often.
Open up a 750 x 650 blank canvas (we can resize it later)
Select Element 36 - resize by 85%
Paste and position in the center of the canvas
Select Element 48 - resize by 95%
Paste and position on the top below the cliff element
Select Element 60 - resize by 35%
Paste and position on the top left
Select Element 15 - resize by 40%
Paste and position on the left side
Select Element 56 - resize by 45%
Image mirror and paste on the right side
Select Element 35 - resize by 55%
Paste and position on the bottom right
Select Element 22 - resize by 40%
Paste and position on the bottom left
Select Element 29 - resize by 45%
Paste and position on the bottom left
Paste tube of choice where desired
Apply Lokas 3D Shadow at default settings
Select Element 51 - resize by 20%
Paste and position on the bottom left
Select Element 46 - resize by 15%
Paste and position on the bottom
Select Element 34 - resize by 20%
Paste and position on the bottom
Select Element 59 - resize by 20%
Paste and position on the bottom
Select Element 25 - resize by 30%
Paste and position on the bottom
Select Element 52 - resize by 30%
Paste and paste on the bottom right
Select Element 9 - resize by 15%
Paste and position on the bottom right
Select Element 50 - resize by 40%
Paste and position on the left side
Select Element 75 - resize by 75%
Paste and position on the canvas where desired
Paste paper 7 on the canvas
Apply Mask 328 or mask of choice
Merge group and move to the bottom layer
Add any dropshadows you like
Sharpen any elements as needed
Crop and resize as desired
Add copyright info, license number and name
You're done! Thanks for trying my tutorial!

Labels:Maiden of Darkness | 0
comments
Saturday, June 24, 2017
HOT SUMMER

These Extra's were made using the amazing artwork by Lysisange and kit by Lil Mz Brainstorm called "Hot Summer". You can purchase the kit here and the tube here
These extra's were made by me and my own creativity. Please do not rip apart, destroy, alter them or claim them as your own. Thanks

FAIRYTALE
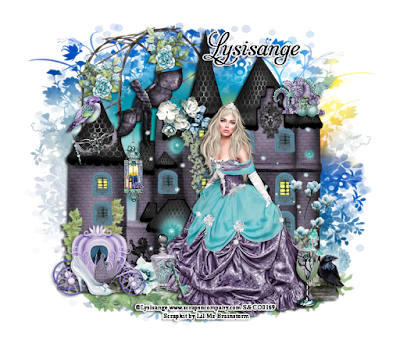
Supplies needed:
I am using the stunning artwork from Lysisange for this tutorial which you can find here
Scrapkit: I am using a stunning Collab kit from A Lil Mz Brainstorm called "Fairytale Collab 2" which you can get by going here
Mask 4 from Dee which you can find here
Plugins: Lokas 3D Shadow
----------------------------
This tutorial is written for those who have working knowledge of PSPX2 (any version will do).
This tutorial was written by me on June 24, 2017. Please do not copy or paste on any other forum, website or blog provide link back to tut only. Please do not claim as your own. This tutorial is copyrighted to me. Any resemblance to any other tutorial is purely coincidental.
Ok - let's start and remember to save often.
Open up a 750 x 650 blank canvas (we can resize it later)
Select Element 19
Paste and position in the center of the canvas
Select Element 47 - paste and position on the bottom below castle element
Select Element 36 - resize by 80%
Paste and position on the top left below the castle element
Select Element 18 - resize by 15%
Paste and position on the top left above the trellis element
Image duplicate, mirror and reposition on another part of the trellis
Select Element 20 - resize by 20%
Paste and position on the top right
Select Element 6 - resize by 20%
Paste and position on top center where desired
Select Element 15 - resize by 25%
Paste and position on the castle element
Select Element 42 - resize by 65%
Paste and position on the right side where desired
Select Element 7 - resize by 30%
Paste and position on the bottom right
Paste tube of choice where desired
Apply Lokas 3D Shadow at default settings
Select Element 16 - resize by 20%
Paste and position on the top left
Select Element 10 - resize by 15%
Image Free Rotate Left by 15% and paste on the top left
Select Element 22 - resize by 30%
Paste and position on the bottom left
Select Element 24 - resize by 15%
Paste and position on the bottom left
Select Element 5 - resize by 15%
Paste and position on the bottom
Select Element 8 - resize by 20%
Paste and paste on the bottom
Select Element 37 - resize by 25%
Paste and position on the bottom right
Select Element 14 - resize by 20%
Paste and position on the bottom right
Paste paper 2 on the canvas
Apply Mask 32 or mask of choice
Merge group and move to the bottom layer
Add any dropshadows you like
Sharpen any elements as needed
Crop and resize as desired
Add copyright info, license number and name
You're done! Thanks for trying my tutorial!

Labels:Lil Mz Brainstorm | 0
comments
GOTHIC BUTTERFLY

Supplies needed:
I am using the stunning artwork from Andy Cooper for this tutorial which you can find here
Scrapkit: I am using a stunning kit from Disturbed Scraps called "Gothic Butterfly" which you can get by going here
Mask 3 from Moonbeams and Spiderwebs which you can find here
Plugins: Lokas 3D Shadow, Eyecandy 4000 - Gradient Glow
----------------------------
This tutorial is written for those who have working knowledge of PSPX2 (any version will do).
This tutorial was written by me on June 24, 2017. Please do not copy or paste on any other forum, website or blog provide link back to tut only. Please do not claim as your own. This tutorial is copyrighted to me. Any resemblance to any other tutorial is purely coincidental.
Ok - let's start and remember to save often.
Open up a 750 x 650 blank canvas (we can resize it later)
Select Frame Element 70 - resize by 85%
Paste and position in the center of the canvas
Select your magic wand tool and select the center of the frame (Add (Shift), RGB Value, Tolerance 25, Contiguous checked, Feather 0)
Selections, Modify, Expand by 5
Paste paper 14
Select invert, delete
Paste close-up tube on paper layer and delete
Select none
Chage the closeup to Luminance (Legacy)
Apply dropshadow and merge down on paper layer
Effect, Texture Effects, Blinds (Width 3, Opactity 15, Horizontal and Light from left/top checked)
Move paper layer below frame layer
Select Element 69 - resize by 45%
Image Free Rotate Left by 5% and paste in the center of the canvas above frame layer
Select Element 75 - resize by 30%
Paste and position on the top center
Apply Eyecandy Gradient Glow on fat default settings (Glow width 3)
Select Element 37 - resize by 25%
Paste and position on the bottom right
Select Element 43 - resize by 20%
Paste and position on the bottom left
Select Element 15 - resize by 40%
Paste and position on the bottom left
Image duplicate mirror and position on the bottom right
Select Element 8 - resize by 50%
Paste and position on the bottom
Select Element 7 - resize by 20%
Paste and position on the bottom right
Paste tube of choice where desired
Apply Lokas 3D Shadow at default settings
Select Element 19 - resize by 20%
Paste and position on the bottom left
Select Element 23 - resize by 20%
Paste and position on the bottom
Select Element 26 - resize by 25%
Paste and position on the bottom
Select Element 14 - resize by 20%
Paste and position on the bottom left
Select Element 5 - resize by 25%
Paste and position on the bottom left
Select Element 32 - resize by 30%
Paste and paste on the bottom
Select Element 63 - resize by 40%
Image mirror and paste on the bottom where desired
Select Element 29 - resize by 20%
Image Free Rotate Right by 15% and paste on the top left
Select Element 39 - resize by 30%
Paste and position on the left side
Paste paper 9 on the canvas
Apply Mask 32 or mask of choice
Merge group and move to the bottom layer
Add any dropshadows you like
Sharpen any elements as needed
Crop and resize as desired
Add copyright info, license number and name
You're done! Thanks for trying my tutorial!

Labels:Scraps N Company | 0
comments
Monday, June 19, 2017
CINDERELLA

Supplies needed:
I am using the stunning artwork from Toriya for this tutorial which you can find here
Scrapkit: I am using a stunning kit from Bibi'a Collections called "Cinderella" which you can get by going here
Plugins: Lokas 3D Shadow
----------------------------
This tutorial is written for those who have working knowledge of PSPX2 (any version will do).
This tutorial was written by me on June 19, 2017. Please do not copy or paste on any other forum, website or blog provide link back to tut only. Please do not claim as your own. This tutorial is copyrighted to me. Any resemblance to any other tutorial is purely coincidental.
Ok - let's start and remember to save often.
Open up a 750 x 650 blank canvas (we can resize it later)
Select Element 138 - resize by 80%
Paste and position in the center of the canvas
Select Frame Element 120 - resize by 65%
Paste and position in the center of the canvas
Select your magic wand tool and select the center of the frame (Add (Shift), RGB Value, Tolerance 25, Contiguous checked, Feather 0)
Selections, Modify, Expand by 5
Paste paper 1
Select invert, delete, select none
Move paper layer below frame layer
Select Element 43 - resize by 45%
Paste and position on top of the frame
Select Element 125 - resize by 35%
Paste and position on the top left
Select Element 1 - resize by 35%
Paste and position on the left side
Paste tube of choice where desired
Apply Lokas 3D Shadow at default settings
Select Element 71 - resize by 25%
Image mirror and paste on the right side
Select Element 48 - resize by 15%
Image Free Rotate Right by 15% and paste on the right side
Select Element 90 - resize by 15%
Paste and position on the bottom right
Select Element 121 - resize by 25%
Paste and position on the bottom right
Select Element 62 - resize by 20%
Paste and position on the bottom right
Select Element 130 - resize by 20%
Paste and position on the bottom right
Select Element 9 - resize by 15%
Paste and position on the bottom right
Select Element 16 - resize by 30%
Paste and paste on the bottom
Select Element 26 - resize by 15%
Paste and position on the top left
Select Element 15 - resize by 15%
Paste and position on the bottom left
Select Element 51 - resize by 8%
Paste and position on the bottom left
Select Element 67 - resize by 20%
Paste and position on the top where desired
Select Element 83 - resize by 45%
Paste and position on the canvas where desired
Add any dropshadows you like
Sharpen any elements as needed
Crop and resize as desired
Add copyright info, license number and name
You're done! Thanks for trying my tutorial!

Labels:Bibi's Collections | 0
comments
Sunday, June 18, 2017
FAIRY QUEEN
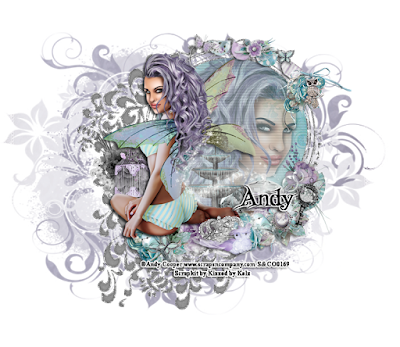
Supplies needed:
I am using the stunning artwork from Andy Cooper for this tutorial which you can find here
Scrapkit: I am using a stunning Collab kit from Kizzed by Kelz called "Fairytale Queen" which you can get by going here
Floral Mask 1 from which you can find here
Plugins: Lokas 3D Shadow
----------------------------
This tutorial is written for those who have working knowledge of PSPX2 (any version will do).
This tutorial was written by me on June 18, 2017. Please do not copy or paste on any other forum, website or blog provide link back to tut only. Please do not claim as your own. This tutorial is copyrighted to me. Any resemblance to any other tutorial is purely coincidental.
Ok - let's start and remember to save often.
Open up a 750 x 650 blank canvas (we can resize it later)
Select Frame Element 39 - resize by 85%
Paste and position in the center of the canvas
Select your magic wand tool and select the center of the frame (Add (Shift), RGB Value, Tolerance 25, Contiguous checked, Feather 0)
Selections, Modify, Expand by 5
Paste paper 3
Select invert, delete
Paste close-up tube on paper layer and delete
Select none
Drop opacity on closeup down to 50%
Apply dropshadow and merge down on paper layer
Effect, Texture Effects, Blinds (Width 3, Opactity 15, Horizontal and Light from left/top checked)
Move paper layer below frame layer
Select Element 33 - resize by 40%
Paste and position on the top
Select Element 31 - resize by 30%
Paste and position on the top right
Select Element 40 - resize by 30%
Paste and position on the left side
Select Element 7 - resize by 20%
Paste and position on the left side
Select Element 13 - resize by 30%
Paste and position on the bottom
Paste tube of choice where desired
Apply Lokas 3D Shadow at default settings
Select Element 25 - resize by 30%
Paste and position on the bottom left
Select Element 26 - resize by 30%
Paste and position on the right side
Select Element 6 - resize by 20%
Image Free Rotate Right by 15% and paste on the bottom right
Select Element 32 - resize by 40%
Paste and position on the bottom right
Select Element 16 - resize by 30%
Paste and position on the bottom
Select Element 8 - resize by 20%
Paste and paste on the bottom
Select Element 18 - resize by 20%
Paste and position on the bottom
Select Element 20 - resize by 55%
Paste and position on the canvas where desired
Paste paper on the canvas
Apply Mask 32 or mask of choice
Merge group and move to the bottom layer
Add any dropshadows you like
Sharpen any elements as needed
Crop and resize as desired
Add copyright info, license number and name
You're done! Thanks for trying my tutorial!

Labels:Scraps N Company | 0
comments
ANNIE
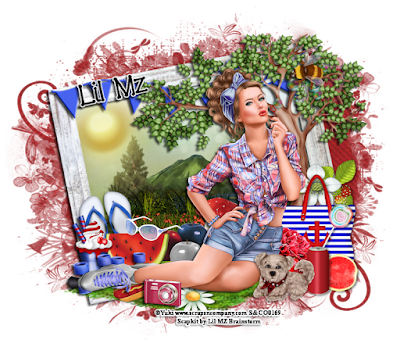
Supplies needed:
I am using the stunning artwork from Yuki for this tutorial which you can find here
Scrapkit: I am using a stunning kit from A Lil Mz Brainstorm called "Annie 5" which you can get by going here
Mask 3 from Dee which you can find here
Plugins: Lokas 3D Shadow
----------------------------
This tutorial is written for those who have working knowledge of PSPX2 (any version will do).
This tutorial was written by me on June 18, 2017. Please do not copy or paste on any other forum, website or blog provide link back to tut only. Please do not claim as your own. This tutorial is copyrighted to me. Any resemblance to any other tutorial is purely coincidental.
Ok - let's start and remember to save often.
Open up a 750 x 650 blank canvas (we can resize it later)
Select Frame Element 15
Paste and position in the center of the canvas
Select your magic wand tool and select the center of the frame (Add (Shift), RGB Value, Tolerance 25, Contiguous checked, Feather 0)
Selections, Modify, Expand by 5
Paste paper 2
Select invert, delete, select none
Move paper layer below frame layer
Select Element 80 - resize by 50%
Paste and position on the bottom above paper layer
Select Element 42 - resize by 40%
Paste and position on the top left below the frame layer
Select Element 66 - resize by 80%
Paste and position on the top of the frame
Select Element 109 - resize by 75%
Paste and position on the right side
Select Element 111 - resize by 30%
Paste and position on the top right
Select Element 96 - resize by 25%
Paste and position on the right side
Select Element 63 - resize by 30%
Paste and position on the bottom right
Select Element 81 - resize by 80%
Paste and position on the bottom where desired
Paste tube of choice where desired
Apply Lokas 3D Shadow at default settings
Select Element 112 - resize by 20%
Paste and position on the bottom right
Select Element 11 - resize by 15%
Paste and position on the bottom right
Select Element 30 - resize by 15%
Paste and position on the bottom left
Select Element 10 - resize by 20%
Paste and position on the bottom right
Select Element 7 - resize by 20%
Paste and position on the bottom right
Select Element 76 - resize by 20%
Image Free Rotate Left by 15% and paste on the bottom left
Select Element 73 - resize by 20%
Paste and position on the bottom left
Select Element 26 - resize by 20%
Paste and position on the bottom left
Select Element 23 - resize by 20%
Paste and position on the bottom
Select Element 33 - resize by 15%
Paste and position on the bottom
Select Element 5 - resize by 15%
Paste and position on the bottom
Select Element 106 - resize by 15%
Paste and position on the bottom
Paste paper 4 on the canvas
Apply Mask 3 or mask of choice
Merge group and move to the bottom layer
Add any dropshadows you like
Sharpen any elements as needed
Crop and resize as desired
Add copyright info, license number and name
You're done! Thanks for trying my tutorial!

Labels:Lil Mz Brainstorm | 0
comments
Friday, June 16, 2017
CUBE OF KISSES

These Extra's were made using the amazing artwork by Danny Lee and kit by Angel Wings Scraps called "Cube of Kisses". You can purchase the kit here and the tube here
These extra's were made by me and my own creativity. CPlease do not rip apart, destroy, alter them or claim them as your own. Thanks

Labels:Extras,Scraps N Company | 0
comments
Thursday, June 15, 2017
BLACK MERMAID
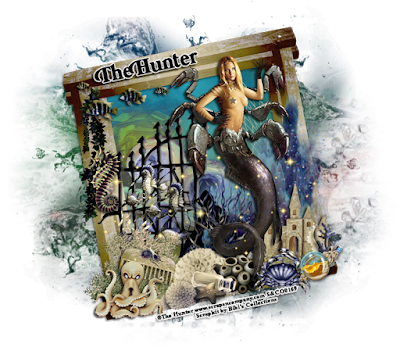
Supplies needed:
I am using the stunning artwork from The Hunter for this tutorial which you can find here
Scrapkit: I am using a stunning kit from Bibi's Collections called "Black Mermaid" which you can get by going here
Mask 4 from Rachel Designs which you can find here
Plugins: Lokas 3D Shadow
----------------------------
This tutorial is written for those who have working knowledge of PSPX2 (any version will do).
This tutorial was written by me on June 15, 2017. Please do not copy or paste on any other forum, website or blog provide link back to tut only. Please do not claim as your own. This tutorial is copyrighted to me. Any resemblance to any other tutorial is purely coincidental.
Ok - let's start and remember to save often.
Open up a 750 x 650 blank canvas (we can resize it later)
Select Frame Element 138 - resize by 55%
Paste and position in the center of the canvas
Select your magic wand tool and select the center of the frame (Add (Shift), RGB Value, Tolerance 25, Contiguous checked, Feather 0)
Selections, Modify, Expand by 5
Paste paper 3
Select invert, delete, select none
Move paper layer below frame layer
Select Element 90 - resize by 40%
Paste and position on top of the paper layer where desired
Select Element 113 - resize by 50%
Paste and position on the right side
Select Element 55 - resize by 20%
Paste and position on the bottom right
Select Element 62 - resize by 20%
Paste and position on the bottom
Select Element 60 - resize by 40%
Paste and position on the left side
Select Element 9 - resize by 25%
Paste and position on the bottom
Paste tube of choice where desired
Apply Lokas 3D Shadow at default settings
Select Element 88 - resize by 30%
Paste and position on the top left
Select Element 59 - resize by 20%
Paste and position on top left
Select Element 3 - resize by 10%
Paste and position on the left side
Select Element 56 - resize by 20%
Paste and position on the bottom left
Select Element 50 - resize by 20%
Paste and position on the bottom left
Select Element 69 - resize by 12%
Image Free Rotate Right by 15% and paste on the bottom left
Select Element 109 - resize by 12%
Paste and position on the bottom left
Select Element 64 - resize by 40%
Paste and position on the bottom
Select Element 127 - resize by 25%
Paste and position on the bottom
Select Element 58 - resize by 20%
Paste and position on the bottom
Select Element 46 - resize by 15%
Paste and position on the bottom
Select Element 105 - resize by 25%
Paste and position on the bottom right
Select Element 135 - resize by 8%
Paste and position on the bottom right
Select Element 67 - resize by 12%
Paste and position on the bottom right
Select Element 117 - resize by
Paste and position on the canvas where desired
Paste paper 2 on the canvas
Apply Mask 4 or mask of choice
Merge group and move to the bottom layer
Add any dropshadows you like
Sharpen any elements as needed
Crop and resize as desired
Add copyright info, license number and name
You're done! Thanks for trying my tutorial!

Labels:Bibi's Collections,Scraps N Company | 0
comments
Wednesday, June 14, 2017
DARK ANNABELLE

Supplies needed:
I am using the stunning artwork from Maiden of Darkness for this tutorial which you can find here
Scrapkit: I am using a stunning kit from A Lil Mz Brainstorm called "Dark Angel" which you can get by going here
Mask 22 from Becky which you can find here
Plugins: Lokas 3D Shadow
----------------------------
This tutorial is written for those who have working knowledge of PSPX2 (any version will do).
This tutorial was written by me on June 14, 2017. Please do not copy or paste on any other forum, website or blog provide link back to tut only. Please do not claim as your own. This tutorial is copyrighted to me. Any resemblance to any other tutorial is purely coincidental.
Ok - let's start and remember to save often.
Open up a 750 x 650 blank canvas (we can resize it later)
Select Frame Element 107 - resize by 85%
Paste and position in the center of the canvas
Select your magic wand tool and select the center of the frame (Add (Shift), RGB Value, Tolerance 25, Contiguous checked, Feather 0)
Selections, Modify, Expand by 5
Paste paper 15
Select invert, delete, select none
Move paper layer below frame layer
Select Element 9 - resize by 75%
Paste and position on the of the paper layer where desired
Select Element 68 - resize by 25%
Paste and position on the left
Image duplicate and mirror - reposition on the top right of the frame
Select Element 40 - resize by 40%
Paste and position on the top left above the paper layer
Select Element 99 - resize by 75%
Paste and position on the left side
Select Element 15 - resize by 85%
Paste and position in the center
Select Element 93 - resize by 20%
Paste and position on the right side
Select Element 110 - resize by 35%
Paste and position on the bottom right
Select Element 61 - resize by 15%
Image Free Rotate Right by 15% and paste on the bottom right
Paste tube of choice where desired
Apply Lokas 3D Shadow at default settings
Select Element 88 - resize by 30%
Paste and position on the bottom left
Select Element 109 - resize by 45%
Paste and position on the bottom
Select Element 42 - resize by 25%
Paste and position on the bottom
Select Element 98 - resize by 40%
Paste and position on the bottom
Select Element 111 - resize by 25%
Paste and position on the bottom above coffin element
Select Element 89 - resize by 20%
Paste and paste on the bottom above coffin element
Select Element 100 - resize by 25%
Paste and position on the bottom above coffin element
Select Element 104 - resize by 15%
Paste and position on the bottom left
Select Element 69 - resize by 25%
Paste and position on the bottom left
Select Element 23 - resize by 20%
Paste and position on the bottom left
Paste paper 7 on the canvas
Apply Mask 22 or mask of choice
Merge group and move to the bottom layer
Add any dropshadows you like
Sharpen any elements as needed
Crop and resize as desired
Add copyright info, license number and name
You're done! Thanks for trying my tutorial!

Labels:Maiden of Darkness | 0
comments
Sunday, June 11, 2017
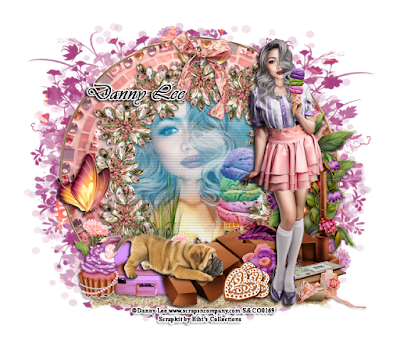
ICE CREAM DREAM
Supplies needed:
I am using the stunning artwork from Danny Lee for this tutorial which you can find here
Scrapkit: I am using a stunning kit from Bibi's Collections called "Vera" which you can get by going here
Mask 4 from Dee which you can find here
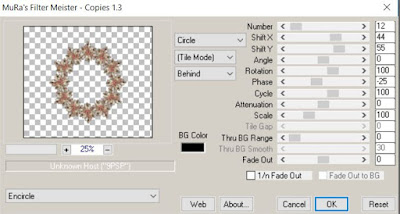
Plugins: Lokas 3D Shadow, Mura Meister - Copies
----------------------------
This tutorial is written for those who have working knowledge of PSPX2 (any version will do).
This tutorial was written by me on June 11 2017. Please do not copy or paste on any other forum, website or blog provide link back to tut only. Please do not claim as your own. This tutorial is copyrighted to me. Any resemblance to any other tutorial is purely coincidental.
Ok - let's start and remember to save often.
Open up a 750 x 650 blank canvas (we can resize it later)
Select Frame Element 82
Paste and position in the center of the canvas
Select your magic wand tool and select the center of the frame (Add (Shift), RGB Value, Tolerance 25, Contiguous checked, Feather 0)
Selections, Modify, Expand by 5
Paste paper 3
Select invert, delete
Paste close-up tube on paper layer and delete
Select none
Chage the closeup to Overlay
Apply dropshadow and merge down on paper layer
Effect, Texture Effects, Blinds (Width 3, Opactity 15, Horizontal and Light from left/top checked)
Move paper layer below frame layer
Select Element 65 - resize by 20%
Paste and position in the center of the canvas
Apply Mura Meister - copies with the following settings:
Select Element 135 - resize by 20%
Paste and position on the bottom right
Select Element 102 - resize by 30%
Paste and position on the bottom right
Select Element 104 - resize by 25%
Image mirror and paste on the bottom right
Select Element 78 - resize by 12%
Paste and position on the bottom right
Select Element 41 - resize by 15%
Paste and position on the bottom right
Select Element 97 - resize by 15%
Paste and position on the bottom right
Paste tube of choice where desired
Apply Lokas 3D Shadow at default settings
Select Element 137 - resize by 20%
Paste and position on the bottom right
Select Element 15 - resize by 20%
Paste and position on the bottom left
Select Element 12 - resize by 20%
Paste and position on the bottom left
Select Element 121 - resize by 25%
Paste and position on the bottom left
Select Element 106 - resize by 15%
Paste and position on the bottom left
Select Element 133 - resize by 25%
Paste and paste on the bottom
Select Element 63 - resize by 20%
Paste and position on the top center of the frame
Paste paper 10 on the canvas
Apply Mask 4 or mask of choice
Merge group and move to the bottom layer
Add any dropshadows you like
Sharpen any elements as needed
Crop and resize as desired
Add copyright info, license number and name
You're done! Thanks for trying my tutorial!

Labels:Bibi's Collections | 0
comments
Saturday, June 10, 2017
LOLITA

Supplies needed:
I am using the stunning artwork from Lady Mishka for this tutorial which you can find here
Scrapkit: I am using a stunning kit from A Lil Mz Brainstorm called "Lolitas" which you can get by going here
Mask 4 from Dee which you can find here
Plugins: Lokas 3D Shadow
----------------------------
This tutorial is written for those who have working knowledge of PSPX2 (any version will do).
This tutorial was written by me on June 10, 2017. Please do not copy or paste on any other forum, website or blog provide link back to tut only. Please do not claim as your own. This tutorial is copyrighted to me. Any resemblance to any other tutorial is purely coincidental.
Ok - let's start and remember to save often.
Open up a 750 x 650 blank canvas (we can resize it later)
Select Frame Element 28 - resize by 85%
Paste and position in the center of the canvas
Select your magic wand tool and select the center of the frame (Add (Shift), RGB Value, Tolerance 25, Contiguous checked, Feather 0)
Selections, Modify, Expand by 5
Paste paper 3
Select invert, delete
Paste close-up tube on paper layer and delete
Select none
Chage the closeup to Overlay and drop opacity down to 70%
Apply dropshadow and merge down on paper layer
Effect, Texture Effects, Blinds (Width 3, Opactity 15, Horizontal and Light from left/top checked)
Move paper layer below frame layer
Select Element 20 - resize by 85%
Paste and position in the center above the frame
Select Element 37 - resize by 15%
Paste and position on the left side
Select Element 19 - resize by 25%
Image Free Rotate Left by 15% and paste on the bottom left
Select Element 7 - resize by 20%
Paste and position on the bottom left
Select Element 113 (cup) - resize by 20%
Paste and position on the bottom left above element 7
Paste tube of choice where desired
Apply Lokas 3D Shadow at default settings
Select Element 62 - resize by 40%
Paste and position on the bottom right
Select Element 44 - resize by 15%
Paste and position on the bottom right
Select Element 90 - resize by 25%
Paste and position on the bottom right
Select Element 60 - resize by 15%
Paste and position on the bottom right
Select Element 46 - resize by 20%
Paste and position on the bottom right
Select Element 53 - resize by 30%
Image Free Rotate Left by 15% and paste on the bottom
Select Element 95 - resize by 20%
Paste and position on the bottom
Select Element 83 - resize by 25%
Paste and position on the bottom
Select Element 40 - resize by 25%
Paste and position on the bottom
Select Element 10 - resize by 15%
Paste and position on the bottom
Add new raster layer and flood-fill with color of choice
Apply Mask 4 or mask of choice
Merge group and move to the bottom layer
Add any dropshadows you like
Sharpen any elements as needed
Crop and resize as desired
Add copyright info, license number and name
You're done! Thanks for trying my tutorial!

Labels:Lil Mz Brainstorm,Scraps N Company | 0
comments
Subscribe to:
Comments
(Atom)


