Labels
- Alikas Scraps
- All Dolled Up Store
- Amy Marie
- Annaica
- Arthur Crowe
- Babycakes Scraps
- Barbara Jensen
- Bibi's Collections
- Black Widow Creationz
- Blu Moon
- Bonnies Creations
- Bookwork Dezines
- Broken Sky Dezine
- Carita Creationz
- Carpe Diem Designs
- CDO
- Celinart Pinup
- Celine
- Chacha Creationz
- Charmed Designs
- Cherry Blossom Designs
- Chili Designz
- Cluster Frame
- Creative Misfits
- Creative Scraps by Crys
- Curious Creative Dreams
- Danny Lee
- Derzi
- Designs by Ali
- Designs by Joan
- Designs by Ketura
- Designs By Norella
- Designs by Vi
- Diana Gali
- Diry Art Designs
- Disturbed Scraps
- Dreaming With Bella
- Eclipse Creations
- Elegancefly
- Extras
- Fabulous Designz
- Forum Set
- Foxy's Designz
- Freek's Creation
- FTU
- FwTags
- Goldwasser
- Gothic Inspirations
- Gothic Raven Designs
- Graphfreaks
- Hania's Designs
- Happy Pumpkin Studios
- Horseplay's Pasture Designs
- indie-Zine
- Irish Princess Designs
- Ishika Chowdhury
- Kaci McVay
- Kajenna
- katharine
- Katherine
- Khloe Zoey
- Killer Kitty
- Kissing Kate
- KiwiFirestorm
- Kiya Designs
- Kizzed by Kelz
- KZ Designz
- Lady Mishka
- Lil Mz Brainstorm
- Maiden of Darkness
- Mariel Designs
- MellieBeans
- Michelle's Myths
- Midnight Shadow
- Misticheskya
- MistyLynn's Creations
- MMeliCrea Designz
- Moon Vixen Designs
- NaSionainne
- Ninaste
- Niqui Designs
- Pandora
- Picsfordesign
- Pink Paradox Productions
- Radyga Designs
- Redefined Designs
- Rissa's Designs
- Schnegge
- ScottishButterfly Creations
- Scrappin Krazy Designs
- Scrappin With Lil Ol Me
- Scraps and the City
- Scraps Dimensions
- Scraps From The Heart
- Scraps N Company
- Scraps with Attitude
- Shining Star Art
- Skyscraps
- Sleek N Sassy Designs
- Sophisticat Simone
- Souldesigner
- Soxsational Scraps
- Spazz
- Starlite and Soul
- Stella Felice
- Tammy Welt
- Tasha's Playground
- The PSP Project
- Thrifty Scraps by Gina
- Tiny Turtle Designs
- Upyourart
- Verymany
- Wendy Gerber
- Whisper In the Wind
- Wick3d Creationz
- Wicked Diabla
- Yude's Kreationz
Blog Archive
Monday, July 31, 2017
DEEP WATER
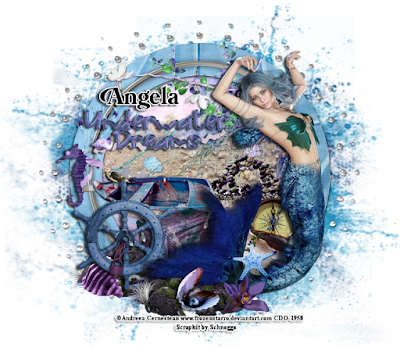
Supplies needed:
I am using the stunning artwork from Andreea Cernestean for this tutorial which you can find here
Scrapkit: I am using a stunning kit from Schnegge called "Go Deep" which you can get by going here
Mask 1 from Rachel Designs which you can find here
Plugins: Lokas 3D Shadow
----------------------------
This tutorial is written for those who have working knowledge of PSPX2 (any version will do).
This tutorial was written by me on July 31, 2017. Please do not copy or paste on any other forum, website or blog provide link back to tut only. Please do not claim as your own. This tutorial is copyrighted to me. Any resemblance to any other tutorial is purely coincidental.
Ok - let's start and remember to save often.
Open up a 750 x 650 blank canvas (we can resize it later)
Select Frame Element 4
Paste and position in the center of the canvas
Select your magic wand tool and select the center of the frame (Add (Shift), RGB Value, Tolerance 25, Contiguous checked, Feather 0)
Selections, Modify, Expand by 5
Paste paper 16
Select invert, delete, select none
Move paper layer below frame layer
Select Sand Element - resize by 85%
Paste and position in the center of the frame above paper layer
Select Net 1 Element - resize by 65%
Paste and position on the top right
Select Foliage 2 Element - resize by 40%
Paste and position on the top of the frame
Select String 1 Element - resize by 55%
Paste and position on the top left
Select Foliage 3 Element - resize by 40%
Image Free Rotate Right by 15% and paste on the top left
Select WordArt2 Element - resize by 50%
Paste and position on the left side
Select Rocks Element - resize by 55%
Paste and position on the bottom
Select Stones Element - resize by 40%
Paste and position on the right side
Paste tube of choice where desired
Apply Lokas 3D Shadow at default settings
Select Boat Element - resize by 42%
Paste and position on the left side
Select Box Element - resize by 35%
Paste and position on the bottom
Select Wheel Element - resize by 50%
Paste and position on the bottom left
Select Shell 2 Element - resize by 40%
Paste and position on the bottom left
Select Shell 4 Element - resize by 25%
Paste and position on the bottom
Select Compass Element - resize by 35%
Paste and paste on the bottom right below tube layer
Select Amphore Element - resize by 30%
Paste and position on the bottom right below tube layer
Select Starfish 1 Element - resize by 30%
Paste and position on the bottom right
Select Flower 5 Element - resize by 30%
Paste and position on the bottom right
Select Seahorse Element - resize by 25%
Paste and position on the left side
Select Waterdrops 2 Element - resize by 110%
Paste and position in the center of the canvas and move to the bottom layer
Paste paper 13 on the canvas
Apply Mask 1 or mask of choice
Merge group and move to the bottom layer
Add any dropshadows you like
Sharpen any elements as needed
Crop and resize as desired
Add copyright info, license number and name
You're done! Thanks for trying my tutorial!

Labels:Schnegge | 0
comments
YELLOW PINUP
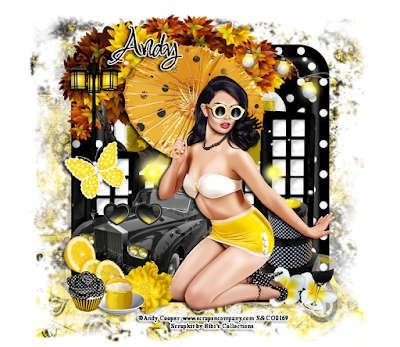
Supplies needed:
I am using the stunning artwork from Andy Cooper for this tutorial which you can find here
Scrapkit: I am using a stunning kit from Bibi's Collections called "Yellow Pinup" which you can get by going here
Plugins: Lokas 3D Shadow
----------------------------
This tutorial is written for those who have working knowledge of PSPX2 (any version will do).
This tutorial was written by me on July 31, 2017. Please do not copy or paste on any other forum, website or blog provide link back to tut only. Please do not claim as your own. This tutorial is copyrighted to me. Any resemblance to any other tutorial is purely coincidental.
Ok - let's start and remember to save often.
Open up a 750 x 650 blank canvas (we can resize it later)
Select Element 41 - resize by 55%
Paste and position in the center of the canvas
Select Frame Element 37 - resize by 55%
Paste and position in the center of the canvas
Select your magic wand tool and select the center of the frame (Add (Shift), RGB Value, Tolerance 25, Contiguous checked, Feather 0)
Selections, Modify, Expand by 5
Paste paper 1
Select invert, delete, select none
Move paper layer below frame layer
Select Element 108 - resize by 75%
Paste and position in the center above paper layer
Select Element 88 - resize by 50%
Paste and position on the top left
Select Element 43 - resize by 30%
Paste and position on the top right
Select Element 110 - resize by 40%
Paste and position on the center of the canvas
Select Element 113 - resize by 50%
Paste and position on the top left
Select Element 30 - resize by 25%
Paste and position on the bottom right
Select Element 20 - resize by 30%
Paste and position on the bottom right
Paste tube of choice where desired
Apply Lokas 3D Shadow at default settings
Select Element 19 - resize by 25%
Paste and position on the bottom right
Select Element 112 - resize by 30%
Paste and position on the bottom left below tube layer
Select Element 2 - resize by 30%
Paste and position on the left side
Select Element 90 - resize by 15%
Paste and position on the bottom left
Select Element 16 - resize by 20%
Paste and position on the bottom left
Select Element 100 - resize by 25%
Paste and paste on the bottom left
Select Element 58 - resize by 20%
Paste and position on the bottom
Select Element 111 - resize by 20%
Paste and position on the car element
Select Element 97 - resize by 40%
Paste and position on the canvas where desired
Add any dropshadows you like
Sharpen any elements as needed
Crop and resize as desired
Add copyright info, license number and name
You're done! Thanks for trying my tutorial!

Labels:Scraps N Company | 0
comments
Sunday, July 30, 2017
WOLF HUNTER
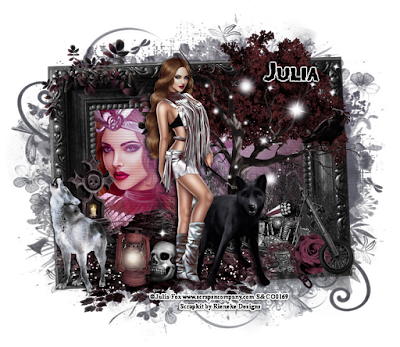
Supplies needed:
I am using the stunning artwork from Julia Fox for this tutorial which you can find here
Scrapkit: I am using a stunning kit from Rieneke Designs called "Wolf Hunter 4" which you can get by going here
Mask 3 from Dee which you can find here
Plugins: Lokas 3D Shadow
----------------------------
This tutorial is written for those who have working knowledge of PSPX2 (any version will do).
This tutorial was written by me on July 30, 2017. Please do not copy or paste on any other forum, website or blog provide link back to tut only. Please do not claim as your own. This tutorial is copyrighted to me. Any resemblance to any other tutorial is purely coincidental.
Ok - let's start and remember to save often.
Open up a 750 x 650 blank canvas (we can resize it later)
Select Frame Element 40
Paste and position in the center of the canvas
Select your magic wand tool and select the center of the frame (Add (Shift), RGB Value, Tolerance 25, Contiguous checked, Feather 0)
Selections, Modify, Expand by 5
Paste paper 1
Select invert, delete
Paste close-up tube on the left side of the paper layer and delete
Select none
Chage the closeup to Overlay
Apply dropshadow and merge down on paper layer
Effect, Texture Effects, Blinds (Width 3, Opactity 15, Horizontal and Light from left/top checked)
Move paper layer below frame layer
Select Element 5 - resize by 55%
Paste and position on the top right
Select Element 11 - resize by 65%
Paste and position on the top right
Select Element 33 - resize by 40%
Paste and position on the top left
Select Element 6 - resize by 75%
Paste and position on the bottom
Select Element 41 - resize by 75%
Paste and position on the bottom left
Select Element 25 - resize by 50%
Paste and position on the bottom right
Paste tube of choice where desired
Apply Lokas 3D Shadow at default settings
Select Element 13 - resize by 30%
Image mirror and paste on the bottom left
Select Element 1 - resize by 40%
Paste and position on the bottom left
Select Element 45 - resize by 25%
Paste and position on the bottom
Select Element 31 - resize by 15%
Paste and position on the bottom
Select Element 7 - resize by 15%
Paste and position on the bottom right
Select Element 26 - resize by 50%
Paste and paste on the bottom below tube layer
Select Element 17 - resize by 15%
Paste and position on the right side
Select Element 43 - resize by 75%
Paste and position on the canvas where desired
Paste paper 3 on the canvas
Apply Mask 2 or mask of choice
Merge group and move to the bottom layer
Add any dropshadows you like
Sharpen any elements as needed
Crop and resize as desired
Add copyright info, license number and name
You're done! Thanks for trying my tutorial!

Labels:Scraps N Company | 0
comments
Saturday, July 29, 2017
FAIRY LOU
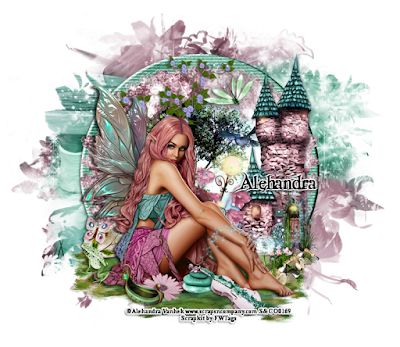
Supplies needed:
I am using the stunning artwork from Alehandra Vanhek for this tutorial which you can find here
Scrapkit: I am using a stunning kit from FW Tags Creations called "Fairy Lou" which you can get by going here
Mask 4 from Rachel Designs which you can find here
Plugins: Lokas 3D Shadow
----------------------------
This tutorial is written for those who have working knowledge of PSPX2 (any version will do).
This tutorial was written by me on July 29, 2017. Please do not copy or paste on any other forum, website or blog provide link back to tut only. Please do not claim as your own. This tutorial is copyrighted to me. Any resemblance to any other tutorial is purely coincidental.
Ok - let's start and remember to save often.
Open up a 750 x 650 blank canvas (we can resize it later)
Select Frame Element 6 - resize by 75%
Paste and position in the center of the canvas
Select your magic wand tool and select the center of the frame (Add (Shift), RGB Value, Tolerance 25, Contiguous checked, Feather 0)
Selections, Modify, Expand by 5
Paste paper 2
Select invert, delete, select none
Move paper layer below frame layer
Select Frame Element 3 - resize by 75%
Paste and position in the center above frame layer
Select Element 5 - resize by 45%
Image Free Rotate Right by 15% and paste on the top left
Select Element 62 - resize by 65%
Paste and position on the right side
Select Element 59 - resize by 75%
Paste and position on the bottom
Select Element 48 - resize by 40%
Paste and position on the bottom right
Select Element 27 - resize by 25%
Paste and position on the bottom
Select Element 26 - resize by 15%
Paste and position on the bottom right
Select Element 51 - resize by 20%
Paste and position on the bottom right
Paste tube of choice where desired
Apply Lokas 3D Shadow at default settings
Select Element 14 - resize by 15%
Paste and position on the bottom left
Select Element 20 - resize by 15%
Paste and position on the bottom left
Select Element 41 - resize by 12%
Paste and position on the bottom
Select Element 31 - resize by 25%
Paste and position on the bottom
Select Element 34 - resize by 15%
Paste and position on the bottom
Select Element 15 - resize by 15%
Paste and paste on the bottom
Select Element 19 - resize by 25%
Paste and position on the top right
Select Element 2 - resize by 40%
Paste and position on the bottom below tube layer
Select Element 24 - resize by 40%
Paste and position on the canvas where desired
Paste paper 1 on the canvas
Apply Mask 4 or mask of choice
Merge group and move to the bottom layer
Add any dropshadows you like
Sharpen any elements as needed
Crop and resize as desired
Add copyright info, license number and name
You're done! Thanks for trying my tutorial!

Labels:Scraps N Company | 0
comments
Tuesday, July 25, 2017
STEAMPUNK FAIRYLAND
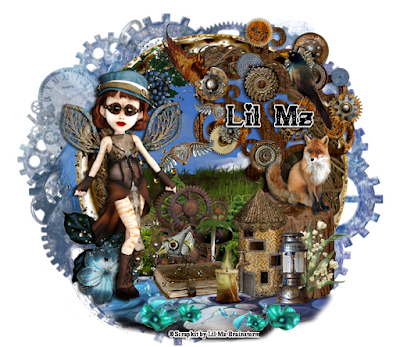
Supplies needed:
Scrapkit: I am using a stunning kit from A Lil Mz Brainstorm called "Steampunk Fairyland" which you can get by going here
Mask 122 from Babs Bitzy Designz which you can find here
Plugins: Lokas 3D Shadow
----------------------------
This tutorial is written for those who have working knowledge of PSPX2 (any version will do).
This tutorial was written by me on July 24, 2017. Please do not copy or paste on any other forum, website or blog provide link back to tut only. Please do not claim as your own. This tutorial is copyrighted to me. Any resemblance to any other tutorial is purely coincidental.
Ok - let's start and remember to save often.
Open up a 750 x 650 blank canvas (we can resize it later)
Select Element 96 -
Paste and position in the center of the canvas
Select Frame Element 104 - resize by 85%
Paste and position in the center of the canvas
Select your magic wand tool and select the center of the frame (Add (Shift), RGB Value, Tolerance 25, Contiguous checked, Feather 0)
Selections, Modify, Expand by 5
Paste paper 9
Select invert, delete, select none
Move paper layer below frame layer
Select Element 73 - resize by 75%
Paste and position in the center of the canvas above frame layer
Select Element 57 - resize by 80%
Paste and position on the left side
Select Element 15 - resize by 65%
Paste and position on the top right
Select Element 70 - resize by 80%
Paste and position on the bottom
Select Element 69 - resize by 55%
Paste and position on the bottom
Select Element 48 - resize by 40%
Image mirror and paste on the bottom right
Select Element 68 - resize by 30%
Paste and position on the right side
Select Element 5 - resize by 40%
Image mirror and paste on the bottom right
Select Element 22 - resize by 40%
Paste and position on the bottom
Select Element 44 - resize by 25%
Paste and position on the top left
Select Element 111 - resize by 75%
Paste and position on the left side where desired
Apply Lokas 3D Shadow at default settings
Select Element 92 - resize by 30%
Image Free Rotate Left by 15% and paste on the bottom left
Select Element 102 - resize by 20%
Paste and position on the bottom left
Select Element 53 - resize by 25%
Paste and position on the bottom right
Select Element 8 - resize by 30%
Paste and position on the bottom right
Select Element 63 - resize by 20%
Paste and position on the bottom
Select Element 37 - resize by 30%
Paste and paste on the bottom
Select Element 114 - resize by 20%
Paste and position on the bottom
Select Element 50 - resize by 20%
Paste and position on the bottom
Select Element 100 - resize by 50%
Paste and position on the bottom
Select Element 2 - resize by 30%
Paste and position in the center
Paste paper 10 on the canvas
Apply Mask 122 or mask of choice
Merge group and move to the bottom layer
Add any dropshadows you like
Sharpen any elements as needed
Crop and resize as desired
Add copyright info, license number and name
You're done! Thanks for trying my tutorial!

Labels:Lil Mz Brainstorm | 0
comments
Sunday, July 23, 2017
LATEX
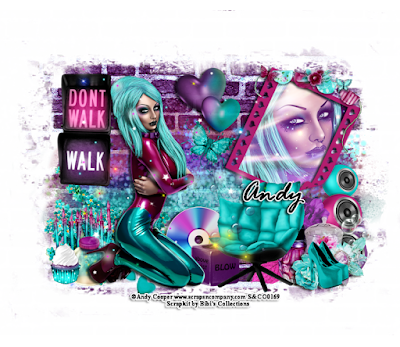
Supplies needed:
I am using the stunning artwork from Andy Cooper for this tutorial which you can find here
Scrapkit: I am using a stunning kit from Bibi's Collections called "Latex" which you can get by going here
Plugins: Lokas 3D Shadow
----------------------------
This tutorial is written for those who have working knowledge of PSPX2 (any version will do).
This tutorial was written by me on July 23, 2017. Please do not copy or paste on any other forum, website or blog provide link back to tut only. Please do not claim as your own. This tutorial is copyrighted to me. Any resemblance to any other tutorial is purely coincidental.
Ok - let's start and remember to save often.
Open up a 750 x 650 blank canvas (we can resize it later)
Select Element 109
Paste and position in the center of the canvas
Select Element 23 - resize by 85%
Paste and position in the center towards the bottom
Select Element 113 - resize by 55%
Paste and position on the top left
Select Element 120 - resize by 50%
Image Free Rotate Right by 25% and paste on the top right
Select your magic wand tool and select the center of the frame (Add (Shift), RGB Value, Tolerance 25, Contiguous checked, Feather 0)
Selections, Modify, Expand by 5
Paste paper 12
Select invert, delete
Paste close-up tube on left side of paper layer and delete
Select none
Chage the closeup to Screen
Apply dropshadow and merge down on paper layer
Move paper layer below frame layer
Select Element 90 - resize by 25%
Paste and position on the top right
Select Element 56 - resize by 55%
Image mirror and paste on the bottom left
Select Element 31 - resize by 25%
Paste and position on the bottom left
Select Element 69 - resize by 40%
Paste and position on top center
Select Element 32 - resize by 20%
Image Free Rotate Right by 15% and paste in the center where desired
Paste tube of choice where desired
Apply Lokas 3D Shadow at default settings
Select Element 52 - resize by 30%
Paste and position on the bottom left
Select Element 74 - resize by 20%
Paste and position on the bottom left
Select Element 81 - resize by 35%
Paste and position on the bottom right
Select Element 91 - resize by 15%
Paste and position on the bottom right
Select Element 43 - resize by 30%
Paste and paste on the bottom right
Select Element 53 - resize by 18%
Paste and position on the bottom right
Select Element 40 - resize by 30%
Paste and position on the bottom
Select Element 119 - resize by 40%
Paste and position on the bottom
Select Element 6 - resize by 30%
Paste and position on the bottom
Select Element 48 - resize by 30%
Paste and position on the bottom
Select Element 24 - resize by 75%
Paste and position on the canvas where desired
Add any dropshadows you like
Sharpen any elements as needed
Crop and resize as desired
Add copyright info, license number and name
You're done! Thanks for trying my tutorial!

Labels:Bibi's Collections | 0
comments
GRUNGE GIRL
These Extra's were made using the amazing artwork by Andy Cooper and stunning kit by Rieneke Designs called "Latex 2". You can purchase the kit here and the tube here
These extra's were made by me and my own creativity. Please do not rip apart, destroy, alter them or claim them as your own. Thanks

Labels:Extras,Scraps N Company | 0
comments
CORAL BEACH
Supplies needed:
I am using the stunning artwork from Alehandra Vanhek for this tutorial which you can find here
Scrapkit: I am using a stunning kit from Bibi's Collections called "Golden Beach" which you can get by going here
Plugins: Lokas 3D Shadow
----------------------------
This tutorial is written for those who have working knowledge of PSPX2 (any version will do).
This tutorial was written by me on July 23, 2017. Please do not copy or paste on any other forum, website or blog provide link back to tut only. Please do not claim as your own. This tutorial is copyrighted to me. Any resemblance to any other tutorial is purely coincidental.
Ok - let's start and remember to save often.
Open up a 750 x 650 blank canvas (we can resize it later)
Select Element 2 - resize by 55%
Paste and position in the center of the canvas
Select Element 41 - resize by 50%
Paste and position on the left side of the mask layer
Select Element 24
Paste and position in the center towards the bottom
Select Element 8 - resize by 85%
Paste and position in the center of the canvas
Select Element 21 - resize by 550%
Paste and position on the bottom
Select Element 49 - resize by 65%
Paste and position on the bottom
Select Element 82 - resize by 40%
Paste and position on the top left
Select Element 55 - resize by 65%
Paste and position on the top
Select Element 13 - resize by 40%
Paste and position on the top right
Paste tube of choice where desired
Apply Lokas 3D Shadow at default settings
Select Element 4 - resize by 30%
Paste and position on the bottom left
Select Element 7 - resize by 40%
Paste and position on the bottom left below tube layer
Select Element 1 - resize by 20%
Paste and position on the bottom left below tube layer
Select Element 75 - resize by 45%
Paste and position on the bottom right
Select Element 6 - resize by 30%
Paste and position on the bottom right
Select Element 73 - resize by 25%
Paste and paste on the bottom right
Select Element 69 - resize by 20%
Paste and position on the bottom right
Select Element 12 - resize by 50%
Paste and position on the bottom right
Select Element 16 - resize by 40%
Paste and position on the bottom
Select Element 86 - resize by 40%
Paste and position on the bottom
Select Element 5 - resize by 40%
Paste and position on the bottom
Select Element 42 - resize by 40%
Paste and position on the bottom
Select Element 14 - resize by 30%
Paste and position on the bottom
Select Element 40 - resize by 75%
Paste and position on the canvas where desired
Add any dropshadows you like
Sharpen any elements as needed
Crop and resize as desired
Add copyright info, license number and name
You're done! Thanks for trying my tutorial!

Labels:Bibi's Collections,Scraps N Company | 0
comments
Saturday, July 22, 2017
IVORY
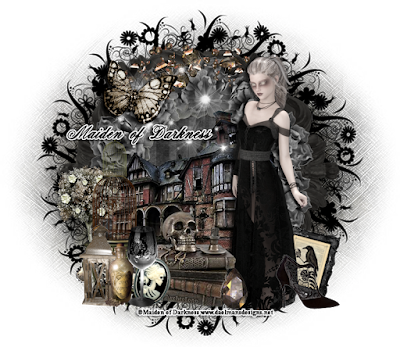
Supplies needed:
I am using the stunning artwork from Maiden of Darkness for this tutorial which you can find here
Scrapkit: I am using a stunning kit from Tiny Turtle Designs called "Zyper" which you can get by going here
Mask 8 from Horseplays Pasture which you can find here
Plugins: Lokas 3D Shadow, Mura Meister - Copies
----------------------------
This tutorial is written for those who have working knowledge of PSPX2 (any version will do).
This tutorial was written by me on July 22, 2017. Please do not copy or paste on any other forum, website or blog provide link back to tut only. Please do not claim as your own. This tutorial is copyrighted to me. Any resemblance to any other tutorial is purely coincidental.
Ok - let's start and remember to save often.
Open up a 750 x 650 blank canvas (we can resize it later)
Select Element 32 - resize by 115%
Paste and position in the center of the canvas
Select Element 33 - resize by 85%
Paste and position in the center of the canvas
Select your magic wand tool and select the center of the frame (Add (Shift), RGB Value, Tolerance 25, Contiguous checked, Feather 0)
Selections, Modify, Expand by 5
Paste paper 4
Select invert, delete, select none
Move paper layer below frame layer
Select Element 48 - resize by 30%
Paste and position in the center of the canvas
Apply Mura Meister Copies with the following settings:
Select Element 62 - resize by 25%
Paste and position on the top left
Select Element 27 - resize by 55%
Paste and position on the bottom left
Select Element 79 - resize by 55%
Paste and position on the bottom left
Select Element 13 - resize by 20%
Image Free Rotate Right by 15% and paste on the bottom right
Paste tube of choice where desired
Apply Lokas 3D Shadow at default settings
Select Element 14 - resize by 20%
Paste and position on the bottom right
Select Element 25 - resize by 30%
Paste and position on the bottom
Select Element 74 - resize by 45%
Paste and position on the bottom left
Select Element 77 - resize by 30%
Paste and position on the bottom left
Select Element 4 - resize by 20%
Paste and position on the bottom left
Select Element 23 - resize by 15%
Image Free Rotate Right by 15% and paste on the bottom
Select Element 43 - resize by 30%
Paste and paste on the bottom
Select Element 78 - resize by 20%
Paste and position on the bottom
Select Element 2 - resize by 55%
Paste and position on the canvas where desired
Paste paper 22 on the canvas
Apply Mask 8 or mask of choice
Merge group and move to the bottom layer
Add any dropshadows you like
Sharpen any elements as needed
Crop and resize as desired
Add copyright info, license number and name
You're done! Thanks for trying my tutorial!

Labels:Maiden of Darkness | 0
comments
Sunday, July 16, 2017
FABULOUS JOY
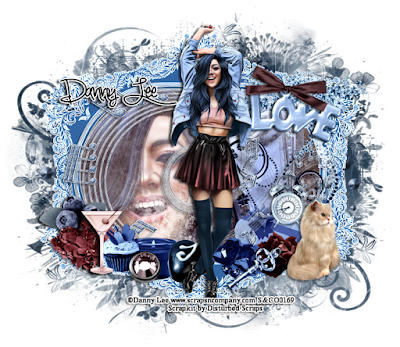
Supplies needed:
I am using the stunning artwork from Danny Lee for this tutorial which you can find here
Scrapkit: I am using a stunning kit from Disturbed Scraps called "Fabulous Joy" which you can get by going here
Mask 3 from Dee which you can find here
Plugins: Lokas 3D Shadow, Eyecandy 4000 - Gradient Glow
----------------------------
This tutorial is written for those who have working knowledge of PSPX2 (any version will do).
This tutorial was written by me on July 16, 2017. Please do not copy or paste on any other forum, website or blog provide link back to tut only. Please do not claim as your own. This tutorial is copyrighted to me. Any resemblance to any other tutorial is purely coincidental.
Ok - let's start and remember to save often.
Open up a 750 x 650 blank canvas (we can resize it later)
Select Frame Element 74
Paste and position in the center of the canvas
Select your magic wand tool and select the center of the frame (Add (Shift), RGB Value, Tolerance 25, Contiguous checked, Feather 0)
Selections, Modify, Expand by 5
Paste paper 14
Select invert, delete
Paste close-up tube on left side of paper layer and delete
Select none
Chage the closeup to Screen
Apply dropshadow and merge down on paper layer
Effect, Texture Effects, Blinds (Width 3, Opactity 15, Horizontal and Light from left/top checked)
Move paper layer below frame layer
Select Element 70 - resize by 85%
Paste and position on top of the frame layer
Apply Eyecandy Gradient Glow on medium settings
Select Element 10 - resize by 45%
Paste and position on the top right
Select Element 46 - resize by 35%
Paste and position on the top right
Select Element 51 - resize by 35%
Image Free Rotate Right by 15% and paste on the top right
Select Element 41 - resize by 40%
Paste and position on the bottom right
Paste tube of choice where desired
Apply Lokas 3D Shadow at default settings
Select Element 29 - resize by 30%
Paste and position on the bottom right
Select Element 18 - resize by 30%
Paste and position on the bottom right
Select Element 4 - resize by 20%
Paste and position on the bottom right
Select Element 17 - resize by 20%
Paste and position on the bottom right
Select Element 33 - resize by 22%
Paste and position on the bottom
Select Element 12 - resize by 22%
Paste and paste on the bottom
Select Element 20 - resize by 25%
Paste and position on the bottom left
Select Element 25 - resize by 20%
Paste and position on the bottom left
Select Element 15 - resize by 30%
Paste and position on the bottom left
Select Element 21 - resize by 25%
Paste and position on the bottom
Select Element 30 - resize by 20%
Paste and position on the bottom
Select Element 14 - resize by 20%
Paste and position on the bottom
Select Element 35 - resize by 25%
Paste and position on the bottom
Paste paper 11 on the canvas
Apply Mask 3 or mask of choice
Merge group and move to the bottom layer
Add any dropshadows you like
Sharpen any elements as needed
Crop and resize as desired
Add copyright info, license number and name
You're done! Thanks for trying my tutorial!

Labels:Scraps N Company | 0
comments
COLOR FAIRY

These Extra's were made using the amazing artwork by Andy Cooper and stunning kit by Jens Sweet Temptations called "Color Fairy". You can purchase the kit here and the tube here
These extra's were made by me and my own creativity. Please do not rip apart, destroy, alter them or claim them as your own. Thanks

Labels:Scraps N Company | 0
comments
MORENA'S LAIR
Supplies needed:
Scrapkit: I am using a stunning kit from A Lil Mz Brainstorm called "Morena's Lair" which you can get by going here
Mask 3 from Rachel Designs which you can find here
Plugins: Lokas 3D Shadow
----------------------------
This tutorial is written for those who have working knowledge of PSPX2 (any version will do).
This tutorial was written by me on July 16, 2017. Please do not copy or paste on any other forum, website or blog provide link back to tut only. Please do not claim as your own. This tutorial is copyrighted to me. Any resemblance to any other tutorial is purely coincidental.
Ok - let's start and remember to save often.
Open up a 750 x 650 blank canvas (we can resize it later)
Select Frame Element 2
Paste and position in the center of the canvas
Select your magic wand tool and select the center of the frame (Add (Shift), RGB Value, Tolerance 25, Contiguous checked, Feather 0)
Selections, Modify, Expand by 5
Paste paper 12
Select invert, delete, select none
Move paper layer below frame layer
Select Element 109 - resize by 85%
Paste and position on the top of the frame where desired
Select Element 103 - resize by 75%
Paste and position in the center of the frame
Select Element 74 - resize by 30%
Paste and position on the right side
Select Element 32 - resize by 65%
Paste and position toward the bottom of the frame
Select Element 42 - resize by 25%
Paste and position in the center below Triton element
Select Element 112 - resize by 30%
Paste and position on the top
Select Element 9 - resize by 15%
Paste and position on the right side
Select Element 28 - resize by 30%
Paste and position on the bottom left
Select Element 11 - resize by 55%
Paste and position on the top left
Apply Lokas 3D Shadow at default settings
Select Element 94 - resize by 50%
Paste and position on the bottom right
Select Element 72 - resize by 30%
Paste and position on the bottom
Select Element 82 - resize by 30%
Paste and position on the bottom right
Select Element 21 - resize by 25%
Paste and position on the bottom right
Select Element 73 - resize by 25%
Paste and position on the bottom right
Select Element 39 - resize by 30%
Paste and position on the bottom left
Select Element 68 - resize by 30%
Paste and paste on the bottom left
Select Element 57 - resize by 30%
Paste and position on the bottom left
Select Element 20 - resize by 20%
Paste and position on the bottom left
Select Element 38 - resize by 20%
Paste and position on the bottom left
Select Element 41 - resize by 30%
Paste and position on the bottom
Select Element 56 - resize by 15%
Paste and position on the bottom
Select Element 27 - resize by 22%
Paste and position on the bottom
Select Element 16 - resize by 15%
Paste and position on the bottom
Select Element 25 - resize by 25%
Paste and position on the top where desired
Paste paper 6 on the canvas
Apply Mask 3 or mask of choice
Merge group and move to the bottom layer
Add any dropshadows you like
Sharpen any elements as needed
Crop and resize as desired
Add copyright info, license number and name
You're done! Thanks for trying my tutorial!

Labels:Lil Mz Brainstorm | 0
comments
Saturday, July 15, 2017
TROPICAL SUN

Supplies needed:
I am using the stunning artwork from Andy Cooper for this tutorial which you can find here
Scrapkit: I am using a stunning kit from Bibi's Collections called "Tropical Sun" which you can get by going here
Mask 2 from Dee which you can find here
Plugins: Lokas 3D Shadow
----------------------------
This tutorial is written for those who have working knowledge of PSPX2 (any version will do).
This tutorial was written by me on July 15, 2017. Please do not copy or paste on any other forum, website or blog provide link back to tut only. Please do not claim as your own. This tutorial is copyrighted to me. Any resemblance to any other tutorial is purely coincidental.
Ok - let's start and remember to save often.
Open up a 750 x 650 blank canvas (we can resize it later)
Select Frame Element 50 - resize by 50%
Paste and position in the center of the canvas
Select your magic wand tool and select the center of the frame (Add (Shift), RGB Value, Tolerance 25, Contiguous checked, Feather 0)
Selections, Modify, Expand by 5
Paste paper 7
Select invert, delete, select none
Move paper layer below frame layer
Select Element 46 - resize by 55%
Select Element 67 - resize by 25%
Paste and position on the the bottom below the frame
Select Element 92 - resize by 30%
Image mirror and Free Rotate Image Right by 15% and paste on the top left
Select Element 114 - resize by 15%
Paste and position on the top left
Select Element 41 - resize by 65%
Paste and position on the bottom
Select Element 48 - resize by 55%
Paste and position on the bottom right
Select Element 59 - resize by 30%
Paste and position on the left side
Select Element 29 - resize by 60%
Image Free Rotate Left by 15% and paste on the top right
Select Element 108 - resize by 20%
Paste and position on the bottom right
Paste tube of choice where desired
Apply Lokas 3D Shadow at default settings
Select Element 13 - resize by 20%
Paste and position on the bottom right
Select Element 60 - resize by 20%
Paste and position on the bottom right
Select Element 108 - resize by 20%
Paste and position on the bottom left
Select Element 1 - resize by 15%
Paste and position on the bottom left
Select Element 117 - resize by 15%
Paste and position on the bottom
Select Element 95 - resize by 20%
Paste and paste on the bottom
Select Element 102 - resize by 20%
Paste and position on the bottom
Select Element 27 - resize by 25%
Paste and position on the bottom
Select Element 38 - resize by 30%
Image Free Rotate Right by 15% and paste and position on the bottom
Select Element 78 - resize by 30%
Paste and position on the bottom
Select Element 101 - resize by 15%
Paste and position on the bottom
Select Element 82 - resize by 25%
Paste and position on the bottom
Select Element 111 - resize by 15%
Paste and position on the bottom
Select Element 2 - resize by 20%
Paste and position on the bottom
Select Element 98 - resize by 15%
Paste and position on the bottom
Select Element 26 - resize by 25%
Paste and position on the canvas
Paste paper 4 on the canvas
Apply Mask 2 or mask of choice
Merge group and move to the bottom layer
Add any dropshadows you like
Sharpen any elements as needed
Crop and resize as desired
Add copyright info, license number and name
You're done! Thanks for trying my tutorial!

Labels:Bibi's Collections | 0
comments
Monday, July 10, 2017
GUARDIAN ANGEL
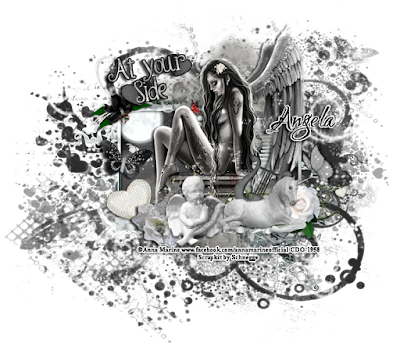
Supplies needed:
I am using the stunning artwork from Anna Marine for this tutorial which you can find here
Scrapkit: I am using a stunning mega kit from Schnegge called "Guardian Angel" which you can get by going here
Mask 1 from Dee which you can find here
Plugins: Lokas 3D Shadow, Eyecandy 4000 - Gradient Glow
----------------------------
This tutorial is written for those who have working knowledge of PSPX2 (any version will do).
This tutorial was written by me on July 10, 2017. Please do not copy or paste on any other forum, website or blog provide link back to tut only. Please do not claim as your own. This tutorial is copyrighted to me. Any resemblance to any other tutorial is purely coincidental.
Ok - let's start and remember to save often.
Open up a 750 x 650 blank canvas (we can resize it later)
Select Frame Element 4
Paste and position in the center of the canvas
Select your magic wand tool and select the center of the frame (Add (Shift), RGB Value, Tolerance 25, Contiguous checked, Feather 0)
Selections, Modify, Expand by 5
Paste paper 16
Select invert, delete, select none
Move paper layer below frame layer
Select M00n Element - resize by 30%
Paste and position on the top left below the frame layer
Select Flower 11 Element - resize by 40%
Paste and position on the top left
Select Staircase Element - resize by 40%
Paste and position on the right side
Select Ruffle Element - resize by 65%
Paste and position on the top of the frame
Image duplicate, flip and reposition on the bottom of the frame
Paste tube of choice where desired
Apply Lokas 3D Shadow at default settings
Select Deco 01 Element - resize by 80%
Paste and position on the bottom
Select Butterfly 1 Element - resize by 30%
Image mirror and paste on the bottom left
Select Butterfly 9 Element - resize by 30%
Paste and position on the bottom right
Select Flower 9 Element - resize by 40%
Paste and position on the bottom right
Select Harp Element - resize by 40%
Image Free Rotate Right by 25% and paste on the bottom right
Select Unicorn Element - resize by 50%
Paste and paste on the bottom right
Select Angel 1 Element - resize by 35%
Paste and position on the bottom
Select Flower 5 Element - resize by 30%
Paste and position on the bottom
Select Wordart 6 Element - resize by 40%
Paste and position on the top left
Apply Eyecandy Gradient Glow on fat default settings (Glow width 3)
Select Stars Element - resize by 75%
Paste and position on the canvas where desired
Paste paper 25 on the canvas
Apply Mask 1 or mask of choice
Merge group and move to the bottom layer
Add any dropshadows you like
Sharpen any elements as needed
Crop and resize as desired
Add copyright info, license number and name
You're done! Thanks for trying my tutorial!

Labels:Schnegge | 0
comments
Sunday, July 9, 2017
CIRCUS TIME
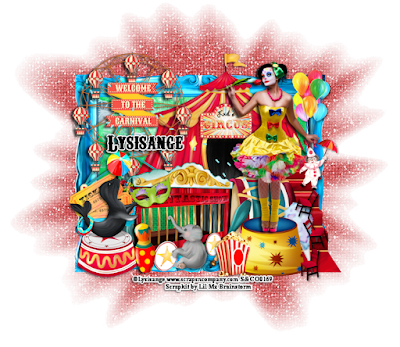
Supplies needed:
I am using the stunning artwork from Lysisange for this tutorial which you can find here
Scrapkit: I am using a stunning kit from A Lil Mz Brainstorm called "Circus Time" which you can get by going here
Mask 17 from Horseplay's Pasture which you can find here
Plugins: Lokas 3D Shadow
----------------------------
This tutorial is written for those who have working knowledge of PSPX2 (any version will do).
This tutorial was written by me on July 9, 2017. Please do not copy or paste on any other forum, website or blog provide link back to tut only. Please do not claim as your own. This tutorial is copyrighted to me. Any resemblance to any other tutorial is purely coincidental.
Ok - let's start and remember to save often.
Open up a 750 x 650 blank canvas (we can resize it later)
Select Frame Element 55
Paste and position in the center of the canvas
Select your magic wand tool and select the center of the frame (Add (Shift), RGB Value, Tolerance 25, Contiguous checked, Feather 0)
Selections, Modify, Expand by 5
Paste paper 10
Select invert, delete, select none
Move paper layer below frame layer
Select Element 106 - resize by 45%
Paste and position on the left side above the paper layer
Select Element 28 - resize by 65%
Paste and position on the top right
Select Element 114 - resize by 45%
Paste and position on the top left side
Select Element 30 - resize by 30%
Paste and position on the top right
Select Element 31 - resize by 40%
Paste and position on the bottom right
Select Element 12 - resize by 30%
Paste and position on the bottom right
Select Element 84 - resize by 25%
Paste and position on the bottom right
Select Element 103 - resize by 20%
Image Free Rotate Left by 15% and paste on the bottom right
Paste tube of choice where desired
Apply Lokas 3D Shadow at default settings
Select Element 42 - resize by 45%
Paste and position on the bottom right
Select Element 36 - resize by 45%
Paste and position on the bottom
Select Element 54 - resize by 22%
Paste and position on the bottom left
Select Element 33 - resize by 40%
Paste and position on the bottom left
Select Element 115 - resize by 20%
Paste and position on the bottom left
Select Element 53 - resize by 25%
Paste and paste on the bottom
Select Element 39 - resize by 22%
Paste and position on the bottom
Select Element 9 - resize by 25%
Paste and position on the bottom
Select Element 52 - resize by 20%
Paste and position on the bottom
Select Element 104 - resize by 50%
Paste and position on the canvas where desired
Paste paper 6 on the canvas
Apply Mask 17 or mask of choice
Merge group and move to the bottom layer
Add any dropshadows you like
Sharpen any elements as needed
Crop and resize as desired
Add copyright info, license number and name
You're done! Thanks for trying my tutorial!

Labels:Lil Mz Brainstorm | 0
comments
Saturday, July 8, 2017
GOTHIC KISSES
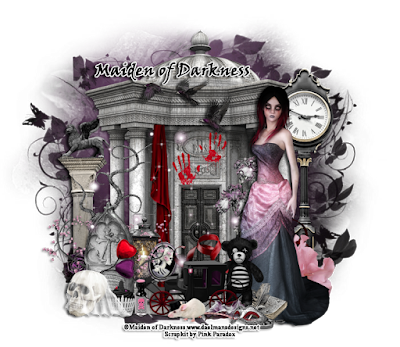
Supplies needed:
I am using the stunning artwork from Maiden of Darkness for this tutorial which you can find here
Scrapkit: I am using a stunning kit from Pink Paradox Productions called "Gothic Kisses" which you can get by going here
Mask 26 from Splitz Designs which you can find here
Plugins: Lokas 3D Shadow
----------------------------
This tutorial is written for those who have working knowledge of PSPX2 (any version will do).
This tutorial was written by me on July 8, 2017. Please do not copy or paste on any other forum, website or blog provide link back to tut only. Please do not claim as your own. This tutorial is copyrighted to me. Any resemblance to any other tutorial is purely coincidental.
Ok - let's start and remember to save often.
Open up a 750 x 650 blank canvas (we can resize it later)
Select Element 118 - resize by 55%
Paste and position in the center of the canvas
Select Element 121 - resize by 40%
Paste and position on the left side
Select Element 104 - resize by 50%
Paste and position on the right side
Select Element 14 - resize by 25%
Paste and position on the top left
Select Element 107 - resize by 40%
Paste and position in the center where desired
Select Element 65 - resize by 15%
Paste and position in the center where desired
Select Element 164 - resize by 30%
Paste and position on the left side
Select Element 126 - resize by 30%
Paste and position on the bottom left
Paste tube of choice where desired
Apply Lokas 3D Shadow at default settings
Select Element 149 - resize by 20%
Paste and position on the bottom right
Select Element 179 - resize by 30%
Paste and position on the bottom
Select Element 64 - resize by 15%
Paste and position on the bottom left
Select Element 6 - resize by 25%
Paste and position on the bottom left
Select Element 33 - resize by 12%
Paste and position on the bottom left
Select Element 56 - resize by 20%
Paste and paste on the bottom
Select Element 27 - resize by 15%
Image Free Rotate Right by 15% and paste on the bottom
Select Element 152 - resize by 25%
Paste and position on the right side below the tube layer
Select Element 55 - resize by 15%
Paste and position on the bottom
Select Element 8 - resize by 20%
Paste and position on the bottom
Select Element 112 - resize by 22%
Paste and position on the bottom
Select Element 13 - resize by 20%
Paste and position on the bottom
Select Element 31 - resize by 20%
Paste and position on the bottom
Select Element 156 - resize by 12%
Paste and position on the bottom
Select Element 19 - resize by 15%
Paste and position on the bottom
Select Element 188 - resize by 50%
Paste and position on the canvas where desired
Paste paper 29 on the canvas
Apply Mask 26 or mask of choice
Merge group and move to the bottom layer
Add any dropshadows you like
Sharpen any elements as needed
Crop and resize as desired
Add copyright info, license number and name
You're done! Thanks for trying my tutorial!

Labels:Maiden of Darkness | 0
comments
CANDY SKULL
Supplies needed:
I am using the stunning artwork from Lysisange for this tutorial which you can find here
Scrapkit: I am using a stunning kit from Bibi's Collections called "Sweet Candy Skull" which you can get by going here
Mask 5 from Melissaz Creationz which you can find here
Plugins: Lokas 3D Shadow
----------------------------
This tutorial is written for those who have working knowledge of PSPX2 (any version will do).
This tutorial was written by me on July 8, 2017. Please do not copy or paste on any other forum, website or blog provide link back to tut only. Please do not claim as your own. This tutorial is copyrighted to me. Any resemblance to any other tutorial is purely coincidental.
Ok - let's start and remember to save often.
Open up a 750 x 650 blank canvas (we can resize it later)
Select Frame Element 64 - resize by 85%
Paste and position in the center of the canvas
Select your magic wand tool and select the center of the frame (Add (Shift), RGB Value, Tolerance 25, Contiguous checked, Feather 0)
Selections, Modify, Expand by 5
Paste paper 13
Select invert, delete
Paste close-up tube on paper layer and delete
Select none
Chage the closeup to Overlay and drop opacity down to 80%
Apply dropshadow and merge down on paper layer
Move paper layer below frame layer
Select Element 121 - resize by 80%
Paste and position on the top right below the frame layer
Select Element 123
Paste and position on top of the paper layer
Change element to Overlay
Select Element 65 - resize by 65%
Paste and position in the center of the canvas above the frame layer
Select Element 13 - resize by 25%
Paste and position on the top where desired
Select Element 93 - resize by 20%
Paste and position on the right side
Select Element 80 - resize by 25%
Paste and position on the bottom right
Select Element 41 - resize by 25%
Paste and position on the bottom right
Select Element 99 - resize by 20%
Paste and position on the bottom right
Select Element 32 - resize by 20%
Paste and position on the bottom right
Paste tube of choice where desired
Apply Lokas 3D Shadow at default settings
Select Element 90 - resize by 20%
Paste and position on the bottom
Select Element 42 - resize by 20%
Paste and position on the bottom
Select Element 98 - resize by 20%
Paste and position on the bottom
Select Element 81 - resize by 20%
Paste and position on the left side
Select Element 69 - resize by 30%
Paste and position on the bottom left
Select Element 12 - resize by 25%
Paste and paste on the bottom left
Select Element 23 - resize by 20%
Paste and position on the bottom left
Select Element 16 - resize by 20%
Paste and position on the bottom left
Select Element 89 - resize by 30%
Paste and position on the bottom
Select Element 101 - resize by 20%
Paste and position on the bottom
Paste paper 7 on the canvas
Apply Mask 5 or mask of choice
Merge group and move to the bottom layer
Add any dropshadows you like
Sharpen any elements as needed
Crop and resize as desired
Add copyright info, license number and name
You're done! Thanks for trying my tutorial!

Labels:Bibi's Collections | 0
comments
Friday, July 7, 2017
STEAMPUNK WARRIOR
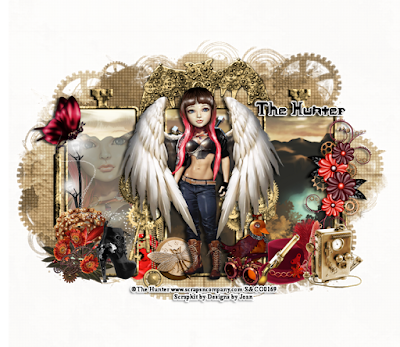
Supplies needed:
I am using the stunning artwork from The Hunter for this tutorial which you can find here
Scrapkit: I am using a stunning kit from Designs by Joan called "Steampunk Warrior" which you can get by going here
Steampunk Mask 1 from Kissing Kate which you can find here
Plugins: Lokas 3D Shadow
----------------------------
This tutorial is written for those who have working knowledge of PSPX2 (any version will do).
This tutorial was written by me on July 7, 2017. Please do not copy or paste on any other forum, website or blog provide link back to tut only. Please do not claim as your own. This tutorial is copyrighted to me. Any resemblance to any other tutorial is purely coincidental.
Ok - let's start and remember to save often.
Open up a 750 x 650 blank canvas (we can resize it later)
Select Frame Element 22 - resize by 75%
Paste and position in the center of the canvas
Select your magic wand tool and select the center of the each of the frames (Add (Shift), RGB Value, Tolerance 25, Contiguous checked, Feather 0)
Selections, Modify, Expand by 2
Paste paper 3
Select invert, delete
Paste close-up tube above paper layer on the left side and delete
Select none
Chage the closeup to Screen and drop opacity down to 45%
Apply dropshadow and merge down on paper layer
Move paper layer below frame layer
Select Element 29 - resize by 40%
Paste and position on the right side
Select Element 25 - resize by 25%
Paste and position on the top left
Select Element 49 - resize by 55%
Paste and position on the left side
Select Element 30 - resize by 30%
Paste and position on the bottom left
Select Element 28 - resize by 30%
Paste and position on the bottom left
Paste tube of choice where desired
Apply Lokas 3D Shadow at default settings
Select Element 13 - resize by 25%
Paste and position on the bottom right
Select Element 1 - resize by 25%
Paste and position on the bottom right
Select Element 41 - resize by 25%
Paste and position on the bottom
Select Element 17 - resize by 22%
Paste and position on the bottom
Select Element 9 - resize by 22%
Paste and position on the bottom
Select Element 62 - resize by 25%
Paste and paste on the bottom
Select Element 19 - resize by 25%
Paste and position on the bottom
Select Element 52 - resize by 20%
Paste and position on the bottom
Select Element 72 - resize by 50%
Paste and position on the canvas where desired
Paste paper 7 on the canvas
Apply Mask 1 or mask of choice
Merge group and move to the bottom layer
Add any dropshadows you like
Sharpen any elements as needed
Crop and resize as desired
Add copyright info, license number and name
You're done! Thanks for trying my tutorial!

Labels:Scraps N Company | 0
comments
Monday, July 3, 2017
CELEBRATION

These Extra's were made using the amazing artwork by Mariel and stunning Collab kit by Bibi's Collections called "Celebration". You can purchase the kit and the tube here
These extra's were made by me and my own creativity. Please do not rip apart, destroy, alter them or claim them as your own. Thanks

Labels:Extras,Scraps N Company | 0
comments
Subscribe to:
Comments
(Atom)


