Labels
- Alikas Scraps
- All Dolled Up Store
- Amy Marie
- Annaica
- Arthur Crowe
- Babycakes Scraps
- Barbara Jensen
- Bibi's Collections
- Black Widow Creationz
- Blu Moon
- Bonnies Creations
- Bookwork Dezines
- Broken Sky Dezine
- Carita Creationz
- Carpe Diem Designs
- CDO
- Celinart Pinup
- Celine
- Chacha Creationz
- Charmed Designs
- Cherry Blossom Designs
- Chili Designz
- Cluster Frame
- Creative Misfits
- Creative Scraps by Crys
- Curious Creative Dreams
- Danny Lee
- Derzi
- Designs by Ali
- Designs by Joan
- Designs by Ketura
- Designs By Norella
- Designs by Vi
- Diana Gali
- Diry Art Designs
- Disturbed Scraps
- Dreaming With Bella
- Eclipse Creations
- Elegancefly
- Extras
- Fabulous Designz
- Forum Set
- Foxy's Designz
- Freek's Creation
- FTU
- FwTags
- Goldwasser
- Gothic Inspirations
- Gothic Raven Designs
- Graphfreaks
- Hania's Designs
- Happy Pumpkin Studios
- Horseplay's Pasture Designs
- indie-Zine
- Irish Princess Designs
- Ishika Chowdhury
- Kaci McVay
- Kajenna
- katharine
- Katherine
- Khloe Zoey
- Killer Kitty
- Kissing Kate
- KiwiFirestorm
- Kiya Designs
- Kizzed by Kelz
- KZ Designz
- Lady Mishka
- Lil Mz Brainstorm
- Maiden of Darkness
- Mariel Designs
- MellieBeans
- Michelle's Myths
- Midnight Shadow
- Misticheskya
- MistyLynn's Creations
- MMeliCrea Designz
- Moon Vixen Designs
- NaSionainne
- Ninaste
- Niqui Designs
- Pandora
- Picsfordesign
- Pink Paradox Productions
- Radyga Designs
- Redefined Designs
- Rissa's Designs
- Schnegge
- ScottishButterfly Creations
- Scrappin Krazy Designs
- Scrappin With Lil Ol Me
- Scraps and the City
- Scraps Dimensions
- Scraps From The Heart
- Scraps N Company
- Scraps with Attitude
- Shining Star Art
- Skyscraps
- Sleek N Sassy Designs
- Sophisticat Simone
- Souldesigner
- Soxsational Scraps
- Spazz
- Starlite and Soul
- Stella Felice
- Tammy Welt
- Tasha's Playground
- The PSP Project
- Thrifty Scraps by Gina
- Tiny Turtle Designs
- Upyourart
- Verymany
- Wendy Gerber
- Whisper In the Wind
- Wick3d Creationz
- Wicked Diabla
- Yude's Kreationz
Blog Archive
Sunday, August 27, 2017
WHERE LOVE GROWS

These Extra's were made using the amazing artwork by Andy Cooper and stunning kit by Jenn's Designs called "Where Love Grows". You can purchase the kit here and the tube here
These extra's were made by me and my own creativity. Please do not rip apart, destroy, alter them or claim them as your own. Thanks

Labels:Extras,Scraps N Company | 0
comments
PAMPERED MOUSE
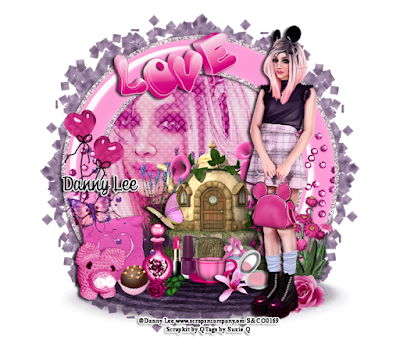
Supplies needed:
I am using the stunning artwork from Danny Lee for this tutorial which you can find here
Scrapkit: I am using a stunning kit from QTags by Suzie Q called "Pampered Mouse" which you can get by going here
Plugins: Lokas 3D Shadow
----------------------------
This tutorial is written for those who have working knowledge of PSPX2 (any version will do).
This tutorial was written by me on August 27, 2017. Please do not copy or paste on any other forum, website or blog provide link back to tut only. Please do not claim as your own. This tutorial is copyrighted to me. Any resemblance to any other tutorial is purely coincidental.
Ok - let's start and remember to save often.
Open up a 750 x 650 blank canvas (we can resize it later)
Select Frame 3 Element - resize by 70%
Paste and position in the center of the canvas
Select Frame 5 Element - resize by 65%
Paste and position in the center of the canvas
Select your magic wand tool and select the center of the frame (Add (Shift), RGB Value, Tolerance 25, Contiguous checked, Feather 0)
Selections, Modify, Expand by 5
Paste paper 9
Select invert, delete
Paste close-up tube on paper layer and delete
Select none
Chage the closeup to Screen
Apply dropshadow and merge down on paper layer
Effect, Texture Effects, Blinds (Width 3, Opactity 15, Horizontal and Light from left/top checked)
Move paper layer below frame layer
Select Element 28 - resize by 40%
Image Free Rotate Left by 15% and paste on the top
Select Element 5 - resize by 40%
Paste and position on the bottom
Select Element 13 - resize by 40%
Paste and position on the bottom
Select Element 1 - resize by 30%
Paste and position on the bottom right
Select Element 47 - resize by 30%
Image mirror and paste on the left side
Paste and position on the bottom
Paste tube of choice where desired
Apply Lokas 3D Shadow at default settings
Select Element 74 - resize by 25%
Paste and position on the bottom left
Select Element 46 - resize by 30%
Image Free Rotate Left and paste on the bottom left
Select Element 68 - resize by 20%
Paste and position on the bottom left
Select Element 31 - resize by 30%
Paste and position on the bottom right
Select Element 29 - resize by 30%
Paste and paste on the bottom
Select Element 49 - resize by 20%
Paste and position on the bottom
Select Element 73 - resize by 15%
Paste and position on the bottom
Select Element 53 - resize by 15%
Paste and position on the bottom
Select Element 65 - resize by 15%
Paste and position on the bottom
Select Element 2 - resize by 20%
Paste and position on the bottom
Select Element 32 - resize by 30%
Paste and position on the bottom
Select Element 30 - resize by 20%
Paste and position on the bottom
Select Element 38 - resize by 15%
Paste and position on the bottom
Select Element 42 - resize by 15%
Paste and position on the bottom where desired
Add any dropshadows you like
Sharpen any elements as needed
Crop and resize as desired
Add copyright info, license number and name
You're done! Thanks for trying my tutorial!

Labels:Scraps N Company | 0
comments
Saturday, August 19, 2017
DJAMILA
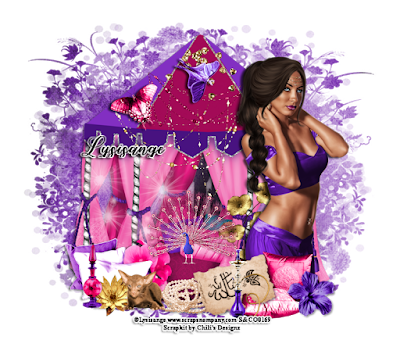
Supplies needed:
I am using the stunning artwork from Lysisange for this tutorial which you can find here
Scrapkit: I am using a stunning kit from Chili's Designz called "Djamila" which you an find here
Mask 4 from Dee which you can find here
Plugins: Lokas 3D Shadow
----------------------------
This tutorial is written for those who have working knowledge of PSPX2 (any version will do).
This tutorial was written by me on August 19, 2017. Please do not copy or paste on any other forum, website or blog provide link back to tut only. Please do not claim as your own. This tutorial is copyrighted to me. Any resemblance to any other tutorial is purely coincidental.
Ok - let's start and remember to save often.
Open up a 750 x 650 blank canvas (we can resize it later)
Select Pavillion Element - resize by 75%
Paste and position in the center of the canvas
Select Beads Element - resize by 40%
Paste and position on the top where desired
Select Dangle and Deangle 2 Elements - resize by 30%
Paste and position on the top where desired
Select Butterfly Element - resize by 40%
Paste and position on the top right
Select Butterfly 2 Element - resize by 30%
Paste and position on the top where desired
Select Pillows Element - resize by 50%
Paste and position on the bottom left
Select Caraff4 Element - resize by 30%
Paste and position on the bottom left
Select Flower 2 Element - resize by 25%
Paste and position on the bottom left
Paste tube of choice where desired
Apply Lokas 3D Shadow at default settings
Select Pillows2 Element - resize by 40%
Paste and position on the bottom right
Select Flower Element - resize by 25%
Image mirror and paste on the bottom right
Select Greenery 2 Element - resize by 30%
Image Free Rotate Right by 15% and paste on the right side
Select Peacock Element - resize by 30%
Paste and position on the bottom
Select Deco 2 Element - resize by 20%
Image Free Rotate Left by 15% and paste on the bottom
Select Pipe Element - resize by 30%
Paste and paste on the bottom
Select Pearls3 Element - resize by 30%
Paste and position on the bottom
Select Cat Element - resize by 30%
Paste and position on the bottom
Select Sparkles 4 Element - resize by 50%
Paste and position on the canvas where desired
Paste paper 1 on the canvas
Apply Mask 4 or mask of choice
Merge group and move to the bottom layer
Add any dropshadows you like
Sharpen any elements as needed
Crop and resize as desired
Add copyright info, license number and name
You're done! Thanks for trying my tutorial!

Labels:Chili Designz | 0
comments
Thursday, August 17, 2017
ROSE
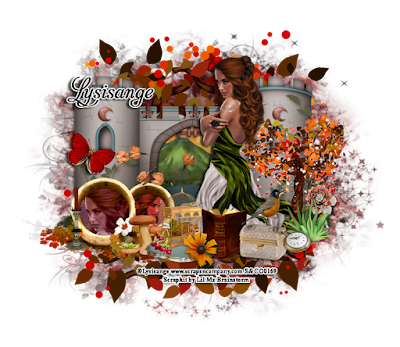
Supplies needed:
I am using the stunning artwork from Lysisange for this tutorial which you can find here
Scrapkit: I am using a stunning kit from A Lil Mz Brainstorm called "Rose" which you can get by going here
Mask 28 from Splitz Designs which you can find here
Plugins: Lokas 3D Shadow
----------------------------
This tutorial is written for those who have working knowledge of PSPX2 (any version will do).
This tutorial was written by me on August 17, 2017. Please do not copy or paste on any other forum, website or blog provide link back to tut only. Please do not claim as your own. This tutorial is copyrighted to me. Any resemblance to any other tutorial is purely coincidental.
Ok - let's start and remember to save often.
Open up a 750 x 650 blank canvas (we can resize it later)
Select Frame Element 3
Paste and position in the center of the canvas
Select Element 31 - resize by 72%
Paste and position in the center of the frame
Select Element 5 - resize by 75%
Paste and position in the center
Select Element 4 - resize by 45%
Paste and position on the right side
Select Element 100 - resize by 50%
Paste and position on the bottom left
Select your magic wand tool and select the center each circle (Add (Shift), RGB Value, Tolerance 25, Contiguous checked, Feather 0)
Selections, Modify, Expand by 5
Paste paper 5
Select invert, delete
Paste close-up tubes on paper layer and delete
Select none
Change the closeup to Hard Light and Luminance Legacy
Apply dropshadow and merge down on paper layer
Effect, Texture Effects, Blinds (Width 3, Opactity 15, Horizontal and Light from left/top checked)
Move paper layer below frame layer
Select Element 18 - resize by 15%
Paste and position on the left side
Select Element 23 - resize by 15%
Paste and position on the bottom right
Select Element 43 - resize by 20%
Paste and position on the bottom right
Select Element 108 - resize by 20%
Paste and position on the bottom left
Paste tube of choice where desired
Apply Lokas 3D Shadow at default settings
Select Element 60 - resize by 15%
Paste and position on the bottom right
Select Element 56 - resize by 20%
Paste and position on the bottom
Select Element 75 - resize by 15%
Paste and position on the bottom
Select Element 40 - resize by 25%
Paste and position on the bottom
Select Element 34 - resize by 20%
Paste and paste on the bottom
Select Element 122 - resize by 12%
Paste and position on the bottom
Select Element 95 - resize by 15%
Paste and position on the bottom
Select Element 131 - resize by 15%
Paste and position on the bottom
Select Element 39 - resize by 25%
Paste and position in the center where desired
Select Element 99 - resize by 15%
Paste and position on the bottom right
Paste paper 12 on the canvas
Apply Mask 28 or mask of choice
Merge group and move to the bottom layer
Add any dropshadows you like
Sharpen any elements as needed
Crop and resize as desired
Add copyright info, license number and name
You're done! Thanks for trying my tutorial!

Labels:Lil Mz Brainstorm | 0
comments
Sunday, August 13, 2017
PECADO
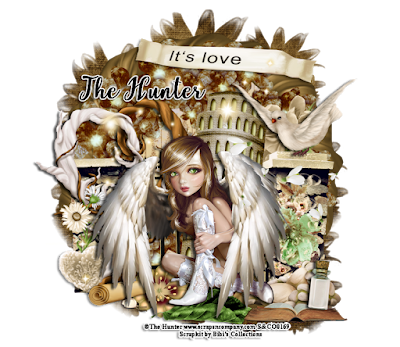
Supplies needed:
I am using the stunning artwork from The Hunter for this tutorial which you can find here
Scrapkit: I am using a stunning kit from Bibi's Collections called "Pecado Original" which you can get by going here
Plugins: Lokas 3D Shadow
----------------------------
This tutorial is written for those who have working knowledge of PSPX2 (any version will do).
This tutorial was written by me on August 13, 2017. Please do not copy or paste on any other forum, website or blog provide link back to tut only. Please do not claim as your own. This tutorial is copyrighted to me. Any resemblance to any other tutorial is purely coincidental.
Ok - let's start and remember to save often.
Open up a 750 x 650 blank canvas (we can resize it later)
Select Element 31 - resize by 45%
Paste and position in the center of the canvas
Select Frame Element 64 - resize by 45%
Paste and position in the center of the canvas
Select your magic wand tool and select the center of the frame (Add (Shift), RGB Value, Tolerance 25, Contiguous checked, Feather 0)
Selections, Modify, Expand by 5
Paste paper 3
Select invert, delete, select none
Move paper layer below frame layer
Select Element 30 - resize by 75%
Paste and position in the center above the frame
Select Element 8 - resize by 20%
Paste and position in the center towards the right
Select Element 96 - resize by 40%
Paste and position on the top
Select Element 70 - resize by 50%
Paste and position in the center towards the bottom
Select Element 111 - resize by 25%
Paste and position on the left side
Select Element 37 - resize by 15%
Paste and position on the bottom right
Paste tube of choice where desired
Apply Lokas 3D Shadow at default settings
Select Element 123 - resize by 20%
Paste and position on the right side
Select Element 9 - resize by 30%
Paste and position on the bottom right
Select Element 22 - resize by 20%
Paste and position on the bottom right
Select Element 66 - resize by 20%
Paste and position on the bottom right
Select Element 112 - resize by 20%
Paste and position on the bottom left
Select Element 99 - resize by 25%
Paste and paste on the bottom left
Select Element 69 - resize by 20%
Paste and position on the bottom left
Select Element 27 - resize by 25%
Paste and position on the bottom
Select Element 48 - resize by 25%
Paste and position on the bottom
Select Element 119 - resize by 20%
Paste and position on the right side
Select Element 7 - resize by 75%
Paste and position on the canvas where desired
Add any dropshadows you like
Sharpen any elements as needed
Crop and resize as desired
Add copyright info, license number and name
You're done! Thanks for trying my tutorial!

Labels:Bibi's Collections | 0
comments
Saturday, August 12, 2017
VOODOO DOLL

These Extra's were made using the amazing artwork by Lady Mishka and stunning kit by Bibi's Collections called "Sugar Skull". You can purchase the kit here and the tube here
These extra's were made by me and my own creativity. Please do not rip apart, destroy, alter them or claim them as your own. Thanks

Labels:Extras,Scraps N Company | 0
comments
Friday, August 11, 2017
SUMMER HAPPINESS
Supplies needed:
I am using the stunning artwork from Toriya for this tutorial which you can find here
Scrapkit: I am using a stunning kit from Designs by Joan called "Happiness" which you can get by going here
Mask 4 from Dee which you can find here
Plugins: Lokas 3D Shadow
----------------------------
This tutorial is written for those who have working knowledge of PSPX2 (any version will do).
This tutorial was written by me on August 11, 2017. Please do not copy or paste on any other forum, website or blog provide link back to tut only. Please do not claim as your own. This tutorial is copyrighted to me. Any resemblance to any other tutorial is purely coincidental.
Ok - let's start and remember to save often.
Open up a 750 x 650 blank canvas (we can resize it later)
Select Frame Element 20 - resize by 65%
Paste and position in the center of the canvas
Select your magic wand tool and select the center of the frame (Add (Shift), RGB Value, Tolerance 25, Contiguous checked, Feather 0)
Selections, Modify, Expand by 5
Paste paper 2
Select invert, delete
Paste close-up tube on paper layer and delete
Select none
Change the closeup to Hard Light
Apply dropshadow and merge down on paper layer
Effect, Texture Effects, Blinds (Width 3, Opactity 15, Horizontal and Light from left/top checked)
Move paper layer below frame layer
Select Element 28 - resize by 40%
Image mirro and flip and paste on the top left of the frame
Select Element 45 - resize by 22%
Paste and position on the top left
Select Element 10 - resize by 40%
Paste and position on the top
Apply Eyecandy Gradient Glow on fat default settings (glow width 3)
Select Element 65 - resize by 40%
Image mirror, Free Rotate Left by 15% and paste on the left side
Select Element 2 - resize by 65%
Paste and position on the bottom
Select Element 9 - resize by 30%
Paste and position on the bottom right
Select Element 22 - resize by 30%
Paste and position on the bottom left
Paste tube of choice where desired
Apply Lokas 3D Shadow at default settings
Select Element 33 - resize by 30%
Paste and position on the bottom right
Select Element 11 - resize by 15%
Paste and position on the bottom right
Select Element 59 - resize by 20%
Paste and position on the bottom
Select Element 44 - resize by 15%
Paste and position on the bottom
Select Element 60 - resize by 20%
Paste and position on the bottom
Select Element 66 - resize by 25%
Paste and paste on the bottom below tube layer
Select Element 34 - resize by 20%
Paste and position on the bottom
Select Element 14 - resize by 25%
Paste and position on the bottom
Select Element 71 - resize by 30%
Paste and position on the canvas where desired
Paste paper 1 on the canvas
Apply Mask 4 or mask of choice
Merge group and move to the bottom layer
Add any dropshadows you like
Sharpen any elements as needed
Crop and resize as desired
Add copyright info, license number and name
You're done! Thanks for trying my tutorial!

Labels:Scraps N Company | 0
comments
Tuesday, August 8, 2017
DELICIOUS GLAMOUR
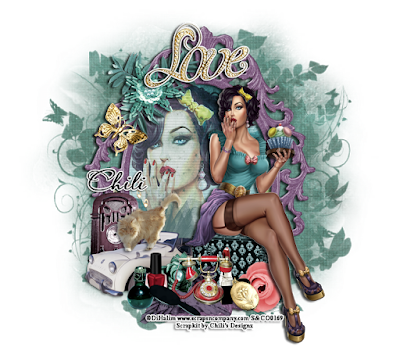
Supplies needed:
I am using the stunning artwork from DiHalim for this tutorial which you can find here
Scrapkit: I am using a stunning kit from Chili's Designz called "Delicious Glamour" which you can get by going here
Mask 26 from Splitz Designs which you can find here
Plugins: Lokas 3D Shadow, Eyecandy 4000 - Gradient Glow
----------------------------
This tutorial is written for those who have working knowledge of PSPX2 (any version will do).
This tutorial was written by me on August 8, 2017. Please do not copy or paste on any other forum, website or blog provide link back to tut only. Please do not claim as your own. This tutorial is copyrighted to me. Any resemblance to any other tutorial is purely coincidental.
Ok - let's start and remember to save often.
Open up a 750 x 650 blank canvas (we can resize it later)
Select Frame Element 3 - resize by 75%
Paste and position in the center of the canvas
Select your magic wand tool and select the center of the frame (Add (Shift), RGB Value, Tolerance 25, Contiguous checked, Feather 0)
Selections, Modify, Expand by 5
Paste paper 2
Select invert, delete
Paste close-up tube on the left side of the paper layer and delete
Select none
Chage the closeup to Hard Light and drop opacity down to 70%
Apply dropshadow and merge down on paper layer
Effect, Texture Effects, Blinds (Width 3, Opactity 15, Horizontal and Light from left/top checked)
Move paper layer below frame layer
Select Leaf 3 Element - resize by 30%
Image mirror Paste and position on the top left
Select Deco 2 Element - resize by 30%
Paste and position on the top left
Select WA2 Element - resize by 40%
Paste and position on the top of the frame
Apply Eyecandy Gradient Glow on fat default settings (Glow width 3)
Select Butterfly Element - resize by 40%
Paste and position on the top left
Select Box Element - resize by 40%
Paste and position on the bottom right
Select Radio Element - resize by 30%
Paste and position on the bottom left
Select Car Element - resize by 35%
Paste and position on the bottom left
Paste tube of choice where desired
Apply Lokas 3D Shadow at default settings
Select Flower 4 Element - resize by 30%
Paste and position on the bottom right
Select Charm Element - resize by 40%
Paste and position on the bottom
Select Pillow 2 Element - resize by 30%
Paste and position on the bottom
Select Lipstick 2 Element - resize by 40%
Paste and position on the bottom
Select Phone Element - resize by 30%
Paste and position on the bottom
Select Flower 10 Element - resize by 30%
Paste and position on the bottom
Select Polish Element - resize by 40%
Paste and paste on the bottom
Select Brush Element - resize by 30%
Paste and position on the bottom
Select Bottle Element - resize by 25%
Paste and position on the bottom
Select Cat Element - resize by 30%
Paste and position on the bottom left
Paste paper 13 on the canvas
Apply Mask 26 or mask of choice
Merge group and move to the bottom layer
Add any dropshadows you like
Sharpen any elements as needed
Crop and resize as desired
Add copyright info, license number and name
You're done! Thanks for trying my tutorial!

Labels:Chili Designz | 0
comments
Monday, August 7, 2017
SEA PIRATE
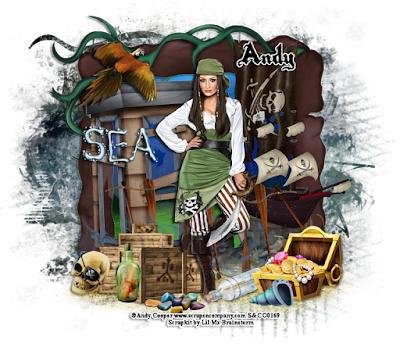
Supplies needed:
I am using the stunning artwork from Andy Cooper for this tutorial which you can find here
Scrapkit: I am using a stunning kit from Lil Mz Brainstorm called "Undead Pirate Sea" which you can get by going here
Mask 4 from Rachel Designs which you can find here
Plugins: Lokas 3D Shadow
----------------------------
This tutorial is written for those who have working knowledge of PSPX2 (any version will do).
This tutorial was written by me on August 7, 2017. Please do not copy or paste on any other forum, website or blog provide link back to tut only. Please do not claim as your own. This tutorial is copyrighted to me. Any resemblance to any other tutorial is purely coincidental.
Ok - let's start and remember to save often.
Open up a 750 x 650 blank canvas (we can resize it later)
Select Frame Element 90
Paste and position in the center of the canvas
Select your magic wand tool and select the center of the frame (Add (Shift), RGB Value, Tolerance 25, Contiguous checked, Feather 0)
Selections, Modify, Expand by 5
Paste paper 12
Select invert, delete, select none
Move paper layer below frame layer
Select Element 19 - resize by 75%
Paste and position on the left side
Select Element 118 - resize by 25%
Paste and position on the top left
Select Element 55 - resize by 40%
Paste and position on the bottom right
Select Element 105 - resize by 40%
Paste and position on the top right
Select Element 16 - resize by 45%
Paste and position on the right side
Select Element 70 - resize by 80%
Paste and position on the bottom
Select Element 63 -
Paste and position on the bottom
Select Element 104 - resize by 40%
Paste and position on the bottom left
Paste tube of choice where desired
Apply Lokas 3D Shadow at default settings
Select Element 120 - resize by 30%
Paste and position on the left side
Select Element 11 - resize by 15%
Paste and position on the bottom left
Select Element 93 - resize by 20%
Paste and position on the bottom left
Select Element 15 - resize by 20%
Paste and position on the bottom
Select Element 81 - resize by 30%
Paste and position on the bottom right
Select Element 64 - resize by 25%
Paste and paste on the bottom
Select Element 73 - resize by 25%
Paste and position on the bottom right
Paste paper 2 on the canvas
Apply Mask 4 or mask of choice
Merge group and move to the bottom layer
Add any dropshadows you like
Sharpen any elements as needed
Crop and resize as desired
Add copyright info, license number and name
You're done! Thanks for trying my tutorial!

Labels:Lil Mz Brainstorm | 0
comments
Sunday, August 6, 2017
GRADUAL FADING
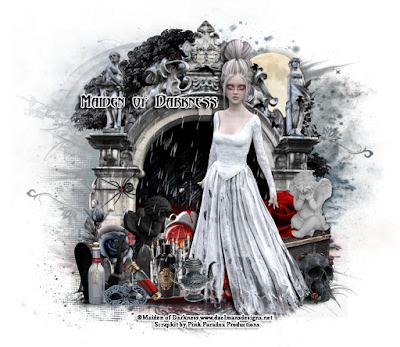
Supplies needed:
I am using the stunning artwork from Maiden of Darkness for this tutorial which you can find here
Scrapkit: I am using a stunning kit from Pink Paradox Productions called "Gradually Fading" which you can get by going here
Mask 21 from Moonbeams and Spiderwebs which you can find here
Plugins: Lokas 3D Shadow
----------------------------
This tutorial is written for those who have working knowledge of PSPX2 (any version will do).
This tutorial was written by me on August 6, 2017. Please do not copy or paste on any other forum, website or blog provide link back to tut only. Please do not claim as your own. This tutorial is copyrighted to me. Any resemblance to any other tutorial is purely coincidental.
Ok - let's start and remember to save often.
Open up a 750 x 650 blank canvas (we can resize it later)
Select Element 58 - resize by 50%
Paste and position in the center of the canvas
Select Element 101 - resize by 50%
Image mirror and paste on the top left of the frame below element 58
Select Elment 79 - resize by 65%
Paste and position on the bottom
Select Element 74 - resize by 20%
Paste and position on the top right below element 58
Select Element 28 - resize by 25%
Paste and position on the bottom right
Select Element 13 - resize by 15%
Paste and position on the right side
Select Element 85 - resize by 15%
Paste and position on the right side
Select Element 11 - resize by 25%
Paste and position on the bottom right
Select Element 9 - resize by 20%
Image Free Rotate Left by 15% and paste on the left side
Paste tube of choice where desired
Apply Lokas 3D Shadow at default settings
Select Element 91 - resize by 20%
Paste and position on the bottom left
Select Element 68 - resize by 40%
Image mirror and paste on the bottom left
Select Element 21 - resize by 20%
Paste and position on the bottom left
Select Element 30 - resize by 15%
Paste and position on the bottom left
Select Element 12 - resize by 15%
Paste and position on the bottom
Select Element 39 - resize by 20%
Image Free Rotate Left by 15% and paste on the bottom right
Select Element 41 - resize by 15%
Paste and position on the bottom
Select Element 26 - resize by 30%
Paste and position on the bottom
Select Element 24 - resize by 15%
Paste and position on the bottom
Select Element 27 - resize by 15%
Paste and position on the bottom
Select Element 110 - resize by 50%
Paste and position on the canvas where desired
Paste paper 1 on the canvas
Apply Mask 21 or mask of choice
Merge group and move to the bottom layer
Add any dropshadows you like
Sharpen any elements as needed
Crop and resize as desired
Add copyright info, license number and name
You're done! Thanks for trying my tutorial!

Labels:Maiden of Darkness | 0
comments
Subscribe to:
Comments
(Atom)


