Labels
- Alikas Scraps
- All Dolled Up Store
- Amy Marie
- Annaica
- Arthur Crowe
- Babycakes Scraps
- Barbara Jensen
- Bibi's Collections
- Black Widow Creationz
- Blu Moon
- Bonnies Creations
- Bookwork Dezines
- Broken Sky Dezine
- Carita Creationz
- Carpe Diem Designs
- CDO
- Celinart Pinup
- Celine
- Chacha Creationz
- Charmed Designs
- Cherry Blossom Designs
- Chili Designz
- Cluster Frame
- Creative Misfits
- Creative Scraps by Crys
- Curious Creative Dreams
- Danny Lee
- Derzi
- Designs by Ali
- Designs by Joan
- Designs by Ketura
- Designs By Norella
- Designs by Vi
- Diana Gali
- Diry Art Designs
- Disturbed Scraps
- Dreaming With Bella
- Eclipse Creations
- Elegancefly
- Extras
- Fabulous Designz
- Forum Set
- Foxy's Designz
- Freek's Creation
- FTU
- FwTags
- Goldwasser
- Gothic Inspirations
- Gothic Raven Designs
- Graphfreaks
- Hania's Designs
- Happy Pumpkin Studios
- Horseplay's Pasture Designs
- indie-Zine
- Irish Princess Designs
- Ishika Chowdhury
- Kaci McVay
- Kajenna
- katharine
- Katherine
- Khloe Zoey
- Killer Kitty
- Kissing Kate
- KiwiFirestorm
- Kiya Designs
- Kizzed by Kelz
- KZ Designz
- Lady Mishka
- Lil Mz Brainstorm
- Maiden of Darkness
- Mariel Designs
- MellieBeans
- Michelle's Myths
- Midnight Shadow
- Misticheskya
- MistyLynn's Creations
- MMeliCrea Designz
- Moon Vixen Designs
- NaSionainne
- Ninaste
- Niqui Designs
- Pandora
- Picsfordesign
- Pink Paradox Productions
- Radyga Designs
- Redefined Designs
- Rissa's Designs
- Schnegge
- ScottishButterfly Creations
- Scrappin Krazy Designs
- Scrappin With Lil Ol Me
- Scraps and the City
- Scraps Dimensions
- Scraps From The Heart
- Scraps N Company
- Scraps with Attitude
- Shining Star Art
- Skyscraps
- Sleek N Sassy Designs
- Sophisticat Simone
- Souldesigner
- Soxsational Scraps
- Spazz
- Starlite and Soul
- Stella Felice
- Tammy Welt
- Tasha's Playground
- The PSP Project
- Thrifty Scraps by Gina
- Tiny Turtle Designs
- Upyourart
- Verymany
- Wendy Gerber
- Whisper In the Wind
- Wick3d Creationz
- Wicked Diabla
- Yude's Kreationz
Blog Archive
Wednesday, November 29, 2017
CHIC SANTA
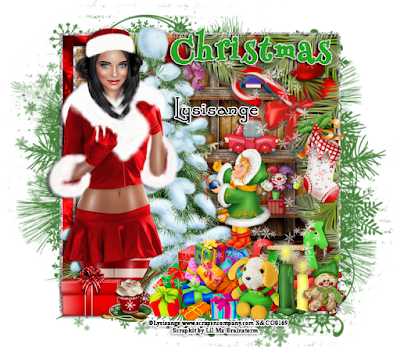
Supplies needed:
I am using the stunning artwork from Lysisange for this tutorial which you can find here
Scrapkit: I am using a stunning kit from A Lil Mz Brainstorm called "Chic Santa" which you can get by going here
Mask 1 from Dee which you can find here
Plugins: Lokas 3D Shadow
----------------------------
This tutorial is written for those who have working knowledge of PSPX2 (any version will do).
This tutorial was written by me on November 29, 2017. Please do not copy or paste on any other forum, website or blog provide link back to tut only. Please do not claim as your own. This tutorial is copyrighted to me. Any resemblance to any other tutorial is purely coincidental.
Ok - let's start and remember to save often.
Open up a 750 x 650 blank canvas (we can resize it later)
Select Frame Element 69
Paste and position in the center of the canvas
Select your magic wand tool and select the center of the frame (Add (Shift), RGB Value, Tolerance 25, Contiguous checked, Feather 0)
Selections, Modify, Expand by 5
Paste paper 6
Select invert, delete, select none
Move paper layer below frame layer
Select Element 90 - resize by 85%
Paste and position on the top right
Select Element 10 -
Paste and position on the left side
Select Element 19 - resize by 30%
Paste and position on the right side
Select Element 55 - resize by 30%
Paste and position on the bottom right
Select Element 58 - resize by 50%
Paste and position on the top right
Apply Eyecandy Gradient Glow on fat default settings (Glow Width 2)
Paste tube of choice where desired
Apply Lokas 3D Shadow at default settings
Select Element 74 - resize by 25%
Paste and position on the bottom left
Select Element 66 - resize by 20%
Paste and position on the bottom left
Select Element 20 - resize by 40%
Paste and position on the bottom
Select Element 79 - resize by 20%
Paste and position on the bottom
Select Element 67 - resize by 20%
Paste and paste on the bottom right
Select Element 54 - resize by 25%
Paste and position on the bottom right
Select Element 13 - resize by 40%
Paste and position on the center where desired
Select Element 11 - resize by 75%
Paste and position on the canvas where desired
Add new raster layer and flood-fill with color of choice
Apply Mask 1 or mask of choice
Merge group and move to the bottom layer
Add any dropshadows you like
Sharpen any elements as needed
Crop and resize as desired
Add copyright info, license number and name
You're done! Thanks for trying my tutorial!

Labels:Lil Mz Brainstorm | 0
comments
Sunday, November 26, 2017
SAD SAD AUTUMN

Supplies needed:
I am using the stunning artwork from Andy Cooper for this tutorial which you can find here
Scrapkit: I am using a stunning kit from Chili's Designz called "Sad Sad Autumn" which you can get by going here
Mask 4 from Dee which you can find here
Plugins: Lokas 3D Shadow
----------------------------
This tutorial is written for those who have working knowledge of PSPX2 (any version will do).
This tutorial was written by me on November 26, 2017. Please do not copy or paste on any other forum, website or blog provide link back to tut only. Please do not claim as your own. This tutorial is copyrighted to me. Any resemblance to any other tutorial is purely coincidental.
Ok - let's start and remember to save often.
Open up a 750 x 650 blank canvas (we can resize it later)
Select Frame Element 5 - resize by 75%
Paste and position in the center of the canvas
Select your magic wand tool and select the center of the frame (Add (Shift), RGB Value, Tolerance 25, Contiguous checked, Feather 0)
Selections, Modify, Expand by 5
Paste paper 8
Select invert, delete, select none
Move paper layer below frame layer
Select Berries Element - resize by 55%
Paste and position on the top right
Select Tree Element - resize by 65%
Image mirror and paste on the left side
Select Cloud2 Element - resize by 55%
Paste and position on the top left
Select WA Element - resize by 40%
Paste and position on the top left
Apply Eyecandy Gradient Glow on fat default settings (Glow width 3)
Select Owl 2 Element - resize by 30%
Paste and position on the top left
Select Leaves Element - resize by 50%
Paste and position on the top of the canvas where desired
Paste tube of choice where desired
Apply Lokas 3D Shadow at default settings
Select Girl Element - resize by 30%
Paste and position on the bottom left
Select Nut Element - resize by 30%
Paste and position on the bottom left
Select Mushroom 4 Element - resize by 20%
Paste and position on the bottom left
Select Deco 4 Element - resize by 25%
Paste and position on the bottom
Select Pumpkin Element - resize by 30%
Paste and paste on the bottom
Select Kitten Element - resize by 40%
Paste and position on the bottom
Select Rain Element - resize by 55%
Paste and position on the canvas where desired
Select Flower Element - resize by 30%
Paste and position on the bottom
Select Soil Element - resize by 50%
Paste and position on the bottom above frame layer
Paste paper 9 on the canvas
Apply Mask 4 or mask of choice
Merge group and move to the bottom layer
Add any dropshadows you like
Sharpen any elements as needed
Crop and resize as desired
Add copyright info, license number and name
You're done! Thanks for trying my tutorial!

Labels:Chili Designz | 0
comments
STEAMPUNK MELISA
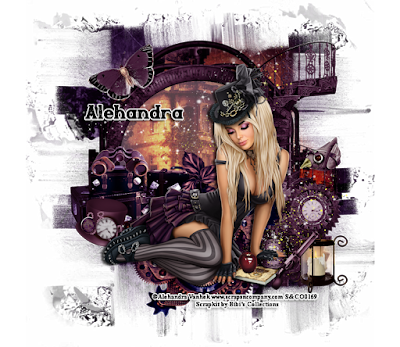
Supplies needed:
I am using the stunning artwork from Alehandra Vanhek for this tutorial which you can find here
Scrapkit: I am using a stunning kit from Bibi's Collections called "Steampunk Melisa" which you can get by going here
Plugins: Lokas 3D Shadow
----------------------------
This tutorial is written for those who have working knowledge of PSPX2 (any version will do).
This tutorial was written by me on November 26, 2017. Please do not copy or paste on any other forum, website or blog provide link back to tut only. Please do not claim as your own. This tutorial is copyrighted to me. Any resemblance to any other tutorial is purely coincidental.
Ok - let's start and remember to save often.
Open up a 750 x 650 blank canvas (we can resize it later)
Select Element 44 - resize by 45%
Paste and position in the center of the canvas
Select Frame Element 65 - resize by 55%
Paste and position in the center of the canvas
Reposition where desired
Select Element 58 - resize by 35%
Paste and position on the top right
Select Element 78 - resize by 20%
Paste and position on the bottom right
Select Element 89 - resize by 40%
Paste and position on the top of the canvas
Select Element 26 - resize by 20%
Paste and position on the top left
Select Element 34 - resize by 50%
Paste and position on the bottom left
Paste tube of choice where desired
Apply Lokas 3D Shadow at default settings
Select Element 72 - resize by 10%
Paste and position on the right side
Select Element 67 - resize by 40%
Paste and position on the bottom right
Select Element 68 - resize by 25%
Paste and position on the bottom right
Select Element 3 - resize by 15%
Paste and position on the left side
Select Element 4 - resize by 20%
Paste and position on the bottom left
Select Element 59 - resize by 30%
Paste and paste on the bottom below tube layer
Select Element 20 - resize by 10%
Paste and position on in the center below tube layer
Add any dropshadows you like
Sharpen any elements as needed
Crop and resize as desired
Add copyright info, license number and name
You're done! Thanks for trying my tutorial!

Labels:Bibi's Collections | 0
comments
Friday, November 24, 2017
GRATITUDE
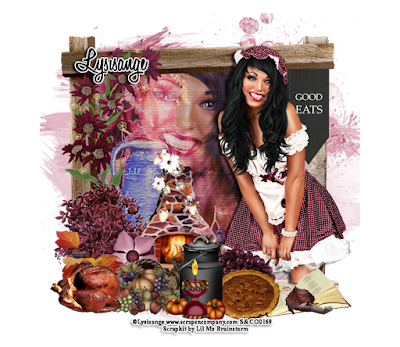
Supplies needed:
I am using the stunning artwork from Lysisange for this tutorial which you can find here
Scrapkit: I am using a stunning kit from A Lil Mz Brainstorm called "Gratitude" which you can get by going here
Plugins: Lokas 3D Shadow
----------------------------
This tutorial is written for those who have working knowledge of PSPX2 (any version will do).
This tutorial was written by me on November 24, 2017. Please do not copy or paste on any other forum, website or blog provide link back to tut only. Please do not claim as your own. This tutorial is copyrighted to me. Any resemblance to any other tutorial is purely coincidental.
Ok - let's start and remember to save often.
Open up a 750 x 650 blank canvas (we can resize it later)
Select Element 84 - paste and position in the center of the canvas
Select Frame Element 53
Paste and position in the center of the canvas
Select your magic wand tool and select the center of the frame (Add (Shift), RGB Value, Tolerance 25, Contiguous checked, Feather 0)
Selections, Modify, Expand by 5
Paste paper 15
Select invert, delete
Paste close-up tube on paper layer and delete
Select none
Chage the closeup to Screen and drop opacity down to 80%
Apply dropshadow and merge down on paper layer
Effect, Texture Effects, Blinds (Width 3, Opactity 15, Horizontal and Light from left/top checked)
Move paper layer below frame layer
Select Element 24 - resize by 50%
Paste and position on the top left
Select Element 92 - resize by 50%
Paste and position on the bottom left
Select Element 5 - resize by 30%
Paste and position on the top right
Select Element 9 - resize by 25%
Paste and position on the bottom left
Select Element 60 - resize by 30%
Paste and position on the bottom left
Select Element 51 - resize by 40%
Paste and position on the bottom
Paste tube of choice where desired
Apply Lokas 3D Shadow at default settings
Select Element 59 - resize by 30%
Paste and position on the bottom right
Select Element 82 - resize by 15%
Paste and position on the bottom right
Select Element 96 - resize by 20%
Paste and position on the bottom
Select Element 99 - resize by 30%
Paste and position on the bottom
Select Element 15 - resize by 30%
Paste and position on the bottom
Select Element 47 - resize by 20%
Paste and paste on the bottom
Select Element 58 - resize by 20%
Paste and position on the bottom
Select Element 69 - resize by 20%
Paste and position on the bottom
Select Element 89 - resize by 25
Paste and position where desired
Add any dropshadows you like
Sharpen any elements as needed
Crop and resize as desired
Add copyright info, license number and name
You're done! Thanks for trying my tutorial!

Labels:Lil Mz Brainstorm | 0
comments
Thursday, November 23, 2017
SWEET WINTER
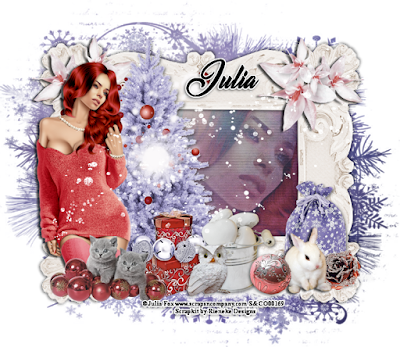
Supplies needed:
I am using the stunning artwork from Julia Fox for this tutorial which you can find here
Scrapkit: I am using a stunning kit from Rieneke Designs called "Sweet Winter 2" which you can get by going here
Winter Mask 1 from Dee which you can find here
Plugins: Lokas 3D Shadow
----------------------------
This tutorial is written for those who have working knowledge of PSPX2 (any version will do).
This tutorial was written by me on November 23, 2017. Please do not copy or paste on any other forum, website or blog provide link back to tut only. Please do not claim as your own. This tutorial is copyrighted to me. Any resemblance to any other tutorial is purely coincidental.
Ok - let's start and remember to save often.
Open up a 750 x 650 blank canvas (we can resize it later)
Select Frame Element 64
Paste and position in the center of the canvas
Select your magic wand tool and select the center of the frame (Add (Shift), RGB Value, Tolerance 25, Contiguous checked, Feather 0)
Selections, Modify, Expand by 5
Paste paper 8
Select invert, delete
Paste close-up tube on paper layer and delete
Select none
Chage the closeup to Overlay and drop opacity down to 45%
Apply dropshadow and merge down on paper layer
Effect, Texture Effects, Blinds (Width 3, Opactity 15, Horizontal and Light from left/top checked)
Move paper layer below frame layer
Select Element 19 - resize by 40%
Paste and position on the top right
Image duplicate and mirror - reposition on top left
Select Element 24 - resize by 75%
Paste and position on the left side
Select Element 60 - resize by 50%
Paste and position on the top left above tree element
Paste tube of choice where desired
Apply Lokas 3D Shadow at default settings
Select Element 25 - resize by 40%
Paste and position on the bottom left
Select Element 40 - resize by 30%
Paste and position on the bottom
Select Element 56 - resize by 30%
Paste and position on the bottom
Select Element 5 - resize by 30%
Paste and position on the bottom
Select Element 22 - resize by 20%
Paste and position on the bottom
Select Element 30 - resize by 40%
Paste and paste on the bottom right
Select Element 54 - resize by 20%
Paste and position on the bottom right
Select Element 61 - resize by 25%
Paste and position on the bottom right
Select Element 2 - resize by 15%
Paste and position on the bottom
Select Element 23 - paste and position on top of canvas
Paste paper 1 on the canvas
Apply Mask 1 or mask of choice
Merge group and move to the bottom layer
Add any dropshadows you like
Sharpen any elements as needed
Crop and resize as desired
Add copyright info, license number and name
You're done! Thanks for trying my tutorial!

Labels:Scraps N Company | 0
comments
Wednesday, November 22, 2017
AUTUMN CAT

Supplies needed:
I am using the stunning artwork from Danny Lee for this tutorial which you can find here
Scrapkit: I am using a stunning kit from Rieneke Designs called "Cat in Autumn" which you can get by going here
Mask 26 from Splitz Designs which you can find here
Plugins: Lokas 3D Shadow
----------------------------
This tutorial is written for those who have working knowledge of PSPX2 (any version will do).
This tutorial was written by me on November 22, 2017. Please do not copy or paste on any other forum, website or blog provide link back to tut only. Please do not claim as your own. This tutorial is copyrighted to me. Any resemblance to any other tutorial is purely coincidental.
Ok - let's start and remember to save often.
Open up a 750 x 650 blank canvas (we can resize it later)
Select Frame Element 32
Paste and position in the center of the canvas
Select your magic wand tool and select the center of the frame (Add (Shift), RGB Value, Tolerance 25, Contiguous checked, Feather 0)
Selections, Modify, Expand by 5
Paste paper 1
Select invert, delete
Paste close-up tube on paper layer and delete
Select none
Chage the closeup to Overlay and drop opacity down to 60%
Apply dropshadow and merge down on paper layer
Effect, Texture Effects, Blinds (Width 3, Opactity 15, Horizontal and Light from left/top checked)
Move paper layer below frame layer
Select Element 26 - resize by 65%
Paste and position on the right side
Select Element 18- resize by 60%
Paste and position on the right side
Select Element 50 - resize by 50%
Paste and position on the bottom left
Select Element 44 - resize by 20%
Paste and position on the bottom left
Select Element 29 - resize by 20%
Paste and position on the bottom left
Select Element 37 - resize by 65%
Paste and position on the bottom left
Paste tube of choice where desired
Apply Lokas 3D Shadow at default settings
Select Element 4 - resize by 15%
Paste and position on the bottom left
Select Element 53 - resize by 20%
Paste and position on the bottom right
Select Element 60 - resize by 25%
Paste and position on the bottom right
Select Element 12 - resize by 15%
Paste and position on the bottom
Select Element 21 - resize by 15%
Paste and position on the bottom
Select Element 25 - resize by 20%
Paste and paste on the bottom right
Paste paper 3 on the canvas
Apply Mask 26 or mask of choice
Merge group and move to the bottom layer
Add any dropshadows you like
Sharpen any elements as needed
Crop and resize as desired
Add copyright info, license number and name
You're done! Thanks for trying my tutorial!

Labels:Scraps N Company | 0
comments
Sunday, November 19, 2017
GOTHIKA

Supplies needed:
I am using the stunning artwork from Lysisange for this tutorial which you can find here
Scrapkit: I am using a stunning kit from Lil Mz Brainstorm called "Gothika" which you can get by going here
Mask 4 from Dee which you can find here
Plugins: Lokas 3D Shadow
----------------------------
This tutorial is written for those who have working knowledge of PSPX2 (any version will do).
This tutorial was written by me on November 19, 2017. Please do not copy or paste on any other forum, website or blog provide link back to tut only. Please do not claim as your own. This tutorial is copyrighted to me. Any resemblance to any other tutorial is purely coincidental.
Ok - let's start and remember to save often.
Open up a 750 x 650 blank canvas (we can resize it later)
Select Frame Element 48 -
Paste and position in the center of the canvas
Select your magic wand tool and select the center of the frame (Add (Shift), RGB Value, Tolerance 25, Contiguous checked, Feather 0)
Selections, Modify, Expand by 5
Paste paper 10
Select invert, delete
Paste close-up tube on paper layer and delete
Select none
Chage the closeup to Screem
Apply dropshadow and merge down on paper layer
Move paper layer below frame layer
Select Element 1 - resize by 30%
Paste and position on the top left of the frame
Select Element 21 - resize by 75%
Paste and position on the bottom
Select Element 97 - resize by 30%
Image mirror and paste on the bottom left
Select Element 11- resize by 15%
Paste and position on the bottom left
Select Element 112 resize by 30%
Paste and position on the bottom left
Select Element 3 - resize by 15%
Paste and position on the bottom left
Paste tube of choice where desired
Apply Lokas 3D Shadow at default settings
Select Element 16 - resize by 30%
Paste and position on the bottom right
Select Element 94 - resize by 20%
Paste and position on the bottom right
Select Element 20 - resize by 40%
Paste and position on the bottom right
Select Element 74- resize by 15%
Image Free Rotate Left by 15% and paste it on the bottom right
Select Element 9 - resize by 15%
Paste and position on the bottom right
Select Element 107 - resize by 30%
Paste and paste on the bottom
Select Element 61 - resize by 15%
Paste and position on the bottom
Select Element 45 - resize by 20%
Paste and position on the bottom
Select Element 4 - resize by 15%
Paste and position on the bottom
Paste paper 1 on the canvas
Apply Mask 4 or mask of choice
Merge group and move to the bottom layer
Add any dropshadows you like
Sharpen any elements as needed
Crop and resize as desired
Add copyright info, license number and name
You're done! Thanks for trying my tutorial!

Labels:Lil Mz Brainstorm | 0
comments
Saturday, November 18, 2017
PIRATES SOUL
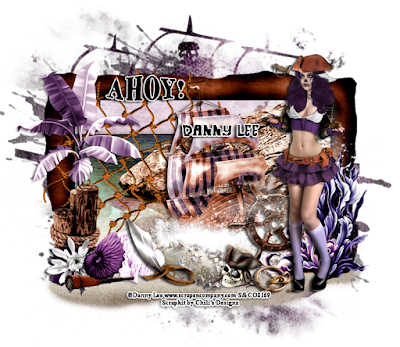
Supplies needed:
I am using the stunning artwork from Danny Lee for this tutorial which you can find here
Scrapkit: I am using a stunning kit from Chili's Designz called "Pirates Soul" which you can get by going here
Mask 2 from Rachel Designs which you can find here
Plugins: Lokas 3D Shadow
----------------------------
This tutorial is written for those who have working knowledge of PSPX2 (any version will do).
This tutorial was written by me on November 18, 2017. Please do not copy or paste on any other forum, website or blog provide link back to tut only. Please do not claim as your own. This tutorial is copyrighted to me. Any resemblance to any other tutorial is purely coincidental.
Ok - let's start and remember to save often.
Open up a 750 x 650 blank canvas (we can resize it later)
Select Frame Element 2 - resize by 85%
Paste and position in the center of the canvas
Select your magic wand tool and select the center of the frame (Add (Shift), RGB Value, Tolerance 25, Contiguous checked, Feather 0)
Selections, Modify, Expand by 5
Paste paper 5
Select invert, delete, select none
Move paper layer below frame layer
Select Net Element - resize by 85%
Paste and position on the left side
Select Palm 4 Element - resize by 40%
Paste and position on the top left
Select Wood Element - resize by 40%
Paste and position on the bottom left
Select Ship Element - resize by 50%
Paste and position in the center where desired
Select Sand Element - resize by 65%
Paste and position on the bottom
Select WA Element - resize by 30%
Paste and position on the top left
Apply Eyecandy Gradient Glow on fat default settings (glow width 3)
Select Plant 2 Element - resize by 50%
Image mirror and paste on the bottom right
Select Wheel Element - resize by 30%
Paste and position on the bottom right
Paste tube of choice where desired
Apply Lokas 3D Shadow at default settings
Select Flower Element - resize by 25%
Paste and position on the bottom left
Select Kikkert Element - resize by 30%
Paste and position on the bottom left
Select Shell 2 Element - resize by 30%
Paste and position on the bottom left
Select Stone 2 Element - resize by 30%
Paste and position on the bottom left
Select Deco 2 Element - resize by 40%
Paste and position on the bottom
Select Sable Element - resize by 40%
Paste and paste on the bottom
Select Skull 2 Element - resize by 30%
Paste and position on the bottom
Select Hook Element - resize by 30%
Paste and position on the bottom
Select Shell 3 Element - resize by 30%
Paste and position on the bottom
Select Sparkles 4 Element
Paste and position on the bottom right
Paste paper 7 on the canvas
Apply Mask 2 or mask of choice
Merge group and move to the bottom layer
Add any dropshadows you like
Sharpen any elements as needed
Crop and resize as desired
Add copyright info, license number and name
You're done! Thanks for trying my tutorial!

Labels:Chili Designz | 0
comments
Monday, November 13, 2017
CONJURING WITCH

Supplies needed:
I am using the stunning artwork from Danny Lee for this tutorial which you can find here
Scrapkit: I am using a stunning kit from Bibi's Collections called "Conjuring Witch" which you can get by going here
Mask 4 from Toxic Desirez which you can find here
Plugins: Lokas 3D Shadow
----------------------------
This tutorial is written for those who have working knowledge of PSPX2 (any version will do).
This tutorial was written by me on November 13, 2017. Please do not copy or paste on any other forum, website or blog provide link back to tut only. Please do not claim as your own. This tutorial is copyrighted to me. Any resemblance to any other tutorial is purely coincidental.
Ok - let's start and remember to save often.
Open up a 750 x 650 blank canvas (we can resize it later)
Select Element 16 - resize by 65%
Paste and position in the center of the canvas
Select Element 76 - resize by 25%
Paste and position on the left side
Select Element 32 - resize by 45%
Paste and position on the bottom
Select Element 1 - resize by 40%
Paste and position in the center of the canvas
Select Element 3 - resize by 15%
Paste and position on the top right
Select Element 24 - resize by 12%
Paste and position on the top left
Select Element 88 - resize by 20%
Paste and position on the left side
Select Element 62 - resize by 15%
Paste and position on the bottom left
Paste tube of choice where desired
Apply Lokas 3D Shadow at default settings
Select Element 21 - resize by 20%
Paste and position on the bottom left
Select Element 44 - resize by 20%
Paste and position on the bottom right
Select Element 42 - resize by 12%
Paste and position on the bottom right
Select Element 41 - resize by 15%
Paste and position on the bottom right
Select Element 97 - resize by 15%
Paste and position on the bottom right
Select Element 67 - resize by 12%
Paste and paste on the bottom
Select Element 33 - resize by 20%
Paste and position on the bottom
Select Element 109 - resize by 20%
Image free Rotate Right by 15% and paste on the bottom
Select Element 105 - resize by 10%
Paste and position on the bottom left
Select Element 99 - resize by 8%
Paste and position on the bottom left
Select Element 81 - resize by 10%
Paste and position on the bottom
Select Element 61 - resize by 15%
Paste and position on the top where desired
Select Element 59 - resize by 30%
Paste and position on the canvas where desired
Paste paper 9 on the canvas
Apply Mask 4 or mask of choice
Merge group and move to the bottom layer
Add any dropshadows you like
Sharpen any elements as needed
Crop and resize as desired
Add copyright info, license number and name
You're done! Thanks for trying my tutorial!

Labels:Bibi's Collections | 0
comments
Sunday, November 12, 2017
SECRETS OF THE BAT
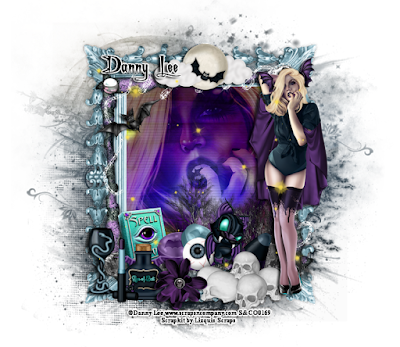
Supplies needed:
I am using the stunning artwork from Danny Lee for this tutorial which you can find here
Scrapkit: I am using a stunning kit from Lizquis Scraps called "Secrets of Bat" which you can get by going here
Mask 21 from Moonbeams and Spiderwebs which you can find here
Plugins: Lokas 3D Shadow
----------------------------
This tutorial is written for those who have working knowledge of PSPX2 (any version will do).
This tutorial was written by me on November 12, 2017. Please do not copy or paste on any other forum, website or blog provide link back to tut only. Please do not claim as your own. This tutorial is copyrighted to me. Any resemblance to any other tutorial is purely coincidental.
Ok - let's start and remember to save often.
Open up a 750 x 650 blank canvas (we can resize it later)
Select Frame Element 4 - resize by 75%
Paste and position in the center of the canvas
Select your magic wand tool and select the center of the frame (Add (Shift), RGB Value, Tolerance 25, Contiguous checked, Feather 0)
Selections, Modify, Expand by 5
Paste paper 5
Select invert, delete
Paste close-up tube on paper layer and delete
Select none
Chage the closeup to Hard Light and drop opacity down to 55%
Apply dropshadow and merge down on paper layer
Effect, Texture Effects, Blinds (Width 3, Opactity 15, Horizontal and Light from left/top checked)
Move paper layer below frame layer
Select Frame Element 2 - resize by 65%
Paste and position in the center of the canvas above original frame
Select Moon Element - resize by 40%
Paste and position on the top where desired
Select Branch 1 Element - resize by 85%
Paste and position on the bottom of the frame
Select Bat 3 Element - resize by 30%
Paste and position on the top left
Select Skulls Element - resize by 50%
Paste and position on the bottom right
Paste tube of choice where desired
Apply Lokas 3D Shadow at default settings
Select Glass 1 Element - resize by 30%
Paste and position on the bottom left
Select Lipstick Element - resize by 30%
Paste and position on the bottom left
Select Book Element - resize by 30%
Paste and position on the bottom left
Select Potion Element - resize by 30%
Paste and position on the bottom
Select Flower 3 Element - resize by 25%
Paste and position on the bottom
Select Candies Element - resize by 30%
Paste and paste on the bottom
Select Eye Element - resize by 25%
Paste and position on the bottom
Select Bat 1 Element - resize by 35%
Paste and position on the bottom
Select Candy Corn Element - resize by 20%
Paste and position on the bottom
Select Light 2 Element - resize by 65%
Paste and position on the canvas where desired
Paste paper 4 on the canvas
Apply Mask 21 or mask of choice
Merge group and move to the bottom layer
Add any dropshadows you like
Sharpen any elements as needed
Crop and resize as desired
Add copyright info, license number and name
You're done! Thanks for trying my tutorial!

Labels:Scraps N Company | 0
comments
Subscribe to:
Comments
(Atom)

