Labels
- Alikas Scraps
- All Dolled Up Store
- Amy Marie
- Annaica
- Arthur Crowe
- Babycakes Scraps
- Barbara Jensen
- Bibi's Collections
- Black Widow Creationz
- Blu Moon
- Bonnies Creations
- Bookwork Dezines
- Broken Sky Dezine
- Carita Creationz
- Carpe Diem Designs
- CDO
- Celinart Pinup
- Celine
- Chacha Creationz
- Charmed Designs
- Cherry Blossom Designs
- Chili Designz
- Cluster Frame
- Creative Misfits
- Creative Scraps by Crys
- Curious Creative Dreams
- Danny Lee
- Derzi
- Designs by Ali
- Designs by Joan
- Designs by Ketura
- Designs By Norella
- Designs by Vi
- Diana Gali
- Diry Art Designs
- Disturbed Scraps
- Dreaming With Bella
- Eclipse Creations
- Elegancefly
- Extras
- Fabulous Designz
- Forum Set
- Foxy's Designz
- Freek's Creation
- FTU
- FwTags
- Goldwasser
- Gothic Inspirations
- Gothic Raven Designs
- Graphfreaks
- Hania's Designs
- Happy Pumpkin Studios
- Horseplay's Pasture Designs
- indie-Zine
- Irish Princess Designs
- Ishika Chowdhury
- Kaci McVay
- Kajenna
- katharine
- Katherine
- Khloe Zoey
- Killer Kitty
- Kissing Kate
- KiwiFirestorm
- Kiya Designs
- Kizzed by Kelz
- KZ Designz
- Lady Mishka
- Lil Mz Brainstorm
- Maiden of Darkness
- Mariel Designs
- MellieBeans
- Michelle's Myths
- Midnight Shadow
- Misticheskya
- MistyLynn's Creations
- MMeliCrea Designz
- Moon Vixen Designs
- NaSionainne
- Ninaste
- Niqui Designs
- Pandora
- Picsfordesign
- Pink Paradox Productions
- Radyga Designs
- Redefined Designs
- Rissa's Designs
- Schnegge
- ScottishButterfly Creations
- Scrappin Krazy Designs
- Scrappin With Lil Ol Me
- Scraps and the City
- Scraps Dimensions
- Scraps From The Heart
- Scraps N Company
- Scraps with Attitude
- Shining Star Art
- Skyscraps
- Sleek N Sassy Designs
- Sophisticat Simone
- Souldesigner
- Soxsational Scraps
- Spazz
- Starlite and Soul
- Stella Felice
- Tammy Welt
- Tasha's Playground
- The PSP Project
- Thrifty Scraps by Gina
- Tiny Turtle Designs
- Upyourart
- Verymany
- Wendy Gerber
- Whisper In the Wind
- Wick3d Creationz
- Wicked Diabla
- Yude's Kreationz
Blog Archive
Sunday, December 31, 2017
BEAUTY OF SNOW
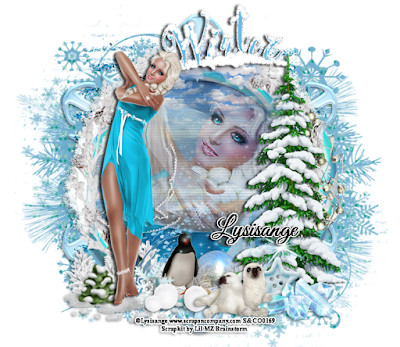
Supplies needed:
I am using the stunning artwork from Lysisange for this tutorial which you can find here
Scrapkit: I am using a stunning kit from Lil Mz Brainstorm called "Beauty of Snow" which you can get by going here
Mask 1 from Dee which you can find here
Plugins: Lokas 3D Shadow
----------------------------
This tutorial is written for those who have working knowledge of PSPX2 (any version will do).
This tutorial was written by me on December 31, 2017. Please do not copy or paste on any other forum, website or blog provide link back to tut only. Please do not claim as your own. This tutorial is copyrighted to me. Any resemblance to any other tutorial is purely coincidental.
Ok - let's start and remember to save often.
Open up a 750 x 650 blank canvas (we can resize it later)
Select Element 35
Paste and position in the center of the canvas
Select Frame Element 27
Paste and position in the center of the canvas
Select your magic wand tool and select the center of the frame (Add (Shift), RGB Value, Tolerance 25, Contiguous checked, Feather 0)
Selections, Modify, Expand by 5
Paste paper 2
Select invert, delete
Paste close-up tube on paper layer and delete
Select none
Chage the closeup to Hard Light and drop opacity down to 75%
Apply dropshadow and merge down on paper layer
Effect, Texture Effects, Blinds (Width 3, Opactity 15, Horizontal and Light from left/top checked)
Move paper layer below frame layer
Select Element 49 - resize by 90%
Paste and position above frame layer
Select Element 60 - resize by 50%
Paste and position on the top
Select Element 31 - resize by 40%
Paste and position on the top
Apply Eyecandy Gradient Glow on fat default settings (Glow Width 2)
Select Element 22 - resize by 75%
Paste and position on the right side
Select Element 25 - resize by 40%
Paste and position on the bottom left
Select Element 3 - resize by 25%
Paste and position on the bottom right
Paste tube of choice where desired
Apply Lokas 3D Shadow at default settings
Select Element 33 - resize by 15%
Paste and position on the bottom right
Select Element 14 - resize by 15%
Paste and position on the bottom
Select Element 30 - resize by 25%
Paste and position on the bottom
Select Element 15 - resize by 20%
Paste and position on the bottom
Select Element 1 - resize by 25%
Paste and paste on the bottom
Select Element 90 - resize by 65%
Paste and position on the canvas where desired
Paste paper 15 on the canvas
Apply Mask 1 or mask of choice
Merge group and move to the bottom layer
Add any dropshadows you like
Sharpen any elements as needed
Crop and resize as desired
Add copyright info, license number and name
You're done! Thanks for trying my tutorial!

Labels:Lil Mz Brainstorm | 0
comments
Wednesday, December 27, 2017
MIDNIGHT PRINCESS

Supplies needed:
I am using the stunning artwork from Lysisange for this tutorial which you can find here
Scrapkit: I am using a stunning kit from A Lil Mz Brainstorm called "Midnight Princess" which you can find here
Mask 2 from Dee which you can find here
Plugins: Lokas 3D Shadow
----------------------------
This tutorial is written for those who have working knowledge of PSPX2 (any version will do).
This tutorial was written by me on December 27, 2017. Please do not copy or paste on any other forum, website or blog provide link back to tut only. Please do not claim as your own. This tutorial is copyrighted to me. Any resemblance to any other tutorial is purely coincidental.
Ok - let's start and remember to save often.
Open up a 750 x 650 blank canvas (we can resize it later)
Select Frame Element 52 -
Paste and position in the center of the canvas
Select your magic wand tool and select the center of the frame (Add (Shift), RGB Value, Tolerance 25, Contiguous checked, Feather 0)
Selections, Modify, Expand by 5
Paste paper 7
Select invert, delete
Paste close-up tube on paper layer and delete
Select none
Chage the closeup to Luminance (Legacy)
Apply dropshadow and merge down on paper layer
Effect, Texture Effects, Blinds (Width 3, Opactity 15, Horizontal and Light from left/top checked)
Move paper layer below frame layer
Select Element 94 - resize by 50%
Paste and position on the top left
Select Element 83 - resize by 30%
Paste and position on the right side
Select Element 89 - resize by 75%
Paste and position on the right side
Select Element 58 - resize by 20%
Paste and position on the bottom left
Select Element 41 - resize by 20%
Paste and position on the bottom left
Select Element 15 - resize by 40%
Paste and position on the bottom
Paste tube of choice where desired
Apply Lokas 3D Shadow at default settings
Select Element 25 - resize by 25%
Paste and position on the bottom right
Select Element 43 - resize by 30%
Paste and position on the bottom right
Select Element 36 - resize by 20%
Paste and position on the bottom right
Select Element 80 - resize by 15%
Paste and position on the bottom right
Select Element 22 - resize by 20%
Paste and position on the bottom
Select Element 20 - resize by 30%
Paste and paste on the bottom
Select Element 54 - resize by 20%
Image Free Rotate Right by 15% and paste on the bottom
Select Element 21 - resize by 20%
Paste and position on the bottom
Select Element 30 - resize by 25%
Paste and position on the bottom
Select Element 18 - resize by 25%
Paste and position on the bottom
Select Element 31 - resize by 25%
Image Free Rotate Left by 15% and paste on the bottom
Select Element 50 - resize by 50%
Paste and position on the canvas where desired
Add new raster layer and flood-fill with color of choice
Apply Mask 2 or mask of choice
Merge group and move to the bottom layer
Add any dropshadows you like
Sharpen any elements as needed
Crop and resize as desired
Add copyright info, license number and name
You're done! Thanks for trying my tutorial!

Labels:Lil Mz Brainstorm | 0
comments
Monday, December 25, 2017
SANTA GIRL
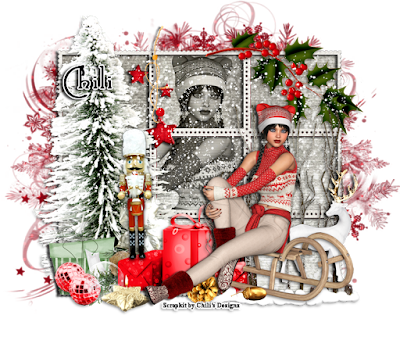
Supplies needed:
Scrapkit: I am using a stunning kit from Chili's Designz called "Santa Girl" which you can get by going here
Mask 3 from Dee which you can find here
Plugins: Lokas 3D Shadow
----------------------------
This tutorial is written for those who have working knowledge of PSPX2 (any version will do).
This tutorial was written by me on December 25, 2017. Please do not copy or paste on any other forum, website or blog provide link back to tut only. Please do not claim as your own. This tutorial is copyrighted to me. Any resemblance to any other tutorial is purely coincidental.
Ok - let's start and remember to save often.
Open up a 750 x 650 blank canvas (we can resize it later)
Select Frame Element - resize by 65%
Paste and position in the center of the canvas
Select your magic wand tool and select the center of the each square in the frame (Add (Shift), RGB Value, Tolerance 25, Contiguous checked, Feather 0)
Selections, Modify, Expand by 2
Paste paper 3
Select invert, delete
Paste close-up tube on paper layer and delete
Select none
Chage the closeup to Luminance (Legacy)
Apply dropshadow and merge down on paper layer
Effect, Texture Effects, Blinds (Width 3, Opactity 15, Horizontal and Light from left/top checked)
Move paper layer below frame layer
Select Branch 3 Element - resize by 40%
Paste and position on the top right
Select Tree Element - resize by 65%
Paste and position on the left side
Select Deco 2 Element - resize by 40%
Paste and position on the top where desired
Select Trees Element - resize by 50%
Paste and position on the bottom right
Select Deer Element - resize by 40%
Paste and position on the bottom right
Select Sledge 2Element - resize by 50%
Paste and position on the bottom right
Paste tube of choice where desired
Apply Lokas 3D Shadow at default settings
Select Gift 4 Element - resize by 40%
Paste and position on the botttom left
Select Ball 3 Element - resize by 30%
Paste and position on the bottom left
Select Gifts Element - resize by 50%
Paste and position on the bottom below tube layer
Select Nutcracker Element - resize by 40%
Paste and position on the bottom above gifts
Select Bubble Element - resize by 40%
Paste and paste on the bottom
Select Candle Element - resize by 30%
Paste and position on the bottom
Select Cone Element - resize by 30%
Paste and position on the bottom
Select Acorn Element - resize by 30%
Paste and position on the bottom
Select Snow 2 Element - resize by 65%
Paste and position on the canvas where desired
Paste paper 6 on the canvas
Apply Mask 3 or mask of choice
Merge group and move to the bottom layer
Add any dropshadows you like
Sharpen any elements as needed
Crop and resize as desired
Add copyright info, license number and name
You're done! Thanks for trying my tutorial!

Labels:Chili Designz | 0
comments
Saturday, December 23, 2017
XMAS GLAM

Supplies needed:
I am using the stunning artwork from Lysisange for this tutorial which you can find here
Scrapkit: I am using a stunning kit from A Lil Mz Brainstorm called "Xmas Glam" which you can get by going here
Mask 3 from Dee which you can find here
Plugins: Lokas 3D Shadow
----------------------------
This tutorial is written for those who have working knowledge of PSPX2 (any version will do).
This tutorial was written by me on December 23, 2017. Please do not copy or paste on any other forum, website or blog provide link back to tut only. Please do not claim as your own. This tutorial is copyrighted to me. Any resemblance to any other tutorial is purely coincidental.
Ok - let's start and remember to save often.
Open up a 750 x 650 blank canvas (we can resize it later)
Select Frame Element 59 - resize by 80%
Paste and position in the center of the canvas
Select your magic wand tool and select the center of the frame (Add (Shift), RGB Value, Tolerance 25, Contiguous checked, Feather 0)
Selections, Modify, Expand by 5
Paste paper 21
Select invert, delete, select none
Move paper layer below frame layer
Select Frame Element - resize by 75%
Paste and position in the center above the original frame
Select Element 75 - resize by 50%
Paste and position on the top right
Select Element 15 - resize by 65%
Paste and position on the left side
Select Element 83 - resize by 75%
Paste and position on the bottom
Select Element 90 - resize by 30%
Paste and position on the left side
Select Element 104 - resize by 20%
Paste and position on the tree element
Select Element 107 - resize by 20%
Paste and position on the bottom right
Paste tube of choice where desired
Apply Lokas 3D Shadow at default settings
Select Element 100 - resize by 20%
Paste and position on the bottom left
Select Element 93 - resize by 20%
Paste and position on the bottom left
Select Element 26 - resize by 15%
Paste and position on the bottom left
Select Element 11 - resize by 25%
Paste and position on the bottom
Select Element 96 - resize by 20%
Image Free Rotate Left by 15% and paste on the bottom
Select Element 12 - resize by 25%
Paste and position on the bottom
Select Element 10 - resize by 15%
Image Free Rotate Left by 15% and paste on the bottom
Select Element 36 - resize by 65%
Paste and position on the canvas where desired
Add new raster layer and flood-fill with color of choice
Apply Mask 4 or mask of choice
Merge group and move to the bottom layer
Add any dropshadows you like
Sharpen any elements as needed
Crop and resize as desired
Add copyright info, license number and name
You're done! Thanks for trying my tutorial!

Labels:Lil Mz Brainstorm | 0
comments
Friday, December 22, 2017
FALL DRESS
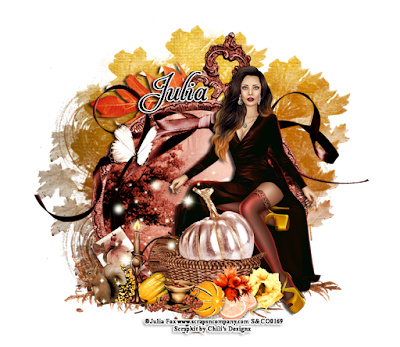
Supplies needed:
I am using the stunning artwork from Julia Fox for this tutorial which you can find here
Scrapkit: I am using a stunning kit from Chili's Designz called "Fall Dress" which you can get by going here
Mask 4 from Rachel Designs which you can find here
Plugins: Lokas 3D Shadow
----------------------------
This tutorial is written for those who have working knowledge of PSPX2 (any version will do).
This tutorial was written by me on December 22, 2017. Please do not copy or paste on any other forum, website or blog provide link back to tut only. Please do not claim as your own. This tutorial is copyrighted to me. Any resemblance to any other tutorial is purely coincidental.
Ok - let's start and remember to save often.
Open up a 750 x 650 blank canvas (we can resize it later)
Select Frame Element 6 - resize by 75%
Paste and position in the center of the canvas
Select your magic wand tool and select the center of the frame (Add (Shift), RGB Value, Tolerance 25, Contiguous checked, Feather 0)
Selections, Modify, Expand by 5
Paste paper 8
Select invert, delete, select none
Move paper layer below frame layer
Select Bow Element - resize by 85%
Paste and position above the frame layer
Select Branch Element - resize by 40%
Image Free Rotate Left by 15% and paste on the top left below frame layer
Select Butterfly Element - resize by 40%
Paste and position on the top left
Select Greenery 2 Element - resize by 65%
Paste and position on the bottom
Paste tube of choice where desired
Apply Lokas 3D Shadow at default settings
Select Deco 2 Element - resize by 55%
Paste and position on the bottom below tube layer
Select Pumpkin 2 Element - resize by 45%
Paste and position on the bottom above basket element
Select your eraser tool and erase the bottom of the pumpkin that overlaps basket
Select Deco 3 Element - resize by 30%
Paste and position on the bottom left
Select Cone Element - resize by 25%
Paste and paste on the bottom left
Select Squierrel Element - resize by 30%
Paste and position on the bottom left
Select Candle Element - resize by 30%
Paste and position on the bottom left
Select Rose Element - resize by 25%
Paste and position on the bottom
Select Orange 3 Element - resize by 30%
Paste and position on the bottom
Select Orange Element - resize by 30%
Paste and position on the bottom
Select Cup Element - resize by 30%
Paste and position on the bottom
Select Pumpkin 3 - resize by 25%
Paste and position on the bottom
Select Nuts Element - resize by 20%
Paste and position on the bottom
Select Sparkles 3 Element - resize by 40%
Paste and position on the canvas where desired
Paste paper 10 on the canvas
Apply Mask 4 or mask of choice
Merge group and move to the bottom layer
Add any dropshadows you like
Sharpen any elements as needed
Crop and resize as desired
Add copyright info, license number and name
You're done! Thanks for trying my tutorial!

Labels:Scraps N Company | 0
comments
Sunday, December 17, 2017
CHRISTMAS JOY
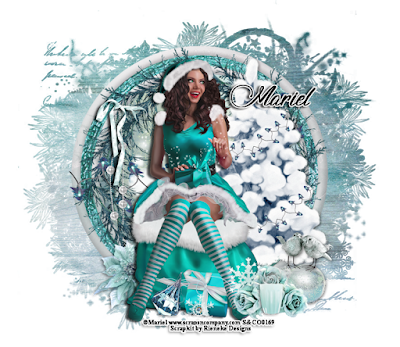
Supplies needed:
I am using the stunning artwork from Mariel for this tutorial which you can find here
Scrapkit: I am using a stunning kit from Rieneke Designs called "Julia" which you can get by going here
Mask 2 from Dee which you can find here
Plugins: Lokas 3D Shadow
----------------------------
This tutorial is written for those who have working knowledge of PSPX2 (any version will do).
This tutorial was written by me on December 17, 2017. Please do not copy or paste on any other forum, website or blog provide link back to tut only. Please do not claim as your own. This tutorial is copyrighted to me. Any resemblance to any other tutorial is purely coincidental.
Ok - let's start and remember to save often.
Open up a 750 x 650 blank canvas (we can resize it later)
Select Frame Element 42 - resize by 85%
Paste and position in the center of the canvas
Select your magic wand tool and select the center of the frame (Add (Shift), RGB Value, Tolerance 25, Contiguous checked, Feather 0)
Selections, Modify, Expand by 5
Paste paper 1
Select invert, delete, select none
Move paper layer below frame layer
Select Element 21 - resize by 85%
Paste and position in the center above the frame layer
Select Element 63 - resize by 75%
Paste and position on the right side
Select Element 37 - resize by 30%
Paste and position on the right side above tree element
Image duplicate and reposition on tree element
Select Element 24 - resize by 40%
Paste and position on the left side
Select Element 11 - resize by 30%
Paste and position on the top left
Select Element 60 - resize by 40%
Paste and position in the center where desired
Paste tube of choice where desired
Apply Lokas 3D Shadow at default settings
Select Element 9 - resize by 30%
Paste and position on the bottom left
Select Element 12 - resize by 15%
Paste and position on the bottom right
Select Element 41 - resize by 20%
Paste and position on the bottom right
Select Element 52 - resize by 30%
Paste and position on the bottom right
Select Element 5 - resize by 30%
Paste and paste on the bottom right
Select Element 46 - resize by 20%
Paste and position on the bottom
Select Element 65 - resize by 15%
Paste and position on the bottom
Paste paper 5 on the canvas
Apply Mask 2 or mask of choice
Merge group and move to the bottom layer
Add any dropshadows you like
Sharpen any elements as needed
Crop and resize as desired
Add copyright info, license number and name
You're done! Thanks for trying my tutorial!

Labels:Scraps N Company | 0
comments
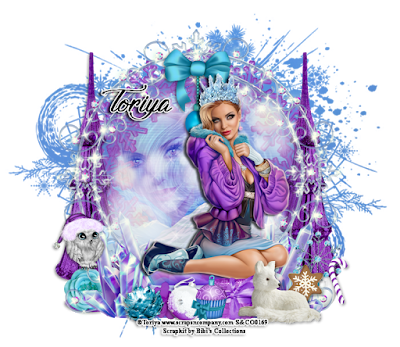
CANDICE PRINCESS
Supplies needed:
I am using the stunning artwork from Toriya for this tutorial which you can find here
Scrapkit: I am using a stunning kit from Bibi's Collections called "Candice Princess" which you can get by going here
Winter Mask 5 from Dee which you can find here
Plugins: Lokas 3D Shadow
----------------------------
This tutorial is written for those who have working knowledge of PSPX2 (any version will do).
This tutorial was written by me on December 17, 2017. Please do not copy or paste on any other forum, website or blog provide link back to tut only. Please do not claim as your own. This tutorial is copyrighted to me. Any resemblance to any other tutorial is purely coincidental.
Ok - let's start and remember to save often.
Open up a 750 x 650 blank canvas (we can resize it later)
Select Element 70 - resize by 70%
Paste and position in the center of the canvas
Select Frame Element 31 - resize by 65%
Paste and position in the center of the canvas
Select your magic wand tool and select the center of the frame (Add (Shift), RGB Value, Tolerance 25, Contiguous checked, Feather 0)
Selections, Modify, Expand by 5
Paste paper 2
Select invert, delete
Paste close-up tube on paper layer and delete
Select none
Chage the closeup to Hard Light
Apply dropshadow and merge down on paper layer
Effect, Texture Effects, Blinds (Width 3, Opactity 15, Horizontal and Light from left/top checked)
Move paper layer below frame layer
Select Element 99 - resize by 15%
Paste and position towards the bottom of the frame
Select Element 93 - resize by 40%
Paste and position in the center above frame layer
Select Element 38 - resize by 50%
Paste and position on the left side below element 93
Image duplicate, mirror and reposition on the right side
Select Element 29 - resize by 12%
Paste and position on the top center where desired
Paste tube of choice where desired
Apply Lokas 3D Shadow at default settings
Select Element 47 - resize by 12%
Paste and position on the bottom left
Select Element 85 - resize by 15%
Paste and position on the bottom left
Select Element 1 - resize by 12%
Paste and position on the bottom right
Select Element 45 - resize by 25%
Paste and position on the bottom
Select Element 51 - resize by 20%
Paste and paste on the bottom
Select Element 46 - resize by 12%
Paste and position on the bottom
Select Element 65 - resize by 7%
Paste and position on the bottom
Select Element 75 - resize by 15%
Paste and position on the bottom
Select Element 82 - resize by 12%
Paste and position on the bottom
Select Element 76 - resize by 30%
Paste and position on the canvas where desired
Paste paper 3 on the canvas
Apply Mask 5 or mask of choice
Merge group and move to the bottom layer
Add any dropshadows you like
Sharpen any elements as needed
Crop and resize as desired
Add copyright info, license number and name
You're done! Thanks for trying my tutorial!

Labels:Bibi's Collections | 0
comments
Tuesday, December 12, 2017
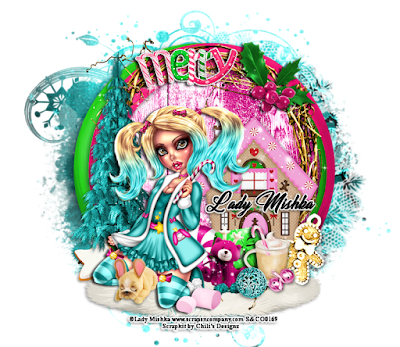
XMAS GINGER
Supplies needed:
I am using the stunning artwork from Lady Mishka for this tutorial which you can find here
Scrapkit: I am using a stunning kit from Chili's Designz called "Xmas Ginger" which you can get by going here
Winter Mask 3 from Dee which you can find here
Plugins: Lokas 3D Shadow
----------------------------
This tutorial is written for those who have working knowledge of PSPX2 (any version will do).
This tutorial was written by me on December 10, 2017. Please do not copy or paste on any other forum, website or blog provide link back to tut only. Please do not claim as your own. This tutorial is copyrighted to me. Any resemblance to any other tutorial is purely coincidental.
Ok - let's start and remember to save often.
Open up a 750 x 650 blank canvas (we can resize it later)
Select Frame Element 8 - resize by 75%
Paste and position in the center of the canvas
Select your magic wand tool and select the center of the frame (Add (Shift), RGB Value, Tolerance 25, Contiguous checked, Feather 0)
Selections, Modify, Expand by 5
Paste paper 5
Select invert, delete, select none
Move paper layer below frame layer
Select Frame Element 3 - resize by 60%
Paste and position in the center of the canvas above the frame
Select Berries 2 Element - resize by 40%
Paste and position on the top right
Select Tree 4 Element - resize by 50%
Paste and position on the left side
Select Ginger House Element - resize by 40%
Paste and position on the right side
Select WA Element - resize by 30%
Paste and position on the top left
Apply Eyecandy Gradient Glow on fat default settings (Glow Width 3)
Select Carpet Element - resize by 65%
Paste and position on the bottom
Paste tube of choice where desired
Apply Lokas 3D Shadow at default settings
Select Charm Element - resize by 75%
Paste and position on the bottom right
Select Cup 2 Element - resize by 40%
Paste and position on the bottom right
Select Bells Element - resize by 25%
Paste and position on the bottom right
Select Gift 3 Element - resize by 40%
Paste and position on the bottom
Select Candy 2 Element - resize by 65%
Paste and position on the bottom
Select Cat Element - resize by 25%
Paste and paste on the bottom
Select Ball 5 Element - resize by 25%
Paste and position on the bottom
Select Candy Element - resize by 30%
Paste and position on the bottom
Select Cookie Element - resize by 40%
Paste and position on the bottom left
Select Puppy Element - resize by 25%
Paste and position on the bottom
Select Sparkles Element - resize by 50%
Paste and position on the canvas where desired
Paste paper 2 on the canvas
Apply Mask 3 or mask of choice
Merge group and move to the bottom layer
Add any dropshadows you like
Sharpen any elements as needed
Crop and resize as desired
Add copyright info, license number and name
You're done! Thanks for trying my tutorial!

Labels:Chili Designz | 0
comments
Saturday, December 9, 2017
QUEEN OF HEARTS
Supplies needed:
I am using the stunning artwork from Lysisange for this tutorial which you can find here
Scrapkit: I am using a stunning kit from Lil Mz Brainstorm called "Queen of Hearts" which you can get by going here
Mask 315 from Aqua which you can find here
Plugins: Lokas 3D Shadow
----------------------------
This tutorial is written for those who have working knowledge of PSPX2 (any version will do).
This tutorial was written by me on December 9, 2017. Please do not copy or paste on any other forum, website or blog provide link back to tut only. Please do not claim as your own. This tutorial is copyrighted to me. Any resemblance to any other tutorial is purely coincidental.
Ok - let's start and remember to save often.
Open up a 750 x 650 blank canvas (we can resize it later)
Select Frame Element 26 - resize by 85%
Paste and position in the center of the canvas
Select your magic wand tool and select the center of the frame (Add (Shift), RGB Value, Tolerance 25, Contiguous checked, Feather 0)
Selections, Modify, Expand by 5
Paste paper 14
Select invert, delete, select none
Move paper layer below frame layer
Select Element 37 - resize by 65%
Paste and position on the top left below the frame
Select Element 89 - resize by 65%
Paste and position on the top right below frame
Select Element 67 -
Paste and position on the bottom below the frame
Select Element 106 - resize by 30%
Paste and position on the bottom right
Select Element 52 - resize by 40%
Paste and position on the left side of the frame
Select Element 41 - resize by 20%
Image mirror and paste on the bottom left
Select Element 28 - resize by 50%
Paste and position on the bottom left
Paste tube of choice where desired
Apply Lokas 3D Shadow at default settings
Select Element 8 - resize by 15%
Paste and position on the bottom right
Select Element 107 - resize by 25%
Paste and position on the bottom right
Select Element 11 - resize by 15%
Paste and position on the bottom right
Select Element 105 - resize by 30%
Paste and position on the bottom
Select Element 108 - resize by 20%
Paste and paste on the bottom
Select Element 91 - resize by 30%
Paste and position on the bottom
Select Element 59 - resize by 20%
Paste and position on the bottom
Select Element 10 - resize by 20%
Paste and position on the bottom
Select Element 15 - resize by 20%
Paste and position on the bottom
Select Element 9 - resize by 50%
Paste and position on the canvas where desired
Paste paper 8 on the canvas
Apply Mask 315 or mask of choice
Merge group and move to the bottom layer
Add any dropshadows you like
Sharpen any elements as needed
Crop and resize as desired
Add copyright info, license number and name
You're done! Thanks for trying my tutorial!

Labels:Lil Mz Brainstorm | 0
comments
Sunday, December 3, 2017
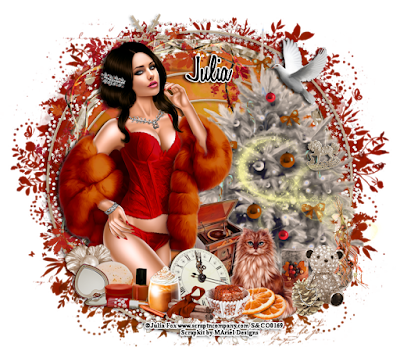
HOLIDAY GLAM
Supplies needed:
I am using the stunning artwork from Julia Fox for this tutorial which you can find here
Scrapkit: I am using a stunning kit from Mariel Designs called "Becki 6" which you can get by going here
Mask 2 from Dee which you can find here
Plugins: Lokas 3D Shadow
----------------------------
This tutorial is written for those who have working knowledge of PSPX2 (any version will do).
This tutorial was written by me on December 3, 2017. Please do not copy or paste on any other forum, website or blog provide link back to tut only. Please do not claim as your own. This tutorial is copyrighted to me. Any resemblance to any other tutorial is purely coincidental.
Ok - let's start and remember to save often.
Open up a 750 x 650 blank canvas (we can resize it later)
Select Frame Element 3 -
Paste and position in the center of the canvas
Select Frame Element 6 - resize by 85%
Paste and position in the center of the canvas
Select your magic wand tool and select the center of the frame (Add (Shift), RGB Value, Tolerance 25, Contiguous checked, Feather 0)
Selections, Modify, Expand by 5
Paste paper 1
Select invert, delete, select none
Move paper layer below frame layer
Select Element 77 -
Paste and position above frame layer
Select Element 103 -
Paste and position on the top left
Select Element 104 -
Paste and position on the right side
Select Element 23 - resize by 30%
Paste and position on the bottom
Select Element 7 - resize by 25%
Paste and position on the top right
Paste tube of choice where desired
Apply Lokas 3D Shadow at default settings
Select Element 37 - resize by 15%
Paste and position on the bottom left
Select Element 52 - resize by 15%
Paste and position on the bottom left
Select Element 22 - resize by 15%
Paste and position on the bottom left
Select Element 87 - resize by 15%
Paste and position on the bottom left
Select Element 48 - resize by 20%
Paste and position on the bottom
Select Element 105 - resize by 20%
Paste and paste on the bottom
Select Element 21 - resize by 15%
Paste and position on the bottom
Select Element 39 - resize by 30%
Paste and position on the bottom right
Select Element 55 - resize by 20%
Paste and position on the bottom right
Select Element 80 - resize by 15%
Paste and position on the bottom right
Select Element 68 - resize by 30%
Paste and position on the bottom
Select Element 91 - resize by 20%
Paste and position on the bottom
Select Element 94 - resize by 15%
Paste and position on the bottom
Select Element 73 - resize by 50%
Paste and position on the canvas where desired
Paste paper 2 on the canvas
Apply Mask 2 or mask of choice
Merge group and move to the bottom layer
Add any dropshadows you like
Sharpen any elements as needed
Crop and resize as desired
Add copyright info, license number and name
You're done! Thanks for trying my tutorial!

Labels:Scraps N Company | 0
comments
Saturday, December 2, 2017
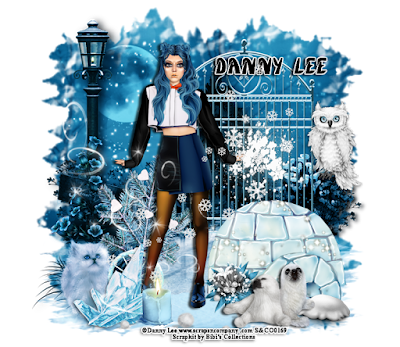
ARTIC QUEEN
Supplies needed:
I am using the stunning artwork from Danny Lee for this tutorial which you can find here
Scrapkit: I am using a stunning kit from Bibi's Collections called "Penguin Queen" which you can get by going here
Plugins: Lokas 3D Shadow
----------------------------
This tutorial is written for those who have working knowledge of PSPX2 (any version will do).
This tutorial was written by me on December 2, 2017. Please do not copy or paste on any other forum, website or blog provide link back to tut only. Please do not claim as your own. This tutorial is copyrighted to me. Any resemblance to any other tutorial is purely coincidental.
Ok - let's start and remember to save often.
Open up a 750 x 650 blank canvas (we can resize it later)
Select Element 17
Paste and position in the center of the canvas
Move paper layer below frame layer
Select Element 59 - resize by 50%
Paste and position on the right side
Select Element 12 - resize by 25%
Paste and position on the bottom right
Select Element 60 - resize by 20%
Paste and position on the right side
Select Element 42- resize by 45%
Paste and position on the bottom
Paste tube of choice where desired
Apply Lokas 3D Shadow at default settings
Select Element 15 - resize by 25%
Paste and position on the bottom left
Select Element 65 - resize by 30%
Paste and position on the bottom left
Select Element 5 - resize by 15%
Paste and position on the bottom left
Select Element 56 -
Paste and position on the left side
Select Element 66 - resize by 12%
Paste and paste on the bottom
Select Element 68 - resize by 12%
Paste and position on the bottom right
Select Element 13 - resize by 15%
Paste and position on the bottom right
Select Element 50 - resize by 15%
Paste and position on the bottom
Select Element 51 - resize by 40%
Paste and position on the right side
Select Element 29 - resize by 40%
Paste and position on the canvas where desired
Add any dropshadows you like
Sharpen any elements as needed
Crop and resize as desired
Add copyright info, license number and name
You're done! Thanks for trying my tutorial!

Labels:Bibi's Collections | 0
comments
Subscribe to:
Comments
(Atom)


