Labels
- Alikas Scraps
- All Dolled Up Store
- Amy Marie
- Annaica
- Arthur Crowe
- Babycakes Scraps
- Barbara Jensen
- Bibi's Collections
- Black Widow Creationz
- Blu Moon
- Bonnies Creations
- Bookwork Dezines
- Broken Sky Dezine
- Carita Creationz
- Carpe Diem Designs
- CDO
- Celinart Pinup
- Celine
- Chacha Creationz
- Charmed Designs
- Cherry Blossom Designs
- Chili Designz
- Cluster Frame
- Creative Misfits
- Creative Scraps by Crys
- Curious Creative Dreams
- Danny Lee
- Derzi
- Designs by Ali
- Designs by Joan
- Designs by Ketura
- Designs By Norella
- Designs by Vi
- Diana Gali
- Diry Art Designs
- Disturbed Scraps
- Dreaming With Bella
- Eclipse Creations
- Elegancefly
- Extras
- Fabulous Designz
- Forum Set
- Foxy's Designz
- Freek's Creation
- FTU
- FwTags
- Goldwasser
- Gothic Inspirations
- Gothic Raven Designs
- Graphfreaks
- Hania's Designs
- Happy Pumpkin Studios
- Horseplay's Pasture Designs
- indie-Zine
- Irish Princess Designs
- Ishika Chowdhury
- Kaci McVay
- Kajenna
- katharine
- Katherine
- Khloe Zoey
- Killer Kitty
- Kissing Kate
- KiwiFirestorm
- Kiya Designs
- Kizzed by Kelz
- KZ Designz
- Lady Mishka
- Lil Mz Brainstorm
- Maiden of Darkness
- Mariel Designs
- MellieBeans
- Michelle's Myths
- Midnight Shadow
- Misticheskya
- MistyLynn's Creations
- MMeliCrea Designz
- Moon Vixen Designs
- NaSionainne
- Ninaste
- Niqui Designs
- Pandora
- Picsfordesign
- Pink Paradox Productions
- Radyga Designs
- Redefined Designs
- Rissa's Designs
- Schnegge
- ScottishButterfly Creations
- Scrappin Krazy Designs
- Scrappin With Lil Ol Me
- Scraps and the City
- Scraps Dimensions
- Scraps From The Heart
- Scraps N Company
- Scraps with Attitude
- Shining Star Art
- Skyscraps
- Sleek N Sassy Designs
- Sophisticat Simone
- Souldesigner
- Soxsational Scraps
- Spazz
- Starlite and Soul
- Stella Felice
- Tammy Welt
- Tasha's Playground
- The PSP Project
- Thrifty Scraps by Gina
- Tiny Turtle Designs
- Upyourart
- Verymany
- Wendy Gerber
- Whisper In the Wind
- Wick3d Creationz
- Wicked Diabla
- Yude's Kreationz
Blog Archive
Saturday, March 30, 2019
WATERMELON CRUSH
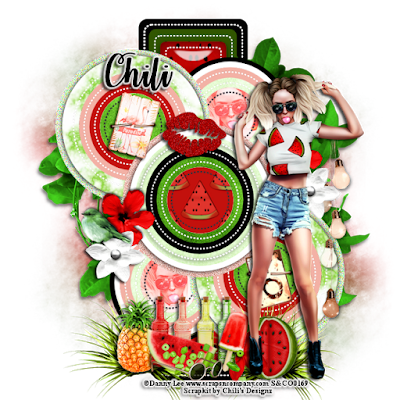
Supplies needed:
I am using the amazing art from Danny Lee for this tutorial, which you can find here
Scrapkit: I am using a kit from Chili's Designz called "Watermelon" which you can get by going here
Template 221 from Pooker which can be found here
Mask 159 from Insatiable Dreams which you can find here
Plugins used: Lokas 3D Shadow, Eyecandy - Marble, Eyecandy - Glass
----------------------------
This tutorial is written for those who have working knowledge of PSPX2 (any version will do).
This tutorial was written by me on , March 30, 2019. Please do not copy or paste on any other forum, website or blog provide link back to tut only. Please do not claim as your own. This tutorial is copyrighted to me. Any resemblance to any other tutorial is purely coincidental.
Ok - let's start and remember to save often.
Open the template and using your shortcut keys on your keyboard (SHIFT+D) duplicate the template as a new image. Close the original and delete the copywrite layer.
Select the 2 Green Squares layer
Select all, float, and defloat
Add new raster layer and flood-fill with color of choice
Select invert delete, select none
Hide/delete the original square layer
Select Wreath Element - resize by 65%
Paste and position in the center above squares layer
Select 2 Pink Squares layer
Select all, float, defloat
Add new raster and flood-fill with color of choice
Select invert, delete, select none
Hide/delete original squares layer
Select 2 Purple Squares layer
Select all, float, defloat
Paste paper 3
Select invert, delete, select none
Apply Eyecandy Glass with the following settings:
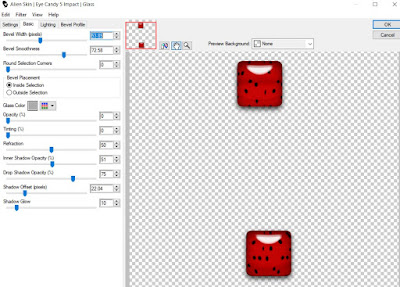
Hide/delete original squares layer
Select 2 purple circles 2 layer
Select all, float, defloat
Add new raster layer and flood-fill with color of choice
Select invert, delete, select none
Hide/delete original circles layer
Select 2 Green Circles 2 layer
Select all, float, defloat
Add new raster layer and flood-fill with color of choice
Select invert, delete, select none
Hide/delete original circles layer
Select 2 White Circles 3 layers
Select all, float, defloat
Add new raster layer and flood-fill with color of choice
Select invert, delete
Paste close-up tubes on color layer and delete
Select none
Delete/Hide original circles layer
Select 2 Glitter Circles layer
Select all, float, defloat
Add new raster layer and flood-fill with color of choice
Select invert, delete, select none
Adjust, Add/Remove Noise, Add Noise (Uniform checked, Noise 85%, Monochrome checked)
Hide/delete original circle layer
Select 2 White Circles layer
Apply Eyecandy Marble with the following settings:
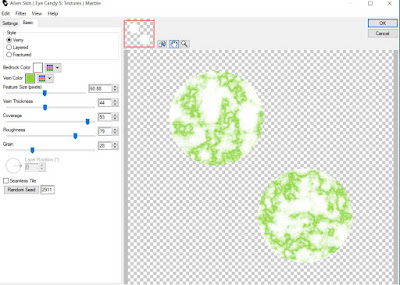
Select 2 Green Circle 1 layer
Select all, float, defloat
Add new raster layer and flood-fill with color of choice
Select invert, delete, select none
Hide/delete original circles layer
Select White Circles 1 layer
Select all, float, defloat
Add new raster layer and flood-fill with color of choice
Select invert, delete, select none
Hide/delete original circles layer
Select Purple Circle 1 layer
Select all, float, defloat
Add new raster layer and flood-fill with color of choice
Select invert, delete, Select none
Hide/delete original circle layer
Select Pink Circle 1 layer
Select all, float, defloat
Add new raster layer and flood-fill with color of choice
Select invert, delete, select none
Hide/delete original circle layer
Select Green Circle 1 layer
Select all, float, defloat
Add new raster layer and flood-fill with color of choice
Select invert, delete, select none
Hide/delete original circle layer
Select White Circle 1 layer
Select all, float, defloat
Paste paper 4
Select invert delete, select none
Hide/delete original circle layer
Copy and paste tube of choice and position where desired
Apply Lokas 3D Shadow
Select Plant Element - resize by 30%
Paste and position on the bottom left
Duplicate element, mirror and position on the bottom right
Select Pineapple Element - resize by 30%
Paste and position on the bottom left
Select Flower 5 Element - resize by 25%
Paste and position on the left side
Select Flower 3 Element - resize by 45%
Paste and position on the left side
Select Bird Element - resize by 38%
Paste and position on the left side
Select Lights Element - resize by 40%
Paste and position on the right side
Select Bottles Element - resize by 35%
Paste and position on the bottom
Select Melon 13 Element - resize by 25%
Image Free Rotate Right by 15% and paste on the bottom
Select Pearls Element - resize by 25%
Paste and position on the bottom
Select Flower 4 Element - resize by 25%
Paste and position on the bottom
Select Ice Element - resize by 25%
Image Free Rotate Right by 15% and paste on the bottom
Select Melon 8 Element - resize by 25%
Paste and position on the bottom right
Select Staple Element - resize by 65%
Paste and postion in the center of the top left circle
Duplicate staple and reposition on bottom circle
Select Sign Element - resize by 15%
Image free Rotate Right by 15% and paste on the top left circle below staple
Select Sign 2 Element - resize by 20%
Image Free Rotate Left by 15% and paste on the bottom circle below staple
Select Lips Element - resize by 65%
Paste and position in the center where desired
Select New raster layer and flood fill with color or gradient of choice
Move layer to the bottom of the template
Apply Mask 159 or mask of choice
Merge group and move to the bottom
Add any additional elements you like.
Add any dropshadows you like
Crop and resize as desired
Add copyright info, license number and name
You're done! Thanks for trying my tutorial!

Labels:Chili Designz | 0
comments
Thursday, March 28, 2019
BEYOND THE DARKNESS
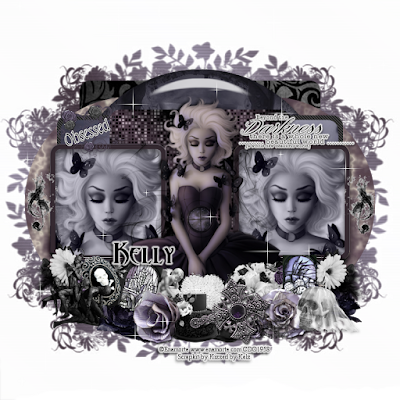
Supplies needed:
I am using the amazing art from Enamorte for this tutorial, which you can find here
Scrapkit: I am using a kit from Kizzed by Kelz called "Apocalyptica" which you can get by going here
Template 892 from Millie which can be found here
Mask 146 from Millie which can be found here
Plugins used: Lokas 3D Shadow, Xero - Fritillary, Alien Skin Eye Candy - Marble, Alien Skin Eyecandy - Glass
----------------------------
This tutorial is written for those who have working knowledge of PSPX2 (any version will do).
This tutorial was written by me on March 28, 2019. Please do not copy or paste on any other forum, website or blog provide link back to tut only. Please do not claim as your own. This tutorial is copyrighted to me. Any resemblance to any other tutorial is purely coincidental.
Ok - let's start and remember to save often.
Open the template and using your shortcut keys on your keyboard (SHIFT+D) duplicate the template as a new image. Close the original and delete the copywrite layer.
Select the Square 1 layer
Select all, float, and defloat
Paste Paper 1
Select invert delete, select none
Hide/delete the orginal square layer
Select Circle 2 layer
Add new raster layer and flood-fill with color of choice
Reselect Circle 2
Select all, float, defloat
Reselect flood-fill layer
Select invert, delete, select none
Apply Eyecandy Marble with the following settings:
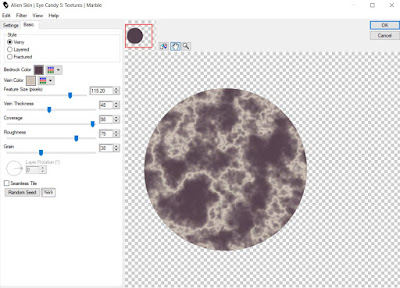
Hide/delete original circle layer
Select Circle 3 layer
Repeat above steps
Select Circle 4 layer
Select all, float, defloat
Paste paper 12
Select invert, delete, select none
Apply Eyecandy Glass with the following settings:
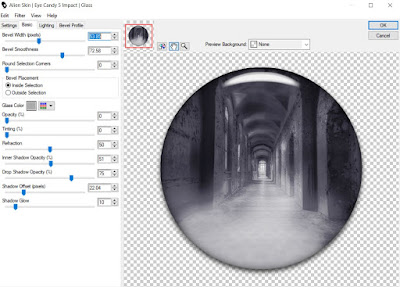
Hide/delete original circle layer
Select Rectangle 5 layer
Add new raster layer and flood-fill with color of choice
Reselect Rectangle 5
Select all, float, defloat
Go back to flood-fill layer
Select invert, delete, select none
Hide/delete original rectangle layer
Select Rectangle 6 layer
Select all, float, defloat
Paste paper 13
Select invert, delete, select none
Hide/delete original rectangle layer
Select Square 7 layer
Select all, float, defloat
Add new raster layer and flood-fill with gradient of choice
Select invert, delete, select none
Apply Xero Fritillary with the following settings:
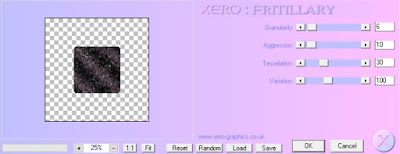
Delete/Hide original square layer
Select Square 8 layer
Select all, float, defloat
Add new raster layer and flood-fill with gradient of choice
Select invert, delete
Paste close-up tube of choice on gradient and delete
Select none
Change close-up to Lumenince (Legacy)
Apply dropshadow and merge down on gradient layer
Hide/delete original square layer
Select Square 10 layer
Repeat above steps
Select Frame 9 layer
Select all, float, defloat
Add new raster layer and flood-fill with color of choice
Select invert, delete, select none
Hide/delete original frame layer
Select Frame 11 layer
Repeat above steps
Copy and paste tube of choice and position in the center where desired
Apply Lokas 3D Shadow
Select Element 40 - resize by 65%
Paste and position on the bottom right
Image duplicate, mirror and repostion on the bottom left
Select Element 97 - resize by 25%
Paste and position on the bottom left
Image duplicate, mirror and reposition on the bottom right
Select Element 1 - resize by 25%
Paste and position on the left side
Image duplicate, mirror and reposition on the right side
Select Element 112 - resize by 25%
Paste and position on the bottom left
Select Element 59 - resize by 25%
Paste and position on the bottom left
Select Element 3 - resize by 25%
Image Free Rotate Right by 15% and paste on the bottom
Select Element 82 - resize by 25%
Paste and position on the bottom
Select Element 26 - resize by 25%
Paste and position on the bottom
Select Element 96 - resize by 25%
Paste and position on the bottom
Select Element 133 - resize by 25%
Paste and position on the bottom
Select Element 124 - resize by 20%
Paste and position on the bottom
Duplicate element and resize by 85% and reposition on bottom right
Select Element 43 - resize by 25%
Paste and position on the bottom right
Select Element 46 - resize by 20%
Paste and position on the bottom
Select Element 7 - resize by 25%
Paste and position on the bottom
Select Element 50 - resize by 20%
Paste and position on the bottom
Select Element 39 - resize by 30%
Paste and position on the bottom
Select Element 130 - resize by 30%
Paste and position on the top left
Select Element 81 - resize by 45%
Paste and position on the top right
Apply Eyecandy Gradient Glow on default settings
Add new raster layer and flood-fill with color of choice
Move layer to the bottom of the template
Apply Mask 146 or mask of choice
Merge group and move to the bottom
Add any additional elements you like.
Add any dropshadows you like
Crop and resize as desired
Add copyright info, license number and name
You're done! Thanks for trying my tutorial!

Labels:All Dolled Up Store | 0
comments
Tuesday, March 26, 2019
GARDEN FANTASY
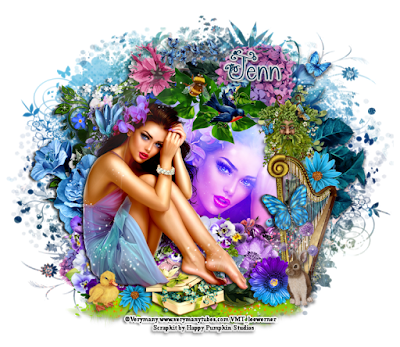
Supplies needed:
I am using the stunning artwork from Verymany for this tutorial which you can find here
Scrapkit: I am using a stunning kit from Happy Pumpkin Studios called "HPS Kit 23" which you can get by going here or here
Mask 2 from Dee which you can find here
Plugins: Lokas 3D Shadow
----------------------------
This tutorial is written for those who have working knowledge of PSPX2 (any version will do).
This tutorial was written by me on March 26, 2019. Please do not copy or paste on any other forum, website or blog provide link back to tut only. Please do not claim as your own. This tutorial is copyrighted to me. Any resemblance to any other tutorial is purely coincidental.
Ok - let's start and remember to save often.
Open up a 750 x 650 blank canvas (we can resize it later)
Select Frame Element 11 - resize by 75%
Paste and position in the center of the canvas
Select your magic wand tool and select the center of the frame (Add (Shift), RGB Value, Tolerance 25, Contiguous checked, Feather 0)
Selections, Modify, Expand by 2
Paste paper 11
Select invert, delete
Paste close-up tube on paper layer and delete
Select none
Chage the closeup to Overlay
Apply dropshadow and merge down on paper layer
Effect, Texture Effects, Blinds (Width 3, Opactity 15, Horizontal and Light from left/top checked)
Move paper layer below frame
Select Element 96 - resize by 40%
Paste and position on the left side below frame layer
Select Element 85 - resize by 55%
Image Free Rotate Right by 90% and paste on the right side below frame
Select Element 59 - resize by 50%
Paste and position on the top left below frame
Select Element 57 - resize by 30%
Paste and position on the top above frame layer
Select Element 55 - resize by 15%
Paste and position on the top where desired
Select Element 22 - resize by 10%
Paste and position on the top of the frame
Select Element 8 - resize by 20%
Paste and postion on the top right
Select Element 43 - resize by 65%
Paste and position on the bottom
Select Element 73 - resize by 50%
Paste and position on the bottom toward the left side
Select Element 29 - resize by 50%
Image mirror and paste on the bottom
Select Element 77 - resize by 25%
Paste and position on the bottom left
Paste tube of choice where desired
Apply Lokas 3D Shadow at default settings
Select Element 7 - resize by 40%
Paste and position on the bottom right
Select Element 37 - resize by 12%
Paste and position on the right below harp element
Image duplicate, resize by 85% and reposition below tube on bottom
Select Element 36 - resize by 15%
Paste and position on the bottom right
Select Element 11 - resize by 15%
Paste and position on the bottom right
Select Element 123 - resize by 15%
Paste and paste on the bottom right
Select Element 17 - resize by 12%
Paste and position on the bottom right
Select Element 106 - resize by 20%
Paste and position on the bottom below tube
Select Element 38 - resize by 12%
Paste and position on the bottom left
Select Element 53 - resize by 65%
Paste and position on the canvas where desired
Paste paper 9 on canvas
Apply Mask 2 or mask of choice
Merge group and move to the bottom layer
Add any dropshadows you like
Sharpen any elements as needed
Crop and resize as desired
Add copyright info, license number and name
You're done! Thanks for trying my tutorial!

Labels:Happy Pumpkin Studios | 0
comments
PINEAPPLE BEACH
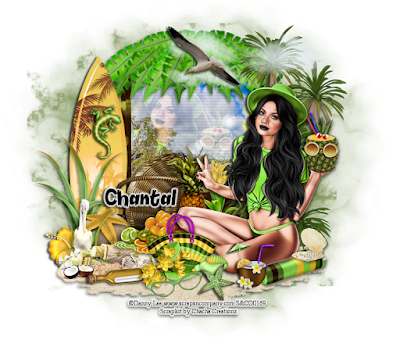
Supplies needed:
I am using the stunning artwork from Danny Lee for this tutorial which you can find here
Scrapkit: I am using a stunning kit from Chacha Creationz called "Pineapple" which you can get by going here
Mask 21 from Gina Gems which you can find here
Plugins: Lokas 3D Shadow
----------------------------
This tutorial is written for those who have working knowledge of PSPX2 (any version will do).
This tutorial was written by me on March 26, 2019. Please do not copy or paste on any other forum, website or blog provide link back to tut only. Please do not claim as your own. This tutorial is copyrighted to me. Any resemblance to any other tutorial is purely coincidental.
Ok - let's start and remember to save often.
Open up a 750 x 650 blank canvas (we can resize it later)
Select Element 61 - resize by 80%
Paste and position in the center of the canvas
Select your magic wand tool and select the center of the frame (Add (Shift), RGB Value, Tolerance 25, Contiguous checked, Feather 0)
Selections, Modify, Expand by 5
Paste paper 5
Select invert, delete
Paste close-up tube on paper layer and delete
Select none
Chage the closeup to Screen
Apply dropshadow and merge down on paper layer
Effect, Texture Effects, Blinds (Width 3, Opactity 15, Horizontal and Light from left/top checked)
Move paper layer below frame
Select Element 69 - resize by 80%
Paste and position on the bottom
Select Element 38 - resize by 80%
Paste and position on the right side
Select Element 62 - resize by 65%
Paste and position on the left side
Select Element 51 - resize by 65%
Paste and position on the top right
Select Element 56 - resize by 30%
Paste and position on the top where desired
Select Element 52 - resize by 50%
Paste and position on the bottom left
Select Element 39 - resize by 40%
Paste and postion on the bottom left
Select Element 82 - resize by 40%
Paste and position on the bottom
Select Element 60 - resize by 30%
Paste and position on the bottom
Paste tube of choice where desired
Apply Lokas 3D Shadow at default settings
Select Element 65 - resize by 30%
Paste and position on the bottom right
Select Element 13 - resize by 15%
Paste and position on the bottom right
Select Element 70 - resize by 20%
Paste and position on the bottom right
Select Element 53 - resize by 25%
Paste and position on the bottom
Select Element 47 - resize by 30%
Paste and paste on the bottom
Select Element 54 - resize by 25%
Paste and position on the bottom
Select Element 46 - resize by 25%
Paste and position on the bottom
Select Element 36 - resize by 20%
Paste and position on the bottom
Select Element 42 - resize by 30%
Image Free Rotate Left by 15% and paste on the bottom
Select Element 7 - resize by 50%
Paste and position on the canvas above frame layer
Add new raster layer and flood-fill with color of choice
Apply Mask 21 or mask of choice
Merge group and move to the bottom layer
Add any dropshadows you like
Sharpen any elements as needed
Crop and resize as desired
Add copyright info, license number and name
You're done! Thanks for trying my tutorial!

Labels:Chacha Creationz | 0
comments
Thursday, March 21, 2019
SWEET UNICORN
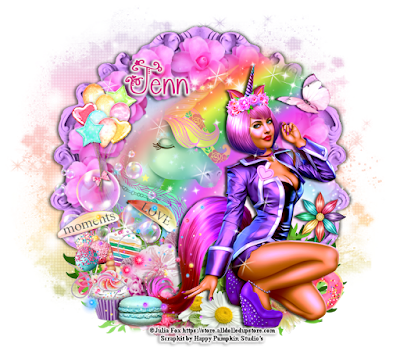
Supplies needed:
Scrapkit: I am using a stunning kit from Happy Pumpkin Studios called "HPS Kit 22 2019" which you can get by going here
Mask 25 from Witchyheart which you can find here
Plugins: Lokas 3D Shadow, Mura Meister Copies
----------------------------
This tutorial is written for those who have working knowledge of PSPX2 (any version will do).
This tutorial was written by me on March 21, 2019. Please do not copy or paste on any other forum, website or blog provide link back to tut only. Please do not claim as your own. This tutorial is copyrighted to me. Any resemblance to any other tutorial is purely coincidental.
Ok - let's start and remember to save often.
Open up a 750 x 650 blank canvas (we can resize it later)
Select Frame Element 10 - resize by 75%
Paste and position in the center of the canvas
Select your magic wand tool and select the center of the frame (Add (Shift), RGB Value, Tolerance 25, Contiguous checked, Feather 0)
Selections, Modify, Expand by 5
Paste paper 16
Select invert, delete, select none
Move paper below frame
Select Element 109 - resize by 15%
Paste and position in the center of the canvas
Apply Mura Meister Copies with the following settings:
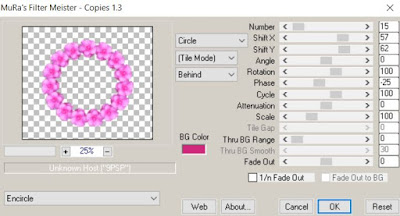
Select Element 9 - resize by 65%
Paste and position in the center where desired
Select Element 5 - resize by 55%
Paste and position above rainbow element
Select Element 70 - resize by 30%
Paste and position on the top left
Select Element 56 - resize by 15%
Paste and position on the top right
Select Element 137 - resize by 75%
Paste and position on the bottom
Select Element 20 - resize by 25%
Paste and position on the bottom right
Select Element 73 - resize by 15%
Paste and position on the bottom right
Select tube element of choice and position where desired
Apply Lokas 3D Shadow at default settings
Select Element 113 - resize by 30%
Paste and position on the bottom below tube layer
Select Element 102 - resize by 30%
Paste and position on the left side
Select Element 36 - resize by 30%
Paste and position on the bottom left
Select Element 98 - resize by 20%
Image Free Rotate Left by 15% and paste on the bottom left
Select Element 18 - resize by 15%
Paste and paste on the bottom left
Select Element 8 - resize by 20%
Paste and position on the bottom left
Select Element 118 - resize by 55%
Paste and position on the bottom
Select Element 110 - resize by 20%
Paste and position on the bottom
Select Element 51 - resize by 15%
Paste and position on the bottom
Select Element 44 - resize by 30%
Paste and position on the bottom left
Select Element 28 - resize by 55%
Paste and position on the canvas where desired
Paste paper 4 on canvas
Apply Mask 25 or mask of choice
Merge group and move to the bottom layer
Add any dropshadows you like
Sharpen any elements as needed
Crop and resize as desired
Add copyright info, license number and name
You're done! Thanks for trying my tutorial!

Labels:Happy Pumpkin Studios | 0
comments
HONEY QUEEN
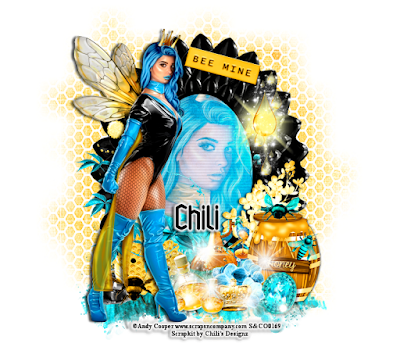
Supplies needed:
I am using the stunning artwork from Andy Cooper for this tutorial which you can find here
Scrapkit: I am using a stunning kit from Chili's Designz called "Honey Queen" which you can get by going here
Mask 84 from Weescottlass which you can find here
Plugins: Lokas 3D Shadow
----------------------------
This tutorial is written for those who have working knowledge of PSPX2 (any version will do).
This tutorial was written by me on March 21, 2019. Please do not copy or paste on any other forum, website or blog provide link back to tut only. Please do not claim as your own. This tutorial is copyrighted to me. Any resemblance to any other tutorial is purely coincidental.
Ok - let's start and remember to save often.
Open up a 750 x 650 blank canvas (we can resize it later)
Select Frame Element 5 - resize by 75%
Paste and position in the center of the canvas
Select your magic wand tool and select the center of the frame (Add (Shift), RGB Value, Tolerance 25, Contiguous checked, Feather 0)
Selections, Modify, Expand by 5
Paste paper 12
Select invert, delete
Paste close-up tube on paper layer and delete
Select none
Chage the closeup to Screen
Apply dropshadow and merge down on paper layer
Effect, Texture Effects, Blinds (Width 3, Opactity 15, Horizontal and Light from left/top checked)
Move paper layer below frame element
Select WA2 Element - resize by 55%
Image Free Rotate Right by 15% and paste on the top right
Select Honey 4 Element - resize by 25%
Paste and position on the top right
Select Grass Element - resize by 55%
Paste and position on the bottom
Select Cube 2 Element - resize by 20%
Paste and position on the bottom left
Select Greenery Element - resize by 30%
Paste and position on the bottom left
Select Bee 6 Element - resize by 40%
Paste and position on the bottom left
Select Candle Element - resize by 25%
Paste and position on the bottom left
Paste tube of choice where desired
Apply Lokas 3D Shadow at default settings
Select Barrel 2 Element - resize by 60%
Paste and position on the bottom right
Select Flower Element - resize by 40%
Paste and position on the bottom right
Select Bee 8 Element - resize by 40%
Paste and position on top of the barrel element
Select Hive 2 Element - resize by 20%
Paste and position on the bottom
Select Flower 2 Element - resize by 30%
Paste and position on the bottom
Select Honey Element - resize by 30%
Paste and paste on the bottom
Select Bee Element - resize by 30%
Paste and position on the bottom right
Select Gem Element - resize by 40%
Image Free Rotate Right by 15% and paste on the bottom right
Select Crown Element - resize by 30%
Paste and position on the bottom
Select Sparkles 4 Element - resize by 55%
Paste and position on the bottom where desired
Paste paper 6 on canvas
Apply Mask 84 or mask of choice
Merge group and move to the bottom layer
Add any dropshadows you like
Sharpen any elements as needed
Crop and resize as desired
Add copyright info, license number and name
You're done! Thanks for trying my tutorial!

Labels:Chili Designz | 0
comments
Sunday, March 17, 2019
LACE BUNNY
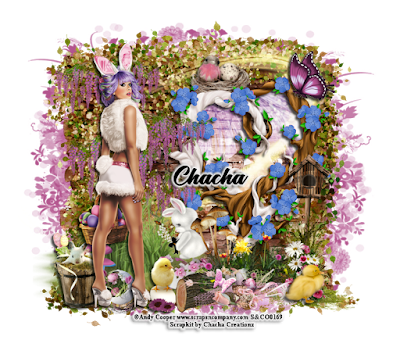
Supplies needed:
I am using the stunning artwork from Andy Cooper for this tutorial which you can find here
Scrapkit: I am using a stunning kit from Chacha Creationz called "Lace Bunny" which you can get by going here
Mask 4 from Dee which you can find here
Plugins: Lokas 3D Shadow
----------------------------
This tutorial is written for those who have working knowledge of PSPX2 (any version will do).
This tutorial was written by me on March 17, 2019. Please do not copy or paste on any other forum, website or blog provide link back to tut only. Please do not claim as your own. This tutorial is copyrighted to me. Any resemblance to any other tutorial is purely coincidental.
Ok - let's start and remember to save often.
Open up a 750 x 650 blank canvas (we can resize it later)
Select Element 4 - paste and position in the center of the canvas
Select Element 21 - paste and position on the top right
Select Element 59 - resize by 85%
Image mirror paste and position on the left side
Select Element 38 - resize by 65%
Paste and position on the right side
Select your magic wand tool and select the center of the frame (Add (Shift), RGB Value, Tolerance 25, Contiguous checked, Feather 0)
Selections, Modify, Expand by 5
Paste close-up tube and delete
Select none
Change the closeup to Screen
Apply dropshadow and move below tree element
Select Element 42 - resize by 30%
Paste and position on the top of the tree element
Select Element 48 - resize by 30%
Paste and position on the top right
Select Element 5 - resize by 65%
Paste and position on the bottom right
Select Element 53 - resize by 50%
Paste and position on the bottom right
Select Element 17 - resize by 20%
Paste and position on the bottom right
Select Element 56 - resize by 50%
Paste and position on the bottom
Select Element 29 - resize by 30%
Image mirror and paste on the bottom
Paste tube of choice where desired
Apply Lokas 3D Shadow at default settings
Select Element 69 - resize by 30%
Paste and position on the bottom left
Select Element 16 - resize by 20%
Paste and position on the bottom below tube layer
Select Element 18 - resize by 22%
Paste and position on the bottom
Select Element 44 - resize by 30%
Paste and position on the bottom
Select Element 50 - resize by 30%
Paste and paste on the bottom
Add new raster layer and flood-fill with color of choice
Apply Mask 4 or mask of choice
Merge group and move to the bottom layer
Add any dropshadows you like
Sharpen any elements as needed
Crop and resize as desired
Add copyright info, license number and name
You're done! Thanks for trying my tutorial!

Labels:Chacha Creationz | 0
comments
LUCKY DRINK
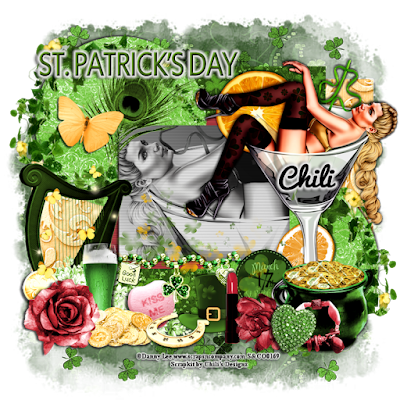
Supplies needed:
I am using the amazing art from Danny Lee for this tutorial, which you can find here
Scrapkit: I am using a kit from Chili's Designz called "Lucky Drink" which you can get by going here
Template 96 from Rachel Designs which can be found here
Becky Mask 22 which unfortunately is no longer available
Plugins used: Lokas 3D Shadow, Eyecandy Gradient Glow
----------------------------
This tutorial is written for those who have working knowledge of PSPX2 (any version will do).
This tutorial was written by me on March 17, 2019. Please do not copy or paste on any other forum, website or blog provide link back to tut only. Please do not claim as your own. This tutorial is copyrighted to me. Any resemblance to any other tutorial is purely coincidental.
Ok - let's start and remember to save often.
Open the template and using your shortcut keys on your keyboard (SHIFT+D) duplicate the template as a new image. Close the original and delete the copywrite layer.
Resize the canvas to 750 x 750
Select the Square 1 layer
Select all, float, defloat
Paste paper 8
Select invert, delete, select none
Delete/Hide original square layer
Select the Square 2 layer and repeat above steps
Select Rectangle 3 layer
Select all, float, and defloat
Paste Paper 7
Select invert delete, select none
Hide/delete the orginal rectangle layer
Select Rectangle 4 layer and repeat above steps
Select Square 5 layer
Select all, float, defloat
Add new raster layer and flood-fill with color of choice
Select none
Hide/delete square layer
Select Circle 6 layer
Select all, float, defloat
Paste paper 2
Select invert, delete, select none
Hide/delete original circle layer
Select Circle 7 layer and repeat above steps
Select Square 8 layer
Select all, float, defloat
Add new raster layer and flood-fill with color/gradient of choice
Paste close-up tube of choice on colored layer
Select invert, delete, select none
Change close-up to Luminance (Legacy) and add dropshadow
Merge down on colored layer
Effect,Texture Effects, Blinds (Width 3, Opactity 15, Horizontal and Light from left/top checked)
Hide/delete original square layer
Copy and paste tube of choice and position where desired
Apply Lokas 3D Shadow
Select Greenery 3 Element - resize by 40%
Paste and position on top of the bottom right circle
Image duplicate, mirror and flip and reposition on the top left circle
Select Harp Element - resize by 50%
Paste and position on the bottom left
Select Feather Element - resize by 65%
Image Free Rotate Right b 15% and paste on the top left circle
Erase and stem bits that you desire
Select Butterfly Element - resize by 40%
Image Free Rotate Right by 15% and paste on the top left
Select Coin Element - resize by 75%
Paste and position on the bottom left
Select Deco 3 Element - resize by 30%
Paste and position on the bottom left
Select Beer Element - resize by 30%
Paste and position on the bottom left
Select Coins Element - resize by 45%
Paste and position on the bottom left
Select Flower 2 Element - resize by 40%
Paste and position on the bottom left
Select Orange Element - resize by 35%
Paste and position on the bottom right below tube
Select Pot 2 Element - resize by 50%
Paste and position on the bottom right
Select Bracelet Element - resize by 35%
Paste and position on the bottom right
Select Charms Element - resize by 75%
Paste and position on the bottom
Select Flair Element - resize by 40%
Paste and position on the bottom
Select Heart 5 Element - resize by 60%
Image Free Rotate Right by 15% and paste on the bottom
Select Flower Element - resize by 30%
Paste and position on the bottom
Select Hat 3 Element - resize by 40%
Paste and position on the bottom
Select Heart 4 Element - resize by 45%
Image Free Rotate Left by 15% and paste on the bottom
Select Horses Hoe Element - resize by 30%
Paste and position on the bottom
Select Lipstick Element - resize by 40%
Paste and position on the bottom
Select Butterflies Element - resize by 30%
Paste and position on the bottom left
Select WA2 Element - resize by 65%
Paste and position on the top left
Apply Eyecand Gradient Glow on default settings
Select Brushed Element - resize by 65%
Paste and position on the canvas where you desired
Paste paper 5 on canvas
Move layer to the bottom of the template
Apply Mask 22 or mask of choice
Merge group and move to the bottom
Add any additional elements you like.
Add any dropshadows you like
Crop and resize as desired
Add copyright info, license number and name
You're done! Thanks for trying my tutorial!

Labels:Chili Designz | 0
comments
Saturday, March 9, 2019
DARK LADY
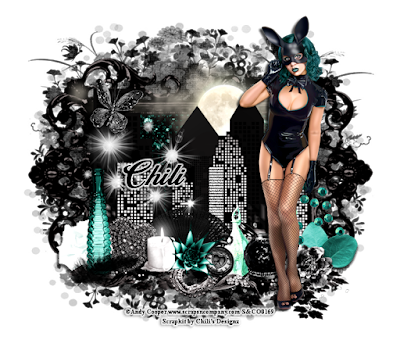
Supplies needed:
I am using the stunning artwork from Andy Cooper for this tutorial which you can find here
Scrapkit: I am using a stunning Collab kit from Chili's Designz called "Dark Lady" which you can get by going here
Mask 4 from Dee which you can find here
Plugins: Lokas 3D Shadow
----------------------------
This tutorial is written for those who have working knowledge of PSPX2 (any version will do).
This tutorial was written by me on March 9, 2019. Please do not copy or paste on any other forum, website or blog provide link back to tut only. Please do not claim as your own. This tutorial is copyrighted to me. Any resemblance to any other tutorial is purely coincidental.
Ok - let's start and remember to save often.
Open up a 750 x 650 blank canvas (we can resize it later)
Select Frame Element - resize by 85%
Paste and position in the center of the canvas
Select your magic wand tool and select the center of the frame (Add (Shift), RGB Value, Tolerance 25, Contiguous checked, Feather 0)
Selections, Modify, Expand by 5
Paste paper 6
Select invert, delete, select none
Move paper layer below frame element
Select Moon Element - resize by 55%
Paste and position on the top of the frame layer
Select City Element - resize by 50%
Paste and position in the center of the canvas above frame layer
Select Butterfly Element - resize by 30%
Image Free Rotate Right by 15% and paste on the top left
Select Deco 3 Element - resize by 75%
Paste on the bottom below frame element
Select Sparkles 2 Element - resize by 55%
Paste and position on the left side
Select Spill Element - resize by 40%
Paste and position on the bottom right
Select Leaf Element - resize by 25%
Image mirror and paste on the bottom right
Select Flower 8 Element - resize by 20%
Paste and position on the bottom right
Paste tube of choice where desired
Apply Lokas 3D Shadow at default settings
Select Flower 3 Element - resize by 25%
Image mirror and paste on the bottom left
Select Bottle Element - resize by 40%
Paste and position on the bottom left
Select Heart Element - resize by 65%
Image Free Rotate Right by 15% and paste on the bottom
Select Feather Element - resize by 25%
Paste and position on the bottom left
Select Fan Element - resize by 30%
Paste and paste on the bottom
Select Candle 3 Element - resize by 30%
Paste and position on the bottom
Select Cacti Element - resize by 20%
Paste and position on the bottom
Select Vase 4 Element - resize by 30%
Paste and position on the bottom
Select Jar Element - resize by 30%
Paste and position on the bottom
Select Clock Element - resize by 30%
Image Free Rotate Right by 15% and paste on the bottom
Select Bracelet Element - resize by 25%
Paste and position on the bottom
Select Broche Element - resize by 25%
Paste and position on the bottom
Paste paper 8 on canvas
Apply Mask 4 or mask of choice
Merge group and move to the bottom layer
Add any dropshadows you like
Sharpen any elements as needed
Crop and resize as desired
Add copyright info, license number and name
You're done! Thanks for trying my tutorial!

Labels:Chili Designz | 0
comments
Monday, March 4, 2019
LUCKY GOLD
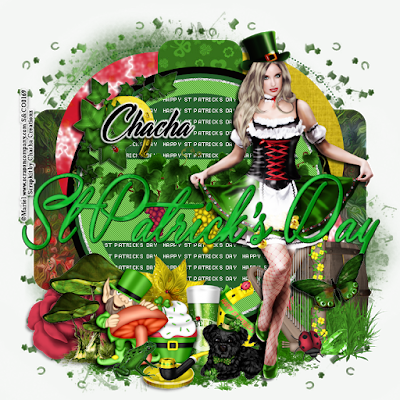
Supplies needed:
I am using the amazing art from Mariel Designs for this tutorial, which you can find here.
Scrapkit: I am using a kit from Chachaz Creationz called "Gold Lucky" which you can get by going here:
Template 888 from Millie which can be found here
Dray Mask 2 which you can find on the Misfits Blog here
Plugins used: Lokas 3D Shadow, Penta - Jeans, Eyecandy Marble
----------------------------
This tutorial is written for those who have working knowledge of PSPX2 (any version will do).
This tutorial was written by me on March 4, 2019. Please do not copy or paste on any other forum, website or blog provide link back to tut only. Please do not claim as your own. This tutorial is copyrighted to me. Any resemblance to any other tutorial is purely coincidental.
Ok - let's start and remember to save often.
Open the template and using your shortcut keys on your keyboard (SHIFT+D) duplicate the template as a new image. Close the original and delete the copywrite layer.
Select the Rectangle 1 layer
Select all, float, and defloat
Paste Paper 3
Select invert delete, select none
Hide/delete the orginal rectangle layer
Select Circle 2 layer
Select all, float, defloat
Paste paper 6
Select invert, delete, select none
Hide/delete original circle layer
Select Circle 8 layer and repeat above steps
Select Circle 7 layer
Select all, float, defloat
Add new raster layer and flood-fill with color of choice
Select none
Apply Eyecandy marble effects with the following setting (optional):
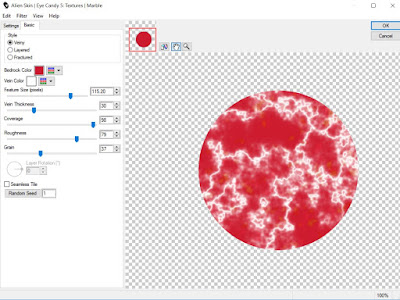
Hide/delete original circle layer
Select Circle 9 layer and repeat above steps
Select Strip 10 layer
Select all, float, defloat
Paste paper 4
Select invert, delete, select none
Hide/delete original strip layer
Select Circle 13 layer
Adjust, Add/Remove Noise with the following settings:
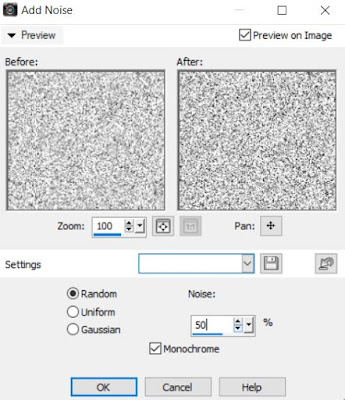
Select Circle 14 layer
Select all, float, defloat
Add new raster layer and flood-fill with color of choice
Select none
Delete/Hide original circle layer
Select Element 19 - paste and position on top of circle 14 layer
Select Shape 15 layer
Select all, float, defloat
Add new raster layer and flood-fill with color of choice
Select none
Hide/delete original circle layer
Apply Penta Jeans with the following settings:
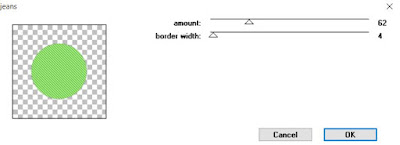
Copy and paste tube of choice and position where desired
Apply Lokas 3D Shadow
Select Element 34 - resize by 45%
Paste and position on the top left
Select Element 20 - Paste and position on the bottom
Select Element 2 - resize by 50%
Paste and position on the bottom right below tube layer
Select Element 43 - resize by 50%
Image mirror and paste and position on the bottom right below tube
Select Element 74 - resize by 40%
Paste and position on the bottom right
Select Element 35 - resize by 25%
Paste and position on the bottom right
Select Element 23 - resize by 45%
Image mirror and paste on the bottom left
Select Element 59 - resize by 45%
Paste and position on the bottom left
Select Element 39 - resize by 50%
Paste and position on the bottom
Select Element 46 - resize by 35%
Paste and position on the bottom
Select Element 42 - resize by 30%
Paste and position on the bottom
Select Element 37 - resize by 40%
Paste and position on the bottom right
Select Element 44 - resize by 30%
Paste and position on the bottom
Select Element 47 - resize by 30%
Paste and position on the bottom
Select Element 28 - resize by 40%
Paste and position on the bottom
Select Element 52 - resize by 30
Paste and position on the bottom
Select Element 70 - resize by 35%
Paste and position on the bottom
Paste paper 7 on canvas
Move layer to the bottom of the template
Apply Mask 2 or mask of choice
Merge group and move to the bottom
Add any additional elements you like.
Add any dropshadows you like
Crop and resize as desired
Add copyright info, license number and name
You're done! Thanks for trying my tutorial!

Labels:Chacha Creationz | 0
comments
Saturday, March 2, 2019
PURPLE CLOVER
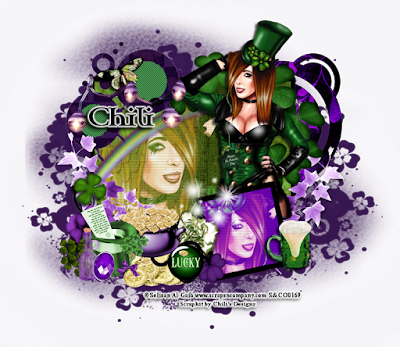
Supplies needed:
I am using the amazing art from Selisan Al-Gaib for this tutorial, which you can find here
Scrapkit: I am using a kit from Chili's Designz called "St. Patty Purple" which you can get by going here
Template 87 from Melissaz Creationz which can be found here
Mask 2 from Dee which you can find here
Mask 3 from Annaica which you can find on the Misfits blog here
Plugins used: Lokas 3D Shadow, Penta - Jeans
----------------------------
This tutorial is written for those who have working knowledge of PSPX2 (any version will do).
This tutorial was written by me on March 2, 2019. Please do not copy or paste on any other forum, website or blog provide link back to tut only. Please do not claim as your own. This tutorial is copyrighted to me. Any resemblance to any other tutorial is purely coincidental.
Ok - let's start and remember to save often.
Open the template and using your shortcut keys on your keyboard (SHIFT+D) duplicate the template as a new image. Close the original and delete the copywrite layer.
Select the Raster 2 layer
Select all, float, and defloat
Paste Paper 6
Select invert delete, select none
Hide/delete the orginal layer
Select copy of Raster 2 layer and repeat
Select Raster 4 layer
Select all, float, defloat
Paste paper 7
Select invert, delete
Paste close-up tube on paper layer where desired and delete, select none
Change close-up tube to Screen and merge down on paper layer
Effect,Texture Effects, Blinds (Width 3, Opactity 15, Horizontal and Light from left/top checked)
Hide/delete original raster layer
Select Raster 3 layer
Select all, float, defloat
Add new raster layer and flood-fill with color of choice
Select none
Hide/delete original layer
Select Raster 5 layer
Select your magic wand tool and select the center of the circles (Add (Shift), RGB Value, Tolerance 25, Contiguous checked, Feather 0)
Add new raster layer and flood-fill with color of choice
Select none and apply Penta Jeans with the following settings:
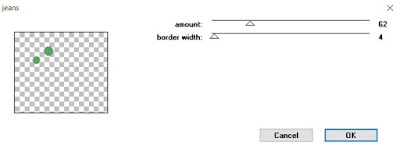
Go back and reselect raster 5 layer
Select all, float, defloat
Paste paper 9
Select invert, delete, select none
Move layer below circle layer
Hide/delete original layer
Select Raster 7 layer
Add new raster layer and flood-fill with color of choice
Paste close-up tube on layer
Select invert, delete, select none
Change close-up to Screen and merge down on flood-fill layer
Effect, Texture Effects, Blinds (Width 3, Opactity 15, Horizontal and Light from left/top checked)
Hide/delete original layer
Select Raster 6 layer
Select all, float, defloat
Add new raster layer and flood-fill with color of choice
Select none
Delete/Hide original layer
Copy and paste tube of choice and position where desired
Apply Lokas 3D Shadow
Select Lights Element - resize by 40%
Paste and position on the top left
Select Butterfly Element - resize by 40%
Paste and position on the top left
Select Clovers 3 Element - resize by 40%
Paste and position on the top right below tube element
Select Greenery 3 Element - resize by 40%
Paste and position on the bottom left side
Image duplicate, mirror and repostion on the bottom right
Select Rainbow Element - resize by 40%
Image mirror and paste on the left side
Select Flower 3 Element - resize by 30%
Paste and position on the bottom left
Select Clovers Element - resize by 30%
Paste and position on the bottom left
Select Hat Element - resize by 40%
Paste and position on the bottom left
Select Bottle Element - resize by 25%
Paste and position on the bottom left
Select Jewel Element - resize by 55%
Image Free Rotate Right by 15% and paste on the bottom left
Select Coins 2 Element - resize by 60%
Paste and position on the bottom
Select Pot 3 Element - resize by 40%
Paste and position on the bottom
Select Flower 4 Element - resize by 30%
Paste and position on the bottom below pot element
Select Brand Element - resize by 40%
Paste and position on the bottom
Select Glass 2 Element - resize by 40%
Image mirror and paste on the bottom right
Add new raster layer and flood-fill with color of choice
Apply Mask 3 from Annaica or mask of choice
Merge group and move to the bottom
Repeat mask steps but apply Mask 3 from Dee
Add any additional elements you like.
Add any dropshadows you like
Crop and resize as desired
Add copyright info, license number and name
You're done! Thanks for trying my tutorial!

Labels:Chili Designz | 0
comments
Subscribe to:
Comments
(Atom)

