Labels
- Alikas Scraps
- All Dolled Up Store
- Amy Marie
- Annaica
- Arthur Crowe
- Babycakes Scraps
- Barbara Jensen
- Bibi's Collections
- Black Widow Creationz
- Blu Moon
- Bonnies Creations
- Bookwork Dezines
- Broken Sky Dezine
- Carita Creationz
- Carpe Diem Designs
- CDO
- Celinart Pinup
- Celine
- Chacha Creationz
- Charmed Designs
- Cherry Blossom Designs
- Chili Designz
- Cluster Frame
- Creative Misfits
- Creative Scraps by Crys
- Curious Creative Dreams
- Danny Lee
- Derzi
- Designs by Ali
- Designs by Joan
- Designs by Ketura
- Designs By Norella
- Designs by Vi
- Diana Gali
- Diry Art Designs
- Disturbed Scraps
- Dreaming With Bella
- Eclipse Creations
- Elegancefly
- Extras
- Fabulous Designz
- Forum Set
- Foxy's Designz
- Freek's Creation
- FTU
- FwTags
- Goldwasser
- Gothic Inspirations
- Gothic Raven Designs
- Graphfreaks
- Hania's Designs
- Happy Pumpkin Studios
- Horseplay's Pasture Designs
- indie-Zine
- Irish Princess Designs
- Ishika Chowdhury
- Kaci McVay
- Kajenna
- katharine
- Katherine
- Khloe Zoey
- Killer Kitty
- Kissing Kate
- KiwiFirestorm
- Kiya Designs
- Kizzed by Kelz
- KZ Designz
- Lady Mishka
- Lil Mz Brainstorm
- Maiden of Darkness
- Mariel Designs
- MellieBeans
- Michelle's Myths
- Midnight Shadow
- Misticheskya
- MistyLynn's Creations
- MMeliCrea Designz
- Moon Vixen Designs
- NaSionainne
- Ninaste
- Niqui Designs
- Pandora
- Picsfordesign
- Pink Paradox Productions
- Radyga Designs
- Redefined Designs
- Rissa's Designs
- Schnegge
- ScottishButterfly Creations
- Scrappin Krazy Designs
- Scrappin With Lil Ol Me
- Scraps and the City
- Scraps Dimensions
- Scraps From The Heart
- Scraps N Company
- Scraps with Attitude
- Shining Star Art
- Skyscraps
- Sleek N Sassy Designs
- Sophisticat Simone
- Souldesigner
- Soxsational Scraps
- Spazz
- Starlite and Soul
- Stella Felice
- Tammy Welt
- Tasha's Playground
- The PSP Project
- Thrifty Scraps by Gina
- Tiny Turtle Designs
- Upyourart
- Verymany
- Wendy Gerber
- Whisper In the Wind
- Wick3d Creationz
- Wicked Diabla
- Yude's Kreationz
Blog Archive
Sunday, April 28, 2019
BIKER GIRL

Supplies needed:
I am using the stunning artwork from Zlata for this tutorial which was part of a quest completion here
Scrapkit: I am using a kit from Drea's Designs called "Bad Boys " which you can get by going here
Mask 119 from Vaybs which you can find here
Plugins: Lokas 3D Shadow
----------------------------
This tutorial is written for those who have working knowledge of PSPX2 (any version will do).
This tutorial was written by me on April 28, 2019. Please do not copy or paste on any other forum, website or blog provide link back to tut only. Please do not claim as your own. This tutorial is copyrighted to me. Any resemblance to any other tutorial is purely coincidental.
Ok - let's start and remember to save often.
Open up a 750 x 650 blank canvas (we can resize it later)
Select Element 151 - resize by 75%
Paste and position in the center of the canvas
Select your magic wand tool and select the center of the frame (Add (Shift), RGB Value, Tolerance 25, Contiguous checked, Feather 0)
Selections, Modify, Expand by 5
Paste paper 10
Select invert, delete, select none
Move paper layer below frame element
Select Element 131 - resize by 40%
Paste and position on left side above paper layer
Select Element 139 - resize by 65%
Paste and position on top of the paper/tree element
Select Element 123 - resize by 55%
Paste and position below the frame element
Select Element 78 - resize by 25%
Image Free Rotate Left by 15% and paste on the top left
Select Element 125 - resize by 40%
Select Element 126 - resize by 55%
Paste and position on the bottom
Paste and position on the right side
Select Element 84 - resize by 75%
Paste and position on the top right
Select Element 77 - resize by 30%
Paste and position on the bottom right
Select Element 109 - resize by 15%
Paste and position on the bottom right
Select Element 101 - resize by 30%
Paste and position on the bottom
Select Element 87 - resize by 20%
Paste and position on the bottom
Select Element 86 - resize by 25%
Paste and position on the bottom
Paste tube of choice where desired
Apply Lokas 3D Shadow at default settings
Select Element 66 - resize by 30%
Paste and position on the bottom
Select Element 60 - resize by 40%
Paste and position on the bottom left
Select Element 103 - resize by 20%
Paste and position on the bottom left below element 60
Select Element 97 - resize by 20%
Paste and position on the bottom left
Select Element 5 - resize by 15%
Paste and paste on the bottom left
Select Element 31 - resize by 12%
Paste and position on the bottom left
Select Element 116 - resize by 25%
Paste and position on the bottom
Select Element 12 - resize by 20%
Paste and position on the bottom
Select Element 138 - resize by 30%
Paste and position on the right side
Image duplicate and reposition on the top left
Select Element 58 - resize by 15%
Paste and position on the bottom right
Paste paper 15 on canvas
Apply Mask 119 or mask of choice
Merge group and move to the bottom layer
Add any dropshadows you like
Sharpen any elements as needed
Crop and resize as desired
Add copyright info, license number and name
You're done! Thanks for trying my tutorial!

Labels:All Dolled Up Store | 0
comments
SPRING BEAUTY
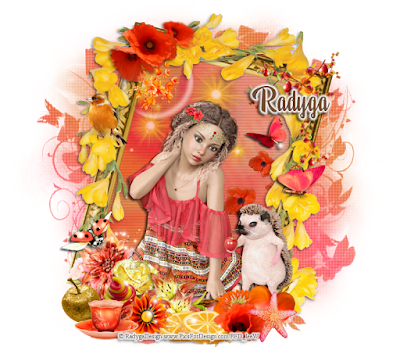
Supplies needed:
I am using the stunning artwork from Radyga Designs for this tutorial which you can find here, here, here or here
Scrapkit: I am using a kit from Tiny Turtle Designs called "Summer Blast " which you can get by going here
Mask 26 from Splitz Designs which you can find here
Plugins: Lokas 3D Shadow
----------------------------
This tutorial is written for those who have working knowledge of PSPX2 (any version will do).
This tutorial was written by me on April 27, 2019. Please do not copy or paste on any other forum, website or blog provide link back to tut only. Please do not claim as your own. This tutorial is copyrighted to me. Any resemblance to any other tutorial is purely coincidental.
Ok - let's start and remember to save often.
Open up a 750 x 650 blank canvas (we can resize it later)
Select Frame Element 134 - resize by 85%
Image Free Rotate Right by 15% and paste in the center of the canvas
Select your magic wand tool and select the center of the frame (Add (Shift), RGB Value, Tolerance 25, Contiguous checked, Feather 0)
Selections, Modify, Expand by 5
Paste paper 37
Select invert, delete, select none
Effect, Texture Effects, Blinds (Width 3, Opactity 15, Horizontal and Light from left/top checked)
Move paper layer below frame element
Select Element 132 -
Paste and position on canvas above frame layer
Select Element 116 - resize by 30%
Paste and position on the top left
Select Element 137 - resize by 40%
Paste and position on the top right
Select Element 48 - resize by 25%
Paste and position on the top left
Select Element 97 - resize by 65%
Paste and position on the paper element where desired
Select Element 21 - resize by 25%
Paste and position on the right side
Paste tube of choice where desired
Apply Lokas 3D Shadow at default settings
Select Element 128 - resize by 25%
Paste and position on the bottom left
Select Element 152 - resize by 30%
Image Free Rotate Left by 15% and paste on the bottom left
Select Element 15 - resize by 12%
Paste and position on the bottom left
Select Element 54 - resize by 15%
Paste and position on the bottom left
Select Element 38 - resize by 20%
Paste and paste on the bottom
Select Element 85 - resize by 30%
Paste and position on the bottom
Select Element 13 - resize by 15%
Paste and position on the bottom left
Select Element 76 - resize by 18%
Paste and position on the bottom
Select Element 83 - resize by 15%
Image Free Rotate Right by 15% and paste on the bottom right
Select Element 7 - resize by 15%
Paste and position on the bottom right
Select Element 14 - resize by 15%
Paste and position on the bottom right
Select Element 118 - resize by 20%
Paste and position on the bottom right
Select Element 117 - resize by 20%
Paste and position on the left side
Add new raster layer and flood-fill with color or gradient of choice
Apply Mask 26 or mask of choice
Merge group and move to the bottom layer
Add any dropshadows you like
Sharpen any elements as needed
Crop and resize as desired
Add copyright info, license number and name
You're done! Thanks for trying my tutorial!

Labels:Radyga Designs | 0
comments
Wednesday, April 24, 2019
DOWN BY THE SEA
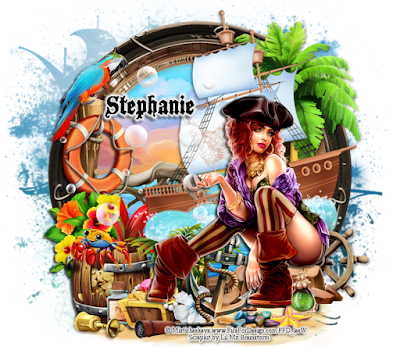
Supplies needed:
I am using the stunning artwork from Misticheskaya for this tutorial which you can find here
Scrapkit: I am using a stunning kit from Lil Mz Brainstorm called "Down by the Sea" which you can get by going here
Mask 158-1 from Rachel Design which you can find here
Plugins: Lokas 3D Shadow
----------------------------
This tutorial is written for those who have working knowledge of PSPX2 (any version will do).
This tutorial was written by me on April 24, 2019. Please do not copy or paste on any other forum, website or blog provide link back to tut only. Please do not claim as your own. This tutorial is copyrighted to me. Any resemblance to any other tutorial is purely coincidental.
Ok - let's start and remember to save often.
Open up a 750 x 650 blank canvas (we can resize it later)
Select Frame Element 28 - resize by 95%
Paste and position in the center of the canvas
Select Frame Element 63 - resize by 85%
Select your magic wand tool and select the center of the frame (Add (Shift), RGB Value, Tolerance 25, Contiguous checked, Feather 0)
Selections, Modify, Expand by 5
Paste paper 14
Select invert, delete, select none
Select Element 51 - resize by 85%
Paste and position on the top right
Select Element 124 - resize by 75%
Image Free Rotate Left by 15% and paste on the right side
Select Element 83 - resize by 75%
Paste and position on the bottom of the ship element
Select Element 70 - resize by 55%
Paste and position on the left side below ship element
Select Element 38 - resize by 90%
Paste and position on the bottom
Select Element 59 - resize by 40%
Paste and position on the bottom right
Select Element 54 - resize by 30%
Paste and position on the bottom right
Paste tube of choice where desired
Apply Lokas 3D Shadow at default settings
Select Element 100 - resize by 40%
Paste and position on the left side
Select Element 69 - resize by 30%
Paste and position on the left side
Select Element 91 - resize by 30%
Paste and position on the bottom left
Select Element 72 - resize by 40%
Paste and position on the bottom left
Select Element 33 - resize by 30%
Paste and position on the bottom left
Select Element 41 - resize by 20%
Paste and paste on the bottom left
Select Element 34 - resize by 15%
Paste and position on the bottom left
Select Element 66 - resize by 15%
Paste and position on the bottom left
Select Element 45 - resize by 40%
Paste and position on the bottom
Select Element 52 - resize by 30%
Paste and position on the bottom
Select Element 114 - resize by 15%
Paste and position on the bottom
Select Element 99 - resize by 30%
Paste and position on the bottom below tube layer
Select Element 94 - resize by 20%
Paste and position on the bottom
Select Element 25 - resize by 15%
Paste and position on the bottom right
Select Element 105 - resize by 15%
Paste and position on the bottom right
Select Element 106 - resize by 50%
Paste and position on the left side
Paste paper 6 on the canvas
Apply Mask 1 or mask of choice
Merge group and move to the bottom layer
Add any dropshadows you like
Sharpen any elements as needed
Crop and resize as desired
Add copyright info, license number and name
You're done! Thanks for trying my tutorial!

Labels:All Dolled Up Store | 0
comments
Monday, April 22, 2019
MERMAID CROWN

Supplies needed:
I am using the stunning artwork from Danny Lee for this tutorial which you can find here
Scrapkit: I am using a stunning kit from Chacha Creationz called "Mermaid Crown" which you can get by going here
Mask 3 from Rachel which you can find here
Plugins: Lokas 3D Shadow
----------------------------
This tutorial is written for those who have working knowledge of PSPX2 (any version will do).
This tutorial was written by me on April 22, 2019. Please do not copy or paste on any other forum, website or blog provide link back to tut only. Please do not claim as your own. This tutorial is copyrighted to me. Any resemblance to any other tutorial is purely coincidental.
Ok - let's start and remember to save often.
Open up a 750 x 650 blank canvas (we can resize it later)
Select Element 37
Paste and position in the center of the canvas
Select Element 36
Paste and position on the top left below element 37
Select Element 3 - resize by 50%
Paste and position on the top right nelow element 37
Select Element 19 - resize by 50%
Paste and position on the top righ below element 37
Select Element 52 - resize by 30%
Paste and position in the center
Select Element 60 - resize by 55%
Paste and position on the bottom left
Select Element 53
Paste and position on the bottom
Select Element 45 - resize by 40%
Paste and position on the bottom left
Paste tube of choice where desired
Apply Lokas 3D Shadow at default settings
Select Element 7 - resize by 40%
Paste and position on the bottom left column
Select Element 75 - resize by 40%
Paste and position on the bottom right
Select Element 42 - resize by 40%
Paste and position on the bottom right column
Select Element 21 - resize by 30%
Paste and position on the bottom
Select Element 77 - resize by 30%
Paste and paste on the bottom
Select Element 10 - resize by 20%
Paste and position on the top left
Select Element 23 - resize by 30%
Paste and position on the left side
Select Element 46 - resize by 15%
Paste and position on the top center
Select Element 69 - resize by 20%
Paste and position on the bottom right
Select Element 38 - resize by 30%
Paste and position on the bottom right
Select Element 62 - resize by 30%
Paste and position on the bottom left
Select Element 43 - resize by 25%
Paste and position on the bottom
Select Element 5 - resize by 65%
Paste and position on the canvas where desired
Paste paper 3 on canvas
Apply Mask 4 or mask of choice
Merge group and move to the bottom layer
Add any dropshadows you like
Sharpen any elements as needed
Crop and resize as desired
Add copyright info, license number and name
You're done! Thanks for trying my tutorial!

Labels:Chacha Creationz | 0
comments
Sunday, April 21, 2019
RED RABBIT
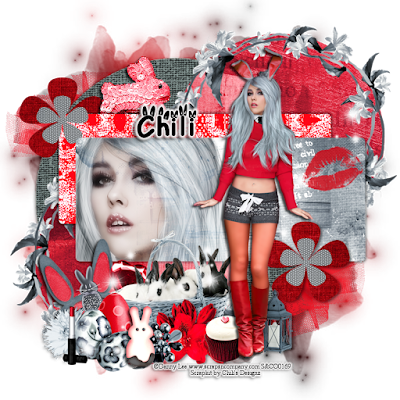
Supplies needed:
I am using the amazing art from Danny Lee for this tutorial, which you can find here
Scrapkit: I am using a kit from Chili's Designz called "Red Rabbit" which you can get by going here
Template 64 from Rachel Designs which can be found here
Easter Mask 2 from Creative Chicks which you can find here
Plugins used: Lokas 3D Shadow, Cybia Screenwork
----------------------------
This tutorial is written for those who have working knowledge of PSPX2 (any version will do).
This tutorial was written by me on April 20, 2019. Please do not copy or paste on any other forum, website or blog provide link back to tut only. Please do not claim as your own. This tutorial is copyrighted to me. Any resemblance to any other tutorial is purely coincidental.
Ok - let's start and remember to save often.
Open the template and using your shortcut keys on your keyboard (SHIFT+D) duplicate the template as a new image. Close the original and delete the copywrite layer.
Resize Template/Canvas to 750 x 750
Select the Circle 1 layer
Select all, float, and defloat
Paste paper 11
Select invert delete, select none
Hide/delete the orginal circle layer
Select Circle 2 layer
Select all, float, defloat
Paste paper 14
Select invert, delete, select none
Hide/delete original circle layer
Select Circle 3 layer
Repeat above steps
Select Wreath Element - resize by 49%
Paste and position above the Circle 2 layer
Duplicate and reposition above Circle 3 layer
Select Flower shape 3 layer
Select all, float, defloat
Paste paper 8
Select invert, delete, select none
Hide/delete original flower layer
Select Flower shape 8 layer
Repeat above steps
Select Flower Shape 6 layer
Select all, float, defloat
Add new raster layer and flood-fill with color of choice
Select invert, delete, select none
Apply Cybia Screenworks with the Pin Hole default settings
Hide/delete original flower layer
Select Flower shape 9 layer
Repeat above steps
Select Rectangle 5 layer
Select all, float, defloat
Paste paper 6
Select invert, delete, select none
Hide/delete original rectangle layer
Select Rectangle 7 layers
Select all, float, defloat
Paste paper 5
Select invert, delete
Paste close-up tube on paper layer and delete
Select none
Change close-up to Luminance (Legacy) and drop opacity down to 75%
Delete/Hide original Rectangle layer
Copy and paste tube of choice and position where desired
Apply Lokas 3D Shadow
Select Rabbit 5 Element - resize by 50%
Paste and position on the top
Select Bunnyears Element - resize by 40%
Image Free Rotate Left by 15% and paste on the bottom left
Select Basket 2 Element - resize by 50%
Paste and position on the bottom
Select Light Element - resize by 30%
Paste and position on the bottom right
Select Flower 5 Element - resize by 30%
Paste and position on bottom left
Select Lolli 2 Element - resize by 30%
Image Free Rotate Left by 15% and paste on the bottom left
Select Egg4 Element - resize by 40%
Paste and position on the bottom
Select Eggs Element - resize by 45%
Paste and position on the bottom
Select Lipstick 2 Element - resize by 40%
Paste and position on the bottom left
Select Flower 3 Element - resize by 40%
Paste and position on the bottom
Select Cupcake Element - resize by 40%
Paste and position on the bottom
Select Gem Element - resize by 4%
Paste and postion on the bottom
Select Rabbit 2 Element - resize by 30%
Paste and position on the bottom
Select Lips Element - resize by 65%
Image Free Rotate Left by 15% and paste on the right side
Select Sparkles Element - resize by 85%
Paste and position on the canvas where desired
Select New raster layer and flood fill with color or gradient of choice
Move layer to the bottom of the template
Apply Mask 2 or mask of choice
Merge group and move to the bottom
Add any additional elements you like.
Add any dropshadows you like
Crop and resize as desired
Add copyright info, license number and name
You're done! Thanks for trying my tutorial!

Labels:Chili Designz | 0
comments
Thursday, April 18, 2019
FLEUR
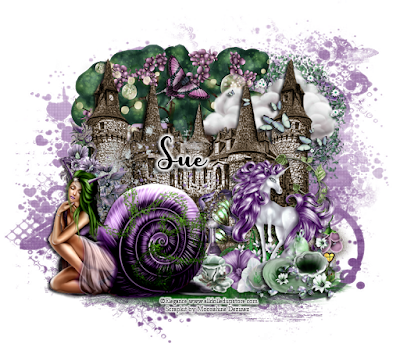
Supplies needed:
Scrapkit: I am using a stunning kit from Moonshine Dezinez called "Fleur" which you can get by going here
Mask 1 from Dee which you can find here
Plugins: Lokas 3D Shadow
----------------------------
This tutorial is written for those who have working knowledge of PSPX2 (any version will do).
This tutorial was written by me on April 18, 2019. Please do not copy or paste on any other forum, website or blog provide link back to tut only. Please do not claim as your own. This tutorial is copyrighted to me. Any resemblance to any other tutorial is purely coincidental.
Ok - let's start and remember to save often.
Open up a 750 x 650 blank canvas (we can resize it later)
Select Element 16 - resize by 55%
Paste and position on the top right
Select Element 8 - resize by 55%
Paste and position on the top left
Select Element 38 - resize by 40%
Paste and position on the top right side
Select Element 39 - resize by 75%
Paste and position in the center of the canvas
Select Element 5 - resize by 65%
Paste and position on the bottom
Select Element 9 - resize by 615%
Paste and position on the bottom
Select Element 34 - resize by 20%
Image mirror and paste on the left side
Select Element 37 - resize by 20%
Paste and position on the left side
Paste tube of choice on bottom left
Apply Lokas 3D Shadow at default settings
Select Element 50 - resize by 30%
Paste and position on the top right
Select Element 42 - resize by 30%
Paste and position on the right side
Select Element 12 - resize by 30%
Paste and position on the bottom right
Select Element 14 - resize by 20%
Paste and position on the bottom
Select Element 15 - resize by 30%
Paste and paste on the bottom
Select Element 55 - resize by 25%
Paste and position on the bottom right
Select Element 52 - resize by 25%
Paste and position on the bottom right
Select Element 54 - resize by 12%
Paste and position on the bottom
Select Element 56 - resize by 12%
Paste and position on the bottom
Select Element 18 - resize by 30%
Paste and position on the bottom
Select Element 46 - resize by 15%
Paste and position on the bottom
Select Element 19 - resize by 15%
Paste and position on the top where desired
Paste paper 10 on the canvas
Apply Mask 1 or mask of choice
Merge group and move to the bottom layer
Add any dropshadows you like
Sharpen any elements as needed
Crop and resize as desired
Add copyright info, license number and name
You're done! Thanks for trying my tutorial!
Labels:All Dolled Up Store | 0
comments
Wednesday, April 17, 2019
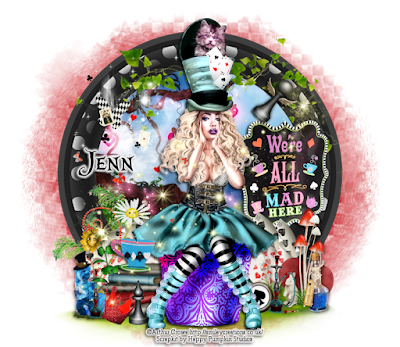
MAD ALICE
Supplies needed:
Scrapkit: I am using a stunning kit from Happy Pumpkin Studios called "HPS Alice" which you can get by going here, here or here
Mask 133 from Aqua which you can find on the Misfits Blog here
Plugins: Lokas 3D Shadow, Mura Meister Copies
----------------------------
This tutorial is written for those who have working knowledge of PSPX2 (any version will do).
This tutorial was written by me on April 17, 2019. Please do not copy or paste on any other forum, website or blog provide link back to tut only. Please do not claim as your own. This tutorial is copyrighted to me. Any resemblance to any other tutorial is purely coincidental.
Ok - let's start and remember to save often.
Open up a 750 x 650 blank canvas (we can resize it later)
Select Frame Element 8 - resize by 80%
Paste and position in the center of the canvas
Select your magic wand tool and select the center of the frame (Add (Shift), RGB Value, Tolerance 25, Contiguous checked, Feather 0)
Selections, Modify, Expand by 5
Paste paper 9
Select invert, delete, select none
Move paper layer below frame element
Select Element 56 -
Image Free Rotate Right by 15% and paste on the top right
Erase any excess bits that you want
Select Element 115 - resize by 40%
Paste and position on the top left
Select Element 90 - resize by 85%
Paste and position on the bottom
Select Element 102 - resize by 40%
Paste and position on the bottom left
Select Element 25 - resize by 30%
Paste and position on the right side
Select Element 81 - resize by 25%
Paste and position on the bottom
Apply Mura Meister Copies with the following settings:
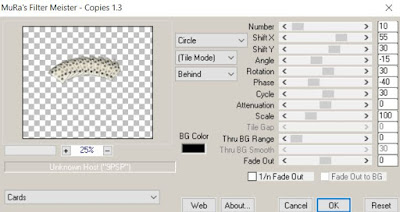
Select Element 74 - resize by 25%
Repeat above steps/settings
Select Element 49 - resize by 15%
Image Free Rotate Right by 15% and paste on the bottom right
Select Element 99 - resize by 40%
Paste and position on the bottom right
Paste tube of choice where desired
Apply Lokas 3D Shadow at default settings
Select Element 77 - resize by 20%
Paste and position on the bottom right
Select Element 101 - resize by 30%
Paste and position on the bottom left
Select Element 127 - resize by 25%
Paste and position on the bottom left
Select Element 130 - resize by 25%
Paste and position on the bottom left
Select Element 121 - resize by 20%
Paste and paste on the bottom left
Select Element 48 - resize by 25%
Paste and position on the bottom
Select Element 20 - resize by 12%
Paste and position on the bottom
Select Element 91 - resize by 15%
Paste and position on the bottom
Select Element 39 - resize by 12%
Paste and position on the bottom
Select Element 95 - resize by 15%
Paste and position on the bottom
Select Element 41 - resize by 12%
Paste and position on the top right
Select Element 68 - resize by 30%
Paste and position on the canvas where desired
Add new raster layer and flood-fill with color of choice
Apply Mask 133 or mask of choice
Merge group and move to the bottom layer
Add any dropshadows you like
Sharpen any elements as needed
Crop and resize as desired
Add copyright info, license number and name
You're done! Thanks for trying my tutorial!

Labels:Happy Pumpkin Studios | 0
comments
Thursday, April 11, 2019
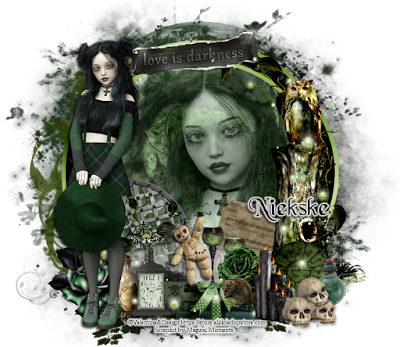
LITTLE DARK SOUL
Supplies needed:
Scrapkit: I am using a stunning kit from Magical Moments called "Little Dark Soul" which you can get by going here
Mask 20 from Moonbeams and Spiderwebs which you can find here
Plugins: Lokas 3D Shadow
----------------------------
This tutorial is written for those who have working knowledge of PSPX2 (any version will do).
This tutorial was written by me on April 11, 2019. Please do not copy or paste on any other forum, website or blog provide link back to tut only. Please do not claim as your own. This tutorial is copyrighted to me. Any resemblance to any other tutorial is purely coincidental.
Ok - let's start and remember to save often.
Open up a 750 x 650 blank canvas (we can resize it later)
Select Frame Element 50 - resize by 65%
Paste and position in the center of the canvas
Select your magic wand tool and select the center of the frame (Add (Shift), RGB Value, Tolerance 25, Contiguous checked, Feather 0)
Selections, Modify, Expand by 5
Paste paper 2
Select invert, delete
Paste close-up tube on paper layer and delete
Select none
Chage the closeup to Luminance (Legacy) and drop opacity down to 65%
Apply dropshadow on close-up
Select none
Select Element 82 - resize by 75%
Paste and position in the center above paper layer
Select Element 58 - resize by 80%
Paste and position on the bottom
Select Element 44 - resize by 50%
Paste and position on the left side below frame layer
Select Element 4 - resize by 40%
Paste and position on the bottom left
Select Element 14 - resize by 25%
Image Free Rotate Left by 15% and paste on the bottom left
Select Element 70 - resize by 25%
Paste and position on the bottom left above element 14
Select Element 64 - resize by 50%
Paste and position on the bottom right
Select Element 53 - resize by 20%
Image Free Rotate Right by 15% and paste on the bottom
Paste Tube Element on left side - resize by 35%
Apply Lokas 3D Shadow at default settings
Select Element 67 - resize by 25%
Paste and position on the bottom right
Select Element 47 - resize by 10%
Paste and position on the bottom right
Select Element 65 - resize by 20%
Paste and position on the bottom right
Select Element 23 - resize by 15%
Paste and position on the bottom
Select Element 57 - resize by 25%
Paste and paste on the bottom
Select Element 16 - resize by 15%
Paste and position on the bottom
Select Element 32- resize by 10%
Paste and position on the bottom
Select Element 27 - resize by 10%
Paste and position on the bottom
Select Element 38 - resize by 15%
Paste and position on the bottom
Select Element 25 - resize by 15%
Paste and position on the bottom
Select Element 84 - resize by 20%
Paste and position on the bottom
Select Element 48 - resize by 30%
Paste and position on the bottom
Select Element 86 - resize by 40%
Image Free Rotate Left by 5% and paste on the top
Select Element 76 - image mirror
Paste and position on the right side where desired
Add new raster layer and flood-fill with color of choice
Apply Mask 260 or mask of choice
Merge group and move to the bottom layer
Add any dropshadows you like
Sharpen any elements as needed
Crop and resize as desired
Add copyright info, license number and name
You're done! Thanks for trying my tutorial!

Labels:All Dolled Up Store | 0
comments
Monday, April 8, 2019
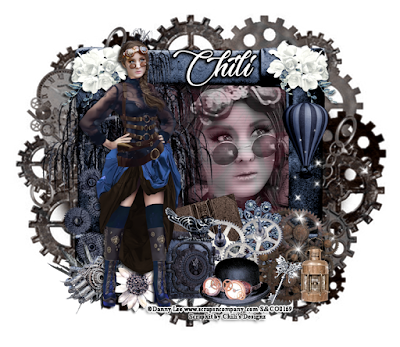
STEAMPUNK SOCIETY
Supplies needed:
I am using the stunning artwork from Danny Lee for this tutorial which you can find here
Scrapkit: I am using a stunning kit from Chili's Designz called "Steampunk Society" which you can get by going here
Mask 125 from Babs Bitzy Designz which you can find here
Plugins: Lokas 3D Shadow
----------------------------
This tutorial is written for those who have working knowledge of PSPX2 (any version will do).
This tutorial was written by me on April 8, 2019. Please do not copy or paste on any other forum, website or blog provide link back to tut only. Please do not claim as your own. This tutorial is copyrighted to me. Any resemblance to any other tutorial is purely coincidental.
Ok - let's start and remember to save often.
Open up a 750 x 650 blank canvas (we can resize it later)
Select Frame Element 2 - resize by 75%
Paste and position in the center of the canvas
Select your magic wand tool and select the center of the frame (Add (Shift), RGB Value, Tolerance 25, Contiguous checked, Feather 0)
Selections, Modify, Expand by 5
Paste paper 8
Select invert, delete
Paste close-up tube on paper layer and delete
Select none
Chage the closeup to Luminance (Legacy) and drop opacity down to 85%
Apply dropshadow and merge down on paper layer
Effect, Texture Effects, Blinds (Width 2, Opactity 20, Horizontal and Light from left/top checked)
Move paper layer below frame layer
Select Flower 2 Element - resize by 30%
Paste and position on the top right
Image duplicate, mirror and reposition on top left side
Select Tree Element - resize by 50%
Paste and position on the left side
Select Gears 3 Element - resize by 40%
Paste and position on the bottom left
Select Flower 4 Element - resize by 30%
Paste and position on the bottom left
Select Hand Element - resize by 30%
Paste and position on the bottom left
Select Flower 3 Element - resize by 30%
Paste and position on the bottom
Paste tube of choice where desired
Apply Lokas 3D Shadow at default settings
Select Clock Element - resize by 30%
Paste and position on the bottom
Select Book Element - resize by 30%
Image Free Rotate Left by 15% and paste on the bottom
Select Broche Element - resize by 65%
Paste and position on the bottom
Select Gears 2 Element - resize by 40%
Image Free Rotate Right by 15% and paste on the bottom right
Select Gears 4 Element - resize by 40%
Paste and paste on the bottom
Select Hat Element - resize by 40%
Paste and position on the bottom
Select Lamp Element - resize by 30%
Paste and position on the bottom right
Select Key Element - resize by 25%
Paste and position on the bottom
Select Balloon Element - resize by 25%
Paste and position on the top right
Select Sparkles 5 Element - resize by 75%
Paste and position on the bottom right
Paste paper 5 on canvas
Apply Mask 125 or mask of choice
Merge group and move to the bottom layer
Add any dropshadows you like
Sharpen any elements as needed
Crop and resize as desired
Add copyright info, license number and name
You're done! Thanks for trying my tutorial!

Labels:Chili Designz | 0
comments
Sunday, April 7, 2019
COFFEE TIME

Supplies needed:
I am using the stunning artwork from Verymany for this tutorial which you can find here
Scrapkit: I am using a stunning kit from Happy Pumpkin Studios called "HPS Kit 4" which you can get by going here or here
Mask 179 which you can find here
Plugins: Lokas 3D Shadow
----------------------------
This tutorial is written for those who have working knowledge of PSPX2 (any version will do).
This tutorial was written by me on April 7, 2019. Please do not copy or paste on any other forum, website or blog provide link back to tut only. Please do not claim as your own. This tutorial is copyrighted to me. Any resemblance to any other tutorial is purely coincidental.
Ok - let's start and remember to save often.
Open up a 750 x 650 blank canvas (we can resize it later)
Select Frame Element 6 - resize by 75%
Paste and position in the center of the canvas
Select your magic wand tool and select the center of each frame (Add (Shift), RGB Value, Tolerance 25, Contiguous checked, Feather 0)
Selections, Modify, Expand by 5
Paste paper 4
Select invert, delete
Paste close-up tubes on paper layer and delete
Select none
Chage the closeups to Luminance (Legacy) and drop opacity down to 70%
Apply dropshadow and merge down on paper layer
Effect, Texture Effects, Blinds (Width 23, Opactity 20, Horizontal and Light from left/top checked)
Move paper layer below frame layer
Select Element 71 - resize by 15%
Paste and position on the top right
Select Element 69 - resize by 30%
Paste and position on the top right
Select Element 10 - resize by 25%
Paste and position on the top right
Apply Eyecandy Gradient Glow on fat default settings
Select Element 93 - resize by 20%
Paste and position on the top right
Select Element 161 - resize by 20%
Paste and position on the top left
Paste tube of choice where desired
Apply Lokas 3D Shadow at default settings
Select Element 18 - resize by 20%
Image Free Rotate Right by 15% and paste on the left side below tube
Select Element 63 - resize by 25%
Paste and position on the left side
Select Element 7 - resize by 15%
Paste and position on the left side
Select Element 6 - resize by 15%
Paste and position on the left side
Select Element 4 - resize by 15%
Paste and paste on the left side
Select Element 38 - resize by 25%
Paste and position on the bottom left
Select Element 162 - resize by 22%
Image Free Rotate Left by 15% and paste on the bottom left
Select Element 83 - resize by 15%
Paste and position on the bottom
Select Element 28 - resize by 30%
Paste and position on the bottom
Select Element 150 - resize by 25%
Paste and position on the bottom
Select Element 39 - resize by 12%
Paste and position on the bottom
Select Element 29 - resize by 15%
Image Free Rotate Left by 15% and paste on the bottom
Select Element 48 - resize by 20%
Paste and position on the bottom
Select Element 157 - resize by 30%
Paste and position on the bottom right
Select Element 36 - resize by 20%
Image Free Rotate Right by 15% and paste on the bottom right
Select Element 34 - resize by 20%
Paste and position on the bottom right
Select Element 35 - resize by 20%
Paste and position on the bottom
Select Element 91 - resize by 12%
Paste and position on the bottom right
Select Element 94 - resize by 15%
Paste and position on the bottom right
Select Element 165 - resize by 85%
Paste and position on the canvas where desired
Add new raster layer and flood-fill with color or gradient of choice
Apply Mask 179 or mask of choice
Merge group and move to the bottom layer
Add any dropshadows you like
Sharpen any elements as needed
Crop and resize as desired
Add copyright info, license number and name
You're done! Thanks for trying my tutorial!

Labels:Happy Pumpkin Studios | 0
comments
EASTER CUTIE
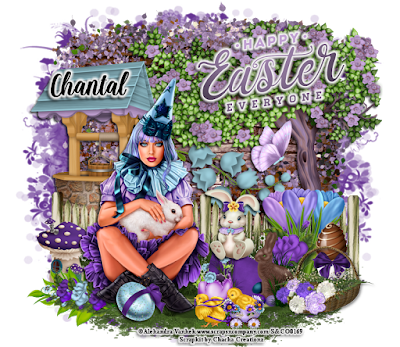
Supplies needed:
I am using the stunning artwork from Alehandra Vanhek for this tutorial which you can find here
Scrapkit: I am using a stunning kit from Chacha Creationz called "Arlene" which you can get by going here
Mask 4 from Dee which you can find here
Plugins: Lokas 3D Shadow, Eyecandy Gradient Glow
----------------------------
This tutorial is written for those who have working knowledge of PSPX2 (any version will do).
This tutorial was written by me on April 7, 2019. Please do not copy or paste on any other forum, website or blog provide link back to tut only. Please do not claim as your own. This tutorial is copyrighted to me. Any resemblance to any other tutorial is purely coincidental.
Ok - let's start and remember to save often.
Open up a 750 x 650 blank canvas (we can resize it later)
Select Element 66
paste and position in the center of the canvas
Select Element 24 - resize by 85%
Paste and position on the right side
Select Element 28 - resize by 60%
Paste and position on the left side
Select Element 44 - resize by 40%
Image Free Rotate Right by 15% and paste on the left side
Select Element 74 -
Paste and position on the bottom
Select Element 33 -
Paste and position on the bottom
Select Element 49 - resize by 30%
Paste and position on the bottom left
Select Element 4 - resize by 40%
Image mirror and paste on the bottom left
Paste tube of choice where desired
Apply Lokas 3D Shadow at default settings
Select Element 16 - resize by 30%
Paste and position on the bottom
Select Element 58 - resize by 30%
Paste and position on the bottom right
Select Element 15 - resize by 40%
Paste and position on the bottom right
Select Element 23 - resize by 40%
Paste and position on the bottom right
Select Element 29 - resize by 50%
Paste and paste on the center of the canvas above gate element
Select Element 1 - resize by 30%
Paste and position on the bottom
Select Element 67 - resize by 30%
Paste and position on the bottom
Select Element 14 - resize by 25%
Paste and position on the bottom
Select Element 5 - resize by 25%
Paste and position on the bottom
Select Element 68 - resize by 25%
Paste and position on the bottom
Select Element 62 - resize by 55%
Paste and position on the top right
Apply Eyecandy Gradient Glow on default settings
Select Element 18 - resize by 30%
Paste and position on the right side
Add new raster layer and flood-fill with color of choice
Apply Mask 4 or mask of choice
Merge group and move to the bottom layer
Add any dropshadows you like
Sharpen any elements as needed
Crop and resize as desired
Add copyright info, license number and name
You're done! Thanks for trying my tutorial!

Labels:Chacha Creationz | 0
comments
Thursday, April 4, 2019
GLAMOUR STEAMPUNK

Supplies needed:
Scrapkit: I am using a stunning kit from All Dolled Up called "Glamour Steam" which you can get by going here
Mask 125 from Babs Bitzy Designz which you can find here
Plugins: Lokas 3D Shadow
----------------------------
This tutorial is written for those who have working knowledge of PSPX2 (any version will do).
This tutorial was written by me on April 3, 2019. Please do not copy or paste on any other forum, website or blog provide link back to tut only. Please do not claim as your own. This tutorial is copyrighted to me. Any resemblance to any other tutorial is purely coincidental.
Ok - let's start and remember to save often.
Open up a 750 x 650 blank canvas (we can resize it later)
Select Element 81 - paste and position in the center of the canvas
Select Frame Element 5 - paste and position in the center of the canvas above element 81
Select your magic wand tool and select the center of the frame (Add (Shift), RGB Value, Tolerance 25, Contiguous checked, Feather 0)
Selections, Modify, Expand by 5
Paste close-up tube
Select invert, delete, Select none
Chage the closeup to Overlay and move below frame layer
Apply dropshadow
Select Element 78 - resize by 90%
Paste and position in the center above frame layer
Select Frame Element 7 - resize by 55%
Image Free Rotate Right by 15% and paste on the top right below frame layers
Select your magic wand tool and select the center of the frame (Add (Shift), RGB Value, Tolerance 25, Contiguous checked, Feather 0)
Selections, Modify, Expand by 5
Paste paper 17
Select invert, delete, select none
Move paper below frame
Select Element 36 - resize by 30%
Image Free Rotate Left by 90% and paste on the top right
Select Element 9 - resize by 20%
Paste and position on the top right below element 36
Select Element 64 - resize by 25%
Paste and position on the top right
Select Element 32 - resize by 40%
Image Free Rotate Right by 15% and paste on the top left
Select Element 139 - resize by 30%
Paste and position on the left side
Paste tube of choice on the left
Apply Lokas 3D Shadow at default settings
Select Element 56 - resize by 20%
Paste and position on the bottom left below tube
Select Element 54 - resize by 20%
Paste and position on the bottom left
Select Element 70 - resize by 18%
Paste and position on the bottom left
Select Element 132 - resize by 20%
Paste and position on the bottom left
Select Element 145 - resize by 30%
Image Free Rotate Left by 15% and paste on the bottom right
Select Element 47 - resize by 20%
Paste and position on the bottom right
Select Element 90 - resize by 25%
Paste and position on the bottom right
Select Element 105 - resize by 22%
Paste and position on the bottom right
Select Element 51 - resize by 20%
Paste and position on the bottom
Select Element 55 - resize by 25%
Paste and position on the bottom
Select Element 37 - resize by 20%
Paste and position on the bottom
Select Element 102 - resize by 30%
Paste and position on the bottom
Select Element 31 - resize by 25%
Paste and position on the bottom right
Select Element 138 - resize by 18%
Paste and position on the bottom
Select Element 80 - resize by 20%
Paste and position on the bottom
Select Element 110 - resize by 13%
Paste and position on the bottom
Select Element 65 - resize by 20%
Paste and position on the bottom
Select Element 6 - paste and position on the bottom
Add new raster layer and flood-fill with color of choice
Apply Mask 125 or mask of choice
Merge group and move to the bottom layer
Add any dropshadows you like
Sharpen any elements as needed
Crop and resize as desired
Add copyright info, license number and name
You're done! Thanks for trying my tutorial!

Labels:All Dolled Up Store | 0
comments
Tuesday, April 2, 2019
LILAC BEAUTY
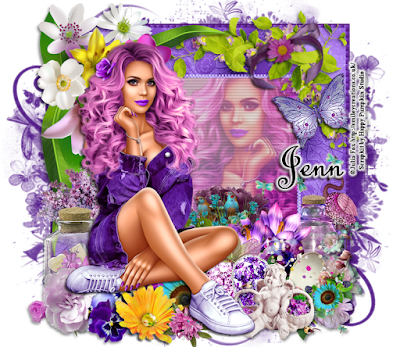
Supplies needed:
Scrapkit: I am using a stunning kit from Happy Pumpkin Studios called "HPS Kit 13" which you can get by going here or here
Mask 3 from Dee which you can find here
Plugins: Lokas 3D Shadow
----------------------------
This tutorial is written for those who have working knowledge of PSPX2 (any version will do).
This tutorial was written by me on April 2, 2019. Please do not copy or paste on any other forum, website or blog provide link back to tut only. Please do not claim as your own. This tutorial is copyrighted to me. Any resemblance to any other tutorial is purely coincidental.
Ok - let's start and remember to save often.
Open up a 750 x 650 blank canvas (we can resize it later)
Select Frame Element 13 - resize by 75%
Paste and position in the center of the canvas
Select your magic wand tool and select the center of the frame (Add (Shift), RGB Value, Tolerance 25, Contiguous checked, Feather 0)
Selections, Modify, Expand by 5
Paste paper 1
Select invert, delete
Paste close-up tube on paper layer and delete
Select none
Chage the closeup to Overlay and drop opacity down to 85%
Apply dropshadow and merge down on paper layer
Effect, Texture Effects, Blinds (Width 2, Opactity 25, Horizontal and Light from left/top checked)
Move paper layer below frame layer
Select Element 50 - resize by 65%
Paste and position on the top left
Select Element 123 - resize by 55%
Image mirror and paste on the top right
Select Element 98 - resize by 20%
Image Free Rotate Left by 15% and paste on the top right
Select Element 127 - resize by 20%
Paste and position on the top right
Select Element 54 - resize by 40%
Paste and position on the bottom left
Select Element 53 - resize by 25%
Paste and position on the bottom left
Select Element 138 - resize by 25%
Paste and position on the bottom left
Select Element 15 - resize by 20%
Paste and position on the bottom left
Select Element 16 - resize by 20%
Paste and position on the bottom left
Select Element 129 - resize by 15%
Paste and position on the bottom
Select Element 2 - resize by 15%
Paste and position on the bottom
Paste tube of choice on left side or where desired
Apply Lokas 3D Shadow at default settings
Select Element 24 - resize by 25%
Paste and position on bottom below tube
Select Element 69 - resize by 25%
Paste and position on the bottom below tube
Select Element 37 - resize by 35%
Paste and position on the bottom right
Select Element 43 - resize by 20%
Paste and position on the bottom right
Select Element 29 - resize by 25%
Paste and position on the bottom
Select Element 131 - resize by 30%
Paste and paste on the bottom right
Select Element 36 - resize by 25%
Paste and position on the bottom right
Select Element 20 - resize by 10%
Paste and position on the bottom
Select Element 97 - resize by 15%
Paste and position on the bottom
Select Element 132 - resize by 30%
Paste and position on the right where desired
Select Element 48 - resize by 30%
Paste and position on the bottom right
Add new raster layer and flood-fill with color of choice
Apply Mask 3 or mask of choice
Merge group and move to the bottom layer
Add any dropshadows you like
Sharpen any elements as needed
Crop and resize as desired
Add copyright info, license number and name
You're done! Thanks for trying my tutorial!

Labels:Happy Pumpkin Studios | 0
comments
Subscribe to:
Comments
(Atom)


