Labels
- Alikas Scraps
- All Dolled Up Store
- Amy Marie
- Annaica
- Arthur Crowe
- Babycakes Scraps
- Barbara Jensen
- Bibi's Collections
- Black Widow Creationz
- Blu Moon
- Bonnies Creations
- Bookwork Dezines
- Broken Sky Dezine
- Carita Creationz
- Carpe Diem Designs
- CDO
- Celinart Pinup
- Celine
- Chacha Creationz
- Charmed Designs
- Cherry Blossom Designs
- Chili Designz
- Cluster Frame
- Creative Misfits
- Creative Scraps by Crys
- Curious Creative Dreams
- Danny Lee
- Derzi
- Designs by Ali
- Designs by Joan
- Designs by Ketura
- Designs By Norella
- Designs by Vi
- Diana Gali
- Diry Art Designs
- Disturbed Scraps
- Dreaming With Bella
- Eclipse Creations
- Elegancefly
- Extras
- Fabulous Designz
- Forum Set
- Foxy's Designz
- Freek's Creation
- FTU
- FwTags
- Goldwasser
- Gothic Inspirations
- Gothic Raven Designs
- Graphfreaks
- Hania's Designs
- Happy Pumpkin Studios
- Horseplay's Pasture Designs
- indie-Zine
- Irish Princess Designs
- Ishika Chowdhury
- Kaci McVay
- Kajenna
- katharine
- Katherine
- Khloe Zoey
- Killer Kitty
- Kissing Kate
- KiwiFirestorm
- Kiya Designs
- Kizzed by Kelz
- KZ Designz
- Lady Mishka
- Lil Mz Brainstorm
- Maiden of Darkness
- Mariel Designs
- MellieBeans
- Michelle's Myths
- Midnight Shadow
- Misticheskya
- MistyLynn's Creations
- MMeliCrea Designz
- Moon Vixen Designs
- NaSionainne
- Ninaste
- Niqui Designs
- Pandora
- Picsfordesign
- Pink Paradox Productions
- Radyga Designs
- Redefined Designs
- Rissa's Designs
- Schnegge
- ScottishButterfly Creations
- Scrappin Krazy Designs
- Scrappin With Lil Ol Me
- Scraps and the City
- Scraps Dimensions
- Scraps From The Heart
- Scraps N Company
- Scraps with Attitude
- Shining Star Art
- Skyscraps
- Sleek N Sassy Designs
- Sophisticat Simone
- Souldesigner
- Soxsational Scraps
- Spazz
- Starlite and Soul
- Stella Felice
- Tammy Welt
- Tasha's Playground
- The PSP Project
- Thrifty Scraps by Gina
- Tiny Turtle Designs
- Upyourart
- Verymany
- Wendy Gerber
- Whisper In the Wind
- Wick3d Creationz
- Wicked Diabla
- Yude's Kreationz
Blog Archive
Wednesday, May 29, 2019
MERMAID PARADISE
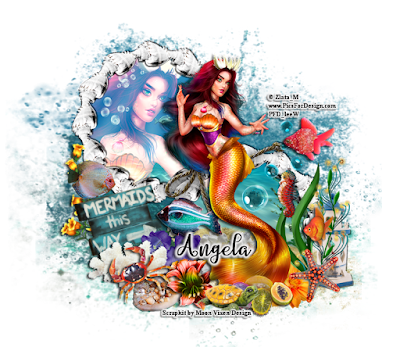
Supplies needed:
I am using the stunning artwork from Zlata for this tutorial which you can find here
Scrapkit: I am using a stunning kit from Moon Vixen Designs called "Paradise" which you can get by going Here, Here and Here
Set 74 Mask 2 and 3 from Rachel which you can find here
Plugins: Lokas 3D Shadow
----------------------------
This tutorial is written for those who have working knowledge of PSPX2 (any version will do).
This tutorial was written by me on May 29, 2019. Please do not copy or paste on any other forum, website or blog provide link back to tut only. Please do not claim as your own. This tutorial is copyrighted to me. Any resemblance to any other tutorial is purely coincidental.
Ok - let's start and remember to save often.
Open up a 750 x 650 blank canvas (we can resize it later)
Select Paper 15 and paste on the canvas
Apply mask 2 and merge group
Repaste paper 15 and apply mask 3
Merge group and reposition masks as desired
Select Frame Element 145 - resize by 55%
Paste and position in the center of the canvas
Select your magic wand tool and select the center of each circle in the frame (Add (Shift), RGB Value, Tolerance 25, Contiguous checked, Feather 0)
Selections, Modify, Expand by 5
Paste paper 1
Select invert, delete
Paste close-up tube on paper layer and delete
Select none
Chage the closeup to Screen
Move paper layer and close-up below the frame layer
Select Element 105 - resize by 75%
Paste and position on the bottom right
Select Element 72 - resize by 25%
Image Free Rotate Left by 15% and paste on the left side
Select Element 114 - resize by 40%
Image Free Rotate Left by 15% and paste on the left side
Select Element 2 - resize by 25%
Paste and position on the right side
Select Element 75 - resize by 30%
Paste and position on the bottom left
Select Element 21 - resize by 30%
Paste and position on the bottom
Select Element 141 - resize by 25%
Paste and position on the bottom
Paste tube of choice where desired
Apply Lokas 3D Shadow at default settings
Select Element 84 - resize by 30%
Paste and position on the bottom right
Select Element 103 - resize by 40%
Paste and position on the bottom right
Select Element 8 - resize by 20%
Paste and position on the bottom right
Select Element 59 - resize by 20%
Paste and position on the bottom right
Select Element 135- resize by 15%
Paste and paste on the bottom right
Select Element 104 - resize by 40%
Paste and position on the right side
Select Element 35 - resize by 20%
Paste and position on the bottom right
Select Element 27 - resize by 25%
Paste and position on the bottom
Select Element 125 - resize by 20%
Paste and position on the bottom
Select Element 60 - resize by 20%
Paste and position on the bottom
Select Element 142 - resize by 20%
Paste and position on the bottom
Select Element 28 - resize by 30%
Paste and position on the bottom
Select Element 69 - resize by 25%
Paste and position on the bottom left
Add any dropshadows you like
Sharpen any elements as needed
Crop and resize as desired
Add copyright info, license number and name
You're done! Thanks for trying my tutorial!

Labels:Moon Vixen Designs | 0
comments
Monday, May 27, 2019
LEMON BUTTERFLY
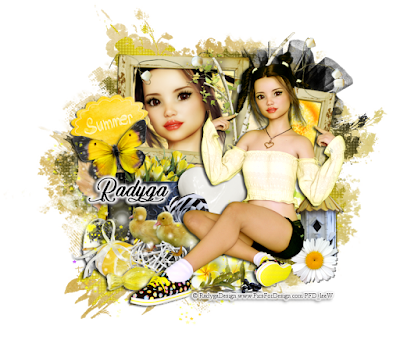
Supplies needed:
I am using the stunning artwork from Radyga Design for this tutorial which you can find Here, Here, Here, Here or Here
Scrapkit: I am using a beautiful kit from Tiny Turtle Designs called "Lemon Butterflies" which you can get by going here
Mask 285 from MzTeeques which you can find here
Plugins: Lokas 3D Shadow
----------------------------
This tutorial is written for those who have working knowledge of PSPX2 (any version will do).
This tutorial was written by me on May 27, 2019. Please do not copy or paste on any other forum, website or blog provide link back to tut only. Please do not claim as your own. This tutorial is copyrighted to me. Any resemblance to any other tutorial is purely coincidental.
Ok - let's start and remember to save often.
Open up a 750 x 650 blank canvas (we can resize it later)
Select Paper 16
Paste and position in the center of the canvas
Apply mask 285 and merge group
Select Frame Element 103 - resize by 65%
Paste and position in the center of the canvas
Select your magic wand tool and select the center of each window frame (Add (Shift), RGB Value, Tolerance 25, Contiguous checked, Feather 0)
Selections, Modify, Expand by 5
Paste paper 1
Select invert, delete
Paste close-up tube on paper layer and delete
Select none
Duplicate close-up and apply Blur, Gaussian Blur at 4
Change duplicate to Overlay
Move paper and close-ups below frame element
Select Element 90 - resize by 40%
Image Free Rotate Right by 15% and paste on top right below frame
Select Element 7 - resize by 25%
Image Free Rotate Left by 15% and paste on the left side
Select Element 1 - resize by 30%
Paste and position on the left side
Select Element 78 - resize by 30%
Paste and position on the left side
Select Element 19 - resize by 35%
Paste and position on the left side
Select Element 104 - resize by 25%
Image Free Rotate Left by 15% and paste on the left side
Select Element 77 - resize by 22%
Paste and position in the center next to element 77
Paste tube of choice where desired
Apply Lokas 3D Shadow at default settings
Select Element 11 - resize by 30%
Paste and position on the bottom right
Select Element 3 - resize by 15%
Paste and position on the bottom right
Select Element 83 - resize by 20%
Paste and position on the bottom left
Select Element 95 - resize by 25%
Paste and position on the bottom left
Select Element 80 - resize by 15%
Paste and paste on the bottom
Select Element 56 - resize by 20%
Paste and position on the bottom
Select Element 45 - resize by 25%
Paste and position on the bottom
Select Element 6 - resize by 20%
Paste and position on the bottom
Select Element 10 - resize by 25%
Paste and position on the bottom
Select Element 33 - resize by 30%
Paste and position on the bottom
Select Element 101 - resize by 75%
Paste and position on the bottom left
Add any dropshadows you like
Sharpen any elements as needed
Crop and resize as desired
Add copyright info, license number and name
You're done! Thanks for trying my tutorial!

Labels:Radyga Designs | 0
comments
Saturday, May 25, 2019
BOOKWORM
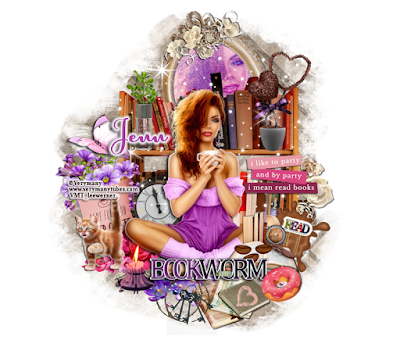
Supplies needed:
I am using the stunning artwork from Verymany for this tutorial which you can find here
Scrapkit: I am using a stunning kit from Happy Pumpkin Studios called "HPS Kit 32" which you can get by going here
Mask 310 from MzTeeques which you can find here
Plugins: Lokas 3D Shadow
----------------------------
This tutorial is written for those who have working knowledge of PSPX2 (any version will do).
This tutorial was written by me on May 25, 2019. Please do not copy or paste on any other forum, website or blog provide link back to tut only. Please do not claim as your own. This tutorial is copyrighted to me. Any resemblance to any other tutorial is purely coincidental.
Ok - let's start and remember to save often.
Open up a 750 x 650 blank canvas (we can resize it later)
Select Paper 19 and paste on the canvas
Apply Mask 310 and merge group
Select Frame Element 11 - resize by 40%
Image Free Rotate Left by 15% and paste on the top
Select your magic wand tool and select the center of the frame (Add (Shift), RGB Value, Tolerance 25, Contiguous checked, Feather 0)
Selections, Modify, Expand by 5
Paste paper 22
Select invert, delete
Paste close-up tube on paper layer and delete
Select none
Chage the closeup to Overlay
Apply dropshadow and merge down on paper layer
Move paper layer below frame element
Select Element 82 - resize by 20%
Paste and position on top of the frame
Select Element 85 - resize by 20%
Paste and position on the top of the frame
Select Element 16 - resize by 45%
Paste and position in the center
Select Element 57 - resize by 20%
Paste and position on the left side above bookcase element
Select Element 86 - resize by 25%
Paste and position on the right side above bookcase element
Select Element 81 - resize by 20%
Paste and position on the right side
Select Element 106 - resize by 20%
Paste and position on the right side
Select Element 23 - resize by 25%
Paste and position on the left side
Select Element 33 - resize by 15%
Image Free Rotate Left by 15% and paste on the left side
Paste tube of choice where desired
Apply Lokas 3D Shadow at default settings
Select Element 91 - resize by 15%
Image Free Rotate Left by 15% and paste on the left side
Select Element 36 - resize by 25%
Paste and position on the left side
Select Element 55 - resize by 20%
Paste and position on the left side
Select Element 77 - resize by 15%
Paste and position on the top left
Select Element 71 - resize by 20%
Paste and paste on the bottom right
Select Element 95 - resize by 12%
Image Free Rotate Right by 15% and paste on the bottom right
Select Element 1 - resize by 20%
Paste and position on the bottom right
Select Element 67 - resize by 10%
Paste and position on the bottom right
Select Element 73 - resize by 10%
Paste and position on the bottom right
Select Element 112 - resize by 15%
Paste and position on the bottom left
Select Element 26 - resize by 20%
Paste and position on the bottom
Select Element 123 - resize by 20%
Paste and position on the bottom
Select Element 69 - resize by 15%
Paste and position on the bottom
Select Element 115 - resize by 15%
Paste and position on the bottom
Select Element 28 - resize by 30%
Paste and position on the bottom
Select Element 126 - resize by 75%
Paste and position on the canvas where desired
Add any dropshadows you like
Sharpen any elements as needed
Crop and resize as desired
Add copyright info, license number and name
You're done! Thanks for trying my tutorial!

Labels:Happy Pumpkin Studios | 0
comments
Friday, May 24, 2019
PIXIE PATCH
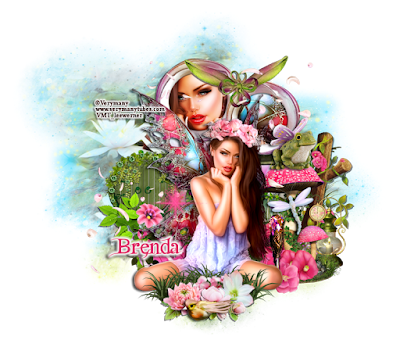
Supplies needed:
I am using the stunning artwork from Verymany for this tutorial which you can find here
Scrapkit: I am using a stunning kit from All Dolled Up called "Pixie Patch" which you can get by going here
Mask 38 from Vivienne which you can find here
Plugins: Lokas 3D Shadow
----------------------------
This tutorial is written for those who have working knowledge of PSPX2 (any version will do).
This tutorial was written by me on May 24, 2019. Please do not copy or paste on any other forum, website or blog provide link back to tut only. Please do not claim as your own. This tutorial is copyrighted to me. Any resemblance to any other tutorial is purely coincidental.
Ok - let's start and remember to save often.
Open up a 750 x 650 blank canvas (we can resize it later)
Select Paper 9 and paste on the canvas
Apply Mask 38 and merge group
Select Paper 1 and paste on top of mask layer
Apply Mask 38 again and merge group - resize to 80%
Select Frame Element 69 - resize by 55%
Image Free Rotate Right by 15% and paste on the top right
Select your magic wand tool and select the center circles of the frame (Add (Shift), RGB Value, Tolerance 25, Contiguous checked, Feather 0)
Selections, Modify, Expand by 5
Paste paper 5
Select invert, delete
Paste close-up tube on paper layer and delete
Select none
Move paper and close-up below frame layer
Duplicate the close-up and adjust, Blur, Gaussian Blur at 4
Change duplicate to Overlay
Select Element 121 - resize by 75%
Image mirror and paste in the center of the canvas
Select Element 27 - resize by 45%
Paste and position on the right side
Select Element 39 - resize by 50%
Paste and position on left side
Paste tube of choice where desired
Apply Lokas 3D Shadow at default settings
Select Element 92 - resize by 25%
Paste and position on the bottom left
Select Element 30 - resize by 30%
Image mirror and paste on the left side
Select Element 75 - resize by 30%
Paste and position on the bottom left
Select Element 88 - resize by 30%
Paste and position on the bottom right
Select Element 126 - resize by 20%
Image Free Rotate Left by 15% and paste on bottom right
Select Element 24 - resize by 25%
Paste and position on the bottom right
Select Element 15 - resize by 25%
Paste and position on the bottom
Select Element 70 - resize by 75%
Paste and position on the canvas below tube layer
Select Element 72 - resize by 55%
Paste and position on the bottom
Select Element 111 - resize by 25%
Image Free Rotate by 15% and paste on the bottom
Select Element 51 - resize by 15%
Paste and position on the bottom
Select Element 120 - resize by 20%
Paste and position on the bottom
Select Element 116 - resize by 20%
Paste and position on the bottom
Select Element 68 - resize by 20%
Paste and position on the bottom
Select Element 66 - resize by 25%
Paste and position on the canvas where desired
Add any dropshadows you like
Sharpen any elements as needed
Crop and resize as desired
Add copyright info, license number and name
You're done! Thanks for trying my tutorial!

Labels:All Dolled Up Store | 0
comments
Wednesday, May 22, 2019
GOTHIC ANGEL

Supplies needed:
I am using the stunning artwork from Andy Cooper for this tutorial which you can find here
Scrapkit: I am using a stunning kit from Chacha Creationz called "Gothic Angel" which you can get by going here
Mask 42 from Vivienne which you can find here
Plugins: Lokas 3D Shadow
----------------------------
This tutorial is written for those who have working knowledge of PSPX2 (any version will do).
This tutorial was written by me on May 22, 2019. Please do not copy or paste on any other forum, website or blog provide link back to tut only. Please do not claim as your own. This tutorial is copyrighted to me. Any resemblance to any other tutorial is purely coincidental.
Ok - let's start and remember to save often.
Open up a 750 x 650 blank canvas (we can resize it later)
Select Paper 6 and paste on the canvas
Apply mask 42 and merge group
Select Element 8 - resize by 65%
Paste and position on the top left
Select Element 14 - resize by 65%
Paste and position on top left below house element
Select Element 2 - resize by 40%
Paste and position on the left side
Select Element 5 - resize by 40%
Image Free Rotate Right by 15% and paste on the right side
Select Element 52 - resize by 40%
Image mirror and paste on the right side
Select Element 13 - resize by 40%
Paste and position on the bottom right
Paste tube of choice where desired
Apply Lokas 3D Shadow at default settings
Select Element 22 - resize by 50%
Paste and position on the bottom
Select Element 51 - resize by 25%
Paste and position on the bottom left
Select Element 25 - resize by 25%
Paste and position on the bottom left
Select Element 33 - resize by 40%
Paste and position on the bottom
Select Element 36 - resize by 15%
Paste and paste on the bottom left
Select Element 63 - resize by 20%
Paste and position on the bottom
Select Element 29 - resize by 30%
Paste and position on the bottom
Select Element 44 - resize by 15%
Image mirror and paste on the bottom
Select Element 41 - resize by 25%
Paste and position on the bottom
Select Element 1 - resize by 30%
Paste and position on the top left
Add any dropshadows you like
Sharpen any elements as needed
Crop and resize as desired
Add copyright info, license number and name
You're done! Thanks for trying my tutorial!

Labels:Chacha Creationz | 0
comments
Tuesday, May 21, 2019
DARK FLOWERS
Supplies needed:
I am using the stunning artwork from Alehandra Vanhek for this tutorial which you can find here
Scrapkit: I am using a stunning Collab kit from Chili's Designz called "Dark Flowers" which you can get by going here
Mask 53 from Vivienne which you can find here
Plugins: Lokas 3D Shadow
----------------------------
This tutorial is written for those who have working knowledge of PSPX2 (any version will do).
This tutorial was written by me on May 21, 2019. Please do not copy or paste on any other forum, website or blog provide link back to tut only. Please do not claim as your own. This tutorial is copyrighted to me. Any resemblance to any other tutorial is purely coincidental.
Ok - let's start and remember to save often.
Open up a 750 x 650 blank canvas (we can resize it later)
Select Paper 6
Paste and position in the center of the canvas
Apply mask 53 and merge group
Select Greenery Element - resize by 75%
Paste and position on the top above mask layer
Select Flowers Element - resize by 50%
Paste and position on the top right
Select Butterflies 2 Element - resize by 80%
Paste and position on the right side where desired
Select Frame Element 5 - resize by 40%
Image Free Rotate Right by 15% and paste on the top right
Select your magic wand tool and select the center of the frame (Add (Shift), RGB Value, Tolerance 25, Contiguous checked, Feather 0)
Selections, Modify, Expand by 5
Paste paper 9
Select invert, delete
Paste close-up tube on paper layer and delete
Select none
Duplicate close-up tube and apply Gaussian Blur at 4
Change duplicate to Overlay
Apply dropshadow
Move paper and close-ups below frame element
Select House 2 Element - resize by 40%
Image mirror and paste on the left side
Paste tube of choice where desired
Apply Lokas 3D Shadow at default settings
Select Broche 2 Element - resize by 35%
Image Free Rotate Right by 15% and paste on the top left
Select Box Element - resize by 30%
Paste and position on the bottom left
Select Flower Element - resize by 30%
Paste and position on the bottom left
Select Vase Element - resize by 30%
Paste and position on the bottom left
Select Flowers 3 Element - resize by 40%
Paste and position on the bottom
Select Deco 3 Element - resize by 30%
Paste and position on the bottom
Select Book Element - resize by 30%
Paste and position on the bottom
Select Broche Element - resize by 30%
Paste and position on the bottom right
Select Candle Element - resize by 30%
Paste and position on the bottom right
Select Flower 2 Element - resize by 25%
Paste and position on the bottom
Select Jar 2 Element - resize by 30%
Paste and position on the bottom right
Select Goblet Element - resize by 40%
Paste and position on the bottom left
Select Flower 8 Element - resize by 30%
Paste and position on the bottom left
Select Jar 3 Element - resize by 30%
Paste and position on the bottom
Select Cameo Element - resize by 30%
Image Free Rotate left by 15% and paste on the bottom
Select Shoes Element - resize by 40%
Paste and position on the bottom
Select Sparkles Element - resize by 55%
Paste and position on the canvas where desired
Add new raster layer and flood-fill with color of choice
Apply Mask 260 or mask of choice
Merge group and move to the bottom layer
Add any dropshadows you like
Sharpen any elements as needed
Crop and resize as desired
Add copyright info, license number and name
You're done! Thanks for trying my tutorial!

Labels:Chili Designz | 0
comments
Monday, May 20, 2019
MISTY SPRING
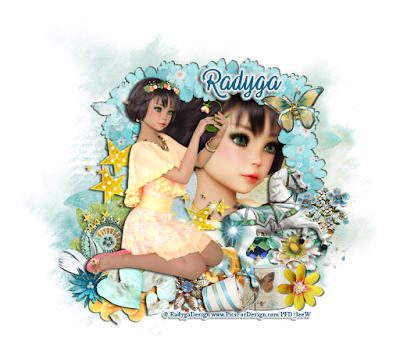
Supplies needed:
I am using the stunning artwork from Radyga Design for this tutorial which you can find Here, Here, Here, Here and Here
Scrapkit: I am using a beautiful kit from Tiny Turtle Designs called "Misty Spring" which you can get by going here
Mask 16 from Vivienne which you can find here
Plugins: Lokas 3D Shadow
----------------------------
This tutorial is written for those who have working knowledge of PSPX2 (any version will do).
This tutorial was written by me on May 20, 2019. Please do not copy or paste on any other forum, website or blog provide link back to tut only. Please do not claim as your own. This tutorial is copyrighted to me. Any resemblance to any other tutorial is purely coincidental.
Ok - let's start and remember to save often.
Open up a 750 x 650 blank canvas (we can resize it later)
Paste paper 2 on canvas
Apply Mask 16 or mask of choice
Merge group
Select Frame Element 17 - resize by 75%
Paste and position in the center of the canvas
Select your magic wand tool and select the center of the frame (Add (Shift), RGB Value, Tolerance 25, Contiguous checked, Feather 0)
Selections, Modify, Expand by 5
Paste paper 18
Select invert, delete
Paste close-up tube on paper layer and delete
Select none
Duplicate close-up and change to Overlay
Adjust, Blur, Gaussian Blur radius 4
Apply dropshadow on original
Move paper and tube layer below frame element
Select Element 45 - resize by 75%
Paste and position in the center where desired
Select Element 194 - resize by 20%
Image Free Rotate Left by 15% and paste on the top right
Select Element 208 - resize by 35%
Image Free Rotate Left by 15% and paste on the bottom right
Select Element 6 - resize by 25%
Image mirror Paste and position on the right side
Select Element 98 - resize by 30%
Paste and position on the bottom left
Select Element 154 - resize by 25%
Paste and position on the bottom left
Select Element 44 - resize by 25%
Paste and position on the bottom left
Select Element 20 - resize by 25%
Paste and position on the bottom left
Select Element 187 - resize by 15%
Paste and position on the bottom left
Paste tube of choice where desired
Apply Lokas 3D Shadow at default settings
Select Element 88 - resize by 20%
Paste and position on the bottom right
Select Element 91 - resize by 40%
Paste and position on the bottom right
Select Element 153 - resize by 30%
Paste and position on the bottom
Select Element 46 - resize by 15%
Paste and position on the bottom right
Select Element 51 - resize by 20%
Paste and paste on the bottom
Select Element 21 - resize by 25%
Paste and position on the bottom
Select Element 5 - resize by 20%
Paste and position on the bottom
Select Element 22 - resize by 45%
Paste and position on the canvas where desired
Add any dropshadows you like
Sharpen any elements as needed
Crop and resize as desired
Add copyright info, license number and name
You're done! Thanks for trying my tutorial!

Labels:Radyga Designs | 0
comments
Sunday, May 19, 2019
LADY OF THE NIGHT
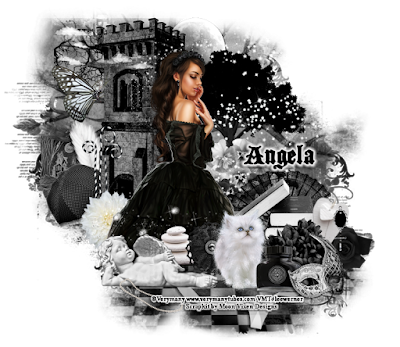
Supplies needed:
I am using the stunning artwork from Verymany for this tutorial which you can find here
Scrapkit: I am using a stunning kit from Moon Vixen Designs called "Black and White" which you can get by going Here, Here, Here
Mask 12 from Vivienne which you can find here
Plugins: Lokas 3D Shadow
----------------------------
This tutorial is written for those who have working knowledge of PSPX2 (any version will do).
This tutorial was written by me on May 19, 2019. Please do not copy or paste on any other forum, website or blog provide link back to tut only. Please do not claim as your own. This tutorial is copyrighted to me. Any resemblance to any other tutorial is purely coincidental.
Ok - let's start and remember to save often.
Open up a 750 x 650 blank canvas (we can resize it later)
Select Paper 7 and paste on the canvas
Apply Mask 12 and merge group
Select Element 89 - resize by 30%
Paste and position on the top left
Select Element 23 - resize by 65%
Paste and position on the top left
Select Element 64 - resize by 15%
Paste and position on the top below element 23
Select Element 13 - resize by 40%
Paste and position on the top right
Select Element 8 - resize by 55%
Paste and position on the right side
Select Element 88 - resize by 35%
Paste and position on the top left
Select Element 26 - resize by 15%
Paste and position on the top left
Select Element 6 - resize by 30%
Paste and position on the right side
Select Element 47 - resize by 15%P
Paste and position on the left side
Select Element 73 - resize by 20%
Image Free Rotate Left by 15% and paste on the left side
Select Element 103 - resize by 15%
Paste and position on the left side
Select Element 98 - resize by 20%
Paste and position on the left side
Select Element 42 - resize by 15%
Paste and position on the left side
Paste tube of choice where desired
Apply Lokas 3D Shadow at default settings
Select Element 85 - resize by 40%
Paste and position on the right side
Select Element 11 - resize by 55%
Paste and position on the right side
Select Element 53 - resize by 15%
Image Free Rotate Right by 15% and paste on the right side
Select Element 3 - resize by 20%
Paste and position on the bottom
Select Element 16 - resize by 25%
Paste and paste on the bottom left
Select Element 74 - resize by 15%
Paste and position on the bottom
Select Element 27 - resize by 20%
Paste and position on the bottom
Select Element 18 - resize by 30%
Paste and position on the bottom right
Select Element 102 - resize by 30%
Paste and position on the bottom right
Select Element 67 - resize by 12%
Paste and position on the bottom
Select Element 35 - resize by 15%
Paste and position on the bottom right
Select Element 2 - resize by 40%
Image flip and Paste and position on the bottom
Select Element 82 - resize by 15%
Paste and position on the bottom left
Select Element 91 - resize by 65%
Paste and position on the canvas where desired
Add any dropshadows you like
Sharpen any elements as needed
Crop and resize as desired
Add copyright info, license number and name
You're done! Thanks for trying my tutorial!

Labels:Moon Vixen Designs | 0
comments
Saturday, May 18, 2019
TAG SHOWOFF FOR CUTENTOONS


These CT Tags were made using the amazing artwork by CUTEN TOONS. You can purchase the tube "The Kids 3" Here
These tags were made by me and my own creativity. Please do not rip apart, destroy, alter them or claim them as your own. Thanks.

Labels:All Dolled Up Store | 0
comments
Thursday, May 16, 2019
LIVE LOVE LAUGH
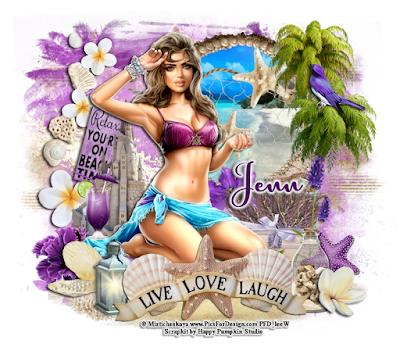
Supplies needed:
I am using the stunning artwork from Misticheskaya for this tutorial which you can find here
Scrapkit: I am using a stunning kit from Happy Pumpkin Studios called "HPS Kit 28" which you can get by going HERE, HERE, HERE
Mask 63 and 193 from Sophisticated Simone here
Plugins: Lokas 3D Shadow
----------------------------
This tutorial is written for those who have working knowledge of PSPX2 (any version will do).
This tutorial was written by me on May 16, 2019. Please do not copy or paste on any other forum, website or blog provide link back to tut only. Please do not claim as your own. This tutorial is copyrighted to me. Any resemblance to any other tutorial is purely coincidental.
Ok - let's start and remember to save often.
Open up a 750 x 650 blank canvas (we can resize it later)
Select paper 6 on the canvas
Apply mask 63 and merge group
Select paper 5 and paste on the canvas
Apply mask 193 and merge group
Select Frame Element 6 - resize by 40%
Paste and position on the top right
Select your magic wand tool and select the center of the frame (Add (Shift), RGB Value, Tolerance 25, Contiguous checked, Feather 0)
Selections, Modify, Expand by 5
Paste paper 15
Select invert, delete, select none
Move paper layer below frame layer
Select Element 44 - resize by 50%
Paste and position on above the frame layer
Select Element 32 - resize by 50%
Image mirror and paste on the right side of the frame layer
Select Element 43 - resize by 55%
Paste and position on the top left side
Select Element 6 - resize by 25%
Image Free Rotate Right by 15% and paste on the left side
Select Element 119 - resize by 40%
Paste and position on the left side
Select Element 4 - resize by 30%
Paste and position on the right side
Select Element 87 - resize by 30%
Paste and position on the right side
Select Element 14 - resize by 20%
Paste and position on the bottom of the frame
Select Element 22 - resize by 80%
Paste and position on the bottom
Paste tube of choice where desired
Apply Lokas 3D Shadow at default settings
Select Element 56 - resize by 20%
Paste and position on the bottom left
Select Element 30 - resize by 15%
Paste and position on the bottom left
Select Element 46 - resize by 15%
Paste and position on the bottom left
Select Element 26 - resize by 20%
Paste and position on the bottom left
Select Element 148 - resize by 20%
Paste and positon on the bottom left
Select Element 16 - resize by 15%
Paste and paste on the bottom right
Select Element 45 - resize by 25%
Paste and position on the bottom right
Select Element 37 - resize by 15%
Paste and position on the bottom right
Select Element 28 - resize by 55%
Paste and position on the bottom
Select Element 5 - resize by 15%
Paste and position on the top right
Add any dropshadows you like
Sharpen any elements as needed
Crop and resize as desired
Add copyright info, license number and name
You're done! Thanks for trying my tutorial!

Labels:Happy Pumpkin Studios | 0
comments
Tuesday, May 14, 2019
MANDRAGORA
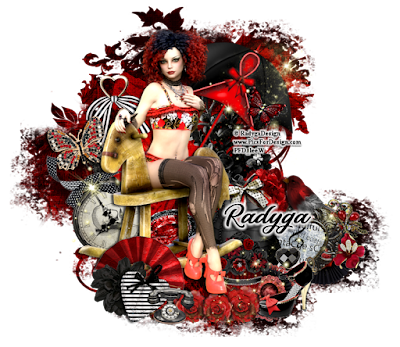
Supplies needed:
I am using the stunning artwork from Raydga Designs for this tutorial which you can find here, Here, Here, Here or Here
Scrapkit: I am using a beautiful kit from Tiny Turtle Designs called "Marline" which you can get by going here
Mask 32 from Vivienne which you can find here
Plugins: Lokas 3D Shadow
----------------------------
This tutorial is written for those who have working knowledge of PSPX2 (any version will do).
This tutorial was written by me on May 14, 2019. Please do not copy or paste on any other forum, website or blog provide link back to tut only. Please do not claim as your own. This tutorial is copyrighted to me. Any resemblance to any other tutorial is purely coincidental.
Ok - let's start and remember to save often.
Open up a 750 x 650 blank canvas (we can resize it later)
Paste paper 26 on the canvas
Apply Mask 32 and merge group
Paste tube of choice where desired
Apply Lokas 3D Shadow at default settings
Select Element 25 - resize by 50%
Image Free Rotate Right by 30% and paste on the top right below tube
Select Element 55 - resize by 25%
Paste and position on the top left
Select Element 116 - resize by 40%
Image Free Rotate Left by 15% and paste on the right side below tube
Select Element 104 - resize by 40%
Image Free Rotate Left by 15% and paste on the left side
Select Element 43 - resize by 30%
Paste and paste on the left side
Select Element 1 - resize by 25%
Image Free Rotate Left by 15% and paste on the left
Select Element 44 - resize by 30%
Image Free Rotate Right by 15% and paste on the bottom left
Select Element 34 - resize by 20%
Paste and position on the bottom left
Select Element 57 - resize by 20%
Paste and position on the bottom left
Select Element 150 - resize by 15%
Paste and position on the bottom left
Select Element 49 - resize by 40%
Paste and position on the bottom
Select Element 18 - resize by 15%
Paste and position on the right side
Select Element 62 - resize by 30%
Paste and position on the bottom
Select Element 58 - resize by 20%
Paste and position on the bottom
Select Element 32 - resize by 20%
Paste and position on the bottom
Select Element 145 - resize by 20%
Paste and position on the bottom right
Select Element 4 - resize by 30%
Image Free Rotate Right by 15% and paste on the bottom right
Select Element 13 - resize by 20%
Paste and position on the bottom right
Select Element 54 - resize by 20%
Paste and position on the bottom
Select Element 22 - resize by 20%
Paste and position on the bottom
Select Element 95 - resize by 20%
Image Free Rotate Left by 15% and paste above the present element
Select Element 24 - resize by 20%
Paste and position on the right side
Select Element 135 - resize by 20%
Paste and position on the bottom where desired
Select Element 37 - resize by 90%
Paste and position on the canvas where desired
Add any dropshadows you like
Sharpen any elements as needed
Crop and resize as desired
Add copyright info, license number and name
You're done! Thanks for trying my tutorial!

Labels:Radyga Designs | 0
comments
Monday, May 13, 2019
FAIRY SPARKLES
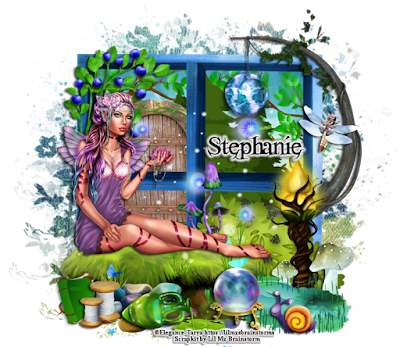
Supplies needed:
Scrapkit: I am using a stunning kit from Lil Mz Brainstorm called "Fairy Sparkles" which you can get by going here
Mask 731 from Rachel which you can find here
Plugins: Lokas 3D Shadow
----------------------------
This tutorial is written for those who have working knowledge of PSPX2 (any version will do).
This tutorial was written by me on May 13, 2019. Please do not copy or paste on any other forum, website or blog provide link back to tut only. Please do not claim as your own. This tutorial is copyrighted to me. Any resemblance to any other tutorial is purely coincidental.
Ok - let's start and remember to save often.
Open up a 750 x 650 blank canvas (we can resize it later)
Select Frame Element 96 -
Paste and position in the center of the canvas
Select your magic wand tool and select the center of each square frame (Add (Shift), RGB Value, Tolerance 25, Contiguous checked, Feather 0)
Selections, Modify, Expand by 5
Paste paper 5
Select invert, delete, select none
Move paper layer below frame element layer
Select Element 26 - resize by 75%
Paste and position in the center above paper layer
Select Element 45 - resize by 40%
Paste and position on the left side below frame layer
Select Element 17 - resize by 50%
Image Free Rotate Right by 15% and paste on top left
Select Element 18 - resize by 75%
Paste and position on the right side
Select Element 11 - resize by 65%
Paste and position on the bottom right
Select Element 81 - resize by 65%
Paste and position on the bottom left
Select Element 66 - resize by 55%
Paste and position on the bottom right
Select Element 65 - resize by 25%
Paste and position on the bottom center
Paste tube of choice where desired
Apply Lokas 3D Shadow at default settings
Select Element 59 - resize by 30%
Image mirror and paste on the bottom right
Select Element 38 - resize by 65%
Paste and position on the bottom right
Select Element 47 - resize by 15%
Paste and position on the bottom right
Select Element 12 - resize by 45%
Paste and position on the bottom left
Select Element 71 - resize by 15%
Image Free Rotate Left by 15% and paste on the bottom left
Select Element 41 - resize by 20%
Paste and position on the bottom left
Select Element 76 - resize by 40%
Paste and position on the bottom
Select Element 62 - resize by 20%
Paste and position on the bottom
Select Element 4 - resize by 20%
Paste and position on the right side
Select Element 20 - resize by 65%
Paste and position on the canvas where desired
Paste paper 7 on the canvas
Apply Mask 731 or mask of choice
Merge group and move to the bottom layer
Add any dropshadows you like
Sharpen any elements as needed
Crop and resize as desired
Add copyright info, license number and name
You're done! Thanks for trying my tutorial!

Labels:All Dolled Up Store | 0
comments
Saturday, May 11, 2019
DARK FANTASY

Supplies needed:
I am using the stunning artwork from Alehandra Vanhek for this tutorial which you can find here
Scrapkit: I am using a stunning kit from Moon Vixen Designs called "Dark Fantasy" which you can get by going HERE AND HERE
Mask 17 from Vivienne which you can find here
Plugins: Lokas 3D Shadow
----------------------------
This tutorial is written for those who have working knowledge of PSPX2 (any version will do).
This tutorial was written by me on May 11, 2019. Please do not copy or paste on any other forum, website or blog provide link back to tut only. Please do not claim as your own. This tutorial is copyrighted to me. Any resemblance to any other tutorial is purely coincidental.
Ok - let's start and remember to save often.
Open up a 750 x 650 blank canvas (we can resize it later)
Select Frame Element 166 - resize by 55%
Image Free Rotate Right by 15% and paste in the center of the canvas
Select your magic wand tool and select the center of the frame (Add (Shift), RGB Value, Tolerance 25, Contiguous checked, Feather 0)
Selections, Modify, Expand by 5
Paste paper 9
Select invert, delete, select none
Move paper layer below frame element
Select Element 38 - resize by 55%
Paste and position on the left side
Select Element 110 - resize by 65%
Paste and position on the top right side
Select Element 29 - resize by 55%
Paste and position on the bottom right
Select Element 126 - resize by 30%
Image mirror and paste on the top right
Image Free Rotate Right by 15%
Select Element 8 - resize by 40%
Paste and position on the bottom left
Select Element 20 - resize by 40%
Paste and position on the left side
Apply Eyecandy Gradient Glow on fat default setting (glow width 3)
Paste tube of choice where desired
Apply Lokas 3D Shadow at default settings
Select Element 5 - resize by 30%
Paste and position on the bottom right
Select Element 43 - resize by 25%
Paste and position on the bottom right
Select Element 154 - resize by 15%
Paste and position on the bottom right
Select Element 88 - resize by 20%
Paste and position on the bottom
Select Element 56 - resize by 40%
Paste and paste on the bottom
Select Element 94 - resize by 15%
Paste and position on the bottom
Select Element 99 - resize by 20%
Paste and position on the bottom
Select Element 37 - resize by 30%
Paste and position on the bottom
Select Element 114 - resize by 15%
Paste and position on the bottom
Select Element 96 - resize by 15%
Paste and position on the bottom
Select Element 35 - resize by 20%
Paste and position on the bottom
Select Element 101 - resize by 15%
Paste and position on the bottom
Select Element 51 - resize by 30%
Paste and position on the canvas where desired
Paste paper 20 on canvas
Apply Mask 17 or mask of choice
Merge group and move to the bottom layer
Add any dropshadows you like
Sharpen any elements as needed
Crop and resize as desired
Add copyright info, license number and name
You're done! Thanks for trying my tutorial!

Labels:Moon Vixen Designs | 0
comments
Friday, May 10, 2019
FAIRYLAND ALICE
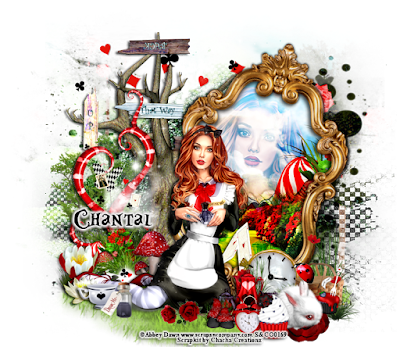
Supplies needed:
Scrapkit: I am using a stunning kit from Chacha Creationz called "Fairyland Alice" which you can get by going here
Set 25 Mask 3 from Rachel which you can find here
Plugins: Lokas 3D Shadow
----------------------------
This tutorial is written for those who have working knowledge of PSPX2 (any version will do).
This tutorial was written by me on May 10, 2019. Please do not copy or paste on any other forum, website or blog provide link back to tut only. Please do not claim as your own. This tutorial is copyrighted to me. Any resemblance to any other tutorial is purely coincidental.
Ok - let's start and remember to save often.
Open up a 750 x 650 blank canvas (we can resize it later)
Select Element 44 - resize by 90%
Paste and position on the top left of canvas
Select Frame Element 65 -
Image Free Rotate Right by 15% and paste on the right side
Select your magic wand tool and select the center of the frame (Add (Shift), RGB Value, Tolerance 25, Contiguous checked, Feather 0)
Selections, Modify, Expand by 5
Paste paper 9
Select invert, delete
Paste close-up tube on paper layer and delete
Select none
Change the closeup to Overlay
Apply dropshadow and merge down on paper layer
Move paper layer below frame element
Select Element 50 - resize by 85%
Paste and position on the top left below tree element
Select Element 35 -
Paste and position on the bottom
Select Element 78 - resize by 85%
Paste and position on the bottom left
Select Element 26 - resize by 40%
Paste and position on the bottom left
Select Element 58 - resize by 25%
Paste and position on the bottom left
Select Element 6 - resize by 20%
Paste and position on the bottom left
Select Element 71 - resize by 50%
Paste and position on the bottom right
Paste tube of choice where desired
Apply Lokas 3D Shadow at default settings
Select Element 7 - resize by 30%
Paste and position on the bottom right
Select Element 85 - resize by 20%
Paste and position on the bottom right
Select Element 54 - resize by 25%
Paste and position on the bottom right
Select Element 40 - resize by 25%
Paste and position on the bottom right
Select Element 84 - resize by 20%
Paste and paste on the bottom right
Select Element 28 - resize by 20%
Paste and position on the bottom
Select Element 73 - resize by 20%
Paste and position on the bottom
Select Element 55 - resize by 20%
Paste and position on the bottom
Select Element 2 - resize by 20%
Paste and position on the bottom left
Select Element 64 - resize by 15%
Paste and position on the bottom left
Select Element 12 - resize by 55%
Paste and position on the left side
Select Element 17 - resize by 25%
Paste and position on the bottom
Select Element 15 - resize by 20%
Paste and position on the bottom left
Select Element 43 -
Paste and position on the canvas where desired
Paste paper 6 on canvas
Apply Mask 3 or mask of choice
Merge group and move to the bottom layer
Add any dropshadows you like
Sharpen any elements as needed
Crop and resize as desired
Add copyright info, license number and name
You're done! Thanks for trying my tutorial!

Labels:Chacha Creationz | 0
comments
Wednesday, May 8, 2019
QUEEN CROWN
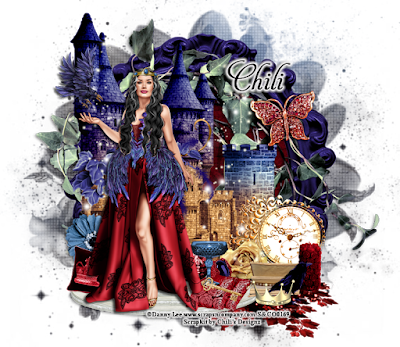
Supplies needed:
I am using the stunning artwork from Danny Lee for this tutorial which you can find here
Scrapkit: I am using a stunning kit from Chili's Designz called "Queen Crown" which you can get by going here
Set 68 Mask 1 from Rocked by Rachel which you can find here
Plugins: Lokas 3D Shadow
----------------------------
This tutorial is written for those who have working knowledge of PSPX2 (any version will do).
This tutorial was written by me on May 8, 2019. Please do not copy or paste on any other forum, website or blog provide link back to tut only. Please do not claim as your own. This tutorial is copyrighted to me. Any resemblance to any other tutorial is purely coincidental.
Ok - let's start and remember to save often.
Open up a 750 x 650 blank canvas (we can resize it later)
Select Frame Element 7 - resize by 75%
Paste and position in the center of the canvas
Select your magic wand tool and select the center of the frame (Add (Shift), RGB Value, Tolerance 25, Contiguous checked, Feather 0)
Selections, Modify, Expand by 5
Paste paper 10
Select invert, delete, select none
Move paper layer below frame element layer
Select Wreath Element - resize by 75%
Paste and position above frame layer
Select Castle 2 Element - resize by 65%
Paste and position on the top left side
Select Tower Element - resize by 40%
Paste and position on the right side below castle 2 element
Select Vine Element - resize by 30%
Paste and position on the left side
Select Clock Element - resize by 50%
Paste and position on the bottom right
Select Plat Element - resize by 50%
Paste and position on the bottom left
Select Flower 4 Element - resize by 25%
Paste and position on the bottom left
Paste tube of choice where desired
Apply Lokas 3D Shadow at default settings
Select Pillow Element - resize by 25%
Paste and position on the bottom left
Select Deco 2 Element - resize by 70%
Paste and position on the bottom right and move to the bottom layer
Select Candle Element - resize by 30%
Paste and position on the bottom right
Select Book Element - resize by 20%
Paste and position on the bottom right
Select Crow Element - resize by 30%
Paste and paste on the bottom right
Select Crown 4 Element - resize by 20%
Paste and position on the bottom right
Select Rose Element - resize by 25%
Paste and position on the bottom
Select Goblet Element - resize by 25%
Paste and position on the bottom
Select Ring 2 Element - resize by 25%
Paste and position on the bottom
Select Pillows Element - resize by 25%
Paste and position on the bottom
Select Key Element - resize by 20%
Paste and position on the bottom
Select Sparkles 2 Element - resize by 55%
Paste and position on the canvas where desired
Paste paper 2 on canvas
Apply Mask 1 or mask of choice
Merge group and move to the bottom layer
Add any dropshadows you like
Sharpen any elements as needed
Crop and resize as desired
Add copyright info, license number and name
You're done! Thanks for trying my tutorial!

Labels:Chili Designz | 0
comments
Tuesday, May 7, 2019
RADYGA DESIGNS TAG SHOWOFF
These CT Tags were made using the amazing artwork by Radyga Designs. You can purchase the tube "Gill" HERE, HERE, HERE, HERE OR HERE
These tags were made by me and my own creativity. Please do not rip apart, destroy, alter them or claim them as your own. Thanks.

Labels:Radyga Designs | 0
comments
Monday, May 6, 2019
HAVING FUN
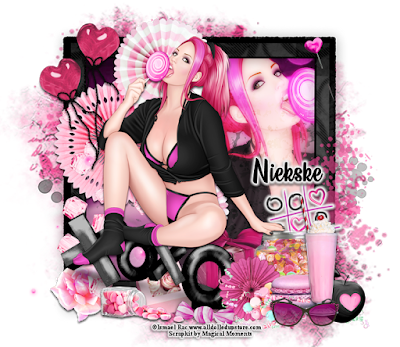
Supplies needed:
Scrapkit: I am using a stunning kit from Magical Moments called "Have a Little Fun" which you can get by going here
Mask 35 from Vivienne which you can find here
Plugins: Lokas 3D Shadow, Eyecandy - Gradient Glow
----------------------------
This tutorial is written for those who have working knowledge of PSPX2 (any version will do).
This tutorial was written by me on May 6, 2019. Please do not copy or paste on any other forum, website or blog provide link back to tut only. Please do not claim as your own. This tutorial is copyrighted to me. Any resemblance to any other tutorial is purely coincidental.
Ok - let's start and remember to save often.
Open up a 750 x 650 blank canvas (we can resize it later)
Select Frame Element 2- resize by 70%
Paste and position in the center of the canvas
Select your magic wand tool and select the center of the frame (Add (Shift), RGB Value, Tolerance 25, Contiguous checked, Feather 0)
Selections, Modify, Expand by 5
Paste paper 5
Select invert, delete
Paste close-up tube on paper layer and delete
Select none
Apply Xero Radiance or filter of choice
Apply dropshadow and merge down on paper layer
Move paper layer below frame element
Select Element 54 - resize by 85%
Paste and position in the center above paper layer
Select Element 82 - resize by 55%
Image mirror and paste on the top left
Select Element 12 - resize by 40%
Paste and position on the bottom left
Select Element 3 - resize by 20%
Paste and position on the bottom left
Select Element 24 - resize by 65%
Image Free Rotate Right by 15% and paste on the bottom left
Select Element 77 - resize by 40%
Paste and position on the top left
Paste tube of choice where desired
Apply Lokas 3D Shadow at default settings
Select Element 29 - resize by 25%
Paste and position on the bottom right
Apply Eyecand Gradient Glow on fat default settings (Glow width 3)
Select Element 70 - resize by 30%
Paste and position on the bottom right
Select Element 79 - resize by 20%
Image mirror and paste on the bottom right
Select Element 14 - resize by 15%
Paste and position on the bottom right
Select Element 31 - resize by 20%
Paste and paste on the bottom right
Select Element 13 - resize by 20%
Paste and position on the bottom
Select Element 4 - resize by 15%
Paste and position on the bottom
Select Element 72 - resize by 25%
Paste and position on the bottom
Select Element 5 - resize by 25%
Paste and position on the bottom
Select Element 53 - resize by 25%
Paste and position on the bottom
Select Element 67 - resize by 20%
Paste and position on the bottom
Select Element 71 - resize by 40%
Paste and position on the bottom
Select Element 49 - resize by 20%
Paste and position on the top right
Select Element 35 -
Paste and position on center of the canvas and move to the bottom layer
Select Element 51 - resize by 30%
Paste and position on the right side
Paste paper 3 on canvas
Apply Mask 35 or mask of choice
Merge group and move to the bottom layer
Add any dropshadows you like
Sharpen any elements as needed
Crop and resize as desired
Add copyright info, license number and name
You're done! Thanks for trying my tutorial!

Labels:All Dolled Up Store | 0
comments
Friday, May 3, 2019
ALOHA DREAMS

Supplies needed:
Scrapkit: I am using a kit from Happy Pumpkin Studios called "HPS Kit 27" which you can get by going HERE, HERE, OR HERE
Circle Template from Charmed Cowgirl which can be found here
Mask 41 from Vivienne which you can find here
Plugins used: Lokas 3D Shadow
----------------------------
This tutorial is written for those who have working knowledge of PSPX2 (any version will do).
This tutorial was written by me on May 3, 2019. Please do not copy or paste on any other forum, website or blog provide link back to tut only. Please do not claim as your own. This tutorial is copyrighted to me. Any resemblance to any other tutorial is purely coincidental.
Ok - let's start and remember to save often.
Open the template and using your shortcut keys on your keyboard (SHIFT+D) duplicate the template as a new image. Close the original and delete the copywrite layer.
Select the Black Rectangle layer
Select all, float, and defloat
Add new raster layer and flood-fill with color of choice
Select none
Hide/delete the orginal rectangle layer
Select Pink Rectangle layer
Select all, float, defloat
Paste paper 20
Select invert, delete, select none
Hide/delete original rectangle layer
Select Black Circle layer
Select all, float, defloat
Add new raster layer and flood-fill with color or gradient of choice
Select none
Hide/delete original Circle layer
Select Pink Circle layer
Select all, float, defloat
Paste paper 19
Select invert, delete, select none
Hide/delete original circle layer
Select Medium Pink Circle 1 layer
Select all, float, defloat
Paste paper 24
Select invert, delete, select none
Delete/Hide original circle layer
Select Med. Pink Circle 2 layer and repeat above steps
Select Medium Circle outline 1 layer
Select all, float, defloat
Add new raster layer and flood-fill with color of choice
Select none
Delete/Hide original Line layer
Select Medium Circle outline 2 layer and repeat above steps
Select Darker Pink Circle1 layer
Select all, float, defloat
Add new raster layer and flood-fill with color of choice
Select none
Delete/Hide original circle layer
Select Darker Pink Circle 2 layer and repeat above steps
Select Outline 1 layer
Select all, Float, defloat
Add new raster layer and flood-fill with color of choice
Select none
Delete/Hide orginal outline layer
Select Ouline 2 layer and repeat above steps
Select Element 26 - resize by 65%
Paste and position in the center of the canvas
Select Element 116 - resize by 45%
Paste and position on the bottom between circle layers
Select Element 101 - resize by 40%
Paste and position on the left side
Select Element 8 - resize by 75%
Paste and position on the top left side
Select Element 105 - resize by 25%
Paste and position on the bottom right
Select Element 61 - resize by 40%
Paste and position on the bottom right
Select Element 9 - resize by 30%
Paste and position on the bottom right
Copy and paste tube of choice and position where desired
Apply Lokas 3D Shadow
Select Element 10 - resize by 25%
Paste and position on the bottom left side
Select Element 103 - resize by 25%
Paste and position on the bottom left
Select Element 48 - resize by 30%
Paste and position on bottom left
Select Element 2 - resize by 15%
Paste and position on the bottom left
Select Element 52 - resize by 80%
Paste and position on the bottom below tube layer
Select Element 118 - resize by 30%
Paste and position on the top right
Select Element 17 - resize by 40%
Paste and position on the top right
Select Element 32 - resize by 20%
Paste and position on the bottom right
Select Element 34 - resize by 40%
Paste and postion on the bottom right
Select Element 88 - resize by 20%
Paste and position on the bottom right
Select Element 5 - resize by 20%
Paste and position on the bottom right
Select Element 67 - resize by 20%
Paste and position on the bottom right
Select Element 1 - resize by 20%
Paste and position on the bottom
Select Element 23 - resize by 30%
Paste and position on the bottom
Select Element 148 - resize by 20%
Paste and position on the bottom
Select Element 45 - resize by 30%
Paste and position on the bottom
Select Element 39 - resize by 25%
Paste and position on the bottom
Select Element 22 - resize by 20%
Paste and position on the bottom
Select Element 113 - resize by 50%
Paste and position on the top
Paste paper 27 on canvas
Move layer to the bottom of the template
Apply Mask 41 or mask of choice
Merge group and move to the bottom
Add any additional elements you like.
Add any dropshadows you like
Crop and resize as desired
Add copyright info, license number and name
You're done! Thanks for trying my tutorial!

Labels:Happy Pumpkin Studios | 0
comments
Thursday, May 2, 2019
STRAWBERRY FIELDS
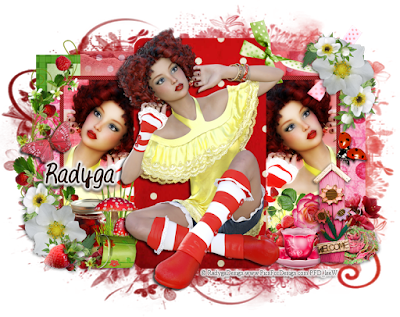
Supplies needed:
I am using the amazing art from Radyga Design for this tutorial, which you can find HERE, HERE, HERE, HERE OR HERE
Scrapkit: I am using a kit from Tiny Turtle called "Strawberry Fields" which you can get by going here:
Template 896 from Millie which can be found here
Mask 3 from Dee which you can find here
Plugins used: Lokas 3D Shadow
----------------------------
This tutorial is written for those who have working knowledge of PSPX2 (any version will do).
This tutorial was written by me on May 2, 2019. Please do not copy or paste on any other forum, website or blog provide link back to tut only. Please do not claim as your own. This tutorial is copyrighted to me. Any resemblance to any other tutorial is purely coincidental.
Ok - let's start and remember to save often.
Open the template and using your shortcut keys on your keyboard (SHIFT+D) duplicate the template as a new image. Close the original and delete the copywrite layer.
Select the Rectangle 1 layer
Select all, float, and defloat
Paste paper 2
Select invert delete, select none
Hide/delete the orginal rectangle layer
Select Rectangle 2 layer
Select all, float, defloat
Paste paper 10
Select invert, delete, select none
Hide/delete original rectangle layer
Select Square 3 layer
Select all, float, defloat
Paste paper 26
Select invert, delete, select none
Hide/delete original square layer
Select Rectangle 4 layer
Select all, float, defloat
Paste paper 7
Select invert, delete, select none
Hide/delete original rectangle layer
Select Rectangle 5 layer
Select all, float, defloat
Paste paper 8
Select invert, delete
Paste close-up tube on paper and delete
Select none
Duplicate close-up and adjust, blue, guassian blur at 4
Change copy to overlay
Delete/Hide original Rectangle layer
Select Rectangle 6 layer and repeat above steps
Select Rectangle Line 7 layer
Select all, float, defloat
Add new raster layer and flood-fill with color of choice
Select none
Delete/Hide original Line layer
Select Rectangle Line 8 layer and repeat above steps
Select Rectangle 9 layer
Select all, float, defloat
Paste paper 23
Select invert, delete, select none
Hide original rectangle layer
Copy and paste tube of choice and position where desired
Apply Lokas 3D Shadow
Select Element 58 - resize by 65%
Image mirror and paste on the left side
Select Element 144 - resize by 30%
Paste and position on the bottom left
Image duplicate, mirror and flip
Reposition on the top right
Select Element 101 - resize by 15%
Paste and position on bottom right
Select Element 19 - resize by 15%
Paste and position on the bottom right
Select Element 68 - resize by 30%
Paste and position on the bottom right
Select Element 119 - resize by 12%
Paste and position on the bottom
Select Element 79 - resize by 15%
Paste and position on the bottom
Select 20 Element - resize by 20%
Paste and position on the bottom
Select Element 102 - resize by 15%
Paste and position on the left side
Select Element 128 - resize by 15%
Paste and postion on the bottom left
Select Element 124 - resize by 30%
Paste and position on the bottom
Select Element 56 - resize by 30%
Paste and position on the bottom
Select Element 96 - resize by 12%
Paste and position on the bottom
Select Element 148 - resize by 10%
Paste and position on the right side
Paste paper 27 on canvas
Move layer to the bottom of the template
Apply Mask 41 or mask of choice
Merge group and move to the bottom
Add any additional elements you like.
Add any dropshadows you like
Crop and resize as desired
Add copyright info, license number and name
You're done! Thanks for trying my tutorial!


Labels:Radyga Designs | 0
comments
Subscribe to:
Comments
(Atom)


