Labels
- Alikas Scraps
- All Dolled Up Store
- Amy Marie
- Annaica
- Arthur Crowe
- Babycakes Scraps
- Barbara Jensen
- Bibi's Collections
- Black Widow Creationz
- Blu Moon
- Bonnies Creations
- Bookwork Dezines
- Broken Sky Dezine
- Carita Creationz
- Carpe Diem Designs
- CDO
- Celinart Pinup
- Celine
- Chacha Creationz
- Charmed Designs
- Cherry Blossom Designs
- Chili Designz
- Cluster Frame
- Creative Misfits
- Creative Scraps by Crys
- Curious Creative Dreams
- Danny Lee
- Derzi
- Designs by Ali
- Designs by Joan
- Designs by Ketura
- Designs By Norella
- Designs by Vi
- Diana Gali
- Diry Art Designs
- Disturbed Scraps
- Dreaming With Bella
- Eclipse Creations
- Elegancefly
- Extras
- Fabulous Designz
- Forum Set
- Foxy's Designz
- Freek's Creation
- FTU
- FwTags
- Goldwasser
- Gothic Inspirations
- Gothic Raven Designs
- Graphfreaks
- Hania's Designs
- Happy Pumpkin Studios
- Horseplay's Pasture Designs
- indie-Zine
- Irish Princess Designs
- Ishika Chowdhury
- Kaci McVay
- Kajenna
- katharine
- Katherine
- Khloe Zoey
- Killer Kitty
- Kissing Kate
- KiwiFirestorm
- Kiya Designs
- Kizzed by Kelz
- KZ Designz
- Lady Mishka
- Lil Mz Brainstorm
- Maiden of Darkness
- Mariel Designs
- MellieBeans
- Michelle's Myths
- Midnight Shadow
- Misticheskya
- MistyLynn's Creations
- MMeliCrea Designz
- Moon Vixen Designs
- NaSionainne
- Ninaste
- Niqui Designs
- Pandora
- Picsfordesign
- Pink Paradox Productions
- Radyga Designs
- Redefined Designs
- Rissa's Designs
- Schnegge
- ScottishButterfly Creations
- Scrappin Krazy Designs
- Scrappin With Lil Ol Me
- Scraps and the City
- Scraps Dimensions
- Scraps From The Heart
- Scraps N Company
- Scraps with Attitude
- Shining Star Art
- Skyscraps
- Sleek N Sassy Designs
- Sophisticat Simone
- Souldesigner
- Soxsational Scraps
- Spazz
- Starlite and Soul
- Stella Felice
- Tammy Welt
- Tasha's Playground
- The PSP Project
- Thrifty Scraps by Gina
- Tiny Turtle Designs
- Upyourart
- Verymany
- Wendy Gerber
- Whisper In the Wind
- Wick3d Creationz
- Wicked Diabla
- Yude's Kreationz
Blog Archive
Tuesday, July 30, 2019
ANCHOR SAILOR
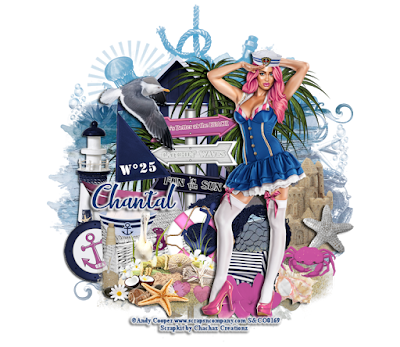
Supplies needed:
I am using the stunning artwork from Andy Cooper for this tutorial which you can find here
Scrapkit: I am using a beautiful kit from Chachaz Creationz called "Anchor Sailor" which you can get by going here
Summer Mask 2 from Fecnikek which you can find here
Plugins: Lokas 3D Shadow
----------------------------
This tutorial is written for those who have working knowledge of PSPX2 (any version will do).
This tutorial was written by me on July 30, 2019. Please do not copy or paste on any other forum, website or blog provide link back to tut only. Please do not claim as your own. This tutorial is copyrighted to me. Any resemblance to any other tutorial is purely coincidental.
Ok - let's start and remember to save often.
Open up a 750 x 650 blank canvas (we can resize it later)
Add new raster layer and flood-fill with color of choice
Apply Mask 2 and merge group
Paste paper 9 on the canvas
Reapply Mask 2 and merge group
Select Element 43 - resize by 65%
Paste and position in on the top left
Select Element 3 - resize by 75%
Paste and position on the top right
Select Element 67 - resize by 75%
Paste and position on the bottom
Select Element 40 - resize by 40%
Image mirror and paste on the bottom right
Select Element 63 - resize by 40%
Paste and position on the bottom
Select Element 64 - resize by 40%
Paste and positon on the bottom center
Paste tube of choice where desired
Apply Lokas 3D Shadow at default settings
Select Element 46 - resize by 40%
Paste and position on the left side
Select Element 57 - resize by 30%
Paste and position on the top left
Select Element 38 - resize by 40%
Paste and position on the left side
Select Element 44 - resize by 30%
Paste and position on the bottom left
Select Element 19 - resize by 40%
Paste and position on the bottom left
Select Element 53 - resize by 25%
Paste and paste on the left bottom left
Select Element 34 - resize by 30%
Paste and position on the bottom
Select Element 16 - resize by 30%
Paste and position on the bottom
Select Element 24 - resize by 30%
Paste and position on the bottom left
Select Element 35 - resize by 40%
Paste and position on the bottom left
Select Element 65 - resize by 40%
Paste and position on the bottom left
Select Element 23 - resize by 30%
Paste and position on the bottom right
Select Element 4 - resize by 25%
Paste and position on the bottom right
Select Element 26 - resize by 20%
Paste and position on the bottom right
Select Element 30 - resize by 40%
Paste and position on the bottom
Select Element 50 - resize by 30%
Paste and position on the bottom
Add any dropshadows you like
Sharpen any elements as needed
Crop and resize as desired
Add copyright info, license number and name
You're done! Thanks for trying my tutorial!

Labels:Chacha Creationz | 0
comments
Monday, July 29, 2019
SKULL FAIRY
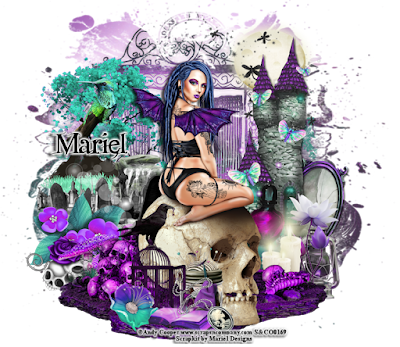
Supplies needed:
I am using the beautiful artwork from Andy Cooper for this tutorial which you can find here
Scrapkit: I am using a stunning kit from Muriel Designs called "Skull Fairy" which you can get by going here
Mask 58 from Vivienne which you can find here
Plugins: Lokas 3D Shadow
----------------------------
This tutorial is written for those who have working knowledge of PSPX2 (any version will do).
This tutorial was written by me on July 29, 2019. Please do not copy or paste on any other forum, website or blog provide link back to tut only. Please do not claim as your own. This tutorial is copyrighted to me. Any resemblance to any other tutorial is purely coincidental.
Ok - let's start and remember to save often.
Open up a 750 x 650 blank canvas (we can resize it later)
Select Paper 4 and paste on the canvas
Apply Mask 58 and merge group
Select Element 71 - resize by 55%
Paste and position on the top left
Select Element 24 - resize by 30%
Paste and position on the top right
Select Element 21 - resize by 65%
Paste and position on the top right
Select Element 79 - resize by 40%
Image mirror and paste on the left side
Select Element 54 - resize by 50%
Paste and position on the left side
Select Element 96 - resize by 85%
Paste and position on the bottom
Paste tube of choice where desired
Apply Lokas 3D Shadow at default settings
Select Element 27 - resize by 40%
Paste and position on the left side
Select Element 42 - resize by 30%
Paste and position on the left side
Select Element 76 - resize by 25%
Paste and position on the bottom left
Select Element 50 - resize by 30%
Image mirror and paste on the bottom left
Select Element 44 - resize by 30%
Image Free Rotate Right by 15% and paste on the right side
Select Element 40 - resize by 50%
Paste and paste on the top right
Select Element 91 - resize by 25%
Paste and position on the bottom right
Select Element 92 - resize by 30%
Paste and position on the bottom right
Select Element 52 - resize by 20%
Paste and position on the bottom right
Select Element 11 - resize by 30%
Paste and position on the bottom right
Select Element 98 - resize by 40%
Paste and position on the bottom
Select Element 32 - resize by 20%
Paste and position on the bottom
Select Element 48 - resize by 25%
Paste and position on the bottom
Select Element 20 - resize by 25%
Paste and position on the bottom
Select Element 15 - resize by 20%
Paste and position on the bottom
Select Element 53 - resize by 25%
Paste and position on the top left
Add any dropshadows you like
Sharpen any elements as needed
Crop and resize as desired
Add copyright info, license number and name
You're done! Thanks for trying my tutorial!

Labels:Mariel Designs | 0
comments
Friday, July 26, 2019
OCEANS EDGE
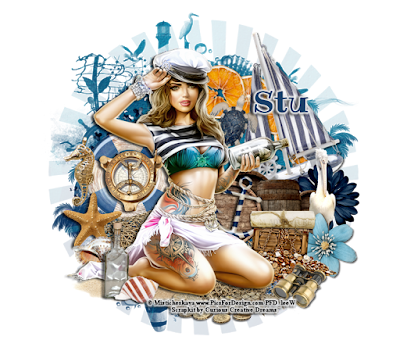
Supplies needed:
I am using the stunning artwork from Misticheskaya for this tutorial which you can find here
Scrapkit: I am using a beautiful kit from Curious Creative Dreams called "Oceans Edge" which you can get by going Here, Here and Here
Summer Mask 1 from Fecnikek which you can find here
Plugins: Lokas 3D Shadow
----------------------------
This tutorial is written for those who have working knowledge of PSPX2 (any version will do).
This tutorial was written by me on July 26, 2019. Please do not copy or paste on any other forum, website or blog provide link back to tut only. Please do not claim as your own. This tutorial is copyrighted to me. Any resemblance to any other tutorial is purely coincidental.
Ok - let's start and remember to save often.
Open up a 750 x 650 blank canvas (we can resize it later)
Select Paper 60 and paste on the canvas
Apply Mask 1 and merge group
Select Element 15 - resize by 85%
Paste and position on the top right
Select Element 3 -
Image Free Rotate Left by 15% and paste on the top right
Select Element 10 - resize by 55%
Paste and position on the left side
Select Element 34 - resize by 30%
Paste and position on the left side
Select Element 43 - resize by 75%
Paste and position on the bottom left
Select Element 42 -
Paste and position on the bottom left
Select Element 45 - resize by 75%
Paste and position on the right side
Select Element 26 - resize by 55%
Paste and position on the bottom
Paste tube of choice where desired
Apply Lokas 3D Shadow at default settings
Select Element 30 - resize by 30%
Paste and position on the left side
Select Element 20 - resize by 55%
Paste and position on the left side
Select Element 49 - resize by 50%
Paste and position on the bottom left
Select Element 14 - resize by 65%
Paste and position on the right side
Select Element 31 - resize by 30%
Paste and position on the right side
Select Element 16 - resize by 40%
Paste and paste on the bottom right
Select Element 46 - resize by 55%
Paste and position on the bottom right
Select Element 2 - resize by 40%
Image Free Rotate Right by 15% and paste on the right side
Select Element 35 - resize by 55%
Paste and position on the right side
Select Element 32 - resize by 25%
Paste and position on the bottom right
Select Element 28 - resize by 30%
Image Free Rotate Right by 15% and paste on the top right
Select Element 11 - resize by 25%
Paste and position on the bottom
Add any dropshadows you like
Sharpen any elements as needed
Crop and resize as desired
Add copyright info, license number and name
You're done! Thanks for trying my tutorial!

Labels:Curious Creative Dreams | 0
comments
Wednesday, July 24, 2019
SUMMER VIBE
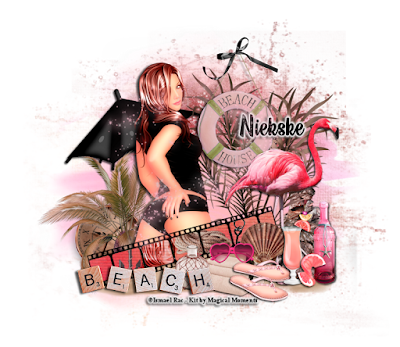
Supplies needed:
Scrapkit: I am using a beautiful kit from Magical Moments called "Naughty Summer Vibes" which you can get by going here
Mask 1 from Set 74 from Rachel which you can find here
Plugins: Lokas 3D Shadow
----------------------------
This tutorial is written for those who have working knowledge of PSPX2 (any version will do).
This tutorial was written by me on July 24, 2019. Please do not copy or paste on any other forum, website or blog provide link back to tut only. Please do not claim as your own. This tutorial is copyrighted to me. Any resemblance to any other tutorial is purely coincidental.
Ok - let's start and remember to save often.
Open up a 750 x 650 blank canvas (we can resize it later)
Select Paper 6 and paste on the canvas
Apply Mask 1 and merge group
Select Element 4 -
Paste and position in the center of the canvas
Select Element 67 - resize by 85%
Paste and position on the top where desired
Select Element 30 - resize by 50%
Paste and position on the top right
Select Element 22 - resize by 75%
Paste and position on the bottom
Select Element 62 - resize by 25%
Paste and position on the bottom left
Select Element 13 - resize by 55%
Paste and position on the bottom left
Select Element 5 - resize by 55%
Paste and position on the left side
Paste tube of choice where desired
Apply Lokas 3D Shadow at default settings
Select Frame Element 65 - resize by 55%
Image Free Rotate Left by 15% and paste on the bottom left
Select your magic wand tool and select the center squares of the frame (Add (Shift), RGB Value, Tolerance 25, Contiguous checked, Feather 0)
Selections, Modify, Expand by 1
Paste paper 8
Select invert, delete
Paste close-up tubes on paper layer and delete
Select none
Move paper layer and closeups below frame element
Merge close-ups down on paper layer
Effect, Texture Effects, Blinds (Width 2, Opactity 25, Horizontal and Light from left/top checked)
Select Element 29 - resize by 40%
Paste and position on the top right
Select Element 2 - resize by 25%
Paste and position on the top right
Select Element 53 - resize by 30%
Paste and position on the bottom right
Select Element 25 - resize by 40%
Paste and position on the right side
Select Element 31 - resize by 20%
Paste and position on the bottom right
Select Element 8 - resize by 15%
Paste and position on the bottom right
Select Element 6 - resize by 15%
Paste and position on the bottom right
Select Element 44 - resize by 12%
Paste and position on the bottom
Select Element 26 - resize by 45%
Paste and position on the bottom left
Select Element 21 - resize by 15%
Paste and paste on the bottom
Select Element 54 - resize by 25%
Paste and position on the bottom
Select Element 55 - resize by 30%
Paste and position on the bottom
Select Element 1 - resize by 20%
Paste and position on the bottom
Select Element 3 - resize by 80%
Paste and position on the left side
Add any dropshadows you like
Sharpen any elements as needed
Crop and resize as desired
Add copyright info, license number and name
You're done! Thanks for trying my tutorial!

Labels:All Dolled Up Store | 0
comments
Sunday, July 21, 2019
SKIRT TRANSPARENT
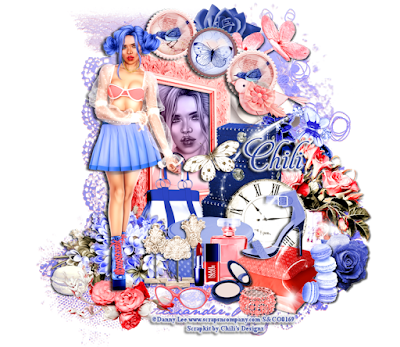
Supplies needed:
I am using the stunning artwork from Danny Lee for this tutorial which you can find HERE
Scrapkit: I am using a beautiful kit from Chili's Desinz called "Skirt Transparent" which you can get by going HERE
Mask 1 from Imagine by Fran which you can find here
Plugins: Lokas 3D Shadow
----------------------------
This tutorial is written for those who have working knowledge of PSPX2 (any version will do).
This tutorial was written by me on July 21, 2019. Please do not copy or paste on any other forum, website or blog provide link back to tut only. Please do not claim as your own. This tutorial is copyrighted to me. Any resemblance to any other tutorial is purely coincidental.
Ok - let's start and remember to save often.
Open up a 750 x 650 blank canvas (we can resize it later)
Select Paper 2 and paste on the canvas
Apply Mask 1 and merge group
Select Paper 10 and paste on the canvas
Reapply Mask 1, merge group and change to Luminence (Legacy)
Select Frame Element 5 - resize by 50%
Paste and position on the left side
Select your magic wand tool and select the center of the frame (Add (Shift), RGB Value, Tolerance 25, Contiguous checked, Feather 0)
Selections, Modify, Expand by 5
Add new raster layer and flood-fill with gradient of choice
Paste close-up tube on gradient layer and delete
Select none
Change close-up to Luminence (Legacy)
Move gradient layer and closeups below frame element
Select Deco 3 Element - resize by 40%
Paste and position on the top right
Select Flower 3 Element - resize by 40%
Paste and position on the top right
Select Flower Element - resize by 40%
Image mirror and paste on the top right
Select Paper Element - resize by 30%
Paste and positon below Deco 3 Element on the right
Select Jewelry Element - resize by 40%
Paste and position on the right side
Select Flowers Element - resize by 40%
Paste and position on the bottom left
Select Flowers2 Element - resize by 30%
Paste and position on the bottom left
Paste tube of choice where desired
Apply Lokas 3D Shadow at default settings
Select Boxes Element - resize by 50%
Paste and position on the right side
Select Vase Element - resize by 40%
Paste and position on the bottom right
Select Flower 4 Element - resize by 30%
Paste and position on the bottom right
Select Clock Element - resize by 50%
Paste and position on the bottom right
Select Bag Element - resize by 30%
Paste and position on the bottom
Select Box Element - resize by 40%
Paste and paste on the bottom
Select Deco 5 Element - resize by 30%
Paste and position on the bottom
Select Perfume Element - resize by 40%
Paste and position on the bottom
Select Pillows Element - resize by 40%
Paste and position on the bottom right
Select Macarons Element - resize by 30%
Paste and position on the bottom right
Select Shoe Element - resize by 40%
Paste and position on the pillows element
Select Bracelet Element - resize by 30%
Paste and position on the bottom
Select Powder Element - resize by 30%
Paste and position on the bottom
Select Polish 2 Element - resize by 30%
Paste and position on the bottom
Select Lipstick Element - resize by 30%
Paste and position on the bottom
Select Glasses Element - resize by 30%
Paste and position on the bottom
Select Macron 2 Element - resize by 30%
Paste and position on the bottom left
Select Butterfly Element - resize by 40%
Paste and position in the center where desired
Select Sparkles Element - resize by 75%
Paste and position on the bottom right
Add any dropshadows you like
Sharpen any elements as needed
Crop and resize as desired
Add copyright info, license number and name
You're done! Thanks for trying my tutorial!

Labels:Chili Designz | 0
comments
Thursday, July 18, 2019
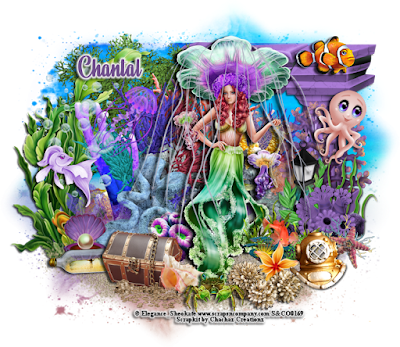
JELLYFISH
Supplies needed:
Scrapkit: I am using a beautiful kit from Chachaz Creationz called "Medusa" which you can get by going here
Mask 120 from Sophisticated Simone which you can find here
Plugins: Lokas 3D Shadow
----------------------------
This tutorial is written for those who have working knowledge of PSPX2 (any version will do).
This tutorial was written by me on July 18, 2019. Please do not copy or paste on any other forum, website or blog provide link back to tut only. Please do not claim as your own. This tutorial is copyrighted to me. Any resemblance to any other tutorial is purely coincidental.
Ok - let's start and remember to save often.
Open up a 750 x 650 blank canvas (we can resize it later)
Select Paper 5 and paste on the canvas
Apply Mask 120 and merge group
Select Element 71 - resize by 75%
Paste and position on the top right
Select Element 84 - resize by 65%
Paste and position on the top left
Select Element 65 - resize by 75%
Paste and position on the left side
Select Element 45 - resize by 75%
Paste and position in the center of the mask
Select Element 53 - resize by 40%
Paste and position on the right side
Select Element 47 - resize by 85%
Paste and position on the bottom
Select Element 82 - resize by 40%
Paste and position on the bottom right
Paste tube of choice where desired
Apply Lokas 3D Shadow at default settings
Select Element 38 - resize by 30%
Paste and position on the right side
Select Element 51 - resize by 25%
Paste and position on the top right
Select Element 70 - resize by 25%
Paste and position on the left side
Select Element 58 - resize by 20%
Paste and position on the bottom left
Select Element 74 - resize by 30%
Paste and position on the bottom left
Select Element 48 - resize by 30%
Paste and paste on the bottom left
Select Element 2 - resize by 25%
Paste and position on the bottom
Select Element 68 - resize by 30%
Paste and position on the bottom right
Select Element 69 - resize by 25%
Paste and position on the bottom right
Select Element 38 - resize by 30%
Paste and position on the bottom right
Select Element 24 - resize by 25%
Paste and position on the bottom
Select Element 42 - resize by 30%
Paste and position on the bottom
Select Element 30 - resize by 20%
Paste and position on the bottom
Select Element 54 - resize by 25%
Paste and position on the bottom
Select Element 57 - resize by 30%
Paste and position on the top left
Select Element 63 - resize by 55%
Paste and position on the top left
Add any dropshadows you like
Sharpen any elements as needed
Crop and resize as desired
Add copyright info, license number and name
You're done! Thanks for trying my tutorial!

Labels:Chacha Creationz | 0
comments
Sunday, July 14, 2019
LEMONADE BEACH
Supplies needed:
Scrapkit: I am using a beautiful kit from Moonshine Dezinez called "Lemonade" which you can get by going here
Mask 42 from Vivienne which you can find here
Plugins: Lokas 3D Shadow
----------------------------
This tutorial is written for those who have working knowledge of PSPX2 (any version will do).
This tutorial was written by me on July 14, 2019. Please do not copy or paste on any other forum, website or blog provide link back to tut only. Please do not claim as your own. This tutorial is copyrighted to me. Any resemblance to any other tutorial is purely coincidental.
Ok - let's start and remember to save often.
Open up a 750 x 650 blank canvas (we can resize it later)
Select Paper 9 and paste on the canvas
Apply Mask 42 and merge group
Select Element 42 - resize by 75%
Paste and position on the top right
Select Element 4 - resize by 45%
Paste and position on the top left
Select Element 33 - resize by 75%
Paste and position on the left side
Select Element 26 - resize by 50%
Paste and position on the bottom
Paste Element 59 or tube of choice where desired
Apply Lokas 3D Shadow at default settings
Select Element 17 - resize by 30%
Paste and position on the top left
Select Element 38 - resize by 15%
Image Free Rotate Right by 15% and paste on the top right
Select Element 12 - resize by 40%
Paste and position on the bottom right
Select Element 23 - resize by 40%
Paste and position on the right side below tube layer
Select Element 21 - resize by 20%
Paste and position on the bottom right
Select Element 47 - resize by 30%
Paste and paste on the bottom right
Select Element 56 - resize by 15%
Paste and position on the bottom right
Select Element 31 - resize by 15%
Paste and position on the bottom right
Select Element 60 - resize by 20%
Paste and position on the bottom right
Select Element 10 - resize by 40%
Image Free Rotate Left by 15% and paste on the left side
Select Element 49 - resize by 20%
Paste and position on the bottom left
Select Element 35 - resize by 25%
Paste and position on the bottom left
Select Element 7 - resize by 15%
Paste and position on the bottom left
Select Element 25 - resize by 15%
Paste and position on the bottom left
Select Element 30 - resize by 20%
Paste and position on the bottom left
Select Element 36 - resize by 65%
Add any dropshadows you like
Sharpen any elements as needed
Crop and resize as desired
Add copyright info, license number and name
You're done! Thanks for trying my tutorial!

Labels:All Dolled Up Store | 0
comments
DARK BEGINNINGS
Supplies needed:
I am using the stunning artwork from Natalia NZ for this tutorial which you can find here
Scrapkit: I am using a beautiful kit from Curious Creative Dreams called "Dark Beginnings" which you can get by going here
Mask 51 from Vivienne which you can find here
Plugins: Lokas 3D Shadow, Eyecandy - Gradient Glow
----------------------------
This tutorial is written for those who have working knowledge of PSPX2 (any version will do).
This tutorial was written by me on July 14, 2019. Please do not copy or paste on any other forum, website or blog provide link back to tut only. Please do not claim as your own. This tutorial is copyrighted to me. Any resemblance to any other tutorial is purely coincidental.
Ok - let's start and remember to save often.
Open up a 750 x 650 blank canvas (we can resize it later)
Select Paper 10 and paste on the canvas
Apply Mask 51 and merge group
Select Mask layer
Select all, float, defloat
Paste close-up tube on mask layer where desired and delete
Select none
Change close-up to Hard Light
Select Element 17 - resize by 55%
Paste and position on the top left
Select Element 33 - resize by 40%
Paste and position on the right side
Select Element 6 - resize by 40%
Paste and position on the right side
Select Element 39 - resize by 40%
Image Free Rotate Left by 15% and paste on the left side
Paste tube of choice where desired
Apply Lokas 3D Shadow at default settings
Select Element 18 - resize by 40%
Paste and position on the bottom left side
Select Element 5 - resize by 30%
Paste and position on the bottom left side
Select Element 24 - resize by 40%
Paste and position on the bottom left
Select Element 25 - resize by 50%
Paste and position on the bottom left
Select Element 40 - resize by 40%
Paste and position on the right side
Select Element 32 - resize by 55%
Paste and paste on the right side
Select Element 34 - resize by 25%
Paste and position on the right side
Select Element 4 - resize by 40%
Paste and position on the bottom right
Select Element 9 - resize by 25%
Paste and position on the bottom right
Select Element 23 - resize by 55%
Paste and position on the bottom right
Select Element 30 - resize by 55%
Paste and position on the bottom
Select Element 27 - resize by 30%
Paste and position on the bottom
Select Element 26 - resize by 30%
Paste and position on the bottom
Select Element 11 - resize by 30%
Paste and position on the bottom
Select Element 38 - resize by 30%
Paste and position on the bottom
Select Element 35 - resize by 30%
Image Free Rotate Right by 15% and paste on the bottom
Select Element 45 - resize by 40%
Paste and position on the right side
Apply Eyecandy Gradient Glow on fat default settings.
Add any dropshadows you like
Sharpen any elements as needed
Crop and resize as desired
Add copyright info, license number and name
You're done! Thanks for trying my tutorial!

Labels:Curious Creative Dreams | 0
comments
Saturday, July 13, 2019
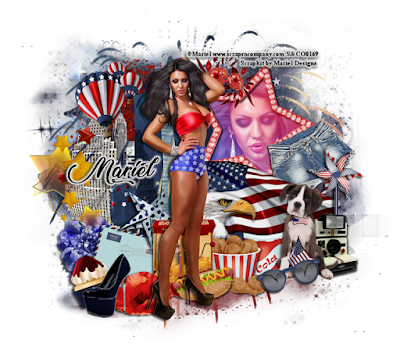
LOVE AMERICA
Supplies needed:
I am using the stunning artwork from Mariel for this tutorial which you can find here
Scrapkit: I am using a beautiful matching kit from Mariel Designs called "America 2" which you can get by going here
Mask 853 from Rachel which you can find here
Plugins: Lokas 3D Shadow
----------------------------
This tutorial is written for those who have working knowledge of PSPX2 (any version will do).
This tutorial was written by me on July 13, 2019. Please do not copy or paste on any other forum, website or blog provide link back to tut only. Please do not claim as your own. This tutorial is copyrighted to me. Any resemblance to any other tutorial is purely coincidental.
Ok - let's start and remember to save often.
Open up a 750 x 650 blank canvas (we can resize it later)
Select Paper 4 and paste on the canvas
Apply Mask 853 and merge group
Select Element 89 -
Paste and position in the center of the canvas above mask layer
Select Element 96 - resize by 50%
Paste and position on the top left
Select Frame Element 4 - resize by 40%
Image Free Rotate Right by 15% and paste on the top right
Select your magic wand tool and select the center of the frame (Add (Shift), RGB Value, Tolerance 25, Contiguous checked, Feather 0)
Selections, Modify, Expand by 5
Add new raster layer and flood-fill with gradient of choice
Paste close-up tube on gradient layer and delete
Select none
Change close-up to Screen
Move gradient layer and closeup below frame element
Select Element 92 - resize by 65%
Paste and position on the left side
Select Element 85 - resize by 40%
Paste and position on the left side
Select Element 80 - resize by 30%
Paste and position on the right side
Select Element 13 - resize by 55%
Paste and position below frame element on the right
Select Element 41 - resize by 25%
Paste and position on the bottom
Paste tube of choice where desired
Apply Lokas 3D Shadow at default settings
Select Element 33 - resize by 20%
Paste and position on the bottom left
Select Element 27 - resize by 25%
Image Free Rotate Right by 15% and paste on the bottom left
Select Element 2 - resize by 20%
Paste and position on the bottom left
Select Element 56 - resize by 20%
Paste and position on the bottom left
Select Element 3 - resize by 20%
Paste and position on the bottom left
Select Element 61 - resize by 30%
Paste and position on the bottom right
Select Element 26 - resize by 25%
Image mirror and paste on the bottom right
Select Element 32 - resize by 30%
Paste and position on the bottom right
Select Element 64 - resize by 25%
Paste and position on the bottom
Select Element 66 - resize by 20%
Paste and position on the bottom
Select Element 67 - resize by 20%
Paste and position on the bottom
Select Element 23 - resize by 20%
Image Free Rotate Left by 15% and paste on the bottom
Select Element 17 - resize by 20%
Paste and position on the left side
Select Element 5 - resize by 20%
Paste and position on the left side
Select Element 54 - resize by 25%
Paste and position on the top
Add any dropshadows you like
Sharpen any elements as needed
Crop and resize as desired
Add copyright info, license number and name
You're done! Thanks for trying my tutorial!

Labels:Mariel Designs | 0
comments
Tuesday, July 9, 2019
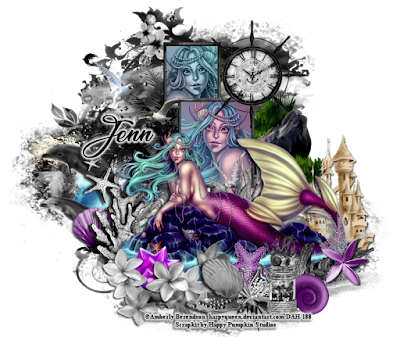
CALM AFTER THE STORM
Supplies needed:
I am using the stunning artwork from Amberly Berendson for this tutorial which you can find here
Scrapkit: I am using a beautiful Exclusive kit from Happy Pumpkin Studios called "Calm After The Storm" which you can get by going here
Mask 32 from Vivienne which you can find here
Plugins: Lokas 3D Shadow
----------------------------
This tutorial is written for those who have working knowledge of PSPX2 (any version will do).
This tutorial was written by me on July 9, 2019. Please do not copy or paste on any other forum, website or blog provide link back to tut only. Please do not claim as your own. This tutorial is copyrighted to me. Any resemblance to any other tutorial is purely coincidental.
Ok - let's start and remember to save often.
Open up a 750 x 650 blank canvas (we can resize it later)
Select Paper 4 and paste on the canvas
Apply Mask 32 and merge group
Select Frame Element 12 - resize by 50%
Paste and position on the top right
Select your magic wand tool and select the center square of each frame (Add (Shift), RGB Value, Tolerance 25, Contiguous checked, Feather 0)
Selections, Modify, Expand by 2
Add new raster layer and flood-fill with gradient of choice
Paste close-up tubes on gradient layer and delete
Select none
Change close-up tubes to Luminence (Legacy) and Overlay
Move paper layer and closeups below frame element
Select Element 71 - resize by 30%
Image mirror and paste on the right side below the frame
Select Element 45 - resize by 30%
Paste and position on the top right - erase any bits that cover the tube layer
Select Element 35 - resize by 30%
Paste and position on the left side of the frame
Select Element 49 - resize by 25%
Paste and position on the top left
Select Element 75 - resize by 30%
Paste and position on the top left
Select Element 18 - resize by 50%
Paste and position on the left side
Select Element 6 - resize by 55%
Paste and position on the left side
Select Element 51 - resize by 40%
Paste and position on the left side
Paste tube of choice where desired
Apply Lokas 3D Shadow at default settings
Select Element 53 - resize by 30%
Image mirror and paste on the left side
Select Element 12 - resize by 15%
Image Free Rotate Left by 15% and paste on the left side
Select Element 44 - resize by 40%
Paste and position on the bottom left
Select Element 78 - resize by 15%
Paste and position on the bottom left
Select Element 5 - resize by 30%
Paste and position on the bottom right
Select Element 46 - resize by 30%
Paste and paste on the bottom right
Select Element 13 - resize by 12%
Paste and position on the bottom right
Select Element 15 - resize by 12%
Paste and position on the bottom
Select Element 17 - resize by 12%
Paste and position on the bottom
Select Element 52 - resize by 25%
Paste and position on the bottom
Select Element 37 - resize by 20%
Paste and position on the bottom
Select Element 57 - resize by 15%
Paste and position on the bottom
Select Element 47 - resize by 25%
Paste and position on the bottom of the frame layer
Add any dropshadows you like
Sharpen any elements as needed
Crop and resize as desired
Add copyright info, license number and name
You're done! Thanks for trying my tutorial!

Labels:Happy Pumpkin Studios | 0
comments
Sunday, July 7, 2019
SPIDERWEB
Supplies needed:
I am using the stunning artwork from Radyga Design for this tutorial which you can find Here, Here, Here, Here and Here
Scrapkit: I am using a kit from Designs by Joan called "Spider" which you can get by going here
Mask 102 from Moonbeams and Spiderwebs which you can find here
Plugins: Lokas 3D Shadow
----------------------------
This tutorial is written for those who have working knowledge of PSPX2 (any version will do).
This tutorial was written by me on July 7, 2019. Please do not copy or paste on any other forum, website or blog provide link back to tut only. Please do not claim as your own. This tutorial is copyrighted to me. Any resemblance to any other tutorial is purely coincidental.
Ok - let's start and remember to save often.
Open up a 750 x 650 blank canvas (we can resize it later)
Select Paper 6 and paste on the canvas
Apply Mask 102 and merge group
Select Element 2 - resize by 30%
Paste and position on the top left
Select Frame Element 11 - resize by 30%
Paste and position on the top right
Select your magic wand tool and select the center of the frame (Add (Shift), RGB Value, Tolerance 25, Contiguous checked, Feather 0)
Selections, Modify, Expand by 5
Paste paper 3
Select invert, delete
Paste close-up tube on paper layer and delete
Select none
Duplicate close-up, apply Gaussian Blur at 4 and change to Overlay
Move paper layer and closeups below frame element
Select Element 60 - resize by 40%
Paste and position on the left side of the frame
Select Element 66 - resize by 40%
Paste and paste on the top right below frame layers
Select Element 78 - resize by 25%
Paste and position on the top left
Select Element 39 - resize by 40%
Paste and position on the bottom
Select Element 57 - resize by 30%
Paste and position on the bottom left
Paste tube of choice where desired
Apply Lokas 3D Shadow at default settings
Select Element 34 - resize by 40%
Paste and position on the right side
Select Element 16 - resize by 55%
Image mirror and paste on the bottom right
Select Element 74 - resize by 30%
Paste and position on the bottom right
Select Element 65 - resize by 30%
Paste and position on the bottom right
Select Element 4 - resize by 20%
Paste and position on the bottom right
Select Element 89 - resize by 25%
Paste and paste on the bottom left
Select Element 21 - resize by 40%
Paste and position on the bottom left
Select Element 47 - resize by 25%
Paste and position on the bottom left
Add any dropshadows you like
Sharpen any elements as needed
Crop and resize as desired
Add copyright info, license number and name
You're done! Thanks for trying my tutorial!
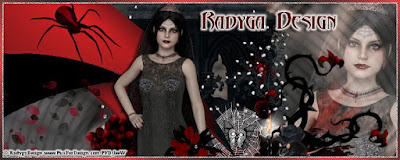

Labels:Radyga Designs | 0
comments
Saturday, July 6, 2019
CAMILLA
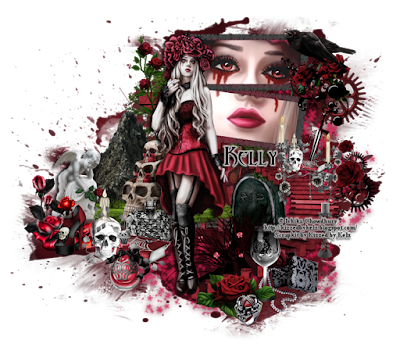
Supplies needed:
Scrapkit: I am using a beautiful kit from Kizzed by Kelz called "Camilla" which you can get by going here
Mask 48 from Vivienne which you can find here
Plugins: Lokas 3D Shadow
----------------------------
This tutorial is written for those who have working knowledge of PSPX2 (any version will do).
This tutorial was written by me on July 6, 2019. Please do not copy or paste on any other forum, website or blog provide link back to tut only. Please do not claim as your own. This tutorial is copyrighted to me. Any resemblance to any other tutorial is purely coincidental.
Ok - let's start and remember to save often.
Open up a 750 x 650 blank canvas (we can resize it later)
Select Paper 12 and paste on the canvas
Apply Mask 48 and merge group
Select Element 9 - resize by 65%
Paste and position on the left side
Select Element 12 - resize by 40%
Paste and position on the right side of element 9
Select Element 42 - resize by 95%
Image Free Rotate Left by 25% and paste on the bottom right
Select Element 145 - resize by 65%
Paste and position on the right side
Select Frame Element 113 - resize by 40%
Paste and position on the top right
Select your magic wand tool and select the center rectangles of the frame (Add (Shift), RGB Value, Tolerance 25, Contiguous checked, Feather 0)
Selections, Modify, Expand by 5
Paste paper 8
Select invert, delete
Paste close-up tube on paper layer and delete
Select none
Duplicate close-up, apply Gaussian Blur at 4 and change to Overlay
Move paper layer and closeups below frame element
Select Element 99 - resize by 30%
Paste and position on the top right
Select Element 37 - resize by 25%
Paste and position on the top left
Select Element 131 - resize by 25%
Paste and position on the top right
Paste tube of choice where desired
Apply Lokas 3D Shadow at default settings
Select Element 11 - resize by 30%
Paste and position on the left side
Select Element 7 - resize by 30%
Paste and position on the left side
Select Element 142 - resize by 30%
Paste and position on the bottom left
Select Element 120 - resize by 30%
Paste and position on the bottom left
Select Element 51 - resize by 22%
Paste and position on the bottom left
Select Element 133 - resize by 20%
Paste and paste on the bottom left
Select Element 98 - resize by 30%
Image Free Rotate Left by 15% and paste on the right side
Select Element 121 - resize by 30%
Paste and position on the right side
Select Element 22 - resize by 30%
Paste and position on the bottom right
Select Element 41 - resize by 20%
Paste and position on the bottom right
Select Element 127 - resize by 25%
Paste and position on the bottom below stair layer
Select Element 118 - resize by 50%
Paste and position on the bottom
Select Element 93 - resize by 25%
Paste and position on the bottom
Select Element 31 - resize by 25%
Paste and position on the bottom
Select Element 3 - resize by 15%
Paste and position on the bottom
Select Element 91 - resize by 20%
Paste and position on the bottom left
Add any dropshadows you like
Sharpen any elements as needed
Crop and resize as desired
Add copyright info, license number and name
You're done! Thanks for trying my tutorial!

Labels:All Dolled Up Store | 0
comments
Tuesday, July 2, 2019
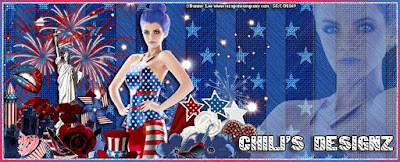
PATRIOTIC LATEX
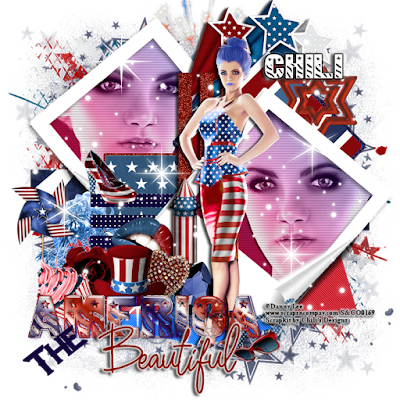
Supplies needed:
Scrapkit: I am using a Collab kit from Chili's Designz called "Patriotic" which you can get by going here
4th of July Template from Marie's Designs which can be found here
Stars Mask from Angie which you can find here
Patriotic Mask 2 from Dee which you can find here
Plugins used: Lokas 3D Shadow, Penta - Jeans
----------------------------
This tutorial is written for those who have working knowledge of PSPX2 (any version will do).
This tutorial was written by me on July 2, 2019. Please do not copy or paste on any other forum, website or blog provide link back to tut only. Please do not claim as your own. This tutorial is copyrighted to me. Any resemblance to any other tutorial is purely coincidental.
Ok - let's start and remember to save often.
Open the template and using your shortcut keys on your keyboard (SHIFT+D) duplicate the template as a new image. Close the original and delete the copywrite layer.
Select the Raster 3 layer
Apply Penta Jeans with the following setting:
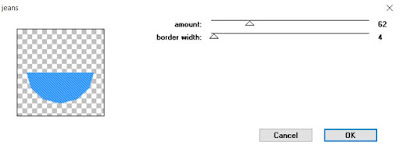
Select Promoted Selection layer and repeat
Select Raster 4 layer
Select all, float, defloat
Paste paper 8
Select invert, delete, select none
Hide/delete original raster layer
Select Photo Background layer
Select all, float, defloat
Add new raster layer and flood-fill with color or gradient of choice
Paste close-up on gradient layer
Select invert, delete, select none
Change close-up layer to Luminence (Legacy)
Merge down on gradient layer
Effect, Texture Effects, Blinds (Width 2, Opactity 25, Horizontal and Light from left/top checked)
Select the right photo background layer and repeat above steps
Select Blue Stars layer and delete
Select White Square layer
Select all, float, defloat
Paste paper 7
Select invert, delete, select none
Hide/delete original square layer
Select Diamond layer
Select all, float, defloat
Paste paper 10
Select invert, delete, select none
Delete/Hide original diamond layer
Select Blue Stripes layer
Apply Effects, Texture Effects, Weave (Gap size 2, Width 6, Opacity 2, Fill gaps checked, change Gap and Weave color to one of choice)
Select Red Stripes layer
Adjust, Add/Remove Noise, Add Noise (Uniform checked, Noise 50%, Monochrome checked)
Copy and paste tube of choice and position where desired
Apply Lokas 3D Shadow
Select Stars 2 Element - resize by 40%
Paste and position on the top right
Select Deco 5 Element - resize by 50%
Image mirror and paste on the left side
Select Pinwheel Element - resize by 30%
Paste and position on left side
Select Shoe Element - resize by 30%
Paste and position on top of the blue stripes
Select Cake Element - resize by 40%
Paste and position on the bottom left below wordart
Select Flower 9 Element - resize by 30%
Paste and position on the bottom below wordart
Select Hat 2 Element - resize by 30%
Paste and position on the bottom below wordart
Select Heart Element - resize by 55%
Image Free Rotate Right by 15% and paste on the bottom
Select Lips Element - resize by 50%
Paste and postion on the bottom
Select Rocket 2 Element - resize by 40%
Paste and position on the bottom
Select Gem Element - resize by 80%
Image Free Rotate Right by 15% and paste on the bottom
Select Glasses Element - resize by 30%
Paste and position on the bottom
Paste paper 2 on canvas
Move layer to the bottom of the template
Apply Patriotic Mask 2 or mask of choice
Merge group and move to the bottom
Paste paper 4 on canvas
Move layer to the bottom of the template
Apply Stars Mask or mask of choice
Merge group and move to the bottom
Add any additional elements you like.
Add any dropshadows you like
Crop and resize as desired
Add copyright info, license number and name
You're done! Thanks for trying my tutorial!

Labels:Chili Designz | 0
comments
Subscribe to:
Comments
(Atom)


