Labels
- Alikas Scraps
- All Dolled Up Store
- Amy Marie
- Annaica
- Arthur Crowe
- Babycakes Scraps
- Barbara Jensen
- Bibi's Collections
- Black Widow Creationz
- Blu Moon
- Bonnies Creations
- Bookwork Dezines
- Broken Sky Dezine
- Carita Creationz
- Carpe Diem Designs
- CDO
- Celinart Pinup
- Celine
- Chacha Creationz
- Charmed Designs
- Cherry Blossom Designs
- Chili Designz
- Cluster Frame
- Creative Misfits
- Creative Scraps by Crys
- Curious Creative Dreams
- Danny Lee
- Derzi
- Designs by Ali
- Designs by Joan
- Designs by Ketura
- Designs By Norella
- Designs by Vi
- Diana Gali
- Diry Art Designs
- Disturbed Scraps
- Dreaming With Bella
- Eclipse Creations
- Elegancefly
- Extras
- Fabulous Designz
- Forum Set
- Foxy's Designz
- Freek's Creation
- FTU
- FwTags
- Goldwasser
- Gothic Inspirations
- Gothic Raven Designs
- Graphfreaks
- Hania's Designs
- Happy Pumpkin Studios
- Horseplay's Pasture Designs
- indie-Zine
- Irish Princess Designs
- Ishika Chowdhury
- Kaci McVay
- Kajenna
- katharine
- Katherine
- Khloe Zoey
- Killer Kitty
- Kissing Kate
- KiwiFirestorm
- Kiya Designs
- Kizzed by Kelz
- KZ Designz
- Lady Mishka
- Lil Mz Brainstorm
- Maiden of Darkness
- Mariel Designs
- MellieBeans
- Michelle's Myths
- Midnight Shadow
- Misticheskya
- MistyLynn's Creations
- MMeliCrea Designz
- Moon Vixen Designs
- NaSionainne
- Ninaste
- Niqui Designs
- Pandora
- Picsfordesign
- Pink Paradox Productions
- Radyga Designs
- Redefined Designs
- Rissa's Designs
- Schnegge
- ScottishButterfly Creations
- Scrappin Krazy Designs
- Scrappin With Lil Ol Me
- Scraps and the City
- Scraps Dimensions
- Scraps From The Heart
- Scraps N Company
- Scraps with Attitude
- Shining Star Art
- Skyscraps
- Sleek N Sassy Designs
- Sophisticat Simone
- Souldesigner
- Soxsational Scraps
- Spazz
- Starlite and Soul
- Stella Felice
- Tammy Welt
- Tasha's Playground
- The PSP Project
- Thrifty Scraps by Gina
- Tiny Turtle Designs
- Upyourart
- Verymany
- Wendy Gerber
- Whisper In the Wind
- Wick3d Creationz
- Wicked Diabla
- Yude's Kreationz
Blog Archive
Saturday, May 30, 2020
VINTAGE CHARM
Supplies needed:
I am using the gorgeous artwork from Zindy S.D. Nielsen for this tutorial which you can find here
Scrapkit: I am using a stunning kit by Curious Creative Dreams called "Vintage Charm" which you can get by going Here, Here and Here
Vintage Mask 1 from Fecnikek which you can find here
Plugins: Lokas 3D Shadow
----------------------------
This tutorial is written for those who have working knowledge of PSPX2 (any version will do).
This tutorial was written by me on May 29, 2020. Please do not copy or paste on any other forum, website or blog provide link back to tut only. Please do not claim as your own. This tutorial is copyrighted to me. Any resemblance to any other tutorial is purely coincidental.
Ok - let's start and remember to save often.
Open up a 750 x 650 blank canvas (we can resize it later)
Select Paper 5 and paste on the canvas
Apply Mask 1 and merge group
Select Element 4 - resize by 55%
Paste and position on the top left
Select Element 47 - resize by 30%
Paste and positon on the center of element 4
Select Element 13 - resize by 50%
Image mirror and paste on the top left
Select Element 29 - resize by 65%
Paste and position on the top center
Select Frame Element 15 - resize by 50%
Paste and position on the right side
Select your magic wand tool and select the center of the frame (Add (Shift), RGB Value, Tolerance 25, Contiguous checked, Feather 0)
Selections, Modify, Expand by 5
Paste paper 11
Select invert, delete
Paste close-up tube on paper layer and delete
Select none
Change close-up tube to and to Luminance (Legacy)
Move paper and close-up layer below frame element
Select Element 28 - resize by 50%
Paste and position in the center
Paste tube of choice where desired
Apply Lokas 3D Shadow at default settings
Select Element 6 - resize by 20%
Image Free Rotate Left by 15% and paste on the left side
Select Element 41 - resize by 30%
Paste and position on the b0ttom left
Select Element 33 - resize by 30%
Paste and position on the bottom left
Select Element 30 - resize by 30%
Paste and position on the bottom left
Select Element 18 - resize by 40%
Paste and paste on the bottom left
Select Element 26 - resize by 25%
Paste and position on the bottom left
Select Element 1 - resize by 30%
Paste and position on the bottom left
Select Element 40 - resize by 20%
Paste and position on the bottom left
Select Element 12 - resize by 30%
Paste and position on the top right
Select Element 14 - resize by 25%
Paste and position on the top right
Select Element 35 - resize by 30%
Paste and position on the bottom right
Select Element 46 - resize by 20%
Paste and position on the bottom right
Select Element 3 - resize by 25%
Paste and position on the bottom right
Select Element 19 - resize by 30%
Paste and position on the bottom right
Select Element 36 - resize by 20%
Paste and position on the bottom right
Select Element 21 - resize by 25%
Image Free Rotate Left by 15% and paste on bottom right
Select Element 17 - resize by 25%
Paste and position on the bottom right
Select Element 22 - resize by 20%
Paste and position on the bottom right
Select Element 25 - resize by 25%
Image Free Rotate Right by 15% and paste on the bottom right
Add any dropshadows you like
Sharpen any elements as needed
Crop and resize as desired
Add copyright info, license number and name
You're done! Thanks for trying my tutorial!

Labels:Curious Creative Dreams | 0
comments
Friday, May 29, 2020
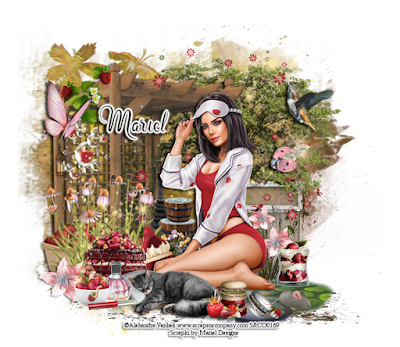
SLEEPING KITTEN
Supplies needed:
I am using the gorgeous artwork from Alehandra Vanhek for this tutorial which you can find here
Scrapkit: I am using a stunning kit by Mariel Designs called "Sleeping Kitten" which you can get by going here
Mask 921 from Rachel Designs which you can find here
Plugins: Lokas 3D Shadow
----------------------------
This tutorial is written for those who have working knowledge of PSPX2 (any version will do).
This tutorial was written by me on May 29, 2020. Please do not copy or paste on any other forum, website or blog provide link back to tut only. Please do not claim as your own. This tutorial is copyrighted to me. Any resemblance to any other tutorial is purely coincidental.
Ok - let's start and remember to save often.
Open up a 750 x 650 blank canvas (we can resize it later)
Select Paper 2 and paste on the canvas
Apply Mask 921 and merge group
Select Paper 1 and paste on the canvas
Reapply Mask 921 and change to Overlay
Select Element 73 - resize by 75%
Paste and position on the top right
Select Element 76 - resize by 75%
Paste and positon on the top left
Select Element 92 - resize by 20%
Paste and position on the top left
Select Element 80 - resize by 55%
Paste and position on the bottom right
Select Element 51 - resize by 30%
Paste and position on the bottom right
Select Element 77 - resize by 40%
Paste and position on the bottom
Select Element 83 - resize by 30%
Paste and position on the bottom right
Select Element 54 - resize by 65%
Paste and position on top right side
Paste tube of choice where desired
Apply Lokas 3D Shadow at default settings
Select Element 56 - resize by 30%
Paste and position on the left side
Select Element 39 - resize by 25%
Paste and position on the b0ttom left
Select Element 86 - resize by 40%
Paste and position on the bottom left
Select Element 96 - resize by 20%
Paste and position on the bottom left
Select Element 84 - resize by 15%
Paste and paste on the bottom left
Select Element 58 - resize by 20%
Paste and position on the bottom
Select Element 99 - resize by 15%
Paste and position on the bottom left
Select Element 35 - resize by 15%
Paste and position on the bottom left
Select Element 98 - resize by 15%
Paste and position on the bottom left
Select Element 11 - resize by 15%
Paste and position on the bottom right
Select Element 67 - resize by 18%
Paste and position on the bottom right
Select Element 17 - resize by 20%
Paste and position on the bottom
Select Element 25 - resize by 25%
Paste and position on the bottom
Select Element 100 - resize by 20%
Paste and position on the top right
Select Element 93 - resize by 15%
Paste and position on the right
Add any dropshadows you like
Sharpen any elements as needed
Crop and resize as desired
Add copyright info, license number and name
You're done! Thanks for trying my tutorial!

Labels:Mariel Designs | 0
comments
Tuesday, May 26, 2020
AMETHYST SPRING

These CT Tags were made using the amazing artwork by Charmed Designs. You can purchase the tube "Amethyst Spring" Here:
P4DsDesignz Store, Designz Scrap Shop, Secret Garden Designs, All that Glitterz, Mystical Scraps, Sensibility Scrapping, Direct Digital Scrap, Digital Scrappin Depot
These tags were made by me and my own creativity. Please do not rip apart, destroy, alter them or claim them as your own. Thanks.


Labels:Charmed Designs | 0
comments
Friday, May 22, 2020
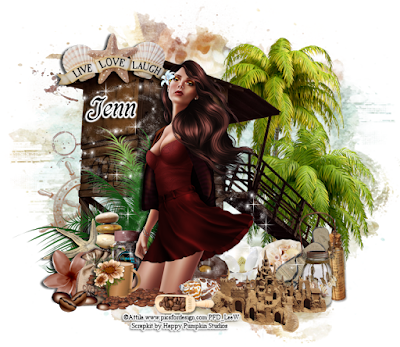
COFFEE BEACH
Supplies needed:
Scrapkit: I am using a stunning kit by Happy Pumpkin Studios called "Coffee Beach" which you can get by going here and here
Mask 41 from Vivienne which you can find here
Set 74 Mask 3 Rachel Designs which you can find here
Plugins: Lokas 3D Shadow
----------------------------
This tutorial is written for those who have working knowledge of PSPX2 (any version will do).
This tutorial was written by me on May 22, 2020. Please do not copy or paste on any other forum, website or blog provide link back to tut only. Please do not claim as your own. This tutorial is copyrighted to me. Any resemblance to any other tutorial is purely coincidental.
Ok - let's start and remember to save often.
Open up a 750 x 650 blank canvas (we can resize it later)
Select Paper 2 and paste on the canvas
Apply Mask 41 and merge group
Select Paper 2 and paste on canvas
Apply Mask 3 from Set 74 and merge group
Select Element 16 - resize by 75%
Image mirror and paste on the top right side
Select Element 111 - resize by 75%
Paste and positon on the top left
Select Element 27 - resize by 30%
Paste and position on the top left
Select Element 81 - resize by 25%
Paste and position on the bottom left
Select Element 14 - resize by 40%
Paste and position on the bottom left
Select Frame Element 5 - resize by 40%
Paste tube of choice where desired
Apply Lokas 3D Shadow at default settings
Select Element 4 - resize by 20%
Paste and position on the bottom left
Select Element 91 - resize by 20%
Paste and position on the b0ttom left
Select Element 49 - resize by 15%
Paste and position on the bottom left
Select Element 10 - resize by 15%
Paste and position on the bottom left
Select Element 54 - resize by 15%
Paste and paste on the bottom left
Select Element 66 - resize by 15%
Paste and position on the bottom left
Select Element 84 - resize by 40%
Paste and position on the bottom of the tube
Select Element 85 - resize by 15%
Paste and position on the bottom left
Select Element 23 - resize by 15%
Paste and position on the bottom right
Select Element 89 - resize by 20%
Paste and position on the bottom right
Select Element 106 - resize by 20%
Paste and position on the bottom right
Select Element 17 - resize by 25%
Paste and position on the bottom right
Select Element 2 - resize by 15%
Paste and position on the bottom right
Select Element 33 - resize by 12%
Paste and position on the bottom
Select Element 78 - resize by 12%
Paste and position on the bottom
Select Element 45 - resize by 15%
Paste and position on the bottom
Select Element 108 - resize by 30%
Paste and position on the bottom right
Select Sparkle 3 Element - resize by 75%
Paste and position on the canvas where desired
Add any dropshadows you like
Sharpen any elements as needed
Crop and resize as desired
Add copyright info, license number and name
You're done! Thanks for trying my tutorial!

Labels:Happy Pumpkin Studios | 0
comments
Tuesday, May 19, 2020
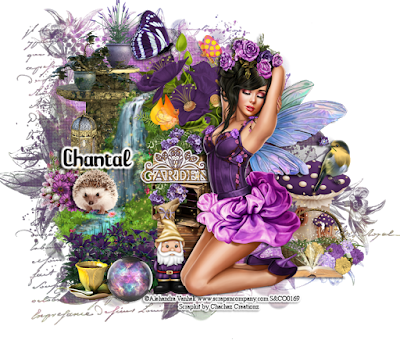
GARDEN FAIRY
Supplies needed:
I am using the gorgeous artwork from Alehandra Vanhek for this tutorial which you can find here
Scrapkit: I am using a stunning kit by Chachaz Creationz called "Spring Fairy" which you can get by going here
Mask 27 from Kopona which you can find here
Plugins: Lokas 3D Shadow
----------------------------
This tutorial is written for those who have working knowledge of PSPX2 (any version will do).
This tutorial was written by me on May 19, 2020. Please do not copy or paste on any other forum, website or blog provide link back to tut only. Please do not claim as your own. This tutorial is copyrighted to me. Any resemblance to any other tutorial is purely coincidental.
Ok - let's start and remember to save often.
Open up a 750 x 650 blank canvas (we can resize it later)
Add new raster layer and flood-fill with solid color of choice
Apply Mask 27 and merge group
Select Paper 1 and paste on the canvas
Reapply Mask 27 and merge group change to overlay
Select Element 72 - resize by 65%
Image mirror and paste and position on the top left
Select Element 86 - resize by 55%
Paste and positon on the left side
Select Element 31 - resize by 40%
Paste and position on the top right
Select Element 83 - resize by 50%
Paste and position on the bottom
Select Element 75 - resize by 40%
Paste and position on the bottom right
Select Element 50 - resize by 40%
Image mirror and Paste and position on the bottom right
Paste tube of choice where desired
Apply Lokas 3D Shadow at default settings
Select Element 65 - resize by 30%
Paste and position on the left side
Select Element 58 - resize by 25%
Paste and position on the left side
Select Element 67 - resize by 50%
Paste and position on the bottom left
Select Element 18 - resize by 30%
Paste and position on the bottom left
Select Element 61 - resize by 20%
Paste and paste on the bottom left
Select Element 53 - resize by 30%
Paste and position on the bottom
Select Element 30 - resize by 40%
Paste and position on the top
Select Element 15 - resize by 25%
Paste and position on the right side
Select Element 55 - resize by 30%
Paste and position on the bottom right
Select Element 1 - resize by 25%
Paste and position on in the center where desired
Select Element 44 - paste and position in the center where desired
Apply Eyecandy Gradient Glow on fat default settings (Glow width 3)
Add any dropshadows you like
Sharpen any elements as needed
Crop and resize as desired
Add copyright info, license number and name
You're done! Thanks for trying my tutorial!

Labels:Chacha Creationz | 0
comments
Monday, May 18, 2020
CREEPY CORNER

Supplies needed:
I am using the gorgeous artwork from Jasmine Becket Griffith for this tutorial which you can find here
Scrapkit: I am using a stunning kit by Curious Creative Dreams called "Creepy Corner" which you can get by going here
Mask 71 from Vivienne which you can find here
Plugins: Lokas 3D Shadow
----------------------------
This tutorial is written for those who have working knowledge of PSPX2 (any version will do).
This tutorial was written by me on May 18, 2020. Please do not copy or paste on any other forum, website or blog provide link back to tut only. Please do not claim as your own. This tutorial is copyrighted to me. Any resemblance to any other tutorial is purely coincidental.
Ok - let's start and remember to save often.
Open up a 750 x 650 blank canvas (we can resize it later)
Select Paper 10 and paste on the canvas
Apply Mask 71 and merge group
Select Element 16 - resize by 40%
Paste and position on the top right
Select Element 10 - resize by 40%
Paste and positon on the top left
Select Element 24 - resize by 50%
Paste and postion on the top left
Select Element 9 - resize by 40%
Paste and position on the top left
Select Element 27 - resize by 55%
Paste and position on the top left
Select Element 26 - resize by 75%
Paste and position in the center
Paste tube of choice where desired
Apply Lokas 3D Shadow at default settings
Select Element 14 - resize by 40%
Image Free Rotate Left by 15% and paste on the left side
Select Element 44 - resize by 40%
Paste and position on the b0ttom left
Select Element 32 - resize by 30%
Paste and position on the left side
Select Element 20 - resize by 30%
Paste and position on the bottom left side
Select Element 31 - resize by 25%
Paste and paste on the bottom left
Select Element 1 - resize by 65%
Paste and position on the bottom
Select Element 35 - resize by 40%
Paste and position on the bottom right
Select Element 41- resize by 30%
Paste and position on the bottom right
Select Element 28 - resize by 25%
Paste and position on the bottom right
Select Element 51 - resize by 65%
Paste and position on the bottom
Add any dropshadows you like
Sharpen any elements as needed
Crop and resize as desired
Add copyright info, license number and name
You're done! Thanks for trying my tutorial!

Labels:Curious Creative Dreams | 0
comments
Friday, May 15, 2020
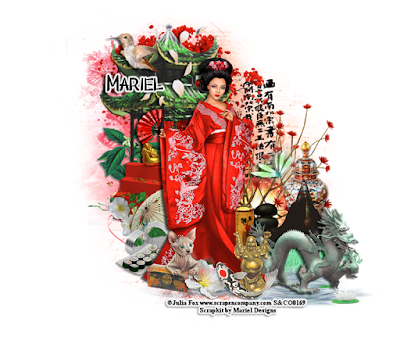
GEISHA
Supplies needed:
Scrapkit: I am using a stunning kit by Mariel Designs called "Japan Geisha" which you can get by going here
Mask 348 from Mizteeques which you can find here
Plugins: Lokas 3D Shadow
----------------------------
This tutorial is written for those who have working knowledge of PSPX2 (any version will do).
This tutorial was written by me on May 15, 2020. Please do not copy or paste on any other forum, website or blog provide link back to tut only. Please do not claim as your own. This tutorial is copyrighted to me. Any resemblance to any other tutorial is purely coincidental.
Ok - let's start and remember to save often.
Open up a 750 x 650 blank canvas (we can resize it later)
Select Paper 10 and paste on the canvas
Apply Mask 348 and merge group
Select Element 63 - resize by 65%
Paste and position on the top of the canvas
Select Element 48 - resize by 50%
Paste and positon on the top left
Select Element 46 - resize by 25%
Paste and position on the left side
Select Element 83 - resize by 30%
Paste and position on the left side
Select Element 68 - resize by 40%
Paste and position on the top right
Select Element 51 - resize by 30%
Paste and position on the right side
Select Element 64 - resize by 50%
Paste and position on the right side
Select Element 58 - resize by 20%
Paste and position on the right side
Select Element 105 - resize by 75%
Paste and position on the bottom right
Paste tube of choice where desired
Apply Lokas 3D Shadow at default settings
Select Element 35 - resize by 25%
Paste and position on the left side
Select Element 52 - resize by 20%
Paste and position on the b0ttom left
Select Element 42 - resize by 15%
Paste and position on the bottom left
Select Element 77 - resize by 20%
Paste and position on the bottom left
Select Element 53 - resize by 30%
Paste and paste on the right side
Select Element 101 - resize by 50%
Paste and position on the bottom right
Select Element 2 - resize by 20%
Paste and position on the bottom right
Select Element 88 - resize by 15%
Paste and position on the bottom right
Select Element 65 - resize by 18%
Paste and position on the bottom right
Select Element 74 - resize by 40%
Paste and position on the bottom right
Select Element 59 - resize by 20%
Paste and position on the bottom
Select Element 61 - resize by 15%
Paste and postion on the bottom
Select Element 44 - resize by 15%
Paste and position on the bottom
Select Element 40 - resize by 15%
Paste and position on the bottom
Select Element 14 - resize by 20%
Paste and position on the bottom
Select Element 89 - resize by 20%
Paste and position on the top left
Select Element 22 - resize by 25%
Paste and position on the top left
Add any dropshadows you like
Sharpen any elements as needed
Crop and resize as desired
Add copyright info, license number and name
You're done! Thanks for trying my tutorial!

Labels:Mariel Designs | 0
comments
Friday, May 8, 2020
MY PRESENT
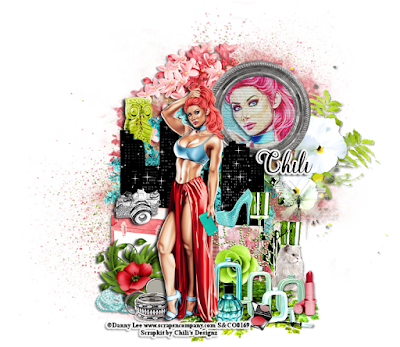
Supplies needed:
I am using the gorgeous artwork from Danny Lee for this tutorial which you can find here
Scrapkit: I am using a stunning kit by Chili's Designz called "The Present" which you can get by going here
Mask 349 from Mizteeques which you can find here
Plugins: Lokas 3D Shadow
----------------------------
This tutorial is written for those who have working knowledge of PSPX2 (any version will do).
This tutorial was written by me on May 8, 2020. Please do not copy or paste on any other forum, website or blog provide link back to tut only. Please do not claim as your own. This tutorial is copyrighted to me. Any resemblance to any other tutorial is purely coincidental.
Ok - let's start and remember to save often.
Open up a 750 x 650 blank canvas (we can resize it later)
Select Paper 4 and paste on the canvas
Apply Mask 349 and merge group
Select Flowers 3 Element - resize by 40%
Image mirror and paste on the top left
Select Tagbck Element - resize by 40%
Paste and position on the right side
Select Greenery Element - resize by 50%
Paste and position on the bottom right
Select Frame Element 3 - resize by 30%
Paste and position on the top right
Select Flowers Element - resize by 50%
Paste and position on the left side
Select your magic wand tool and select the center of the frame (Add (Shift), RGB Value, Tolerance 25, Contiguous checked, Feather 0)
Selections, Modify, Expand by 5
Paste paper 5
Select invert, delete
Paste close-up tube on paper layer and delete
Select none
Change close-up tube to and to Hard Light and drop opacity to 80%
Merge close-up down on paper layer
Effect, Texture Effects, Blinds (Width 2, Opacity 25, Horizontal and Light from left/top checked)
Move paper and close-up layer below frame element
Select City Element - resize by 30%
Paste and position on the left side
Paste tube of choice where desired
Apply Lokas 3D Shadow at default settings
Select Owl Element - resize by 30%
Paste and position on the top left
Select Box Element - resize by 30%
Image mirror and paste on the bottom left
Select Camera Element - resize by 30%
Paste and position on the left side above box element
Select Plant 2 Element - resize by 30%
Paste and position on the bottom left
Select Pearls Element - resize by 25%
Paste and paste on the bottom left
Select Locket Element - resize by 20%
Paste and position on the bottom left
Select Bracelet 2 Element- resize by 30%
Paste and position on the bottom left
Select Bag Element - resize by 30%
Paste and position on the right side
Select Shoe 2 Element - resize by 25%
Paste and position on the right side
Select Deco 6 Element - resize by 40%
Paste and position on the bottom right
Select Cat 2 Element - resize by 25
Paste and position on the bottom right%
Select Pearls 2 Element - resize by 25%
Paste and position on the bottom right
Select Flower 5 Element - resize by 30%
Paste and position on the bottom right
Select Deco 4 Element - resize by 30%
Paste and position on the bottom right
Select Lipstick Element - resize by 30%
Paste and position on the bottom right
Select Perfume 2 Element - resize by 25%
Paste and position on the bottom right
Select Blush Element - resize by 20%
Paste and position on the bottom right
Select Makeup Element - resize by 25%
Paste and position on the bottom right
Add any dropshadows you like
Sharpen any elements as needed
Crop and resize as desired
Add copyright info, license number and name
You're done! Thanks for trying my tutorial!

Labels:Chili Designz | 0
comments
Wednesday, May 6, 2020
PIXIE HOLLOW
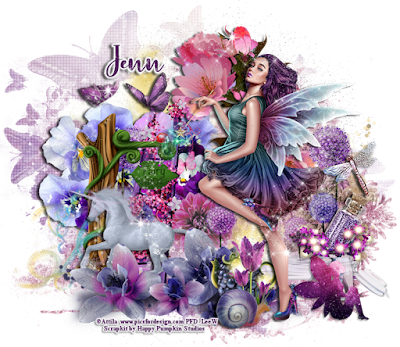
Supplies needed:
Scrapkit: I am using a stunning kit by Happy Pumpkin Studios called "HPS Kit 06 2020" which you can get by going here and here
Mask 50 & 52 from Vivienne which you can find here
Plugins: Lokas 3D Shadow
----------------------------
This tutorial is written for those who have working knowledge of PSPX2 (any version will do).
This tutorial was written by me on May 6, 2020. Please do not copy or paste on any other forum, website or blog provide link back to tut only. Please do not claim as your own. This tutorial is copyrighted to me. Any resemblance to any other tutorial is purely coincidental.
Ok - let's start and remember to save often.
Open up a 750 x 650 blank canvas (we can resize it later)
Select Paper 3 and paste on the canvas
Apply Mask 50 and merge group
Select Paper 16 and paste on the canvas
Apply Mask 52 and merge group
Select Element 124 - resize by 50%
Paste and position on the top left
Select Element 50 - resize by 50%
Paste and position on the left side
Select Element 101 - resize by 50%
Paste and positon on left side
Select Element 45 - resize by 50%
Paste and position on the top right
Select Element 123 - resize by 65%
Paste and position on in the center
Select Element 57 - resize by 25%
Paste and position on the bottom
Select Element 117 - resize by 50%
Paste and position on the left side
Paste tube of choice where desired
Apply Lokas 3D Shadow at default settings
Select Element 70 - resize by 40%
Paste and position on the bottom left
Select Element 48 - resize by 65%
Paste and position on the b0ttom left
Select Element 159 - resize by 25%
Paste and position on the bottom left
Select Element 162 - resize by 25%
Paste and position on the top left
Select Element 150 - resize by 15%
Paste and paste on the right side
Select Element 156 - resize by 20%
Paste and position on the bottom right
Select Element 75 - resize by 25%
Paste and position on the bottom right
Select Element 74 - resize by 20%
Paste and position on the bottom right
Select Element 116 - resize by 15%
Paste and position on the bottom
Select Element 77 - resize by 25%
Paste and position on the bottom
Select Element 73 - resize by 15%
Paste and position on the bottom
Select Element 65 - resize by 90%
Paste and position in the center canvas
Add any dropshadows you like
Sharpen any elements as needed
Crop and resize as desired
Add copyright info, license number and name
You're done! Thanks for trying my tutorial!

Labels:Happy Pumpkin Studios | 0
comments
Sunday, May 3, 2020
BUTTERFLY STEAM
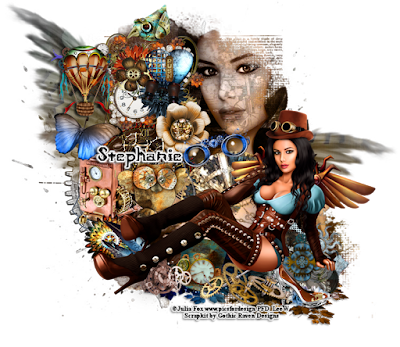
Supplies needed:
Scrapkit: I am using a stunning kit by Gothic Raven Designs called "Butterfly Steam" which you can get by going here
Mask 77 from Vivienne which you can find here
Mask 330 from Mizteeques which you can find here
Plugins: Lokas 3D Shadow
----------------------------
This tutorial is written for those who have working knowledge of PSPX2 (any version will do).
This tutorial was written by me on May 3, 2020. Please do not copy or paste on any other forum, website or blog provide link back to tut only. Please do not claim as your own. This tutorial is copyrighted to me. Any resemblance to any other tutorial is purely coincidental.
Ok - let's start and remember to save often.
Open up a 750 x 650 blank canvas (we can resize it later)
Select Paper 15 and paste on the canvas
Apply Mask 77 and merge group
Select Paper 6 and paste on the canvas
Apply Mask 330 and merge group
Select Mask 330 layer - select all, float, defloat
Paste close-up tube on the top right of the mask layer and delete
Select none
Change close-up to Luminance (Legacy)
Select Element 80 - resize by 30%
Paste and position on the top left
Select Element 26 - resize by 25%
Paste and positon on the top left
Select Element 81 - resize by 55%
Paste and position on the bottom right
Select Element 76 - resize by 30%
Paste and position on the bottom right
Select Element 70 - resize by 20%
Paste and position on the top left
Select Element 14 - resize by 30%
Paste and position on the left side
Select Element 28 - resize by 20%
Paste and position on the top left
Paste tube of choice where desired
Apply Lokas 3D Shadow at default settings
Select Element 61 - resize by 20%
Paste and position in the center
Select Element 93 - resize by 25%
Paste and position on the left side
Select Element 15 - resize by 20%
Paste and position on the left side
Select Element 113- resize by 30%
Image Free Rotate Left by 15% and paste in the center below tube layer
Select Element 9 - resize by 25%
Image Free Rotate Left by 15% and paste above fan element
Select Element 31 - resize by 20%
Paste and position on the bottom left below tube layer
Select Element 84 - resize by 25%
Paste and position on the bottom left below tube layer
Select Element 30 - resize by 20%
Paste and position on the bottom
Select Element 92 - resize by 30%
Paste and position on the bottom
Select Element 67 - resize by 15%
Paste and position on the bottom right
Add any dropshadows you like
Sharpen any elements as needed
Crop and resize as desired
Add copyright info, license number and name
You're done! Thanks for trying my tutorial!

Labels:Gothic Raven Designs | 0
comments
Friday, May 1, 2020
LADY CARIBBEAN
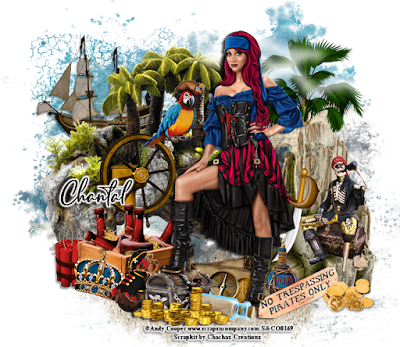
Supplies needed:
I am using the gorgeous artwork from Andy Cooper for this tutorial which you can find here
Scrapkit: I am using a stunning kit by Chachaz Creationz called "Lady Caribbean" which you can get by going here
Set 74 Mask 3 from Rachel Designs which you can find here
Mask 102 from Moonbeams and Spiderwebs which you can find here
Plugins: Lokas 3D Shadow
----------------------------
This tutorial is written for those who have working knowledge of PSPX2 (any version will do).
This tutorial was written by me on May 1, 2020. Please do not copy or paste on any other forum, website or blog provide link back to tut only. Please do not claim as your own. This tutorial is copyrighted to me. Any resemblance to any other tutorial is purely coincidental.
Ok - let's start and remember to save often.
Open up a 750 x 650 blank canvas (we can resize it later)
Select Paper 3 and paste on the canvas
Apply Mask 3 by Rachel and merge group
Move the mask down to the right a bit
Select Paper 2 and paste on the canvas
Apply Mask 102 and merge group
Select Element 24 - resize by 75%
Paste and position on the bottom
Select Element 1 - resize by 50%
Paste and positon on the top left
Select Element 94 - resize by 75%
Paste and position on the left side
Select Element 63 - resize by 40%
Paste and position on the top right
Select Element 82 - resize by 50%
Paste and position on the top right
Select Element 37 - resize by 65%
Paste and position on the bottom right
Paste tube of choice where desired
Apply Lokas 3D Shadow at default settings
Select Element 10 - resize by 50%
Paste and position on the left side
Select Element 54 - resize by 25%
Paste and position on the b0ttom left
Select Element 57 - resize by 40%
Paste and position on the bottom left
Select Element 48 - resize by 20%
Paste and position on the bottom left
Select Element 38 - resize by 25%
Paste and paste on the bottom left
Select Element 75 - resize by 30%
Paste and position on the center where desired
Select Element 67 - resize by 40%
Paste and position on the bottom right
Select Element 45 - resize by 20%
Paste and position on the bottom right
Select Element 50 - resize by 25%
Paste and position on the bottom right
Select Element 64 - resize by 40%
Paste and position on the bottom right
Select Element 78 - resize by 40%
Paste and position on the right side
Select Element 93 - resize by 30%
Paste and position on the bottom
Select Element 87 - resize by 25%
Paste and position on the bottom
Select Element 14 - resize by 20%
Paste and position on the bottom
Select Element 11 - resize by 25%
Paste and position on the bottom
Select Element 20 - resize by 40%
Paste and position on the bottom
Add any dropshadows you like
Sharpen any elements as needed
Crop and resize as desired
Add copyright info, license number and name
You're done! Thanks for trying my tutorial!

Labels:Chacha Creationz | 0
comments
Subscribe to:
Comments
(Atom)


