Labels
- Alikas Scraps
- All Dolled Up Store
- Amy Marie
- Annaica
- Arthur Crowe
- Babycakes Scraps
- Barbara Jensen
- Bibi's Collections
- Black Widow Creationz
- Blu Moon
- Bonnies Creations
- Bookwork Dezines
- Broken Sky Dezine
- Carita Creationz
- Carpe Diem Designs
- CDO
- Celinart Pinup
- Celine
- Chacha Creationz
- Charmed Designs
- Cherry Blossom Designs
- Chili Designz
- Cluster Frame
- Creative Misfits
- Creative Scraps by Crys
- Curious Creative Dreams
- Danny Lee
- Derzi
- Designs by Ali
- Designs by Joan
- Designs by Ketura
- Designs By Norella
- Designs by Vi
- Diana Gali
- Diry Art Designs
- Disturbed Scraps
- Dreaming With Bella
- Eclipse Creations
- Elegancefly
- Extras
- Fabulous Designz
- Forum Set
- Foxy's Designz
- Freek's Creation
- FTU
- FwTags
- Goldwasser
- Gothic Inspirations
- Gothic Raven Designs
- Graphfreaks
- Hania's Designs
- Happy Pumpkin Studios
- Horseplay's Pasture Designs
- indie-Zine
- Irish Princess Designs
- Ishika Chowdhury
- Kaci McVay
- Kajenna
- katharine
- Katherine
- Khloe Zoey
- Killer Kitty
- Kissing Kate
- KiwiFirestorm
- Kiya Designs
- Kizzed by Kelz
- KZ Designz
- Lady Mishka
- Lil Mz Brainstorm
- Maiden of Darkness
- Mariel Designs
- MellieBeans
- Michelle's Myths
- Midnight Shadow
- Misticheskya
- MistyLynn's Creations
- MMeliCrea Designz
- Moon Vixen Designs
- NaSionainne
- Ninaste
- Niqui Designs
- Pandora
- Picsfordesign
- Pink Paradox Productions
- Radyga Designs
- Redefined Designs
- Rissa's Designs
- Schnegge
- ScottishButterfly Creations
- Scrappin Krazy Designs
- Scrappin With Lil Ol Me
- Scraps and the City
- Scraps Dimensions
- Scraps From The Heart
- Scraps N Company
- Scraps with Attitude
- Shining Star Art
- Skyscraps
- Sleek N Sassy Designs
- Sophisticat Simone
- Souldesigner
- Soxsational Scraps
- Spazz
- Starlite and Soul
- Stella Felice
- Tammy Welt
- Tasha's Playground
- The PSP Project
- Thrifty Scraps by Gina
- Tiny Turtle Designs
- Upyourart
- Verymany
- Wendy Gerber
- Whisper In the Wind
- Wick3d Creationz
- Wicked Diabla
- Yude's Kreationz
Blog Archive
Friday, July 31, 2020
CAFE ALA GOTHIC


These CT Tags were made using the amazing artwork by Charmed Designs. You can purchase the kit "Cafe Ala Gothic" Here:
P4DsDesignz Store, Designz Scrap Shop, Secret Garden Designs, All that Glitterz, Mystical Scraps, Sensibility Scrapping, Direct Digital Scrap, Digital Scrappin Depot and Design n Company
These tags were made by me and my own creativity. Please do not rip apart, destroy, alter them or claim them as your own. Thanks.


Labels:Charmed Designs | 0
comments
SALT LIFE
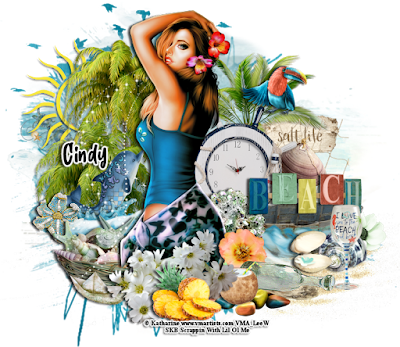
Supplies needed:
I am using the gorgeous artwork from Katharine for this tutorial which you can find here
Scrapkit: I am using a stunning kit by Scrappin With Lil Ol Me called "Sea Salt" which you can get by going here
Mask 10 & 45 from Vivienne which you can find here
Plugins: Lokas 3D Shadow
----------------------------
This tutorial is written for those who have working knowledge of PSPX2 (any version will do).
This tutorial was written by me on July 31, 2020. Please do not copy or paste on any other forum, website or blog provide link back to tut only. Please do not claim as your own. This tutorial is copyrighted to me. Any resemblance to any other tutorial is purely coincidental.
Ok - let's start and remember to save often.
Open up a 750 x 650 blank canvas (we can resize it later)
Select Paper 20 and paste on the canvas
Apply Mask 10 and merge group
Select Paper 10 and paste on the canvas
Apply Mask 45 and merge group
Select Element 138 - resize by 30%
Image mirror and paste on the top left
Select Element 81 - resize by 75%
Paste and positon on the top left
Select Element 124 - resize by 50%
Paste and position on the top right
Select Element 96 - resize by 30%
Paste and position on the left side
Select Element 149 - resize by 25%
Paste and position on the right side
Select Element 44 - resize by 40%
Paste and position on the right side
Select Element 61 - resize by 40%
Paste and position on the right side
Select Element 144 -
Paste and position in the center
Select Element 122 - resize by 65%
Paste and position on the bottom right
Paste tube of choice where desired
Apply Lokas 3D Shadow at default settings
Select Element 147 - resize by 20%
Paste and position on the left side
Select Element 133 - resize by 30%
Paste and position on the b0ttom left
Select Element 18 - resize by 20%
Paste and position on the bottom left
Select Element 32 - resize by 40%
Paste and position on the bottom
Select Element 118 - resize by 25%
Paste and paste on the bottom
Select Element 115 - resize by 40%
Paste and position on the right side
Select Element 82 - resize by 30%
Paste and position on the right side
Select Element 63 - resize by 15%
Paste and position on the bottom right
Select Element 50 - resize by 15%
Paste and position on the bottom right
Select Element 10 - resize by 15%
Paste and position on the bottom right
Select Element 57 - resize by 30%
Paste and position on the bottom right
Select Element 143 - resize by 25%
Paste and position on the bottom right
Select Element 66 - resize by 25%
Paste and position on the bottom
Select Element 77 - resize by 15%
Paste and position on the bottom
Select Element 13 - resize by 20%
Paste and position on the top right
Select Element 116 - resize by 65%
Paste and position on the left side
Add any dropshadows you like
Sharpen any elements as needed
Crop and resize as desired
Add copyright info, license number and name
You're done! Thanks for trying my tutorial!

Labels:Scrappin With Lil Ol Me | 0
comments
Monday, July 27, 2020
MERMAIDS REVENGE
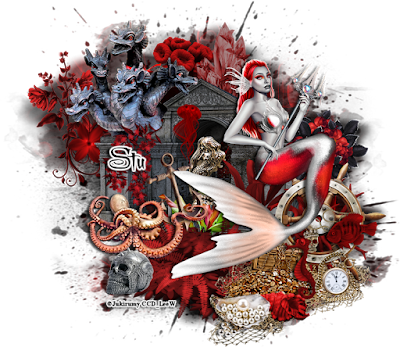
Supplies needed:
Scrapkit: I am using a stunning kit by Curious Creative Dreams called "Mermaids Revenge" which you can get by going Here, Here, Here, and Here
Mask 54 from Vivienne which you can find here
Plugins: Lokas 3D Shadow
----------------------------
This tutorial is written for those who have working knowledge of PSPX2 (any version will do).
This tutorial was written by me on July 27, 2020. Please do not copy or paste on any other forum, website or blog provide link back to tut only. Please do not claim as your own. This tutorial is copyrighted to me. Any resemblance to any other tutorial is purely coincidental.
Ok - let's start and remember to save often.
Open up a 750 x 650 blank canvas (we can resize it later)
Select Paper 6 and paste on the canvas
Apply Mask 54 and merge group
Select Element 35 - resize by 50%
Paste and position on the top left
Select Element 16 - resize by 25%
Paste and positon on the top left
Select Element 49 - resize by 30%
Paste and position on the top center
Select Element 22 - resize by 50%
Paste and position on the top right
Select Element 43 -
Paste and position on the left side
Select Element 19 - resize by 65%
Paste and position on the top left
Duplicate element and move original below element 43
Reselect copy of element 19 and erase any excess that covers element 43
Select Element 27 - resize by 40%
Paste and position on the bottom right of element 27
Select Element 32 - resize by 55%
Paste and position on the right side
Select Element 47 - resize by 85%
Paste and position on the bottom right
Select Element 4 - resize by 65%
Paste and position on the bottom right
Paste tube of choice where desired
Apply Lokas 3D Shadow at default settings
Select Element 34 - resize by 40%
Paste and position on the left side
Select Element 46 - resize by 55%
Paste and position on the left side
Select Element 5 - resize by 30%
Paste and position in the center
Select Element 21 - resize by 50%
Paste and position in the center
Select Element 31 - resize by 40%
Paste and paste below the mermaid element (21)
Select Element 8 - resize by 65%
Paste and position on the bottom left
Select Element 40 - resize by 65%
Paste and position on the bottom left
Select Element 41 - resize by 30%
Paste and position on the bottom left
Select Element 36 - resize by 50%
Paste and position on the bottom
Select Element 45 - resize by 25%
Paste and position on the bottom right
Select Element 7 - resize by 25%
Paste and position on the bottom right
Select Element 25 - resize by 30%
Paste and position on the bottom right
Select Element 3 - resize by 25%
Paste and position on the bottom right
Select Element 42 - resize by 40%
Paste and position on the bottom
Add any dropshadows you like
Sharpen any elements as needed
Crop and resize as desired
Add copyright info, license number and name
You're done! Thanks for trying my tutorial!

Labels:Curious Creative Dreams | 0
comments
Sunday, July 26, 2020
LADY PINEAPPLE

Supplies needed:
I am using the gorgeous artwork from Andy Cooper for this tutorial which you can find here
Scrapkit: I am using a stunning kit by Mariel Designs called "Lady Pineapple" which you can get by going here
Mask 936 from Rachel Designs which you can find here
Plugins: Lokas 3D Shadow
----------------------------
This tutorial is written for those who have working knowledge of PSPX2 (any version will do).
This tutorial was written by me on July 26, 2020. Please do not copy or paste on any other forum, website or blog provide link back to tut only. Please do not claim as your own. This tutorial is copyrighted to me. Any resemblance to any other tutorial is purely coincidental.
Ok - let's start and remember to save often.
Open up a 750 x 650 blank canvas (we can resize it later)
Select Paper 1 and paste on the canvas
Apply Mask 936 and merge group
Select Element 49 - resize by 75%
Paste and position in the center of the mask
Select Element 68 - resize by 55%
Paste and positon on the left side
Select Element 65 - resize by 20%
Paste and position on the top left
Select Element 23 - resize by 25%
Paste and position on the left side
Select Element 51 - resize by 25%
Paste and position on the top right
Select Element 47 - resize by 50%
Paste and position on the right side
Select Element 31 - resize by 55%
Paste and position on the right side
Paste tube of choice where desired
Apply Lokas 3D Shadow at default settings
Select Element 85 - resize by 30%
Paste and position on the bottom left
Select Element 19 - resize by 20%
Paste and position on the b0ttom left
Select Element 54 - resize by 30%
Paste and position on the bottom left
Select Element 76 - resize by 15%
Paste and position on the bottom left
Select Element 73 - resize by 15%
Paste and paste on the bottom left
Select Element 42 - resize by 20%
Paste and position on the top right
Select Element 48 - resize by 25%
Paste and position on the bottom right
Select Element 14 - resize by 30%
Paste and position on the bottom right
Select Element 32 - resize by 25%
Paste and position on the bottom right
Select Element 15 - resize by 25%
Paste and position on the bottom
Select Element 83
Paste and position in the center of the canvas
Add any dropshadows you like
Sharpen any elements as needed
Crop and resize as desired
Add copyright info, license number and name
You're done! Thanks for trying my tutorial!

Labels:Mariel Designs | 0
comments
Thursday, July 23, 2020
SAILOR LIFE

Supplies needed:
I am using the gorgeous artwork from Andy Cooper for this tutorial which you can find here
Scrapkit: I am using a stunning kit by Chachaz Creationz called "Sailor Life" which you can get by going here
Summer Mask 2 from Fecnikek which you can find here
Plugins: Lokas 3D Shadow
----------------------------
This tutorial is written for those who have working knowledge of PSPX2 (any version will do).
This tutorial was written by me on July 23, 2020. Please do not copy or paste on any other forum, website or blog provide link back to tut only. Please do not claim as your own. This tutorial is copyrighted to me. Any resemblance to any other tutorial is purely coincidental.
Ok - let's start and remember to save often.
Open up a 750 x 650 blank canvas (we can resize it later)
Add new raster and flood-fill with color of choice
Apply Summer Mask 2 and merge group
Select Paper 2 and paste on the canvas
Reapply Mask 2 and merge group
Resize by 95%
Select Element 26 - resize by 65%
Paste and position on the left side
Select Element 33 - resize by 50%
Image mirror and paste on the left side
Select Element 52 - resize by 45%
Image mirror and paste on the right side
Select Element 28 - resize by 50%
Paste and position on the right side
Select Element 54 - resize by 25%
Paste and position on the right side
Select Element 67 - resize by 30%
Paste and position on the top left
Paste tube of choice where desired
Apply Lokas 3D Shadow at default settings
Select Element 46 - resize by 30%
Paste and position on the left side
Select Element 10 - resize by 30%
Paste and position on the b0ttom left
Select Element 20 - resize by 30%
Paste and position on the bottom left
Select Element 9 - resize by 30%
Paste and position on the bottom
Select Element 3 - resize by 30%
Image Free Rotate Right by 15% and paste on the bottom
Select Element 5 - resize by 40%
Paste and position on the bottom right
Select Element 58 - resize by 40%
Paste and position on the bottom right
Select Element 41 - resize by 20%
Paste and position on the bottom right
Select Element 74 - resize by 30%
Paste and position on the bottom right
Select Element 75 - resize by 25%
Paste and position on the bottom right
Select Element 15 - resize by 25%
Paste and position on the bottom right
Select Element 65 - resize by 40%
Paste and position on the bottom right
Select Element 13 - resize by 25%
Paste and position on the bottom
Select Element 40 - resize by 40%
Paste and position on the top right
Add any dropshadows you like
Sharpen any elements as needed
Crop and resize as desired
Add copyright info, license number and name
You're done! Thanks for trying my tutorial!

Labels:Chacha Creationz | 0
comments
Tuesday, July 21, 2020
HAUNT


These CT Tags were made using the amazing artwork by Charmed Designs. You can purchase the kit "Haunt" Here:
P4DsDesignz Store, Designz Scrap Shop, Secret Garden Designs, All that Glitterz, Mystical Scraps, Sensibility Scrapping, Direct Digital Scrap, Digital Scrappin Depot and Design n Company
These tags were made by me and my own creativity. Please do not rip apart, destroy, alter them or claim them as your own. Thanks.


Labels:Charmed Designs | 0
comments
Monday, July 20, 2020
STEAMY DREAMS
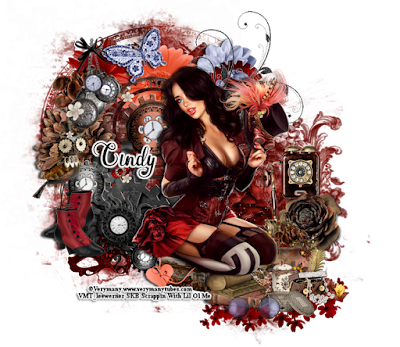
Supplies needed:
I am using the gorgeous artwork from Verymany for this tutorial which you can find here
Scrapkit: I am using a stunning kit by Scrappin With Lil Ol Me called "Steamy Dreams" which you can get by going here
Mask 316 from Mizteeques which you can find here
Plugins: Lokas 3D Shadow
----------------------------
This tutorial is written for those who have working knowledge of PSPX2 (any version will do).
This tutorial was written by me on July 20, 2020. Please do not copy or paste on any other forum, website or blog provide link back to tut only. Please do not claim as your own. This tutorial is copyrighted to me. Any resemblance to any other tutorial is purely coincidental.
Ok - let's start and remember to save often.
Open up a 750 x 650 blank canvas (we can resize it later)
Select Paper 8 and paste on the canvas
Apply Mask 316 and merge group
Select Element 135 - resize by 30%
Paste and position on the top left
Select Element 60 - resize by 30%
Paste and positon on the top center
Select Element 41 - resize by 30%
Paste and position on the left side
Select Element 61 - resize by 30%
Paste and position on the top left
Select Element 130 - resize by 40%
Paste and position on the top center
Select Element 109 - resize by 30%
Paste and position on the top left
Select Element 144 - resize by 25%
Paste and position on the top right
Select Element 69 - resize by 20%
Paste and position on the top right
Select Element 124 - resize by 40%
Paste and position on the top right
Paste tube of choice where desired
Apply Lokas 3D Shadow at default settings
Select Element 128 - resize by 40%
Paste and position on the bottom left
Select Element 73 - resize by 25%
Paste and position on the b0ttom left
Select Element 111 - resize by 30%
Paste and position on the left side
Select Element 120 - resize by 20%
Paste and position on the bottom left
Select Element 66 - resize by 25%
Paste and paste on the bottom
Select Element 139 - resize by 30%
Paste and position on the bottom
Select Element 102 - resize by 65%
Paste and position on the right side
Select Element 62 - resize by 30%
Paste and position on the right side
Select Element 65 - resize by 25%
Paste and position on the bottom right
Select Element 146 - resize by 30%
Paste and position on the bottom right
Select Element 154 - resize by 50%
Paste and position on the bottom right
Select Element 51 - resize by 15%
Paste and position on the bottom right
Select Element 53 - resize by 30%
Image mirror and paste on the bottom right
Select Element 83 - resize by 25%
Paste and position on the bottom right
Select Element 74 - resize by 20%
Paste and position on the top left
Select Element 150 - resize by 40%
Paste and position on the left side
Add any dropshadows you like
Sharpen any elements as needed
Crop and resize as desired
Add copyright info, license number and name
You're done! Thanks for trying my tutorial!

Labels:Scrappin With Lil Ol Me | 0
comments
Friday, July 17, 2020
CANDI ROCK
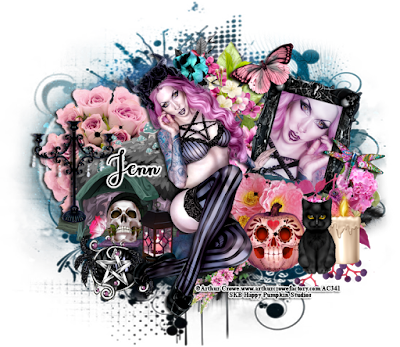
Supplies needed:
I am using the gorgeous artwork from Arthur Crowe for this tutorial which you can find here
Scrapkit: I am using a stunning kit by Happy Pumpkin Studios called "Lovey Candi Rock" which you can get by going here and here
Mask 0007 from Vivienne which you can find here
Plugins: Lokas 3D Shadow
----------------------------
This tutorial is written for those who have working knowledge of PSPX2 (any version will do).
This tutorial was written by me on July 17, 2020. Please do not copy or paste on any other forum, website or blog provide link back to tut only. Please do not claim as your own. This tutorial is copyrighted to me. Any resemblance to any other tutorial is purely coincidental.
Ok - let's start and remember to save often.
Open up a 750 x 650 blank canvas (we can resize it later)
Select Paper 13 and paste on the canvas
Apply Mask 0007 and merge group
Select Element 12 - resize by 40%
Paste and position on the top left
Select Element 20 - resize by 30%
Image Free Rotate Left by 15% and paste on the top right
Select Element 89 - resize by 20%
Paste and position on the top center
Select Element 70 - resize by 40%
Image mirror and paste on the left side
Select Element 81 - resize by 25%
Paste and position on the left side
Select Frame Element 1- resize by 50%
Image Free Rotate Right by 15% and paste on the right side
Select your magic wand tool and select the center of the frame (Add (Shift), RGB Value, Tolerance 25, Contiguous checked, Feather 0)
Selections, Modify, Expand by 5
Add new raster layer and flood-fill with gradient of choice
Paste close-up tube on gradient layer
Select invert, delete, select none
Change close-up tube to Luminence (Legacy)
Move gradient and close-up layer below frame element
Paste tube of choice where desired
Apply Lokas 3D Shadow at default settings
Select Element 1 - resize by 15%
Paste and position on the bottom left
Select Element 49 - resize by 20%
Paste and position on the b0ttom left
Select Element 94 - resize by 15%
Paste and position on the bottom left
Select Element 74 - resize by 15%
Paste and position on the right side
Select Element 37 - resize by 20%
Image mirorr and paste on the right side
Select Element 55 - resize by 20%
Paste and position on the bottom right
Select Element 54 - resize by 20%
Paste and position on the bottom right
Select Element 2 - resize by 20%
Paste and position on the bottom right
Select Element 36 - resize by 15%
Paste and position on the top right
Select Element 57 - resize by 25%
Paste and position on the bottom
Select Element
Add any dropshadows you like
Sharpen any elements as needed
Crop and resize as desired
Add copyright info, license number and name
You're done! Thanks for trying my tutorial!
Labels:Happy Pumpkin Studios | 0
comments
Thursday, July 16, 2020
ROMANTIC HEART
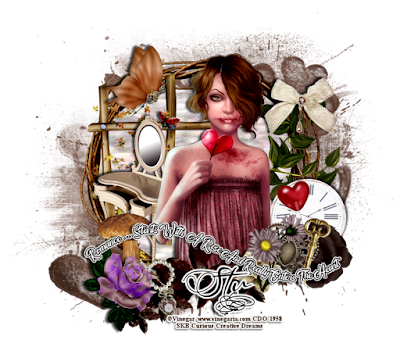
Supplies needed:
I am using the gorgeous artwork from Vinegar for this tutorial which you can only find here
Scrapkit: I am using a stunning kit by Curious Creative Dreams called "IB-VinegarFeb2019" which you can get by going here
Mask 903 from Rachel Designs which you can find here
Plugins: Lokas 3D Shadow
----------------------------
This tutorial is written for those who have working knowledge of PSPX2 (any version will do).
This tutorial was written by me on July 16, 2020. Please do not copy or paste on any other forum, website or blog provide link back to tut only. Please do not claim as your own. This tutorial is copyrighted to me. Any resemblance to any other tutorial is purely coincidental.
Ok - let's start and remember to save often.
Open up a 750 x 650 blank canvas (we can resize it later)
Select Paper 24 and paste on the canvas
Apply Mask 903 and merge group
Select Element 21- resize by 75%
Paste and position in the center of the canvas
Select your magic wand tool and select the center of the frame (Add (Shift), RGB Value, Tolerance 25, Contiguous checked, Feather 0)
Selections, Modify, Expand by 2
Paste paper 27
Select invert, delete, select none
Move paper and below frame element
Apply Eyecandy Texture Noise with the following settings:
Select Element 18 - resize by 65%
Paste and position on the left side above frame layer
Select Element 16 - resize by 65%
Paste and position on the left side of the frame
Select Element 17 - resize by 45%
Paste tube of choice where desired
Apply Lokas 3D Shadow at default settings
Select Element 13 - resize by 65%
Paste and position on the left side below tube layer
Select Element 9 - resize by 55%
Paste and position on the top left
Select Element 14 - resize by 50%
Paste and position on the top right
Select Element 7 - resize by 50%
Paste and position on the bottom left
Select Element 2 - resize by 40%
Paste and paste on the bottom left
Select Element 4 -
Paste and position on the bottom below left side of tube
Select Element 11 - resize by 30%
Image Free Rotate Left by 15% and paste on the bottom left
Select Element 6 - resize by 40%
Paste and position on the bottom right
Select Element 15 - resize by 50%
Paste and position on the bottom right
Select Element 20 - resize by 50%
Image Free Rotate Right by 15% and paste on the bottom right
Select Element 1 - resize by 40%
Image Free Rotate Left by 15% and pasate on the bottom left
Select Element 3 - resize by 40%
Paste and position on the bottom right
Select Element 10 - resize by 75%
Image Free Rotate Right by 15% and paste on the bottom right
Select Element 29 -
Paste and position on the bottom
Apply Eyecandy Gradient Glow on fat default settings (Glow Width 3)
Add any dropshadows you like
Sharpen any elements as needed
Crop and resize as desired
Add copyright info, license number and name
You're done! Thanks for trying my tutorial!

Labels:Curious Creative Dreams | 0
comments
Tuesday, July 14, 2020
SPLISH SPLASH
Supplies needed:
I am using the gorgeous artwork from Pinup Toons for this tutorial which you can find here
Scrapkit: I am using a stunning kit by Chili's Designz called "Bubbles" which you can get by going here, here here
Mask 934 from Rachel Designs which you can find here
Plugins: Lokas 3D Shadow, Eyecandy Gradient Glow
----------------------------
This tutorial is written for those who have working knowledge of PSPX2 (any version will do).
This tutorial was written by me on July 14, 2020. Please do not copy or paste on any other forum, website or blog provide link back to tut only. Please do not claim as your own. This tutorial is copyrighted to me. Any resemblance to any other tutorial is purely coincidental.
Ok - let's start and remember to save often.
Open up a 750 x 650 blank canvas (we can resize it later)
Select Paper 9 and paste on the canvas
Apply Mask 934 and merge group
Select Greenery 2 Element - resize by 65%
Paste and position on above the mask
Select Clock Element - resize by 40%
Paste and positon on the top left
Select Drawer Element - resize by 30%
Paste and position on the top center
Select Jars Element - resize by 25%
a;na;A;
Paste and position on the above drawer element
Select Candle 2 Element - resize by 20%
Paste and position above the drawer element
Select Soap 2 Element - resize by 30%
Paste and position on the top right
Select Branch 2 Element - resize by 30%
Paste and position below bottom right on clock
Paste tube of choice where desired
Apply Lokas 3D Shadow at default settings
Select Bathtub Element - resize by 55%
Paste and position on the left side
Select Flower 4 Element - resize by 30%
Paste and position on the right side
Select Towels Element - resize by 30%
Paste and position on the right side
Select Soap 4 Element - resize by 25%
Paste and position on the bottom left
Select Towel Element - resize by 30%
Paste and paste on the bottom left
Select Bottle Element - resize by 25%
Paste and position on the bottom left
Select Creme Element - resize by 30%
Paste and position on the bottom
Select Gems Element - resize by 25%
Paste and position on the top of the Creme Element
Select Perfume 2 Element - resize by 25%
Paste and position on the bottom left
Select Cat Element - resize by 30%
Paste and position on the bottom
Select Mirror 2 Element - resize by 30%
Image Free Rotate Right by 15% and paste on the bottom
Select Duck Element - resize by 25%
Paste and position on the bottom
Select Candle Element - resize by 30%
Paste and position on the bottom
Select Salt Element - resize by 25%
Paste and position on the bottom right
Select Duck 2 Element - resize by 25%
Paste and position on the bottom right
Select Flower 3 Element - resize by 25%
Paste and position on the bottom right
Select Deco Element - resize by 30%
Paste and position on the bottom right
Select Resin Element - resize by 25%
Paste and position on the bottom right
Select Candle Element - resize by 30%
Paste and position on the bottom right
Select Bubbles Element - resize by 25%
Paste and position on the top left
Select WA3 Element - resize by 40%
Paste and position on the top left
Apply Eyecandy Gradient Glow on fat default settings (Glow width 3)
Add any dropshadows you like
Sharpen any elements as needed
Crop and resize as desired
Add copyright info, license number and name
You're done! Thanks for trying my tutorial!

Labels:Chili Designz | 0
comments
Monday, July 13, 2020
LAVA
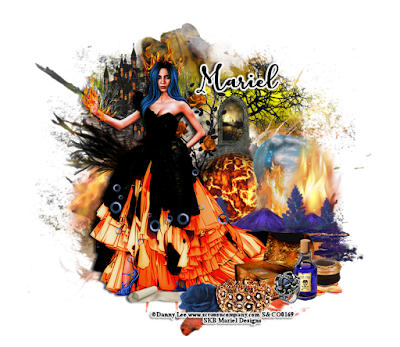
Supplies needed:
I am using the gorgeous artwork from Danny Lee for this tutorial which you can find here
Scrapkit: I am using a stunning kit by Mariel Designs called "Lava" which you can get by going here
Set 107 Mask 2 from Rachel Designs which you can find here
Plugins: Lokas 3D Shadow
----------------------------
This tutorial is written for those who have working knowledge of PSPX2 (any version will do).
This tutorial was written by me on July 13, 2020. Please do not copy or paste on any other forum, website or blog provide link back to tut only. Please do not claim as your own. This tutorial is copyrighted to me. Any resemblance to any other tutorial is purely coincidental.
Ok - let's start and remember to save often.
Open up a 750 x 650 blank canvas (we can resize it later)
Select Paper 4 and paste on the canvas
Apply Mask 2 and merge group
Select Element 43 - resize by 40%
Image mirror Paste and position on the top right
Select Element 69 - resize by 40%
Paste and positon on the top left
Select Element 36 - resize by 65%
Paste and position on the right side
Select Element 74 - resize by 30%
Paste and position on the top center
Select Element 29 - resize by 30%
Paste and position on the top left
Select Element 22 - resize by 40%
Paste and position on the left side
Paste tube of choice where desired
Apply Lokas 3D Shadow at default settings
Select Element 10 - resize by 40%
Paste and position on the right side
Select Element 98 - resize by 25%
Paste and position on the right side
Select Element 65 - resize by 60%
Paste and position on the bottom right
Select Element 2 - resize by 40%
Paste and position on the bottom right
Select Element 91 - resize by 25%
Paste and paste on the bottom right
Select Element 50 - resize by 15%
Paste and position on the bottom right
Select Element 87 - resize by 20%
Paste and position on the bottom right
Select Element 27 - resize by 10%
Image Free Rotate Left by 15% and paste on the bottom right
Select Element 30 - resize by 30%
Paste and position on the bottom
Select Element 41 - resize by 15%
Paste and position on the bottom
Select Element 51 - resize by 20%
Paste and position on the bottom
Select Element 42 - resize by 40%
Paste and position on the bottom left
Add any dropshadows you like
Sharpen any elements as needed
Crop and resize as desired
Add copyright info, license number and name
You're done! Thanks for trying my tutorial!

Labels:Mariel Designs | 0
comments
RAINBOW ANGEL


These CT Tags were made using the amazing artwork by Charmed Designs. You can purchase the kit "Torn" Here:
P4DsDesignz Store, Designz Scrap Shop, Secret Garden Designs, All that Glitterz, Mystical Scraps, Sensibility Scrapping, Direct Digital Scrap, Digital Scrappin Depot and Design n Company
These tags were made by me and my own creativity. Please do not rip apart, destroy, alter them or claim them as your own. Thanks.


Labels:Charmed Designs | 0
comments
Wednesday, July 8, 2020
WONDERLAND MADNESS
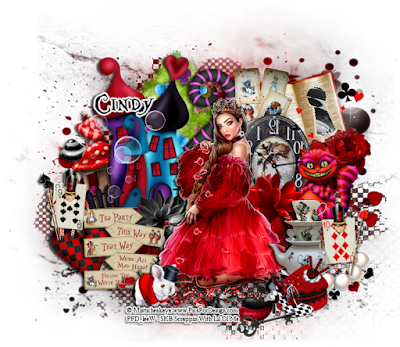
Supplies needed:
I am using the gorgeous artwork from Misticheskaya for this tutorial which you can find here
Scrapkit: I am using a stunning kit by Scrappin With Lil Ol Me called "Wonderland Madness" which you can get by going here
Set 25 Mask 3 from Rocked by Rachel which you can find here
Plugins: Lokas 3D Shadow
----------------------------
This tutorial is written for those who have working knowledge of PSPX2 (any version will do).
This tutorial was written by me on July 8, 2020. Please do not copy or paste on any other forum, website or blog provide link back to tut only. Please do not claim as your own. This tutorial is copyrighted to me. Any resemblance to any other tutorial is purely coincidental.
Ok - let's start and remember to save often.
Open up a 750 x 650 blank canvas (we can resize it later)
Select Paper 12 and paste on the canvas
Apply Mask 3 and merge group
Select Element 132 - resize by 65%
Paste and position on the top left
Select Element 103 - resize by 40%
Paste and positon on the top center
Select Element 2 - resize by 25%
Image Free Rotate Left by 15% and paste on the top right
Select your magic wand tool and select the center of the keyhole (Add (Shift), RGB Value, Tolerance 25, Contiguous checked, Feather 0)
Selections, Modify, Expand by 2
Paste paper 10
Select invert, delete, select none
Move paper below keyhole
Select Element 121 - resize by 40%
Paste and position on the top right
Select Element 118 - resize by 20%
Paste and position on the top right
Select Element 130 - resize by 55%
Paste and position on the top left
Select Element 25 - resize by 30%
Paste and position on the top left
Paste tube of choice where desired
Apply Lokas 3D Shadow at default settings
Select Element 117 - resize by 25%
Paste and position on the left side
Select Element 42 - resize by 25%
Image Free Rotate Left by 15% and paste on the bottom left
Select Element 86 - resize by 25%
Paste and position on the left side
Select Element 31 - resize by 25%
Paste and position on the bottom left
Select Element 70 - resize by 20%
Paste and paste on the bottom left
Select Element 32 - resize by 30%
Paste and position on the right side
Select Element 88 - resize by 20%
Paste and position on the right side
Select Element 4 - resize by 25%
Paste and position on the right side
Select Element 68 - resize by 25%
Paste and position on the right side
Select Element 84 - resize by 25%
Paste and position on the bottom right
Select Element 28 - resize by 15%
Paste and position on the bottom right
Select Element 18 - resize by 20%
Paste and position on the bottom right
Select Element 59 - resize by 20%
Paste and position on the bottom right
Select Element 90 - resize by 15%
Paste and position on the bottom right
Select Element 104 - resize by 30%
Paste and position on the bottom
Select Element 69 - resize by 20%
Paste and position on the bottom
Select Element 128 - resize by 20%
Image Free Rotate Left by 15% and paste on the bottom
Select Element 86 - resize by 20%
Paste and position on the bottom
Select Element 131 - resize by 30%
Paste and position on the left
Add any dropshadows you like
Sharpen any elements as needed
Crop and resize as desired
Add copyright info, license number and name
You're done! Thanks for trying my tutorial!

Labels:Scrappin With Lil Ol Me | 0
comments
Sunday, July 5, 2020
ANGEL WITCH
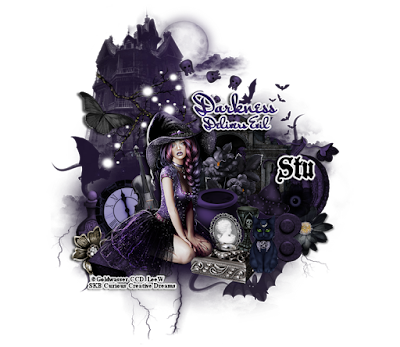
Supplies needed:
Scrapkit: I am using a stunning kit by Curious Creative Dreams called "Angel Witch" which you can get by going HERE, HERE, HERE, HERE and HERE
Halloween Mask from Fecnikek which you can find here
Plugins: Lokas 3D Shadow, Eyecandy Gradient Glow
----------------------------
This tutorial is written for those who have working knowledge of PSPX2 (any version will do).
This tutorial was written by me on July 4, 2020. Please do not copy or paste on any other forum, website or blog provide link back to tut only. Please do not claim as your own. This tutorial is copyrighted to me. Any resemblance to any other tutorial is purely coincidental.
Ok - let's start and remember to save often.
Open up a 750 x 650 blank canvas (we can resize it later)
Select Paper 4 and paste on the canvas
Apply Halloween Mask and merge group
Select Element 1 - resize by 40%
Paste and position on the top left
Select Element 13 - resize by 50%
Paste and positon on the right sid
Select Element 37 - resize by 40%
Paste and position on the top right
Select Element 5 - resize by 30%
Paste and position on the right side
Select Element 3 - resize by 30%
Paste and position on the top left
Paste tube of choice where desired
Apply Lokas 3D Shadow at default settings
Select Element 15 - resize by 30%
Paste and position on the left side
Select Element 20 - resize by 30%
Image Free Rotate Left by 15% and paste on the left side
Select Element 55 - resize by 30%
Paste and position on the bottom left
Select Element 10 - resize by 25%
Paste and position on the bottom left
Select Element 7 - resize by 25%
Paste and paste on the bottom left
Select Element 12 - resize by 30%
Paste and position on the right side
Select Element 4 - resize by 30%
Paste and position on the right side
Select Element 27 - resize by 30%
Paste and position on the right side
Select Element 2 - resize by 30%
Paste and position on the bottom right
Select Element 11 - resize by 30%
Image mirror and paste on the bottom right
Select Element 34 - resize by 30%
Paste and position on the bottom right
Select Element 24 - resize by 30%
Paste and position on the bottom right
Select Element 19 - resize by 25%
Image Free Rotate Left by 15% and paste on the bottom right
Select Element 21 - resize by 30%
Paste and position on the bottom right
Select Element 60 - resize by 30%
Paste and position on the top right where desired
Apply Eyecandy Gradient Glow on fat default settings (Glow width 3)
Add any dropshadows you like
Sharpen any elements as needed
Crop and resize as desired
Add copyright info, license number and name
You're done! Thanks for trying my tutorial!

Labels:Curious Creative Dreams | 0
comments
Saturday, July 4, 2020
TORN


These CT Tags were made using the amazing artwork by Charmed Designs. You can purchase the kit "Torn" Here:
P4DsDesignz Store, Designz Scrap Shop, Secret Garden Designs, All that Glitterz, Mystical Scraps, Sensibility Scrapping, Direct Digital Scrap, Digital Scrappin Depot and Design n Company
These tags were made by me and my own creativity. Please do not rip apart, destroy, alter them or claim them as your own. Thanks.

Labels:Charmed Designs | 0
comments
Subscribe to:
Comments
(Atom)


