Labels
- Alikas Scraps
- All Dolled Up Store
- Amy Marie
- Annaica
- Arthur Crowe
- Babycakes Scraps
- Barbara Jensen
- Bibi's Collections
- Black Widow Creationz
- Blu Moon
- Bonnies Creations
- Bookwork Dezines
- Broken Sky Dezine
- Carita Creationz
- Carpe Diem Designs
- CDO
- Celinart Pinup
- Celine
- Chacha Creationz
- Charmed Designs
- Cherry Blossom Designs
- Chili Designz
- Cluster Frame
- Creative Misfits
- Creative Scraps by Crys
- Curious Creative Dreams
- Danny Lee
- Derzi
- Designs by Ali
- Designs by Joan
- Designs by Ketura
- Designs By Norella
- Designs by Vi
- Diana Gali
- Diry Art Designs
- Disturbed Scraps
- Dreaming With Bella
- Eclipse Creations
- Elegancefly
- Extras
- Fabulous Designz
- Forum Set
- Foxy's Designz
- Freek's Creation
- FTU
- FwTags
- Goldwasser
- Gothic Inspirations
- Gothic Raven Designs
- Graphfreaks
- Hania's Designs
- Happy Pumpkin Studios
- Horseplay's Pasture Designs
- indie-Zine
- Irish Princess Designs
- Ishika Chowdhury
- Kaci McVay
- Kajenna
- katharine
- Katherine
- Khloe Zoey
- Killer Kitty
- Kissing Kate
- KiwiFirestorm
- Kiya Designs
- Kizzed by Kelz
- KZ Designz
- Lady Mishka
- Lil Mz Brainstorm
- Maiden of Darkness
- Mariel Designs
- MellieBeans
- Michelle's Myths
- Midnight Shadow
- Misticheskya
- MistyLynn's Creations
- MMeliCrea Designz
- Moon Vixen Designs
- NaSionainne
- Ninaste
- Niqui Designs
- Pandora
- Picsfordesign
- Pink Paradox Productions
- Radyga Designs
- Redefined Designs
- Rissa's Designs
- Schnegge
- ScottishButterfly Creations
- Scrappin Krazy Designs
- Scrappin With Lil Ol Me
- Scraps and the City
- Scraps Dimensions
- Scraps From The Heart
- Scraps N Company
- Scraps with Attitude
- Shining Star Art
- Skyscraps
- Sleek N Sassy Designs
- Sophisticat Simone
- Souldesigner
- Soxsational Scraps
- Spazz
- Starlite and Soul
- Stella Felice
- Tammy Welt
- Tasha's Playground
- The PSP Project
- Thrifty Scraps by Gina
- Tiny Turtle Designs
- Upyourart
- Verymany
- Wendy Gerber
- Whisper In the Wind
- Wick3d Creationz
- Wicked Diabla
- Yude's Kreationz
Blog Archive
Sunday, August 30, 2020
GOTHIC STEAMPUNK
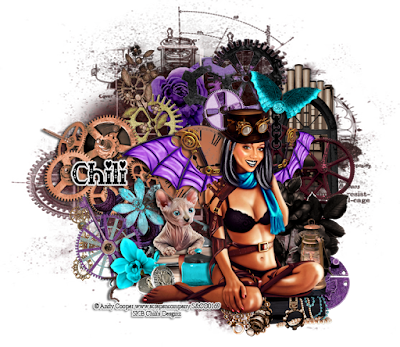
Supplies needed:
I am using the gorgeous artwork from Andy Cooper for this tutorial which you can find here
Scrapkit: I am using a stunning kit by Chili's Designz called "Gothic Steampunk" which you can get by going here
Mask 83 from Vivienne which you can find here
Plugins: Lokas 3D Shadow, Eyecandy Gradient Glow
----------------------------
This tutorial is written for those who have working knowledge of PSPX2 (any version will do).
This tutorial was written by me on August 30, 2020. Please do not copy or paste on any other forum, website or blog provide link back to tut only. Please do not claim as your own. This tutorial is copyrighted to me. Any resemblance to any other tutorial is purely coincidental.
Ok - let's start and remember to save often.
Open up a 750 x 650 blank canvas (we can resize it later)
Select Paper 3 and paste on the canvas
Apply Mask 83 and merge group
Select Orgel Element - resize by 30%
Paste and position on the top right
Select Deco 2 Element - resize by 30%
Paste and positon on the top right
Select Rose 3 Element - resize by 30%
Paste and position on the top center
Select Deco 3 Element - resize by 30%
Paste and position on the top left
Select Gears 2 Element - resize by 40%
Paste and position on the left side
Select Clock Element - resize by 35%
Paste and position in the center
Select Window Element - resize by 30%
Paste and position on the right side
Select Gears 3 - resize by 40%
Image mirror and paste on the right side
Paste tube of choice where desired
Apply Lokas 3D Shadow at default settings
Select Deco Element - resize by 40%
Paste and position on the bottom left
Select Orchid Element - resize by 25%
Image mirror and paste on the bottom left
Select Books 2 Element - resize by 40%
Paste and position on the bottom left
Select Kitten Element - resize by 25%
Paste and position on the bottom left
Select Jar Element - resize by 20%
Paste and paste on the bottom
Select Button 2 Element - resize by 25%
Paste and position on the bottom left
Select Deco 5 Element - resize by 30%
Paste and position on the bottom right
Select Deco 8 Element - resize by 30%
Paste and position on the bottom right
Select Box Element - resize by 25%
Paste and position on the bottom right
Select Chain Element - resize by 25%
Image mirror and paste on the bottom
Select Googles Element - resize by 20%
Paste and position on the bottom
Select Lamp 4 Element - resize by 25%
Paste and position on the bottom right
Select Wings Element - resize by 20%
Image Free Rotate Right by 15% and paste on the top right
Add any dropshadows you like
Sharpen any elements as needed
Crop and resize as desired
Add copyright info, license number and name
You're done! Thanks for trying my tutorial!

Labels:Chili Designz | 0
comments
Thursday, August 27, 2020
SWEET ORANGE
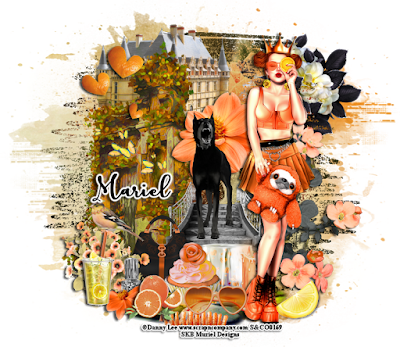
Supplies needed:
I am using the gorgeous artwork from Danny Lee for this tutorial which you can find here
Scrapkit: I am using a stunning kit by Mariel Designs called "Sweet Orange" which you can get by going here
Mask 41 from Vivienne which you can find here
Plugins: Lokas 3D Shadow
----------------------------
This tutorial is written for those who have working knowledge of PSPX2 (any version will do).
This tutorial was written by me on August 27, 2020. Please do not copy or paste on any other forum, website or blog provide link back to tut only. Please do not claim as your own. This tutorial is copyrighted to me. Any resemblance to any other tutorial is purely coincidental.
Ok - let's start and remember to save often.
Open up a 750 x 650 blank canvas (we can resize it later)
Select Paper 4 and paste on the canvas
Apply Mask 41 and merge group
Select Element 65 -
Paste and position above the mask layer
Select Element 15 - resize by 55%
Paste and positon on the top left
Select Element 61 - resize by 50%
Paste and position on the bottom
Select Element 86 - resize by 75%
Paste and position on the left side
Select Element 79 - resize by 40%
Paste and position on the top right
Select Element 13 - resize by 60%
Paste and position on the bottom right
Select Element 59 - resize by 30%
Paste and position in the center
Select Element 14 - resize by 40%
Paste and position on the bottom
Paste tube of choice where desired
Apply Lokas 3D Shadow at default settings
Select Element 88 - resize by 30%
Paste and position on the top left
Select Element 53 - resize by 30%
Paste and position on the left side
Select Element 90 - resize by 30%
Paste and position on the bottom left
Select Element 19 - resize by 25%
Paste and position on the bottom left
Select Element 43 - resize by 20%
Paste and paste on the bottom left
Select Element 63 - resize by 25%
Paste and position on the bottom left
Select Element 64 - resize by 15%
Paste and position on the bottom left
Select Element 58 - resize by 15%
Paste and position on the bottom left
Select Element 73 - resize by 20%
Paste and position on the bottom
Select Element 75 - resize by 20%
Paste and position on the bottom
Select Element 6 - resize by 20%
Paste and position on the bottom
Select Element 71 - resize by 20%
Paste and position on the bottom
Select Element 29 - resize by 25%
Paste and position on the bottom
Select Element 39 - resize by 40%
Paste and position in the center
Select Element 23 - resize by 15%
Paste and position on the bottom right
Add any dropshadows you like
Sharpen any elements as needed
Crop and resize as desired
Add copyright info, license number and name
You're done! Thanks for trying my tutorial!

Labels:Mariel Designs | 0
comments
Wednesday, August 26, 2020
MOONLIGHT MAGIC
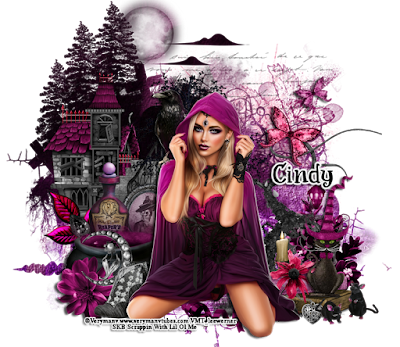
Supplies needed:
I am using the gorgeous artwork from Verymany for this tutorial which you can find here
Scrapkit: I am using a stunning kit by Scrappin With Lil Ol Me called "Moonlight Magic" which you can get by going here
Mask 2 from Fecnikek which you can find here
Plugins: Lokas 3D Shadow
----------------------------
This tutorial is written for those who have working knowledge of PSPX2 (any version will do).
This tutorial was written by me on August 26, 2020. Please do not copy or paste on any other forum, website or blog provide link back to tut only. Please do not claim as your own. This tutorial is copyrighted to me. Any resemblance to any other tutorial is purely coincidental.
Ok - let's start and remember to save often.
Open up a 750 x 650 blank canvas (we can resize it later)
Select Paper 14 and paste on the canvas
Apply Mask 2 and merge group
Select Element 158 - resize by 65%
Paste and position on the top right
Select Element 125 - resize by 40%
Paste and positon on the top left
Select Element 77 - resize by 65%
Paste and position on the left side
Select Element 103 - resize by 40%
Paste and position on the left side
Select Element 45 - resize by 65%
Paste and position on the right side
Paste tube of choice where desired
Apply Lokas 3D Shadow at default settings
Select Element 108 - resize by 25%
Paste and position on the left side
Select Element 31 - resize by 20%
Image Free Rotate Right by 15% and paste on the left side
Select Element 159 - resize by 40%
Paste and position on the bottom left
Select Element 101 - resize by 25%
Paste and position on the bottom left
Select Element 127 - resize by 25%
Paste and paste on the bottom left
Select Element 111 - resize by 20%
Paste and position on the bottom left
Select Element 107 - resize by 30%
Paste and position on the top right
Select Element 138 - resize by 40%
Paste and position on the bottom right
Select Element 91 - resize by 40%
Paste and position on the bottom right
Select Element 37 - resize by 20%
Paste and position on the bottom right
Select Element 145 - resize by 40%
Paste and position on the bottom right
Select Element 98 - resize by 25%
Paste and position on the bottom right
Select Element 3 - resize by 20%
Paste and position on the bottom right
Add any dropshadows you like
Sharpen any elements as needed
Crop and resize as desired
Add copyright info, license number and name
You're done! Thanks for trying my tutorial!

Labels:Scrappin With Lil Ol Me | 0
comments
Sunday, August 23, 2020
AMAZON

Supplies needed:
I am using the gorgeous artwork from Attila for this tutorial which you can find here
Scrapkit: I am using a stunning kit by Curious Creative Dreams called "Amazon" which you can get by going HERE, HERE, HERE, HERE, HERE
Mask 53 from Vivienne which you can find here
Plugins: Lokas 3D Shadow
----------------------------
This tutorial is written for those who have working knowledge of PSPX2 (any version will do).
This tutorial was written by me on August 23, 2020. Please do not copy or paste on any other forum, website or blog provide link back to tut only. Please do not claim as your own. This tutorial is copyrighted to me. Any resemblance to any other tutorial is purely coincidental.
Ok - let's start and remember to save often.
Open up a 750 x 650 blank canvas (we can resize it later)
Select Paper 1 and paste on the canvas
Apply Mask 53 and merge group
Select Element 8 - resize by 40%
Paste and position on the top right
Select Element 1 - resize by 30%
Paste and positon on the top right
Select Element 44 - resize by 40%
Paste and position on the right side
Select Element 30 - resize by 85%
Paste and position on the right side
Select Element 35 - resize by 55%
Paste and position on the top left
Select Element 27 - resize by 40%
Paste and position on the left side
Select Element 17 - resize by 40%
Paste and position on the top left
Select Element 60 - resize by 30%
Paste and position on the top left
Paste tube of choice where desired
Apply Lokas 3D Shadow at default settings
Select Element 23 - resize by 40%
Paste and position on the left side
Select Element 29 - resize by 40%
Image mirror and paste on the bottom left
Select Element 25 - resize by 40%
Paste and position on the bottom left
Select Element 21 - resize by 30%
Paste and position on the bottom left
Select Element 41 - resize by 40%
Paste and paste on the top right
Select Element 32 - resize by 30%
Paste and position on the right side
Select Element 38 - resize by 50%
Paste and position on the right side
Select Element 22 - resize by 55%
Paste and position on the bottom right
Select Element 14 - resize by 30%
Paste and position on the bottom right
Select Element 46 - resize by 30%
Paste and position on the bottom right
Select Element 24 - resize by 40%
Image mirror and paste on the top right
Select Element 31 -
Paste and position on the canvas where desired
Add any dropshadows you like
Sharpen any elements as needed
Crop and resize as desired
Add copyright info, license number and name
You're done! Thanks for trying my tutorial!

Labels:Curious Creative Dreams | 0
comments
Wednesday, August 19, 2020
MYSTERIOUS LADY


These CT Tags were made using the amazing artwork by Charmed Designs. You can purchase the kit "Mysterious Lady" Here:
Labels:Charmed Designs | 0
comments
Tuesday, August 18, 2020
ANIMAL WOMAN

Supplies needed:
I am using the gorgeous artwork from Andy Cooper for this tutorial which you can find here
Scrapkit: I am using a stunning kit by Chachaz Creationz called "Animal Woman" which you can get by going here
Mask 343 & 323 from Mizteeques which you can find here
Plugins: Lokas 3D Shadow
----------------------------
This tutorial is written for those who have working knowledge of PSPX2 (any version will do).
This tutorial was written by me on August 18, 2020. Please do not copy or paste on any other forum, website or blog provide link back to tut only. Please do not claim as your own. This tutorial is copyrighted to me. Any resemblance to any other tutorial is purely coincidental.
Ok - let's start and remember to save often.
Open up a 750 x 650 blank canvas (we can resize it later)
Select Paper 6 and paste on the canvas
Apply Mask 343 and merge group
Select Paper 5 and paste above mask layer
Apply Mask 323 and merge group
Resize mask to 40% and reposition on the bottom right side
Select Element 97 - resize by 30%
Paste and position on the top left
Select Element 64 - resize by 30%
Paste and position on the top left
Select Element 25 - resize by 25%
Paste and position on the top left
Select Element 51 - resize by 50%
Paste and position on the top center
Select Element 36 - resize by 40%
Paste and position on top right
Select Element 89 - resize by 40%
Paste and position on the right side
Select Element 53 -
Image mirror and paste on the left side
Select Element 68 - resize by 25%
Paste and position on the top left
Select Element 41 - resize by 40%
Paste and position on the left side
Paste tube of choice where desired
Apply Lokas 3D Shadow at default settings
Select Element 54 - resize by 30%
Paste and position on the bottom left
Select Element 94 - resize by 30%
Paste and position on the bottom left
Select Element 38 - resize by 40%
Paste and position on the bottom left below tube layer
Select Element 67 - resize by 30%
Paste and position on the bottom left below tube layer
Select Element 83 - resize by 25%
Paste and position on the bottom left
Select Element 7 - resize by 30%
Paste and paste on the right side
Select Element 69 - resize by 30%
Paste and position on the right side
Select Element 56 - resize by 40%
Paste and position on the bottom right
Select Element 4 - resize by 25%
Paste and position on the bottom right
Select Element 23 - resize by 30%
Paste and position on the bottom right
Select Element 65 - resize by 25%
Paste and position on the bottom right
Select Element 96 - resize by 30%
Paste and position on the bottom
Select Element 16 - resize by 30%
Paste and position on the bottom
Select Element 45 - resize by 40%
Paste and position on the bottom right
Add any dropshadows you like
Sharpen any elements as needed
Crop and resize as desired
Add copyright info, license number and name
You're done! Thanks for trying my tutorial!

Labels:Chacha Creationz | 0
comments
Sunday, August 16, 2020
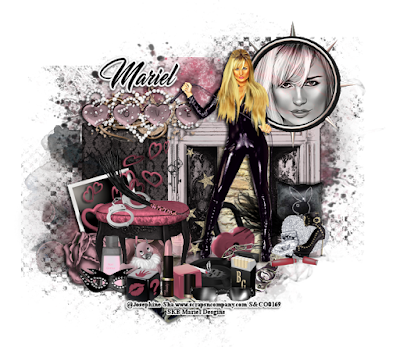
PUNISHER
Supplies needed:
I am using the gorgeous artwork from Josephine Sha for this tutorial which you can find here
Scrapkit: I am using a stunning kit by Mariel Designs called "Punisher" which you can get by going here
Set 37 Mask 2 from Rocked by Rachel which you can find here
Plugins: Lokas 3D Shadow
----------------------------
This tutorial is written for those who have working knowledge of PSPX2 (any version will do).
This tutorial was written by me on August 16, 2020. Please do not copy or paste on any other forum, website or blog provide link back to tut only. Please do not claim as your own. This tutorial is copyrighted to me. Any resemblance to any other tutorial is purely coincidental.
Ok - let's start and remember to save often.
Open up a 750 x 650 blank canvas (we can resize it later)
Select Paper 2 and paste on the canvas
Apply Mask 2 and merge group
Select Element 15 - resize by 75%
Paste and position on the top center
Select Element 2 - resize by 55%
Paste and position on the right side
Select Element 10 - resize by 50%
Paste and position on the right side behind element 2
Select Element 49 - resize by 40%
Paste and position on the top left
Select Element 16 - resize by 40%
Paste and position in the center
Select Frame Element 1 - resize by 40%
Paste and position on the top right
Select your magic wand tool and select the center of the frame (Add (Shift), RGB Value, Tolerance 25, Contiguous checked, Feather 0)
Selections, Modify, Expand by 5
Paste paper 5
Select invert, delete
Paste close-up tube on paper layer and delete
Select none
Change close-up tube to and to Luminance (Legacy)
Move paper and close-up layer below frame element
Paste tube of choice where desired
Apply Lokas 3D Shadow at default settings
Select Element 41 - resize by 25%
Paste and position on the bottom left
Select Element 55 - resize by 20%
Paste and position on the b0ttom left
Select Element 40 - resize by 30%
Paste and position on the left side
Select Element 3 - resize by 40%
Paste and position on the bottom left
Select Element 18 - resize by 15%
Paste and position on the left side
Select Element 51 - resize by 30%
Paste and position on the left side
Select Element 28 - resize by 20%
Paste and position on the bottom left
Select Element 59 - resize by 20%
Paste and position on the bottom left
Select Element 56 - resize by 15%
Paste and position on the bottom left
Select Element 37- resize by 15%
Paste and position on the bottom
Select Element 42 - resize by 20%
Image Free Rotate Left by 15% and paste on the bottom
Select Element 58 - resize by 25%
Paste and position on the bottom
Select Element 34 - resize by 20%
Paste and position on the bottom
Select Element 60 - resize by 15%
Paste and position on the bottom right
Select Element 74 - resize by 15%
Paste and position on the bottom right
Select Element 11 - resize by 15%
Paste and position on the right side
Selet Element 27 - resize by 15%
Paste and position on the bottom right
Select Element 47 - resize by 20%
Paste and position on the bottom
Select Element 19 - resize by 15%
Paste and position on the bottom
Select Element 24 - resize by 20%
Paste and position on the bottom
Select Element 76 - resize by 20%
Paste and position on the bottom
Add any dropshadows you like
Sharpen any elements as needed
Crop and resize as desired
Add copyright info, license number and name
You're done! Thanks for trying my tutorial!

Labels:Mariel Designs | 0
comments
Tuesday, August 11, 2020
SUMMER LOVE
Supplies needed:
Scrapkit: I am using a stunning kit by Curious Creative Dreams called "Summer Love" which you can get by going here, here, here, here, here, here and here
Mask 332 from Mizteeques which you can find here
Plugins: Lokas 3D Shadow
----------------------------
This tutorial is written for those who have working knowledge of PSPX2 (any version will do).
This tutorial was written by me on August 11, 2020. Please do not copy or paste on any other forum, website or blog provide link back to tut only. Please do not claim as your own. This tutorial is copyrighted to me. Any resemblance to any other tutorial is purely coincidental.
Ok - let's start and remember to save often.
Open up a 750 x 650 blank canvas (we can resize it later)
Select Paper 9 and paste on the canvas
Apply Mask 332 and merge group
Duplicate mask layer - Adjust, Blur, Motion Blur (Angle 55%, Strength 5%)
Move below original mask layer
Select Element 37 -
Paste and positon on the top center
Select Element 47 - resize by 95%
Paste and position on the top right
Select Element 5 - resize by 50%
Paste and position on the top left
Select Element 50 - resize by 40%
Paste and position on the left side
Select Element 40 - resize by 40%
Paste and position on the left side
Select Element 42 - resize by 50%
Paste and position on the left side
Paste tube of choice where desired
Apply Lokas 3D Shadow at default settings
Select Element 4 - resize by 55%
Paste and position on the right side
Select Element 10 - resize by 50%
Paste and position on the right side
Select Element 44 - resize by 30%
Paste and position on the top right
Select Element 1 - resize by 40%
Paste and position on the right side
Select Element 33 - resize by 30%
Paste and paste on the right side
Select Element 26 - resize by 55%
Paste and position on the bottom right
Select Element 36 - resize by 40%
Paste and position on the bottom right
Select Element 24 - resize by 50%
Paste and position on the bottom
Select Element 15 - resize by 40%
Paste and position on the bottom
Select Element 38 - resize by 30%
Image Free Rotate Left by 15% and paste on the bottom
Select Wordart 2 Element - resize by 40%
Paste and position on the bottom
Select Element 17 - resize by 40%
Paste and position on the top
Select Element 48 - resize by 50%
Paste and position on the canvas where desired
Add any dropshadows you like
Sharpen any elements as needed
Crop and resize as desired
Add copyright info, license number and name
You're done! Thanks for trying my tutorial!

Labels:Curious Creative Dreams | 0
comments
Saturday, August 8, 2020
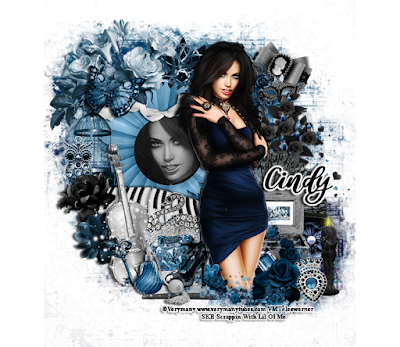
FREDERICA'S SONG
Supplies needed:
I am using the gorgeous artwork from Verymany for this tutorial which you can find here
Scrapkit: I am using a stunning kit by Scrappin With Lil Ol Me called "Frederica's Song" which you can get by going here
Mask 333 from Mizteeques which you can find here
Plugins: Lokas 3D Shadow
----------------------------
This tutorial is written for those who have working knowledge of PSPX2 (any version will do).
This tutorial was written by me on August 8, 2020. Please do not copy or paste on any other forum, website or blog provide link back to tut only. Please do not claim as your own. This tutorial is copyrighted to me. Any resemblance to any other tutorial is purely coincidental.
Ok - let's start and remember to save often.
Open up a 750 x 650 blank canvas (we can resize it later)
Select Paper 2 and paste on the canvas
Apply Mask 333 and merge group
Select Element 20 - resize by 40%
Image mirror and paste on the top left
Select Element 74 - resize by 25%
Paste and positon on the top center
Select Element 132 - resize by 25%
Paste and position on the top right
Select Element 64 - resize by 25%
Paste and position on the top right
Select Element 90 - resize by 40%
Paste and position on the right side
Select Element 82 - resize by 30%
Paste and position on the top right
Select Frame Element 107 - resize by 40%
Paste and position on the left side
Select your magic wand tool and select the center of the frame (Add (Shift), RGB Value, Tolerance 25, Contiguous checked, Feather 0)
Selections, Modify, Expand by 5
Paste paper 18
Select invert, delete
Paste close-up tube on paper layer and delete
Select none
Change close-up tube to and to Luminance (Legacy)
Move paper and close-up layer below frame element
Select Element 60 - resize by 30%
Paste and position on the left side
Select Element 7 - resize by 20%
Paste and position above frame element
Select Element 11 - resize by 20%
Paste and position on the top left
Paste tube of choice where desired
Apply Lokas 3D Shadow at default settings
Select Element 28 - resize by 30%
Paste and position on the right side
Select Element 50 - resize by 20%
Paste and position on the left side
Select Element 6 - resize by 40%
Paste and position on the bottom left
Select Element 14 - resize by 25%
Paste and position on the left side
Select Element 113 - resize by 20%
Paste and paste on the bottom left
Select Element 61 - resize by 45%
Image mirror and paste on the bottom left
Select Element 104 - resize by 15%
Image Free Rotate Left by 15% and paste on the bottom left
Select Element 89 - resize by 30%
Paste and position on the bottom left
Select Element 103 - resize by 25%
Paste and position on the bottom left
Select Element 144 - resize by 25%
Paste and position on the bottom left
Select Element 85 - resize by 25%
Paste and position on the bottom left
Select Element 110 - resize by 15%
Paste and position on the bottom left
Select Element 106 - resize by 40%
Paste and position on the right side
Select Element 97 - resize by 25%
Paste and position on the bottom right
Select Element 93 - resize by 30%
Paste and position on the bottom right
Select Element 17 - resize by 20%
Paste and position on the bottom right
Select Element 72 - resize by 40%
Image mirror and paste on the bottom right
Select Element 100 - resize by 55%
Paste and position on the bottom left
Add any dropshadows you like
Sharpen any elements as needed
Crop and resize as desired
Add copyright info, license number and name
You're done! Thanks for trying my tutorial!

Labels:Scrappin With Lil Ol Me | 0
comments
Friday, August 7, 2020
RAVEN


These CT Tags were made using the amazing artwork by Charmed Designs. You can purchase the kit "Raven" Here:
Designz Scrap Shop, Secret Garden Designs, All that Glitterz, Mystical Scraps, Sensibility Scrapping, Direct Digital Scrap, Digital Scrappin Depot and Design n Company
These tags were made by me and my own creativity. Please do not rip apart, destroy, alter them or claim them as your own. Thanks.


Labels:Charmed Designs | 0
comments
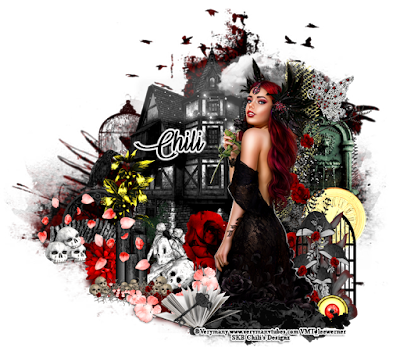
DARK MAGIC
Supplies needed:
I am using the gorgeous artwork from Verymany for this tutorial which you can find here
Scrapkit: I am using a stunning kit by Chili's Designz called "Dark Magic" which you can get by going here, here and here
Mask 86 from Vivienne which you can find here
Plugins: Lokas 3D Shadow
----------------------------
This tutorial is written for those who have working knowledge of PSPX2 (any version will do).
This tutorial was written by me on August 7, 2020. Please do not copy or paste on any other forum, website or blog provide link back to tut only. Please do not claim as your own. This tutorial is copyrighted to me. Any resemblance to any other tutorial is purely coincidental.
Ok - let's start and remember to save often.
Open up a 750 x 650 blank canvas (we can resize it later)
Select Paper 1 and paste on the canvas
Apply Mask 86 and merge group
Select House Element - resize by 55%
Paste and position on the top left
Select Net Element - resize by 50%
Paste and position on the top right
Select Clouds 2 Element - resize by 30%
Paste and position on the top right
Select Fountain Element - resize by 30%
Paste and position on the right side
Select Glitter 2 Element - resize by 40%
Paste and position on the right side
Select Clock Element - resize by 55%
Paste and position on the right side
Select Roses Element - resize by 40%
Paste and position on the right side
Select Window Element - resize by 20%
Paste and position on the left side
Select Plant Element - resize by 25%
Paste and position on the left side
Select Path Element - resize by 20%
Paste and position on the left side
Select Skulls 2 Element - resize by 30%
Paste and position on the left side
Paste tube of choice where desired
Apply Lokas 3D Shadow at default settings
Select Flower 6 Element - resize by 40%
Paste and position on the bottom left
Select Candles Element - resize by 40%
Paste and position on the bottom left
Select Flower Leaves Element - resize by 30%
Paste and position on the bottom left
Select Rose Element - resize by 30%
Paste and position on the bottom
Select Skulls Element - resize by 50%
Paste and paste on the bottom
Select Flowers 5 Element - resize by 30%
Paste and position on the bottom
Select Greenery 2 Element - resize by 50%
Paste and position on the bottom
Select Book Element - resize by 30%
Paste and position on the bottom
Select Key Element - resize by 20%
Paste and position on the bottom
Select Mushrooms 4 Element - resize by 30%
Paste and position on the bottom right
Select Eye Element - resize by 40%
Paste and position on the bottom right
Select Butterfly 2 Element - resize by 40%
Paste and position on the top left
Select Sparkles 3 Element - resize by 40%
Paste and position on the top left
Add any dropshadows you like
Sharpen any elements as needed
Crop and resize as desired
Add copyright info, license number and name
You're done! Thanks for trying my tutorial!

Labels:Chili Designz | 0
comments
HONEYBEE
Supplies needed:

Labels:Happy Pumpkin Studios | 0
comments
Subscribe to:
Comments
(Atom)


