Labels
- Alikas Scraps
- All Dolled Up Store
- Amy Marie
- Annaica
- Arthur Crowe
- Babycakes Scraps
- Barbara Jensen
- Bibi's Collections
- Black Widow Creationz
- Blu Moon
- Bonnies Creations
- Bookwork Dezines
- Broken Sky Dezine
- Carita Creationz
- Carpe Diem Designs
- CDO
- Celinart Pinup
- Celine
- Chacha Creationz
- Charmed Designs
- Cherry Blossom Designs
- Chili Designz
- Cluster Frame
- Creative Misfits
- Creative Scraps by Crys
- Curious Creative Dreams
- Danny Lee
- Derzi
- Designs by Ali
- Designs by Joan
- Designs by Ketura
- Designs By Norella
- Designs by Vi
- Diana Gali
- Diry Art Designs
- Disturbed Scraps
- Dreaming With Bella
- Eclipse Creations
- Elegancefly
- Extras
- Fabulous Designz
- Forum Set
- Foxy's Designz
- Freek's Creation
- FTU
- FwTags
- Goldwasser
- Gothic Inspirations
- Gothic Raven Designs
- Graphfreaks
- Hania's Designs
- Happy Pumpkin Studios
- Horseplay's Pasture Designs
- indie-Zine
- Irish Princess Designs
- Ishika Chowdhury
- Kaci McVay
- Kajenna
- katharine
- Katherine
- Khloe Zoey
- Killer Kitty
- Kissing Kate
- KiwiFirestorm
- Kiya Designs
- Kizzed by Kelz
- KZ Designz
- Lady Mishka
- Lil Mz Brainstorm
- Maiden of Darkness
- Mariel Designs
- MellieBeans
- Michelle's Myths
- Midnight Shadow
- Misticheskya
- MistyLynn's Creations
- MMeliCrea Designz
- Moon Vixen Designs
- NaSionainne
- Ninaste
- Niqui Designs
- Pandora
- Picsfordesign
- Pink Paradox Productions
- Radyga Designs
- Redefined Designs
- Rissa's Designs
- Schnegge
- ScottishButterfly Creations
- Scrappin Krazy Designs
- Scrappin With Lil Ol Me
- Scraps and the City
- Scraps Dimensions
- Scraps From The Heart
- Scraps N Company
- Scraps with Attitude
- Shining Star Art
- Skyscraps
- Sleek N Sassy Designs
- Sophisticat Simone
- Souldesigner
- Soxsational Scraps
- Spazz
- Starlite and Soul
- Tammy Welt
- Tasha's Playground
- The PSP Project
- Thrifty Scraps by Gina
- Tiny Turtle Designs
- Upyourart
- Verymany
- Wendy Gerber
- Whisper In the Wind
- Wick3d Creationz
- Wicked Diabla
- Yude's Kreationz
Blog Archive
-
▼
2013
(235)
-
▼
September
(22)
- DARK SECRETS
- SOMETHING WICKED COMES
- ROCK THIS PARTY OUT
- MUMMY MAAT
- PEEK A BOO
- DO IT LIKE ROCKSTARS
- DARK ZENIA
- NAUGHTY DEVIL
- DARKNESS WAITS
- BOO-TIFUL
- HARVEST BLESSINGS
- ANGEL OF MINE
- WE'RE ALL MAD
- SEA LOVER
- SUMMERTIME SADNESS
- CAT BABE
- WITCH IN TRAINING
- ROCK REBEL
- SUZUKI
- AUTUMN DAYZ
- STEAMED FAIRY
- MYSTERIOUS MIDNIGHT
-
▼
September
(22)
Monday, September 30, 2013
DARK SECRETS
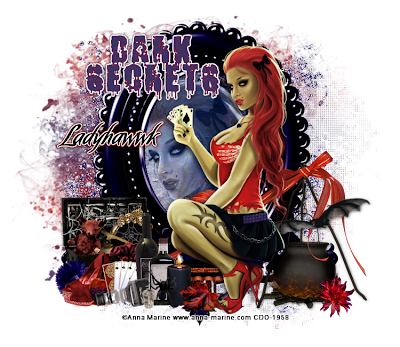
Supplies needed:
I am using the amazing art from Anna Marine for for this tutorial, which you can find here
Scrapkit: I am using a wicked matching kit from Ladyhawwk Designs "Anna Marine 41-3" which you can get by going here
Mask 400 from Vix which you can find here
Plugins used: Eyecandy 4000 - Gradient Glow, Xero-Radiance, Xero-Bad Dream, Lokas 3D Shadow
----------------------------
This tutorial is written for those who have working knowledge of PSPX2 (any version will do).
This tutorial was written by me on September 30, 2013. Please do not copy or paste on any other forum, website or blog provide link back to tut only. Please do not claim as your own. This tutorial is copyrighted to me. Any resemblance to any other tutorial is purely coincidental.
Ok - let's start and remember to save often.
Open up a 750 x 650 blank canvas (we can resize it later)
Select Frame Element 3 and paste in the center of the canvas
Resize by 90%
Select your magic wand tool and click in the center of the Frame (Add (Shift), RGB Value, Tolerance 25, Contiguous checked, Feather 0)
Selections, Modify, Expand by 5
Paste paper 6
Select invert, delete,
Paste a close-up tube of choice on the top of paper where desired and delete, select none
Change close-up to Luminance (Legacy)
Apply Bad Dream on default settings of choice
Drop opacity on close-up down to 80%
Apply dropshadow and merge tube down on top of paper layer
Move paper layer below frame
Select Wordart Element - resize by 50%
Paste on top left where desired
Apply Eyecandy Gradient Glow on fat default settings
Paste tube of choice where desired
Apply Xero Radiance at setting of choice
Apply Lokas 3D Shadow at default settings
Select Element 5 - resize by 50%
Paste and position on bottom right
Select Element 13 - resize by 15%
Image mirror and paste on bottom right
Select Element 19 - resize by 35%
Image Free Rotate Left by 10% and paste on bottom right
Select Element 20 - resize by 40%
Paste and position on bottom left
Select Element 7 - resize by 20%
Paste and position on bottom left
Select Element 10 - resize by 35%
Paste and position on botton left
Select Element 26 - resize by 25%
Paste and position on bottom left
Select Element 23 - resize by 40%
Image mirror and paste on bottom left
Select Element 18 - resize by 25%
Paste and position on bottom left
Select Element 2 - resize by 25%
Paste and position on bottom
Select Element 24 - resize by 115%
Paste and position on canvas and move to bottom layer
Add new raster layer and flood-fill with color or gradient of choice
Move to bottom layer
Apply Mask 362 and merge group
Add any additional elements you like.
Add any dropshadows you like
Crop and resize as desired
Add copyright info, license number and name
You're done! Thanks for trying my tutorial!
Labels:CDO | 0
comments
SOMETHING WICKED COMES
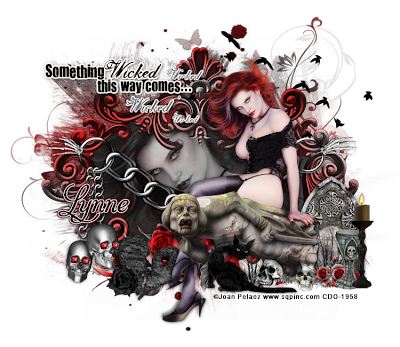
Supplies needed:
I am using the amazing art from Joan Pelaez for for this tutorial, which you can find here
Scrapkit: I am using a stunning kit from Babycakes Scraps "Joan Pelaez 19-2" which you can get by going here
Mask 362 from Vix which you can find here
Plugins used: Eyecandy 4000 - Gradient Glow, Xero-Radiance, Xero-Bad Dream, Lokas 3D Shadow
----------------------------
This tutorial is written for those who have working knowledge of PSPX2 (any version will do).
This tutorial was written by me on September 30, 2013. Please do not copy or paste on any other forum, website or blog provide link back to tut only. Please do not claim as your own. This tutorial is copyrighted to me. Any resemblance to any other tutorial is purely coincidental.
Ok - let's start and remember to save often.
Open up a 750 x 650 blank canvas (we can resize it later)
Select Frame Element 20 and paste in the center of the canvas
Resize by 70%
Select your magic wand tool and click in the center of the Element (Add (Shift), RGB Value, Tolerance 25, Contiguous checked, Feather 0)
Selections, Modify, Expand by 5
Paste paper 1
Select invert, delete,
Paste a close-up tube of choice on the top of paper where desired and delete, select none
Change close-up to Luminance (Legacy)
Apply Bad Dream on default settings of choice
Drop opacity on close-up down to 80%
Apply dropshadow and merge tube down on top of paper layer
Move paper layer below frame
Select Element 26 - resize by 75%
Paste on top of the frame layer where desired
Paste tube of choice where desired
Apply Xero Radiance at setting of choice
Apply Lokas 3D Shadow at default settings
Select Element 22 - resize by 35%
Paste and position on bottom right
Select Element 18 - resize by 50%
Paste and position on bottom right
Select Element 12 - resize by 32%
Paste and position on bottom right
Select Element 9 - resize by 45%
Paste and position on bottom right side
Select Element 19 - resize by 20%
Paste and position on bottom right
Select Element 5 - resize by 40%
Paste and position on bottom
Select Element 10 - resize by 35%
Image Free Rotate Right by 15% and paste on bottom left
Select Element 1 - resize by 25%
Paste and position on bottom left
Select Wordart Element 16 - resize by 65%
Paste and position on top left
Apply Eyecandy Gradient Glow on fat default settings
Add new raster layer and flood-fill with color or gradient of choice
Move to bottom layer
Apply Mask 362 and merge group
Add any additional elements you like.
Add any dropshadows you like
Crop and resize as desired
Add copyright info, license number and name
You're done! Thanks for trying my tutorial!
Labels:Babycakes Scraps | 0
comments
ROCK THIS PARTY OUT
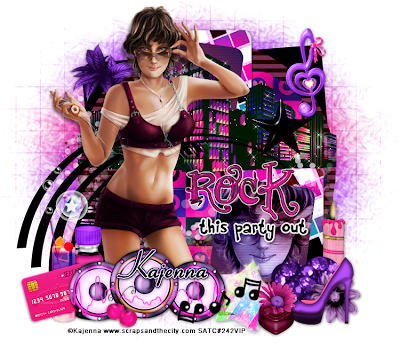
Supplies needed:
I am using the amazing art from Kajenna for this tutorial which you can find here
Scrapkit: I am using a gorgeous kit from Bibi's Collections called "Boom Boom" which you can get by going here
Template 341 from Millie which can be found here
Mask 129 from Aqua which you can find on the Misfits Blog here
Plugins used: Eyecandy 4000 - Glass, Eyecandy 4000 - Gradient Glow, VM Extravaganza - Transmission, Xero-Radiance, Xero - Bad Dream, Lokas 3D Shadow
----------------------------
This tutorial is written for those who have working knowledge of PSPX2 (any version will do).
This tutorial was written by me on September 30, 2013. Please do not copy or paste on any other forum, website or blog provide link back to tut only. Please do not claim as your own. This tutorial is copyrighted to me. Any resemblance to any other tutorial is purely coincidental.
Ok - let's start and remember to save often.
Open the template and using your shortcut keys on your keyboard (SHIFT+D) duplicate the template as a new image. Close the original and delete the copywrite layer.
Adjust canvas size by 750 x 650
Select Wordart 9 layer
Select all, float, defloat
Add new raster layer and flood-fill with colors of choice
Select none
Apply Eyecandy Gradient Glow on fat default settings
Delete/Hide original wordart layer
Select Star 8 layer
Select all, float, defloat
Add new raster layer and flood-fill with color of choice
Select none
Apply Eyecandy Glass on default settings
Delete/Hide original star layer
Select Square 7 layer
Select all, float, defloat
Add new raster layer and flood-fill with gradient or color of choice (Linear style, Angle 45, Repeat 2)
Paste close-up tube of choice on top of gradient and delete
Select none
Change closeups to Luminance (Legacy)
Apply Xero Bad Dream at setting of choice
Apply dropshadow and merge tube down on top of gradient layer
Effect, Texture Effects, Blinds (Width 2, Opactity 20, Horizontal and Light from left/top checked)
Delete/Hide original square layer
Select Square 6 layer and repeat gradient steps
Select Square 5 layer
Select all, float, defloat
Paste paper 6
Select invert, delete, select none
Delete/Hide original square layer
Select Sqauare 4 layer and repeat above steps
Select Circle 3 layer
Select all, float, defloat
Paste paper 9
Select invert, delete, select none
Delete/hide original circle layer
Select Circle 2 layer
Select all, float, defloat
Add new raster layer and flood-fill with color of choice
Select none
Apply VM Extravaganza - Transmission with the following settings:
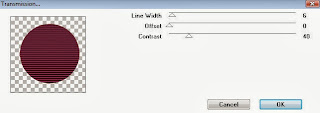
Delete/Hide original circle layer
Copy and paste tube of choice and position where desired
Apply Xero Radiance at setting of choice
Apply Lokas 3D Shadow at default settings
Select Element 77 - resize by 60%
Paste and position in the center below square layers
Select Element 57 - paste and position on left side below tube layer
Select Element 47 - resize by 45%
Paste and position on bottom below tube layer
Select Element 67 - resize by 40%
Paste and position on bottom left
Select Element 7 - resize by 55%
Paste and position on bottom left
Select Element 46 - resize by 30%
Image Free Rotate Left by 15% and paste on bottom left
Select Element 48 and paste on bottom
Select Element 92 - resize by 35%
Paste and position on bottom
Select Element 49 - resize by 45%
Paste and position on bottom right
Select Element 19 - resize by 55%
Paste and position on bottom right
Select Element 26 - resize by 80%
Paste and position on bottom right
Select Element 28 - resize by 35%
Paste and position on bottom left
Select Element 4 - resize by 30%
Paste and position on bottom left
Select Element 2 - resize by 40%
Paste and position on top right
Select New raster layer and flood fill with color or gradient of choice
Move layer to the bottom of the template
Apply Mask 129
Merge group and move to the bottom
Add any additional elements you like.
Add any dropshadows you like
Crop and resize as desired
Add copyright info, license number and name
You're done! Thanks for trying my tutorial!
Saturday, September 28, 2013
MUMMY MAAT
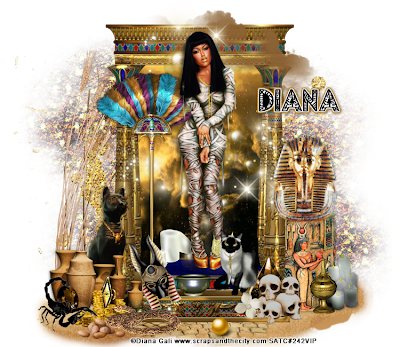
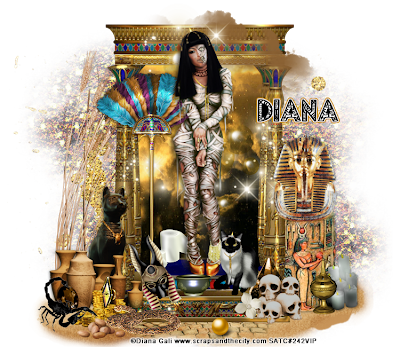
Supplies needed:
I am using the amazing art from Diana Gali for for this tutorial, which you can find here
Scrapkit: I am using a stunning matching kit from Bibi's Collections called "Mummy Maat" which you can get by going here
Mask 159 from Insatiable Dreams which you can find here
Plugins used: Xero-Radiance, Lokas 3D Shadow
----------------------------
This tutorial is written for those who have working knowledge of PSPX2 (any version will do).
This tutorial was written by me on September 28, 2013. Please do not copy or paste on any other forum, website or blog provide link back to tut only. Please do not claim as your own. This tutorial is copyrighted to me. Any resemblance to any other tutorial is purely coincidental.
Ok - let's start and remember to save often.
Open up a 750 x 650 blank canvas (we can resize it later)
Select Element 52 and paste in the center of the canvas
Resize by 55%
Select your magic wand tool and click in the center of the Element (Add (Shift), RGB Value, Tolerance 25, Contiguous checked, Feather 0)
Selections, Modify, Expand by 5
Paste paper 2
Select invert, delete, select none
Move paper layer below frame
Select Element 51 - resize by 40%
Paste and position on left side
Paste tube of choice where desired
Apply Xero Radiance at setting of choice
Apply Lokas 3D Shadow at default settings
Select Element 76 - resize by 75%
Paste and position on bottom below element 52
You can select your pick tool if desired and adjust the sand to your liking
Select Element 127 - resize by 30%
Paste and position on the bottom in the center
Select Element 122 - resize by 85%
Paste and position on bottom right
Select Element 19 - resize by 35%
Paste and positon on right side
Select Element 120 - resize by 50%
Paste and position on bottom right
Select Element 73 - resize by 50%
Paste and position on bottom right
Select Element 93 - resize by 30%
Paste and position on bottom right
Select Element 3 - resize by 25%
Paste and position on bottom
Select Element 12 - resize by 55%
Paste and position on bottom left
Select Element 31 - resize by 50%
Paste and position on bottom left
Select Element 26 - resize by 25%
Image Free Rotate Left by 15% and paste on bottom
Select Element 86 - resize by 50%
Paste and position on bottom left
Select Element 40 - resize by 25%
Paste and position on bottom left
Select Element 126 - resize by 50%
Paste and position on bottom left
Select Element 110 - resize by 70%
Paste and position on top below tube layer
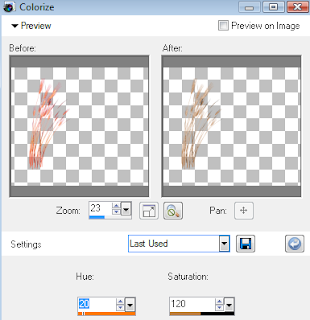
Select Element 25 - resize by 65%
Paste and position on left side and move below doorway element
Colorize with the following setting if desired:
Select Element 89 - resize by 40%
Paste and position on bottom layer
Paste paper 1 on canvas - resize by 120%
Move to bottom layer
Apply Mask 159 and merge group
Add any additional elements you like.
Add any dropshadows you like
Crop and resize as desired
Add copyright info, license number and name
You're done! Thanks for trying my tutorial!
Thursday, September 26, 2013
PEEK A BOO
Supplies needed:
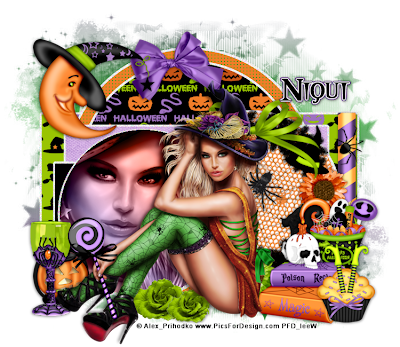
I am using the amazing art from Alex Prihodko for this tutorial which you can find here
Scrapkit: I am using an awesome kit from Niqui's Designs called "Peek A Boo" which you can get by going here
Template 27 from Vickie which can be found here
Halloween Bats Mask from Tonya which you can get on the Misfits Blog here
Halloween Mask from Vix which you can find here
Plugins used: Xero-Radiance, Xero - Bad Dream, Lokas 3D Shadow
----------------------------
This tutorial is written for those who have working knowledge of PSPX2 (any version will do).
This tutorial was written by me on September 26, 2013. Please do not copy or paste on any other forum, website or blog provide link back to tut only. Please do not claim as your own. This tutorial is copyrighted to me. Any resemblance to any other tutorial is purely coincidental.
Ok - let's start and remember to save often.
Open the template and using your shortcut keys on your keyboard (SHIFT+D) duplicate the template as a new image. Close the original and delete the copywrite layer.
Adjust and resize canvas to 750 x 650
Select Circle 4 layer
Select all, float, defloat
Add new raster layer and flood-fill with gradient or color of choice (Linear style, Angle 45, Repeat 2)
Paste close-up tube of choice on top of gradient and delete
Select none
Change closeup to Luminance (Legacy)
Apply Xero Bad Dream at setting of choice
Apply dropshadow and merge tube down on top of gradient layer
Delete/Hide original circle layer
Select Circle 3 and Circle 3 Frame layer
Move it above Rec 3 layer
Reselect Circle 3
Select all, float, defloat
Paste paper 10
Select invert, delete, select none
Delete/Hide original circle layer
Select Element 11 - resize by 65%
Paste and position on top of Paper 10 layer
Select Rec 2 layer
Select all, float, defloat
Paste paper 7
Select invert, delete, select none
Delete/hide original rectangle layer
Select Circle 2 layer
Select all, float, defloat
Paste paper 6
Select invert, delete, select none
Delete/Hide original circle layer
Select Circle 1 layer
Select all, float, defloat
Add new raster layer and flood-fill with color of choice
Select none
Apply Effects, Texture Effects, weave (Gap size 2, Width 4, Opacity 5, Fill gaps checked, Change Gap Color to color of choice)
Delete/Hide original circle layer
Select Rec 1 layer
Select all, float, defloat
Paste paper 3
Select invert, delete, select none
Delete/Hide original rec layer
Copy and paste tube of choice and position where desired
Apply Xero Radiance at setting of choice
Apply Lokas 3D Shadow at default settings
Select Element 27 - resize by 55%
Paste and position on right side
Select Element 34 - resize by 30%
Paste and position on bottom right
Select Element 14 - resize by 35%
Paste and position on bottom right
Select Element 12 - resize by 25%
Paste and position on bottom right
Select Element 36 - resize by 25%
Paste and position on bottom left
Select Element 15 - resize by 30%
Paste and position on bottom left
Select Element 42 - resize by 40%
Paste and position on top left
Select Element 42 - resize by 30%
Image mirror and paste on top
Select New raster layer and flood fill with color or gradient of choice
Move layer to the bottom of the template
Apply Vix Halloween mask
Merge group and move to the bottom
Add new raster layer and again flood-fill with color of choice
Apply Bats Mask and merge group
Add any additional elements you like.
Add any dropshadows you like
Crop and resize as desired
Add copyright info, license number and name
You're done! Thanks for trying my tutorial!
Labels:Niqui Designs | 0
comments
Tuesday, September 24, 2013
DO IT LIKE ROCKSTARS
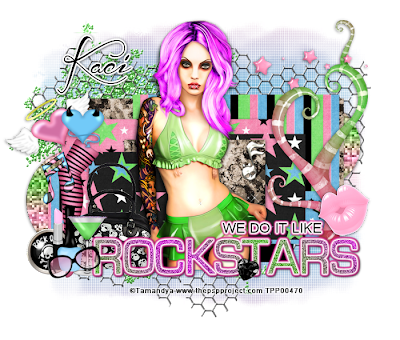
Supplies needed:
I am using the amazing art from Tamandya for this tutorial which you can find here
Scrapkit: I am using an awesome kit from Scrappin Krazy Designs called "Rockabilly Grrl" which you can get by going here
Rockstar Template from Cakes which can be found here
Dead Sexy Mask from Candy Treats which I think you can still get here
Plugins used: Xero - Fritillary, Xero-Radiance, Xero - Bad Dream, Lokas 3D Shadow
----------------------------
This tutorial is written for those who have working knowledge of PSPX2 (any version will do).
This tutorial was written by me on September 24, 2013. Please do not copy or paste on any other forum, website or blog provide link back to tut only. Please do not claim as your own. This tutorial is copyrighted to me. Any resemblance to any other tutorial is purely coincidental.
Ok - let's start and remember to save often.
Open the template and using your shortcut keys on your keyboard (SHIFT+D) duplicate the template as a new image. Close the original and delete the copywrite layer.
Select Wordart 2 layer
Select your magic want and select the inner word portion
Add new raster layer and flood-fill with color or gradient of choice
Select none
Adjust, Add/Remove Noise, Add Noise (Uniform checked, Noise 75%, Monochrome checked)
Select Square 1 layer
Select all, float, defloat
Paste paper 8
Select invert, delete, select none
Delete/Hide original square layer
Select Square 3 layer and repeat above steps
Select Square 2 layer
Select all, float, defloat
Paste paper 3
Select invert, delete, select none
Delete/hide original square layer
Select Rectangle 10 layer and repeat above steps
Select Rectangle 4
Select all, float, defloat
Paste paper 2
Select invert, delete, select none
Delete/Hide original rectangle layer
Select Rectangle 5 layer
Select all, float, defloat
Paste paper 9
Select invert, delete, select none
Delete/Hide original rectangle layer
Select Square 6 layer
Select all, float, defloat
Paste paper 1
Select invert, delete, select none
Delete/Hide orignial square layer
Select Square 7 layer and repeat above steps
Select Circle 8 layer
Select all, float, defloat
Add new raster layer and flood-fill with color or gradient of choice
Select none
Apply Xero-Fritillary with the following settings:
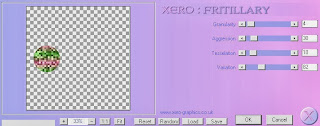
Delete/Hide original circle layer
Select Circle 11 layer and repeat above steps
Copy and paste tube of choice and position where desired
Apply Xero Radiance at setting of choice
Apply Lokas 3D Shadow at default settings
Select Element 20 - resize by 85%
Paste and position on right side
Select Element 44 - resize by 55%
Paste and position on bottom left below wordart layer
Select Element 30 - resize by 40%
Paste and position on bottom left
Select Element 49 - resize by 30%
Paste and position on bottom left
Select Element 48 - resize by 30%
Paste and position on bottom left
Select Element 66 - resize by 45%
Image Free Rotate Left by 15% and paste on bottom left
Select Element 47 - resize by 35%
Image Free Rotate Left by 15% and paste on bottom left
Select Element 41 - resize by 55%
Paste and position on left side
Select Element 33 - resize by 45%
Paste and position on top left
Select Element 3 and paste on canvas - move to bottom layer and reposition
Select Element 78 and paste on top left and move to bottom
Select New raster layer and flood fill with color or gradient of choice
Move layer to the bottom of the template
Apply DeadSexy Mask or mask of choice
Merge group and move to the bottom
Add any additional elements you like.
Add any dropshadows you like
Crop and resize as desired
Add copyright info, license number and name
You're done! Thanks for trying my tutorial!
Labels:Scrappin Krazy Designs | 0
comments
Monday, September 23, 2013
DARK ZENIA
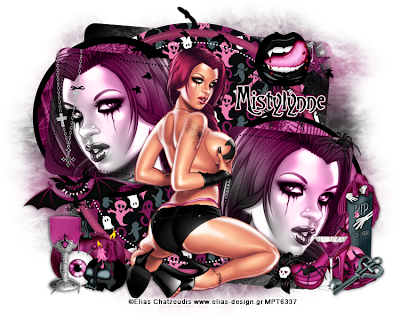
Supplies needed:
I am using the amazing art from Elias Chazoudis for this tutorial which you can find here
Scrapkit: I am using a wicked kit from MistyLynn's Creations called "Morgana" which you can get by going here
Template 334 from Millie which can be found here
Mask 111 from Designs by Vaybs which you can get it here
Plugins used: Eyecandy 4000 - Glass, Xero-Radiance, Xero - Bad Dream, Lokas 3D Shadow
----------------------------
This tutorial is written for those who have working knowledge of PSPX2 (any version will do).
This tutorial was written by me on September 23, 2013. Please do not copy or paste on any other forum, website or blog provide link back to tut only. Please do not claim as your own. This tutorial is copyrighted to me. Any resemblance to any other tutorial is purely coincidental.
Ok - let's start and remember to save often.
Open the template and using your shortcut keys on your keyboard (SHIFT+D) duplicate the template as a new image. Close the original and delete the copywrite layer.
Select Star 14 layer
Select all, float, defloat
Add new raster layer and flood-fill with color of choice
Select none
Apply Eyecandy Glass on fat default settings
Delete/Hide original star layer
Select Star 13 layer and repeat above steps
Select Square 10 layer
Select all, float, defloatAdd new raster layer and flood-fill with gradient or color of choice (Linear style, Angle 45, Repeat 2)
Paste close-up tube of choice on top of gradient and delete
Select none
Change closeup to Luminance (Legacy)
Apply Xero Bad Dream at setting of choice
Apply dropshadow and merge tube down on top of gradient layer
Delete/Hide original square layer
Select Square 9 layer and repeat above steps
Select Circle 8 layer
Select all, float, defloat
Paste paper 6
Select invert, delete, select none
Delete/Hide original circle layer
Select Circle 7 layer and repeat above steps
Select Circle 6 layer
Select all, float, defloat
Add new raster layer and flood-fill with color of choice
Select none
Delete/Hide original circle layer
Select Circle 5 layer and repeat above steps
Select Circle Frame 3 layer
Select all, float, defloat
Paste paper 7
Select invert, delete, select none
Apply Eyecandy Glass on fat default settings
Delete/hide original frame layer
Select Circle 2 layer
Select all, float, defloat
Paste paper 4
Select invert, delete, select none
Delete/Hide original circle layer
Copy and paste tube of choice and position where desired
Apply Xero Porcelain at setting of choice
Apply Lokas 3D Shadow at default settings
Select New raster layer and flood fill with color or gradient of choice
Move layer to the bottom of the template
Select Element 22 - resize by 40%
Paste and position on bottom right
Select Element 47 - resize by 35%
Paste and position on bottom right
Select Element 59 - resize by 30%
Image mirror and paste on bottom right
Select Element 54 - resize by 30%
Paste and position on bottom right
Select Element 14 - resize by 25%
Paste and position on bottom right
Select Element 50 - resize by 35%
Paste and position on bottom left
Select Element 51 - resize by 30%
Paste and position on bototm left
Select Element 46 - resize by 30%
Paste and position on bottom left
Select Element 29 - resize by 35%
Paste and position on bottom left
Select Element 44 - resize by 50%
Paste and position on left side
Apply Mask 111
Merge group and move to the bottom
Add any additional elements you like.
Add any dropshadows you like
Crop and resize as desired
Add copyright info, license number and name
You're done! Thanks for trying my tutorial!
Labels:MistyLynn's Creations | 0
comments
Sunday, September 22, 2013
NAUGHTY DEVIL
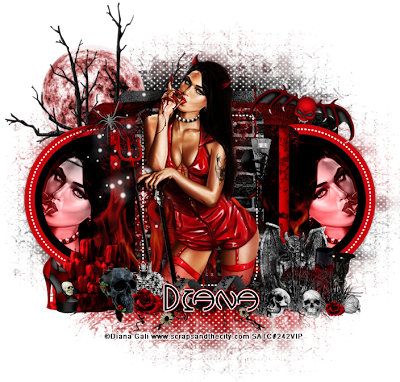
Supplies needed:
I am using the amazing art from Diana Gali for this tutorial which you can find here
Scrapkit: I am using an awesome matching kit from Disturbed Scraps called "Lady Devil" which you can get by going here
Template 176 from Pooker which can be found here
Mask 70 from Yez Doodles which you can get it here
Plugins used: Eyecandy 4000 - Marble, Xero-Porcelain, Xero - Bad Dream, Lokas 3D Shadow
----------------------------
This tutorial is written for those who have working knowledge of PSPX2 (any version will do).
This tutorial was written by me on September 22, 2013. Please do not copy or paste on any other forum, website or blog provide link back to tut only. Please do not claim as your own. This tutorial is copyrighted to me. Any resemblance to any other tutorial is purely coincidental.
Ok - let's start and remember to save often.
Open the template and using your shortcut keys on your keyboard (SHIFT+D) duplicate the template as a new image. Close the original and delete the copywrite layer.
Select Black Rectangle layer
Select all, float, defloat
Paste paper 10
Select invert, delete, select none
Delete/Hide original rectangle layer
Select White Strips layer
Select all, float, defloat
Add new raster layer and flood-fill with color of choice
Select none
Apply Eyecandy Marble with the following settings:
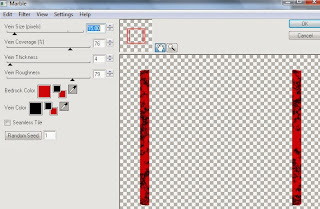
Apply Bevel with the following settings:
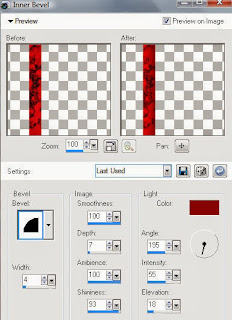
Select Pink Square1 layer
Select all, float, defloat
Paste paper 12
Select invert, delete, select none
Delete/Hide original square layer
Select White Circles layer
Select all, float, defloat
Add new raster layer and flood-fill with gradient or color of choice (Linear style, Angle 45, Repeat 2)
Paste close-up tubes of choice on top of gradient and delete
Select none
Change closeups to Luminance (Legacy)
Apply Xero Bad Dream at setting of choice
Apply dropshadow and merge tubes down on top of gradient layer
Delete/Hide original circles layer
Select Lt. Pink Circles layer
Select all, float, defloat
Add new raster layer and flood-fill with color of choice
Select none
Delete/Hide original circles layer
Select White Square layer
Select all, float, defloat
Paste paper 5
Select invert, delete, select none
Delete/Hide original square layer
Select Grey Rectangle layer
Select all, float, defloat
Paste paper 2
Select invert, delete, select none
Delete/hide original rectangle layer
Select Pink Rectangle layer
Select all, float, defloat
Paste paper 6
Select invert, delete, select none
Delete/Hide original rectangle layer
Copy and paste tube of choice and position where desired
Apply Xero Porcelain at setting of choice
Apply Lokas 3D Shadow at default settings
Select Element 46 - resize by 35%
Paste and position on bottom right
Select Element 4 - resize by 45%
Paste and position on bottom right
Select Element 48 - resize by 30%
Paste and position on bottom right
Select Element 62 - resize by 40%
Paste and position on bottom left
Select Element 63 - resize by 25%
Paste and position on bottom left
Select Element 77 - resize by 25%
Paste and position on bottom left
Select Element 96 - resize by 30%
Paste and position on bottom left
Select Element 5 - resize by 15%
Paste and position on bottom left
Select Element 82 - resize by 70%
Paste and position on bottom
Select Element 19 - resize by 55%
Paste and position on top left
Colorize if desired with the following settings:
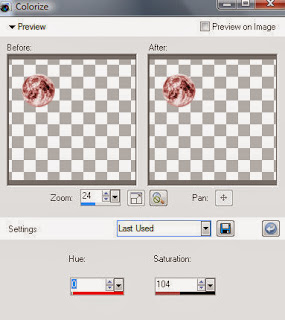
Select Element 11 - resize by 80%
Paste and position on top left above moon
Select New raster layer and flood fill with color or gradient of choice
Move layer to the bottom of the template
Apply Mask 70
Merge group and move to the bottom
Add any additional elements you like.
Add any dropshadows you like
Crop and resize as desired
Add copyright info, license number and name
You're done! Thanks for trying my tutorial!
Thursday, September 19, 2013
DARKNESS WAITS
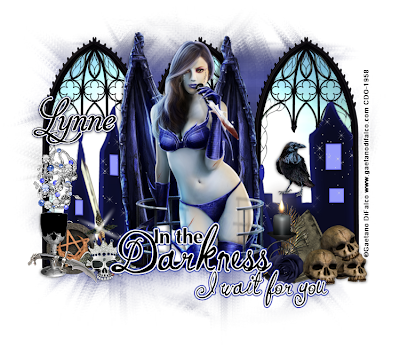
Supplies needed:
I am using the amazing art from Gaetano DiFalco for for this tutorial, which you can find here
Scrapkit: I am using a beautiful matching bundle kit from Babycakes Scraps for DiFalco's Package 18 which you can get by going here
Mask 249 from Weescotslass which you can find here
Plugins used: Penta - Color dot, Eyecandy 4000 - Gradient Glow, Xero- Bad Dream, Xero-Radiance, Lokas 3D Shadow
----------------------------
This tutorial is written for those who have working knowledge of PSPX2 (any version will do).
This tutorial was written by me on September 19, 2013. Please do not copy or paste on any other forum, website or blog provide link back to tut only. Please do not claim as your own. This tutorial is copyrighted to me. Any resemblance to any other tutorial is purely coincidental.
Ok - let's start and remember to save often.
Open up a 750 x 650 blank canvas (we can resize it later)
Select Element 55 and paste in the center of the canvas
Move Element up about an inch from the top
Select your magic wand tool and select the middle portions of the windows (Add (Shift), RGB Value, Tolerance 25, Contiguous checked, Feather 0)
Paste Element 17 on top of window frame - resize by 110%
Select invert, delete, select none
Paste tube of choice where desired
Apply Xero Radiance at setting of choice
Apply Lokas 3D Shadow at default settings
Select Element 48 - resize by 40%
Paste and position on bottom right
Select Element 50 - resize by 50%
Paste and position on bottom right
Select Element 45 - resize by 40%
Paste and position on bottom right
Select Element 56 - resize by 30%
Paste and position on bottom right
Select Element 53 - resize by 50%
Paste and position on bottom left
Select Element 23 - resize by 50%
Image Free Rotate Left by 15% and paste on bottom left
Select Element 54 - resize by 40%
Paste and position on bottom left
Select Element 31 - resize by 50%
Paste and position on bottom left
Select Element 57 - resize by 75%
Paste and position on bottom
Apply Eyecandy Gradient Glow on fat default settings (Glow Width 3)
Add new raster layer and flood-fill with color or gradient of choice
Move to bottom layer
Apply Mask 249 and merge group
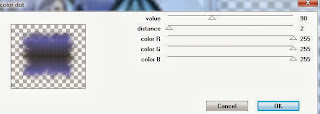
Apply Penta Color dot with the following settings:
Add any additional elements you like.
Add any dropshadows you like
Crop and resize as desired
Add copyright info, license number and name
You're done! Thanks for trying my tutorial!
Labels:Babycakes Scraps | 0
comments
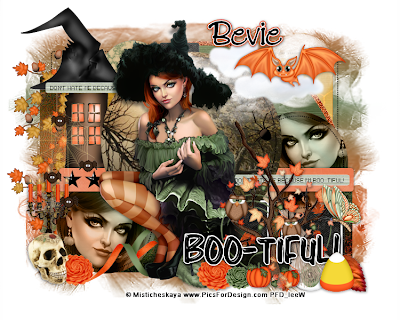
BOO-TIFUL
Supplies needed:
I am using the amazing art from Misticheskaya for this tutorial which you can find here
Scrapkit: I am using an awesome kit from Horseplay's Pasture Designs called "Halloween Magic" which you can get by going here
Halloween Template 1 from Dee which can be found here
Halloween Mask 4 from Uchy which you can find on the Misfits Blog here
Plugins used: Eyecandy 4000 - Glass, Xero-Porcelain, Xero - Bad Dream, Lokas 3D Shadow
----------------------------
This tutorial is written for those who have working knowledge of PSPX2 (any version will do).
This tutorial was written by me on September 19, 2013. Please do not copy or paste on any other forum, website or blog provide link back to tut only. Please do not claim as your own. This tutorial is copyrighted to me. Any resemblance to any other tutorial is purely coincidental.
Ok - let's start and remember to save often.
Open the template and using your shortcut keys on your keyboard (SHIFT+D) duplicate the template as a new image. Close the original and delete the copywrite layer.
Adjust canvas size to 750 x 600
Select Boo-tiful Wordart layer
Apply Eyecandy Glass on default settings
Select Stars layer and repeat above step
Select Purple Strips layer
Select all, float, defloat
Paste paper 12
Select invert, delete, select none
Delete/Hide original strips layer
Select Center Green Circle layer
Select all, float, defloat
Paste paper 16
Select invert, delete, select none
Delete/Hide original circle layer
Select Orange Strip layer
Select all, float, defloat
Paste paper 1
Select invert, delete, select none
Delete/Hide orignal strip layer
Select Left Blue Circle layer
Select all, float, defloat
Add new raster layer and flood-fill with gradient or color of choice (Linear style, Angle 45, Repeat 2)
Paste close-up tube of choice on top of gradient and delete
Select none
Change closeups to Luminance (Legacy)
Apply Xero Bad Dream at setting of choice
Apply dropshadow and merge tube down on top of gradient layer
Effect, Texture Effects, Blinds (Width 2, Opactity 20, Horizontal and Light from left/top checked)
Delete/Hide original circle layer
Select Right Blue Circle and repeat above steps
Select Right Orange Square layer
Select all, float, defloat
Paste paper 3
Select invert, delete, select none
Delete/hide original square layer
Select Left Orange Rectangle layer and repeat above steps
Select Blue Strip layer
Select all, float, defloat
Paste paper 3
Select invert, delete, select none
Delete/Hide original strip layer
Select Green Strip layer
Select all, float, defloat
Paste paper 8
Select invert, delete, select none
Delete/Hide original rectangle layer
Select Green Square layer and repeat above steps
Select Purple 1/2 Circle layer
Select all, float, defloat
Paste paper 13
Select invert, delete, select none
Delete/Hide original 1/2 circle layer
Select White 1/2 Circle layer
Select all, float, defloat
Add new raster layer and flood-fill with color of choice
Select none
Adjust, Add/Remove Noise, Add Noise (Uniform checked, Noise 70%, Monochrome checked)
Copy and paste tube of choice and position where desired
Apply Xero Porcelain at setting of choice
Apply Lokas 3D Shadow at default settings
Select Element 26 - resize by 65%
Paste and position on left side
Select Element 74 - resize by 55%
Image mirror and paste on top left
Select Element 60 - resize by 50%
Paste and position on bottom left
Select Element 80 - resize by 35%
Paste and position on bottom left
Select Element 47 - resize by 55%
Paste and position on top right
Select Element 38 and paste on top right
Select Element 37 - resize by 55%
Paste and position on top right
Select Element 29 - resize by 45%
Paste and position on bottom right
Select Element 71 - resize by 60%
Paste and position on bottom right
Select Element 45 - resize by 35%
Paste and position on bottom right
Select Element 12 - resize by 75%
Paste and position on right side
Select Element 34 - resize by 25%
Paste and position on bottom
Select Element 35 - resize by 18%
Paste and position on bottom
Select New raster layer and flood fill with color or gradient of choice
Move layer to the bottom of the template
Apply Mask 4
Merge group and move to the bottom
Apply Penta - Color dot with the following settings:
Drop opacity down to 70%
Add any additional elements you like.
Add any dropshadows you like
Crop and resize as desired
Add copyright info, license number and name
You're done! Thanks for trying my tutorial!
Labels:Horseplay's Pasture Designs | 0
comments
Tuesday, September 17, 2013
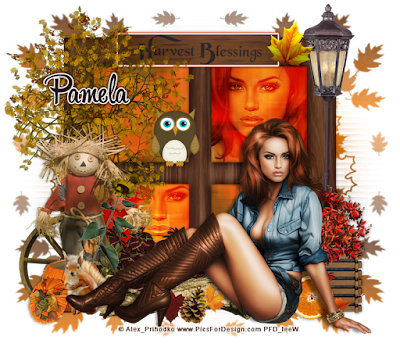
HARVEST BLESSINGS
Supplies needed:
I am using the amazing art from Alex Prihodko for for this tutorial, which you can find here
Scrapkit: I am using a beautiful kit from Redefined Designs called Fall Blessings which you can get by going here
Fall Mask 8 from Jenny which you can find on the Misfits Blog here
Plugins used: Eyecandy 4000 - Gradient Glow, Xero- Bad Dream, Xero-Radiance, Lokas 3D Shadow
----------------------------
This tutorial is written for those who have working knowledge of PSPX2 (any version will do).
This tutorial was written by me on September 17, 2013. Please do not copy or paste on any other forum, website or blog provide link back to tut only. Please do not claim as your own. This tutorial is copyrighted to me. Any resemblance to any other tutorial is purely coincidental.
Ok - let's start and remember to save often.
Open up a 750 x 650 blank canvas (we can resize it later)
Select Frame 3 and paste in the center of the canvas
Resize by 85%
Select your magic wand tool and click in the center of each of the squares in the frame (Add (Shift), RGB Value, Tolerance 25, Contiguous checked, Feather 0)
Selections, Modify, Expand by 5
Paste paper 8
Select invert, delete
Paste close-up tube(s) on top of paper layer where desired and delete
Select none
Change close-ups to Overlay
Apply Bad Dream on default settings of choice
Apply dropshadow and merge tubes down on top of paper layer
Move paper layer below frame
Select HarvestSign Element - resize by 50%
Paste and position on top of frame element
Apply Eyecandy Gradient Glow on fat default settings (Glow Width 3)
Select Tree Element - resize by 65%
Paste and position on top left
Select Scarecrow2 Element - resize by 23%
Paste and position on left side
Select LightPole Element - resize by 30%
Paste and position on right side
Select Plant Element - resize by 55%
Paste and position on bottom right
Select RottingTree Element - resize by 55%
Image mirror and paste on bottom of frame
Paste tube of choice where desired
Apply Xero Radiance at setting of choice
Apply Lokas 3D Shadow at default settings
Select Pumkin2 Element - resize by 25%
Image mirror and paste on bottom left
Select Squirrel Element - resize by 30%
Paste and position on bottom left
Select Wagon Wheel Element - resize by 30%
Paste and position on bottom left
Select Owl Element - resize by 20%
Paste and position where desired
Add new raster layer and flood-fill with color or gradient of choice
Move to bottom layer
Apply Mask 8 and merge group
Add any additional elements you like.
Add any dropshadows you like
Crop and resize as desired
Add copyright info, license number and name
You're done! Thanks for trying my tutorial!
Labels:Redefined Designs | 0
comments
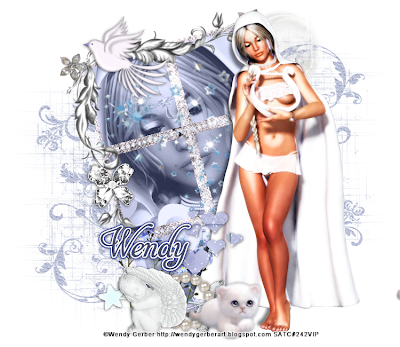
ANGEL OF MINE
Supplies needed:
I am using the amazing art from Wendy Gerber for for this tutorial, which you can find here
Scrapkit: I am using a beautiful matching kit from Black Widow Creationz called "Angel of Mine" which you can get by going here
Mask 52 from Moonbeams and Spiderwebs which you can find here
Plugins used: Xero- Bad Dream, Xero-Radiance, Lokas 3D Shadow
----------------------------
This tutorial is written for those who have working knowledge of PSPX2 (any version will do).
This tutorial was written by me on September 17, 2013. Please do not copy or paste on any other forum, website or blog provide link back to tut only. Please do not claim as your own. This tutorial is copyrighted to me. Any resemblance to any other tutorial is purely coincidental.
Ok - let's start and remember to save often.
Open up a 750 x 650 blank canvas (we can resize it later)
Select Frame Element 9 and paste in the center of the canvas
Resize by 65%
Image Free Rotate Right by 75%
Select your magic wand tool and click in the center of each square in the frame (Add (Shift), RGB Value, Tolerance 25, Contiguous checked, Feather 0)
Selections, Modify, Expand by 5
Paste paper 3
Select invert, delete
Paste close-up tube on top of paper layer where desired and delete
Select none
Change close-up to Luminance (Legacy)
Apply Bad Dream on default settings of choice
Drop opacity on close-up down to 75%
Apply dropshadow and merge tube down on top of paper layer
Move paper layer below frame
Select Element 3 - resize by 90%
Image Free Rotate Left by 15% and reposition on top of frame layer
Paste tube of choice where desired
Apply Xero Radiance at setting of choice
Apply Lokas 3D Shadow at default settings
Select Element 16 - resize by 40%
Paste and position on bottom left
Select Element 21 - resize by 45%
Paste and position on bottom left
Select Element 11 - resize by 20%
Paste and position on bottom left
Select Element 30 - resize by 30%
Paste and position on bottom left
Select Element 1 - resize by 35%
Paste and position on bottom left
Select Element 40 - resize by 40%
Paste and position on top left
Select Element 8 - resize by 20%
Paste and position on left side
Paste paper 10 onto canvas
Move to bottom layer
Apply Mask 52 and merge group
Add any additional elements you like.
Add any dropshadows you like
Crop and resize as desired
Add copyright info, license number and name
You're done! Thanks for trying my tutorial!
Labels:Scraps and the City,Wendy Gerber | 0
comments
Monday, September 16, 2013
WE'RE ALL MAD
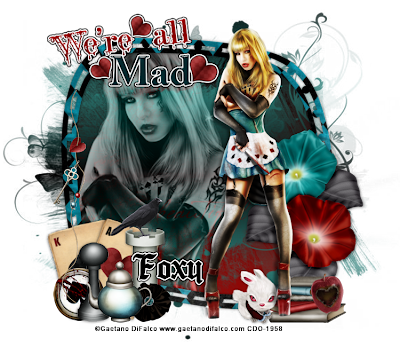
Supplies needed:
I am using the amazing art from Gaetano DiFalco for for this tutorial, which you can find here
Scrapkit: I am using an awesome matching kit from Foxy's Designz which you can get here
Mask 362 from Vix which you can find here
Plugins used: Eyecandy 4000 - Gradient Glow, Xero- Bad Dream, Xero-Radiance, Lokas 3D Shadow
----------------------------
This tutorial is written for those who have working knowledge of PSPX2 (any version will do).
This tutorial was written by me on September 16, 2013. Please do not copy or paste on any other forum, website or blog provide link back to tut only. Please do not claim as your own. This tutorial is copyrighted to me. Any resemblance to any other tutorial is purely coincidental.
Ok - let's start and remember to save often.
Open up a 750 x 650 blank canvas (we can resize it later)
Select Frame 1 and paste in the center of the canvas
Resize by 65%
Select your magic wand tool and click in the center of the frame (Add (Shift), RGB Value, Tolerance 25, Contiguous checked, Feather 0)
Selections, Modify, Expand by 5
Add new raster layer and flood-fill with gradient of choice (Linear style, Angle 0, Repeat 2)
Paste close-up tube on top of gradient layer where desired
Select invert, delete, select none
Change close-up to Luminance (Legacy)
Apply Bad Dream on default settings of choice
Drop opacity on close-up down to 70%
Apply dropshadow
Add new raster layer and flood-fill with color or gradient of choice
Apply Mask 362 and merge group
Move layer below close-up tube and merge tube, mask and gradient layer together
Move layer below frame and apply Effect, Texture Effects, Blinds (Width 2, Opacity 15, Horizontal and Light from left/top checked)
Paste tube of choice where desired
Apply Xero Radiance at setting of choice
Apply Lokas 3D Shadow at default settings
Select Element 16 - resize by 50%
Paste and position on right side
Select Element 7 - resize by 30%
Paste and position on bottom right
Select Element 4 - resize by 25%
Paste and position on bottom right
Select Element 3 - resize by 30%
Paste and position on bottom right
Select Element 13 - resize by 35%
Image Free Rotate Left by 15% and paste on bottom left
Select Element 14 - resize by 35%
Image Free Rotate Right by 15% and paste on bottom left below element 13
Select Element 6 - resize by 30%
Paste and position on bottom left
Select Element 8 - resize by 25%
Paste and position on bottom left
Select Element 5 - resize by 25%
Paste and position on bottom left
Select Element 1 - resize by 35%
Paste and position on bottom left
Select Wordart1 - resize by 70%
Paste and position on top left
Apply Eyecandy Gradient Glow on fat default settings (Glow Width 3)
Add any additional elements you like.
Add any dropshadows you like
Crop and resize as desired
Add copyright info, license number and name
You're done! Thanks for trying my tutorial!
Labels:CDO | 0
comments
Sunday, September 15, 2013
SEA LOVER
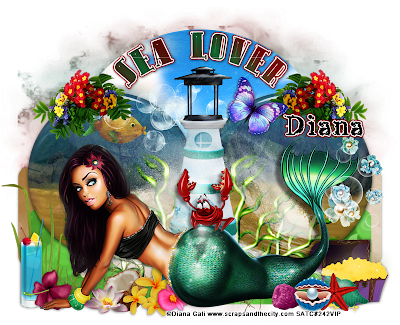
Supplies needed:
I am using the amazing art from Diana Gali for this tutorial which you can find here
Scrapkit: I am using an awesome kit from Disturbed Scraps called "Mermaid and Crab" which you can get by going here
Template 258 from Millie which can be found here
Mask 21 from Gina Gems which you can get it here
Plugins used: Eyecandy 4000 - Gradient Glow, Alien Skin - Eye Candy 5 Impact Glass, Xero-Porcelain, Xero - Bad Dream, Lokas 3D Shadow
----------------------------
This tutorial is written for those who have working knowledge of PSPX2 (any version will do).
This tutorial was written by me on September 15, 2013. Please do not copy or paste on any other forum, website or blog provide link back to tut only. Please do not claim as your own. This tutorial is copyrighted to me. Any resemblance to any other tutorial is purely coincidental.
Ok - let's start and remember to save often.
Open the template and using your shortcut keys on your keyboard (SHIFT+D) duplicate the template as a new image. Close the original and delete the copywrite layer.
Adjust canvas size to 750 x 600
Select Circle 6 layer
Select all, float, defloat
Paste paper 6
Select invert, delete, select none
Apply Eyecandy Glass on the following Clear with Reflections default settings:
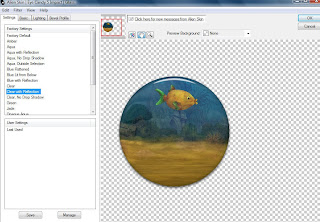
Delete/Hide original circle layer
Select Circle 5 layer and repeat above steps
Select Wordart 4 layer
Select all, float, defloat
Add new raster layer and flood-fill with gradient or color of choice
Select none
Apply Eyecandy Glass on same default settings
Apply Eyecandy Gradient Glow on fat default settings (Glow width 3)
Delete/Hide original wordart layer
Select Circle 3 layer
Select all, float, defloat
Paste paper 2
Select invert, delete, select none
Delete/hide original circle layer
Select Rectangle 2 layer
Select all, float, defloat
Paste paper 12
Select invert, delete, select none
Delete/Hide original rectangle layer
Select Rectangle 1 layer
Select all, float, defloat
Paste paper 3
Select invert, delete, select none
Delete/Hide original rectangle layer
Copy and paste tube of choice and position where desired
Apply Xero Porcelain at setting of choice
Apply Lokas 3D Shadow at default settings
Select House Element - resize by 55%
Paste and position on right side
Select Element 20 - resize by 85%
Paste and position in the center of circle frames where desired
Select Element 97 - resize by 80%
Paste and position on top of element 20 where desired
Select Element 19 - resize by 65%
Paste and position on bottom right
Image duplicate and mirror
Select Element 54 - resize by 45%
Paste and position on top of left circle
Image duplicate and mirror
Select Element 106 - resize by 45%
Image mirror and paste on bottom right
Select Element 74 - resize by 20%
Paste and position on bottom right
Select Element 105 - resize by 30%
Paste and position on bottom right
Select Element 64 - resize by 20%
Paste and position on bottom right
Select Element 22 - resize by 45%
Image mirror and paste on bottom left
Select Element 80 - resize by 40%
Paste and position on bottom left
Select Element 58 - resize by 25%
Paste and position on bottom left
Select Element 55 - resize by 20%
Paste and position on bottom left
Select Element 31 - resize by 20%
Paste and position on bottom
Select Element 76 - resize by 30%
Paste and position on bottom
Select New raster layer and flood fill with color or gradient of choice
Move layer to the bottom of the template
Apply Mask 21
Merge group and move to the bottom
Add any additional elements you like.
Add any dropshadows you like
Crop and resize as desired
Add copyright info, license number and name
You're done! Thanks for trying my tutorial!
Saturday, September 14, 2013
SUMMERTIME SADNESS
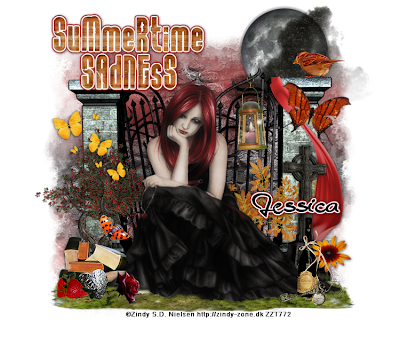
Supplies needed:
I am using the amazing art from Zindy S.D. Nielsen for for this tutorial, which you can find here
Scrapkit: I am using a beautiful kit from Gothic Inspirations called "Summertime Sadnesss" which you can get by going here
Mask 4 from ButterflyFlutterby which you can find here
Plugins used: Eyecandy 4000 - Gradient Glow, Xero- Bad Dream, Xero-Radiance, Lokas 3D Shadow
----------------------------
This tutorial is written for those who have working knowledge of PSPX2 (any version will do).
This tutorial was written by me on September 14, 2013. Please do not copy or paste on any other forum, website or blog provide link back to tut only. Please do not claim as your own. This tutorial is copyrighted to me. Any resemblance to any other tutorial is purely coincidental.
Ok - let's start and remember to save often.
Open up a 750 x 650 blank canvas (we can resize it later)
Select Broken Gates Element and paste in the center of the canvas
Resize by 80%
Select MoonWCloud Element - resize by 35%
Paste and position on top right below gate element
Paste tube of choice where desired
Apply Xero Radiance at setting of choice
Apply Lokas 3D Shadow at default settings
Select Curtain1 Element - resize by 50%
Paste and position on right side
Select GraveStone1 Element - resize by 50%
Paste and position on right side
Select Leaves3 Element - resize by 40%
Image mirror and paste on right side below cross element
Select Lawn Element - resize by 80%
Paste and position on bottom below gate element
Select Bottle Element - resize by 25%
Paste and position on bottom right
Select Flower3 Element - resize by 20%
Paste and position on bottom right
Select Tree Element - resize by 40%
Paste and position on left side
Select Books Element - resize by 30%
Paste and position on bottom left
Select Butterflies Element - resize by 25%
Paste and position on left side
Select Strawberry2 Element - resize by 15%
Paste and position on bottom left
Select StitchedHeart Element - resize by 10%
Paste and position on bottom left
Select Rose Element - resize by 20%
Paste and position on bottom left
Select Wordart2 Element - resize by 50%
Paste and position on top left
Apply Eyecandy Gradient Glow on fat default settings (Glow Width 4)
Select Mask Element - resize by 80%
Paste on canvas and move to bottom layer
Add new raster layer and flood-fill with color or gradient of choice
Move to bottom layer
Apply Mask 4 and merge group
Add any additional elements you like.
Add any dropshadows you like
Crop and resize as desired
Add copyright info, license number and name
You're done! Thanks for trying my tutorial!
Labels:Gothic Inspirations | 1 comments
Wednesday, September 11, 2013
CAT BABE
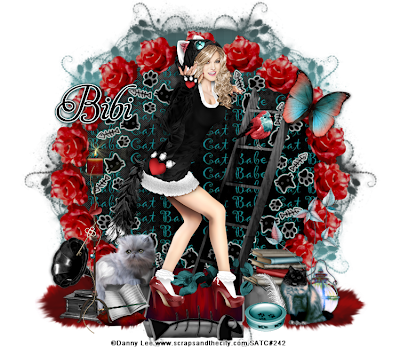
Supplies needed:
I am using the amazing art from Danny Lee for for this tutorial, which you can find here
Scrapkit: I am using a beautiful kit from Bibi's Collection called Cat Babe which you can get by going here
Mask 37 from Babes Designs. Unfortunately, Babes has closed her blog so I am providing it in my files here
Plugins used: Mura Meister - Copies, Penta - Color dot, Xero- Bad Dream, Xero-Radiance, Lokas 3D Shadow
----------------------------
This tutorial is written for those who have working knowledge of PSPX2 (any version will do).
This tutorial was written by me on September 11, 2013. Please do not copy or paste on any other forum, website or blog provide link back to tut only. Please do not claim as your own. This tutorial is copyrighted to me. Any resemblance to any other tutorial is purely coincidental.
Ok - let's start and remember to save often.
Open up a 750 x 650 blank canvas (we can resize it later)
Select Element 43 and paste in the center of the canvas
Resize by 30%
Apply Mura Meister Copies on Encircle with the following settings:
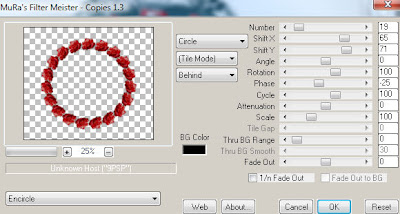
Select your magic wand tool and click in the center of the flower circle frame (Add (Shift), RGB Value, Tolerance 25, Contiguous checked, Feather 0)
Selections, Modify, Expand by 3
Paste paper 12
Select invert, delete
Select Element 36 - resize by 90% and paste on top of paper layer
Apply Eyecandy Gradient Glow on fat default settings
Select Element 13 - resize by 75%
Paste and position on bottom
Paste close-up tube on top of paper layer where desired and delete
Select none
Paste tube of choice where desired
Apply Xero Radiance at setting of choice
Apply Lokas 3D Shadow at default settings
Select Element 82 - resize by 75%
Paste and position on right side below tube layer
Select Element 55 - resize by 70%
Paste and position on bottom below frame layer
Select Element 10 - resize by 25%
Image mirror and paste on bottom right
Select Element 27 - resize by 20%
Paste and position on bottom right
Select Element 69 - resize by 20%
Paste and position on bottom right
Select Element 23 - resize by 50%
Paste and position on bottom right
Select Element 67 - resize by 20%
Paste and position on bottom left
Select Element 49 - resize by 25%
Image mirror and paste on bottom left
Select Element 41 - resize by 75%
Paste and position on bottom left
Select Element 65 - resize by 25%
Paste and position on bottom left
Select Element 30 - resize by 75%
Paste and position on bottom
Add new raster layer and flood-fill with color or gradient of choice
Move to bottom layer
Apply Mask 37 and merge group
Apply Penta Color dot with the following settings:
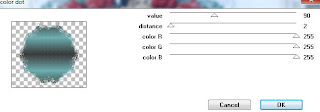
Add any additional elements you like.
Add any dropshadows you like
Crop and resize as desired
Add copyright info, license number and name
You're done! Thanks for trying my tutorial!
WITCH IN TRAINING
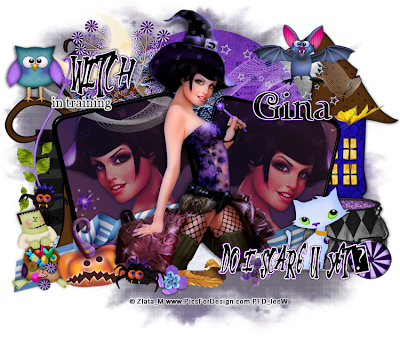
Supplies needed:
I am using the amazing art from Zlata for this tutorial which you can find here
Scrapkit: I am using an awesome kit from Thrifty Scraps by Gina called "Boo Berry" which you can get by going here
Template 40 from Millie which can be found here
Mask 302 from WSL which you can get it here
Plugins used: Penta - Color dot, Eyecandy 4000 - Graident Glow, Eyecandy 4000 - Glass, Xero-Porcelain, Xero - Bad Dream, Lokas 3D Shadow
----------------------------
This tutorial is written for those who have working knowledge of PSPX2 (any version will do).
This tutorial was written by me on September 11, 2013. Please do not copy or paste on any other forum, website or blog provide link back to tut only. Please do not claim as your own. This tutorial is copyrighted to me. Any resemblance to any other tutorial is purely coincidental.
Ok - let's start and remember to save often.
Open the template and using your shortcut keys on your keyboard (SHIFT+D) duplicate the template as a new image. Close the original and delete the copywrite layer.
Adjust canvas size to 750 x 600
Select Wordarts layers 9, 10 and 11 and apply Eyecandy Gradient Glow on fat defaults settings (glow width 3)
Select Square Frame 8
Select all, float, defloat
Add new raster layer and flood-fill with color of choice
Select none
Apply Eyecandy Glass on default settings
Delete/Hide original frame layer
Select Square Frame 6 layer and repeat above steps
Select Square 7 layer
Select all, float, defloat
Add new raster layer and flood-fill with gradient or color of choice (Linear style, Angle 45, Repeat 2)
Paste close-up tube of choice on top of gradient and delete
Select none
Change closeups to Hard Light
Apply Xero Bad Dream at setting of choice
Drop opacity down to 65%
Apply dropshadow and merge tube down on top of gradient layer
Effect, Texture Effects, Blinds (Width 2, Opactity 20, Horizontal and Light from left/top checked)
Delete/Hide original square 7 layer
Select Square 5 layer and repeat above steps
Select Rectangle 4 layer
Select all, float, defloat
Paste paper 2
Select invert, delete, select none
Delete/hide original rectangle layer
Select Rectangle 3 layer
Select all, float, defloat
Paste paper 6
Select invert, delete, select none
Delete/Hide original rectangle layer
Select Circle 2 layer
Select all, float, defloat
Add new raster layer and flood-fill with color of choice
Select none
Effects, Texture Effects, Textures with the following setting set on the snake pattern:
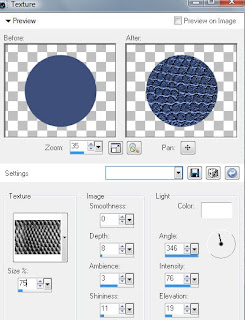
Delete/Hide original circle layer
Select Circle 1 layer
Select all, float, defloat
Paste paper 7
Select invert, delete, select none
Delete/Hide original circle layer
Copy and paste tube of choice and position where desired
Apply Xero Porcelain at setting of choice
Apply Lokas 3D Shadow at default settings
Select House Element - resize by 55%
Paste and position on right side
Select Tree1 Element - resize by 60%
Image mirror and paste on left side below frames layers
Select Cauldron Element - resize by 40%
Paste and position on bottom right
Select Cat 2 Element - resize by 35%
Paste and position on bottom right
Select Ribbon 3 Element - resize by 90%
Paste and position on bottom below tube layer
Select Moon Element - resize by 50%
Image mirror and paste on top left below wordart layer
Select Owl Element - resize by 25%
Paste and position on top left
Select Monster Element - resize by 25%
Paste and position on bottom left
Select Pumpkin 1 Element - resize by 30%
Paste and position on bottom left
Select Bat 2 Element - resize by 50%
Paste and position on top right
Select New raster layer and flood fill with color or gradient of choice
Move layer to the bottom of the template
Apply Mask 302
Merge group and move to the bottom
Apply Penta - Color dot with the following settings:
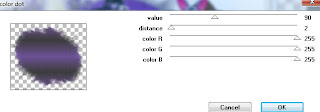
Drop opacity down to 70%
Add any additional elements you like.
Add any dropshadows you like
Crop and resize as desired
Add copyright info, license number and name
You're done! Thanks for trying my tutorial!
Labels:Thrifty Scraps by Gina | 0
comments
Tuesday, September 10, 2013
ROCK REBEL
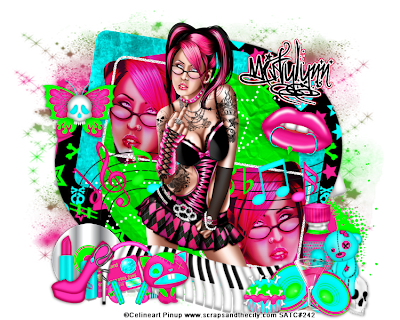
Supplies needed:
I am using the amazing art from Celinart Pinup for this tutorial which you can find here
Scrapkit: I am using an awesome kit from MistyLynns Creations called "Rock Rebel" which you can get by going here
Template 324 from Millie which can be found here
Sparkle Mask from Witchys Heart which you can find on the Misfits Blog here
Plugins used: Xero-Radiance, Xero - Bad Dream, Lokas 3D Shadow
----------------------------
This tutorial is written for those who have working knowledge of PSPX2 (any version will do).
This tutorial was written by me on September 10, 2013. Please do not copy or paste on any other forum, website or blog provide link back to tut only. Please do not claim as your own. This tutorial is copyrighted to me. Any resemblance to any other tutorial is purely coincidental.
Ok - let's start and remember to save often.
Open the template and using your shortcut keys on your keyboard (SHIFT+D) duplicate the template as a new image. Close the original and delete the copywrite layer.
Adjust canvas size to 750 x 600
Select Square Frame 8
Adjust, Add/Remove Noise, Add Noise (Uniform checked, Noise 100%, Monochrome checked)
Select Square Frame 9 and repeat
Select Square 6 layer
Select all, float, defloat
Add new raster layer and flood-fill with gradient or color of choice (Linear style, Angle 45, Repeat 2)
Paste close-up tube of choice on top of gradient and delete
Select none
Change closeups to Hard Light
Apply Xero Bad Dream at setting of choice
Drop opacity down to 75%
Apply dropshadow and merge tube down on top of gradient layer
Effect, Texture Effects, Blinds (Width 2, Opactity 20, Horizontal and Light from left/top checked)
Delete/Hide original square 6 layer
Select Square 5 layer and repeat above steps
Select Circle 4 layer
Select all, float, defloat
Paste paper 4
Select invert, delete, select none
Delete/hide original circle layer
Select Square 3 layer
Select all, float, defloat
Paste paper 8
Select invert, delete, select none
Delete/Hide original square layer
Select Square 2 layer and repeat above steps
Select Oval 1 layer
Select all, float, defloat
Paste paper 12
Select invert, delete, select none
Delete/Hide original oval layer
Copy and paste tube of choice and position where desired
Apply Xero Radiance at setting of choice
Apply Lokas 3D Shadow at default settings
Select Element 36 - resize by 80%
Paste and position on bottom
Select Element 25 - resize by 35%
Paste and position on bottom left
Select Element 62 - resize by 30%
Paste and position on bottom left
Select Element 40 - resize by 30%
Paste and position on bottom left
Select Element 37 - resize by 25%
Image Free Rotate Left by 15% and paste on bottom left
Select Element 23 - resize by 30%
Paste and position on bottom left
Select Element 1 - resize by 25%
Paste and position on bottom left
Select Element 64 - resize by 45%
Paste and position on bottom right
Select Element 4 - resize by 40%
Paste and position on bottom right
Select Element 18 - resize by 40%
Paste and position on bottom right
Select Element 12 - resize by 20%
Paste and position on bottom right
Select Element 54 - resize by 25%
Paste and position on bottom right
Select Element 31 - resize by 90%
Paste and position in the center below tube layer
Select New raster layer and flood fill with color or gradient of choice
Move layer to the bottom of the template
Apply Mask 1
Merge group and move to the bottom
Add any additional elements you like.
Add any dropshadows you like
Crop and resize as desired
Add copyright info, license number and name
You're done! Thanks for trying my tutorial!
Labels:MistyLynn's Creations | 0
comments
Monday, September 9, 2013
SUZUKI
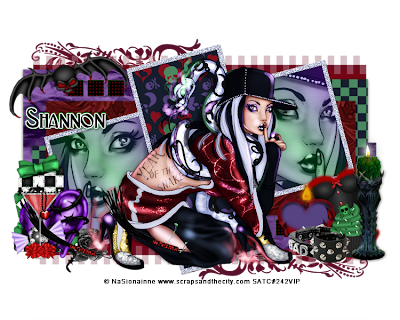
Supplies needed:
I am using the amazing art from NaSionainne for this tutorial which you can find here
Scrapkit: I am using a stunning matching kit from Tiny Turtle Designs called "Suzuki" which you can get by going here
Template 412 from Missy which can be found here
Mask 355 from Weescotlass Creations which you can get it here
Plugins used: Xero-Radiance, Xero - Bad Dream, Lokas 3D Shadow
----------------------------
This tutorial is written for those who have working knowledge of PSPX2 (any version will do).
This tutorial was written by me on September 9, 2013. Please do not copy or paste on any other forum, website or blog provide link back to tut only. Please do not claim as your own. This tutorial is copyrighted to me. Any resemblance to any other tutorial is purely coincidental.
Ok - let's start and remember to save often.
Open the template and using your shortcut keys on your keyboard (SHIFT+D) duplicate the template as a new image. Close the original and delete the copywrite layer.
Adjust canvas size to 750 x 600
Select Rec frame layer
Select all, float, defloat
Add new raster layer and flood-fill with color of choice
Select none
Adjust, Add/Remove Noise, Add Noise (Uniform checked, Noise 65%, Monochrome checked)
Delete/Hide original frame layer
Repeat above steps for Frame left and Frame Right
Select Rec Back layer
Select all, float, defloat
Paste paper 9
Select invert, delete, select none
Delete/Hide original back layer
Select Square Right layer
Select all, float, defloat
Add new raster layer and flood-fill with gradient or color of choice (Linear style, Angle 45, Repeat 2)
Paste close-up tube of choice on top of gradient and delete
Select none
Change closeups to Luminence (Legacy)
Apply Xero Bad Dream at setting of choice
Drop opacity down to 75%
Apply dropshadow and merge tube down on top of gradient layer
Effect, Texture Effects, Blinds (Width 2, Opactity 20, Horizontal and Light from left/top checked)
Delete/Hide original square back layer
Select Square Left layer and repeat above steps
Select Rectangle layer
Select all, float, defloat
Paste paper 17
Select invert, delete, select none
Delete/hide original rectangle layer
Select Rec Shape Left layer
Select all, float, defloat
Paste paper 14
Select invert, delete, select none
Delete/Hide original rec layer
Select Rec Shape Right layer and repeat above steps
Select Small Square layer
Select all, float, defloat
Add new raster layer and flood-fill with color of choice
Select none
Apply Effects, Texture Effects, weave (Gap size 2, Width 4, Opacity 15, Fill gaps checked, Change Gap Color to color of choice)
Delete/Hide original squares layer
Select Raster 2 layer
Select all, float, defloat
Paste paper 1
Select invert, delete, select none
Delete/Hide original raster 2 layer
Select Copy of Raster 2 layer and repeat above steps
Copy and paste tube of choice and position where desired
Apply Xero Radiance at setting of choice
Apply Lokas 3D Shadow at default settings
Select Element 2 - resize by 45%
Paste and position on bottom right
Select Element 25 - resize by 30%
Image Free Rotate Left by 15% and paste on bottom right
Select Element 27 - resize by 20%
Paste and position on bottom right
Select Element 11 - resize by 25%
Paste and position on bottom right
Select Element 42 - resize by 25%
Paste and position on bottom right
Select Element 49 - resize by 20%
Paste and position on bottom right
Select Element 20 - resize by 35%
Image mirror and paste on bottom left
Select Element 81 - resize by 30%
Image Free Rotate Left by 15% and paste on bottom left
Select Element 18 - resize by 25%
Paste and position on bottom left
Select Element 53 - resize by 30%
Paste and position on bottom left
Select New raster layer and flood fill with color or gradient of choice
Move layer to the bottom of the template
Apply Mask 355
Merge group and move to the bottom
Add any additional elements you like.
Add any dropshadows you like
Crop and resize as desired
Add copyright info, license number and name
You're done! Thanks for trying my tutorial!
Subscribe to:
Posts
(Atom)


