Labels
- Alikas Scraps
- All Dolled Up Store
- Amy Marie
- Annaica
- Arthur Crowe
- Babycakes Scraps
- Barbara Jensen
- Bibi's Collections
- Black Widow Creationz
- Blu Moon
- Bonnies Creations
- Bookwork Dezines
- Broken Sky Dezine
- Carita Creationz
- Carpe Diem Designs
- CDO
- Celinart Pinup
- Celine
- Chacha Creationz
- Charmed Designs
- Cherry Blossom Designs
- Chili Designz
- Cluster Frame
- Creative Misfits
- Creative Scraps by Crys
- Curious Creative Dreams
- Danny Lee
- Derzi
- Designs by Ali
- Designs by Joan
- Designs by Ketura
- Designs By Norella
- Designs by Vi
- Diana Gali
- Diry Art Designs
- Disturbed Scraps
- Dreaming With Bella
- Eclipse Creations
- Elegancefly
- Extras
- Fabulous Designz
- Forum Set
- Foxy's Designz
- Freek's Creation
- FTU
- FwTags
- Goldwasser
- Gothic Inspirations
- Gothic Raven Designs
- Graphfreaks
- Hania's Designs
- Happy Pumpkin Studios
- Horseplay's Pasture Designs
- indie-Zine
- Irish Princess Designs
- Ishika Chowdhury
- Kaci McVay
- Kajenna
- katharine
- Katherine
- Khloe Zoey
- Killer Kitty
- Kissing Kate
- KiwiFirestorm
- Kiya Designs
- Kizzed by Kelz
- KZ Designz
- Lady Mishka
- Lil Mz Brainstorm
- Maiden of Darkness
- Mariel Designs
- MellieBeans
- Michelle's Myths
- Midnight Shadow
- Misticheskya
- MistyLynn's Creations
- MMeliCrea Designz
- Moon Vixen Designs
- NaSionainne
- Ninaste
- Niqui Designs
- Pandora
- Picsfordesign
- Pink Paradox Productions
- Radyga Designs
- Redefined Designs
- Rissa's Designs
- Schnegge
- ScottishButterfly Creations
- Scrappin Krazy Designs
- Scrappin With Lil Ol Me
- Scraps and the City
- Scraps Dimensions
- Scraps From The Heart
- Scraps N Company
- Scraps with Attitude
- Shining Star Art
- Skyscraps
- Sleek N Sassy Designs
- Sophisticat Simone
- Souldesigner
- Soxsational Scraps
- Spazz
- Starlite and Soul
- Tammy Welt
- Tasha's Playground
- The PSP Project
- Thrifty Scraps by Gina
- Tiny Turtle Designs
- Upyourart
- Verymany
- Wendy Gerber
- Whisper In the Wind
- Wick3d Creationz
- Wicked Diabla
- Yude's Kreationz
Blog Archive
-
▼
2014
(276)
-
▼
August
(32)
- STEAMPUNK VAMPIRE
- GLAMOROUS AMELIA
- GOTHIC SKULL
- PURPLE STEAMPUNK
- EVOL CARNEY
- THE NILE
- Autumn Winds
- VAMPIRE BRIDE
- RISE AND SHINE
- SCHOOL IS IN
- Rawk My Socks Award
- STEAMPUNK ALICE
- VOODOO VICKY
- GRAVEYARD TEA PARTY
- HULA HAVEN
- PRACTICE SAFE HEX
- VAMPIRE HEARTS
- KIMONO
- NIGHTSHADE
- BELLA'S GOTHIC STYLE
- SCHOOL SPIRIT
- NECROMANCER
- MONSTER LANE
- MY STYLE MY WAY
- DRACULA'S BRIDE
- ON THE SHORE
- SUMMERTIME
- LOVE TO READ
- FORGOTTEN CIRCUS
- SKELETON GIRL
- PEACE AND DAISES
- BLACK SHEEP
-
▼
August
(32)
Sunday, August 31, 2014
STEAMPUNK VAMPIRE
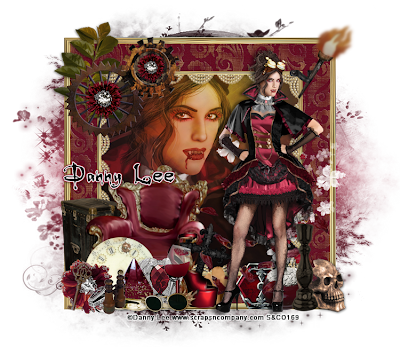
Supplies needed:
I am using the amazing art from Danny Lee for for this tutorial which you can find here
Scrapkit: I am using a beautiful matching kit from Kissing Kate called "Steampunk Vampire" which you can get by going here
Mask 20 from Moonbeams and Spiderwebs which you can find here
Plugins: Lokas 3D Shadow
----------------------------
This tutorial is written for those who have working knowledge of PSPX2 (any version will do).
This tutorial was written by me on August 31, 2014. Please do not copy or paste on any other forum, website or blog provide link back to tut only. Please do not claim as your own. This tutorial is copyrighted to me. Any resemblance to any other tutorial is purely coincidental.
Ok - let's start and remember to save often.
Open up a 750 x 650 blank canvas (we can resize it later)
Select Frame Element 1 and paste in the center of the canvas
Resize by 85%
Select your magic wand tool and click in the center of the Frame (Add (Shift), RGB Value, Tolerance 25, Contiguous checked, Feather 0)
Selections, Modify, Expand by 5
Paste paper 2
Select invert, delete
Add Close-up tube of choice and paste on top of paper layer
Delete, select none
Change close-up to Hard Light and drop opactiy down to 65%
Merge down on paper layer
Move paper below frame
Select Element 13 - resize by 35%
Paste and position on top right
Paste and position on top left
Select Element 57 - resize by 30%
Paste and position on top left
Select Element 27 - resize by 22%
Paste and position on top left
Select Element 15 - resize by 15%
Paste and position on top left
Image duplicate and resize by 80%
Reposition on top left where desired
Select Element 30 - resize by 25%
Paste and position on top right
Select Element 18 - resize by 40%
Paste and position on bottom left
Select Element 21 - resize by 40%
Paste and position on bottom left
Paste tube of choice where desired
Apply Lokas 3D Shadow at default settings
Select Element 32 - resize by 50%
Paste and position on bottom left
Select Element 22 - resize by 20%
Paste and position on bottom left
Select Element 17 - resize by 15%
Image Free Rotate Right by 15% and paste on bottom left
Select Element 41 - resize by 20%
Paste and position on bottom left
Select Element 49 - resize by 40%
Paste and position on bottom left
Select Element 23 - resize by 15%
Paste and position on bottom left
Select Element 12 - resize by 20%
Paste and position on bottom left
Select Element 34 - resize by 25%
Paste and position on bottom
Select Element 16 - resize by 25%
Paste and position on bottom left
Select Element 11 - resize by 20%
Paste and position on bottom left
Select Element 59 - resize by 20%
Paste and position on bottom right
Select Element 56 - resize by 30%
Paste adn position on bottom right
Select Element 63 - resize by 22%
Paste and position on bottom right
Select Element 2 - resize by 20%
Paste and position on bottom right
Add new raster layer and flood-fill with color or gradient of choice
Apply Mask and merge group - move to bottom layer
Add new raster layer and flood-fill with color of choice
Apply Mask 20 and merge group - move to bottom layer
Add any additional elements you like.
Add any dropshadows you like
Sharpen any elements as needed
Crop and resize as desired
Add copyright info, license number and name
You're done! Thanks for trying my tutorial!
Labels:Scraps N Company | 0
comments
Friday, August 29, 2014
GLAMOROUS AMELIA
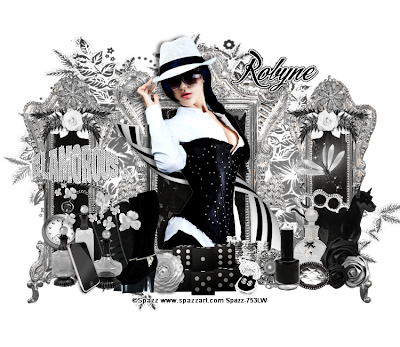
Supplies needed:
I am using the amazing art from Spazz for for this tutorial which you can find here
Scrapkit: I am using a beautiful matching kit from Whisper In the Wind called "Amelia" which you can get by going here
Floral Mask 4 from Dee which you can find here
Plugins: Lokas 3D Shadow
----------------------------
This tutorial is written for those who have working knowledge of PSPX2 (any version will do).
This tutorial was written by me on August 29, 2014. Please do not copy or paste on any other forum, website or blog provide link back to tut only. Please do not claim as your own. This tutorial is copyrighted to me. Any resemblance to any other tutorial is purely coincidental.
Ok - let's start and remember to save often.
Open up a 750 x 650 blank canvas (we can resize it later)
Select Element 17 and paste in the center of the canvas
Resize by 85%
Select Element 23- resize by 20%
Paste and position on top left
Image duplicate and mirror
Select Element 36 - resize by 40%
Paste and position in the center of canvas
Paste tube of choice where desired
Apply Lokas 3D Shadow at default settings
Select Element 48 - resize by 30%
Image Free Rotate Right by 15% and paste on bottom right
Select Element 73 - resize by 22%
Paste and position on bottom right
Select Element 25 - resize by 12%
Paste and position on bottom right
Select Element 7 - resize by 20%
Paste and position on bottom right
Select Element 13 - resize by 9%
Paste and position on bottom right
Select Element 27 - resize by 15%
Paste and position on bottom right
Select Element 14 - resize by 15%
Paste and position on bottom right
Select Element 69 - resize by 25%
Paste and position on bottom
Select Element 76 - resize by 15%
Paste and position on bottom
Select Element 52 - resize by 15%
Paste and position on bottom
Select Element 78 - resize by 10%
Paste and position on bottom
Select Element 80 - resize by 20%
Paste and position on bottom left
Select Element 34 - resize by 20%
Paste and position on bottom left
Select Element 39 - resize by 15%
Paste and position on bottom left
Select Element 30 - resize by 25%
Image Free Rotate Left by 15% and paste on bottom left
Select Element 32 - resize by 25%
Paste and position on bottom left
Select Element 15 - resize by 30%
Paste and position on bottom left
Select Element 90 - resize by 30%
Paste and position on left side
Add new raster layer and flood-fill with gradient of choice
Apply Floral Mask 4 and merge group - move to bottom layer
Add any additional elements you like.
Add any dropshadows you like
Sharpen any elements as needed
Crop and resize as desired
Add copyright info, license number and name
You're done! Thanks for trying my tutorial!
Labels:Whisper In the Wind | 0
comments
Wednesday, August 27, 2014
GOTHIC SKULL

Supplies needed:
I am using the amazing art from Anna Marine for for this tutorial which you can find here
Scrapkit: I am using a stunning kit from Scrappin Krazy Designs called "Gothic Ashley" which you can get by going here
Mask 134 from Designs by Vaybs which you can find here
Plugins: Alien Skin Xenofex 2, Lokas 3D Shadow
----------------------------
This tutorial is written for those who have working knowledge of PSPX2 (any version will do).
This tutorial was written by me on August 27, 2014. Please do not copy or paste on any other forum, website or blog provide link back to tut only. Please do not claim as your own. This tutorial is copyrighted to me. Any resemblance to any other tutorial is purely coincidental.
Ok - let's start and remember to save often.
Open up a 750 x 650 blank canvas (we can resize it later)
Select Frame Element 8 and paste in the center of the canvas
Resize by 90%
Select your magic wand tool and click in the center of the window frames (Add (Shift), RGB Value, Tolerance 25, Contiguous checked, Feather 0)
Selections, Modify, Expand by 5
Paste paper 6
Select invert, delete, select none
Move paper below frame
Select Element 67 - resize by 105%
Paste and position on center of the canvas
Image Free Rotate Right by 15%
Apply Xenofex 2 Burnt Edges with the following settings:

Paste tube of choice where desired
Apply Lokas 3D Shadow at default settings
Select Element 4 - resize by 30%
Paste and position on top left
Select Element 25 - resize by 40%
Paste and position on bottom left
Select Element 30 - resize by 25%
Paste and position on bottom left
Select Element 38 - resize by 25%
Paste adn position on bottom left
Select Element 19 - resize by 35%
Paste and positon on bottom left
Select Element 6 - resize by 15%
Paste and position on bottom left
Select Element 44 - resize by 30%
Paste and position on bottom left
Select Element 65 - resize by 35%
Paste and position on bottom left
Select Element 13 - resize by 30%
Paste and position on bottom
Select Element 42 - resize by 35%
Paste and position on bottom right
Select Element 16 - resize by 30%
Image mirror and paste on bottom right
Select Element 27 - resize by 25%
Paste and position on bottom right
Select Element 9 - resize by 25%
Paste and position on bottom right
Paste paper 8
Apply Mask 134 and merge group - move to bottom layer
Add any additional elements you like.
Add any dropshadows you like
Sharpen any elements as needed
Crop and resize as desired
Add copyright info, license number and name
You're done! Thanks for trying my tutorial!
Labels:Scrappin Krazy Designs | 0
comments
Tuesday, August 26, 2014
PURPLE STEAMPUNK
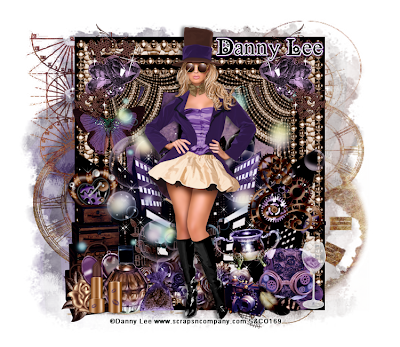
Supplies needed:
I am using the amazing art from Danny Lee for for this tutorial which you can find here
Scrapkit: I am using a beautiful matching kit from Bibi's Collections called "Purple Steam" which you can get by going here
Mask 22 from Becky which you can find here
Mask 291 from Trese which you can find here
Plugins: Eyecandy 4000 - Gradient Glow, Lokas 3D Shadow
----------------------------
This tutorial is written for those who have working knowledge of PSPX2 (any version will do).
This tutorial was written by me on August 26, 2014. Please do not copy or paste on any other forum, website or blog provide link back to tut only. Please do not claim as your own. This tutorial is copyrighted to me. Any resemblance to any other tutorial is purely coincidental.
Ok - let's start and remember to save often.
Open up a 750 x 650 blank canvas (we can resize it later)
Select Frame Element 67 and paste in the center of the canvas
Resize by 75%
Select your magic wand tool and click in the center of the Frame (Add (Shift), RGB Value, Tolerance 25, Contiguous checked, Feather 0)
Selections, Modify, Expand by 5
Paste paper 10
Select invert, delete, select none
Move paper below frame
Select Element 66 - resize by 25%
Paste and position on top right
Image duplicate and mirror
Select Element 31 - resize by 65%
Paste and position on bottom of frame
Select Element 71 - resize by 25%
Paste and position on bottom right
Select Element 27 - resize by 45%
Paste and position on bottom left
Select Element 72 - resize by 15%
Image Free Rotate Left by 15% and paste on left side
Select Element 47 - resize by 30%
Paste and position on bottom center of frame
Select Element 94 - resize by 40%
Image Free Rotate Left by 15% and paste on top left
Select Element 8 - resize by 75%
Paste and position on canvas where desired
Paste tube of choice where desired
Apply Lokas 3D Shadow at default settings
Select Element 16 - resize by 40%
Paste and position on bottom right
Select Element 11 - resize by 30%
Paste and position on bottom right
Select Element 26 - resize by 55%
Paste and position on bottom right
Select Element 19 - resize by 35%
Paste and position on bottom
Select Element 4 - resize by 20%
Paste and position on bottom
Select Element 25 - resize by 20%
Paste and position on bottom left
Select Element 81 - resize by 12%
Image Free Rotate Left by 15% and paste on bottom left
Select Element 6 - resize by 20%
Paste and position on bottom left
Select Element 2 - resize by 25%
Paste and position on bottom left
Select Element 64 - resize by 15%
Paste and position on bottom left
Paste paper 8
Apply Mask 291 and merge group - move to bottom layer
Add new raster layer and flood-fill with color of choice
Apply Mask 22 and merge group - move to bottom layer
Add any additional elements you like.
Add any dropshadows you like
Sharpen any elements as needed
Crop and resize as desired
Add copyright info, license number and name
You're done! Thanks for trying my tutorial!
Labels:Bibi's Collections,Scraps N Company | 0
comments
EVOL CARNEY
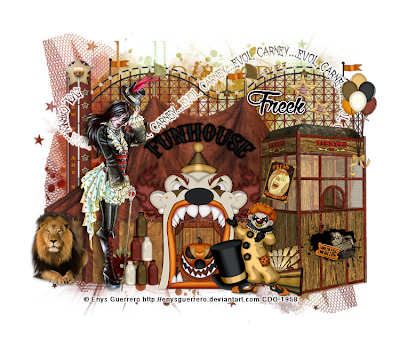
Supplies needed:
I am using the amazing art from Enys Guerrero for for this tutorial which you can find here
Scrapkit: I am using an awesome from Freek's Creation called "Evol Carney" which you can get by going here
Halloween Mask from Vix which you can find here
Plugins: Lokas 3D Shadow
----------------------------
This tutorial is written for those who have working knowledge of PSPX2 (any version will do).
This tutorial was written by me on August 26, 2014. Please do not copy or paste on any other forum, website or blog provide link back to tut only. Please do not claim as your own. This tutorial is copyrighted to me. Any resemblance to any other tutorial is purely coincidental.
Ok - let's start and remember to save often.
Open up a 750 x 650 blank canvas (we can resize it later)
Select Roller Coaster Element and paste in the center of the canvas
Resize by 80% and move to top of canvase
Select Tent Element and paste in the center of the canvas
Select Strength Game Element - resize by 65%
Paste and position on left side behind tent element
Select Ticket Booth Element - resize by 65%
Paste and position on right side
Select Entrance Element - resize by 55%
Paste and position in the bottom center above tent element
Paste tube of choice where desired
Apply Lokas 3D Shadow at default settings
Select Balloons Element - resize by 40%
Paste and position on top right
Select Clown Cluster Element - resize by 22%
Paste and position on bottom right above booth element
Select Poster Element - resize by 15%
Image Free Rotate Right by 15% and paste on top of booth element
Select Megaphone Element - resize by 25%
Paste and position on bottom right
Select Tickets Element - resize by 25%
Paste and position on bottom right
Select Clown Element - resize by 35%
Paste and position on bottom right
Select Top Hat Element - resize by 25%
Paste and position on bottom
Select Pumpkin Element - resize by 30%
Paste and position on bottom where above entrance element
Select Milk Bottles Element - resize by 30%
Paste and position on bottom left
Select Lion Element - resize by 35%
Paste and position on bottom left
Select Flower Element - resize by 25%
Paste and position on bottom left
Select Word Art 2 Element - resize by 80%
Paste and position on top where desired
Paste paper 5 on canvas
Apply Mask 2 and merge group - move to bottom layer
Add any additional elements you like.
Add any dropshadows you like
Sharpen any elements as needed
Crop and resize as desired
Add copyright info, license number and name
You're done! Thanks for trying my tutorial!
Labels:Freek's Creation | 0
comments
Monday, August 25, 2014
THE NILE
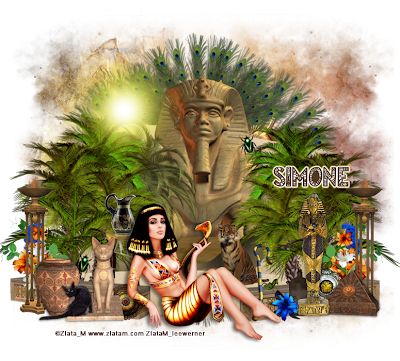
Supplies needed:
I am using the amazing art from Zlata_M for for this tutorial which you can find here
Scrapkit: I am using a beautiful kit from Sophisticat Simone called "The Nile" which you can get by going here
Mask 22 from Gina Gems which you can find here
Plugins: Eyecandy 4000 - Gradient Glow, Xero - Radiance, Lokas 3D Shadow
----------------------------
This tutorial is written for those who have working knowledge of PSPX2 (any version will do).
This tutorial was written by me on August 25, 2014. Please do not copy or paste on any other forum, website or blog provide link back to tut only. Please do not claim as your own. This tutorial is copyrighted to me. Any resemblance to any other tutorial is purely coincidental.
Ok - let's start and remember to save often.
Open up a 775 x 700 blank canvas (we can resize it later)
Select Frame Element 1 and paste in the center of the canvas
Resize by 90%
Select Element 48 - resize by 75%
Paste and position in the center of canvas above frame element
Select Element 2 - resize by 25%
Paste and position on bottom
Select Element 52 - resize by 35%
Paste and position on bottom
Select Element 24 - resize by 28%
Image mirror and paste on bottom above table element
Paste tube of choice where desired
Apply Xero - Radiance on default setting of choice
Apply Lokas 3D Shadow at default settings
Select Element 13 - resize by 48%
Paste and position on bottom right
Image duplicate and mirror
Select Element 61 - resize by 25%
Paste and position on bottom left
Image duplicate and mirror
Select Element 65 - resize by 25%
Paste and position on bottom rigth
Image duplicate and mirror
Select Element 21 - resize by 20%
Paste and position on bottom right
Select Element 49 - resize by 45%
Paste and position on bottom right
Select Element 14 - resize by 40%
Paste and position on bottom right
Select Element 60 - resize by 15%
Paste and position on bottom right
Select Element 12 - resize by 30%
Paste and position on bottom right
Select Element 25 - resize by 30%
Paste and position on bottom left
Select Element 50 - resize by 40%
Paste and position on bottom left
Select Element 20 - resize by 35%
Paste and position on bottom left
Select Element 47 - resize by 65%
Paste and position on top left
Select Element 46 - resize by 32%
Image Free Rotate Left by 15% and paste on top right
Paste paper 11
Apply Mask 22 and merge group - move to bottom layer
Add any additional elements you like.
Add any dropshadows you like
Sharpen any elements as needed
Crop and resize as desired
Add copyright info, license number and name
You're done! Thanks for trying my tutorial!
Labels:Sophisticat Simone | 0
comments
Sunday, August 24, 2014
Autumn Winds
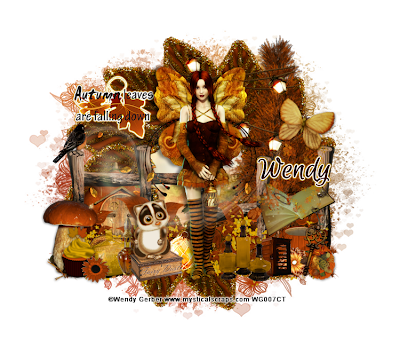
Supplies needed:
I am using the amazing art from Wendy Gerber for for this tutorial which you can find here
Scrapkit: I am using a beautiful matching kit from Whisper In the Wind called "Autumn Winds" which you can get by going here
Floral Mask 2 from Dee which you can find here
Plugins: Eyecandy 4000 - Gradient Glow, Lokas 3D Shadow
----------------------------
This tutorial is written for those who have working knowledge of PSPX2 (any version will do).
This tutorial was written by me on August 24, 2014. Please do not copy or paste on any other forum, website or blog provide link back to tut only. Please do not claim as your own. This tutorial is copyrighted to me. Any resemblance to any other tutorial is purely coincidental.
Ok - let's start and remember to save often.
Open up a 750 x 650 blank canvas (we can resize it later)
Select Frame Element 2 and paste in the center of the canvas
Resize by 70%
Select your magic wand tool and click in the center of the Frame (Add (Shift), RGB Value, Tolerance 25, Contiguous checked, Feather 0)
Selections, Modify, Expand by 5
Paste paper 5
Select invert, delete, select none
Move paper below frame
Select Element 79 - resize by 55%
Paste and position on right side
Select Element 48 - resize by 30%
Image mirror and paste on top right
Select Element 82 - resize by 65%
Select Element 81 - resize by 40%
Paste and position on bottom left
Paste and position on bottom where desired
Paste tube of choice where desired
Apply Lokas 3D Shadow at default settings
Select Element 5 - resize by 20%
Paste and position on bottom left
Select Element 73 - resize by 20%
Paste and position on bottom left
Select Element 88 - resize by 15%
Paste and position on bottom left
Select Element 44 - resize by 20%
Paste and position on bottom left
Select Element 13 - resize by 20%
Paste and position on bottom left
Select Element 17 - resize by 15%
Paste and position on bottom left
Select Element 66 - resize by 15%
Paste and position on bottom left
Select Element 39 - resize by 15%
Paste and position on bottom left
Select Element 36 - resize by 10%
Paste and position on bottom
Select Element 93 - resize by 20%
Paste and position on bottom right
Select Element 68 - resize by 15%
Paste and position on bottom right
Select Element 31 - resize by 15%
Image Free Rotate Right by 15% and paste on bottom right
Select Element 63 - resize by 20%
Paste and position on bottom right
Select Element 90 - resize by 15%
Paste and position on bottom right
Select Element 50 - resize by 15%
Paste and position on bottom right
Select Element 35 - resize by 15%
Image Free Rotate Right by 15% and paste on top right
Select Element 49 - resize by 10%
Paste and position on top left
Select Element 6 - resize by 20%
Paste and position on top left
Apply Eyecandy Gradient Glow on fat default settings (Glow Width 3)
Select Element 22 - resize by 55%
Paste and position on center left where desired
Add new raster layer and flood-fill with color of choice
Apply Mask 2 and merge group - move to bottom layer
Add any additional elements you like.
Add any dropshadows you like
Sharpen any elements as needed
Crop and resize as desired
Add copyright info, license number and name
You're done! Thanks for trying my tutorial!
Labels:Wendy Gerber,Whisper In the Wind | 0
comments
Saturday, August 23, 2014
VAMPIRE BRIDE
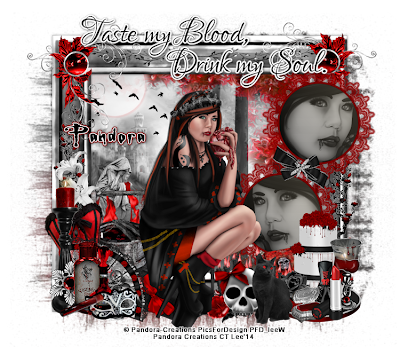
Supplies needed:
I am using the amazing art from Pandora Creations for for this tutorial which you can find here
Scrapkit: I am using a stunning kit from Pink Paradox Productions called "Vampire Bride" which you can get by going here
Mask 179 from Insatiable Dreams which you can find here
Plugins: Eyecandy 4000 - Gradient Glow, Xero - Radiance, Lokas 3D Shadow
----------------------------
This tutorial is written for those who have working knowledge of PSPX2 (any version will do).
This tutorial was written by me on August 23, 2014. Please do not copy or paste on any other forum, website or blog provide link back to tut only. Please do not claim as your own. This tutorial is copyrighted to me. Any resemblance to any other tutorial is purely coincidental.
Ok - let's start and remember to save often.
Open up a 750 x 650 blank canvas (we can resize it later)
Select Frame Element 8 and paste in the center of the canvas
Resize by 65%
Select your magic wand tool and click in the center of the each Frame (Add (Shift), RGB Value, Tolerance 25, Contiguous checked, Feather 0)
Selections, Modify, Expand by 5
Paste paper 19
Select invert, delete, select none
Move paper below frame
Select Element 143 - resize by 22%
Paste and position on top left of paper
Colorize with the following settings if desired:
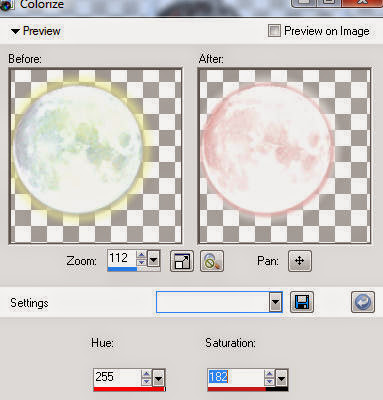
Select Element 4 - resize by 25%
Paste and position on top left above paper layer
Select Element 15 - resize by 25%
Paste and position on left side of paper layer
Select Element 142 - resize by 25%
Paste and position on bottom left above paper layer
Select Element 123 - resize by 20%
Paste and position on bottom left above paper layer
Select Element 178 - resize by 25%
Paste and position on top left above frame
Image duplicate, mirror
Select Frames Element 19 - resize by 5%
Paste and position on top right where desired
Image duplicate and repositon frame copy on bottom right where desired
Select your magic wand tool and click in the center of the original Frame (Add (Shift), RGB Value, Tolerance 25, Contiguous checked, Feather 0)
Selections, Modify, Expand by 3
Add new raster layer and flood-fill with color or gradient of choice (style, Angle 45, Repeat 0)
Add Close-up tube of choice and paste on top of gradient layer
Select invert, delete, select none
Apply Xero Radiance on default setting of choice
Change close-up to Luminace (Legacy) and drop opactiy down to 60%
Merge close-up down onto gradient layer
Effect, Texture Effects, Blinds (Width 2, Opacity 15, Horizontal and Light from left/top checked)
Move gradient/tube layer below frame
Select Copy of Frame Element and repeat above steps
Select Element 33 - resize by 15%
Paste and position in the center between circle frames
Paste tube of choice where desired
Apply Lokas 3D Shadow at default settings
Select Element 158 - resize by 35%
Paste and position on bottom right side of frame
Image duplicate, mirror and paste on top left
Select Element 50 - resize by 25%
Paste and position on bottom right
Select Element 43 - resize by 20%
Paste and position on bottom right
Select Element 36 - resize by 15%
Paste and position on bottom right
Select Element 37 - resize by 15%
Paste and position on bottom right
Select Element 58 - resize by 10%
Paste and position on bottom right
Select Element 149 - resize by 10%
Paste and position on bottom right
Select Element 12 - resize by 18%
Paste and position on bottom right
Select Element 14 - resize by 30%
Paste and position on bottom
Select Element 156 - resize by 15%
Paste and position on left side
Select Element 27 - resize by 35%
Image Free Rotate Left by 15% and paste on bottom left
Select Element 65 - resize by 30%
Paste and position on bottom left
Select Element 73 - resize by 10%
Paste and position on bottom left
Select Element 42 - resize by 22%
Paste and position on bottom left
Select Element 25 - resize by 20%
Paste and position on bottom left
Select Element 41 - resize by 20%
Paste and position on bottom left
Select Element 55 - resize by 15%
Paste and position on bottom left
Select Element 31 - resize by 20%
Paste and position on bottom left
Select Element 181 - resize by 18%
Paste and position on top where desired
Apply Eyecandy Gradient Glow on fat default settings (Glow Width 3)
Add new raster layer and flood-fill with color of choice
Apply Mask 179 and merge group - move to bottom layer
Add any additional elements you like.
Add any dropshadows you like
Sharpen any elements as needed
Crop and resize as desired
Add copyright info, license number and name
You're done! Thanks for trying my tutorial!
Labels:Pandora,Pink Paradox Productions | 0
comments
Friday, August 22, 2014
RISE AND SHINE
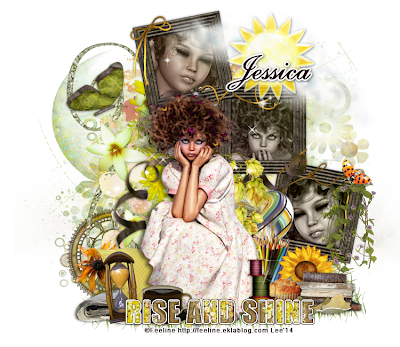
Supplies needed:
I am using the amazing art from Feeline for for this tutorial which you can find here
Scrapkit: I am using a stunning kit from Gothic Inspirations called "Rise and Shine" which you can get by going here
Mask 37 from Moonbeams and Spiderwebs which you can find here
Plugins: Lokas 3D Shadow, Eyecandy 4000 - Gradient Glow
----------------------------
This tutorial is written for those who have working knowledge of PSPX2 (any version will do).
This tutorial was written by me on August 22, 2014. Please do not copy or paste on any other forum, website or blog provide link back to tut only. Please do not claim as your own. This tutorial is copyrighted to me. Any resemblance to any other tutorial is purely coincidental.
Ok - let's start and remember to save often.
Open up a 750 x 650 blank canvas (we can resize it later)
Select Cluster 3 Element and paste in the center of the canvas
Resize by 80%
Select Frames Element - resize by 55%
Paste and position on top right where desired
Select your magic wand tool and click in the center of the each Frame (Add (Shift), RGB Value, Tolerance 25, Contiguous checked, Feather 0)
Selections, Modify, Expand by 5
Add new raster layer and flood-fill with color or gradient of choice (style, Angle 45, Repeat 0)
Add Close-up tubes of choice and paste on top of gradient layer
Select invert, delete, select none
Change close-ups to Luminace (Legacy) and drop opactiy down to 75%
Merge close-ups down onto gradient layer
Move gradient/tubes layer below frame
Select Cloud Element - resize by 50%
Image Free Rotate Right by 15% and paste on top right
Select Sun Element - resize by 30%
Paste and position on top right and drop opacity down to 80%
Select Butterfly Element - resize by 20%
Image mirror and paste on top left
Paste tube of choice where desired
Apply Lokas 3D Shadow at default settings
Select Grass Element - resize by
Paste and position on bottom below tube layer
Select Ribbon 3 - resize by 45%
Paste and position in the center of canvas below tube layer
Select Clock Element - resize by 35%
Paste and position on bottom left
Select Pillow Element - resize by 25%
Paste and position on bottom left
Select Sands of Time Element - resize by 25%
Paste and position on bottom left
Select Flower 2 Element - resize by 30%
Paste and position on bottom left
Select Newspaper Element - resize by 25%
Paste and position on bottom left
Select Coffee Element - resize by 20%
Paste and position on bottom left
Select Flowers 2 Element - resize by 25%
Paste and position on right side of the frame where desired
Select Little Bug Element - resize by 40%
Paste and position on right side
Select Books Element - resize by 20%
Paste and position on bottom right
Select Flower 4 Element - resize by 22%
Paste and position on bottom right
Select Heart Element - resize by 55%
Image Free Rotate Right by 15% and paste on bottom right
Select Pencils Element - resize by 25%
Paste and position on bottom right
Select Muffin Element - resize by 22%
Paste and position on bottom right
Select Thread Element - resize by 25%
Paste and position on bottom right
Select EggShells Element - resize by 25%
Image mirror and paste on bottom right
Select WA7 Element - resize by 45%
Paste and position on bottom
Apply Eyecandy Gradient Glow on fat default settings (Glow Width 3)
Add new raster layer and flood-fill with color of choice
Apply Mask 37 and merge group - move to bottom layer
Add any additional elements you like.
Add any dropshadows you like
Sharpen any elements as needed
Crop and resize as desired
Add copyright info, license number and name
You're done! Thanks for trying my tutorial!
Labels:Gothic Inspirations | 0
comments
Thursday, August 21, 2014
SCHOOL IS IN
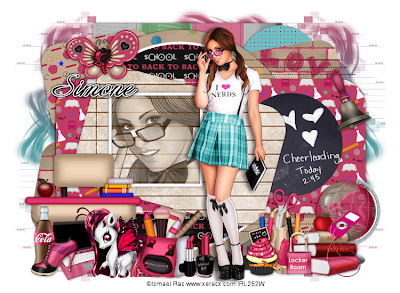
Supplies needed:
I am using the amazing artwork from Ismael Rac for this tutorial which you can find here
Scrapkit: I am using a stunning kit from Sophisticat Simone called "School Is In" which you can get by going here or here
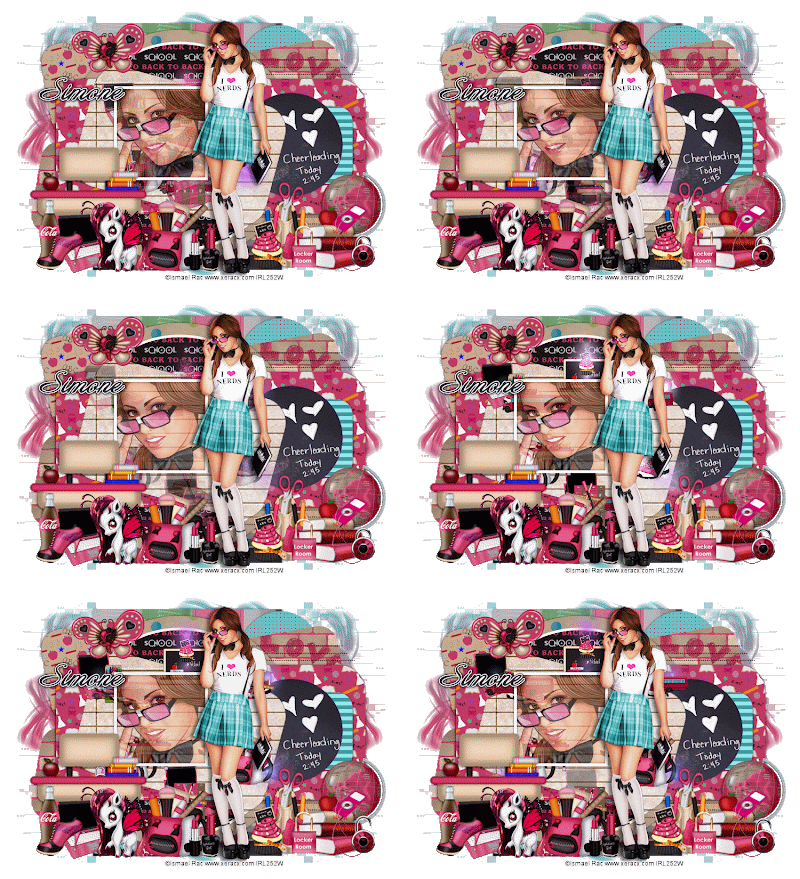
You can also find her awesome matching animation here
Collab Template from Missy and Rosey which you can find here
Mask 242 from Trese which you can find here
Plugins used: VM Extravaganza - Transmission, Xero - Radiance, Lokas 3D Shadow
----------------------------
This tutorial is written for those who have working knowledge of PSPX2 (any version will do).
This tutorial was written by me on August 21, 2014. Please do not copy or paste on any other forum, website or blog provide link back to tut only. Please do not claim as your own. This tutorial is copyrighted to me. Any resemblance to any other tutorial is purely coincidental.
Ok - let's start and remember to save often.
Open the template and using your shortcut keys on your keyboard (SHIFT+D) duplicate the template as a new image. Close the original and delete the copywrite layer.
Adjust canvas to 750 x 550
Select Square Frame Raster 9 layer
Select your magic wand tool and click in the center of the Frame (Add (Shift), RGB Value, Tolerance 25, Contiguous checked, Feather 0)
Selections, Modify, Expand by 3
Add Close-up tube of choice and paste on top of frame layer
Select invert, delete, select none
Change tube to Luminance (Legacy) and drop opacity down to 70%
Move below frame layer
Select Rectangle Raster 5 layer
Select all, float, defloat
Paste paper 1
Select invert, delete, select none
Delete/Hide original rectangle layer
Select Circle Raster 12 layer
Select all, float, defloat
Paste paper 5
Select invert, delete, select none
Delete/Hide original circle layer
Select Square Raster 3 layer
Select all, float, defloat
Add new raster layer and flood-fill with color of choice
Select none
Apply VM Transmission with the following settings:
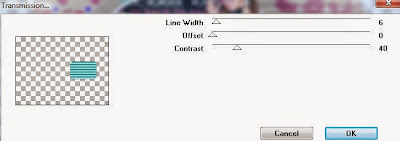
Delete/Hide original square layer
Select Rectangle Raster 1 layer
Select all, float, defloat
Paste paper 12
Select invert, delete, select none
Delete/Hide original rectangle layer
Select Circle Raster 8 layer
Select all, float, defloat
Paste paper 16
Select invert, delete, select none
Delete/Hide original circle layer
Select Circle Raster 2 layer
Select all, float, defloat
Paste paper 19
Select invert, delete, select none
Delete/Hide original circle layer
Select Square Raster 10 layer
Select all, float, defloat
Paste paper 10
Select invert, delete, select none
Delete/Hide original square layer
Select Bottom Left Copy of Square Raster 10 and repeat above steps
Select Top Left Copy of Square Raster 10 layer
Select all, float, defloat
Paste paper 13
Select invert, delete, select none
Delete/Hide original square layer
Select Bottom Right Square layer and repeat above steps
Select Circle Raster 13 layer
Select all, float, defloat
Add new raster layer and flood-fill with color of choice
Select none
Apply Effects, Texture Effects, Weave (Gap size 2, Width 5, Opacity 10, Fill gaps checked, change Gap and Weave color to one of choice)
Delete/Hide original circle layer
Select Circle Copy of Raster 13 and repeat above steps
Select Rectangle Raster 11 layer
Select all, float, defloat
Paste paper 2
Select invert, delete, select none
Delete/Hide original rectangle layer
Select Rectangle Raster 14 layer
Select all, float, defloat
Paste paper 22
Select invert, delete, select none
Delete/Hide original rectangle layer
Copy and paste tube of choice and position where desired
Apply Xero Radiance at setting of choice
Apply Lokas 3D Shadow at default settings
Select Element 21 - resize by 35%
Paste and position on top left
Select Element 8 - resize by 50%
Paste and position on bottom left
Select Element 47 - resize by 40%
Paste and position on bottom left
Select Element 35 - resize by 25%
Paste and position on bottom left
Select Element 3 - resize by 28%
Paste and position on bottom left
Select Element 30 - resize by 40%
Paste and position on bottom left
Select Element 6 - resize by 30%
Paste and position on bottom
Select Element 39 - resize by 15%
Paste and position on bottom
Select Element 14 - resize by 35%
Paste and position on bottom right
Select Element 20 - resize by 30%
Paste and position on bottom right
Select Element 27 - resize by 20%
Paste and position on bottom right
Select Element 37 - resize by 40%
Paste and position on bottom right
Select Element 9 - resize by 25%
Paste and position on bottom right
Select Element 26 - resize by 30%
Paste and position on top right
Select new raster layer and flood fill with color or gradient of choice
Apply Mask 242 or mask of choice
Merge group and move to the bottom layer
Add any additional elements you like.
Add any dropshadows you like
Crop and resize as desired
Add copyright info, license number and name
You're done! Thanks for trying my tutorial!
Labels:Sophisticat Simone | 0
comments
Wednesday, August 20, 2014
Rawk My Socks Award

I received this award from Bibi's Collections and am honored to have received it. TY hun!
Now I get to give this award to five awesome people
They are:
Robyne @ Whisper In the Wind
Millie @ Millie's PSP Madness
Kaci @ Scrappin Krazy Designs
Lisa Auty @ Lisa's Stuff
Estrella @ Pandora Creations
Now Go Share The Love :D
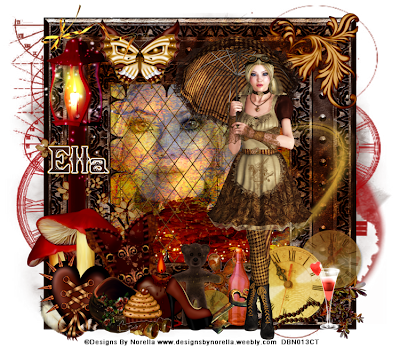
STEAMPUNK ALICE
Supplies needed:
I am using the amazing art from Designs by Norella for for this tutorial which you can find here
Scrapkit: I am using a stunning kit from Bibi's Collections called "Steampunk" which you can get by going here
Mask 54 from Millie which you can find here
Mask 291 from Trese which you can find here
Plugins: Lokas 3D Shadow
----------------------------
This tutorial is written for those who have working knowledge of PSPX2 (any version will do).
This tutorial was written by me on August 20, 2014. Please do not copy or paste on any other forum, website or blog provide link back to tut only. Please do not claim as your own. This tutorial is copyrighted to me. Any resemblance to any other tutorial is purely coincidental.
Ok - let's start and remember to save often.
Open up a 750 x 650 blank canvas (we can resize it later)
Select Frame Element 108 and paste in the center of the canvas
Resize by 45%
Select your magic wand tool and click in the center of the Frame (Add (Shift), RGB Value, Tolerance 25, Contiguous checked, Feather 0)
Selections, Modify, Expand by 5
Paste Paper 1
Select invert, delete
Add Close-up tube of choice and paste on top of paper layer
Delete, select none
Change close-up to Luminace (Legacy) and drop opactiy down to 55%
Merge down on paper layer
Move paper below frame
Select Element 125 - resize by 35%
Paste and position on left side below frame
Select Element 90 - resize by 40%
Paste and position on top right
Select Element 62 - paste and position on left side of frame
Select Element 32 - resize by 25%
Paste and position on top left
Paste tube of choice where desired
Apply Lokas 3D Shadow at default settings
Select Element 140 - resize by 65%
Image mirror and paste on bottom left
Select Element 19 - resize by 25%
Paste and position on bottom left
Select Element 131 - resize by 25%
Paste and position on bottom left
Select Element 80 - resize by 35%
Image Free Rotate Left by 15% and paste on bottom left
Select Element 30 - resize by 25%
Paste and position on bottom left
Select Element 12 - resize by 40%
Paste and position on bottom left
Select Element 36 - resize by 50%
Paste and position on bottom
Select Element 13 - resize by 30%
Paste and position on bottom
Select Element 126 - resize by 22%
Image mirror, flip and reposition on bottom right
Select Element 9 - resize by 80%
Paste and position on bottom right
Select Element 26 - resize by 30%
Paste and position on bottom right
Select Element 7 - resize by 30%
Paste and position on bottom right
Select Element 70 - resize by 55%
Paste and position on bottom
Select Element 89 - resize by 60%
Paste and position on bottom
Add new raster layer and flood-fill with color of choice
Apply Mask 54 and merge group - move to bottom layer
Add new raster layer and flood-fill with color or gradient of choice
Apply Mask 291 and merge group and move to bottom layer
Add any additional elements you like.
Add any dropshadows you like
Sharpen any elements as needed
Crop and resize as desired
Add copyright info, license number and name
You're done! Thanks for trying my tutorial!
Monday, August 18, 2014
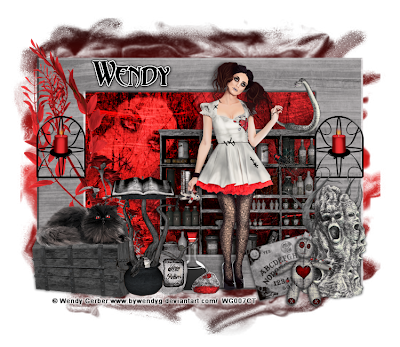
VOODOO VICKY
Supplies needed:
I am using the amazing art from Wendy Gerber for for this tutorial which you can find here
Scrapkit: I am using a stunning kit from Whisper in the Wind called "Voodoo Vicky" which you can get by going here
Mask 34 from Gina Gems which you can find here
Plugins: Eyecandy 4000 - Gradient Glow, Lokas 3D Shadow
----------------------------
This tutorial is written for those who have working knowledge of PSPX2 (any version will do).
This tutorial was written by me on August 18, 2014. Please do not copy or paste on any other forum, website or blog provide link back to tut only. Please do not claim as your own. This tutorial is copyrighted to me. Any resemblance to any other tutorial is purely coincidental.
Ok - let's start and remember to save often.
Open up a 750 x 650 blank canvas (we can resize it later)
Select Frame Element 3 and paste in the center of the canvas
Resize by 80%
Select your magic wand tool and click in the center of the Frame (Add
(Shift), RGB Value, Tolerance 25, Contiguous checked, Feather 0)
Selections, Modify, Expand by 5
Paste Paper 5
Select invert, delete,
Add Close-up tube of choice and paste on top of paper layer
Delete, select none
Change close-up to Overlay and merge down on paper layer
Move paper below frame
Select Element 8 - resize by 45%
Paste and position on right side of frame
Select Element 41 - resize by 55%
Paste and position on top left
Select Element 81 - resize by 15%
Paste and position on left side of frame
Image duplicate, mirror
Paste tube of choice where desired
Apply Lokas 3D Shadow at default settings
Select Element 27 - resize by 30%
Paste and position on bottom right
Select Element 2 - resize by 18%
Paste and position on bottom right
Select Element 77 - resize by 20%
Image Free Rotate Left by 15% and paste on bottom right
Select Element 86 - resize by 25%
Paste and position on bottom left
Select Element 69 - resize by 25%
Paste and position on left side
Select Element 35 - resize by 40%
Paste and position on bottom left
Select Element 9 - resize by 30%
Paste and position on bottom left
Select Element 19 - resize by 15%
Paste and position on bottom
Select Element 84 - resize by 15%
Paste and position on bottom
Select Element 38 - resize by 10%
Paste and position on bottom
Add new raster layer and flood-fill with color or gradient of choice
Apply Mask 34 and merge group and move to bottom layer
Add any additional elements you like.
Add any dropshadows you like
Sharpen any elements as needed
Crop and resize as desired
Add copyright info, license number and name
You're done! Thanks for trying my tutorial!
Labels:Wendy Gerber,Whisper In the Wind | 0
comments
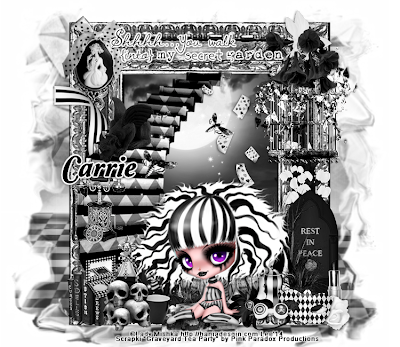
GRAVEYARD TEA PARTY
Supplies needed:
I am using the amazing art from Lady Mishka for for this tutorial which is included in the kit I used from Pink Paradox Productions.
Scrapkit: I am using a stunning kit from Pink Paradox Productions called "Graveyard Tea Party" which you can get by going here
Mask which you can find here. Not sure where this mask came from but will credit if I find out.
Plugins: Eyecandy 4000 - Gradient Glow, Lokas 3D Shadow
----------------------------
This tutorial is written for those who have working knowledge of PSPX2 (any version will do).
This tutorial was written by me on August 18, 2014. Please do not copy or paste on any other forum, website or blog provide link back to tut only. Please do not claim as your own. This tutorial is copyrighted to me. Any resemblance to any other tutorial is purely coincidental.
Ok - let's start and remember to save often.
Open up a 750 x 650 blank canvas (we can resize it later)
Select Frame Element 12 and paste in the center of the canvas
Resize by 70%
Select your magic wand tool and click in the center of the Frame (Add (Shift), RGB Value, Tolerance 25, Contiguous checked, Feather 0)
Selections, Modify, Expand by 5
Paste Paper 28
Select invert, delete, select none
Move paper below frame
Select Element 114 - resize by 48%
Paste and position on left side of frame
Select Element 70 - resize by 25%
Paste and position on top left
Select Element 65 - resize by 30%
Paste and position on top right
Select Element 135 - resize by 20%
Paste and position on top right
Select Element 117 - resize by 25%
Paste and position on center paper where desired
Select Element 7 - resize by 40%
Paste and position on center paper where desired
Select Element 124 - resize by 40%
Paste and position on bottom where desired
Select Element 161 - resize by 20%
Paste and position on top left below stairs
Select Element 82 - resize by 22%
Paste and position on top left
Paste tube of choice where desired
Apply Lokas 3D Shadow at default settings
Select Element 137 - resize by 30%
Paste and position on bottom right
Select Element 89 - resize by 30%
Paste and position on bottom right
Select Element 43 - resize by 20%
Paste and position on bottom right
Select Element 52 - resize by 20%
Image mirror and paste on bottom right
Select Element 27 - resize by 15%
Paste and position on bottom right
Select Element 130 - resize by 10%
Paste and position on bottom right
Select Element 30 - resize by 12%
Paste and position on bottom right
Select Element 131 - resize by 10%
Paste and position on bottom right
Select Element 73 - resize by 20%
Paste and position on left side above stairs
Select Element 77 - resize by 15%
Paste and position on bottom left
Select Element 26 - resize by 15%
Paste and position on bottom left
Select Element 44 - resize by 13%
Paste and position on bottom left
Select Element 46 - resize by 15%
Paste and position on bottom left
Select Element 53 - resize by 12%
Paste and position on bottom left
Select Element 164 - resize by 10%
Paste and position on top where desired
Apply Eyecandy Gradient Glow on fat default settings (Glow Width 3)
Paste paper 23
Apply Mask and merge group and move to bottom layer
Add any additional elements you like.
Add any dropshadows you like
Sharpen any elements as needed
Crop and resize as desired
Add copyright info, license number and name
You're done! Thanks for trying my tutorial!
Labels:Pink Paradox Productions | 0
comments
Sunday, August 17, 2014
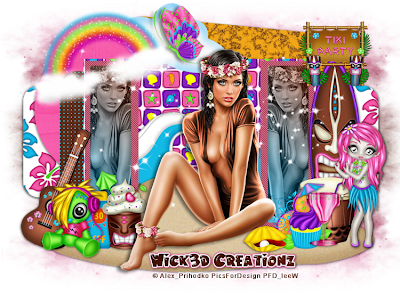
HULA HAVEN
Supplies needed:
I am using the amazing artwork from Alex Prihodko for this tutorial which you can find here
Scrapkit: I am using a stunning kit from Wick3d Creationz called "Hula Haven" which you can get by going here
Template 639 from Millie which you can find here
Mask 22 from Gina Gems which you can find here
Plugins used: Penta - Jeans, Xero - Radiance, Eyecandy 4000 - Marble, Lokas 3D Shadow
----------------------------
This tutorial is written for those who have working knowledge of PSPX2 (any version will do).
This tutorial was written by me on August 17, 2014. Please do not copy or paste on any other forum, website or blog provide link back to tut only. Please do not claim as your own. This tutorial is copyrighted to me. Any resemblance to any other tutorial is purely coincidental.
Ok - let's start and remember to save often.
Open the template and using your shortcut keys on your keyboard (SHIFT+D) duplicate the template as a new image. Close the original and delete the copywrite layer.
Adjust canvas to 750 x 550
Select Rectangle 11 layer
Select all, float, defloat
Add new raster layer and flood-fill with gradient of choice (style, Angle 45, Repeat 2)
Add Close-up tube of choice and paste on top of gradient layer
Select invert, delete, select none
Change close-up to Luminance Legacy and drop opacity down to 75%
Apply dropshadow and merge down on top of gradient
Effect, Texture Effects, Blinds (Width 2, Opactity 15, Horizontal and Light from left/top checked)
Delete/Hide original rectangle layer
Select Rectangle 10 layer and repeat above steps
Select Rectangle 9 layer
Select all, float, defloat
Add new raster layer and flood-fill with color or gradient of choice
Select none
Apply Penta - Jeans with the following settings:
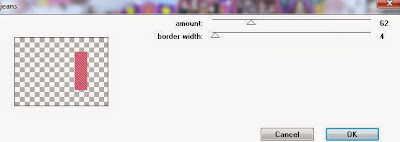
Delete/Hide original rectangle layer
Select Rectangle 8 and repeat above steps
Select Rectangle 7 layer
Select all, float, defloat
Paste paper 3
Select invert, delete, select none
Delete/Hide original rectangle layer
Select Rectangle 6 layer
Select all, float, defloat
Add new raster layer and flood-fill with color of choice
Select none
Apply Effects, Texture Effects, Weave (Gap size 2, Width 5, Opacity 10, Fill gaps checked, change Gap and Weave color to one of choice)
Delete/Hide original rectangle layer
Select Circle 5 layer
Select all, float, defloat
Paste paper 6
Select invert, delete, select none
Delete/Hide original circle layer
Select Circle 4 and repeat above steps
Select Rectangle 3 layer
Select all, float, defloat
Paste paper 5
Select invert, delete, select none
Delete/Hide original rectangle layer
Select Rectangle 2 layer
Apply Eyecandy Marble with the following settings:
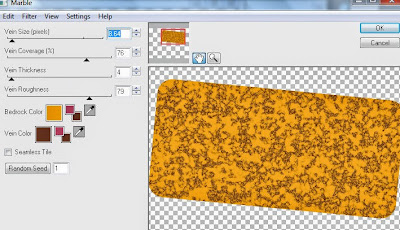
Delete/Hide original rectangle layer
Select Rectangle 1 and repeat above steps
Select Element 20 - resize by 50%
Image mirror and paste on bottom center
Select Element 17 - resize by 110%
Paste and position on bottom
Copy and paste tube of choice and position where desired
Apply Xero Radiance at setting of choice
Apply Lokas 3D Shadow at default settings
Select Element 24 - resize by 45%
Image Free Rotate Left by 15% and paste on top left
Select Element 19 - resize by 40%
Image Free Rotate Right by 15% and paste on top left
Select Element 10 - resize by 18%
Paste and position on top left
Select Element 6 - resize by 25%
Paste and position on top right
Select Element 7 - resize by 22%
Paste and position on right side
Select Element 1 - resize by 20%
Paste and position on bottom right
Select Element 2 - resize by 25%
Paste and position on bottom right
Select Element 9 - resize by 20%
Paste and position on bottom right
Select Element 27 - resize by 20%
Paste and position on bottom right
Select Element 12 - resize by 15%
Paste and position on bottom right
Select Element 8 - resize by 30%
Paste and position on bottom left
Select Element 25 - resize by 25%
Paste and position on bottom left
Select Element 16 - resize by 12%
Paste and position on bottom left
Selct Element 5 - resize by 20%
Paste and position on bottom left
Select new raster layer and flood fill with color or gradient of choice
Apply Mask 22 or mask of choice
Merge group and move to the bottom layer
Add any additional elements you like.
Add any dropshadows you like
Crop and resize as desired
Add copyright info, license number and name
You're done! Thanks for trying my tutorial!
Labels:Wick3d Creationz | 0
comments
Friday, August 15, 2014
PRACTICE SAFE HEX
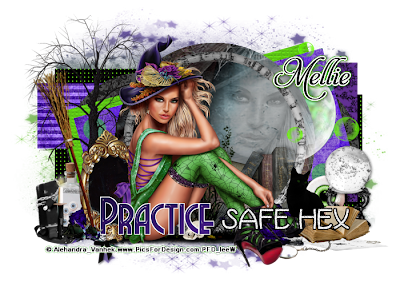
Supplies needed:
I am using the amazing artwork from Alehandra Vanhek for this tutorial which you can find here
Scrapkit: I am using a stunning kit from MellieBeans called "Witchy" which you can get by going here
Halloween Template from Leah which you can find here
Mask 25 from Witchyheart which you can find on the Misfits Blog here
Plugins used: Xero - Radiance, Eyecandy 4000 - Marble, Eyecandy 4000 - HSB Noise, Eyecandy 4000 - Glass, Lokas 3D Shadow
----------------------------
This tutorial is written for those who have working knowledge of PSPX2 (any version will do).
This tutorial was written by me on August 15, 2014. Please do not copy or paste on any other forum, website or blog provide link back to tut only. Please do not claim as your own. This tutorial is copyrighted to me. Any resemblance to any other tutorial is purely coincidental.
Ok - let's start and remember to save often.
Open the template and using your shortcut keys on your keyboard (SHIFT+D) duplicate the template as a new image. Close the original and delete the copywrite layer.
Adjust canvas to 700 x 500
Select Words 1 layer
Adjust, Add/Remove Noise, Add Noise (Uniform checked, Noise 65%, Monochrome checked)
Select Words 1 back layer
Select all, float, defloat
Add new raster layer and flood-fill with color of choice
Select none
Delete/Hide original back layer
Select Words 2 layer and repeat above steps - add Eyecandy Glass on default settings if desired
Select Circle 1 layer
Apply Eyecandy Marble with the following settings:
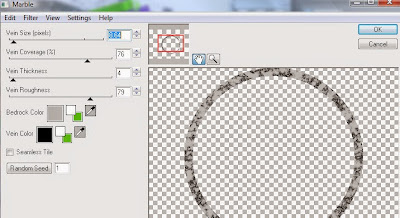
Apply Eyecandy Glass on default settings
Select Circle 2 layer
Select all, float, defloat
Paste paper 11
Select invert, delete
Add Close-up tube of choice and paste on top of paper layer
Delete, select none
Change close-up to Luminance Legacy and drop opacity down to 25%
Select Circle 3 layer
Select all, float, defloat
Add new raster layer and flood-fill with color or gradient of choice
Select none
Apply HSB Noise with the following settings:
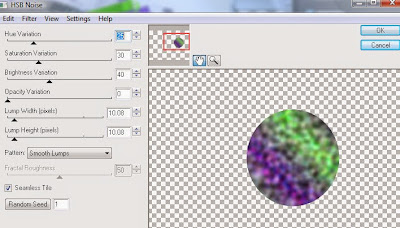
Delete/Hide original circle layer
Select Circle 4 and repeat above steps
Select Element 1 - resize by 23%
Paste and position on top of circle 3 layer
Select Rectangle 5 layer
Select all, float, defloat
Paste paper 6
Select invert, delete, select none
Delete/Hide original rectangle layer
Select Circle 6 layer
Select all, float, defloat
Paste paper 14
Select invert, delete, select none
Delete/Hide original circle layer
Select Circle 8 and repeat above steps
Select Rectangle 7 layer
Select all, float, defloat
Paste paper 10
Select invert, delete, select none
Delete/Hide original rectangle layer
Select Square 9
Apply Eyecandy Marble with the following settings:
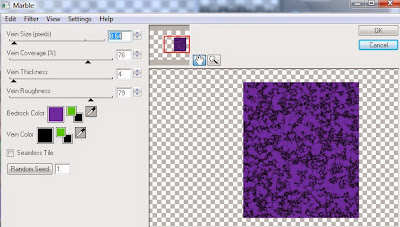
Select Rectangle 10 layer
Select all, float, defloat
Paste paper 5
Select invert, delete, select none
Apply VM Tranmission with the following settings:
Delete/Hide original rectangle layer
Select Rectangle 11 layer
Apply Effects, Texture Effects, Weave (Gap size 2, Width 5, Opacity 10, Fill gaps checked, change Gap and Weave color to one of choice)
Select Rectangle 12 and repeat weave settings
Copy and paste tube of choice and position where desired
Apply Xero Radiance at setting of choice
Apply Lokas 3D Shadow at default settings
Select Element 11 - resize by 55%
Paste and position on top left
Select Element 16 - resize by 25%
Paste and position on bottom left
Select Element 25 - resize by 15%
Paste and position on bottom left
Select Element 20 - resize by 25%
Image Free Rotate Left by 15% and paste on bottom left
Select Element 17 - resize by 15%
Paste and position on bottom left
Select Element 6 - resize by 40%
Image Free Rotate Left by 15% and paste on left side
Select Element 23 - resize by 10%
Paste and position on bottom left
Select Element 13 - resize by 15%
Paste and position on bottom left
Select Element 21 - resize by 30%
Paste and position on bottom right
Select Element 27 - resize by 20%
Paste and position on bottom right
Select Element 4 - resize by 25%
Paste and position on bottom right
Select Element 9 - resize by 22%
Paste and position on top right
Select new raster layer and flood fill with color or gradient of choice
Apply Mask 25 or mask of choice
Merge group and move to the bottom layer
Add any additional elements you like.
Add any dropshadows you like
Crop and resize as desired
Add copyright info, license number and name
You're done! Thanks for trying my tutorial!
Labels:MellieBeans | 0
comments
Thursday, August 14, 2014
VAMPIRE HEARTS
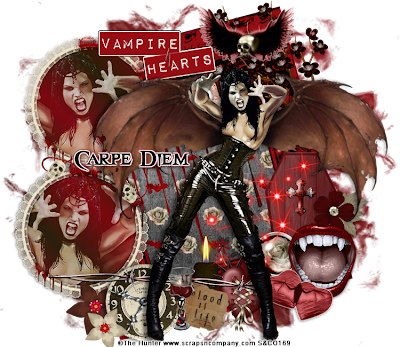
Supplies needed:
I am using the amazing art from The Hunter for for this tutorial which you can find here
Scrapkit: I am using a wicked kit from Carpe Diem called "Vampire Hearts" which you can get by going here
Mask 180 from Insatiable Dreams which you can find here
Plugins: Eyecandy 4000 - Gradient Glow, Lokas 3D Shadow
----------------------------
This tutorial is written for those who have working knowledge of PSPX2 (any version will do).
This tutorial was written by me on August 14, 2014. Please do not copy or paste on any other forum, website or blog provide link back to tut only. Please do not claim as your own. This tutorial is copyrighted to me. Any resemblance to any other tutorial is purely coincidental.
Ok - let's start and remember to save often.
Open up a 750 x 650 blank canvas (we can resize it later)
Select Frame Element 5 and paste in the center of the canvas
Resize by 90%
Image Free Rotate Left by 15%
Select your magic wand tool and click in the center of the Frame (Add (Shift), RGB Value, Tolerance 25, Contiguous checked, Feather 0)
Selections, Modify, Expand by 5
Paste Paper 7
Select invert, delete, select none
Move paper below frame
Select Frame 6 - resize by 45%
Paste and position on left side where desired
Image duplicate, mirror and reposition on bottom left under original frame
Select your magic wand tool and click in the center of your original top frame (Add (Shift), RGB Value, Tolerance 25, Contiguous checked, Feather 0)
Selections, Modify, Expand by 5
Add new raster layer and flood-fill with gradient of choice
Copy and paste close-up tube of choice on top of gradient layer
Select invert, delete, select none
Change close-up to Screen
Drop opactity down to 80%
Merge tube down on gradient layer and drop down under frame
Effect, Texture Effects, Blinds (Width 2, Opactity 15, Horizontal and Light from left/top checked)
Select Frame copy and repeat above steps
Select Dark Twine Element - resize by 40%
Image mirror and paste in the center of both circle frames
Select Cherry Blossom 1 Element - resize by 50%
Image mirror and paste on top right of frame
Paste tube of choice where desired
Apply Lokas 3D Shadow at default settings
Select Coffin 1 Element - resize by 80%
Paste and position on bottom right
Select Vamp Mouth Element - resize by 65%
Paste and position on bottom right
Select Hearts Element - resize by 50%
Paste and position on bottom right
Select Brad 2 Element - paste and position on bottom right
Select Flower 3 Element - resize by 30%
Paste and position on bottom right
Select Winged Skull Element - resize by 55%
Paste and position on top right
Select Spiked Heart Element - resize by 50%
Paste and position on bottom
Select Candle 1 Element - paste and position on bottom
Select Wordart1 Element - resize by 25%
Image Free Rotate Right by 15% and paste on bottom
Select Blood Glass Element - resize by 40%
Paste and position on bottom
Select Clock Element - resize by 80%
Paste and position on bottom left
Select Flower 2 Element - resize by 30%
Image mirror and paste on bottom left
Select Flower 1 - resize by 25%
Paste and position on bottom left
Select Barbed Wire Element - resize by 65%
Paste and position on bottom
Select Wordart 3 - resize by 55%
Paste and position on top left
Apply Eyecandy Gradient Glow on fat default settings
Add new raster layer and flood-fill with color or gradient of choice
Apply Mask 180 and merge group and move to bottom layer
Add any additional elements you like.
Add any dropshadows you like
Sharpen any elements as needed
Crop and resize as desired
Add copyright info, license number and name
You're done! Thanks for trying my tutorial!
Labels:Carpe Diem Designs | 1 comments
KIMONO
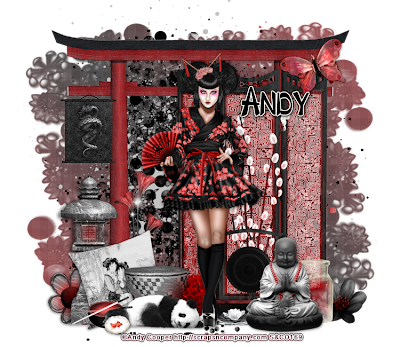
Supplies needed:
I am using the amazing art from Andy Cooper for for this tutorial which you can find here
Scrapkit: I am using a beautiful matching kit from Bibi's Collections called "Kimono" which you can get by going here
Mask 276 from Weescotlass which you can find here
Plugins: Penta - Color dot, Lokas 3D Shadow
----------------------------
This tutorial is written for those who have working knowledge of PSPX2 (any version will do).
This tutorial was written by me on August 13, 2014. Please do not copy or paste on any other forum, website or blog provide link back to tut only. Please do not claim as your own. This tutorial is copyrighted to me. Any resemblance to any other tutorial is purely coincidental.
Ok - let's start and remember to save often.
Open up a 750 x 650 blank canvas (we can resize it later)
Select Element 80 and paste in the center of the canvas
Resize by 55%
Select Element 32 - resize by 75%
Paste and position in the center below element 80
Select Element 15 - resize by 35%
Paste and position on top right
Select Element 71 - resize by 65%
Paste and position on right side
Select Element 104 - resize by 45%
Paste and position in the center of screen element
Paste tube of choice where desired
Apply Lokas 3D Shadow at default settings
Select Element 23 - resize by 40%
Paste and position on bottom right
Select Element 22 - resize by 35%
Paste and position on bottom right
Select Element 67 - resize by 25%
Paste and position on bottom right
Select Element 58 - resize by 35%
Paste and position on bottom right
Select Element 91 - resize by 15%
Paste and position on bottom right
Select Element 72 - resize by 16%
Paste and position on top left
Select Element 81 - resize by 50%
Paste and position on bottom left
Select Element 60 - resize by 40%
Image Free Rotate Left by 15% and paste on bottom left
Select Element 82 - resize by 30%
Paste and position on bottom left
Select Element 9 - resize by 20%
Paste and position on bottom
Select Element 49 - resize by 20%
Paste and position on bottom left
Select Element 63 - resize by 30%
Paste and position on bottom left
Select Element 1 - resize by 15%
Paste and position on bottom left
Select Element 29 - resize by 35%
Paste and position on bottom left
Add new raster layer and flood-fill with color or gradient of choice
Apply Mask 276 and merge group and move to bottom layer
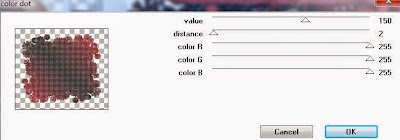
Apply Penta Colordot with the following settings:
Add any additional elements you like.
Add any dropshadows you like
Sharpen any elements as needed
Crop and resize as desired
Add copyright info, license number and name
You're done! Thanks for trying my tutorial!
Labels:Bibi's Collections,Scraps N Company | 0
comments
Tuesday, August 12, 2014
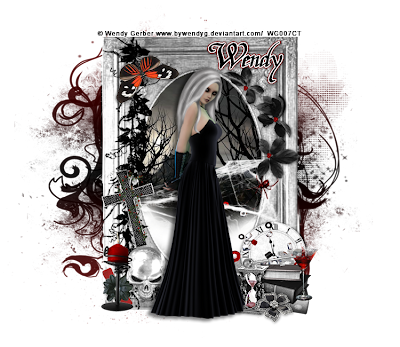
NIGHTSHADE
Supplies needed:
I am using the amazing art from Wendy Gerber for for this tutorial which you can find here
Scrapkit: I am using a stunning kit from Freeks Creations called "Nightshade" which you can get by going here
Mask 32 from Moonbeams and Spiderwebs which you can find here
Plugins: Lokas 3D Shadow
----------------------------
This tutorial is written for those who have working knowledge of PSPX2 (any version will do).
This tutorial was written by me on August 12, 2014. Please do not copy or paste on any other forum, website or blog provide link back to tut only. Please do not claim as your own. This tutorial is copyrighted to me. Any resemblance to any other tutorial is purely coincidental.
Ok - let's start and remember to save often.
Open up a 750 x 650 blank canvas (we can resize it later)
Select Frame 2 and paste in the center of the canvas
Resize by 85%
Select your magic wand tool and click in the center of the Frame (Add (Shift), RGB Value, Tolerance 25, Contiguous checked, Feather 0)
Selections, Modify, Expand by 5
Paste Paper 3
Select invert, delete, select none
Move paper below frame
Select Smoke Element - resize by 50%
Paste and position on bottom below frame layer
Select Butterfly Element - resize by 45%
Paste and position on top left
Select Branch - resize by 40%
Paste and position on top right
Paste tube of choice where desired
Apply Xero Radiance on default setting of choice
Apply Lokas 3D Shadow at default settings
Select Cross Element - resize by 30%
Image Free Rotate Left by 15% and paste on bottom left
Select Candle Element - resize by 35%
Paste and position on bottom left
Select Clock Element - resize by 25%
Paste and position on bottom right
Select Books Element - resize by 35%
Paste and position on bottom right
Select Drink Element - resize by 17%
Paste and position on bottom right
Select Hourglass Element - resize by 30%
Paste and position on bottom right
Select Flower 2 Element - resize by 25%
Paste and position on bottom right
Add new raster layer and flood-fill with color or gradient of choice
Apply Mask 32 and merge group and move to bottom layer
Add any additional elements you like.
Add any dropshadows you like
Sharpen any elements as needed
Crop and resize as desired
Add copyright info, license number and name
You're done! Thanks for trying my tutorial!
Labels:Freek's Creation,Wendy Gerber | 0
comments
Subscribe to:
Posts
(Atom)


