Labels
- Alikas Scraps
- All Dolled Up Store
- Amy Marie
- Annaica
- Arthur Crowe
- Babycakes Scraps
- Barbara Jensen
- Bibi's Collections
- Black Widow Creationz
- Blu Moon
- Bonnies Creations
- Bookwork Dezines
- Broken Sky Dezine
- Carita Creationz
- Carpe Diem Designs
- CDO
- Celinart Pinup
- Celine
- Chacha Creationz
- Charmed Designs
- Cherry Blossom Designs
- Chili Designz
- Cluster Frame
- Creative Misfits
- Creative Scraps by Crys
- Curious Creative Dreams
- Danny Lee
- Derzi
- Designs by Ali
- Designs by Joan
- Designs by Ketura
- Designs By Norella
- Designs by Vi
- Diana Gali
- Diry Art Designs
- Disturbed Scraps
- Dreaming With Bella
- Eclipse Creations
- Elegancefly
- Extras
- Fabulous Designz
- Forum Set
- Foxy's Designz
- Freek's Creation
- FTU
- FwTags
- Goldwasser
- Gothic Inspirations
- Gothic Raven Designs
- Graphfreaks
- Hania's Designs
- Happy Pumpkin Studios
- Horseplay's Pasture Designs
- indie-Zine
- Irish Princess Designs
- Ishika Chowdhury
- Kaci McVay
- Kajenna
- katharine
- Katherine
- Khloe Zoey
- Killer Kitty
- Kissing Kate
- KiwiFirestorm
- Kiya Designs
- Kizzed by Kelz
- KZ Designz
- Lady Mishka
- Lil Mz Brainstorm
- Maiden of Darkness
- Mariel Designs
- MellieBeans
- Michelle's Myths
- Midnight Shadow
- Misticheskya
- MistyLynn's Creations
- MMeliCrea Designz
- Moon Vixen Designs
- NaSionainne
- Ninaste
- Niqui Designs
- Pandora
- Picsfordesign
- Pink Paradox Productions
- Radyga Designs
- Redefined Designs
- Rissa's Designs
- Schnegge
- ScottishButterfly Creations
- Scrappin Krazy Designs
- Scrappin With Lil Ol Me
- Scraps and the City
- Scraps Dimensions
- Scraps From The Heart
- Scraps N Company
- Scraps with Attitude
- Shining Star Art
- Skyscraps
- Sleek N Sassy Designs
- Sophisticat Simone
- Souldesigner
- Soxsational Scraps
- Spazz
- Starlite and Soul
- Stella Felice
- Tammy Welt
- Tasha's Playground
- The PSP Project
- Thrifty Scraps by Gina
- Tiny Turtle Designs
- Upyourart
- Verymany
- Wendy Gerber
- Whisper In the Wind
- Wick3d Creationz
- Wicked Diabla
- Yude's Kreationz
Blog Archive
-
▼
2014
(276)
-
▼
July
(27)
- CIRCUS
- IN THE RAIN
- ART OF CALM
- MELANCHOLIA
- SAFARI EXPEDITION
- WICKED WAYS
- JUNGLE FEVER
- LOVELY LAURA
- SUNSHINE GIRL
- APOCALYPSE
- SAILOR DREAMS
- BLOOD LUST
- A 'LIL GOTH
- ROLLER GIRL
- PROFANITY LACED
- LAURA'S REALM
- ENCHANTING
- SUMMER MADNESS
- ROCKIN CUTIE
- MOMENT IN TIME
- LITTLE GOTH GIRL
- TATTOO BABE
- LAND THAT I LOVE
- FOREVER USA
- PATRIOTIC PARTY
- AFTERNOON DELIGHT
- LOVE THE USA
-
▼
July
(27)
Thursday, July 31, 2014
CIRCUS
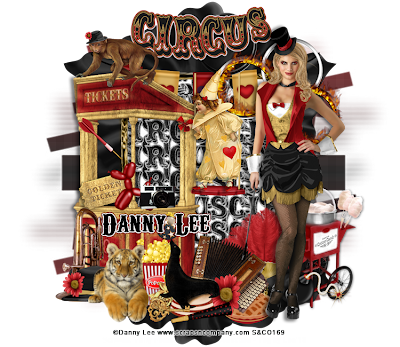
Supplies needed:
I am using the amazing art from Danny Lee for for this tutorial which you can find here
Scrapkit: I am using a beautiful matching Collab kit from Bibi's Collections called "Circus" which you can get by going here
Mask 147 from Weescottlass which you can find here
Plugins: Eyecandy 4000 - Gradient Glow, Lokas 3D Shadow
----------------------------
This tutorial is written for those who have working knowledge of PSPX2 (any version will do).
This tutorial was written by me on June 31, 2014. Please do not copy or paste on any other forum, website or blog provide link back to tut only. Please do not claim as your own. This tutorial is copyrighted to me. Any resemblance to any other tutorial is purely coincidental.
Ok - let's start and remember to save often.
Open up a 750 x 650 blank canvas (we can resize it later)
Select Frame Element 21 and paste in the center of the canvas
Select your magic wand tool and click in the center of the Frame (Add (Shift), RGB Value, Tolerance 25, Contiguous checked, Feather 0)
Selections, Modify, Expand by 5
Paste Paper 10
Select invert, delete, select none
Move paper below frame layer
Select Element 126 - resize by 50%
Paste and position on top of frame where desired
Select Element 153 - resize by 25%
Paste and position on top of frame
Apply Eyecandy Gradient Glow on fat defaults settings (Glow Width 3)
Select Element 71 - resize by 35%
Paste and position on top right
Select Element 65 - resize by 22%
Paste and position in the center of one of the hoops
Image duplicate and reposition on second hoop of choice
Paste tube of choice where desired
Apply Lokas 3D Shadow at default settings
Select Element 154 - resize by 80%
Paste and position on left side
Select Element 2 - resize by 25%
Paste and position on top left
Select Element 137 - resize by 25%
Image Free Rotate Left by 15% and paste on left side
Select Element 92 - resize by 20%
Paste and position on left side
Select Element 61 - resize by 25%
Paste and position on left side
Select Element 95 - resize by 40%
Paste and position on left side
Select Element 38 - resize by 55%
Paste and position on the top center of the frame
Select Element 101 - resize by 50%
Paste and position in the center of the frame where desired
Select Element 68 - reisze by 40%
Paste and position on bottom left
Select Element 63 - resize by 30%
Paste and position on bottom left
Select Element 9 - resize by 40%
Paste and position on bottom left
Select Element 96 - resize by 45%
Paste and position on bottom left
Select Element 17 - resize by 25%
Paste and position on bottom
Select Element 66 - resize by 40%
Paste and position on bottom
Select Element 97 - resize by 30%
Paste and position on bottom
Select Element 74 - resize by 30%
Paste and position on bottom left
Select Element 100 - resize by 40%
Paste and position on bottom left below tube
Select Element 123 - resize by 20%
Paste and position on bottom left
Select new raster layer and flood fill with color or gradient of choice
Apply Mask 147 and merge group and move to bottom layer
Add any additional elements you like.
Add any dropshadows you like
Sharpen any elements as needed
Crop and resize as desired
Add copyright info, license number and name
You're done! Thanks for trying my tutorial!
Labels:Bibi's Collections,Scraps N Company | 0
comments
Tuesday, July 29, 2014
IN THE RAIN
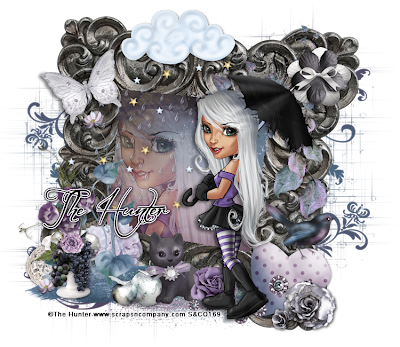
Supplies needed:
I am using the amazing art from The Hunter for for this tutorial which you can find here
Scrapkit: I am using a beautiful matching kit from Kizzed by Kelz called "In The Rain" which you can get by going here
Mask 52 from Moonbeams and Spiderwebs which you can find here
Plugins: Lokas 3D Shadow
----------------------------
This tutorial is written for those who have working knowledge of PSPX2 (any version will do).
This tutorial was written by me on June 29, 2014. Please do not copy or paste on any other forum, website or blog provide link back to tut only. Please do not claim as your own. This tutorial is copyrighted to me. Any resemblance to any other tutorial is purely coincidental.
Ok - let's start and remember to save often.
Open up a 750 x 650 blank canvas (we can resize it later)
Select Frame Element 18 and paste in the center of the canvas
Select your magic wand tool and click in the center of the Frame (Add
(Shift), RGB Value, Tolerance 25, Contiguous checked, Feather 0)
Selections, Modify, Expand by 5
Paste Paper 1
Select invert, delete
Select Close-up tube of choice and paste on top of paper and delete
Select none
Change tube to Overlay
Drop opacity down to 45%
Apply dropshadow and merge down on top of paper
Effects, Texture Effects, Blinds (Width 2, Opactity 15, Horizontal and Light
from left/top checked)
Move paper/tube below frame layer
Move paper below frame layer
Paste tube of choice where desired
Apply Lokas 3D Shadow at default settings
Select Element 25 - resize by 65%
Paste and position on top left
Select Element 92 - resize by 25%
Paste and position on top left
Select Element 91 - resize by 20%
Paste and position on top right
Select Element 68 - resize by 40%
Paste and position on right side
Select Element 19 - resize by 65%
Image mirror and paste on bottom left
Select Element 71 - resize by 25%
Paste and position on bottom left
Select Element 58 - resize by 50%
Paste and position on bottom left
Select Element 41 - resize by 20%
Paste and position on bottom left
Select Element 70 - resize by 25%
Paste and position on bottom
Select Element 46 - resize by 15%
Paste and position on bottom
Select Element 5 - resize by 25%
Paste and position on bottom right
Select Element 16 - resize by 20%
Paste and position on bottom right
Select Element 96 - resize by 22%
Paste and position on bottom right
Select new raster layer and flood fill with color or gradient of choice
Apply Mask 52 and merge group and move to bottom layer
Add any additional elements you like.
Add any dropshadows you like
Sharpen any elements as needed
Crop and resize as desired
Add copyright info, license number and name
You're done! Thanks for trying my tutorial!
Labels:Scraps N Company | 0
comments
Monday, July 28, 2014
ART OF CALM
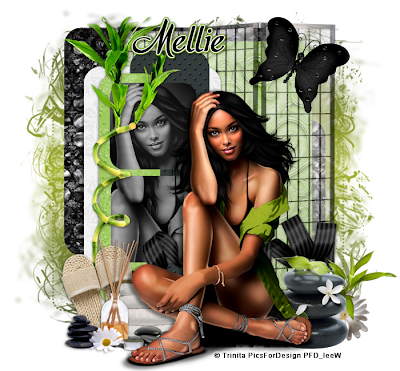
Supplies needed:
I am using the amazing artwork from Trinita for this tutorial which you can find here
Scrapkit: I am using a beautiful kit from MellieBeans called "The Art of Calm which you can get by going here
Template 599 from Millie which you can find here
Mask 41 from Millie which you can find here
Plugins used: Xero - Bad Dream, Xero - Radiance, Lokas 3D Shadow
----------------------------
This tutorial is written for those who have working knowledge of PSPX2 (any version will do).
This tutorial was written by me on July 28, 2014. Please do not copy or paste on any other forum, website or blog provide link back to tut only. Please do not claim as your own. This tutorial is copyrighted to me. Any resemblance to any other tutorial is purely coincidental.
Ok - let's start and remember to save often.
Open the template and using your shortcut keys on your keyboard (SHIFT+D) duplicate the template as a new image. Close the original and delete the copywrite layer.
Adjust canvas to 700 x 650
Select Squares 7 layer
Select all, float, defloat
Add new raster layer and flood-fill with gradient of choice (style, Angle 45, Repeat 2)
Paste close-up tube of choice on top of gradient and delete
Change tube to Luminance (Legacy)
Apply Xero - Bad Dream on settings of choice
Drop opacity down on tube to 75%
Apply dropshadow and merge close-up down on top of gradient layer
Effect, Texture Effects, Blinds (Width 2, Opactity 15, Horizontal and Light from left/top checked)
Delete/Hide original squares layer
Select Rectangle 6 layer
Select all, float, defloat
Paste paper 8
Select invert, delete, select none
Delete/Hide original rectangle layer
Select Rectangle 5 layer
Select all, float, defloat
Paste paper 3
Select invert, delete, select none
Delete/Hide original rectangle layer
Select Rectangle 4 layer
Select all, float, defloat
Paste paper 10
Select invert, delete, select none
Delete/Hide original rectangle layer
Select Rectangle 3 layer
Select all, float, defloat
Paste paper 1
Select invert, delete, select none
Delete/Hide original rectangle layer
Select Element 3 - resize by
Paste and position on right above rectangle 3 layer
Drop opacity down to 55%
Select Square 2 layer
Select all, float, defloat
Paste paper 7
Select invert, delete, select none
Delete/Hide original square layer
Select Square 1 layer and repeat above steps
Select Element 9 - resize by 55%
Image mirror and paste on bottom where desired
Copy and paste tube of choice and position where desired
Apply Xero Radiance at setting of choice
Apply Lokas 3D Shadow at default settings
Select Element 7 - resize by 22%
Paste and position on top right
Select Element 4 - resize by 65%
Paste and position on left side
Select Element 23 - resize by 20%
Paste and position on bottom left
Select Element 24 - resize by 25%
Paste and position on bottom left
Select Element 25 - resize by 15%
Paste and position on bottom left
Select Element 22 - resize by 25%
Paste and position on bottom left
Select Element 1 - resize by 28%
Paste and position on bottom right
Select Element 10 - resize by 12%
Paste and position on bottom right
Select new raster layer and flood fill with color or gradient of choice
Apply Mask 41 or mask of choice
Merge group and move to the bottom layer
Resize mask by 112%
Add any additional elements you like.
Add any dropshadows you like
Crop and resize as desired
Add copyright info, license number and name
You're done! Thanks for trying my tutorial!
Labels:MellieBeans | 0
comments
MELANCHOLIA
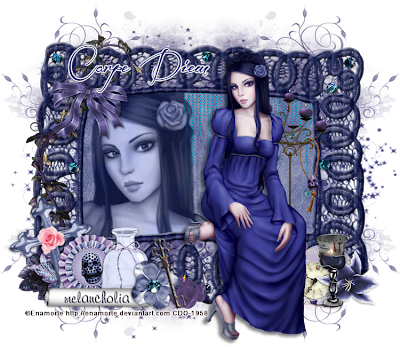
Supplies needed:
I am using the amazing art from Enamorte for for this tutorial which you can find here
Scrapkit: I am using a beautiful kit from Carpe Diem Designs called "Melancholia" which you can get by going here
Mask 22 from Moonbeams and Spiderwebs which you can find here
Plugins: Xero - Radiance, Lokas 3D Shadow
----------------------------
This tutorial is written for those who have working knowledge of PSPX2 (any version will do).
This tutorial was written by me on June 28, 2014. Please do not copy or paste on any other forum, website or blog provide link back to tut only. Please do not claim as your own. This tutorial is copyrighted to me. Any resemblance to any other tutorial is purely coincidental.
Ok - let's start and remember to save often.
Open up a 750 x 650 blank canvas (we can resize it later)
Select Lace Frame 1 and paste in the center of the canvas
Select your magic wand tool and click in the center of the Frame (Add (Shift), RGB Value, Tolerance 25, Contiguous checked, Feather 0)
Selections, Modify, Expand by 5
Paste Paper 9
Select invert, delete
Select Close-up tube of choice and paste on top of paper and delete
Select none
Change tube to Luminance (Legacy)
Drop opacity down to 80%
Apply dropshadow and merge down on top of paper
Effects, Texture Effects, Blinds (Width 2, Opactity 15, Horizontal and Light from left/top checked)
Move paper/tube below frame layer
Select Pluiesaphirs Element - resize by 35%
Paste and position on top right below frame layer
Move paper below frame layer
Paste tube of choice where desired
Apply Lokas 3D Shadow at default settings
Select Vine 1 Element - resize by 75%
Paste and position on top left
Select Bow2 Element - resize by 40%
Paste and position on top left
Select Cross 4 Element - resize by 65%
Image Free Rotate Left by 15% and paste on bottom left
Select Leaves Element - resize by 40%
Paste and position on bottom left
Select Accordian Flower Element - resize by 35%
Paste and position on bottom left
Select Bottle 1 Element - resize by 45%
Paste and position on bottom left
Select Scroll 3 Element - resize by 50%
Paste and position on bottom left
Select Flower 3 Element - resize by 30%
Paste and position on bottom left
Select Candle Element - resize by 30%
Paste and position on bottom
Select Old Key Element - resize by 40%
Image Free Rotate Left by 15% and paste on bottom
Select Candles Element - resize by 65%
Paste and position on right side below tube layer
Select Tag 2 Element - resize by 30%
Paste and position on bottom right
Select Flower 1 - resize by 40%
Paste and position on bottom right
Select Glass Element - resize by 45%
Paste and position on bottom right
Select new raster layer and flood fill with color or gradient of choice
Apply Mask 22 and merge group and move to bottom layer
Add any additional elements you like.
Add any dropshadows you like
Sharpen any elements as needed
Crop and resize as desired
Add copyright info, license number and name
You're done! Thanks for trying my tutorial!
Labels:Carpe Diem Designs | 0
comments
Sunday, July 27, 2014
SAFARI EXPEDITION
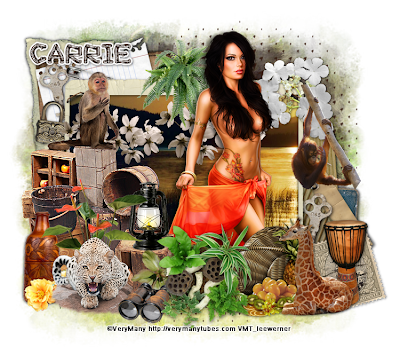
Supplies needed:
I am using the amazing art from Very Many for for this tutorial which you can find here
Scrapkit: I am using a stunning kit from Pink Paradox Productions called "Safari Expedition" which you can get by going here
Mask 4 from ButterflyFlutterby which you can find here
Plugins: Xero - Radiance, Lokas 3D Shadow
----------------------------
This tutorial is written for those who have working knowledge of PSPX2 (any version will do).
This tutorial was written by me on June 28, 2014. Please do not copy or paste on any other forum, website or blog provide link back to tut only. Please do not claim as your own. This tutorial is copyrighted to me. Any resemblance to any other tutorial is purely coincidental.
Ok - let's start and remember to save often.
Open up a 750 x 650 blank canvas (we can resize it later)
Select Frame Element 9 and paste in the center of the canvas
Resize by 65%
Select your magic wand tool and click in the center of the Frame (Add (Shift), RGB Value, Tolerance 25, Contiguous checked, Feather 0)
Selections, Modify, Expand by 5
Paste Paper 16
Select invert, delete, select none
Move paper below frame layer
Select Element 111 - resize by 55%
Paste and position on top of frame where desired
Select Element 107 - resize by 20%
Paste and position on top right
Select Element 117 - resize by 20%
Paste and position on top where desired
Select Element 21 - resize by 22%
Paste and position on top right
Paste tube of choice where desired
Apply Lokas 3D Shadow at default settings
Select Element 66 - resize by 30%
Paste and position on bottom left
Select Element 73 - resize by 25%
Paste and position on bottom left
Select Element 103 - resize by 25%
Paste and position on bottom left
Select Element 1 - resize by 20%
Paste and position on bottom left
Select Element 69 - resize by 18%
Paste and position on bottom left
Select Element 50 - resize by 15%
Paste and position on bottom left
Select Element 98 - resize by 15%
Paste and position on bottom left
Select Element 11 - resize by 20%
Paste and position on top left
Select Element 131 - resize by 22%
Paste and position on bottom
Sleect Element 86 - resize by 20%
Image Free Rotate Left by 15% and paste on bottom right
Select Element 36 - resize by 22%
Paste and position on bottom right
Select Element 55 - resize by 20%
Paste and position on bottom right
Select Element 15 - resize by 20%
Paste and position on bottom right
Select Element 148 - resize by 50%
Paste on canvas and move to bottom layer
Paste paper 28
Apply Mask 4 and merge group and move to bottom layer
Resize by 110%
Add any additional elements you like.
Add any dropshadows you like
Sharpen any elements as needed
Crop and resize as desired
Add copyright info, license number and name
You're done! Thanks for trying my tutorial!
Labels:Pink Paradox Productions | 0
comments
WICKED WAYS
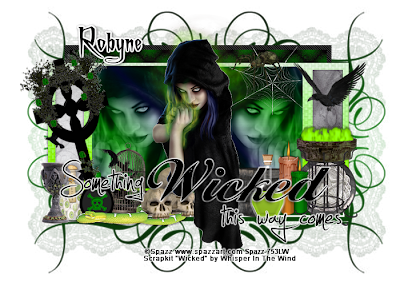
Supplies needed:
I am using the amazing artwork from Spazz for this tutorial which you can find here
Scrapkit: I am using a wicked matching kit from Whisper In the Wind called "Wicked" which you can get by going here
Wicked Template from Styelicious Twinky which you can find here
Mask 125 which you can find here. Not sure who created this mask but will provide credit once I find out.
Plugins used: Penta - Jeans, Xero - Bad Dream, Xero - Radiance, Lokas 3D Shadow
----------------------------
This tutorial is written for those who have working knowledge of PSPX2 (any version will do).
This tutorial was written by me on July 25, 2014. Please do not copy or paste on any other forum, website or blog provide link back to tut only. Please do not claim as your own. This tutorial is copyrighted to me. Any resemblance to any other tutorial is purely coincidental.
Ok - let's start and remember to save often.
Open the template and using your shortcut keys on your keyboard (SHIFT+D) duplicate the template as a new image. Close the original and delete the copywrite layer.
Adjust canvas to 700 x 500
Select Rectangle Raster 6 layer
Select all, float, defloat
Add new raster layer and flood-fill with gradient of choice (style, Angle 45, Repeat 2)
Paste close-up tube of choice on top of gradient and delete
Change tube to Luminance (Legacy)
Apply Xero - Bad Dream on settings of choice
Drop opacity down on tube to 80%
Apply dropshadow and merge close-up down on top of gradient layer
Effect, Texture Effects, Blinds (Width 2, Opactity 15, Horizontal and Light from left/top checked)
Delete/Hide original rectangle layer
Select Rectangle Raster 5 and repeat above steps
Select Shape Raster 4 layer
Select all, float, defloat
Paste paper 7
Select invert, delete, select none
Delete/Hide original shape layer
Select Rectangle Raster 3 layer
Select all, float, defloat
Paste paper 3
Select invert, delete, select none
Delete/Hide original rectangle layer
Select Rectangle Raster 2 layer
Select all, float, defloat
Paste paper 10
Select invert, delete, select none
Delete/Hide original rectangle layer
Select Rectangle Raster 1 layer
Apply Penta - Jeans with the following settings:
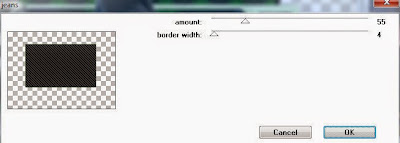
Copy and paste tube of choice and position where desired
Apply Xero Radiance at setting of choice
Apply Lokas 3D Shadow at default settings
Select Element 16 - resize by 30%
Paste and position on top right
Select Element 36 - resize by 15%
Paste and position on top right
Select Element 26 - resize by 25%
Image mirror and paste on top right
Select Element 51 - resize by 25%
Paste and position on bottom right
Select Element 74 - resize by 25%
Paste and position on bottom right
Select Element 64 - resize by 15%
Paste and position on bottom right
Select Element 48 - resize by 30%
Image Free Rotate Left by 15% and paste on left side where desired
Select Element 75 - resize by 22%
Paste and position on bottom left
Select Element 76 - resize by 25%
Paste and position on bottom left
Select Element 61 - resize by 12%
Paste and position on bottom left
Select Element 47 - resize by 25%
Paste and position on bottom left
Select Element 5 - resize by 20%
Paste and position on bottom left
Select Element 62 - resize by 25%
Paste and position on bottom left
Select new raster layer and flood fill with color or gradient of choice
Apply Mask 125 or mask of choice
Merge group and move to the bottom layer
Add any additional elements you like.
Add any dropshadows you like
Crop and resize as desired
Add copyright info, license number and name
You're done! Thanks for trying my tutorial!
Labels:Whisper In the Wind | 0
comments
Thursday, July 24, 2014
JUNGLE FEVER
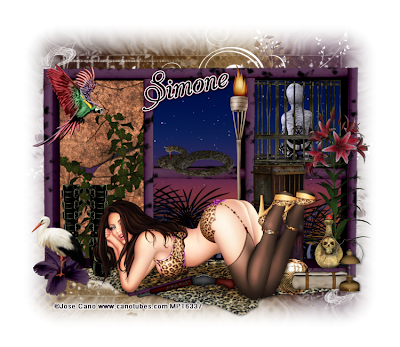
Supplies needed:
I am using the amazing art from Jose Cano for for this tutorial which you can find here
Scrapkit: I am using a stunning kit from Sophisticat Simone called "Jungle Fever" which you can get by going here
Mask 43 from Moonbeams and Spiderwebs which you can find here
Plugins: Xero - Radiance, Lokas 3D Shadow
----------------------------
This tutorial is written for those who have working knowledge of PSPX2 (any version will do).
This tutorial was written by me on July 24, 2014. Please do not copy or paste on any other forum, website or blog provide link back to tut only. Please do not claim as your own. This tutorial is copyrighted to me. Any resemblance to any other tutorial is purely coincidental.
Ok - let's start and remember to save often.
Open up a 750 x 650 blank canvas (we can resize it later)
Select Frame Element 2 and paste in the center of the canvas
Resize by 75%
Select your magic wand tool and click in the center of each frame (Add (Shift), RGB Value, Tolerance 25, Contiguous checked, Feather 0)
Selections, Modify, Expand by 5
Paste paper 11
Select invert, delete, select none
Move paper layer below frame
Select your magic wand tool and click in the center of the Left Frame (Add (Shift), RGB Value, Tolerance 25, Contiguous checked, Feather 0)
Selections, Modify, Expand by 5
Paste Element 2 - resize by 80%
Select invert, delete, select none
Move Element below frame
Select your magic wand tool and click in the center of the top right frame (Add (Shift), RGB Value, Tolerance 25, Contiguous checked, Feather 0)
Selections, Modify, Expand by 5
Select Element 18 - resize by 75%
Select invert, delete, select none
Move Element below frame layer
Paste tube of choice where desired
Apply Lokas 3D Shadow at default settings
Select Element 23 - resize by 50%
Select Element 30 - resize by 75%
Paste and position in center below tube where desired
Paste and position on bottom below tube layer
Select Element 1 - resize by 50%
Paste and position on top left
Select Element 24 - resize by 22%
Paste and position on top center box
Select Element 13 - resize by 55%
Paste and position on bottom right
Select Element 7 - resize by 25%
Paste and position on bottom right
Select Element 41 - resize by 30%
Paste and position on bottom right
Select Element 40 - resize by 40%
Paste and position on bottom right
Select Element 21 - resize by 40%
Paste and position on bottom right below tube layer
Select Element 20 - resize by 45%
Paste and position on bottom left
Select Element 10 - resize by 25%
Paste and position on bottom left
Select Element 39 - resize by 40%
Paste and position on bottom left
Paste paper 1 on canvas
Apply Mask 43 and merge group and move to bottom layer
Add any additional elements you like.
Add any dropshadows you like
Sharpen any elements as needed
Crop and resize as desired
Add copyright info, license number and name
You're done! Thanks for trying my tutorial!
Labels:Sophisticat Simone | 0
comments
Wednesday, July 23, 2014
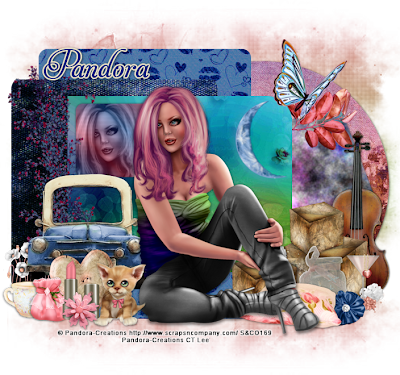
LOVELY LAURA
Supplies needed:
I am using the amazing artwork from Pandora Creations for this tutorial which you can find here
Scrapkit: I am using a beautiful from Bibi's Collections called "Tina Love" which you can get by going here
Template 73 from Drama Bomb Designs which you can find here
Mask 22 from Gina Gems which you can find here
Plugins used: Eyecandy 4000, HSB - Noise, - Bad Dream, Lokas 3D Shadow
----------------------------
This tutorial is written for those who have working knowledge of PSPX2 (any version will do).
This tutorial was written by me on July 23, 2014. Please do not copy or paste on any other forum, website or blog provide link back to tut only. Please do not claim as your own. This tutorial is copyrighted to me. Any resemblance to any other tutorial is purely coincidental.
Ok - let's start and remember to save often.
Open the template and using your shortcut keys on your keyboard (SHIFT+D) duplicate the template as a new image. Close the original and delete the copywrite layer.
Adjust canvas to 800 x 750
Select Square 6 layer
Select all, float, defloat
Add new raster layer and flood-fill with gradient of choice (style, Angle 45, Repeat 2)
Paste close-up tube of choice on top of gradient and delete
Change tube to Luminance (Legacy)
Drop opacity down on tube to 80%
Apply dropshadow and merge close-up down on top of gradient layer
Effect, Texture Effects, Blinds (Width 2, Opactity 15, Horizontal and Light from left/top checked)
Delete/Hide original square layer
Select Square 5 layer
Select all, float, defloat
Paste paper 7
Select invert, delete, select none
Delete/Hide original square layer
Select Square 4 layer
Select all, float, defloat
Add new raster layer and flood-fill with gradient of choice
Select none
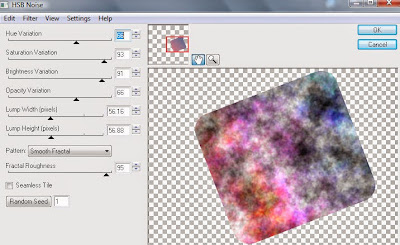
Apply Eyecandy HSB Noise with the following settings:
Delete/Hide original square layer
Select Square 3 layer
Select all, float, defloat
Paste paper 3
Select invert, delete, select none
Delete/Hide original square layer
Select Rectangle 2 layer
Select all, float, defloat
Paste paper 4
Select invert, delete, select none
Delete/Hide original rectangle layer
Select Circle 1 layer
Select all, float, defloat
Paste paper 8
Select invert, delete, select none
Delete/hide original circle layer
Copy and paste tube of choice and position where desired
Apply Xero Radiance at setting of choice
Apply Lokas 3D Shadow at default settings
Select Element 6 - resize by 55%
Paste and position on left side
Select Element 14 - resize by 30%
Paste and position on bottom left
Select Element 24 - resize by 38%
Paste and position on bottom left
Select Element 10 - resize by 30%
Paste and position on bottom left
Select Element 12 - resize by 40%
Paste and position on bottom left
Select Element 11 - resize by 30%
Paste and position on bottom left
Select Element 64 - resize by 30%
Paste and position on bottom left
Select Element 66 - resize by 40%
Paste and position on bottom left
Select Element 39 - resize by 22%
Paste and position on bottom left
Select Element 29 - resize by 45%
Paste and position on right side
Select Element 58 - resize by 40%
Paste and position on bottom right
Select Element 76 - resize by 35%
Paste and position on bottom right
Select Element 54 - resize by 45%
Paste and position on bottom right
Select Element 20 - resize by 40%
Paste and position on bottom right
Select Element 46 - resize by 30%
Paste and position on bottom right
Select Element 16 - resize by 40%
Paste and position on top right
Select Element 63 - resize by 75%
Paste and position on top right
Select new raster layer and flood fill with color or gradient of choice
Apply Mask 22 or mask of choice
Merge group and move to the bottom layer
Add any additional elements you like.
Add any dropshadows you like
Crop and resize as desired
Add copyright info, license number and name
You're done! Thanks for trying my tutorial!
Labels:Bibi's Collections,Pandora | 0
comments
Tuesday, July 22, 2014
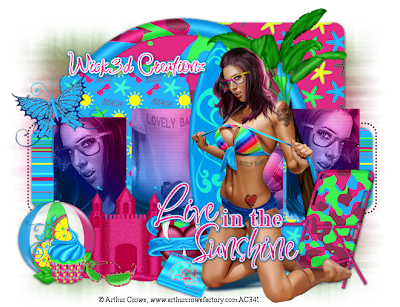
SUNSHINE GIRL
Supplies needed:
I am using the amazing artwork from Arthur Crowe for this tutorial which you can find here
Scrapkit: I am using a stunning matching kit from Wick3d Creationz called "Pixel Sun Girl" which you can get by going here OR here
Template 628 from Millie which you can find here
Mask 7 from Rieka Rafita which you can find here
Plugins used: Xero - Radiance, Xero - Bad Dream, Lokas 3D Shadow
----------------------------
This tutorial is written for those who have working knowledge of PSPX2 (any version will do).
This tutorial was written by me on July 22, 2014. Please do not copy or paste on any other forum, website or blog provide link back to tut only. Please do not claim as your own. This tutorial is copyrighted to me. Any resemblance to any other tutorial is purely coincidental.
Ok - let's start and remember to save often.
Open the template and using your shortcut keys on your keyboard (SHIFT+D) duplicate the template as a new image. Close the original and delete the copywrite layer.
Adjust canvas to 750 x 575
Select Wordart 12 layer
Add new raster layer and flood-fill with color of choice
Reselect wordart - select all, float, defloat
Go back and select layer you just filled - select invert, delete, select none
Adjust, Add/Remove Noise, Add Noise (Uniform checked, Noise 55%, Monochrome checked)
Apply Eyecandy Gradient Glow on fat default settings (Glow Width 3)
Delete/Hide original wordart layer
Select Rectangle 11 layer
Select all, float, defloat
Add new raster layer and flood-fill with gradient of choice (style, Angle 45, Repeat 2)
Paste close-up tube of choice on top of gradient and delete
Change tube to Luminance (Legacy)
Drop opacity down on tubes to 80%
Apply dropshadow and merge close-up down on top of gradient layer
Effect, Texture Effects, Blinds (Width 2, Opactity 15, Horizontal and Light from left/top checked)
Delete/Hide original rectangle layer
Select Rectangles 8, 9 and 10 layers and repeat above steps
Select Square 7 layer
Select all, float, defloat
Paste paper 2
Select invert, delete, select none
Delete/Hide original square layer
Select Square 6 layer and repeat above steps
Select Circle 5 layer
Select all, float, defloat
Paste paper 5
Select invert, delete, select none
Delete/Hide original circle layer
Select Element 27 - resize by 80%
Paste and position on top of circle layer
Select Rectangle 4 layer
Select all, float, defloat
Paste paper 6
Select invert, delete, select none
Delete/Hide original rectangle layer
Select Rectangle 2 layer
Select all, float, defloat
Paste paper 4
Select invert, delete, select none
Delete/Hide original rectangle layer
Select Square 1 layer and repeat above steps
Copy and paste tube of choice and position where desired
Apply Xero Radiance at setting of choice
Apply Lokas 3D Shadow at default settings
Select Element 7 - resize by 20%
Paste and position in the center behind tube layer
Select Element 1 - resize by 65%
Image Free Rotate Left by 15% and paste on top right
Select Element 9 - resize by 85%
Paste and position on bottom right
Select Element 8 - resize by 40%
Paste and position on bottom left
Select Element 12 - resize by 35%
Paste and position on bototm left
Select Element 6 - resize by 45%
Paste and position on bottom left
Select Element 4 - resize by 25%
Paste and position on bottom left
Select Element 18 - resize by 35%
Paste and position on bottom
Select Element 13 - resize by 7%
Paste and position on bottom
Select Element 17 - resize by 48%
Image Free Rotate Left by 15% and paste on top left
Select new raster layer and flood fill with color or gradient of choice
Apply Mask 7 or mask of choice
Merge group and move to the bottom layer
Add any additional elements you like.
Add any dropshadows you like
Crop and resize as desired
Add copyright info, license number and name
You're done! Thanks for trying my tutorial!
Labels:Wick3d Creationz | 0
comments
Sunday, July 20, 2014
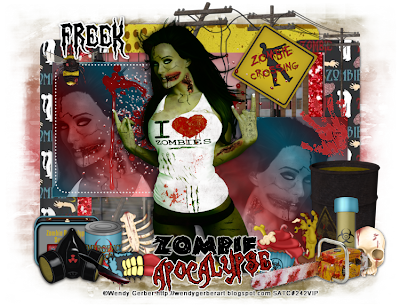
APOCALYPSE
Supplies needed:
I am using the amazing artwork from Wendy Gerber for this tutorial which you can find here
Scrapkit: I am using a stunning kit from Freek's Creations called "Apocalypse" which you can get by going here
Template 635 from Millie which you can find here
Mask 122 from Designs by Vaybs which you can find here
Plugins used: Eyecandy 4000 - Gradient Glow, Xero - Radiance, Xero - Bad Dream, Lokas 3D Shadow
----------------------------
This tutorial is written for those who have working knowledge of PSPX2 (any
version will do).
This tutorial was written by me on July 20, 2014. Please do not copy or paste on any other forum, website or blog provide link back to tut only. Please do not claim as your own. This tutorial is copyrighted to me. Any resemblance to any other tutorial is purely coincidental.
Ok - let's start and remember to save often.
Open the template and using your shortcut keys on your keyboard
(SHIFT+D) duplicate the template as a new image. Close the original and
delete the copywrite layer.
Adjust canvas to 750 x 575
Select Square Raster 8 layer
Select all, float, defloat
Add new raster layer and flood-fill with gradient of choice (style, Angle 45,Repeat 2)
Paste close-up tube of choice on top of gradient and delete
Change tube to Luminance (Legacy)
Drop opacity down on tubes to 65%
Apply dropshadow and merge close-up down on top of gradient layer
Effect, Texture Effects, Blinds (Width 2, Opactity 15, Horizontal and Light from left/top checked)
Delete/Hide original square layer
Select Square 7 layer and repeat above steps
Select Stripes 6 layer
Select all, float, defloat
Paste paper 3
Select invert, delete, select none
Delete/Hide original stripes layer
Select Square 4 layer
Select all, float, defloat
Paste paper 8
Select invert, delete, select none
Delete/Hide original square layer
Select Downed Wires Element and paste on top right above square 4 layer
Select Rectangle 3 layer
Select all, float, defloat
Paste paper 2
Select invert, delete, select none
Delete/Hide original rectangle layer
Select Rectangle 2 layer and repeat above steps
Select Square 1 layer
Select all, float, defloat
Paste paper 10
Select invert, delete, select none
Delete/Hide original square layer
Select Blood Splatter Element - paste and position on left side where desired
Copy and paste tube of choice and position where desired
Apply Xero Radiance at setting of choice
Apply Lokas 3D Shadow at default settings
Select Warning Sign Element - resize by 35%
Image Free Rotate Left by 15% and paste on top right
Select Handprint Element - resize by 25%
Paste and position on top right
Select Toxic Barrel Element - resize by 45%
Paste and position on bottom right
Select Skull Element - resize by 25%
Paste and position on bottom right
Select Virus Element - resize by 30%
Paste and position on bottom right
Select Chainsaw Element - resize by 45%
Paste and position on bottom right
Select Hand Element - resize by 25%
Paste and position on bottom right
Select Cupcake Element - resize by 25%
Paste and position on bottom right
Select Survival Kit Element - resize by 25%
Paste and position on bottom left
Select Gas Mask Element - resize by 25%
Paste and position on bottom left
Select Food Can Element - resize by 25%
Paste and position on bottom left
Select Ribs Element - resize by 22%
Image Free Roate Left by 15% and paste on bottom left
Select Lips Element - resize by 25%
Paste and position on bottom left
Select Bee Element - resize by 25%
Paste and position on top left
Select your text tool and apply or type any wording you prefer
Apply Eyecandy Gradient Glow to wording on fat default settings
Select new raster layer and flood fill with color or gradient of choice
Apply Mask 122 or mask of choice
Merge group and move to the bottom layer
Add any additional elements you like.
Add any dropshadows you like
Crop and resize as desired
Add copyright info, license number and name
You're done! Thanks for trying my tutorial!
Labels:Freek's Creation | 0
comments
Friday, July 18, 2014
SAILOR DREAMS
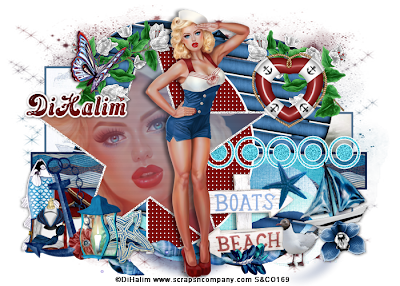
Supplies needed:
I am using the amazing artwork from DiHalim for this tutorial which you can find here
Scrapkit: I am using a stunning matching kit from Bibi's Collection called "Sailor Dreams" which you can get by going here
Template 31 from Scrapity Scrap and More which you can find here
Exclusive Mask 1 from Witchys Heart which you can find on the Misfits Blog here
Plugins used: Xero - Radiance, Xero - Bad Dream, Lokas 3D Shadow
----------------------------
This tutorial is written for those who have working knowledge of PSPX2 (any version will do).
This tutorial was written by me on July 18, 2014. Please do not copy or paste on any other forum, website or blog provide link back to tut only. Please do not claim as your own. This tutorial is copyrighted to me. Any resemblance to any other tutorial is purely coincidental.
Ok - let's start and remember to save often.
Open the template and using your shortcut keys on your keyboard (SHIFT+D) duplicate the template as a new image. Close the original and delete the copywrite layer.
Adjust canvas to 700 x 500
Select Star Raster 5 layer
Select all, float, defloat
Add new raster layer and flood-fill with gradient of choice (style, Angle 45, Repeat 2)
Paste close-up tube of choice on top of gradient and delete
Change tube to Screen
Drop opacity down on tubes to 65%
Apply dropshadow and merge close-up down on top of gradient layer
Effect, Texture Effects, Blinds (Width 2, Opactity 15, Horizontal and Light from left/top checked)
Delete/Hide original star layer
Select Shapes Raster 7 layer
Select all, float, defloat
Add new raster layer and flood-fill with color of choice
Select none
Adjust, Add/Remove Noise, Add Noise (Uniform checked, Noise 55%, Monochrome checked)
Delete/Hide original shapes layer
Select Half Circle Raster 6 layer
Select all, float, defloat
Add new raster layer and flood-fill with color of choice
Select none
Apply Effects, Texture effects, weave (Gap size 2, Width 6, Opacity 10, Fill gaps checked, Change Gap Color to color of choice)
Delete/Hide original circle layer
Select Copy of Vector 3 layer
Select all, float, defloat
Add new raster layer and flood-fill with color of choice
Select none
Delete/Hide original layer
Select Strip Raster 4 layer
Select all, float, defloat
Paste paper 2
Select invert, delete, select none
Delete/Hide original strip layer
Select Copy of Vector 2 and Copy of Vector 1 layers and repeat same steps that you did did for Vector 3 layer
Select Rectangle Raster 3 layer
Select all, float, defloat
Paste paper 1
Select invert, delete, select none
Delete/Hide original rectangle laye
Select Element 9 - resize by 50%
Paste and position on top center above rectangle layer
Select Rectangle Raster 2 layer
Select all, float, defloat
Paste paper 1
Select invert, delete, select none
Delete/Hide original rectangle layer
Copy and paste tube of choice and position where desired
Apply Xero Radiance at setting of choice
Apply Lokas 3D Shadow at default settings
Select Element 114 - resize by 40%
Paste and position on top right
Image duplicate, mirror and reposition on left side where desired
Select Element 75 - resize by 22%
Paste and position on top right
Select Element 104 - resize by 75%
Paste and position on bottom below half circle layer
Select Element 81 - resize by 15%
Paste and position on bottom right
Select Element 61 - resize by 40%
Paste and position on bottom right
Select Element 89 - resize by 30%
Paste and position on bottom right
Select Element 73 - resize by 25%
Paste and position on bottom right
Select Element 2 - resize by 15%
Paste and position on bottom right
Select Element 47 - resize by 20%
Paste and position on bottom right
Select Element 72 - resize by 50%
Paste and position on top left
Select Element 62 - resize by 18%
Paste and position on bottom left
Select Element 113 - resize by 22%
Paste and position on bottom left
Select Element 108 - resize by 20%
Paste and position on bottom left
Sleect Element 7 - resize by 40%
Image Free Rotate Left by 15% and paste on bottom left
Select Element 25 - resize by 30%
Paste and position on bottom left
Select Element 45 - resize by 15%
Paste and position on bottom left
Select Element 13 - resize by 20%
Paste and position on bottom left
Select new raster layer and flood fill with color or gradient of choice
Apply Mask 1 or mask of choice
Merge group and move to the bottom layer
Add any additional elements you like.
Add any dropshadows you like
Crop and resize as desired
Add copyright info, license number and name
You're done! Thanks for trying my tutorial!
Labels:Bibi's Collections,Scraps N Company | 0
comments
Thursday, July 17, 2014
BLOOD LUST
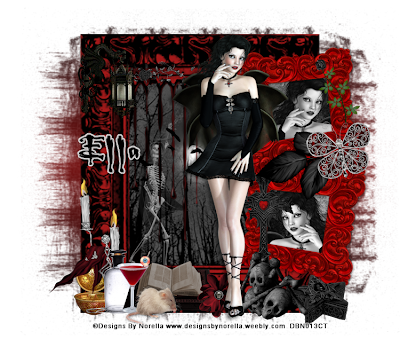
Supplies needed:
I am using the amazing art from Designs by Norella for for this tutorial which you can find here
Scrapkit: I am using a stunning kit from Kissed by Kelz called "Blood Lust" which you can get by going here
Mask 179 from Insatiable Dreams which you can find here
Plugins: Lokas 3D Shadow
----------------------------
This tutorial is written for those who have working knowledge of PSPX2 (any version will do).
This tutorial was written by me on June 17, 2014. Please do not copy or paste on any other forum, website or blog provide link back to tut only. Please do not claim as your own. This tutorial is copyrighted to me. Any resemblance to any other tutorial is purely coincidental.
Ok - let's start and remember to save often.
Open up a 750 x 650 blank canvas (we can resize it later)
Select Frame Element 59 and paste in the center of the canvas
Resize by 175%
Select your magic wand tool and click in the center of the Frame (Add (Shift), RGB Value, Tolerance 25, Contiguous checked, Feather 0)
Selections, Modify, Expand by 5
Paste Paper 22
Select invert, delete, select none
Move paper below frame layer
Select Element 16 and past on bottom left side under frame layer
Change tube to Luminance (Legacy) and drop opacity down to 50%
Select Frame Element 87 - resize by 80%
Paste and position on bottom right
Image duplicate, mirror and reposition on top right under original frame
Select your magic wand tool and click in the center of your original frame (Add (Shift), RGB Value, Tolerance 25, Contiguous checked, Feather 0)
Selections, Modify, Expand by 5
Add new raster layer and flood-fill with gradient of choice
Copy and paste close-up tube of choice on top of gradient layer
Select invert, delete, select none
Change close-up to Luminance (Legacy)
Merge tube down on gradient layer and drop down under frame
Select Frame copy and repeat above steps
Select Element 52 - resize by 55%
Paste and position on right side of small frames
Select Element 56 - resize by 40%
Paste and position on right side
Paste tube of choice where desired
Apply Lokas 3D Shadow at default settings
Select Element 127 - resize by 48%
Paste and position on top left
Select Element 104 - resize by 40%
Paste and position on bottom left
Select Element 47 - resize by 85%
Paste and position on bottom left
Select Element 141 - resize by 40%
Paste and position on bottom left
Select Element 120 - resize by 40%
Paste and position on bottom left
Select Element 82 - resize by 60%
Paste and position on bottom left
Select Element 140 - resize by 35%
Paste and position on bottom left
Select Element 54 - resize by 50%
Paste and position on bottom
Select Element 75 - resize by 40%
Paste adn position on bottom right
Select Element 150 - resize by 50%
Paste and position on bottom right
Select Element 78 - resize by 65%
Paste and position on bottom right
Add new raster layer and flood-fill with gradient of choice
Apply Mask 179 and merge group and move to bottom layer
Add any additional elements you like.
Add any dropshadows you like
Sharpen any elements as needed
Crop and resize as desired
Add copyright info, license number and name
You're done! Thanks for trying my tutorial!
Labels:Designs By Norella | 0
comments
Wednesday, July 16, 2014
A 'LIL GOTH
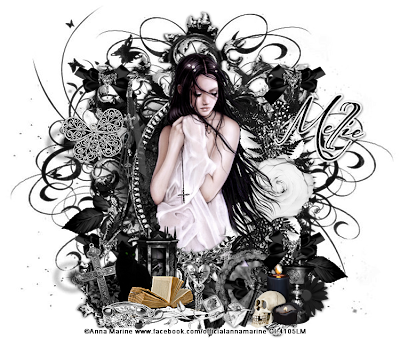
Supplies needed:
I am using the amazing art from Anna Marine for for this tutorial which you can find here
Scrapkit: I am using a beautiufl kit from Mellie Beans called "A Lil Goth" which you can get by going here
Mask 3 from Melissaz Creationz which you can find here
Plugins: Xero - Radiance, Lokas 3D Shadow
----------------------------
This tutorial is written for those who have working knowledge of PSPX2 (any version will do).
This tutorial was written by me on June 16, 2014. Please do not copy or paste on any other forum, website or blog provide link back to tut only. Please do not claim as your own. This tutorial is copyrighted to me. Any resemblance to any other tutorial is purely coincidental.
Ok - let's start and remember to save often.
Open up a 750 x 650 blank canvas (we can resize it later)
Select Frame Element 6 and paste in the center of the canvas
Resize by 65%
Select your magic wand tool and click in the center of the Frame (Add (Shift), RGB Value, Tolerance 25, Contiguous checked, Feather 0)
Selections, Modify, Expand by 5
Paste Paper 11
Select invert, delete, select none
Move paper below frame layer
Paste tube of choice where desired
Apply Xero Radiance with the default settings of choice
Apply Lokas 3D Shadow at default settings
Select Element 9 - resize by 20%
Paste and position on bottom center of the frame
Select Element 7 - resize by 15%
Paste and position on top left on frame where desired
Image duplicate and mirror and repeat step to add element to bottom of frame if desired
Select Element 45 - resize by 15%
Paste and position on left side below frame layer
Image duplicate, mirror and reposition on bottom right where desired
Select Element 4 - resize by 20%
Image Free Rotate Left by 15% and paste on bottom left
Select Element 3 - resize by 25%
Paste and position on bottom left
Select Element 35 - resize by 20%
Paste and position on bottom left
Select Element 28 - resize by 25%
Paste and position on bottom left
Select Element 41 - resize by 12%
Paste and position on bottom right
Select Element 34 - resize by 30%
Paste and position on bottom right
Select Element 1 - resize by 25%
Image Free Rotate Left by 15% and paste on bottom right
Select Element 21 - resize by 15%
Paste and position on bottom right
Select Element 23 - resize by 15%
Paste and position on bottom right
Select Element 37 - resize by 22%
Paste and position on bottom right
Select Element 46 - resize by 15%
Paste and position on top left
Paste paper 12
Apply Mask 3 and merge group and move to bottom layer
Add any additional elements you like.
Add any dropshadows you like
Sharpen any elements as needed
Crop and resize as desired
Add copyright info, license number and name
You're done! Thanks for trying my tutorial!
Labels:MellieBeans | 0
comments
ROLLER GIRL
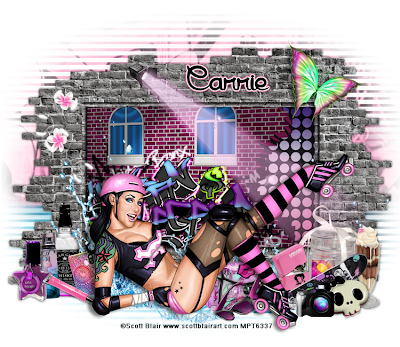
Supplies needed:
I am using the amazing art from Scott Blair for for this tutorial. The tube is no longer for sale but you can view his artwork here
Scrapkit: I am using a stunning kit from Pink Paradox Productions called "Roller Girl" which you can get by going here
Blinds Mask that I have uploaded here. I do not know who created this mask but if I find out I will appropriately link to them.
Plugins: Xero - Radiance, Lokas 3D Shadow
----------------------------
This tutorial is written for those who have working knowledge of PSPX2 (any version will do).
This tutorial was written by me on June 15, 2014. Please do not copy or paste on any other forum, website or blog provide link back to tut only. Please do not claim as your own. This tutorial is copyrighted to me. Any resemblance to any other tutorial is purely coincidental.
Ok - let's start and remember to save often.
Open up a 750 x 650 blank canvas (we can resize it later)
Select Frame Element 12 and paste in the center of the canvas
Resize by 72%
Select your magic wand tool and click in the center of the Frame (Add (Shift), RGB Value, Tolerance 25, Contiguous checked, Feather 0)
Selections, Modify, Expand by 8
Paste Paper 22
Select invert, delete
Select Element 89 (resize by 38%) and paste on left side of paper and delete
Select none
Apply dropshadow and merge down
Move paper below frame layer
Paste tube of choice where desired
Apply Xero Radiance with the default settings of choice
Apply Lokas 3D Shadow at default settings
Select Element 106 - resize by 15%
Paste and position on top left where desired
Select Element 45 - resize by 25%
Paste and position on left side
Select Element 2 - resize by 25%
Paste and position on top right
Select Element 30 - resize by 25%
Paste and position on bottom right
Select Element 33 - resize by 25%
Paste and position on bottom right
Select Element 47 - resize by 22%
Paste and position on bottom right
Select Element 6 - resize by 20%
Paste and position on bottom right
Select Element 23 - resize by 15%
Paste and position on bottom right
Select Element 44 - resize by 25%
Paste and position on bottom right
Select Element 13 - resize by 20%
Paste and position on bottom below tube layer
Select Element 51 - resize by 15%
Paste and position on bottom
Select Element 10 - resize by 18%
Paste and position on bottom left
Select Element 12 - resize by 18%
Paste and postition on bottom left
Select Element 41 - resize by 25%
Paste and position on bottom left
Select Element 16 - resize by 12%
Image Free Rotate Left by 15% and paste on bottom left
Select Element 11 - resize by 15%
Paste and position on bottom left
Paste paper 6 on canvas
Apply Mask and merge group and move to bottom layer
Add any additional elements you like.
Add any dropshadows you like
Sharpen any elements as needed
Crop and resize as desired
Add copyright info, license number and name
You're done! Thanks for trying my tutorial!
Labels:Pink Paradox Productions | 0
comments
Tuesday, July 15, 2014
PROFANITY LACED
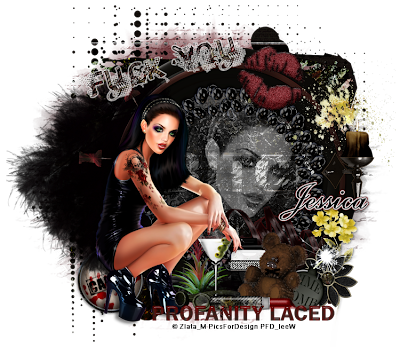
Supplies needed:
I am using the amazing art from Zlata_M for for this tutorial which you can find here
Scrapkit: I am using a stunning kit from Gothic Inspirations called Profanity Laced" which you can get by going here
Mask 236 from Weescottlass which you can find here
Plugins: Eyecandy 4000 - Gradient Glow, Xero - Radiance, Lokas 3D Shadow
----------------------------
This tutorial is written for those who have working knowledge of PSPX2 (any version will do).
This tutorial was written by me on June 15, 2014. Please do not copy or paste on any other forum, website or blog provide link back to tut only. Please do not claim as your own. This tutorial is copyrighted to me. Any resemblance to any other tutorial is purely coincidental.
Ok - let's start and remember to save often.
Open up a 750 x 650 blank canvas (we can resize it later)
Select Frame Element 3 and paste in the center of the canvas
Resize by 90%
Select your magic wand tool and click in the center of the Frame (Add (Shift), RGB Value, Tolerance 25, Contiguous checked, Feather 0)
Selections, Modify, Expand by 8
Paste Smudged 1 Element - resize by 65%
Select invert, delete
Select Close-up tube of choice and paste on top of paper and delete
Select none
Change tube to Luminance (Legacy)
Drop opacity down to 50%
Apply dropshadow and merge down
Move paper/tube below frame layer
Paste tube of choice where desired
Apply Xero Radiance with the default settings of choice
Apply Lokas 3D Shadow at default settings
Select Sconce Element - resize by 30%
Paste and position on right side of frame
Select LipstickKisses Element - resize by 50%
Paste and position on top right
Select Ribbon 3 Element - resize by 30%
Paste and position on bottom right
Select Flowers 2 Element - resize by 50%
Paste and position on bottom right (erase bottom of stem if it overhangs)
Select Flower 2 Element - resize by 22%
Paste and position on bottom right
Select TimeBomb Element - resize by 25%
Paste and position on bottom right
Select Teddy Element - resize by 25%
Paste and position on bottom right
Select Bottle Element - resize by 20%
Paste and position on bottom
Select Foilage1 Element - resize by 25%
Paste and position on bottom
Select Martini Element - resize by 25%
Paste and position on bottom
Select Goggles Element - resize by 25%
Image mirror and paste on the bottom
Select Lipstick Element - resize by 30%
Paste and position on bottom
Select Wordart 8 - resize by 40%
Paste and position on bottom
Select Brad1 Element - resize by 25%
Image Free Rotate Left by 15% and paste on bottom left
Select Wordart 11 Element - resize by 40%
Image Free Rotate Left by 15% and paste on top left
Apply Eyecandy Gradient Glow on medium default settings
Select Mask Element - resize by 75%
Paste on canvas and move to bottom layer
Add new raster layer and flood-fill with color or gradient of choice
Apply Mask 236 and merge group and move to bottom layer
Add any additional elements you like.
Add any dropshadows you like
Sharpen any elements as needed
Crop and resize as desired
Add copyright info, license number and name
You're done! Thanks for trying my tutorial!
Labels:Gothic Inspirations | 0
comments
LAURA'S REALM
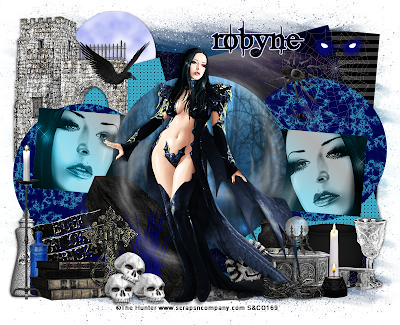
Supplies needed:
I am using the amazing artwork from The Hunter for this tutorial which you can find here
Scrapkit: I am using a stunning kit from Whisper in the Wind called "Laura's Realm" which you can get by going here
Template 241 from Toxic Desirez which you can find here
Folkvangar's Fantasy Background here
Mask Dmsk 0006 which you can find here
Plugins used: Eyecandy 4000 - Marble, VM - Transmission, Xero - Radiance, Xero - Bad Dream, Lokas 3D Shadow
----------------------------
This tutorial is written for those who have working knowledge of PSPX2 (any version will do).
This tutorial was written by me on July 15, 2014. Please do not copy or paste on any other forum, website or blog provide link back to tut only. Please do not claim as your own. This tutorial is copyrighted to me. Any resemblance to any other tutorial is purely coincidental.
Ok - let's start and remember to save often.
Open the template and using your shortcut keys on your keyboard (SHIFT+D) duplicate the template as a new image. Close the original and delete the copywrite layer.
Adjust canvas to 800 x 650
Select Circle 4 layer
Select all, float, defloat
Paste Folkvangar's Fantasy Background of choice
Select invert, delete, select none
Delete/Hide original circle layer
Select Rectangle Raster 3 layer
Select all, float, defloat
Add new raster layer and flood-fill with gradient of choice (style, Angle 45, Repeat 2)
Paste close-up tubes of choice on top of gradient and delete
Change tubes to Luminance (Legacy)
Apply Xero Bad Dream at default settings or random setting of choice
Drop opacity down on tubes to 75%
Apply dropshadow and merge close-ups down on top of gradient layer
Effect, Texture Effects, Blinds (Width 2, Opactity 15, Horizontal and Light from left/top checked)
Delete/Hide original rectangle layer
Select Circle Raster 5 layer
Apply Eyecandy Marble with the following settings:
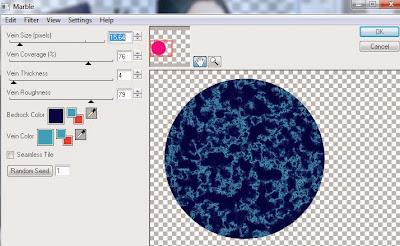
Select Circle Copy of Raster 5 and repeat marble settings
Select Rectangle Raster 6 layer
Select all, float, defloat
Add new raster layer and flood-fill with color of choice
Select none
Apply Effects, Texture effects, weave (Gap size 2, Width 6, Opacity 10, Fill gaps checked, Change Gap Color to color of choice)
Delete/Hide original rectangle layer
Select Rectangle Copy of Raster 6 and repeat above steps
Select Rectangle Raster 7 layer
Paste paper 4
Select invert, delete, select none
Delete/Hide original rectangle layer
Select Rectangle Copy of Raster 7 layer and repeat above steps
Select Rectangle Raster 8 layer
Select all, float, defloat
Paste paper 3
Select invert, delete, select none
Delete/Hide original rectangle layer
Select Rectangle Raster 9 layer
Apply VM Transmission with the following settings:
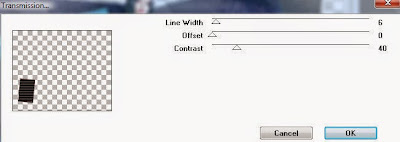
Select Rectangle Copy of Raster 9 layer and repeat VM settings
Select Element 26 - resize by 75%
Paste and position on top center circle
Copy and paste tube of choice and position where desired
Apply Xero Radiance at setting of choice
Apply Lokas 3D Shadow at default settings
Select Element 60 - resize by 40%
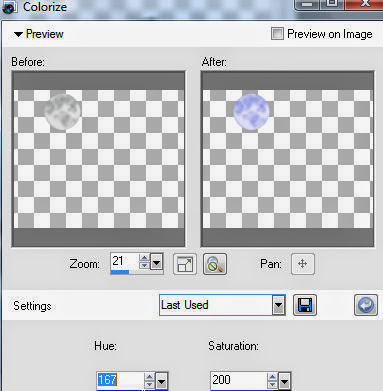
Paste and position on top left - colorize with following settings if desired:
Select Element 22 - resize by 40%
Paste and position on top left
Select Element 30 - resize by 25%
Paste and position on top left
Select Element 7 - resize by 30%
Paste and position on top right
Select Element 52 - resize by 25%
Paste and position on top right
Select Element 69 - resize by 20%
Paste and position on top right
Select Element 48 - resize by 30%
Paste and position on bottom right
Select Element 56 - resize by 20%
Paste and position on bottom right
Select Element 45 - resize by 20%
Paste and position on bottom right
Select Element 39 - resize by 35%
Paste and position on bottom right
Select Element 31 - resize by 15%
Paste and position on bottom right
Select Element 40 - resize by 20%
Paste and position on bottom right
Select Element 23 - resize by 25%
Paste and position on bottom left
Select Element 15 - resize by 22%
Image Free Rotate Left by 15% and paste on bottom left
Select Element 18 - resize by 35%
Paste and position on bottom left
Select Element 4 - resize by 20%
Paste and position on bottom left
Select Element 19 - resize by 45%
Paste and position on bottom left
Select Element 43 - resize by 25%
Paste and position on bottom left
Select Element 46 - resize by 25%
Paste and position on bottom left
Select Element 47 - resize by 25%
Paste and position on bottom left
Select Element 38 - resize by 20%
Paste and position on bottom left
Select new raster layer and flood fill with color or gradient of choice
Apply Mask 6 or mask of choice
Merge group and move to the bottom layer
Add any additional elements you like.
Add any dropshadows you like
Crop and resize as desired
Add copyright info, license number and name
You're done! Thanks for trying my tutorial!
Sunday, July 13, 2014
ENCHANTING
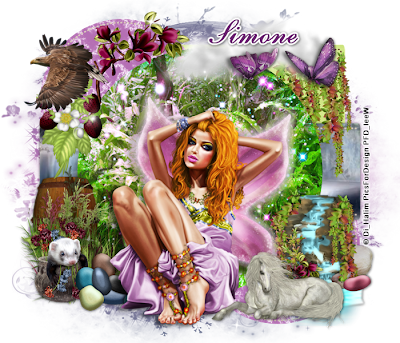
Supplies needed:
I am using the amazing artwork from DiHalm for this tutorial which you can find here
Scrapkit: I am using a beautiful kit from Sophisticat Simone called "Enchanting" which you can get by going here
Template 176 from HorsePlay's Pasture which you can find here
Mask 20 from Moonbeams and Spiderwebs which you can find here
Plugins used: Eyecandy 4000 - Marble, Xero - Radiance, Lokas 3D Shadow
----------------------------
This tutorial is written for those who have working knowledge of PSPX2 (any version will do).
This tutorial was written by me on July 13, 2014. Please do not copy or paste on any other forum, website or blog provide link back to tut only. Please do not claim as your own. This tutorial is copyrighted to me. Any resemblance to any other tutorial is purely coincidental.
Ok - let's start and remember to save often.
Open the template and using your shortcut keys on your keyboard (SHIFT+D) duplicate the template as a new image. Close the original and delete the copywrite layer.
Adjust canvas to 700 x 600
Select Lines Raster 14 layer and delete
Select Strips Raster 13 and 12 and delete
Select Circle Raster 11 layer
Select all, float, defloat
Paste paper 8
Select invert, delete, select none
Delete/Hide original circle layer
Select Rectangle Raster 9 layer
Select all, float, defloat
Paste paper 11
Select invert, delete, select none
Delete/Hide original rectangle layer
Select Circle Raster 7 layer
Apply Eyecandy Marble with the following settings:
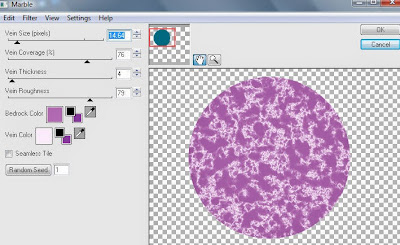
Select Circle Raster 5 and repeat marble settings
Select Rectangle Raster 3 layer
Select all, float, defloat
Add new raster layer and flood-fill with color of choice
Select none
Delete/Hide original rectangle layer
Select Rectangle Raster 1 and repeat above steps
Copy and paste tube of choice and position where desired
Apply Xero Radiance at setting of choice
Apply Lokas 3D Shadow at default settings
Select Element 49 - resize by 30%
Paste and position on top right
Select Element 10 - resize by 50%
Paste and position on top right
Select Element 41 - resize by 50%
Paste and position on top right
Select Element 6 - resize by 50%
Paste and position on top left
Select Element 7 - resize by 45%
Paste and position on top left
Select Element 28 - resize by 35%
Image mirror and paste on top left
Select Element 42 - resize by 40%
Paste and position on bottom right
Select Element 2 - resize by 40%
Paste and position on bottom right
Select Element 4 - resize by 50%
Paste and position on bottom left
Select Element 29 - resize by 30%
Paste and position on bottom left
Select Element 52 - resize by 30%
Image mirror and paste on bottom left
Select new raster layer and flood fill with color or gradient of choice
Apply Mask 20 or mask of choice
Merge group and move to the bottom layer
Add any additional elements you like.
Add any dropshadows you like
Crop and resize as desired
Add copyright info, license number and name
You're done! Thanks for trying my tutorial!
Labels:Sophisticat Simone | 0
comments
Saturday, July 12, 2014
SUMMER MADNESS
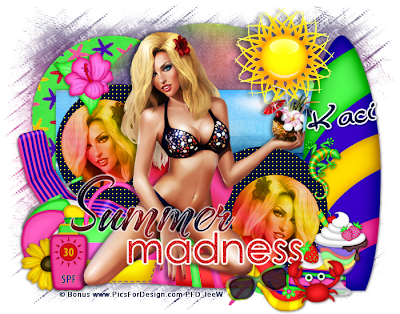
Supplies needed:
I am using the amazing bonus artwork from Picsfordesign for this tutorial which you can find here
Scrapkit: I am using a stunning kit from Scrappin Krazy Designs called "Backyard Summer" which you can get by going here
Template 607 from Millie which you can find here
Summer Mask 4 from Rabid Bunny which you can find on the Misfits Blog here
Plugins used: Eyecandy 4000 - Glass, Eyecandy 4000 - Gradient Glow, Xero - Radiance, Xero - Bad Dream Lokas 3D Shadow
----------------------------
This tutorial is written for those who have working knowledge of PSPX2 (any version will do).
This tutorial was written by me on July 12, 2014. Please do not copy or paste on any other forum, website or blog provide link back to tut only. Please do not claim as your own. This tutorial is copyrighted to me. Any resemblance to any other tutorial is purely coincidental.
Ok - let's start and remember to save often.
Open the template and using your shortcut keys on your keyboard (SHIFT+D) duplicate the template as a new image. Close the original and delete the copywrite layer.
Adjust canvas to 700 x 550
Select Wordart Raster 11 layer
Select all, float, defloat
Add new raster layer and flood-fill with color of choice
Select none
Adjust, Add/Remove Noise, Add Noise (Uniform checked, Noise 65%, Monochrome checked)
Apply Eyecandy Gradient Glow on fat default settings (Glow Width 3)
Delete/Hide original wordart layer
Select Wordart Raster 10 layer
Select all, float, defloat
Add new raster layer and flood-fill with gradient of choice
Select none
Apply Eyecandy Glass on default settings
Delete/Hide original wordart layer
Select Circle 9 layer
Select all, float, defloat
Add new raster layer and flood-fill with gradient of choice (style, Angle 45, Repeat 2)
Paste close-up tube of choice on top of gradient and delete
Change tubes to Luminance (Legacy)
Apply Xero Bad Dream at default settings or random setting of choice
Drop opacity down on tube to 75%
Apply dropshadow and merge close-up down on top of gradient layer
Effect, Texture Effects, Blinds (Width 2, Opactity 15, Horizontal and Light from left/top checked)
Delete/Hide original circle layer
Select Circle 7 layer and repeat above steps
Select Circle 8 layer and repeat gradient steps
Select Circle 6 layer
Select all, float, defloat
Add new raster layer and flood-fill with color of choice
Select none
Apply Effects, Texture effects, weave (Gap size 2, Width 5, Opacity 10, Fill gaps checked, Change Gap Color to color of choice)
Delete/Hide original circle layer
Select Circle 5 layer and repeat above steps
Select Rectangle 4 layer
Select all, float, defloat
Paste paper 13
Select invert, delete, select none
Delete/Hide original rectangle layer
Select Circlde 3 layer
Select all, float, defloat
Paste paper 11
Select invert, delete, select none
Delete/Hide original circle layer
Select Circle 2 layer
Select all, float, defloat
Paste paper 6
Select invert, delete, select none
Delete/hide original circle layer
Select Circle 1 and repeat above steps
Copy and paste tube of choice and position where desired
Apply Xero Radiance at setting of choice
Apply Lokas 3D Shadow at default settings
Select Element 54 - resize by 85%
Paste and position on bottom below tube layer
Select Element 73 - paste and position on right side
Select Element 74 - resize by 35%
Paste and position on top right
Select Element 16 - resize by 35%
Paste and position on bottom right
Select Element 14 - resize by 25%
Paste and position on bottom right
Select Element 29 - resize by 25%
Paste and position on bottom right
Select Element 37 - resize by 25%
Paste and position on bottom right
Select Element 71 - resize by 30%
Image Free Rotate Left by 15% and paste on bottom right
Select Element 32 - resize by 50%
Paste and position on bottom left below tube layer
Select Element 31 - resize by 50%
Image mirror and paste on bottom left
Select Element 5 - resize by 40%
Paste and position on bottom left
Select Element 17 - resize by 30%
Paste and position on bottom left
Select Element 72 - resize by 30%
Paste and position on bottom left
Select Element 39 - resize by 30%
Image mirror and paste on top left
Select new raster layer and flood fill with color or gradient of choice
Apply Mask 4 or mask of choice
Merge group and move to the bottom layer
Add any additional elements you like.
Add any dropshadows you like
Crop and resize as desired
Add copyright info, license number and name
You're done! Thanks for trying my tutorial!
Labels:Scrappin Krazy Designs | 0
comments
Subscribe to:
Comments
(Atom)

