Labels
- Alikas Scraps
- All Dolled Up Store
- Amy Marie
- Annaica
- Arthur Crowe
- Babycakes Scraps
- Barbara Jensen
- Bibi's Collections
- Black Widow Creationz
- Blu Moon
- Bonnies Creations
- Bookwork Dezines
- Broken Sky Dezine
- Carita Creationz
- Carpe Diem Designs
- CDO
- Celinart Pinup
- Celine
- Chacha Creationz
- Charmed Designs
- Cherry Blossom Designs
- Chili Designz
- Cluster Frame
- Creative Misfits
- Creative Scraps by Crys
- Curious Creative Dreams
- Danny Lee
- Derzi
- Designs by Ali
- Designs by Joan
- Designs by Ketura
- Designs By Norella
- Designs by Vi
- Diana Gali
- Diry Art Designs
- Disturbed Scraps
- Dreaming With Bella
- Eclipse Creations
- Elegancefly
- Extras
- Fabulous Designz
- Forum Set
- Foxy's Designz
- Freek's Creation
- FTU
- FwTags
- Goldwasser
- Gothic Inspirations
- Gothic Raven Designs
- Graphfreaks
- Hania's Designs
- Happy Pumpkin Studios
- Horseplay's Pasture Designs
- indie-Zine
- Irish Princess Designs
- Ishika Chowdhury
- Kaci McVay
- Kajenna
- katharine
- Katherine
- Khloe Zoey
- Killer Kitty
- Kissing Kate
- KiwiFirestorm
- Kiya Designs
- Kizzed by Kelz
- KZ Designz
- Lady Mishka
- Lil Mz Brainstorm
- Maiden of Darkness
- Mariel Designs
- MellieBeans
- Michelle's Myths
- Midnight Shadow
- Misticheskya
- MistyLynn's Creations
- MMeliCrea Designz
- Moon Vixen Designs
- NaSionainne
- Ninaste
- Niqui Designs
- Pandora
- Picsfordesign
- Pink Paradox Productions
- Radyga Designs
- Redefined Designs
- Rissa's Designs
- Schnegge
- ScottishButterfly Creations
- Scrappin Krazy Designs
- Scrappin With Lil Ol Me
- Scraps and the City
- Scraps Dimensions
- Scraps From The Heart
- Scraps N Company
- Scraps with Attitude
- Shining Star Art
- Skyscraps
- Sleek N Sassy Designs
- Sophisticat Simone
- Souldesigner
- Soxsational Scraps
- Spazz
- Starlite and Soul
- Stella Felice
- Tammy Welt
- Tasha's Playground
- The PSP Project
- Thrifty Scraps by Gina
- Tiny Turtle Designs
- Upyourart
- Verymany
- Wendy Gerber
- Whisper In the Wind
- Wick3d Creationz
- Wicked Diabla
- Yude's Kreationz
Blog Archive
-
▼
2014
(276)
-
▼
January
(29)
- DREAMS AND IMAGINATION
- SO SWEET AND GIRLY
- 50's GIRL
- CLASSIC LOVE
- HELLZ PRINCESS
- WILD BLACK ROSE
- HELL'S PLAYGROUND
- PHOENIX
- BEAUTIFULLY BROKEN
- SWEETIE PIE
- PROMISES
- YOUR SWEETHEART
- MY SWAG
- YOUR KISS
- CUPID CUTIE
- ALWAYS AND FOREVER
- LOVELY ANGEL
- CHERRY BOMB
- COFFEE HOUSE
- DAZZLING DENIM
- ARCHER
- BAD ROMANCE
- LIGHT ANGEL
- MY LIFE MY MOMENT
- BLACK SKULL
- ART OF GIVING
- BRIGHT MOONLIGHT
- DANGEROUS HEARTBREAKER
- HAPPY NEW YEARS 2014
-
▼
January
(29)
Friday, January 31, 2014
DREAMS AND IMAGINATION
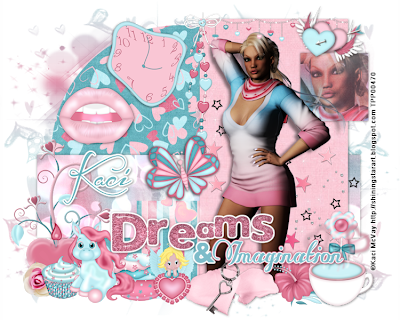
Supplies needed:
I am using the amazing artwork from Shining Star Art for this tutorial which you can find here
Scrapkit: I am using an beautiful kit from Scrappin Krazy Designs called "Natalie" which you can get by going here
Dreams and Imagination Template from Creative Scraps by Crys which can be found here
Mask 82 from Sophisticated Simone which you can find on the Misfits Blog here
Plugins used: Eyecandy 4000 - Glass, Eyecandy 4000 - Gradient Glow, Xero - Radiance, Xero-Bad Dream, Lokas 3D Shadow
----------------------------
This tutorial is written for those who have working knowledge of PSPX2 (any version will do).
This tutorial was written by me on January 31, 2014. Please do not copy or paste on any other forum, website or blog provide link back to tut only. Please do not claim as your own. This tutorial is copyrighted to me. Any resemblance to any other tutorial is purely coincidental.
Ok - let's start and remember to save often.
Open the template and using your shortcut keys on your keyboard (SHIFT+D) duplicate the template as a new image. Close the original and delete the copywrite layer.
Adjust canvas size to 750 x 600
Select Wordart Raster 7 layer
Add new layer and flood-fill with color of choice
Reselect wordart layer - select all, float, defloat
Go back to layer you just filled - select invert, delete, select none
Apply Eyecandy Gradient Glow on fat default settings (Glow Width 3)
Delete/Hide original wordart layer
Select Wordart Raster 6 layer and repeat above steps
Select Wordart Raster 5 layer
Select all, float, defloat
Add new raster layer and flood-fill with color of choice
Select none
Adjust, Add/Remove Noise, Add Noise (Uniform checked, Noise 65%, Monochrome checked)
Apply Eyecandy Glass on default settings
Apply Eyecandy Gradient Glow on fat default setitngs
Delete/Hide original wordart layer
Select Square Raster 8 layer
Select all, float, defloat
Add new raster layer and flood-fill with gradient of choice (style, Angle 45, Repeat 2)
Paste close-up tube of choice on top of gradient and delete
Change close-up to Hard Light
Apply Xero Bad Dream at default settings or random setting of choice
Drop opacity down to 50% on tube
Apply dropshadow and merge close-up down on top of gradient layer
Effect, Texture Effects, Blinds (Width 2, Opactity 25, Horizontal and Light from left/top checked)
Delete/Hide orginal square layer
Select Rectangle Raster 2 layer
Select all, float, defloat
Paste paper 11
Select invert, delete, select none
Delete/Hide original rectangle layer
Select Element 67 - resize by 50%
Paste and position on top of rectangle where desired
Select Square Raster 9 layer
Select all, float, defloat
Paste paper 12
Select invert, delete, select none
Delete/Hide original square layer
Select Rectangle Raster 3 layer
Select all, float, defloat
Paste paper 2
Select invert, delete, select none
Delete/Hide original rectangle layer
Select Circle Raster 4 layer
Select all, float, defloat
Paste paper 6
Select invert, delete, select none
Delete/Hide original circle layer
Copy and paste tube of choice and position where desired
Apply Xero Radiance at setting of choice
Apply Lokas 3D Shadow at default settings
Select Element 6 - resize by 35%
Image Free Rotate Right by 15% and paste on top right
Select Element 17 - resize by 30%
Paste and position on bottom right
Select Element 30 - resize by 40%
Paste and position on bottom right
Select Element 14 - resize by 30%
Paste and position on bottom right
Select Element 75 - resize by 50%
Paste and position on bottom
Select Element 8 - resize by 30%
Paste and position on bottom
Select Element 16 - resize by 30%
Paste and position on bottom
Select Element 13 - resize by 40%
Paste and position on bottom left
Select Element 22 - resize by 65%
Paste and position on bottom left
Select Element 19 - resize by 40%
Paste and position on bottom left
Select Element 21 - resize by 20%
Paste and position on bottom left
Select Element 69 - resize by 25%
Paste and position on bottom left
Select Element 33 - resize by 40%
Paste and position on top left
Select Element 20 - resize by 35%
Paste and position on left side
Select Element 12 - resize by 40%
Image Free Rotate Left by 15% and paste on left side
Select new raster layer and flood fill with color or gradient of choice
Move layer to the bottom of the template
Apply Mask 82
Merge group and move to the bottom layer
Add any additional elements you like.
Add any dropshadows you like
Crop and resize as desired
Add copyright info, license number and name
You're done! Thanks for trying my tutorial!
SO SWEET AND GIRLY
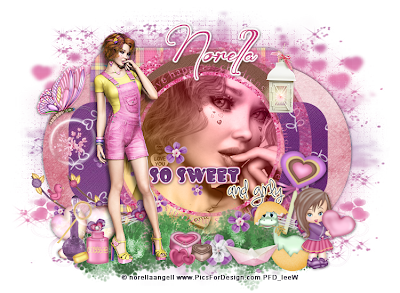
Supplies needed:
I am using the amazing artwork from Designs by Norella for this tutorial which you can find here
Scrapkit: I am using an beautiful kit from Horseplay's Pasture Designs called "Love at First Sight" which you can get by going here
Template 477 from Millie which can be found here
Mask M4 from Kylie which you can find on the Misfits Blog here
Plugins used: Eyecandy 4000 - Glass, Eyecandy 4000 - Gradient Glow, Xero - Radiance, Xero-Bad Dream, Lokas 3D Shadow
----------------------------
This tutorial is written for those who have working knowledge of PSPX2 (any version will do).
This tutorial was written by me on January 31, 2014. Please do not copy or paste on any other forum, website or blog provide link back to tut only. Please do not claim as your own. This tutorial is copyrighted to me. Any resemblance to any other tutorial is purely coincidental.
Ok - let's start and remember to save often.
Open the template and using your shortcut keys on your keyboard (SHIFT+D) duplicate the template as a new image. Close the original and delete the copywrite layer.
Adjust canvas size to 750 x 650
Select Wordart 9 layer and apply Eyecandy Gradient Glow on fat default settings (Glow Width 3)
Select Wordart 8 layer
Select all, float, defloat
Add new raster layer and flood-fill with color of choice
Select none
Apply Eyecandy Glass on default settings
Apply Eyecandy Gradient Glow on fat default setitngs
Delete/Hide original wordart layer
Select Circle 6 layer
Select all, float, defloat
Add new raster layer and flood-fill with gradient of choice (style, Angle 45, Repeat 2)
Paste close-up tube of choice on top of gradient and delete
Change close-up to Luminance (Legacy)
Apply Xero Bad Dream at default settings or random setting of choice
Drop opacity down to 80% on tube
Apply dropshadow and merge close-up down on top of gradient layer
Delete/Hide orginal circle layer
Select Element 50 - resize by 60%
Paste and position above circle layer where desired
Select Rectangle 5 layer
Select all, float, defloat
Paste paper 9
Select invert, delete, select none
Delete/Hide original rectangle layer
Select Circle 4 layer
Select all, float, defloat
Paste paper 16
Select invert, delete, select none
Delete/Hide original circle layer
Select Square 3 layer
Select all, float, defloat
Paste paper 8
Select invert, delete, select none
Delete/Hide original square layer
Select Circle 2 layer
Select all, float, defloat
Paste paper 12
Select invert, delete, select none
Delete/Hide original circle layer
Select Circle 1 layer and repeat above steps
Copy and paste tube of choice and position where desired
Apply Xero Radiance at setting of choice
Apply Lokas 3D Shadow at default settings
Select Element 75 and paste on bottom below tube layer
Select Element 41 - resize by 35%
Paste and position on top right
Select Element 62 - resize by 40%
Paste and position on bottom right
Select Element 15 - resize by 40%
Image Free Rotate Right by 15% and paste on bottom right
Select Element 71 - resize by 40%
Paste and position on bottom right
Select Element 42 - resize by 25%
Paste and position on bottom right
Select Element 61 - resize by 30%
Paste and position on bottom
Select Element 60 - resize by 20%
Paste and position on bottom
Select Element 48 - resize by 25%
Paste and position on bottom
Select Element 12 - resize by 40%
Image mirror and paste on top left
Select Element 53 - resize by 40%
Image mirror and paste on bottom left
Select Element 38 - resize by 30%
Paste and position on bottom left
Select Element 49 - resize by 25%
Paste and position on bottom left
Select Element 16 - resize by 30%
Paste and position on bottom left
Select new raster layer and flood fill with color or gradient of choice
Move layer to the bottom of the template
Apply Mask M4
Merge group and move to the bottom layer
Add any additional elements you like.
Add any dropshadows you like
Crop and resize as desired
Add copyright info, license number and name
You're done! Thanks for trying my tutorial!
Thursday, January 30, 2014
50's GIRL
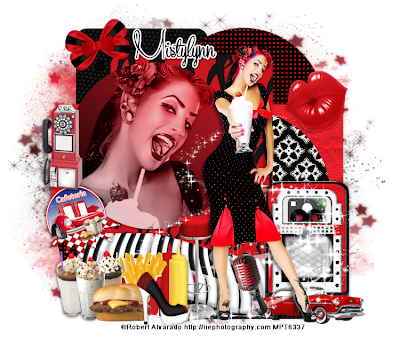
Supplies needed:
I am using the amazing artwork from Robert Alvarado for this tutorial. Unfortunately, he isn't selling his art at this time. You can find his work here
Scrapkit: I am using an awesome kit from Mistylynne's Creations called "The 50's" which you can get by going here
Template 492 from Millie which can be found here
Mask 25 from Witchysheart which you can find here
Plugins used: Xero - Radiance, Xero-Bad Dream, Lokas 3D Shadow
----------------------------
This tutorial is written for those who have working knowledge of PSPX2 (any version will do).
This tutorial was written by me on January 30, 2014. Please do not copy or paste on any other forum, website or blog provide link back to tut only. Please do not claim as your own. This tutorial is copyrighted to me. Any resemblance to any other tutorial is purely coincidental.
Ok - let's start and remember to save often.
Open the template and using your shortcut keys on your keyboard (SHIFT+D) duplicate the template as a new image. Close the original and delete the copywrite layer.
Adjust canvas size to 750 x 650
Select Circle 8 layer
Select all, float, defloat
Add new raster layer and flood-fill with gradient of choice (style, Angle 45, Repeat 2)
Paste close-up tube of choice on top of gradient and delete
Change close-up to Luminance (Legacy)
Apply Xero Bad Dream at default settings or random setting of choice
Drop opacity down to 80% on tube
Apply dropshadow and merge close-up down on top of gradient layer
Effects, Texture Effects, Blinds (Width 2, Opactity 15, Horizontal and Light from left/top checked)
Delete/Hide orginal circle layer
Select Rectangle 7 layer
Select all, float, defloat
Paste paper 13
Select invert, delete, select none
Delete/Hide original rectangle layer
Select Circle 6 layer
Select all, float, defloat
Paste paper 10
Select invert, delete, select none
Delete/Hide original circle layer
Select Rectangle 5 layer
Select all, float, defloat
Paste paper 11
Select invert, delete, select none
Delete/Hide original rectangle layer
Select Circle 4 layer
Select all, float, defloat
Add new raster layer and flood-fill with color of choice
Select none
Apply Effects, Texture effects, weave (Gap size 3, Width 5, Opacity 10, Fill gaps checked, Change Gap Color to color of choice)
Delete/Hide original circle layer
Select Circle 3 layer and repeat above steps
Select Square 2 layer
Select all, float, defloat
Paste paper 6
Select invert, delete, select none
Delete/Hide original square layer
Select Square 1 layer and repeat above steps
Copy and paste tube of choice and position where desired
Apply Xero Radiance at setting of choice
Apply Lokas 3D Shadow at default settings
Select Element 51 - resize by 80%
Paste and position on bottom below tube layer
Select Element 15 - resize by 65%
Paste and position on bottom right
Select Element 9 - resize by 45%
Paste and position on bottom right
Select Element 11 - resize by 30%
Image Free Rotate Left by 15% and paste on bottom right
Select Element 21 - resize by 40%
Paste and position on left side
Select Element 7 - resize by 45%
Image Free Rotate Left by 15% and paste on bottom left
Select Element 12 - resize by 40%
Paste and position on bottom left
Select Element 1 - resize by 35%
Paste and position on bottom left
Select Element 25 - resize by 30%
Paste and position on bottom left
Select Element 19 - resize by 50%
Paste and position on bottom left
Select Element 16 - resize by 50%
Paste and position on bottom left
Select Element 64 - resize by 25%
Paste and position on bottom left
Select Element 22 - resize by 65%
Paste and position on bottom left
Select Element 30 - resize by 30%
Image Free Rotate Left by 15% and paste on top left
Select Element 52 - resize by 40%
Paste and position on top right
Select new raster layer and flood fill with color or gradient of choice
Move layer to the bottom of the template
Apply Mask 25
Merge group and move to the bottom layer
Add any additional elements you like.
Add any dropshadows you like
Crop and resize as desired
Add copyright info, license number and name
You're done! Thanks for trying my tutorial!
Labels:MistyLynn's Creations | 0
comments
CLASSIC LOVE

Supplies needed:
I am using the amazing artwork from Keith Garvey for this tutorial which you can find here
Scrapkit: I am using an awesome kit from ScottishButterfly Creations called "Classic Love" which you can get by going here
Template 487 from Millie which can be found here
Mask 259 from Trese which you can find here
Plugins used: Eyecandy 4000 - Glass, Eyecandy 4000 - Gradient Glow, Xero - Radiance, Xero-Bad Dream, Lokas 3D Shadow
----------------------------
This tutorial is written for those who have working knowledge of PSPX2 (any version will do).
This tutorial was written by me on January 30, 2014. Please do not copy or paste on any other forum, website or blog provide link back to tut only. Please do not claim as your own. This tutorial is copyrighted to me. Any resemblance to any other tutorial is purely coincidental.
Ok - let's start and remember to save often.
Open the template and using your shortcut keys on your keyboard (SHIFT+D) duplicate the template as a new image. Close the original and delete the copywrite layer.
Adjust canvas size to 750 x 650
Select Star 15 layer and move to top right if desired
Select all, float, defloat
Add new raster layer and flood-fill with color of choice
Select none
Apply Eyecandy Glass on default settings
Apply Eyecandy Gradient Glow on fat default settings (Glow Width 3)
Delete/Hide original star layer
Select Star 14 layer and move to bottom left if desired
Repeat above steps
Select Wordart 13 layer
Apply Eyecandy Glass on default settings
Apply Eyecandy Gradient Glow on fat default settings (Glow Width 3)
Select Wordart 12 and 11 layers and repeat above steps
Select Square 10 layer
Select all, float, defloat
Paste paper 10
Select invert, delete, select none
Apply Gradient Glow on fat default settings if desired
Delete/Hide original square layer
Select Rectangle 8 layer
Select all, float, defloat
Paste paper 4
Select invert, delete, select none
Delete/Hide original rectangle layer
Select Circle 7 layer
Select all, float, defloat
Paste paper 5
Select invert, delete, select none
Delete/Hide original circle layer
Select Square 6 layer
Select all, float, defloat
Add new raster layer and flood-fill with gradient of choice (style, Angle 45, Repeat 2)
Select none
Delete/Hide original square layer
Select Square 5 layer and repeat above steps
Select Circle 4 layer
Select all, float, defloat
Paste paper 1
Select invert, delete, select none
Delete/Hide original circle layer
Select Circle 3 and repeat above steps
Select Circle 2 layer
Select all, float, defloat
Add new raster layer and flood-fill with color of choice
Select none
Adjust, Add/Remove Noise, Add Noise (Uniform checked, Noise 85%, Monochrome checked)
Delete/Hide original circle layer
Select Squar 1 layer
Select all, float, defloat
Paste paper 7
Select invert, delete, select none
Delete/Hide original square layer
Copy and paste tube of choice and position where desired
Apply Xero Radiance at setting of choice
Apply Lokas 3D Shadow at default settings
Select Sconce Element - resize by 30%
Paste and position on right side
Select Piano Element - resize by 40%
Paste and position on bottom right
Select Candle Element - resize by 25%
Paste and position on bottom right
Select Purse Element - resize by 35%
Paste and position on bottom right
Select GemFlower Element - resize by 25%
Paste and position on bottom
Select Beads Element - resize by 85%
Paste and position on bottom below tube layer
Select Heart Element - resize by 65%
Paste and position on bottom left
Select Redrose Element - resize by 25%
Paste and position on bottom left
Select Lips Element - resize by 25%
Paste and position on top left
Select new raster layer and flood fill with color or gradient of choice
Move layer to the bottom of the template
Apply Mask 259
Merge group and move to the bottom layer
Select your pick tool and adjust/pull your mask if you desire
Add any additional elements you like.
Add any dropshadows you like
Crop and resize as desired
Add copyright info, license number and name
You're done! Thanks for trying my tutorial!
Labels:ScottishButterfly Creations | 0
comments
Tuesday, January 28, 2014
HELLZ PRINCESS
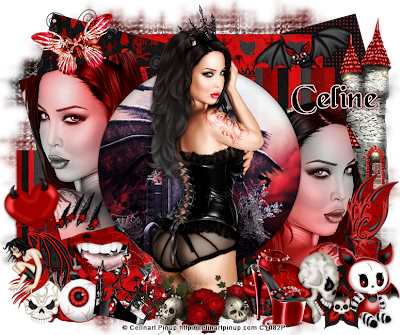
Supplies needed:
I am using the amazing artwork from Celinart Pinup for this tutorial which you can find here
Scrapkit: I am using an awesome kit from Toxic Desirez called "Hellz Princess" which you can get by going here
Template 183 from Kristen which can be found here
Mask 14 from Artmama - unfortunately she has closed her blog but I have uploaded it here
Plugins used: Eyecandy 4000 - Glass, Xero - Radiance, Xero-Bad Dream, Lokas 3D Shadow
----------------------------
This tutorial is written for those who have working knowledge of PSPX2 (any version will do).
This tutorial was written by me on January 28, 2014. Please do not copy or paste on any other forum, website or blog provide link back to tut only. Please do not claim as your own. This tutorial is copyrighted to me. Any resemblance to any other tutorial is purely coincidental.
Ok - let's start and remember to save often.
Open the template and using your shortcut keys on your keyboard (SHIFT+D)duplicate the template as a new image. Close the original and delete the copywrite layer.
Adjust canvas size to 750 x 650
Select Circle layer
Select all, float, defloat
Paste Paper Background
Select invert, delete, select none
Apply Eyecandy Glass on default settings
Delete/Hide original circle layer
Select Dark Grey Bottom Rectangle layer
Select all, float, defloat
Add new raster layer and flood-fill with gradient of choice (style, Angle 45, Repeat 2)
Paste close-up tube of choice on top of gradient and delete
Change close-up to Luminance (Legacy)
Apply Xero Bad Dream at default settings or random setting of choice
Apply dropshadow and merge close-up down on top of gradient layer
Effects, Texture Effects, Blinds (Width 2, Opactity 15, Horizontal and Light from
left/top checked)
Delete/Hide orginal rectangle layer
Select Dark Grey Top Rectangle layer and repeat above steps
Select Grey Bottom Square layer
Select all, float, defloat
Paste paper 11
Select invert, delete, select none
Delete/Hide original square layer
Select Grey Top Square layer and repeat above steps
Select Grey Top Rectangle layer
Select all, float, defloat
Paste paper 6
Select invert, delete, select none
Delete/Hide original rectangle layer
Select Grey Top Rectangle layer and repeat above steps
Select White Bottom Rectangle layer
Select all, float, defloat
Paste paper 4
Select invert, delete, select none
Delete/Hide original rectangle layer
Select White Top Rectange layer and repeat above steps
Select Black Bottom Rectangle layer
Apply Effects, Texture effects, weave (Gap size 2, Width 5, Opacity 10, Fill gaps checked, Change Gap Color to color of choice)
Select Black Top Rectangle layer and repeat above steps
Copy and paste tube of choice and position where desired
Apply Xero Radiance at setting of choice
Apply Lokas 3D Shadow at default settings
Select Skulls & Roses Element - resize by 50%
Paste and position on bottom where desired
Select Castle Element - resize by 40%
Paste and position on top right
Select Bat Element - resize by 30%
Paste and position on top right
Image Free Rotate Left by 15%
Select Butterfly 2 Element - resize by 35%
Paste and position on bottom right
Image Free Rotate Left by 15%
Select Skullie Bat Element - resize by 25%
Image mirror and paste on bottom right
Select Flower 2 Element - resize by 25%
Paste and position on bottom right
Select Cranial Heart Element - resize by 35%
Paste and position on bottom right
Image Free Rotate Left by 15%
Select Shoe Element - resize by 30%
Paste and position on bottom right
Select Tiara Element - resize by 35%
Image mirror and paste on bottom left
Select Bloody Eye Element - resize by 30%
Paste and position on bottom left
Select Fairy & Skull Element - resize by 35%
Paste and position on bottom left
Select Lollipop 2 Element - resize by 40%
Image Free Rotate Left by 15% and paste on bottom left
Select Butterfly 1 Element - resize by 30%
Paste and position on top left
Image Free Rotate Left by 15%
Select new raster layer and flood fill with color or gradient of choice
Move layer to the bottom of the template
Apply Mask 14
Merge group and move to the bottom layer
Add any additional elements you like.
Add any dropshadows you like
Crop and resize as desired
Add copyright info, license number and name
You're done! Thanks for trying my tutorial!
Labels:Celinart Pinup | 0
comments
Monday, January 27, 2014
WILD BLACK ROSE
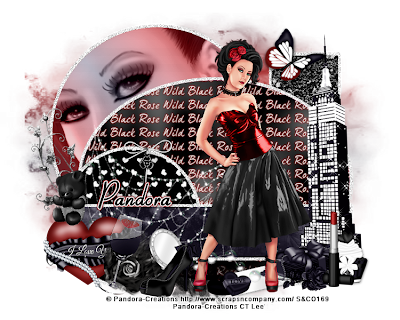
Supplies needed:
I am using the amazing artwork from Pandora Creations for this tutorial which you can find here
Scrapkit: I am using an awesome matching kit from Bibi's Colloctions called "Wild Black Rose" which you can get by going here
Template 71 from Tracey which can be found here
Mask 21 from Gina Gems which you can find here
Plugins used: Xero - Radiance, Xero-Bad Dream, Lokas 3D Shadow
----------------------------
This tutorial is written for those who have working knowledge of PSPX2 (any version will do).
This tutorial was written by me on January 27, 2014. Please do not copy or paste on any other forum, website or blog provide link back to tut only. Please do not claim as your own. This tutorial is copyrighted to me. Any resemblance to any other tutorial is purely coincidental.
Ok - let's start and remember to save often.
Open the template and using your shortcut keys on your keyboard (SHIFT+D) duplicate the template as a new image. Close the original and delete the copywrite layer.
Adjust canvas size to 750 x 650
Select Rectangle 2 layer
Select all, float, defloat
Paste paper 8
Select invert, delete, select none
Delete/Hide original rectangle layer
Select Circle 2 layer
Select all, float, defloat
Paste paper 10
Select invert, delete, select none
Delete/Hide original circle layer
Select Oval layer
Select all, float, defloat
Paste paper 11
Select invert, delete, select none
Delete/Hide original oval layer
Select Rectangle 1 layer
Select all, float, defloat
Paste paper 6
Select invert, delete, select none
Delete/Hide origianl rectangle layer
Select Circle 1 layer
Select all, float, defloat
Add new raster layer and flood-fill with gradient of choice (style, Angle 45, Repeat 2)
Paste close-up tube of choice on top of gradient and delete
Change close-up to Luminance (Legacy)
Apply Xero Bad Dream at default settings or random setting of choice
Apply dropshadow and merge close-up down on top of gradient layer
Effects, Texture Effects, Blinds (Width 2, Opactity 15, Horizontal and Light from left/top checked)
Delete/Hide orginal circle layer
Copy and paste tube of choice and position where desired
Apply Xero Radiance at setting of choice
Apply Lokas 3D Shadow at default settings
Select Element 45 - resize by 60%
Paste and position on right side
Select Element 41 - resize by 15%
Paste and position on bottom right
Select Element 12 - resize by 40%
Paste and position on bottom right
Select Element 1 - resize by 30%
Paste and position on bottom right
Select Element 46 - resize by 20%
Paste and position on bottom left
Select Element 18 - resize by 20%
Paste and position on left side
Select Element 17 - resize by 35%
Paste and position on bottom left
Select Element 24 - resize by 15%
Paste and position on bottom left
Select Element 52 - resize by 40%
Image mirror and paste on bottom left
Select Element 40 - resize by 15%
Paste and position on bottom left
Select Element 9 - resize by 20%
Paste and position on bottom
Select Element 44 - resize by 50%
Paste and position on top right
Select new raster layer and flood fill with color or gradient of choice
Move layer to the bottom of the template
Apply Mask 21
Merge group and move to the bottom layer
Add any additional elements you like.
Add any dropshadows you like
Crop and resize as desired
Add copyright info, license number and name
You're done! Thanks for trying my tutorial!
Sunday, January 26, 2014
HELL'S PLAYGROUND
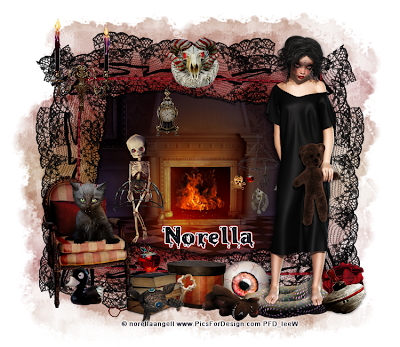
Supplies needed:
I am using the amazing art from Designs by Norella for for this tutorial, which you can find here
Scrapkit: I am using an awesome kit from SussieM called "Hell's Kindergarten" which you can get by going here
Mask 22 from Becky which you can find here
Plugins used: Xero - Bad Dream, Xero-Radiance, Lokas 3D Shadow
----------------------------
This tutorial is written for those who have working knowledge of PSPX2 (any version will do).
This tutorial was written by me on January 26, 2013. Please do not copy or paste on any other forum, website or blog provide link back to tut only. Please do not claim as your own. This tutorial is copyrighted to me. Any resemblance to any other tutorial is purely coincidental.
Ok - let's start and remember to save often.
Open up a 750 x 650 blank canvas (we can resize it later)
Select Frame Lace 2 Element and paste in the center of the canvas
Resize by 18%
Select your magic wand tool and click in the center of each of the Frame (Add (Shift), RGB Value, Tolerance 25, Contiguous checked, Feather 0)
Selections, Modify, Expand by 5
Paste paper 3 - resize as desired
Select invert, delete, select none
Paste tube of choice where desired
Apply Xero Radiance at setting of choice
Apply Lokas 3D Shadow at default settings
Select Skull Head Element - resize by 5%
Paste and position on top center
Select Chair Element - resize by 15%
Paste and position on bottom left
Select Kitten Element - resize by 10%
Paste and position on top of chair element
Select Duck Element - resize by 8%
Paste and position on bottom left
Select Books2 Element - resize by 10%
Image mirror and paste on bottom left
Select Bunny Toy Element - resize by 5%
Paste and position on bottom left
Select Box Element - resize by 8%
Paste and position on bottom
Select Eyeball 4 Element - resize by 20%
Paste and position on bottom
Select Bear Element - resize by 12%
Paste and position on bottom
Select Pillow2 Element - resize by 15%
Paste and position on bottom right
Select Toy Element - resize by 8%
Paste and position on bottom right
Select Lisa Skinner Element - resize by 10%
Paste and position in center where desired
Select Toy Carusel Element - resize by 10%
Paste and position in center where desired
Apply Mask 22 merge group and move to bottom layer
Add any additional elements you like.
Add any dropshadows you like
Sharpen any elements as needed
Crop and resize as desired
Add copyright info, license number and name
You're done! Thanks for trying my tutorial!
Labels:Designs By Norella | 0
comments
Saturday, January 25, 2014
PHOENIX
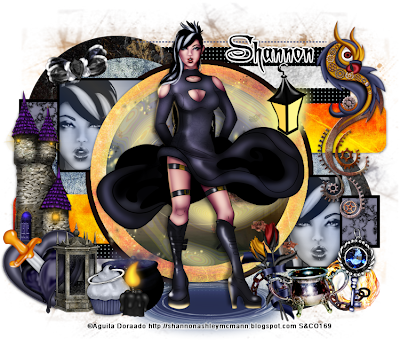
Supplies needed:
I am using the amazing artwork from Aguila Dorado for this tutorial which you can find here
Scrapkit: I am using an awesome matching kit from DNScraps called "Phoenix" which you can get by going here
Collab Template from Minxy and Rosey which can be found here
Mask 112 from Trese which you can find here
Plugins used: Eyecandy 4000 - Marble, Xero - Radiance, Xero-Bad Dream, Lokas 3D Shadow
----------------------------
This tutorial is written for those who have working knowledge of PSPX2 (any version will do).
This tutorial was written by me on January 25, 2014. Please do not copy or paste on any other forum, website or blog provide link back to tut only. Please do not claim as your own. This tutorial is copyrighted to me. Any resemblance to any other tutorial is purely coincidental.
Ok - let's start and remember to save often.
Open the template and using your shortcut keys on your keyboard (SHIFT+D) duplicate the template as a new image. Close the original and delete the copywrite layer.
Select Wordart Raster 13 layer and delete
Select Circle Raster 6 layer
Select all, float, defloat
Paste paper 10
Select invert, delete, select none
Delete/Hide original circle layer
Select Circle Raster 7 layer
Select all, float, defloat
Paste paper 12
Select invert, delete, select none
Delete/Hide original circle layer
Select Hallo2 Element - resize by 50%
Paste and position on top of center circle
Select Square Frame Raster 1 layer
Select all, float, defloat
Add new raster layer and flood-fill with color of choice
Select none
Delete/Hide original square layer
Select Square Copy of Raster 1 layer and repeat above steps
Select Square Raster 9 layer
Select all, float, defloat
Add new raster layer and flood-fill with gradient of choice (style, Angle 45, Repeat 2)
Paste close-up tube of choice on top of gradient and delete
Change close-up to Luminance (Legacy)
Apply Xero Bad Dream at default settings or random setting of choice
Drop opactiy down to 75%
Apply dropshadow and merge close-up down on top of gradient layer
Effects, Texture Effects, Blinds (Width 2, Opactity 15, Horizontal and Light from left/top checked)
Delete/Hide orginal square layer
Select Square Copy of Raster 9 layer and repeat above steps
Select Dotted Line Raster 12 layer
Add new raster layer and flood-fill with color of choice
Reselect dotted line - select all, float, defloat
Go back to color layer you just filled
Select invert, delete, select none
Delete/Hide original dotted line
Select Dotted Line Copy of Raster 12 and repeat above steps
Select Square Frame Raster 10 layer
Select all, float, defloat
Add new raster layer and flood-fill with color of choice
Select none
Delete/Hdie original frame layer
Select Square Frame Copy of Raster 10 and repeat above steps
Select Square Raster 11 layer
Apply Eyecandy Marble with the following settings:
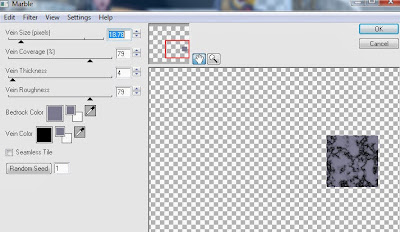
Select Square Copy of Raster 11 layer and repeat above steps
Select Circle Raster 4 layer
Select all, float, defloat
Add new raster layer and flood-fill with color of choice
Select none
Delete/Hide original circle layer
Select Rectangle Promoted Selection layer
Select all, float, defloat
Paste paper 7
Select invert, delete, select none
Delete/Hide original rectangle layer
Select Copy of Promoted Selection layer and repeat above steps
Select Circle Raster 3 layer
Select all, float, defloat
Paste paper 5
Select invert, delete, select none
Delete/Hide original circles layer
Select Circles Raster 5 layer
Select all, float, defloat
Paste paper 2
Select invert, delete, select none
Delete/Hide original circles layer
Select Strip Raster 8 layer
Select all, float, defloat
Paste paper 3
Select invert, delete, select none
Delete/Hide original strip layer
Select Strip Copy of Raster 8 layer and repeat above steps
Select Rectangle Raster 2 layer
Apply Effects, Texture Effects, Weave (Gap size 2, Width 5, Opacity 10, Fill gaps checked, change Gap and Weave color to one of choice)
Select Promoted Selection 1 and repeat above steps
Select Water Element - resize by 40%
Paste and position on bottom
Copy and paste tube of choice and position where desired
Apply Xero Radiance at setting of choice
Apply Lokas 3D Shadow at default settings
Select Bird Element - resize by 50%
Paste and position on top right
Select Latterns2 Element - resize by 20%
Paste and position on top right
Select Castle Element - resize by 40%
Image mirror and paste on left side
Select Heart Element - resize by 20%
Image Free Rotate Left by 15% and paste on bottom left
Select Heart and Dagger Element - resize by 20%
Paste and position on bottom left
Select Prop 24 Element - resize by 30%
Paste and position on bottom left
Select Angel Cupcake Element - resize by 12%
Paste and position on bottom left
Select Cauldron Element - resize by 20%
Paste and position on bottom left
Select Light Candle Element - resize by 15%
Paste and position on bottom left
Select Fire Element - resize by 15%
Paste and position on bottom right
Select Cup Element - resize by 20%
Paste and position on bottom right
Select Key Element - resize by 20%
Paste and position on bottom right
Select Ribbon and Roses Element - resize by 25%
Image Free Rotate Left by 15% and paste on bottom right
Select new raster layer and flood fill with color or gradient of choice
Move layer to the bottom of the template
Apply Mask 112
Merge group and move to the bottom layer
Add any additional elements you like.
Add any dropshadows you like
Crop and resize as desired
Add copyright info, license number and name
You're done! Thanks for trying my tutorial!
Labels:Scraps N Company | 0
comments
BEAUTIFULLY BROKEN
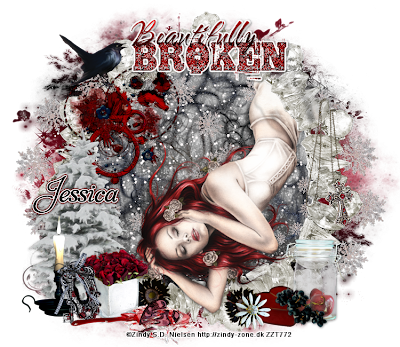
Supplies needed:
I am using the amazing art from Zindy S.D. Nielsen for for this tutorial, which you can find here
Scrapkit: I am using an stunning kit from Gothic Inspirations called "Midnight Snow" which you can get by going here
Mask 20 from Moonbeams and Spiderwebs which you can find here
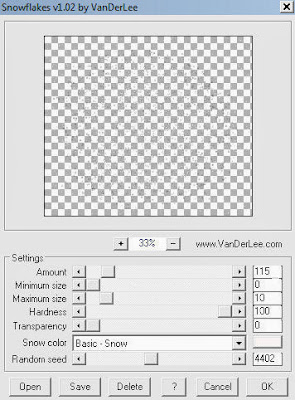
Plugins used: Vanderlee - Snowflakes (optional), Xero - Bad Dream, Xero-Radiance, Lokas 3D Shadow
----------------------------
This tutorial is written for those who have working knowledge of PSPX2 (any version will do).
This tutorial was written by me on January 25, 2013. Please do not copy or paste on any other forum, website or blog provide link back to tut only. Please do not claim as your own. This tutorial is copyrighted to me. Any resemblance to any other tutorial is purely coincidental.
Ok - let's start and remember to save often.
Open up a 750 x 650 blank canvas (we can resize it later)
Select Frame Element 5 and paste in the center of the canvas
Resize by 75%
Select your magic wand tool and click in the center of each of the Frame (Add (Shift), RGB Value, Tolerance 25, Contiguous checked, Feather 0)
Selections, Modify, Expand by 5
Paste paper 7
Select invert, delete, select none
Select Mask Element - resize by 55%
Paste in the center of canvas and move below frame layer
Select the center of the frame again and expand by 5
Add new raster layer and apply Vanderlee Snowflake with the following settings:
Select none
Paste tube of choice where desired
Apply Xero Radiance at setting of choice
Apply Lokas 3D Shadow at default settings
Select Pattern Element - resize by 40%
Paste and position on top left
Select Tree2 Element - resize by 50%
Paste and position on bottom left
Select Candle Element - resize by 35%
Image mirror and paste on bottom left
Select Roses Element - resize by 25%
Paste and position on bottom left
Select Cluster 1 Element - resize by 25%
Paste and positon on bottom left
Image Free Rotate left by 15%
Select BrokenHeart Element - resize by 40%
Paste and position on bottom left
Select Jar Element - resize by 30%
Paste and position on bottom right
Select Heartbox Element - resize by 20%
Paste and position on bottom right
Select Berries Element - resize by 20%
Paste and position on bottom right
Select Flower1 Element - resize by 12%
Paste and position on bottom right
Select Necklace Element - resize by 35%
Paste and position on top right
Select WA1 Element - resize by 55%
Paste and position on top
Apply Eyecandy Gradient Glow on fat default settings (Glow Width 3)
Add new raster layer and flood-fill with color or gradient of choice
Apply Mask 20 merge group and move to bottom layer
Add any additional elements you like.
Add any dropshadows you like
Sharpen any elements as needed
Crop and resize as desired
Add copyright info, license number and name
You're done! Thanks for trying my tutorial!
Labels:Gothic Inspirations | 1 comments
Thursday, January 23, 2014
SWEETIE PIE
Supplies needed:
I am using the amazing artwork from Designs by Norella for this tutorial which you can find here
Scrapkit: I am using an beautiful kit from Amy Marie called "Anjelica" which you can get by going here
Template 1 from Stalked Inspirations by Stayyseee which can be found here
Mask M4 from Kylie which you can find on the Misfits Blog here
Plugins used: Eyecandy 4000 - Marble, Eyecandy 4000 - Gradient Glow, Xero - Radiance, Xero-Bad Dream, Lokas 3D Shadow
----------------------------
This tutorial is written for those who have working knowledge of PSPX2 (any version will do).
This tutorial was written by me on January 23, 2014. Please do not copy or paste on any other forum, website or blog provide link back to tut only. Please do not claim as your own. This tutorial is copyrighted to me. Any resemblance to any other tutorial is purely coincidental.
Ok - let's start and remember to save often.
Open the template and using your shortcut keys on your keyboard (SHIFT+D) duplicate the template as a new image. Close the original and delete the copywrite layer.
Select Top Rt Heart layer
Select all, float, defloat
Add new raster layer and flood-fill with color of choice
Select none
Apply Eyecandy Marble with the following settings:
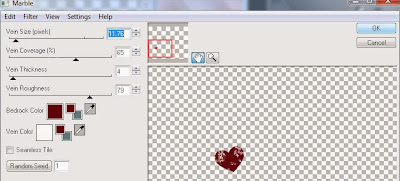
Apply Eyecandy Gradient Glow on fat default settings (Glow Width 3)
Delete/Hide original heart layer
Select remaining small hearts layers and repeat above steps
Select Big Red Heart Layer
Select all, float, defloat
Add new raster layer and flood-fill with gradient of choice (style, Angle 45, Repeat 2)
Paste close-up tube of choice on top of gradient and delete
Change close-up to Luminance (Legacy)
Apply Xero Bad Dream at default settings or random setting of choice
Apply dropshadow and merge close-up down on top of gradient layer
Effects, Texture Effects, Blinds (Width 2, Opactity 15, Horizontal and Light from left/top checked)
Delete/Hide orginal heart layer
Select Top Black Circle layer
Apply Eyecandy Marble with the following settings:
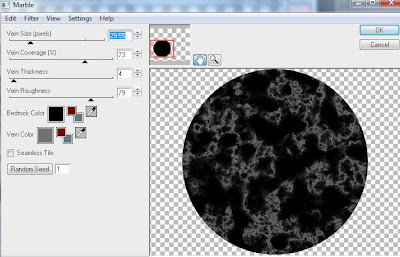
Select Bottom Lft Circle and repeat above steps
Select Medium Black Circle layer
Select all, float, defloat
Paste paper 1
Select invert, delete, select none
Delete/Hide original circle layer
Select Big Red Circle layer
Select all, float, defloat
Add new raster layer and flood-fill with color of choice
Select none
Adjust, Add/Remove Noise, Add Noise (Uniform checked, Noise 100%, Monochrome checked)
Delete/Hide original circle layer
Select Top Left Rectanglt layer
Select all, float, defloat
Paste paper 9
Select invert, delete, select none
Delete/Hide original rectangle layer
Select Bottom Rt Rectangle layer and repeat above steps
Select Bottom Rt Square layer
Select all, float, defloat
Paste paper 5
Select invert, delete, select none
Delete/Hide original square layer
Select Top Lft Square layer and repeat above steps
Copy and paste tube of choice and position where desired
Apply Xero Radiance at setting of choice
Apply Lokas 3D Shadow at default settings
Select Element 60 - resize by 40%
Paste and position on bottom right
Select Element 72 - resize by 30%
Paste and position on bottom right
Select Element 62 - resize by 60%
Paste and position on bottom right
Image Free Rotate Right by 15%
Select Element 77 - resize by 25%
Paste and position on bottom right
Select Element 20 - resize by 30%
Paste and position on bottom right
Image Free Rotate Left by 15%
Select Element 34 - resize by 40%
Paste and position on bottom left
Select Element 75 - resize by 45%
Paste and position on bottom left
Image Free Rotate Left by 15%
Select Element 85 - resize by 35%
Paste and position on bottom left
Select Element 58 - resize by 30%
Paste and position on bottom left
Select Element 69 - resize by 35%
Paste and position on top right
Select new raster layer and flood fill with color or gradient of choice
Move layer to the bottom of the template
Apply Mask M4
Merge group and move to the bottom layer
Add any additional elements you like.
Add any dropshadows you like
Crop and resize as desired
Add copyright info, license number and name
You're done! Thanks for trying my tutorial!
Labels:Amy Marie,Designs By Norella | 0
comments
Wednesday, January 22, 2014
PROMISES
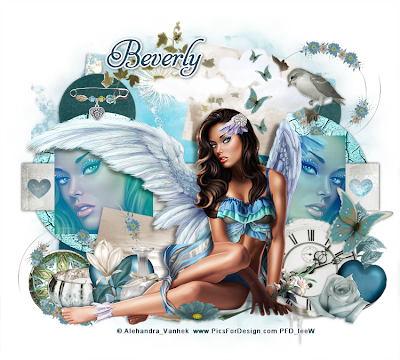
Supplies needed:
I am using the amazing artwork from Alehandra Vanhek for this tutorial which you can find here
Scrapkit: I am using an beautiful kit from Horseplay's Pasture Designs called "Promises" which you can get by going here
Blog Train Template 4 from Millie which can be found here
Mask 21 from Gina Gems which you can find here
Plugins used: Eyecandy 4000 - Glass, Eyecandy 4000 - Gradient Glow, Xero - Radiance, Xero-Bad Dream, Lokas 3D Shadow
----------------------------
This tutorial is written for those who have working knowledge of PSPX2 (any version will do).
This tutorial was written by me on January 22, 2014. Please do not copy or paste on any other forum, website or blog provide link back to tut only. Please do not claim as your own. This tutorial is copyrighted to me. Any resemblance to any other tutorial is purely coincidental.
Ok - let's start and remember to save often.
Open the template and using your shortcut keys on your keyboard (SHIFT+D) duplicate the template as a new image. Close the original and delete the copywrite layer.
Select Square 11 layer
Select all, float, defloat
Paste paper 2
Select invert, delete, select none
Delete/Hide original square layer
Select Square 10 layer and repeat above steps
Select Square 9 layer
Select all, float, defloat
Add new raster layer and flood-fill with gradient of choice (style, Angle 45, Repeat 2)
Paste close-up tube of choice on top of gradient and delete
Change close-ups to Overlay
Apply Xero Bad Dream at default settings or random setting of choice
Apply dropshadow and merge close-up down on top of gradient layer
Effects, Texture Effects, Blinds (Width 2, Opactity 15, Horizontal and Light from left/top checked)
Delete/Hide orginal square layer
Select Square 8 layer and repeat above steps
Select Hearts 7 layer
Select all, float, defloat
Paste paper 3
Select invert, delete, select none
Apply Eyecandy Glass on default settings
Delete/Hide original hearts layer
Select Strip 6 layer
Select all, float, defloat
Paste paper 7
Select invert, delete, select none
Delete/Hide original strip layer
Select Circle 5 layer
Select all, float, defloat
Paste paper 1
Select invert, delete, select none
Delete/Hide original circle layer
Select Circle 4 layer and repeat above steps
Select Circles 3 layer
Select all, float, defloat
Paste paper 12
Select invert, delete, select none
Delete/Hide original circles layer
Select Circle 2 layer and repeat above steps
Select Square 1 layer
Select all, float, defloat
Paste paper 6
Select invert, delete, select none
Delete/Hide original square layer
Copy and paste tube of choice and position where desired
Apply Xero Radiance at setting of choice
Apply Lokas 3D Shadow at default settings
Select Element 45 - resize by 45%
Paste and position on top right
Image duplicate, mirror and flip
Select Element 26 - resize by 40%
Paste and position on top right
Select Element 52 and paste on top where desired
Select Element 66 - resize by 40%
Paste and position on top right
Select Element 67 - resize by 45%
Paste and position on bottom right
Select Element 8 - resize by 35%
Image Free Rotate Right by 15% and paste on bottom right
Select Element 79 - resize by 40%
Paste and position on bottom right
Select Element 28 - resize by 55%
Paste and position on bottom right
Select Element 69 - resize by 40%
Paste and position on bottom left
Select Element 73 - resize by 35%
Paste and position on bottom left
Select Element 49 - resize by 45%
Paste and position on bottom left
Select new raster layer and flood fill with color or gradient of choice
Move layer to the bottom of the template
Apply Mask 113
Merge group and move to the bottom layer
Add any additional elements you like.
Add any dropshadows you like
Crop and resize as desired
Add copyright info, license number and name
You're done! Thanks for trying my tutorial!
Labels:Horseplay's Pasture Designs | 0
comments
Tuesday, January 21, 2014
YOUR SWEETHEART
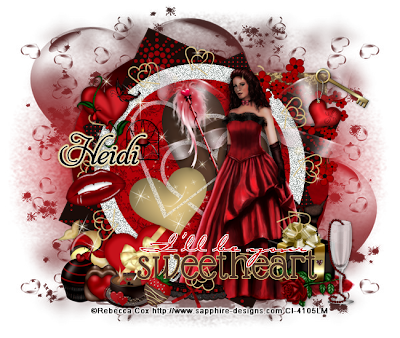
Supplies needed:
I am using the amazing artwork from Rebecca Cox for this tutorial which is no longer available for purchase but you can find her artwork here
Scrapkit: I am using an beautiful kit from ScottishButterfly Creations called "Love Me Tender" which you can get by going here
Valentine Template 11 from Leah which can be found here
Mask M2 from Kylie which you can find on the Misfits Blog here
Plugins used: Eyecandy 4000 - Marble, Eyecandy 4000 - Gradient Glow, Xero - Radiance, Lokas 3D Shadow
----------------------------
This tutorial is written for those who have working knowledge of PSPX2 (any version will do).
This tutorial was written by me on January 21, 2014. Please do not copy or paste on any other forum, website or blog provide link back to tut only. Please do not claim as your own. This tutorial is copyrighted to me. Any resemblance to any other tutorial is purely coincidental.
Ok - let's start and remember to save often.
Open the template and using your shortcut keys on your keyboard (SHIFT+D) duplicate the template as a new image. Close the original and delete the copywrite layer.
Adjust canvas size to 650 x 550
Select Words 2 layer
Select all, float, defloat
Add new raster layer and flood-fill with color or gradient of choice
Select none
Delete/Hide original words layer
Select Words 2 back layer
Add new raster layer and flood-fill with color of choice
Reselect words layer
Select all, float, defloat
Go back to color layer you just filled
Select invert, delete, select none
Delete/Hide original back layer
Select Words 2 fadded layer and repeat above steps
Select Hearts 2 layer
Adjust, Add/Remove Noise, Add Noise (Uniform checked, Noise 75%, Monochrome checked)
Select Heart 3 layer
Select all, float, defloat
Add new raster layer and flood-fill with color of choice
Select none
Apply Eyecandy Glass on default settings
Select/Hide original Heart layer
Select Heart 4 layer and repeat above steps
Select Circle 5 layer
Select all, float, defloat
Paste paper 4
Select invert, delete, select none
Delete/Hide original circle layer
Select Circle 6 layer
Select all, float, defloat
Add new raster layer and flood-fill with color of choice
Select none
Adjust, Add/Remove Noise, Add Noise (Uniform checked, Noise 75%, Monochrome checked)
Delete/Hide original circle layer
Select Square 7 layer
Select all, float, defloat
Add new raster layer and flood-fill with color of choice
Select none
Apply Effects, Texture Effects, Weave (Gap size 2, Width 5, Opacity 10, Fill gaps checked, change Gap and Weave color to one of choice)
Delete/Hide original square layer
Select Square 8 layer
Select all, float, defloat
Paste paper 10
Select invert, delete, select none
Delete/Hide original square layer
Select Circle 9 layer
Select all, float, defloat
Paste paper 6
Select invert, delete, select none
Delete/Hide original circle layer
Select Circle 10 and repeat above steps
Select Square 11 layer
Select all, float, defloat
Add new raster layer and flood-fill with color of choice
Select none
Apply Eyecandy Marble with the following settings:
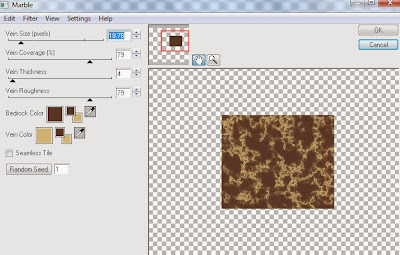
Delete/Hide original square layer
Select Square 12 layer and repeat above steps
Copy and paste tube of choice and position where desired
Apply Xero Radiance at setting of choice
Apply Lokas 3D Shadow at default settings
Select Flowers Corner Element - resize by 55%
Image mirror and paste on top right corner
Select Present Element - resize by 25%
Paste and position on bottom right
Select Candy Element - resize by 55%
Paste and position on bottom left
Select Cupcake Element - resize by 25%
Paste and position on bottom left
Select HeartBonBon Element - resize by 20%
Paste and position on bottom left
Select BoxofChocolates Element - resize by 30%
Image Free Rotate Left by 15% and paste on bottom left
Select Cocoa Element - resize by 30%
Paste and position on bottom left
Select Strawberries Element and select strawberry of choice
Resize by 30% and paste on bottom left
Select Garter Element - resize by 25%
Paste and position on bottom
Select Heart1 Element - resize by 30%
Paste and position on top left
Select new raster layer and flood fill with color or gradient of choice
Move layer to the bottom of the template
Apply M2 Mask
Merge group and move to the bottom layer
Add any additional elements you like.
Add any dropshadows you like
Crop and resize as desired
Add copyright info, license number and name
You're done! Thanks for trying my tutorial!
Labels:ScottishButterfly Creations | 0
comments
Monday, January 20, 2014
MY SWAG
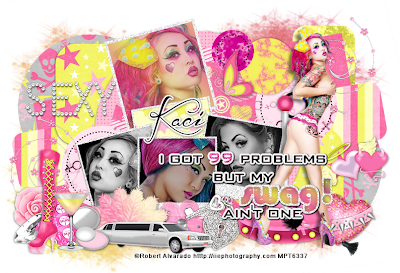
Supplies needed:
I am using the amazing artwork from Robert Alvarado for this tutorial which is no longer available for purchase. You can view his artwork here
Scrapkit: I am using an beautiful kit from Scrappin Krazy Designs called "Blush" which you can get by going here
Collab Template from Minxy and Rosey which can be found here
Mask 16 from Gina Gems which you can find here
Plugins used: Eyecandy 4000 - Marble, Eyecandy 4000 - Glass, Eyecandy 4000 - Gradient Glow, Xero - Radiance, Xero - Bad Dream, Lokas 3D Shadow
----------------------------
This tutorial is written for those who have working knowledge of PSPX2 (any version will do).
This tutorial was written by me on January 20, 2014. Please do not copy or paste on any other forum, website or blog provide link back to tut only. Please do not claim as your own. This tutorial is copyrighted to me. Any resemblance to any other tutorial is purely coincidental.
Ok - let's start and remember to save often.
Open the template and using your shortcut keys on your keyboard (SHIFT+D) duplicate the template as a new image. Close the original and delete the copywrite layer.
Adjust canvas size to 750 x 625
Select all Wordart layer
Select your selections tool and select the wordart you would like to change the color
Add new raster layer and flood-fill with color or gradient of choice
Select none
Apply Eyecandy Glass on default setting on "Swag" wording
Apply Gradient Glow on fat default settings (Glow width 3)
Select Frame Raster 11 layer
Adjust, Add/Remove Noise, Add Noise (Uniform checked, Noise 75%, Monochrome checked)
Select the background picture frame on Raster 12 layer
Select all, float, defloat
Paste close-up tubes/ paper of choice on top where desired
Select invert, delete, select none
Change close-ups to Luminence (Legacy) on left and right and Screen for middle
Apply Xero Bad Dream at default settings or random setting of choice
Apply dropshadow and merge close-up down on top of background layer
Select Square Raster 6 layer
Select all, float, defloat
Add new raster layer and flood-fill with gradient of choice (style, Angle 45, Repeat 2)
Paste close-up tube of choice on top of gradient and delete
Drop opacity on close-up down to 60%
Apply Xero Bad Dream at default settings or random setting of choice
Apply dropshadow and merge close-up down on top of gradient layer
Effects, Texture Effects, Blinds (Width 2, Opactity 15, Horizontal and Light from left/top checked)
Delete/Hide orginal square layer
Select Circles 1 layer
Apply Eyecandy Marble with the following settings:
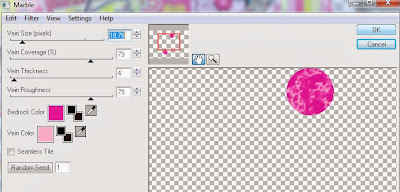
Select Circles 2 layer
Select all, float, defloat
Add new raster layer and flood-fill with color of choice
Select none
Apply same marble settings as above
Delete/Hide original circles layer
Select Circles 3 layer
Select all, float, defloat
Paste paper 12
Select invert, delete, select none
Delete/Hide original circles layer
Select Light Pink Circle layer
Select all, float, defloat
Paste paper 2
Select invert, delete, select none
Delete/Hide original circle layer
Select Big Black Circle layer
Select all, float, defloat
Paste paper 10
Select invert, delete, select none
Apply Effects, Texture Effects, Weave (Gap size 2, Width 5, Opacity 10, Fill gaps checked, change Gap and Weave color to one of choice)
Delete/Hide original circle layer
Select Left Purple Rectangle layer
Select all, float, defloat
Paste paper 4
Select invert, delete, select none
Delete/Hide original rectangle layer
Select Right Purple Rectangle layer and repeat above steps
Select Right Pink Rectangle layer
Select all, float, defloat
Paste paper 1
Select invert, delete, select none
Delete/Hide original rectangle layer
Select Left Pink Rectangle layer and repeat above steps
Select Right Blue Square layer
Select all, float, defloat
Paste paper 8
Select invert, delete, select none
Delete/Hide original square layer
Select Left Blue Square layer and repeat above steps
Select Circle Raster 7 layer
Select all, float, defloat
Paste paper 5
Select invert, delete, select none
Delete/Hide original circle layer
Select Circle Copy of Raster 7 and repeat above steps
Select Strip Raster 10 layer
Select all, float, defloat
Paste paper 14
Select invert, delete, select none
Delete/Hide original strip layer
Select Copy of Raster 10 layer and repeat above steps
Copy and paste tube of choice and position where desired
Apply Xero Radiance at setting of choice
Apply Lokas 3D Shadow at default settings
Select Element 24 - resize by 60%
Paste and position on bottom right below tube layer
Select Element 23 - resize by 35%
Image Free Rotate Right by 15% and paste on bottom right
Select Element 8 - resize by 45%
Paste and position on right side where desired
Select Element 55 - resize by 75%
Paste and position on top left
Select Element 25 - resize by 40%
Paste and position on bottom left
Image, duplicate, mirror and flip
Select Element 47 - resize by 45%
Paste and position on bottom left
Select Element 70 - resize by 50%
Paste and position on bottom right
Select Element 4 - resize by 65%
Paste and position on bottom left
Select Element 50 - resize by 45%
Paste and position on bottom left
Select Element 3 - resize by 30%
Paste and position on bottom left
Select Element 28 - resize by 30%
Image mirror and paste on bottom left
Select Element 80 - resize by 50%
Image Free Rotate Right by 15% and paste on bottom
Select Element 14 - resize by 50%
Paste and position on bottom
Select Element 41 - resize by 40%
Image Free Rotate Right by 15% and paste on bottom
Select new raster layer and flood fill with color or gradient of choice
Move layer to the bottom of the template
Apply Mask 16
Merge group and move to the bottom layer
Add any additional elements you like.
Add any dropshadows you like
Crop and resize as desired
Add copyright info, license number and name
You're done! Thanks for trying my tutorial!
Labels:Scrappin Krazy Designs | 0
comments
Friday, January 17, 2014
YOUR KISS
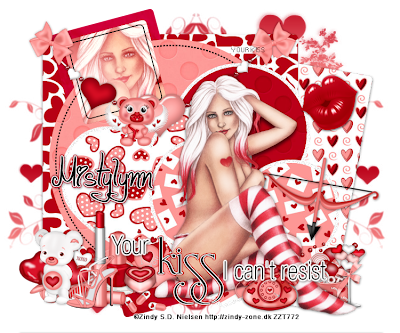
Supplies needed:
I am using the amazing artwork from Zindy S.D. Nielsen for this tutorial which you can find here
Scrapkit: I am using an beautiful kit from Mistylynn's Creations called "Valentine Time" which you can get by going here
Valentine Template 1 from Dee which can be found here
Valentine Mask 4 from Gabee which you can find here
Plugins used: Eyecandy 4000 - Gradient Glow, Xero - Radiance, Xero - Bad Dream, Lokas 3D Shadow
----------------------------
This tutorial is written for those who have working knowledge of PSPX2 (any version will do).
This tutorial was written by me on January 17, 2014. Please do not copy or paste on any other forum, website or blog provide link back to tut only. Please do not claim as your own. This tutorial is copyrighted to me. Any resemblance to any other tutorial is purely coincidental.
Ok - let's start and remember to save often.
Open the template and using your shortcut keys on your keyboard (SHIFT+D) duplicate the template as a new image. Close the original and delete the copywrite layer.
Adjust canvas size to 750 x 625
Select all Wordart layers
Apply Gradient Glow on fat default settings (Glow width 3)
Select Light Pink Heart layer
Select all, float, defloat
Paste paper 4
Select invert, delete, select none
Delete/Hide original heart layer
Select Dark Pink Heart layer
Select all, float, defloat
Paste paper 1
Select invert, delete, select none
Delete/Hide original heart layer
Select Brown Circle layer
Select all, float, defloat
Paste paper 13
Select invert, delete, select none
Delete/Hide original circle layer
Select Small Creme Square layer
Select all, float, defloat
Add new raster layer and flood-fill with gradient of choice (style, Angle 45, Repeat 2)
Paste close-up tube of choice on top of gradient and delete
Change close-up to Screen
Apply Xero Bad Dream at default settings or random setting of choice
Apply dropshadow and merge close-up down on top of gradient layer
Delete/Hide orginal square layer
Select Gold Circle layer
Select all, float, defloat
Paste paper 12
Select invert, delete, select none
Delete/Hide original circle layer
Select Tan Strip layer
Select all, float, defloat
Paste paper 10
Select invert, delete, select none
Delete/Hide original strip layer
Select Large Creme Square layer
Select all, float, defloat
Paste paper 7
Select invert, delete, select none
Delete/Hide original square layer
Select Brown Square layer
Select all, float, defloat
Paste paper 5
Select invert, delete, select none
Delete/Hide original square layer
Select Element 39 and paste on top where desired
Copy and paste tube of choice and position where desired
Apply Xero Radiance at setting of choice
Apply Lokas 3D Shadow at default settings
Select Element 21 - resize by 30%
Paste and position on bottom right
Select Element 26 - resize by 30%
Paste and position on bottom right
Select Element 19 - resize by 25%
Image Free Rotate Left by 15% and paste on bottom left
Select Element 24 - resize by 35%
Paste and position on bottom left
Select Element 17 - resize by 25%
Paste and position on bottom left
Select Element 51 - resize by 45%
Paste and position on bottom left
Select Element 52 - resize by 30%
Paste and positon on bottom left
Select Element 49 - resize by 25%
Paste and position on bottom left
Select Element 27 - resize by 15%
Paste and position on bottom left
Select Element 47 - resize by 20%
Paste and position on bottom left
Select Element 13 - resize by 30%
Paste and positon on bottom
Select Element 45 - resize by 38%
Paste and position on top right
Select new raster layer and flood fill with color or gradient of choice
Move layer to the bottom of the template
Apply Mask 4
Merge group and move to the bottom layer
Add any additional elements you like.
Add any dropshadows you like
Crop and resize as desired
Add copyright info, license number and name
You're done! Thanks for trying my tutorial!
Thursday, January 16, 2014
CUPID CUTIE
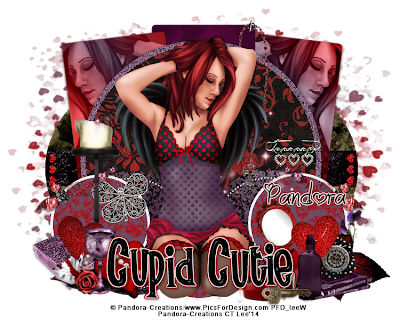
Supplies needed:
I am using the amazing artwork from Pandora-Creations for this tutorial which you can find here
Scrapkit: I am using an beautiful kit from Disturbed Scraps called "Dark Love Memories" which you can get by going here
Valentine Template 3 from Dee which can be found here
SG-HeartBurst Mask from Essex Girl which you can find here
Plugins used: Eyecandy 4000 - Marble, Eyecandy 4000 - Glass, Eyecandy 4000 - Gradient Glow, Xero - Radiance, Xero - Bad Dream, Lokas 3D Shadow
----------------------------
This tutorial is written for those who have working knowledge of PSPX2 (any version will do).
This tutorial was written by me on January 16, 2014. Please do not copy or paste on any other forum, website or blog provide link back to tut only. Please do not claim as your own. This tutorial is copyrighted to me. Any resemblance to any other tutorial is purely coincidental.
Ok - let's start and remember to save often.
Open the template and using your shortcut keys on your keyboard (SHIFT+D) duplicate the template as a new image. Close the original and delete the copywrite layer.
Adjust canvas size to 750 x 600
Select Wordart layer
Apply Eyecandy Glass on default settings
Apply Gradient Glow on fat default settings (Glow width 3)
Select White Hearts layer
Select all, float, defloat
Add new raster layer and flood-fill with color of choice
Select none
Adjust, Add/Remove Noise, Add Noise (Uniform checked, Noise 75%, Monochrome checked)
Apply Eyecandy Glass on default settings
Delete/Hide original hearts layer
Select Pink Circles layer
Select all, float, defloat
Add new raster layer and flood-fill with color of choice
Select none
Apply Eyecandy - Marble with the following settings:
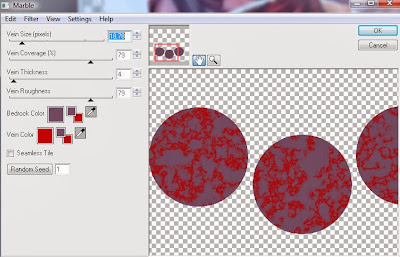
Delete/Hide original circles layer
Select Gold Circles layer
Select all, float, defloat
Paste paper 7
Select invert, delete, select none
Delete/Hide original circles layer
Select Brown Circle layer
Select all, float, defloat
Paste paper 5
Select invert, delete, select none
Delete/Hide original circle layer
Select White Circle layer
Select all, float, defloat
Add new raster layer and flood-fill with color of choice
Select none
Adjust, Add/Remove Noise, Add Noise (Uniform checked, Noise 75%, Monochrome checked)
Delete/Hide original circle layer
Select Pink Strip layer
Select all, float, defloat
Add new raster layer and flood-fill with gradient of choice (style, Angle 45, Repeat 2)
Paste close-up tube of choice on top of gradient and delete
Change close-up to Luminance (Legacy)
Apply Xero Bad Dream at default settings or random setting of choice
Drop opacity on close-ups down to 75%
Apply dropshadow and merge close-up down on top of gradient layer
Effects, Texture Effects, Blinds (Width 2, Opactity 15, Horizontal and Light from left/top checked)
Delete/Hide orginal strip layer
Select Gold Strip layer and repeat above steps
Select Creme Strip layer
Select all, float, defloat
Paste paper 1
Select invert, delete, select none
Delete/Hide original strip layer
Select Small Hearts layer
Select all, float, defloat
Add new raster layer and flood-fill with color of choice
Select none
Adjust, Add/Remove Noise, Add Noise (Uniform checked, Noise 75%, Monochrome checked)
Delete/Hide original hearts layer
Select Light Pink Strip layer
Select all, float, defloat
Paste paper 3
Select invert, delete, select none
Delete/Hide original strip layer
Select Tan Oval layer
Select all, float, defloat
Paste paper 10
Select invert, delete, select none
Delete/Hide original oval layer
Copy and paste tube of choice and position where desired
Apply Xero Radiance at setting of choice
Apply Lokas 3D Shadow at default settings
Select Element 62 - resize by 30%
Paste and position on bottom right circle
Image duplicate and mirror
Select Element 34 - resize by 35%
Paste and position on bottom right
Select Element 2 - resize by 35%
Paste and position on bottom right
Select Element 9 - resize by 35%
Paste and position on bottom right
Select Element 25 - resize by 40%
Paste and position on bottom right
Select Element 54 - resize by 40%
Paste and position on bottom right
Select Element 21 - resize by 35%
Paste and position on bottom right
Select Element 14 - resize by 55%
Paste and position on left side
Select Element 39 - resize by 30%
Paste and position on left side
Select Element 19 - resize by 35%
Paste and position on bottom left
Select Element 8 - resize by 30%
Paste and position on bottom left
Select Element 28 - resize by 25%
Image Free Rotate Left by 35%
Paste and position on bottom left
Select Element 32 - resize by 20%
Paste and position on bottom left
Select new raster layer and flood fill with color or gradient of choice
Move layer to the bottom of the template
Apply Heart Mask
Merge group and move to the bottom layer
Add any additional elements you like.
Add any dropshadows you like
Crop and resize as desired
Add copyright info, license number and name
You're done! Thanks for trying my tutorial!
Labels:Pandora | 0
comments
Wednesday, January 15, 2014
ALWAYS AND FOREVER
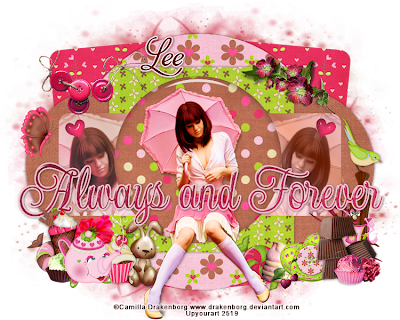
Supplies needed:
I am using the amazing artwork from Camilla Drakenborg for this tutorial which you can find here
Scrapkit: I am using an beautiful kit from Ginas Gems Scraps called "Chocolate Cherries" which you can get by going here
Template 473 from Millie which can be found here
Mask 10 from Melissaz Creationz which you can find here
Plugins used: Eyecandy 4000 - Glass, Eyecandy 4000 - Gradient Glow, Xero - Radiance, Xero - Bad Dream, Lokas 3D Shadow
----------------------------
This tutorial is written for those who have working knowledge of PSPX2 (any version will do).
This tutorial was written by me on January 15, 2014. Please do not copy or paste on any other forum, website or blog provide link back to tut only. Please do not claim as your own. This tutorial is copyrighted to me. Any resemblance to any other tutorial is purely coincidental.
Ok - let's start and remember to save often.
Open the template and using your shortcut keys on your keyboard (SHIFT+D) duplicate the template as a new image. Close the original and delete the copywrite layer.
Adjust canvas size to 750 x 600
Select Wordart 14 layer
Select all, float, defloat
Add new raster layer and flood-fill with color of choice
Select none
Apply Eyecandy Glass on default settings
Apply Gradient Glow on fat default settings (Glow width 3)
Delete/Hide original wordart layer
Select Heart 13 layer
Select all, float, defloat
Add new raster layer and flood-fill with color of choice
Select none
Apply Eyecandy Glass on default settings
Delete/Hide original heart layer
Select Heart 12 layer and repeat above steps
Select Circle 11 layer
Select all, float, defloat
Paste paper 8
Select invert, delete, select none
Delete/Hide original circle layer
Select Square 10 layer
Select all, float, defloat
Add new raster layer and flood-fill with gradient of choice (style, Angle 45, Repeat 2)
Paste close-up tube of choice on top of gradient and delete
Change close-up to Luminance (Legacy)
Apply Xero Bad Dream at default settings or random setting of choice
Drop opacity on close-ups down to 70%
Apply dropshadow and merge close-up down on top of gradient layer
Effects, Texture Effects, Blinds (Width 2, Opactity 15, Horizontal and Light from left/top checked)
Delete/Hide orginal square layer
Select Square 9 layer and repeat above steps
Select Square 8 layer
Select all, float, defloat
Paste paper 4
Select invert, delete, select none
Delete/Hide original square layer
Select Circle 7 layer
Select all, float, defloat
Paste paper 30
Select invert, delete, select none
Delete/Hide original circle layer
Select Circle 6 layer and repeat above steps
Select Circle 5 layer
Select all, float, defloat
Paste paper 16
Select invert, delete, select none
Delete/Hide original circle layer
Select Square 4 layer
Select all, float, defloat
Paste paper 5
Select invert, delete, select none
Delete/Hide original square layer
Select Squares 1, 2 and 3 layers and repeat above steps
Copy and paste tube of choice and position where desired
Apply Xero Radiance at setting of choice
Apply Lokas 3D Shadow at default settings
Select Cherries Blossoms Element - resize by 30%
Paste and position on top right
Select Button String Element - resize by 30%
Paste and position on top left
Select Chocolate Element - resize by 25%
Paste and position on bottom right
Select Mrs Rolling Pin Element - resize by 30%
Paste and position on bottom right
Select Heart Button 4 Element - resize by 25%
Paste and position on bottom right
Select Cream Element - resize by 20%
Paste and position on bottom right
Select Candy Twirl 3 Element - resize by 35%
Paste and position on bottom right
Select Wrapped Chocolate Candy 3 Element - resize by 15%
Paste and position on bottom right
Select Candy Twirl 4 Element - resize by 30%
Paste and position on bottom left
Select Ice Cream Sundae 2 Element - resize by 25%
Paste and position on bottom left
Select Wrapped Chocolate Candy1 Element - resize by 15%
Paste and position on bottom left
Select Mrs Tea Pot Element - resize by 25%
Image mirror and paste on bottom left
Select Cupcake with Cherries 1 Element - resize by 20%
Paste and position on bottom left
Select Bunny 2 Element - resize by 25%
Paste and position on bottom left
Select new raster layer and flood fill with color or gradient of choice
Move layer to the bottom of the template
Apply Mask 10
Merge group and move to the bottom layer
Add any additional elements you like.
Add any dropshadows you like
Crop and resize as desired
Add copyright info, license number and name
You're done! Thanks for trying my tutorial!
Labels:Scraps From The Heart,Upyourart | 0
comments
Subscribe to:
Comments
(Atom)


